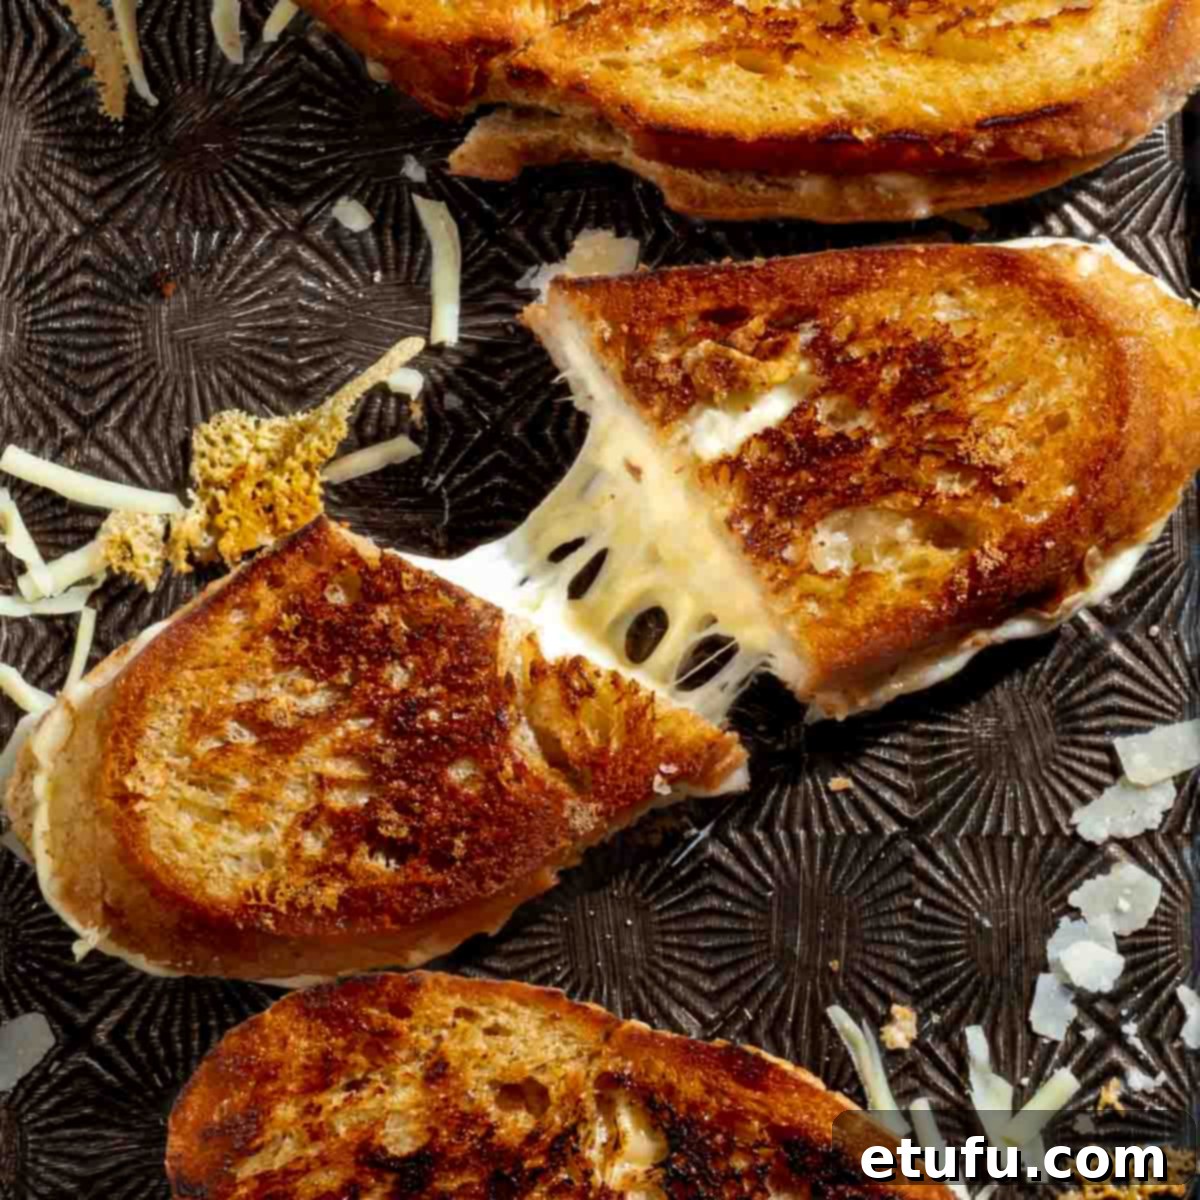
Crafting the Ultimate Sourdough Grilled Cheese Sandwich: Tips, Tricks, and a Recipe for Perfection
Few culinary creations evoke such widespread joy and comfort as the grilled cheese sandwich. It’s more than just a meal; it’s a nostalgic journey, a universal crowd-pleaser, and for many, a delightful obsession. But what if we told you that this seemingly simple classic could be elevated from merely good to truly extraordinary? Our ultimate sourdough grilled cheese recipe is the culmination of countless experiments, refined techniques, and a deep appreciation for this humble masterpiece. We’re here to guide you through the nuanced art of creating a grilled cheese that boasts unparalleled flavor, a perfect melty interior, and a golden, crisp exterior.
Forget everything you thought you knew about grilled cheese. This isn’t just about slapping some cheese between two slices of bread and frying it. This is about understanding the fundamental elements that contribute to a truly exceptional sandwich. We’ve delved deep into the science and art of the perfect toastie, identifying four critical components that, when meticulously combined, transform a simple snack into a gourmet experience. From selecting the ideal bread to mastering the melt, we’ll share our discoveries and arm you with the knowledge to craft a grilled cheese that will leave you craving more.
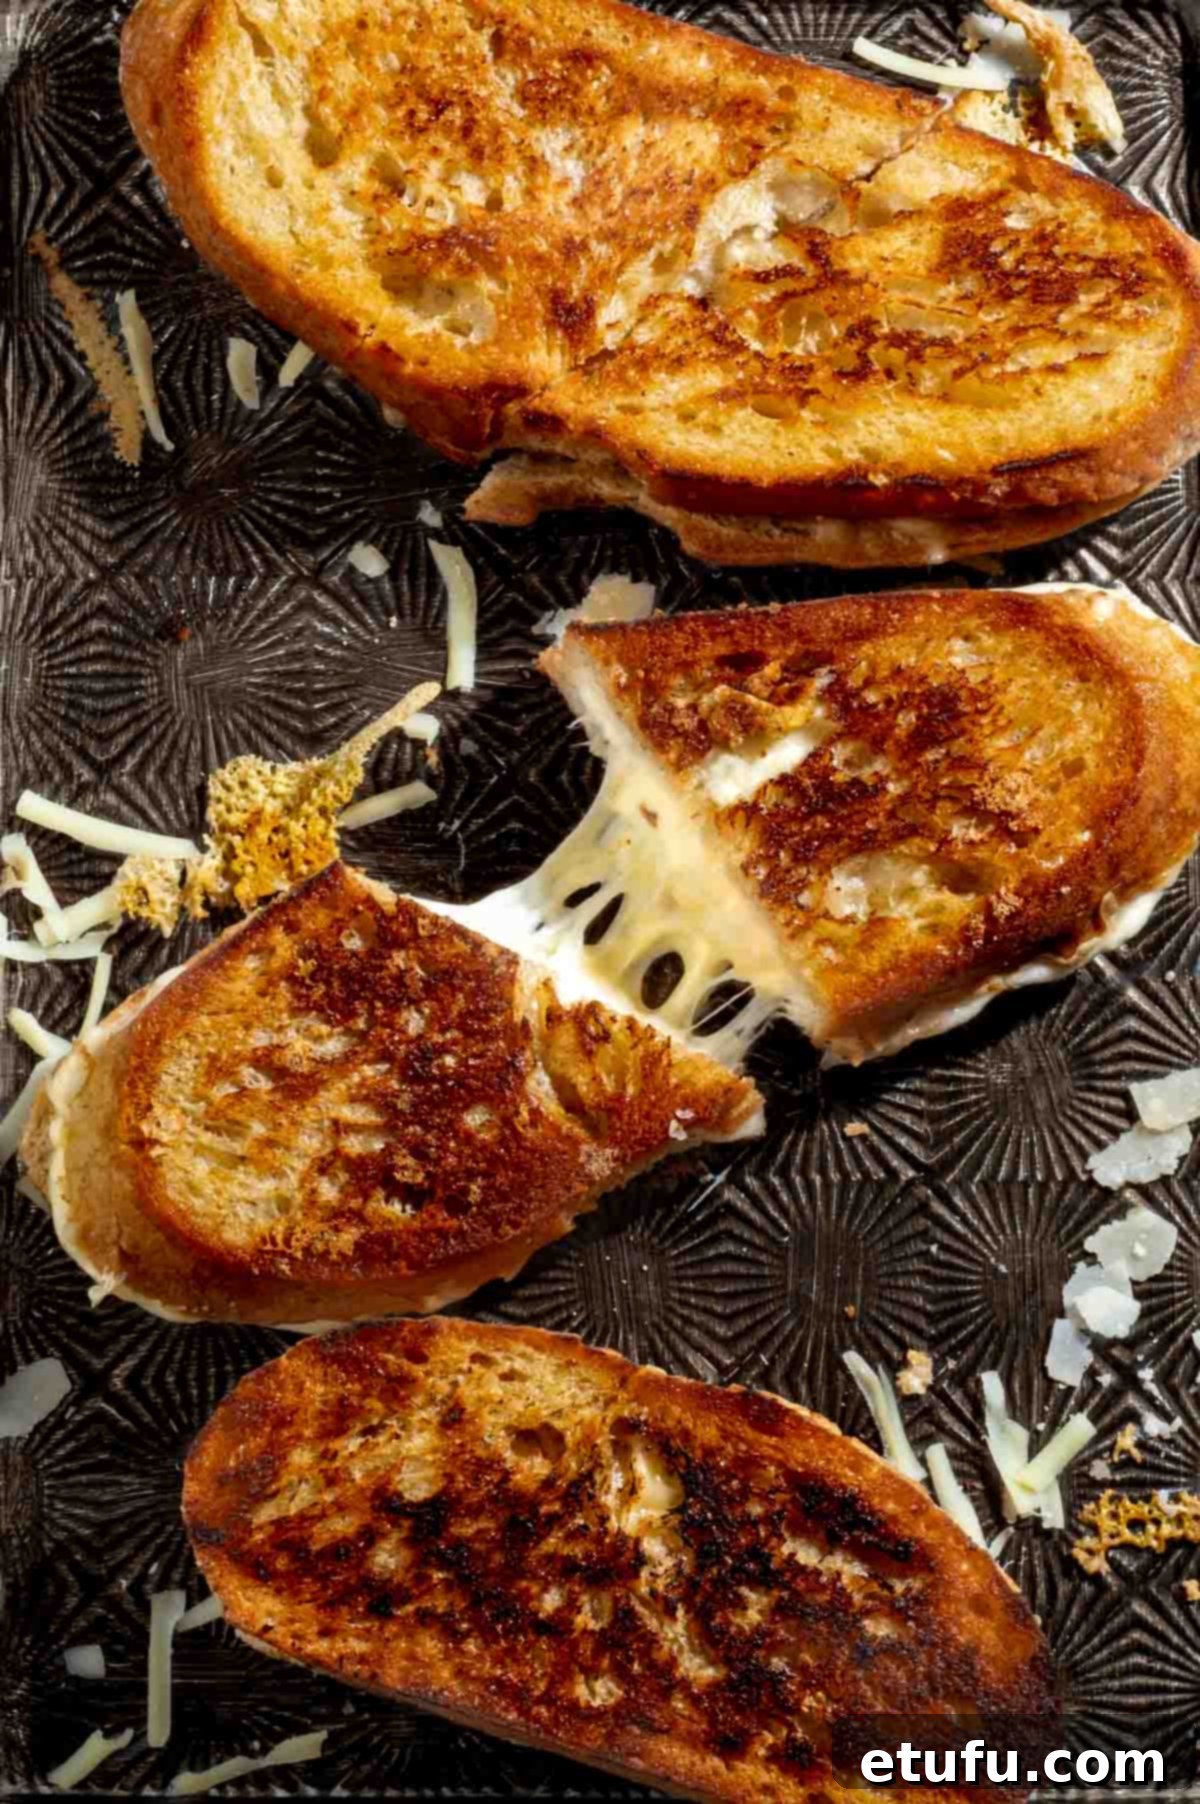
Our journey to grilled cheese nirvana involved exploring everything from the subtle tang of sourdough to the nuanced interplay of different cheese varieties. We’ll even tackle the age-old “mayo or butter” debate and unveil our secrets for preventing the dreaded over-toasted bread with under-melted cheese. While we don’t claim to be grilled cheese virtuosos (yet!), our persistent tinkering and tasting have yielded insights we’re excited to share. Prepare to be inspired, and may your future toasties always be golden, gooey, and utterly glorious!
The Anatomy of a Superior Sourdough Grilled Cheese
The quest for the perfect grilled cheese led us to isolate four fundamental elements. Each plays a pivotal role, contributing to a symphony of flavors and textures that make our sourdough grilled cheese truly exceptional. Understanding these components is the first step towards mastering this beloved comfort food:
- The Bread: More Than Just a Base
Far from being a mere structural support for the cheese, the bread is a critical flavor and texture contributor. Our choice of sourdough brings a delightful tang and a robust structure. It toasts to a magnificent crispy crunch on the outside, providing a perfect contrast to the golden, molten interior. The right bread elevates the entire sandwich, adding a depth of character often overlooked. - The ‘Bulk’ Cheese: The Flavor Foundation
This is your go-to, everyday hero cheese that forms the core of your sandwich. We’re looking for a medium-strength cheese with excellent melting properties that will deliver familiar, comforting flavor. Think Emmental, sharp cheddar, creamy gouda, or any of your personal favorites that melt reliably and provide a satisfying savory base. - The Melt Factor: Achieving Gooey Perfection
For that iconic, irresistible grilled cheese ‘pull,’ a specific cheese is indispensable. Enter mozzarella, the undisputed maestro of melt. Its high moisture content and unique protein structure ensure that coveted gooey perfection, stretching gloriously with every bite. Without a dedicated “melt factor” cheese, your grilled cheese simply won’t achieve its full potential. - The Flavor Punch: The Finishing Touch
To truly seal the deal and elevate the flavor profile, a touch of something extra is needed. Parmesan cheese, with its intense umami and salty notes, delivers that final, powerful flavor punch. Even in small quantities, it adds a layer of sophistication and depth that beautifully complements the other cheeses.
Beyond these core ingredients, we’ll also dive deep into the finer points: the great ‘mayo or butter’ debate, the precise toasting techniques, and even the choice of pan. Our journey through experimentation has yielded insights that we believe will sprinkle some genuine inspiration your way, guiding you toward your most delicious grilled cheese yet.
Why You’ll Love This Recipe: Key Advantages
Our ultimate sourdough grilled cheese recipe isn’t just another way to make a classic; it’s a meticulously developed method designed to maximize flavor, texture, and satisfaction. Here’s what makes this recipe truly stand out:
- The Perfect Cheese Harmony: The strategic combination of Emmental, Mozzarella, and Parmesan creates a dynamic trio that hits all the high notes. Emmental provides the foundational savory taste, Mozzarella delivers the luscious, stretchy melt, and Parmesan offers a sharp, umami-rich finish, ensuring a complex and satisfying cheese experience in every bite.
- Superior Sourdough Foundation: Tangy sourdough bread isn’t just a trend; it’s the ideal choice for grilled cheese. Its robust structure prevents sogginess, its open crumb allows for delightful cheese pockets, and its signature tang perfectly balances the richness of the cheeses. It offers the perfect balance of substance and an irresistible crunch.
- The Golden Touch of Salted Butter: We firmly stand by salted butter for the exterior. It’s not just about fat for crisping; it’s about adding a rich, savory depth and a beautiful golden-brown crust that mayo simply can’t replicate. This ensures that extra crispy perfection and a truly delicious outer layer.
- Foolproof Melting Techniques: Bid farewell to the frustration of perfectly toasted bread with still-solid cheese. Our recipe includes invaluable tips and a unique cooking technique designed to ensure your cheese achieves ultimate meltiness before your bread burns, guaranteeing a perfectly gooey interior every single time.
Key Ingredient Notes and Smart Substitutions
Crafting the perfect sourdough grilled cheese begins with understanding your ingredients. While our recipe highlights specific choices for optimal results, we also provide flexible alternatives. Remember, the quality of your ingredients directly impacts the final taste and texture of your sandwich.
**Please see the recipe card at the bottom of this post for the full list of ingredients with precise measurements.
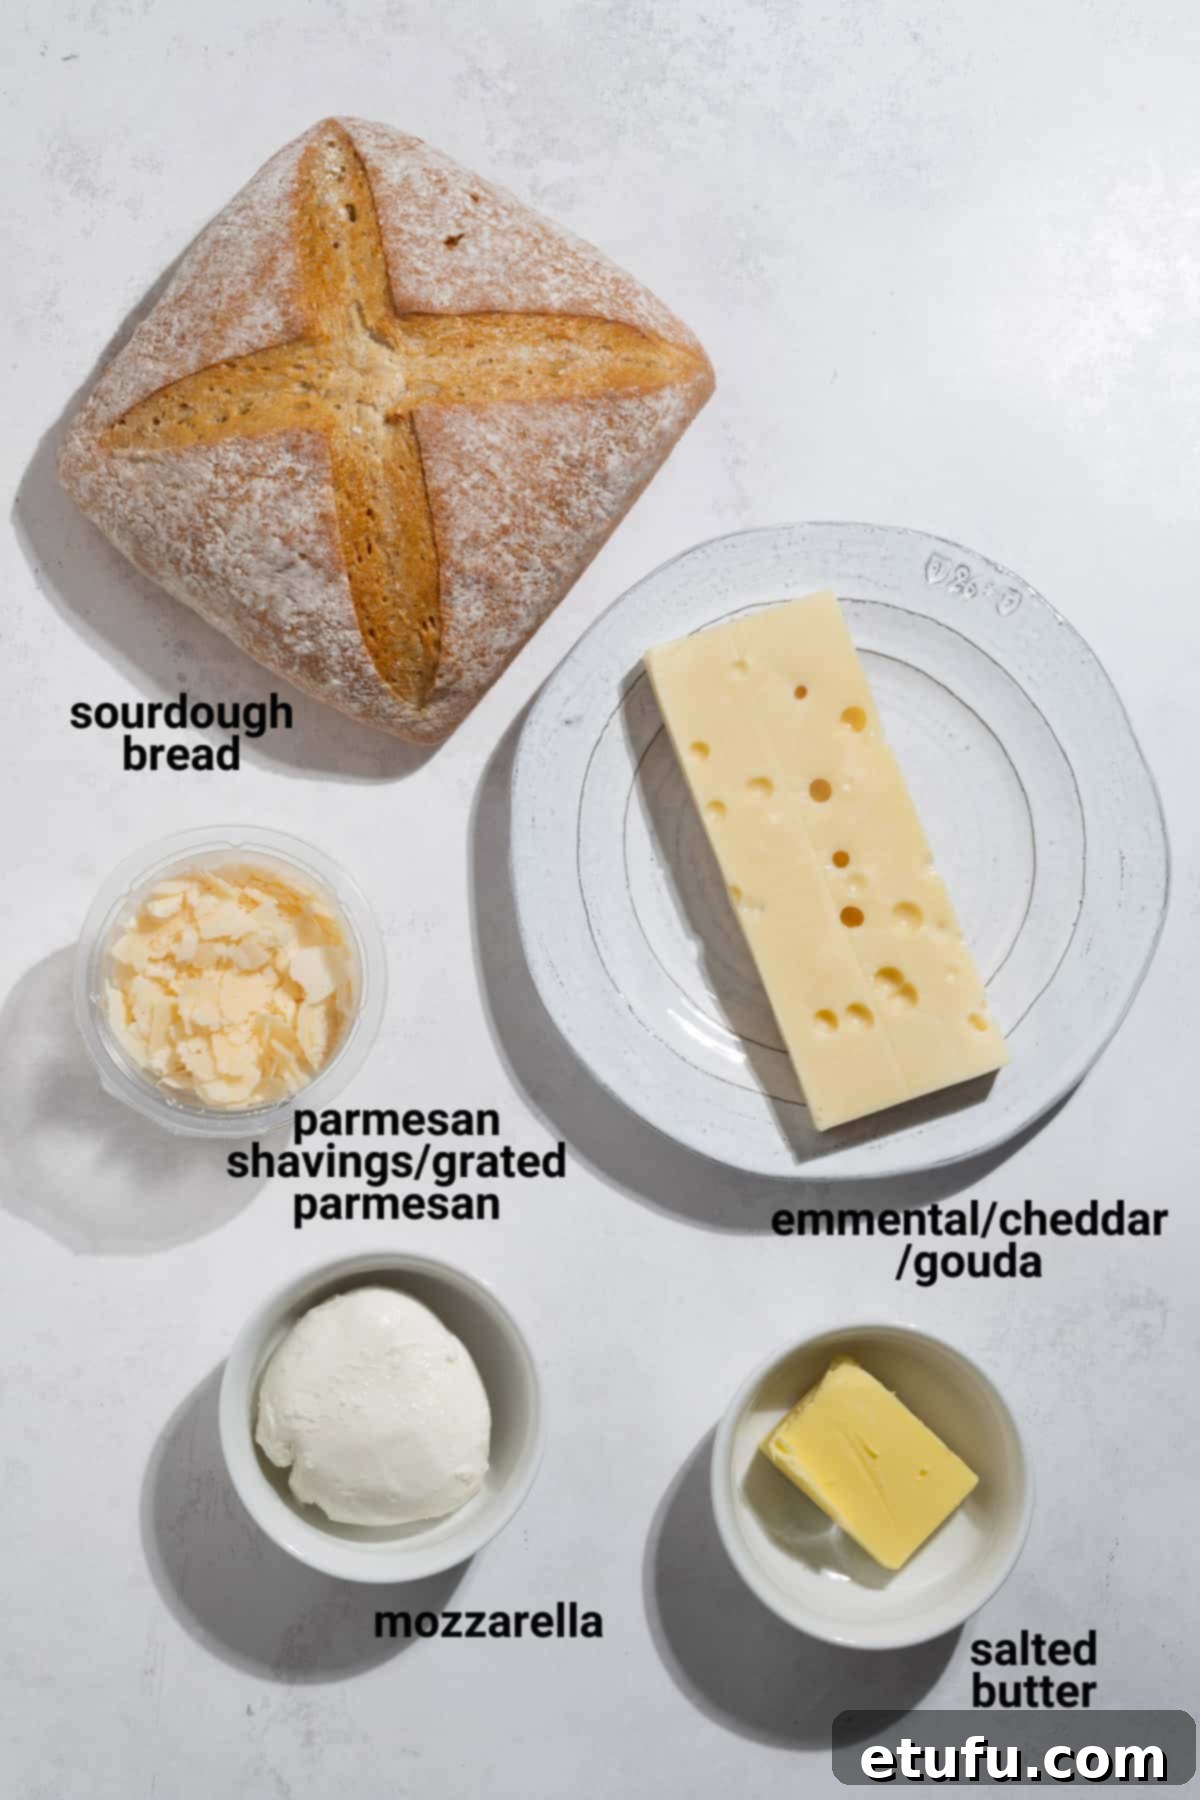
The Best Bread: Why Sourdough Reigns Supreme
Our extensive testing of various bread types consistently pointed to one clear winner for the ultimate grilled cheese: a hearty sourdough bread. Its unique characteristics make it perfectly suited for the task:
- Harmonious Flavor: Sourdough’s distinct, slightly tangy flavor provides an exceptional counterpoint to the rich, savory cheeses. This acidity cuts through the fat, creating a balanced and more exciting flavor profile.
- Consistent Toasting: With sourdough, achieving that ideal golden, crispy toast is remarkably consistent. Its robust structure holds up beautifully under heat, preventing it from becoming flimsy or overly dense.
- Ideal Texture: The sturdy yet open texture of sourdough strikes a perfect balance. It’s not too dense, which can make the sandwich heavy, nor is it excessively holey, which can lead to cheese leakage. However, a few small, well-distributed holes are actually a bonus, allowing a delightful bit of cheese to ooze through and crisp up. While many advocate for ultra-dense bread for toasties, we find that a moderately open crumb contributes to a more interesting textural experience.
The Cheese Trifecta: Three Essential Types
Expert Tip: Always steer clear of pre-grated cheese! These often contain anti-caking additives like cornstarch or cellulose, which can significantly hinder proper melting, resulting in a gritty or clumpy texture. For the absolute best melt and flavor, freshly grating your cheese is non-negotiable.
For a truly exceptional cheese toastie, our focus is on combining three crucial elements related to the cheese. Select one from each category to build your masterpiece:
1. The Bulk Cheese: Your Everyday Flavor Foundation
This is the “Big Cheese,” the primary flavor component that provides the bulk and familiar taste of your grilled cheese. It should be a cheese of medium strength with consistently reliable melting properties. While our personal go-to is often Swiss Emmental for its nutty notes and excellent melt, you have plenty of fantastic options. Choose your preferred ‘everyday’ cheese that you know and love for its balanced flavor and melting ability.
Recommended Options:
- Emmental Cheese: Known for its nutty, buttery flavor and beautiful melt.
- Gouda Cheese: Offers a mild, creamy, and slightly sweet flavor with a smooth melt.
- Cheddar Cheese: A classic for a reason. Choose a medium or sharp cheddar for more flavor complexity and a good melt.
- American Cheese Slices: While often overlooked, high-quality American cheese slices are specifically engineered for superior melt and creaminess, making them a fantastic choice for the melt factor.
- Provolone Cheese: A semi-hard Italian cheese with a mild, slightly sharp flavor and excellent stretchiness when melted.
- Monterey Jack/Pepper Jack Cheese: Monterey Jack is creamy and mild, while Pepper Jack adds a pleasant spicy kick, both melt beautifully.
- Fontina Cheese: A rich, nutty, and creamy Italian cheese that melts into a luxurious, gooey consistency.
2. The Melt Factor: The Essential Gooey Pull
A grilled cheese sandwich without magnificent strings of melty cheese cascading onto your chin is, quite frankly, a missed opportunity. To achieve this gooey bliss, we turn to the undisputed champion: Mozzarella. No other cheese delivers quite the same level of stretch and melt. Its mild flavor also allows the other cheeses to shine.
For optimal results, opt for full-fat, high-moisture Mozzarella, ideally the fresh balls packed in water. Before using, ensure you thoroughly drain and dry the mozzarella, then slice it thinly. Excess moisture can make your sandwich soggy and impede proper browning of the bread.
Recommended Options:
- Fresh Mozzarella: The king of stretch and melt, offering a fresh, creamy texture.
- Burrata: While primarily known for its creamy center, a well-drained burrata can add an extra layer of luxuriousness and melt.
3. The Flavor Punch: Adding Depth and Zest
To bridge the gap between your medium-strength ‘bulk’ cheese and the mild-mannered Mozzarella, introduce a burst of intense flavor with Parmesan cheese. Revered as the reigning king of cheese punch, even a small quantity of Parmesan can elevate the entire sandwich with its salty, umami-rich notes, adding sophistication and complexity.
Recommended Options:
- Parmesan Shavings: Offer a delightful texture and concentrated bursts of flavor.
- Freshly Grated Parmesan: Distributes flavor evenly throughout the cheese layers.
- Pecorino Romano: A sheep’s milk cheese with a sharper, saltier, and more piquant flavor than Parmesan, perfect for those who crave an extra kick.
- Parmigiano-Reggiano: The authentic Italian Parmesan, offering unparalleled depth and quality.
- Grana Padano: A hard, granular cheese similar to Parmigiano-Reggiano but typically milder and slightly less crumbly.
Salted Butter: The Golden Crust Essential
Spoiler alert: When it comes to achieving that perfect golden, crispy exterior and rich flavor, we are firmly Team Butter over mayo, any day! More on our definitive stance below. For this recipe, always opt for salted, real butter. The salt content not only enhances the flavor of the bread but also contributes to a more evenly browned crust. If, however, your chosen cheeses are already quite salty, or if you simply prefer it, unsalted real butter is a perfectly solid alternative. Just ensure it’s at a spreadable consistency for easy application.
Optimizing Bread Thickness for the Perfect Sandwich
The thickness of your sourdough slices is a crucial, yet often underestimated, factor in achieving grilled cheese perfection. It directly impacts the structural integrity, the toast-to-melt ratio, and the overall enjoyment of holding and eating your sandwich.
Aim for slices that are a minimum of 1 cm (0.4 inches) thick. At a maximum, do not exceed 1.5 cm (0.6 inches) thick. This range is thicker than your average pre-sliced supermarket loaf, and for good reason. You want the bread to be substantial enough to comfortably hold the generous layers of cheese without collapsing under its weight, offering a satisfying bite without being overly bready.
The key here is finding a balance: slices that are too thin will cook too quickly, risking burnt bread before the cheese has a chance to fully melt into a gooey interior. Conversely, slices that are excessively thick might struggle to toast evenly, and the heat might not penetrate enough to achieve that perfect molten center, leaving you with cold, unmelted cheese in the middle. The ideal thickness ensures both the exterior toast and interior melt progress harmoniously.
The Age-Old Question: Butter or Mayo for the Exterior?
The debate over whether to use butter or mayonnaise on the outside of a grilled cheese sandwich is one of culinary contention, with passionate proponents on both sides vying for the ultimate crisp and golden hue. We’ve meticulously put both contenders to the test to settle this once and for all.
From a purely visual and textural standpoint, the verdict is surprisingly close: both butter and mayonnaise will yield a remarkably similar, appealing golden color and a satisfyingly crunchy texture. The fat content in both helps to create that desired crust through the Maillard reaction, giving your sandwich its irresistible exterior.
However, the distinguishing factor, and where our preference firmly lies, is flavor. Butter, especially good quality salted butter, contributes a rich, savory, and undeniably delicious flavor to the toasted bread. This added depth enhances the entire sandwich, complementing the cheeses beautifully. Mayonnaise, while effective in achieving crispiness, falls significantly short in this department. Its flavor is far less pronounced and doesn’t offer the same rich, buttery essence that elevates the overall taste experience. Therefore, for a genuinely great grilled cheese sandwich that excites the palate as much as it satisfies the craving, it is butter all the way.
Toasting Technique: Outside Only, or All Sides?
Another frequently debated aspect of grilled cheese preparation is whether to butter and toast all four sides of the bread (both exterior and interior) or only the outsides. We conducted an experiment where we buttered all four sides of two slices, toasted the insides in the pan first, then added the cheese and proceeded to toast the outsides.
The results were clear: toasting all the sides resulted in a sandwich that was overly rough and too crunchy. The interior, meant to be soft and yield to the molten cheese, became brittle and dry, with an unwelcome, slightly charred flavor. In essence, it was simply “too toasty,” detracting from the harmonious balance of textures that defines a truly great grilled cheese.
Our recommendation is to skip this extra, counterproductive step. Focus solely on buttering and toasting the exterior sides of your bread. Keeping the insides soft and un-toasted allows them to absorb some of the melting cheese’s richness and provides a delightful textural contrast against the crisp outer crust. This technique ensures that your sandwich remains perfectly balanced, delivering a satisfying crunch without sacrificing the tender interior.
Pan Preference: Cast-Iron Skillet vs. Non-Stick Frying Pan?
The choice of cooking vessel often sparks fervent discussions among culinary enthusiasts. Undeniably, many grilled cheese aficionados will passionately swear by nothing less than a seasoned cast-iron skillet, often suggesting that using anything else will relegate you to perpetual amateur cook status. While cast iron certainly has its merits, our extensive tests reveal a more nuanced truth.
We found surprisingly little functional difference between toasties grilled in a heavy cast-iron pan and those prepared in a reliable non-stick frying pan. The outcomes, in terms of golden-brown crust and melted interior, were nearly identical. The primary variation observed was often related to cooking time, as cast-iron skillets typically take longer to heat up and retain heat more intensely, which can sometimes require more vigilant temperature control.
The absolute key to grilled cheese success, regardless of the type of pan you choose, is to cook over a very, very low heat. This slow and steady approach allows the bread to crisp and brown gradually without burning, giving ample time for the cheese within to melt thoroughly and become wonderfully gooey. High heat is the enemy of a perfectly melted, evenly toasted grilled cheese.
So, rest assured, the “cast-iron police” will not be coming after you if you opt for your trusty, familiar non-stick pan. Prioritizing low heat and patience will yield far better results than obsessing over the material of your pan. Use what you have and what you’re comfortable with, and focus on the technique.
The Age-Old Dilemma: Perfect Toast, Unmelted Cheese?
Truthfully, this has been the biggest and most frustrating challenge throughout all our years of making cheese toasties. It’s a common scenario: the bread reaches a beautiful golden brown, promising crisp perfection, but upon slicing, the cheese inside remains stubbornly unmelted, leaving a disappointing, cold center. This dilemma often feels like a culinary riddle without an easy answer.
Firstly, let’s reiterate the basics: as mentioned above, keep your pan over the lowest heat possible and exercise patience. Turn the sandwich frequently to ensure even heat distribution. However, sometimes, depending on the density of the bread, the ambient temperature, or simply the whims of the kitchen gods, your cheese might decide to take its sweet time melting, leaving the bread questioning its life choices.
Here’s what works for us to ensure a truly molten interior every time (see photo instructions below under the step-by-step guide for visual guidance):
- Strategic Cheese Placement: Instead of piling all the cheese onto one slice, arrange the cheese on both slices of bread, with the buttered sides facing down in the pan. This splits the cheese across two surfaces, allowing it to heat more efficiently. All will make sense in a moment.
- The Covered Pan Advantage: Place the two open, cheese-topped slices side-by-side in your pan. Crucially, cover the pan with a lid and maintain a low heat. This simple step creates a steamy, enclosed environment that traps heat, effectively giving the cheese a head start in melting from the top down.
- Timely Lid Removal: Keep a close eye on your cheese. Remove the lid as soon as you spot the grated cheese starting to go a bit limp and soften, indicating that it’s warming up nicely. You don’t want it fully melted yet, just beginning to yield.
- The Final Flip and Press: Once the cheese is softened, flip one slice onto the other so that the cheese sides are facing each other, forming your sandwich. Give the top slice a gentle press with a spatula. This action helps to ‘glue’ the softened cheese together and ensures good contact for the final melting phase. Now, you’re all set to continue grilling your toastie the usual way, lid off, with the cheese already well on its way to perfect meltiness.
This method significantly reduces the chance of scorched bread and guarantees a beautifully gooey, fully melted cheese center, ensuring your grilled cheese dreams come true.
Step-by-Step Instructions for Your Ultimate Sourdough Grilled Cheese
Follow these detailed steps carefully to achieve grilled cheese perfection. Each stage is designed to ensure a harmonious balance of crispy exterior and gooey, molten interior.
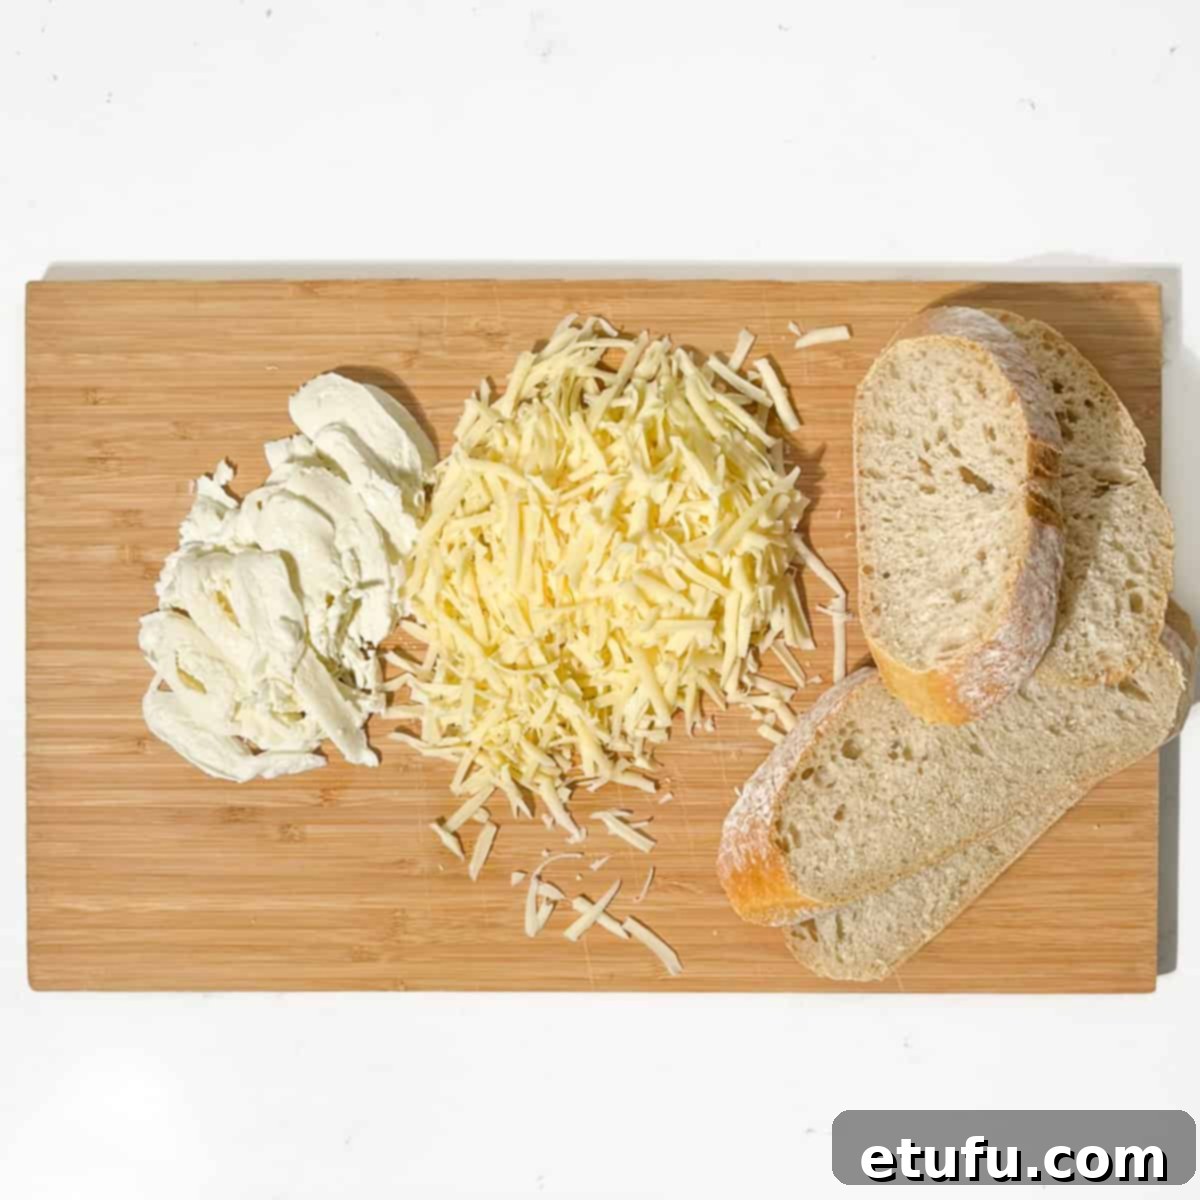
- Prepare Your Ingredients: Begin by slicing your chosen sourdough bread to a medium thickness (approximately 1-1.5 cm or 0.4-0.6 inches). Grate the Emmental (or your preferred bulk cheese) using a box grater. For the mozzarella, if using a fresh ball, drain it thoroughly, pat it dry with paper towels, and then thinly slice it.
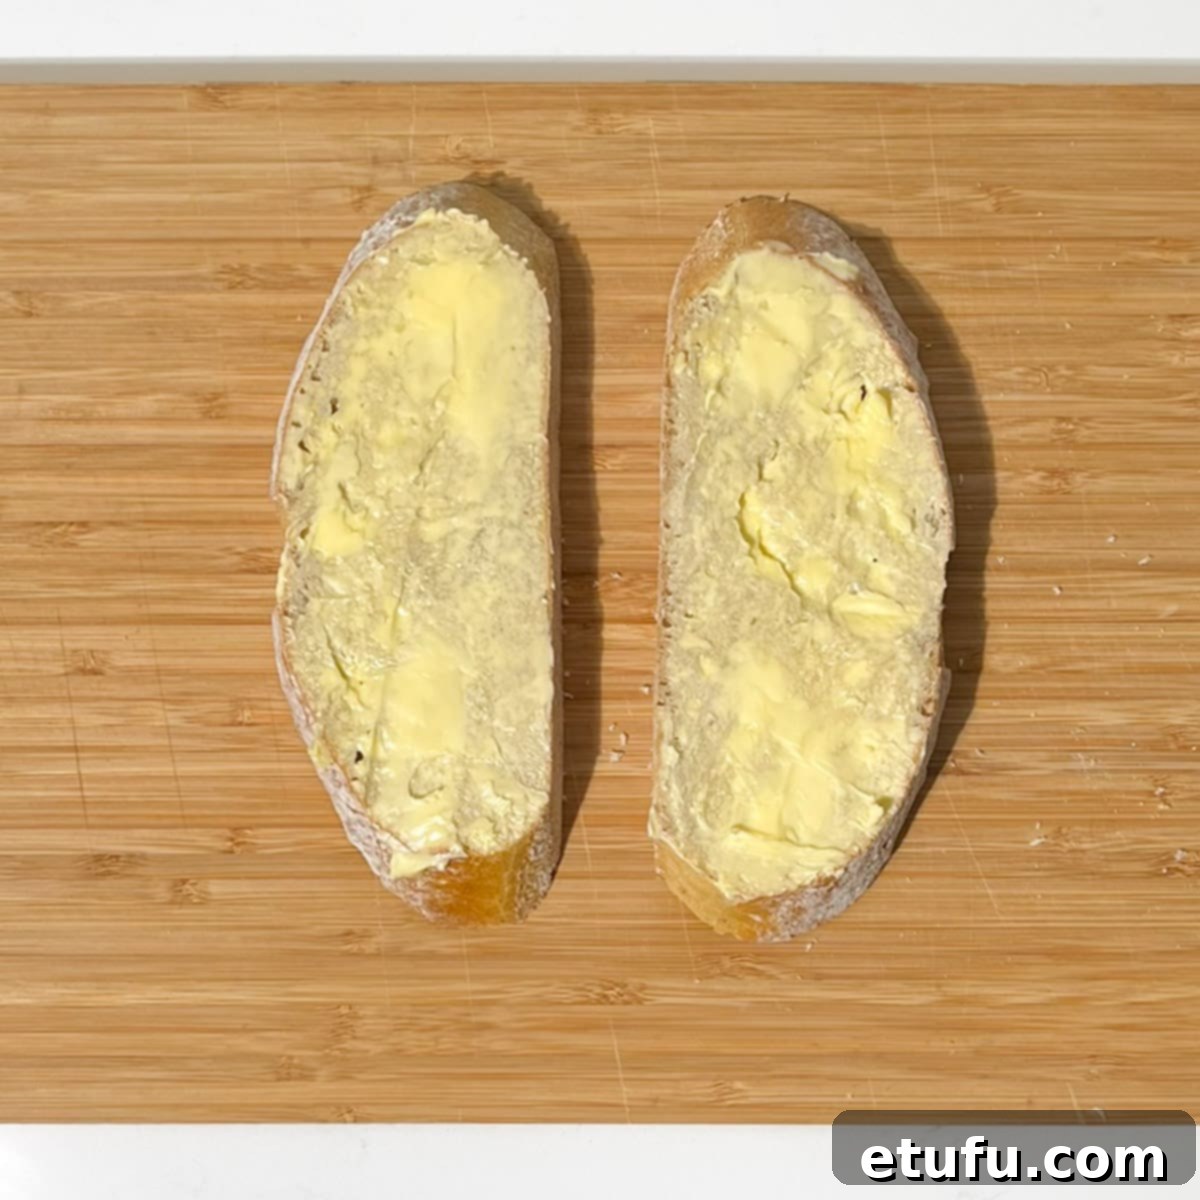
- Butter the Bread: Spread a generous amount of room-temperature salted butter evenly across one side of each of your two sourdough slices. Ensure the entire surface, from edge to edge, is covered. This buttered side will be the exterior that toasts in the pan. Once buttered, flip the slices over so the unbuttered side is facing up.
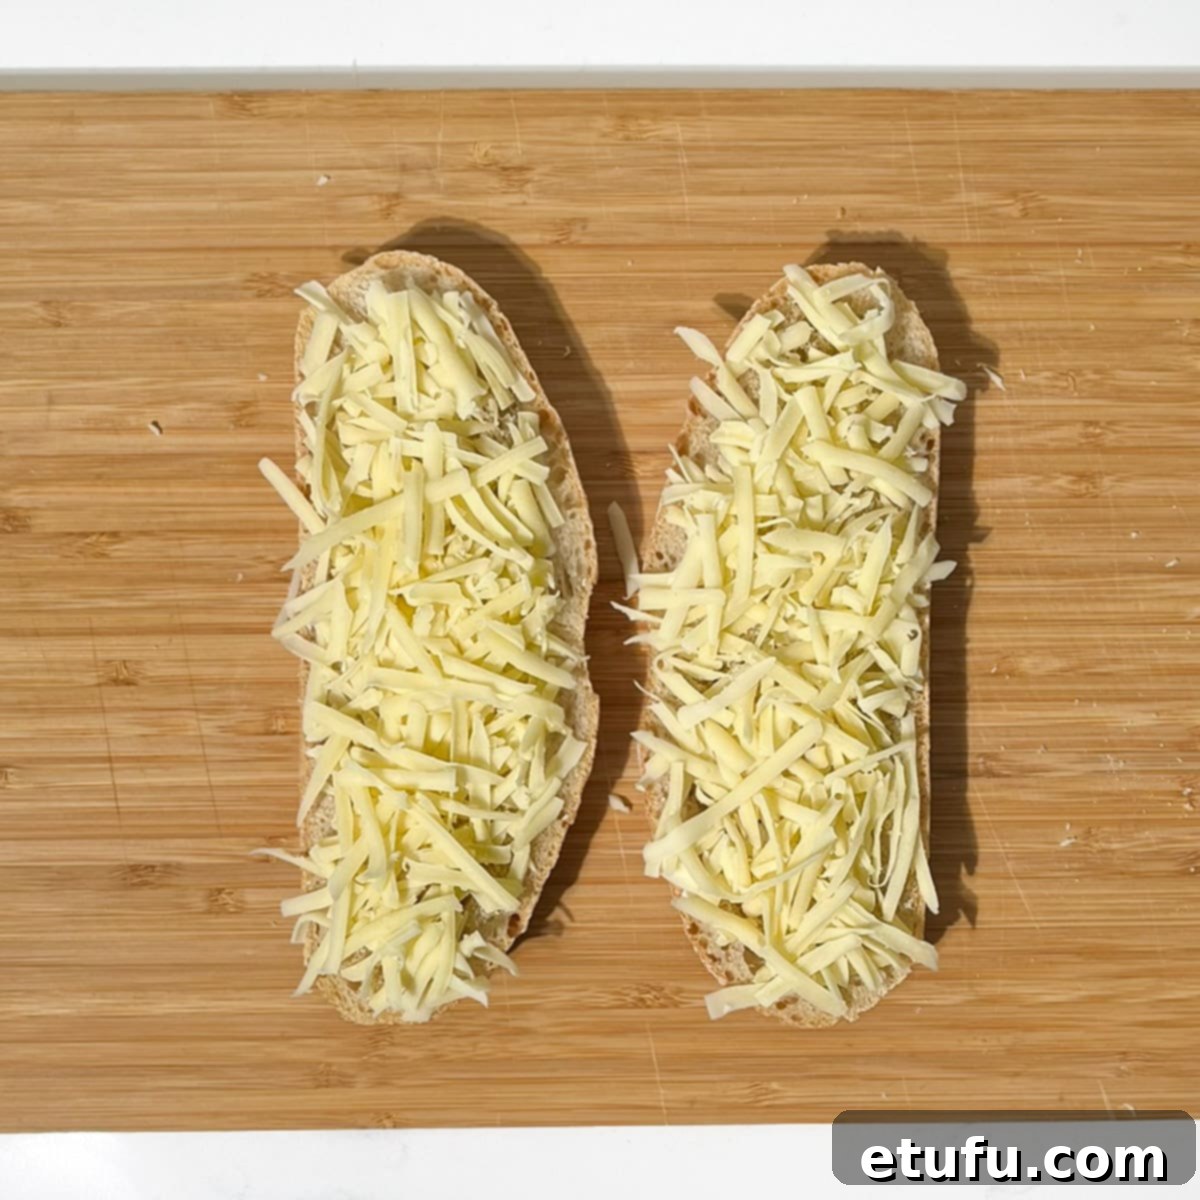
- Add the Bulk Cheese: Generously sprinkle the dry, unbuttered sides of both bread slices with your freshly grated Emmental cheese (or your chosen bulk cheese). Distribute it evenly across the surface.
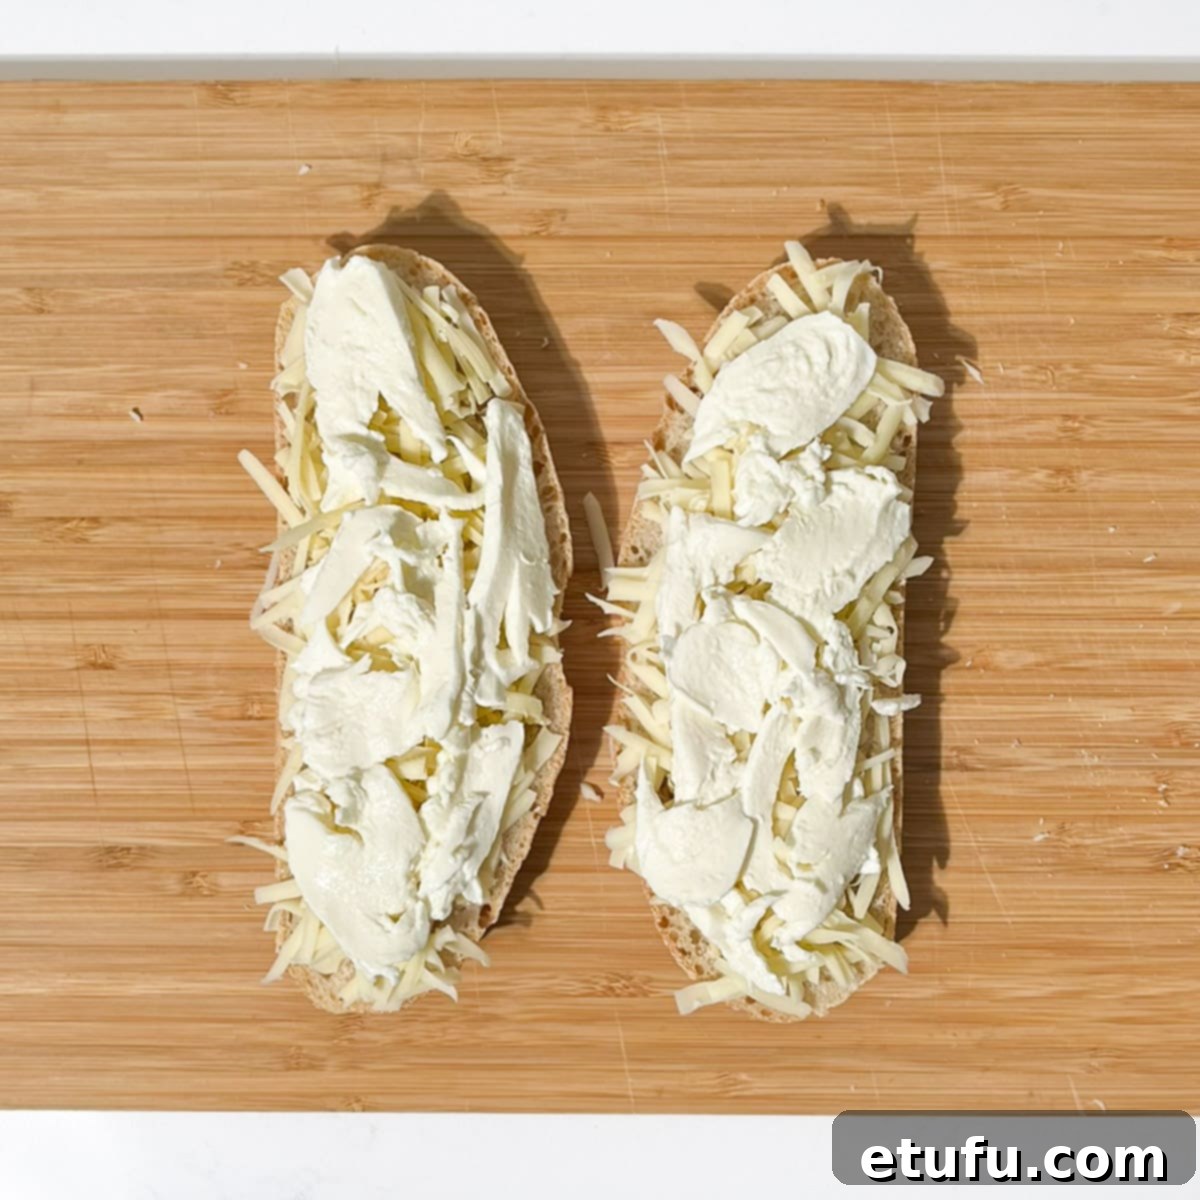
- Layer with Mozzarella: Evenly distribute the thinly sliced mozzarella on top of the grated bulk cheese on both slices. This layer is crucial for the signature gooey melt.
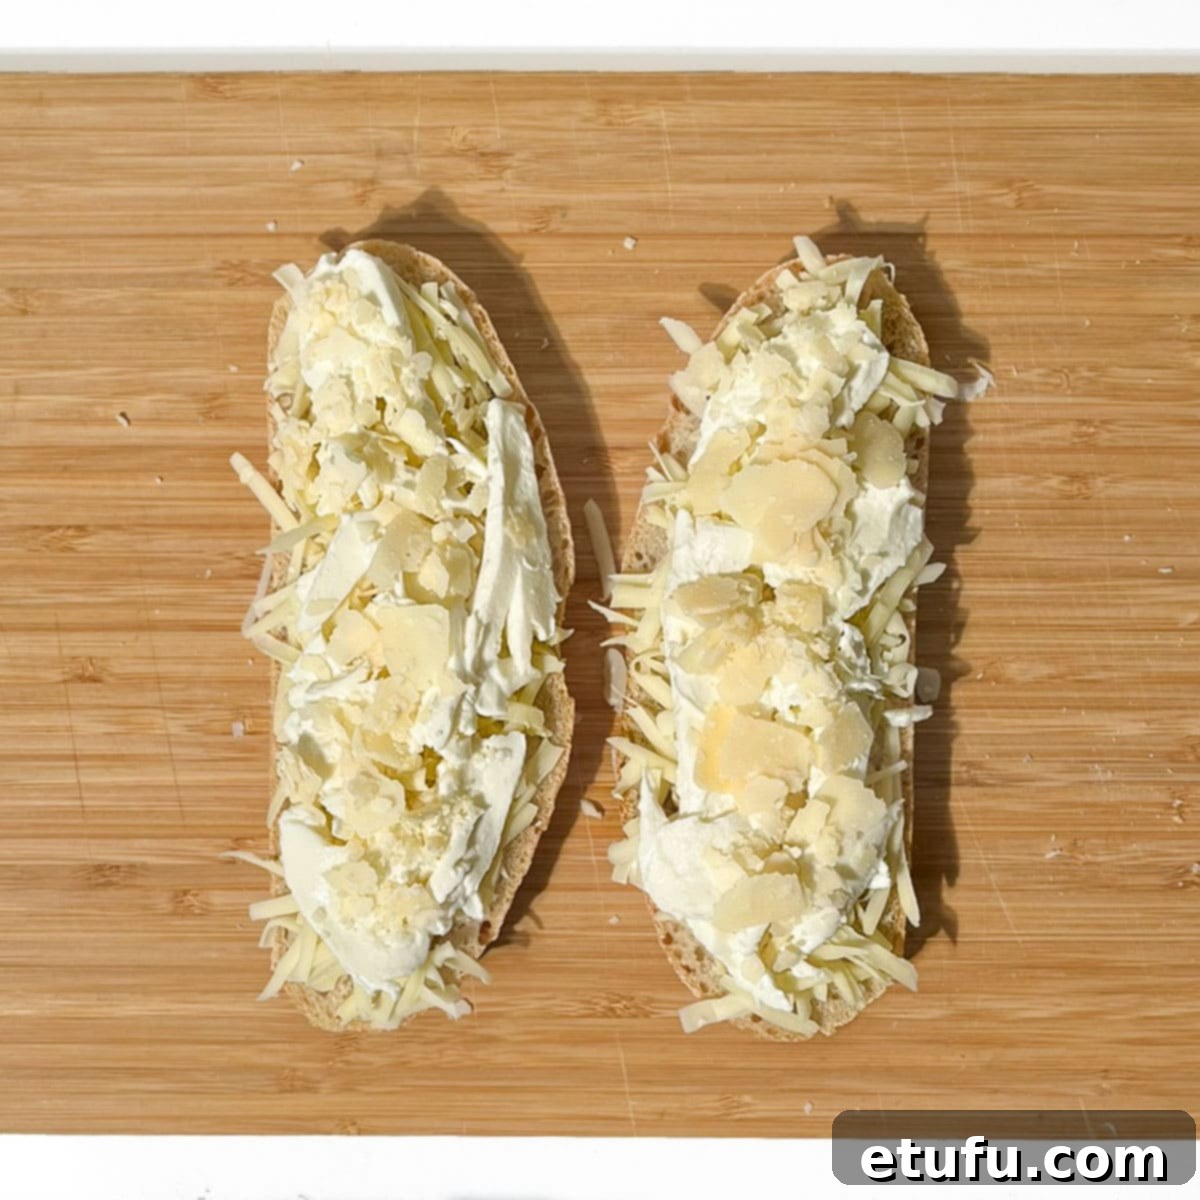
- Finish with Parmesan: Complete your cheese layering by topping the mozzarella slices with a sprinkle of Parmesan shavings or freshly grated Parmesan. This adds the essential flavor punch.
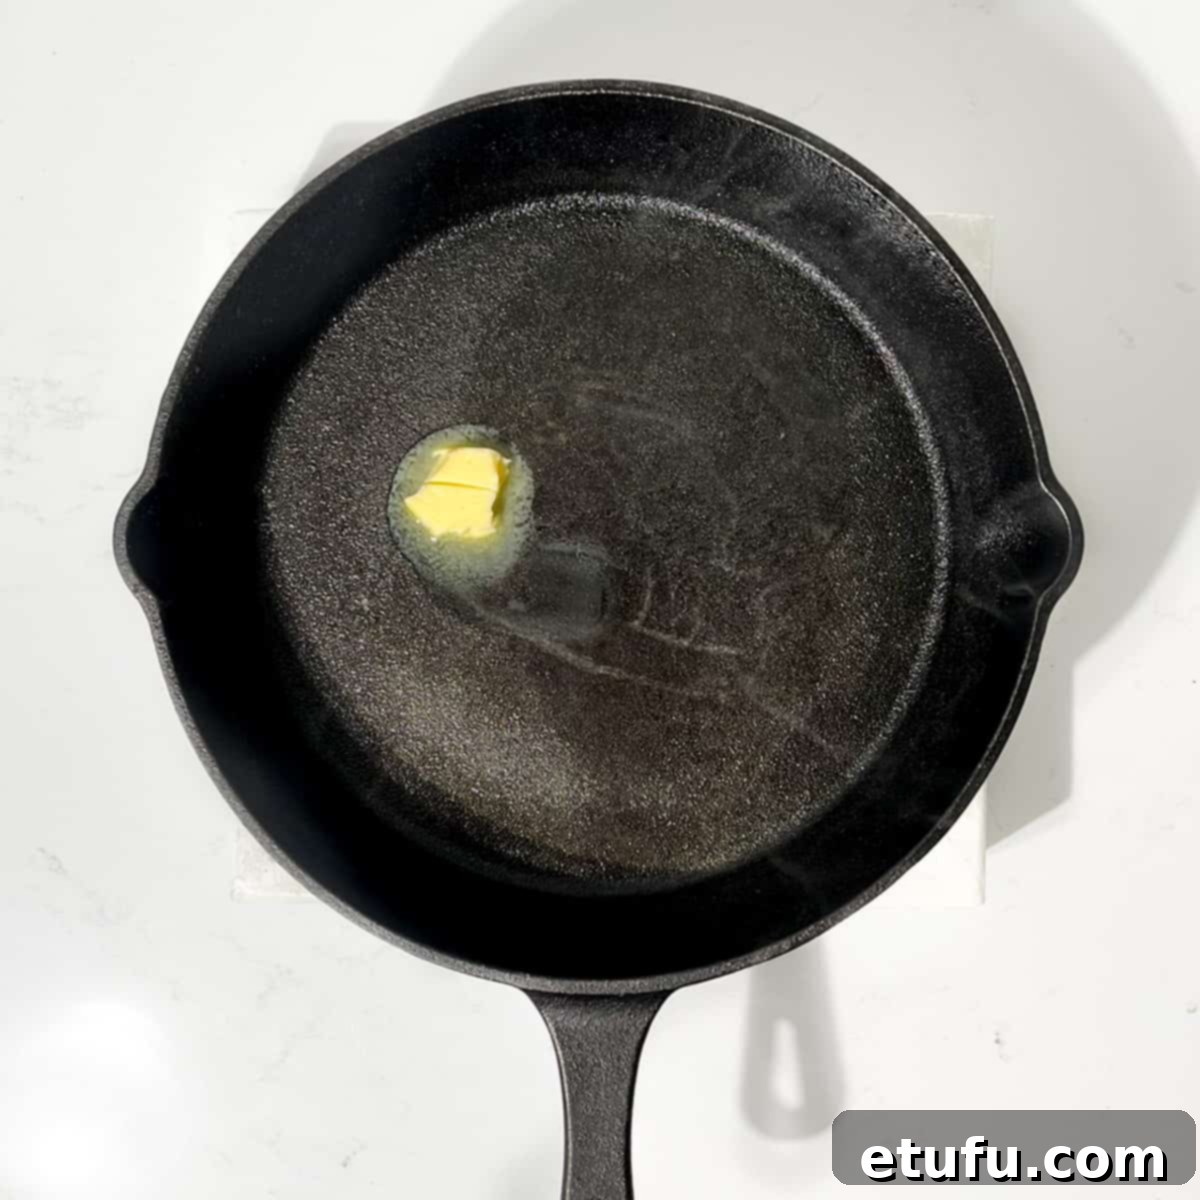
- Prepare the Pan: Melt a small knob of butter (about a teaspoon) in a frying pan or cast-iron skillet over very low heat. Ensure the butter is melted and covers the bottom of the pan.
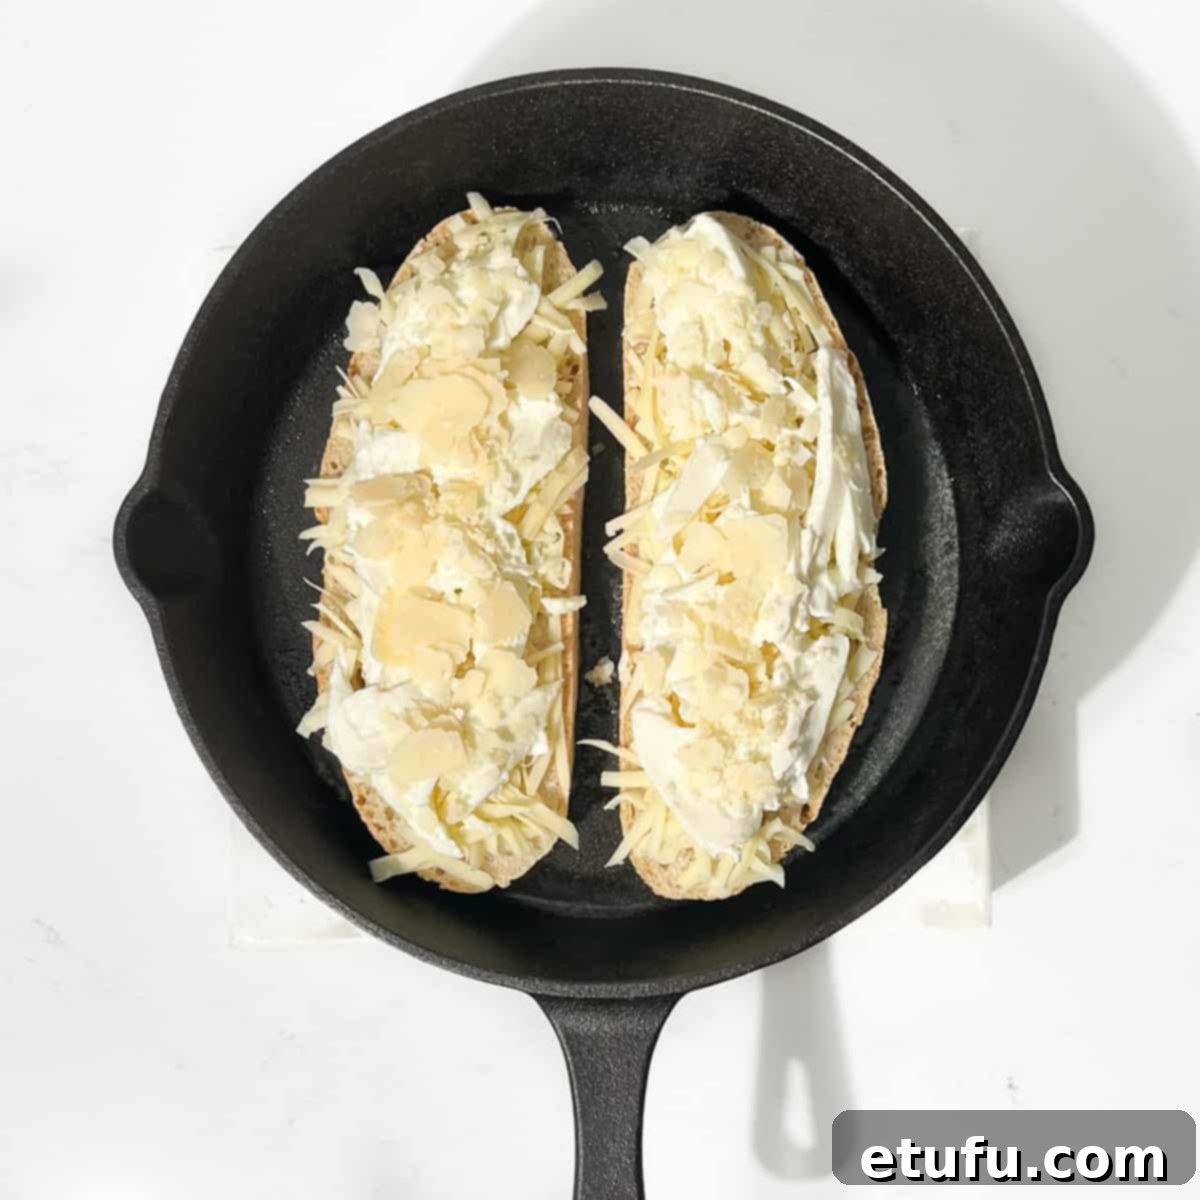
- Initial Melting Phase: Once the butter has melted, carefully position the two cheese-topped bread slices, buttered side down, side by side in the pan. The cheese should be facing up.
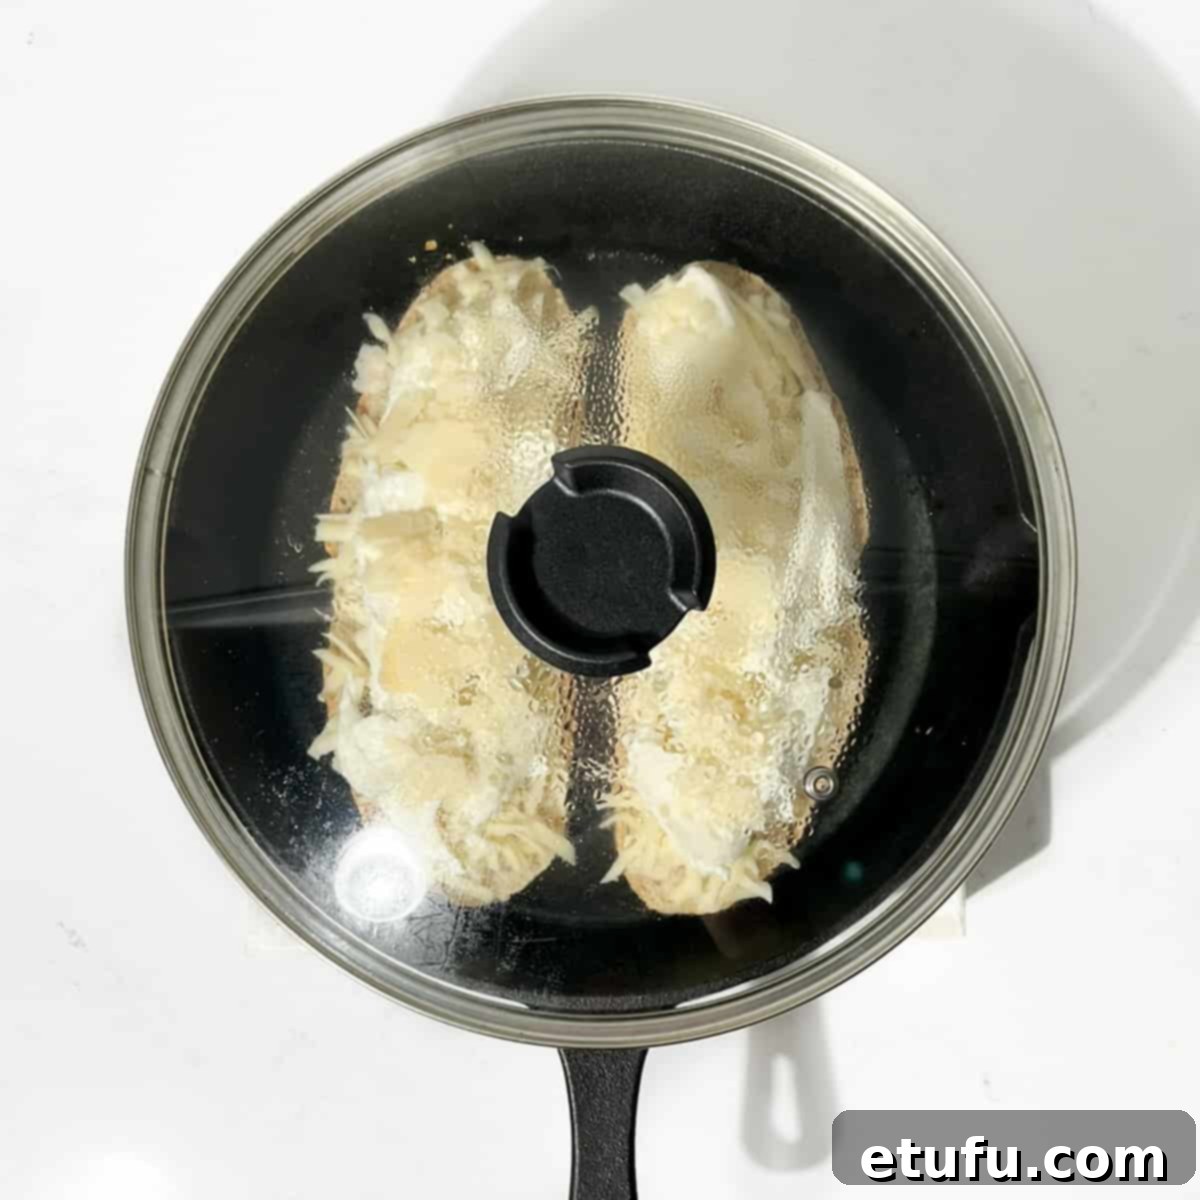
- Cover and Heat: Place a lid on the pan. This traps heat and helps the cheese to start melting. Continue to heat the bread over low heat for approximately 1.5 to 2 minutes. This preliminary step warms the cheese, preventing it from remaining solid while the bread toasts too quickly.
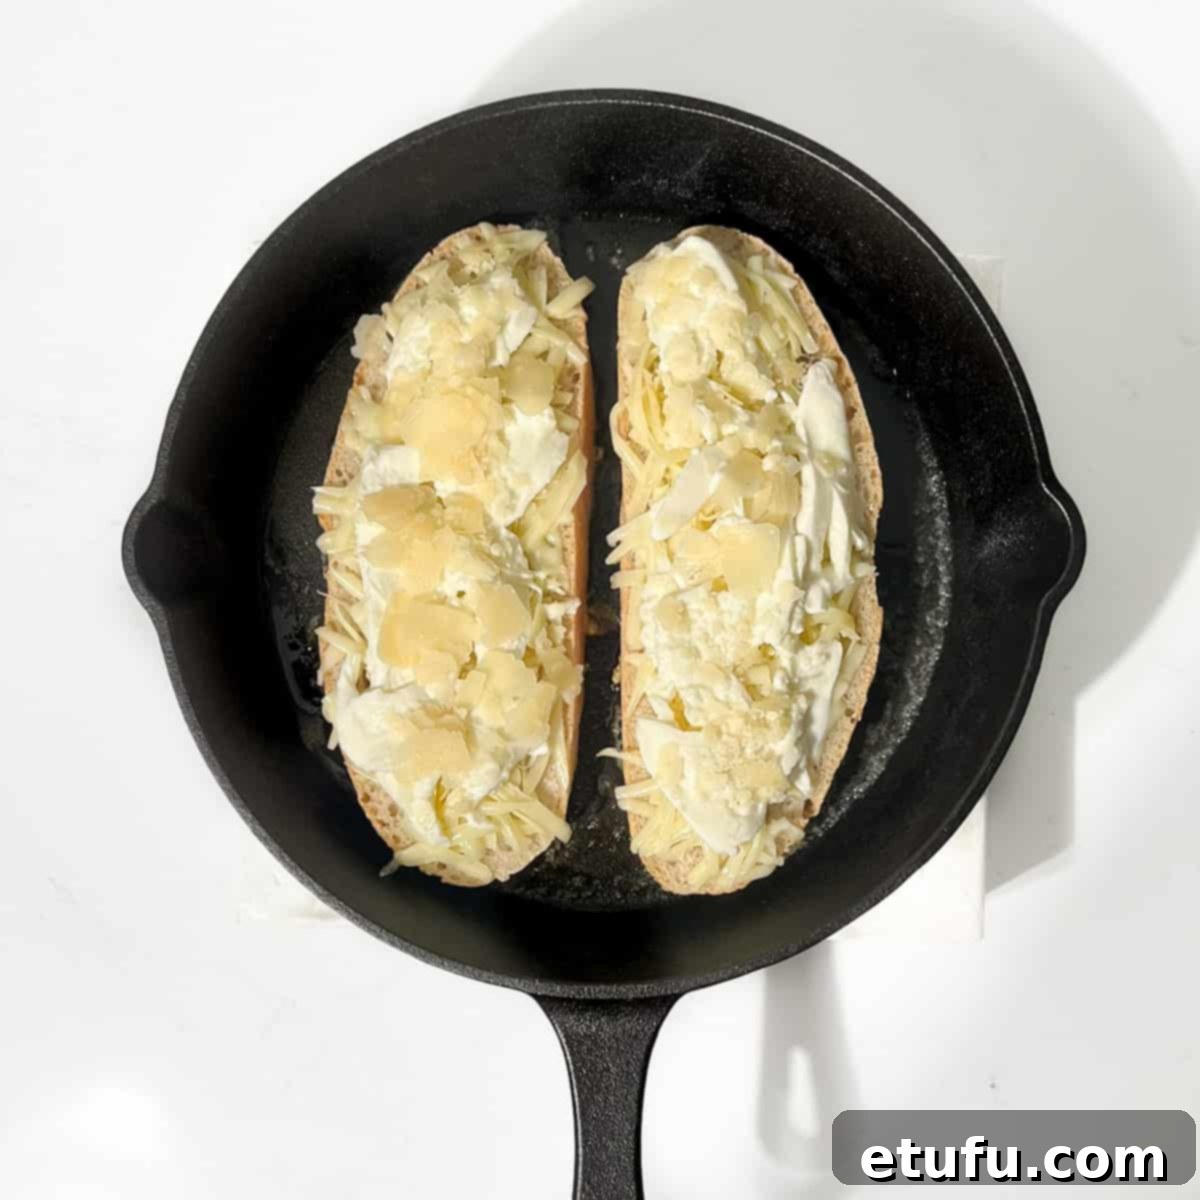
- Remove the Lid: As soon as you observe the grated cheese beginning to soften and look slightly limp from the warmth, promptly remove the lid. The cheese doesn’t need to be fully melted at this stage, just well-warmed.
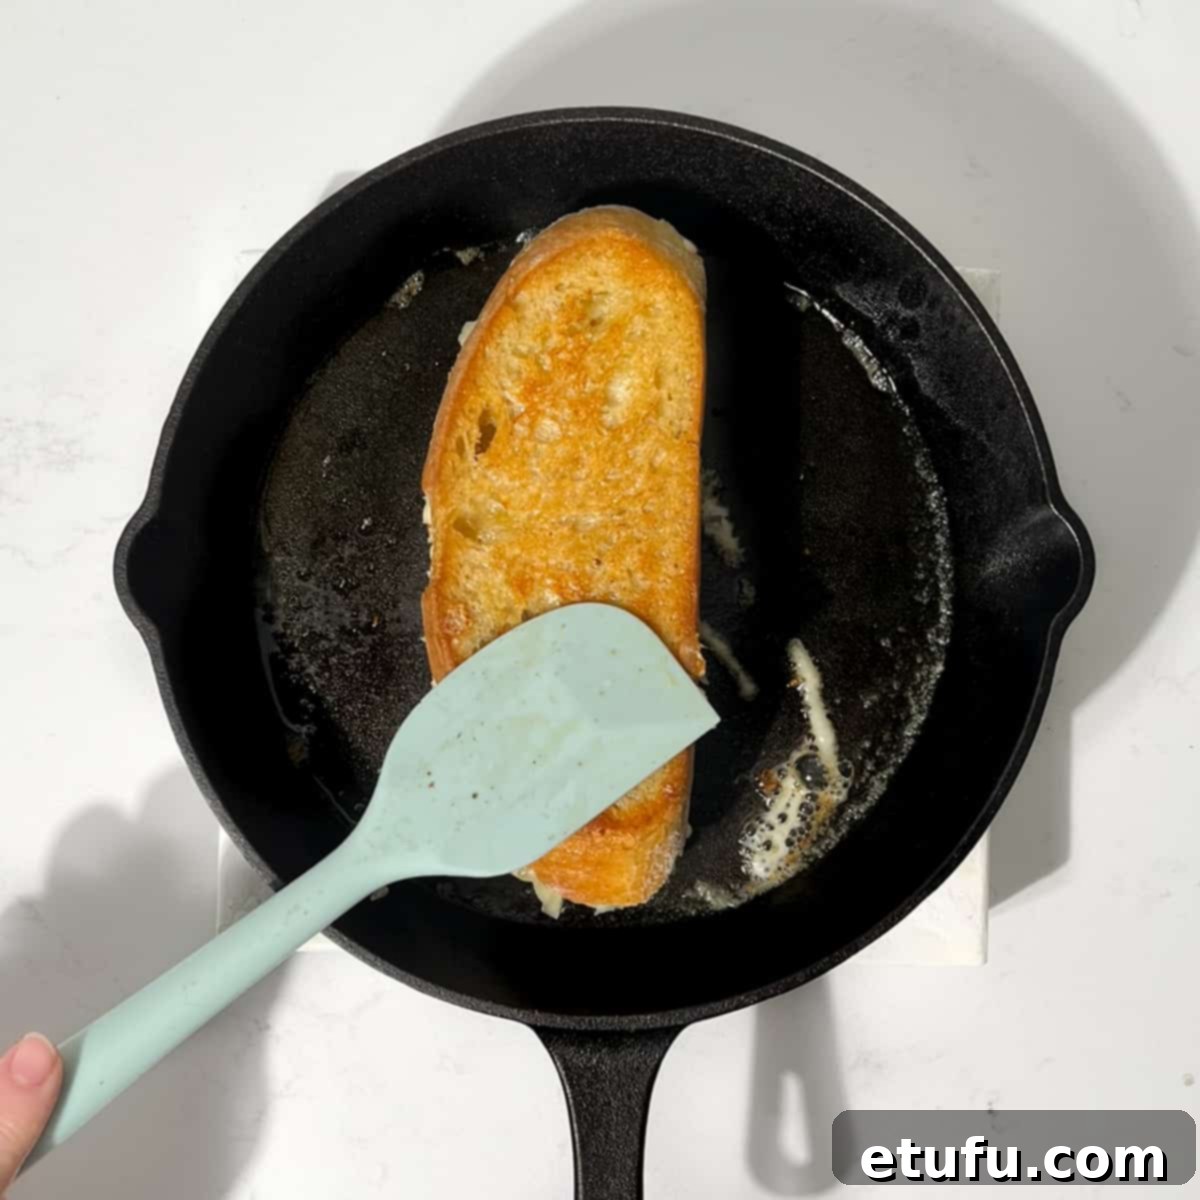
- Form the Sandwich: Carefully flip one cheese-topped slice onto the other, so that the cheese sides are now facing each other. Gently press down on the top slice with a spatula to ‘glue’ the softened cheese together and ensure good contact between the layers.
- Final Grilling and Melting: Continue frying the assembled sandwich over very low heat. Turn the sandwich frequently (every 1-2 minutes) to ensure even browning. Keep cooking until both sides are toasted to a beautiful golden-brown color, the cheese has fully melted into a gooey, irresistible state, and you see it just beginning to ooze out from the edges. This process usually takes an additional 3-5 minutes per side, depending on your heat and pan.
- Serve Immediately: Once perfectly toasted and melted, carefully remove the grilled cheese from the pan. If any cheese has escaped and browned on the bottom of the pan, scrape it off and serve it alongside your sandwich – it’s packed with extra flavor! For the best presentation and eating experience, slice the sandwich in half diagonally using a serrated knife while it’s still hot, revealing that glorious, stretchy cheese pull. Enjoy without delay!
Creative Variations: Elevate Your Grilled Cheese
While our ultimate sourdough grilled cheese recipe stands alone in its perfection, it also serves as a fantastic canvas for culinary creativity. These variations allow you to customize your sandwich to suit different moods and palates, transforming it from a simple comfort food to a gourmet delight:
- Pesto Perfection: Spread a thin layer of vibrant basil pesto on the inside of one or both slices of bread before adding the cheese. The aromatic, savory notes of pesto complement the rich cheeses beautifully, adding a Mediterranean twist.
- Sweet & Savory Balance: Introduce a sophisticated touch by adding a thin layer of fig jam, apricot preserves, or a drizzle of honey on one side of the bread. The sweetness provides a delightful counterpoint to the savory, salty cheeses.
- Freshness Burst: Slip in a few fresh, thinly sliced tomato rounds and a scattering of fresh basil leaves (or other fresh herbs like chives or oregano) between the cheese layers. This adds a burst of acidity, freshness, and vibrant color.
- Spicy Kick: For those who crave heat, sprinkle some crushed red pepper flakes over the cheese or add a thin layer of your favorite hot sauce to the inside of the bread. You can also explore recipes like our chilli cheese toast with jalapeño peppers for more inspiration.
- Hearty Meat Additions: Transform your grilled cheese into a more substantial meal by incorporating thinly sliced cooked meats. Classic options include ham, crispy bacon, or savory pepperoni.
- Caramelized Onion Bliss: Layer sweet and deeply flavored caramelized onions between the cheese. Their rich, savory-sweet profile adds incredible depth and a luxurious texture that pairs wonderfully with sharp cheeses.
- Garlic Butter Exterior: Instead of plain salted butter, infuse your grilled cheese with aromatic garlic by using homemade garlic butter (minced garlic mixed with softened butter) for spreading on the outside of the bread.
- Umami Mushrooms: Sautéed mushrooms, particularly cremini or button mushrooms cooked with a touch of garlic and herbs, can add an earthy, umami-rich layer to your sandwich, making it more substantial and flavorful.
Perfect Pairings: Serving Suggestions for Your Sourdough Grilled Cheese
While a sourdough grilled cheese sandwich is a satisfying meal in itself, pairing it with complementary sides can elevate the dining experience, balancing its richness and adding textural variety. Here are some fantastic serving suggestions:
- Classic Comfort Sides:
- Fries or Sweet Potato Fries: The ultimate comfort food pairing, offering a salty, crispy contrast.
- Crisps (Potato Chips): A simple yet effective choice for added crunch and saltiness.
- Coleslaw: The creamy, tangy crunch of coleslaw provides a refreshing contrast to the warm, rich sandwich.
- Potato Salad: A cool, creamy potato salad makes for a hearty and satisfying side.
- Fresh & Light Companions:
- A Simple Green Salad: A light, crisp salad with a vinaigrette dressing cuts through the richness of the cheese and adds freshness.
- Parmentier Potatoes: Small, diced potatoes roasted until crispy and golden offer a delightful textural counterpoint.
- Soups for Dipping:
- A Classic Bowl of Tomato Soup: This is arguably the most iconic pairing. The acidity and warmth of tomato soup are perfect for dipping and cutting through the cheese’s richness.
- Sweet Potato, Coconut and Chilli Soup: For a more adventurous pairing, the subtle sweetness and gentle heat of this soup offer a delicious contrast.
- Hearty Mains (for a more elaborate meal):
- Grilled Meats: Serve alongside thin slices of grilled steak or crispy fried chicken for a substantial and satisfying meal.
Preserving the Perfection: Storage and Reheating Tips
While a grilled cheese is undoubtedly best enjoyed fresh off the pan, sometimes you might have leftovers or want to prepare one in advance. Don’t despair; reheating a grilled cheese to near-original glory is absolutely possible with the right technique!
Storage Guidelines
For optimal freshness and food safety, store any leftover grilled cheese sandwiches promptly. Place them in an airtight container in the refrigerator, or wrap them tightly in aluminum foil. Stored correctly, your grilled cheese should remain fresh and safe to eat for 3-4 days.
Reheating a Grilled Cheese Toastie: The Comeback Kid
You might mistakenly believe that resurrecting a cold, solidified cheese sandwich to its former crispy, gooey glory is an impossible feat. Think again! With our proven method, you can bring that deliciousness back to life, achieving results that are surprisingly close to freshly made.
Here’s the secret to successful reheating:
- The Microwave Warm-Up: Begin by placing your cold grilled cheese sandwich in the microwave for approximately 30-45 seconds. The goal here isn’t to cook it, but simply to gently warm the cheese through until it’s soft and beginning to melt again. Be careful not to overheat it, as this can make the bread rubbery.
- The Pan Re-Crisp: Immediately after the microwave, transfer the warmed sandwich to a hot, dry frying pan (no butter needed at this stage, unless you want extra richness). Heat the pan over medium-low heat. Gently toast both sides of the sandwich, turning frequently, until the bread is beautifully crispy and golden brown once more, and the cheese inside is fully re-melted and gooey. This step is crucial for restoring the texture.
While it might not achieve the exact 100% freshness and crispness of its original, pan-fresh state, this two-step reheating method comes remarkably close to restoring the crispy exterior and gooey, molten magic of your grilled cheese. It’s a game-changer for enjoying leftovers!
Explore More Delicious Sandwich Recipes
If you’ve enjoyed perfecting the art of grilled cheese, you’ll love exploring these other fantastic sandwich creations from our kitchen:
- Pizza Toast: Quick and Easy Meal Ideas
- The Ultimate Posh Fish Finger Sandwich with Homemade Tartar
- Prego Steak Rolls: A Flavorful Portuguese Favorite
- Cottage Cheese Toast: 6 Versatile Topping Ideas (Sweet & Savory)
Recipe Card: The Ultimate Sourdough Grilled Cheese Sandwich

The Ultimate Sourdough Grilled Cheese Sandwich
Equipment
- 1 cast iron skillet/frying pan
Ingredients
- 2 slices sourdough bread – sliced no thinner than 1cm/0.4″
- 1 tablespoon salted butter (or more if needed) – spreadable consistency
- 40 grams (1½ oz) emmental/Cheddar/Gouda – or to taste. Freshly grated.
- 40 grams (1½ oz) mozzarella cheese – or to taste. From a ball of mozzarella, thinly sliced
- 1 tablespoon parmesan shavings – or to taste. Grated parmesan works too.
Instructions
- Slice the bread into medium-thick slices. Grate the Emmental (or your chosen cheese). Drain, dry and finely slice the mozzarella.2 slices sourdough bread, 40 grams (1½ oz) emmental/Cheddar/Gouda, 40 grams (1½ oz) mozzarella cheese
- Spread a generous amount of butter on two slices of bread, making sure to cover the entire surface from edge to edge. Then, flip the slices over, placing the buttered side down.1 tablespoon salted butter (or more if needed)
- Generously sprinkle both slices, on the dry sides, with freshly grated Emmental cheese (or your chosen cheese).
- Evenly distribute slices of thinly sliced mozzarella on top of the grated cheese.
- Finish it off by topping the mozzarella slices with parmesan shavings or a sprinkle of grated parmesan.1 tablespoon parmesan shavings
- Melt a small knob of butter (about a teaspoon) in a pan over low heat.
- Once the butter has melted, position the two slices of bread, cheese side up, side by side in the pan.
- Place a lid on the pan and continue to heat the bread over low heat for roughly 1.5-2 minutes. See note 1
- As soon as some of the grated cheese starts looking a bit limp from warming, go ahead and remove the lid.
- Flip one slice onto the other so that the cheese faces each other. Give it a gentle press with a spatula to ‘glue’ the cheese together.
- Continue frying the bread over very low heat, turning frequently until both sides are toasted to a golden brown colour, the cheese has fully melted and is just starting to ooze out from the edges.
- Scrape off any grilled cheese that landed in the pan and serve together with the grilled cheese sandwich (flavour!).
Notes
- Arrange the cheese on both slices of bread, buttered sides down. So instead of adding a big, fat layer of cheese on one side, split the cheese across two slices. All will make sense in a moment.
- Place the two open, cheese-topped slices in the pan, cover with a lid and keep the heat on low. This traps the heat, giving the cheese a head start.
- Remove the lid as soon as you spot the grated cheese starting to go a bit limp. Not by much though.
- Flip one slice onto the other, cheese sides facing each other. Now, you’re all set to start grilling your toastie the usual way, lid off with the cheese already heated up.
**Nutritional Data Disclaimer**
Please keep in mind that the nutritional information provided below is calculated by a third party and we cannot guarantee its accuracy. We try our best to give you the most accurate information, but we do not take responsibility for errors that may be present. Also, the nutritional value of the recipe may change depending on the exact brands and products used. We recommend that you consult with a qualified healthcare professional or registered dietitian for personalized advice on your dietary needs.
Nutrition
For food safety advice, including guidance on food allergies
