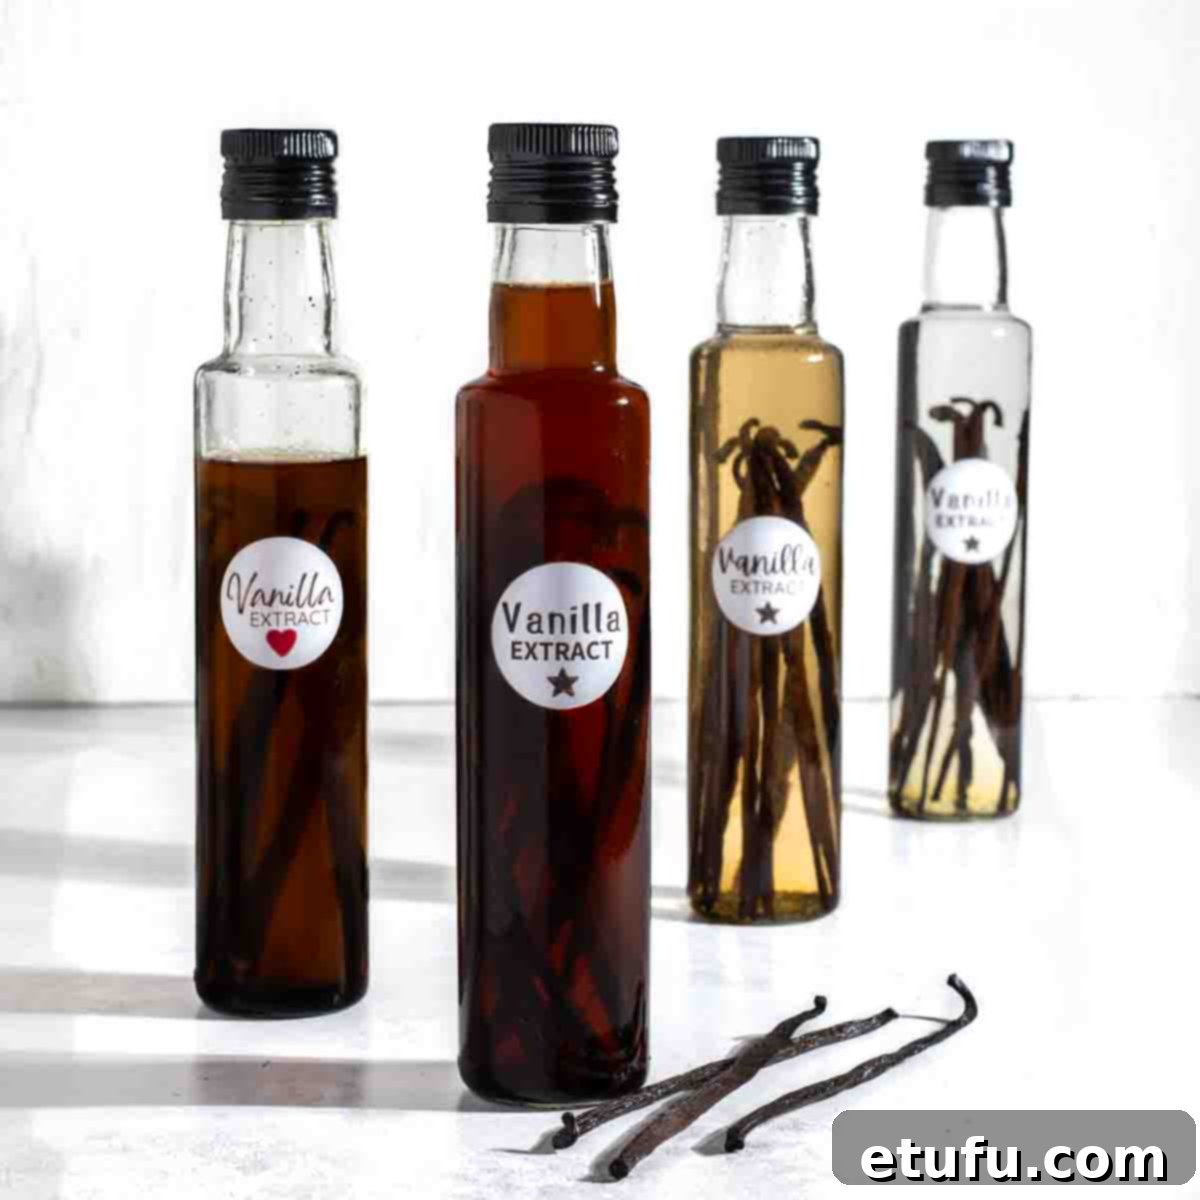
“Oh, vanilla, queen of spices, sweet and rare, your fragrant essence fills the air!”
While that might not be Shakespeare, it certainly captures our profound admiration for vanilla! We wholeheartedly confess our absolute obsession with this delightful spice. The mere sight of those tiny, dark specks dancing in a luscious cream or nestled within a scoop of velvety ice cream instantly ignites joy in our hearts and brings a sigh of pure contentment to our souls.
Vanilla holds a truly unique and special place among all the spices in the world. It’s an embrace of warmth, a kiss of sweetness, a familiar comfort that transcends cultures and palates. Almost everyone is a fan, and its versatility in the kitchen is simply unmatched, gracing everything from delicate pastries to robust savory dishes.
In our household, vanilla is a staple, used in generous quantities. Let’s be honest, maintaining a steady supply of high-quality vanilla can become a rather expensive habit. The cost of premium vanilla extract often makes us pause, especially when we consider how frequently it’s called for in our favorite recipes.
However, a few years ago, we decided to embark on a culinary adventure: making our own vanilla extract from scratch. This decision proved to be an absolute game-changer. The resulting homemade extract not only far surpassed the quality of anything available on store shelves but also offered a significant saving, making it much easier on our budget.
We are here today to enthusiastically persuade you to try making your own vanilla extract. It is surprisingly simple, requiring just two core ingredients and a sprinkle of patience. The initial investment of time and money is undeniably worth it, culminating in an exquisite product that elevates all your culinary creations.
So, if you are a devoted admirer of vanilla, if you insist on top-notch quality, but find yourself wincing at the commercial price tags, then this comprehensive guide to homemade vanilla extract is perfectly tailored for you. Prepare to transform your baking and embark on a rewarding journey into the world of pure, unadulterated vanilla.
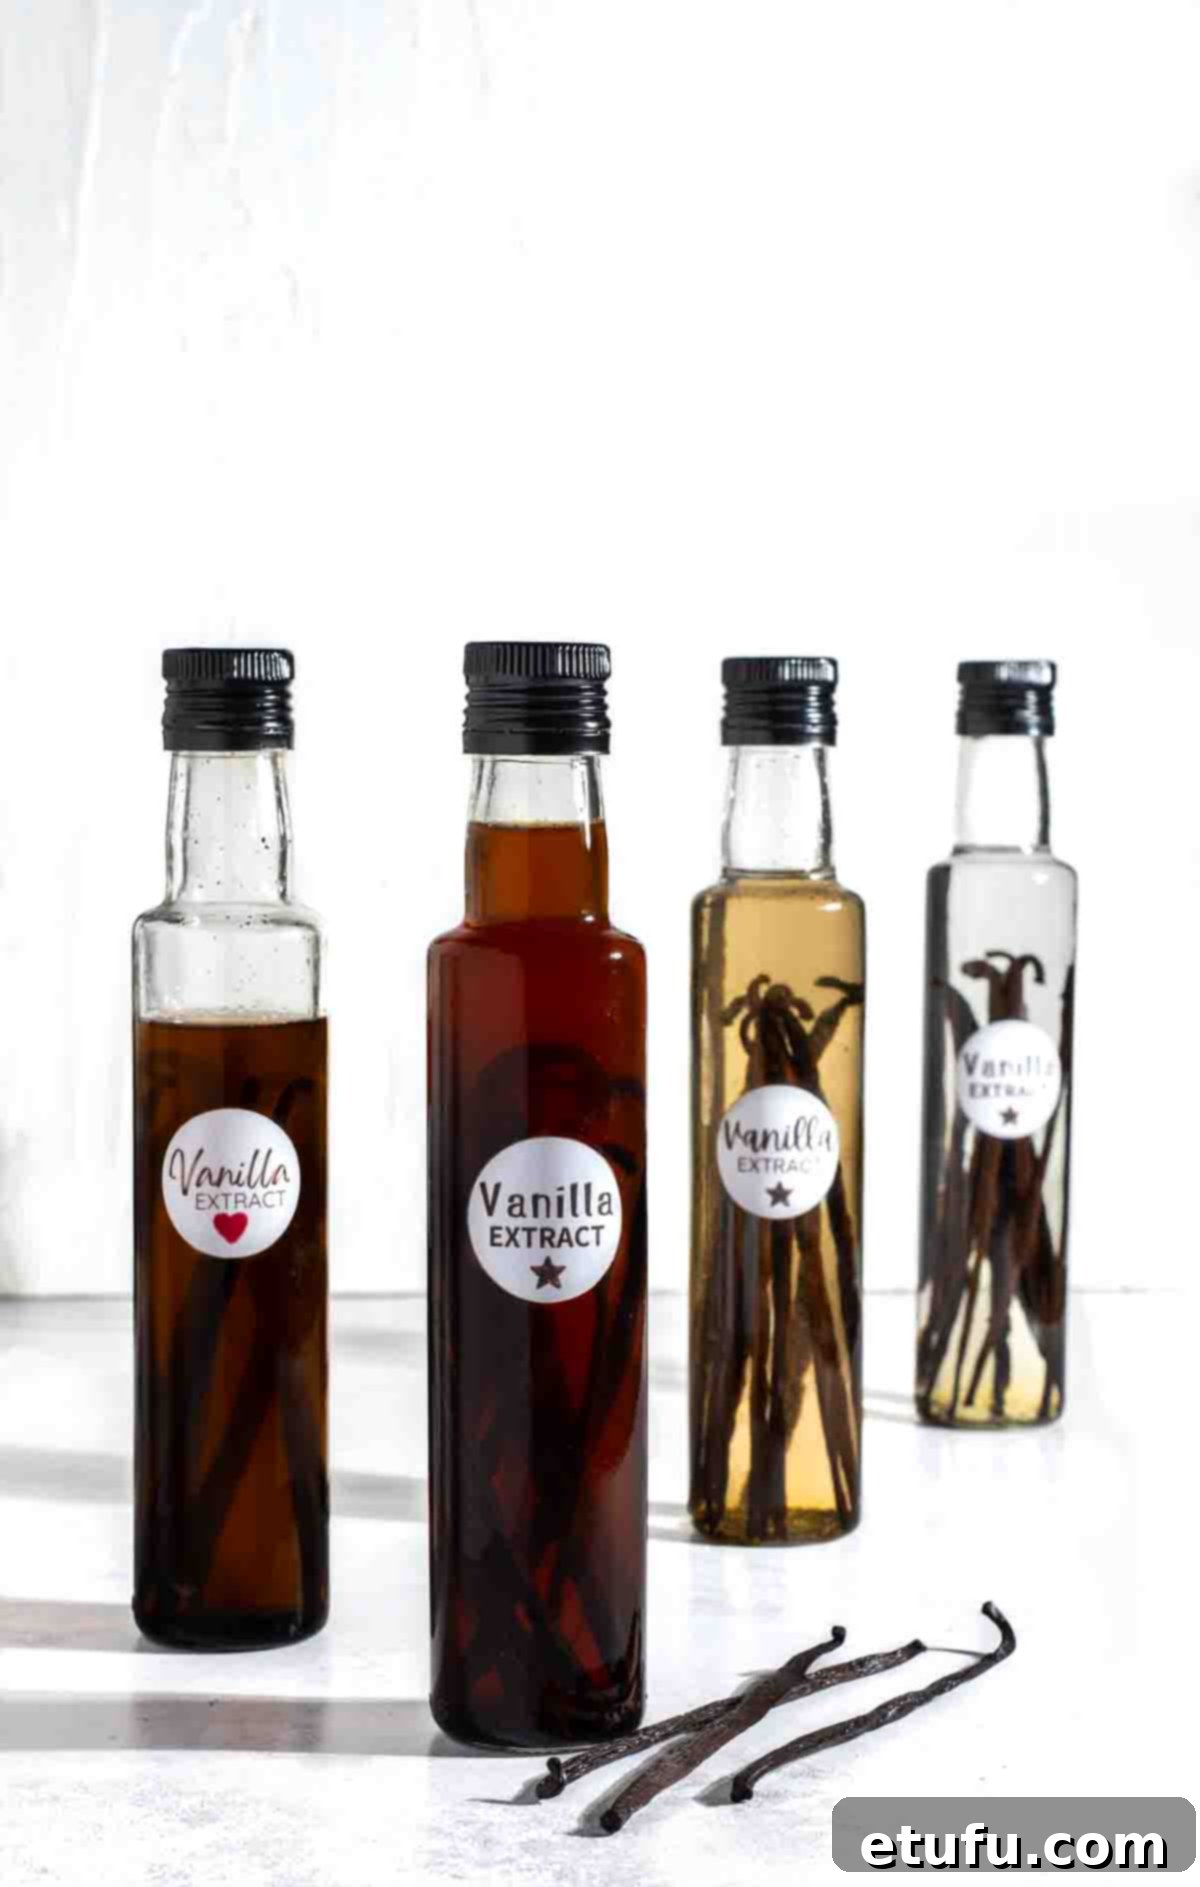
Why Should You Make Your Own Vanilla Extract?
The decision to craft your own vanilla extract goes beyond mere cost savings; it’s an investment in superior quality, personal satisfaction, and culinary excellence. Here are compelling reasons to start your homemade vanilla journey:
- Unmatched Quality: Homemade vanilla extract consistently offers a richer, more complex, and authentic flavor profile compared to many commercial options, which often contain artificial flavors or diluted extracts. You control the quality of your ingredients, ensuring a premium product.
- Significant Cost Savings: While the initial outlay for vanilla beans might seem substantial, making your own extract is considerably more budget-friendly in the long run. Especially for frequent bakers or cooks, the savings accumulate dramatically. We’ve crunched the numbers, and the long-term value is undeniable.
- Purity and Natural Ingredients: When you make vanilla extract at home, you eliminate concerns about artificial flavors, colors, corn syrup, or preservatives. You get a pure, natural product that enhances your recipes without unwanted additives. This provides peace of mind for those prioritizing clean eating.
- A Rewarding DIY Project: The process of making vanilla extract is simple yet immensely satisfying. It’s a hands-on project that yields a high-quality ingredient for all your culinary endeavors, from delicate cakes and pastries to rich sauces and creams. There’s a special pride in using something you’ve crafted yourself.
- The Perfect Artisan Gift: A beautifully bottled, homemade vanilla extract makes an exceptional, thoughtful, and much-appreciated gift for any foodie, baker, or home cook in your life. It’s a touch of homemade luxury that speaks volumes.
- Ethical Sourcing and Reduced Waste: You have the freedom to choose ethically sourced vanilla beans, supporting sustainable practices and responsible growers. Furthermore, by using reusable glass bottles, you significantly reduce packaging waste, aligning with environmentally conscious values.
- Exceptionally Long Shelf Life: Alcohol acts as a natural preservative, giving homemade vanilla extract an incredibly long shelf life—literally years, or even indefinitely if stored correctly and the beans are removed after full extraction. This means you can make large batches without worry.
- Endless Experimentation: The world of vanilla is vast and exciting! Making your own extract allows you to experiment with various types of vanilla beans (each with distinct flavor notes) and different types of alcohol bases, creating custom extracts tailored to specific culinary uses or personal preferences.
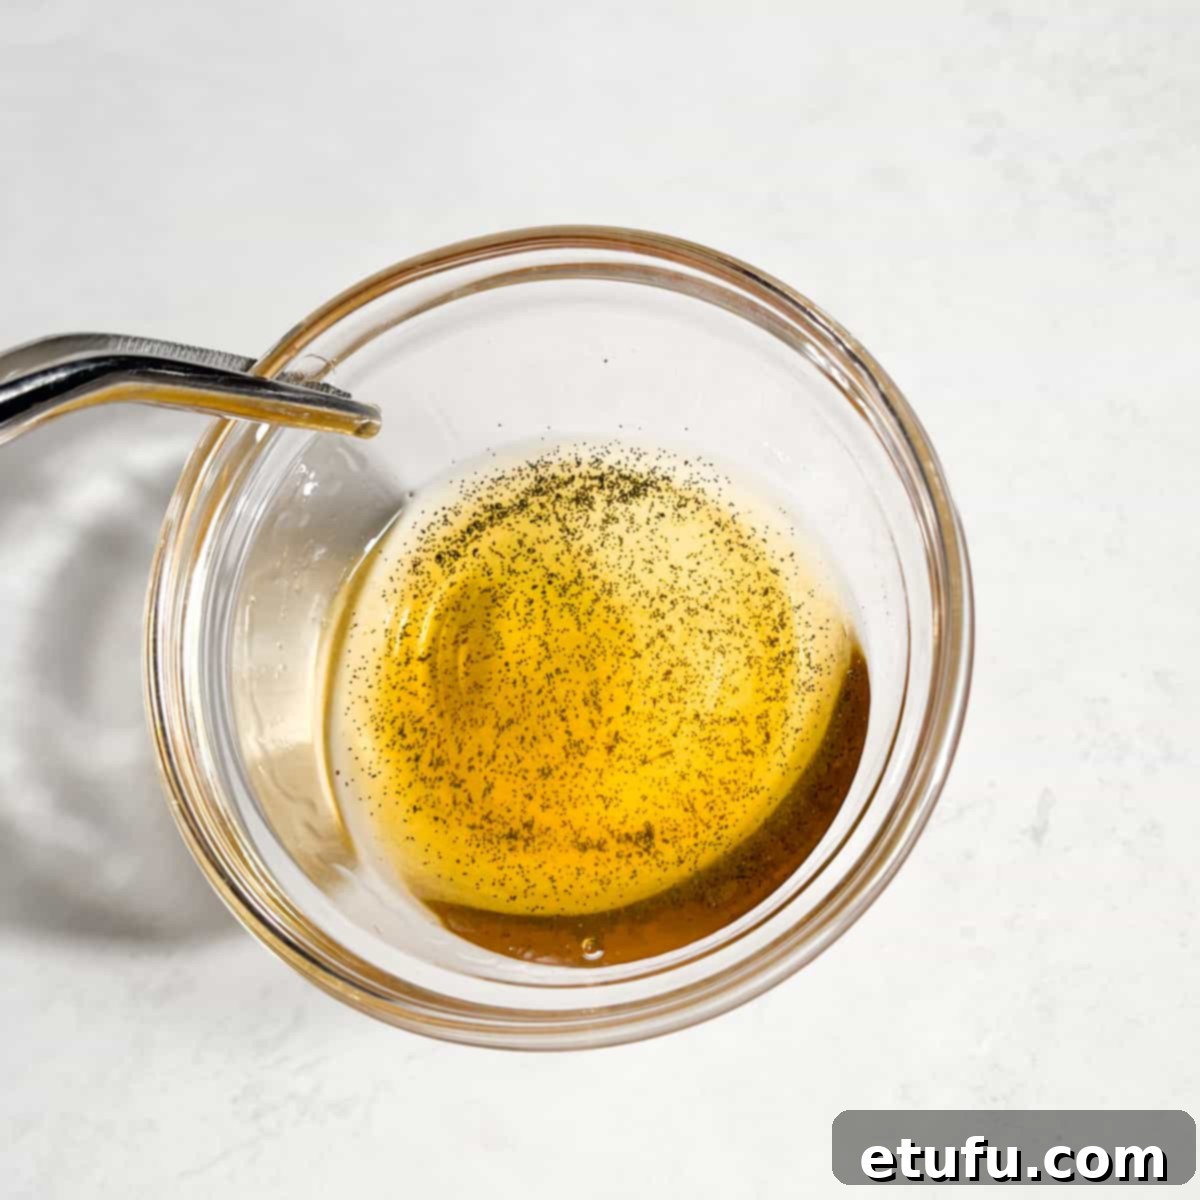
Key Ingredient Notes and Substitutions for Homemade Vanilla Extract
Crafting exceptional vanilla extract hinges on understanding your ingredients. Let’s delve into the two core components – vanilla pods and alcohol – and explore the nuances that will define your homemade creation.
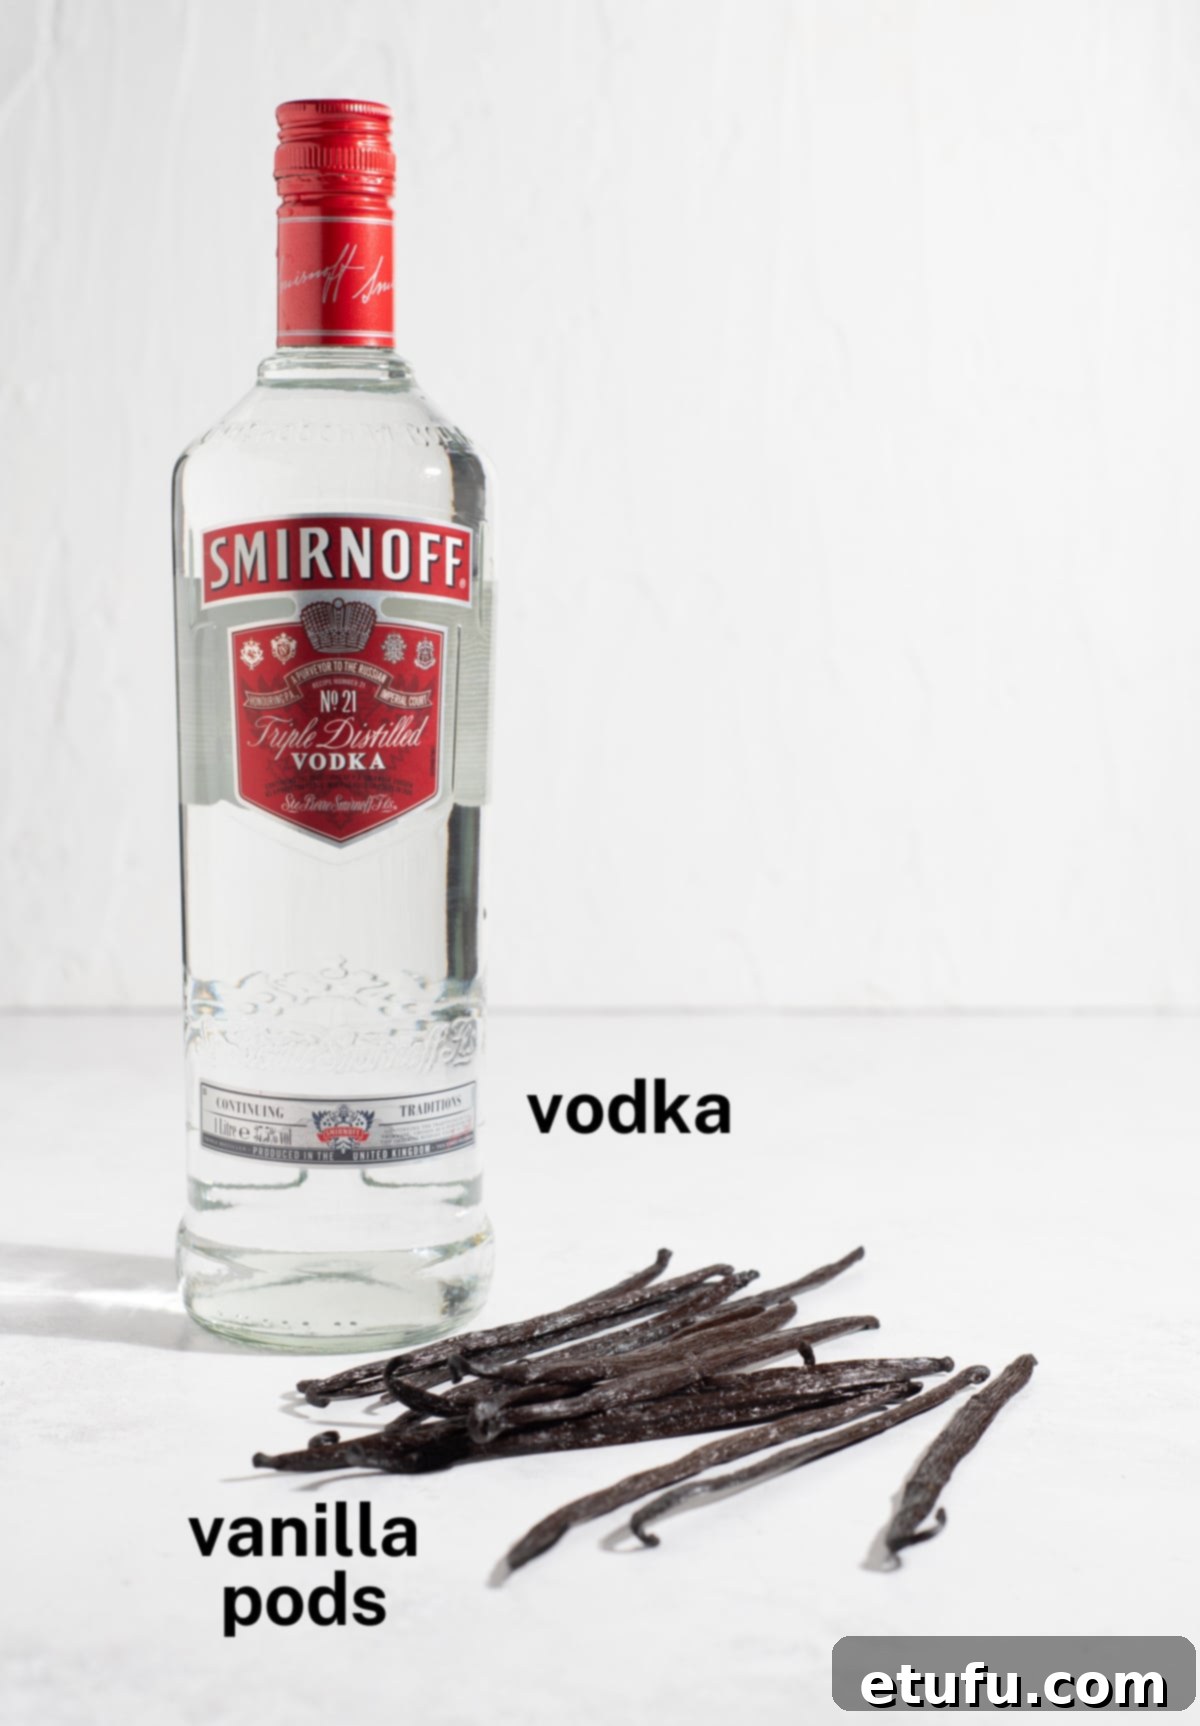
The Vanilla Pods: Heart of Your Extract
The quality and variety of your vanilla beans are paramount, directly influencing the final flavor of your extract. Take the time to select wisely, as this is where the magic truly begins.
Choose Your Flavor: Exploring Vanilla Varieties
Vanilla beans are cultivated in various regions around the globe, forming what is known as the “vanilla belt.” Each region boasts unique soil compositions, climates, and curing processes that impart distinct flavor profiles to the beans. Much like fine wines, coffee, or chocolate, the origin plays a crucial role in the bean’s character.
Here’s a brief overview of some prominent vanilla varieties and their signature notes:
- Madagascar Vanilla Beans (Bourbon Vanilla): These are perhaps the most popular and widely recognized vanilla beans. Known for their rich, creamy, and sweet flavor with undertones of chocolate, they are often considered the classic vanilla standard. Madagascar beans are incredibly versatile and excellent for most baking applications.
- Mexican Vanilla Beans: Offering a slightly bolder, spicier, and woodier flavor than their Madagascar counterparts, Mexican vanilla beans often have hints of smoke and pepper. They are particularly well-suited for chocolate-based desserts or recipes where you want a more robust vanilla presence.
- Tahitian Vanilla Beans (often grown in Papua New Guinea and other regions): Tahitian vanilla beans are prized for their exquisite floral and fruity notes. They frequently exhibit aromas of cherry, licorice, and anise, making them a fantastic choice for fruit tarts, custards, and lighter desserts where their delicate fragrance can truly shine.
- Indonesian Vanilla Beans: Similar to Madagascar vanilla in their sweet and creamy essence, Indonesian beans typically offer a more complex flavor profile. They often feature earthy and woody undertones, alongside subtle fruity hints reminiscent of figs or prunes. This variety adds depth and intrigue.
- Ugandan Vanilla Beans: A rising star in the vanilla world, Ugandan vanilla beans are characterized by a sweet, creamy flavor with notable hints of dried fruit, figs, and often subtle notes of milk chocolate. They are known for their high vanillin content and rich aroma, making them a luxurious choice for extracts.
Choose Your Grade: A vs. B Beans
Vanilla beans are typically graded based on their moisture content and appearance. Understanding these grades will help you make an informed choice for your extract:
- Grade A Vanilla Beans (Gourmet or Prime): These beans are plump, moist, pliable, and visually appealing. They have a higher moisture content (25-30%) and are perfect for applications where the bean itself is showcased, like infusing creams, custards, or making vanilla bean paste. While they can certainly be used for extract, their higher price point might make them less economical for large batches.
- Grade B Vanilla Beans (Extract Grade): Drier, less pliable, and sometimes split or broken, Grade B beans have a lower moisture content (15-25%). This makes them absolutely ideal for extracts! Their drier state means their flavor is more concentrated, and they are typically more affordable, offering excellent value for money when making vanilla extract or vanilla bean powder.
Our Preferred Choice for Vanilla Pods:
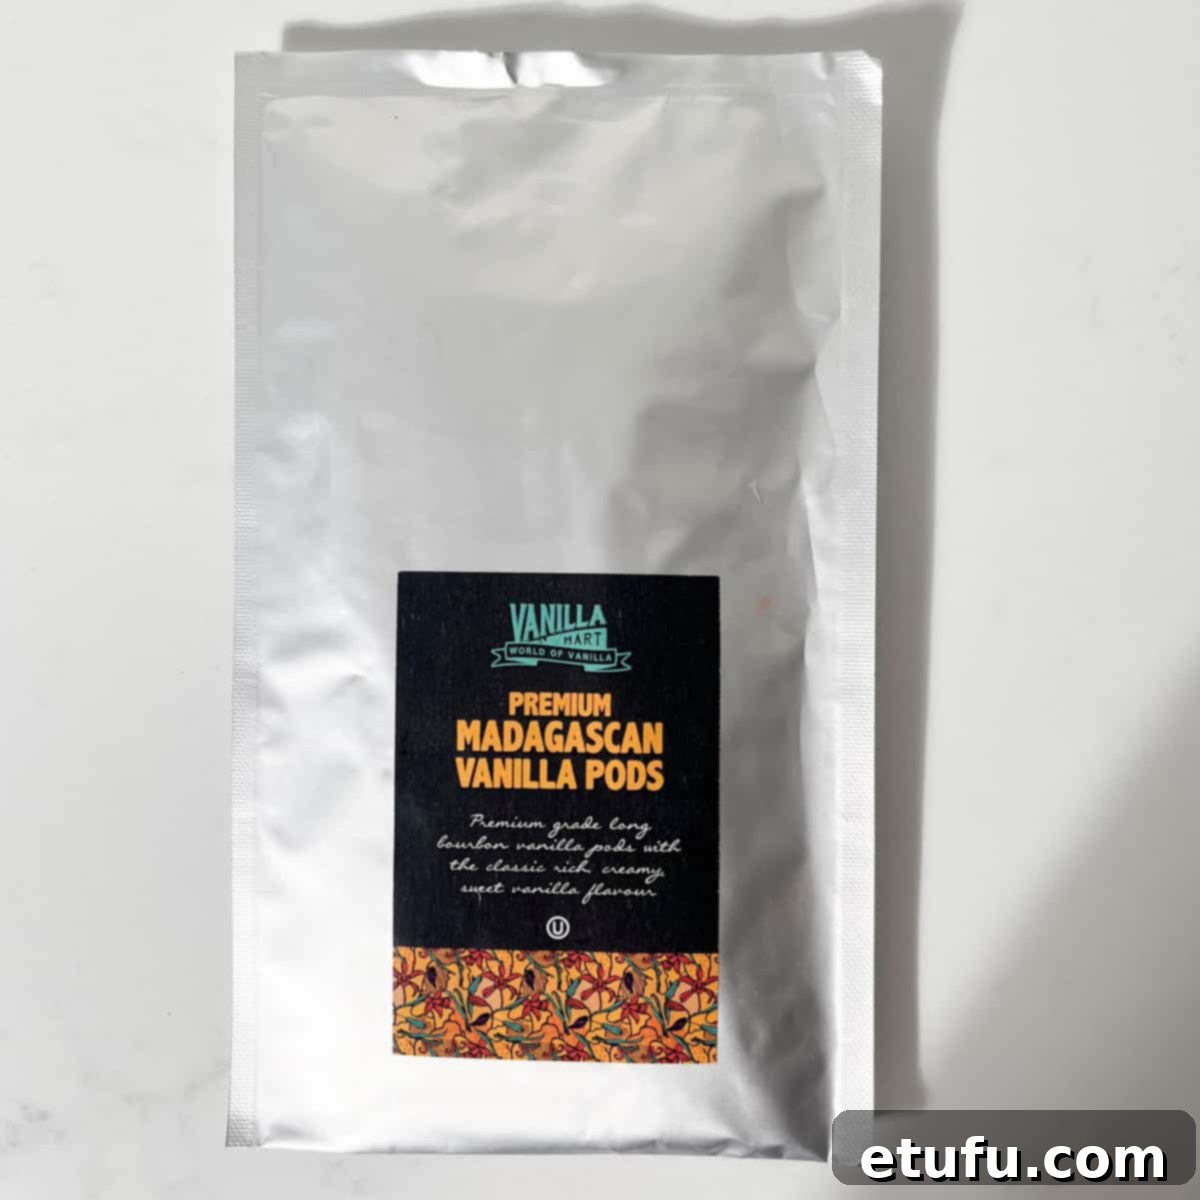
For our vanilla pods in the UK, we consistently choose Vanilla Mart. We are not sponsored, but their premium Madagascar Bourbon beans have consistently impressed us with their quality and excellent prices. Every bean we’ve received has been top-notch, delivering a consistently superb extract.
Ultimately, the world of vanilla offers a delightful spectrum of flavors. Feel free to explore different varieties to discover your favorite. Don’t hesitate to opt for more economical Grade B beans for extracts, or splurge on Grade A if your budget allows for an extra touch of luxury. The choice is yours, and the journey of discovery is part of the fun!
Choosing Your Alcohol Base: Vodka and Beyond
The alcohol serves a dual purpose: it acts as a solvent to extract the vanilla compounds and as a preservative. Your choice of alcohol will influence the final flavor profile and longevity of your extract.
Vodka: The Neutral Canvas
Vodka is widely regarded as the best choice for making pure vanilla extract, and for good reason. Its neutral taste and minimal aroma ensure that the delicate and complex vanilla flavors are front and center, completely unmasked by competing notes. This transparency also allows you to visually appreciate the beautiful amber color development as the vanilla infuses over time.
For official “pure vanilla extract,” the alcohol content must be at least 35% alcohol by volume (ABV), or 70 proof. Most commercially available vodkas meet or exceed this requirement. For the most balanced and sweetest flavor extraction, aim for vodka with an alcohol content between 35% (70 proof) and 45% (90 proof). Higher proofs can extract more efficiently but might also result in a slightly harsher alcohol presence in the finished extract.
There’s no need to splurge on an expensive, top-shelf vodka. A good quality, low to mid-priced brand works perfectly well, as its primary role is to act as a solvent. Save your investment for high-quality whole vanilla beans; they are the true stars responsible for that exquisite, classic vanilla flavor.
Experimenting with Other Alcohols:
While vodka provides a pure vanilla essence, other spirits can impart intriguing complexities to your extract, creating unique flavor profiles for specific culinary uses. However, if this is your first foray into homemade extract, we highly recommend sticking with vodka to truly appreciate the unadulterated vanilla flavor.
- Bourbon: Adds a warm, sweet, and slightly smoky caramel note that pairs wonderfully with vanilla. Excellent for richer desserts like bread puddings, pecan pies, or chocolate cakes.
- Brandy: Offers fruity and slightly sweet undertones, complementing vanilla beautifully. Ideal for fruit-based desserts, custards, or sophisticated glazes.
- Whisky: Can lend a more robust, earthy, and sometimes peaty character, creating a bolder vanilla extract. Best for hearty baked goods or savory applications where a stronger flavor is desired.
- Rum: Imparts a distinct sweetness and notes of molasses or caramel, which can create a tropical or more spiced vanilla extract. Perfect for rum cakes, banana bread, or spiced lattes.
Can You Make Vanilla Extract Without Alcohol?
Yes, an alcohol-free vanilla extract is possible, typically made with food-grade vegetable glycerin. This is an excellent alternative for those who avoid alcohol for dietary or personal reasons.
- Method: Mix three parts glycerin with one part water. This provides a suitable solvent base for extraction.
- Considerations: It’s important to note that glycerin lacks the robust preservative qualities of alcohol, so your non-alcoholic extract will have a shorter shelf life (typically 6-12 months, stored in the refrigerator). Additionally, flavor development takes longer, and the resulting extract may not achieve the same dark, rich color or intensity as its alcohol-based counterpart. Patience is key when making glycerin-based extracts.
How Many Vanilla Pods to Use for Your Extract
Determining the right quantity of vanilla pods is crucial for a potent and flavorful extract. While commercial regulations can be overly precise, for home use, we aim for a robust flavor without unnecessary complication.
Commercial Standards vs. Home Brewing
For commercial “pure vanilla extract” in the USA, the FDA stipulates a minimum of 13.35 ounces of extract-grade vanilla beans per gallon of alcohol. This translates to roughly 100 grams of vanilla beans per liter of alcohol. Such precise measurements are designed for large-scale production and regulatory compliance, and frankly, can make your head spin for a home project!
While we strive for a similar concentration to achieve high-quality results, we don’t let strict adherence to these figures detract from the joy of making our own. Our focus is on personal use, not commercial sale, allowing for a bit more flexibility.
Single-Fold vs. Double-Fold Vanilla Extract
You have the option to make two primary strengths of vanilla extract:
- Single-Fold Vanilla Extract: This is the standard strength, similar to most store-bought pure vanilla extracts. It follows the general ratio of vanilla beans to alcohol to achieve a balanced, versatile flavor. This is what we typically recommend for most home bakers.
- Double-Fold Vanilla Extract: As the name suggests, this contains twice the amount of vanilla beans per volume of alcohol, making it a highly concentrated extract. It offers a much more intense vanilla flavor and is ideal for recipes where vanilla is a key player, or when you want to achieve maximum flavor with less liquid. While more expensive to produce initially, a little goes a long way.
For this guide, we’ll focus on making single-fold vanilla extract, providing a delightful and potent flavor that rivals premium commercial versions.
Weighing vs. Counting Vanilla Pods
One piece of invaluable advice: always weigh your vanilla pods rather than counting them. Vanilla beans vary significantly in size, length, plumpness, and moisture content. For instance, two exceptionally plump Grade A pods might weigh the same as four drier Grade B pods. Weighing ensures a consistent ratio of vanilla mass to alcohol, leading to a more reliable and flavorful extract every time.
However, we understand not everyone has a kitchen scale readily available, so we will still provide a rough estimate of how many pods you might need.
Our Recommended Ratio:
Based on extensive testing, we’ve found a formula that consistently yields excellent single-fold vanilla extract for home use:
Use 15 grams of vanilla pods for every 200ml of vodka (or chosen alcohol).
To give you a rough visual, 15 grams of vanilla pods is approximately equivalent to five plump Grade A vanilla pods, or around 6-8 Grade B vanilla pods, depending on their individual characteristics. Adjust this ratio proportionally if you are making a larger or smaller batch.
For example:
- For a 200ml bottle: 15g vanilla pods
- For a 500ml bottle: 37.5g vanilla pods (approx. 12-18 pods)
- For a 1-liter bottle: 75g vanilla pods (approx. 25-30 pods)
Using these guidelines will ensure you create a rich, aromatic, and potent vanilla extract that will elevate all your baking and cooking to new heights.
Is It Really Cheaper? We Did The Sums!
The question on many minds is whether the initial effort and cost of homemade vanilla extract truly pay off. Let’s break down the economics and see how making your own compares to purchasing store-bought versions. The results might pleasantly surprise you!
Disclaimer: Please note that our calculations are based on average costs of vanilla pods and vodka in the UK in October 2023. Prices and availability can fluctuate significantly depending on your geographical location, the specific quality and origin of the vanilla pods, and the brand of alcohol you select. These figures are illustrative but demonstrate a clear trend.
Cost to Make One 200ml Bottle of Homemade Vanilla Extract
Here’s an estimated breakdown of the cost for a single batch:
| Supplies | Cost per 200ml |
| Smirnoff vodka from Sainsbury’s @£1.80/100ml (Oct ’23) | £3.60 |
| Premium Madagascan Bourbon Vanilla Pods (10 pack) from Vanilla Mart @£1.50/pod (Oct ’23) (5 pods for 15g) | £7.50 |
| Total initial cost per 200ml | £11.10 |
Cost of Shop-Bought Pure Vanilla Extract per 200ml
For comparison, let’s look at a popular, high-quality commercial brand:
| Supplies | Cost per 200ml |
| Nielsen-Massey Vanilla Extract from Sainsbury’s @£9.58/100ml (Oct ’23) | £19.16 |
Conclusion: The Unbeatable Value of Homemade
| Cost per 200ml | |
| Homemade vanilla extract | £11.10 |
| Shop-bought vanilla extract | £19.16 |
As you can see, making homemade vanilla extract using good quality, mid-range products is initially approximately 42% cheaper than purchasing a comparable premium store-bought vanilla extract. This initial saving is already substantial.
The Long-Term Advantage: Topping Up Your Extract
But the savings don’t stop there; this is where homemade vanilla extract truly shines. Unlike commercial bottles that are one-and-done, your homemade extract can be continuously topped up with fresh vodka as you use it. The vanilla pods will continue to infuse the new alcohol, yielding at least double the volume of extract before their potency significantly diminishes.
Let’s consider this long-term value. To yield a total of 400ml of extract from your initial batch of pods, you would add an extra 200ml of vodka as a “top-up,” costing approximately another £3.60.
So, with a total expenditure of £14.70 (initial £11.10 + £3.60 top-up) for 400ml of homemade extract, your homemade version becomes an astonishing 61% cheaper than purchasing the equivalent volume of store-bought alternative. This incredible cost-efficiency, combined with superior quality, makes homemade vanilla extract a truly smart choice for any passionate cook or baker.
Best Bottles to Use for Your Homemade Vanilla Extract
The container you choose for your vanilla extract is more important than you might think. It impacts preservation, aging, and even the aesthetic appeal, especially if you plan to give it as a gift.
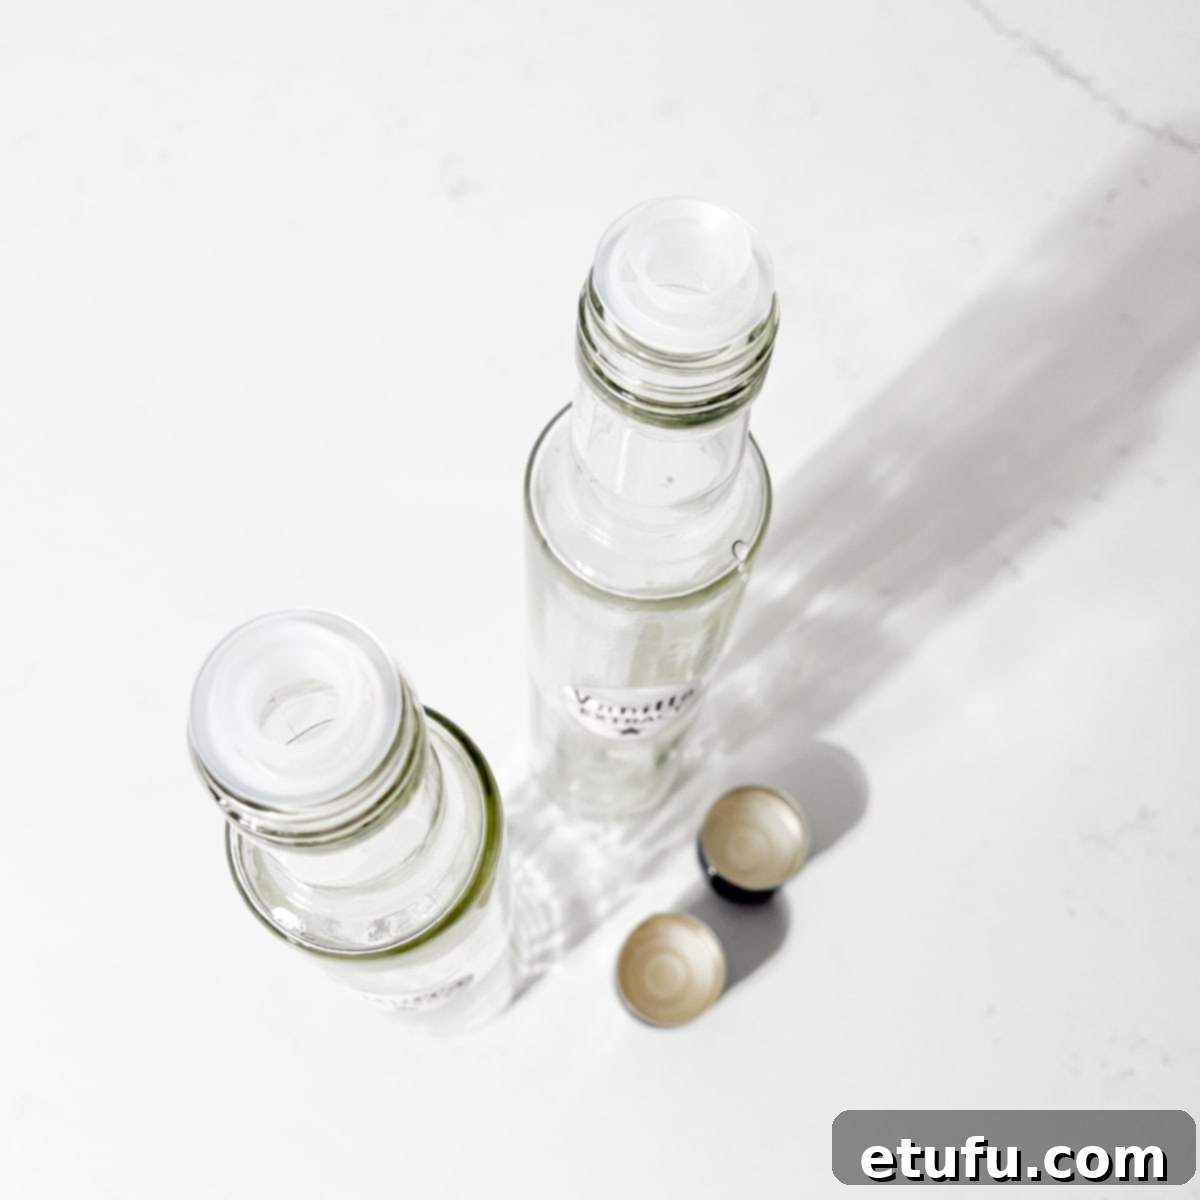
Glass is Essential, Never Plastic
When selecting bottles for your homemade vanilla extract, always opt for glass, and steer clear of plastic. Here’s why:
- Non-Porous Nature of Glass: Plastic is inherently more porous than glass. This permeability means that tiny molecules of oxygen (O2) and carbon dioxide (CO2) can gradually pass through plastic, potentially affecting the flavor and freshness of your extract over time. High-quality spirits, oils, and extracts are consistently bottled in glass for this very reason – it provides an impermeable barrier, preserving the integrity of the contents.
- No Chemical Leaching: While food-grade plastics are generally safe, long-term alcohol exposure can sometimes lead to minuscule leaching of plastic compounds into the liquid, potentially altering the taste or introducing unwanted substances. Glass offers a completely inert and safe environment for your extract to age beautifully.
Clear vs. Dark Glass: A Matter of Preference and Protection
- Clear Glass: We personally favor transparent glass bottles because it allows us to witness the captivating transformation of the extract as it matures. Watching the vodka gradually deepen into a rich, dark amber hue, and observing the vanilla seeds disperse, adds to the enjoyment of the process.
- Dark Glass (Amber or Cobalt Blue): Darker glass offers superior protection against light degradation. While vanilla extract should always be stored in a cool, dark place (like a cupboard), dark bottles provide an extra layer of defense against any stray light that could potentially diminish the extract’s potency or flavor over extended periods. If you’re concerned about maximum preservation or gifting, dark bottles are an excellent choice.
Ensuring a Tight Seal and Cleanliness
Regardless of the bottle type, two factors are non-negotiable:
- Tight Seal: Your bottle must seal tightly to prevent evaporation of the alcohol and exposure to air, which can compromise the extract’s quality. Cork stoppers (wax-sealed), swing-top bottles with rubber gaskets, or screw-top caps are all excellent choices.
- Squeaky Clean: Always ensure your bottles are thoroughly cleaned and completely dry before use. Sterilizing glass bottles by washing them in hot, soapy water, rinsing well, and then drying them in a low oven (around 100°C / 210°F for 10-15 minutes) or using a sanitizing solution, helps prevent any unwanted bacteria or residue from affecting your extract.
Functional Features: Pour Spouts and Gifting Ideas
We often opt for bottles equipped with a plastic stopper or pour spout. This feature proves incredibly useful for controlling the pouring speed, especially when dealing with larger bottles. It makes it much easier to dispense small, precise quantities, like a teaspoon, without spills or waste.
If you’re making vanilla extract for your personal pantry, upcycling any suitable, clean glass bottle is perfectly fine. However, if your homemade extract is destined to be a thoughtful gift, consider investing in attractive, small apothecary-style bottles or elegant mason jars. Adding a personalized, homemade label or a charming tag can elevate it into a truly special present.
Should You Slice The Vanilla Pods Before Infusion?
This is a common question, and our answer is a resounding yes! Slicing or cutting your vanilla pods before adding them to the alcohol significantly enhances the extraction process, leading to a richer and more flavorful extract.
The Science Behind Slicing
Vanilla pods contain thousands of tiny, flavorful seeds, which hold the concentrated essence of vanilla. By slicing or splitting the pods lengthwise, you achieve two main benefits:
- Increased Surface Area: Slicing exposes a much greater internal surface area of the vanilla pod to the alcohol. This allows the alcohol to more efficiently penetrate the pod and extract the vanillin and other complex flavor compounds from the seeds and the pod itself.
- Faster and More Thorough Extraction: With more surface area exposed, the extraction process happens more quickly and comprehensively. This means you’ll get a stronger, more potent extract in a shorter amount of time, although patience for full maturation is still key.
- Aesthetic Appeal: We also love the visual appeal of a vanilla extract dotted with those characteristic black specks of vanilla seeds. Slicing the pods ensures these seeds are released into the alcohol, giving your homemade extract that gourmet, authentic look.
Alternative Methods and Considerations
- Leaving Pods Whole: While it is an option, leaving the vanilla pods whole will result in a significantly longer maturation time for your extract, as the alcohol will have less direct access to the interior of the pod. The flavor will still develop, but at a much slower pace.
- Scraping the Seeds: For maximum seed dispersal and a more immediate burst of flavor, you can gently scrape the vanilla seeds out of the split pods before adding both the seeds and the pod to the alcohol. This is particularly useful if you want a very visible “speckled” extract.
- Dealing with Long Pods: If your vanilla pods are too long to fit comfortably in your chosen bottle, you have a few simple solutions. You can bend them gently in half, tie a loose knot in them, or cut them crosswise into shorter segments. The goal is to ensure the entire pod remains submerged in the alcohol for optimal extraction.
Ultimately, slicing your vanilla pods is a small step that yields big rewards in terms of flavor intensity and extraction efficiency, making it a highly recommended practice for your homemade vanilla extract.
How to Make Your Own Homemade Vanilla Extract: A Step-by-Step Guide
Making your own vanilla extract is a surprisingly simple and rewarding process. With just two ingredients and a bit of patience, you’ll soon have a supply of superior vanilla that elevates all your culinary creations. Follow these easy steps:
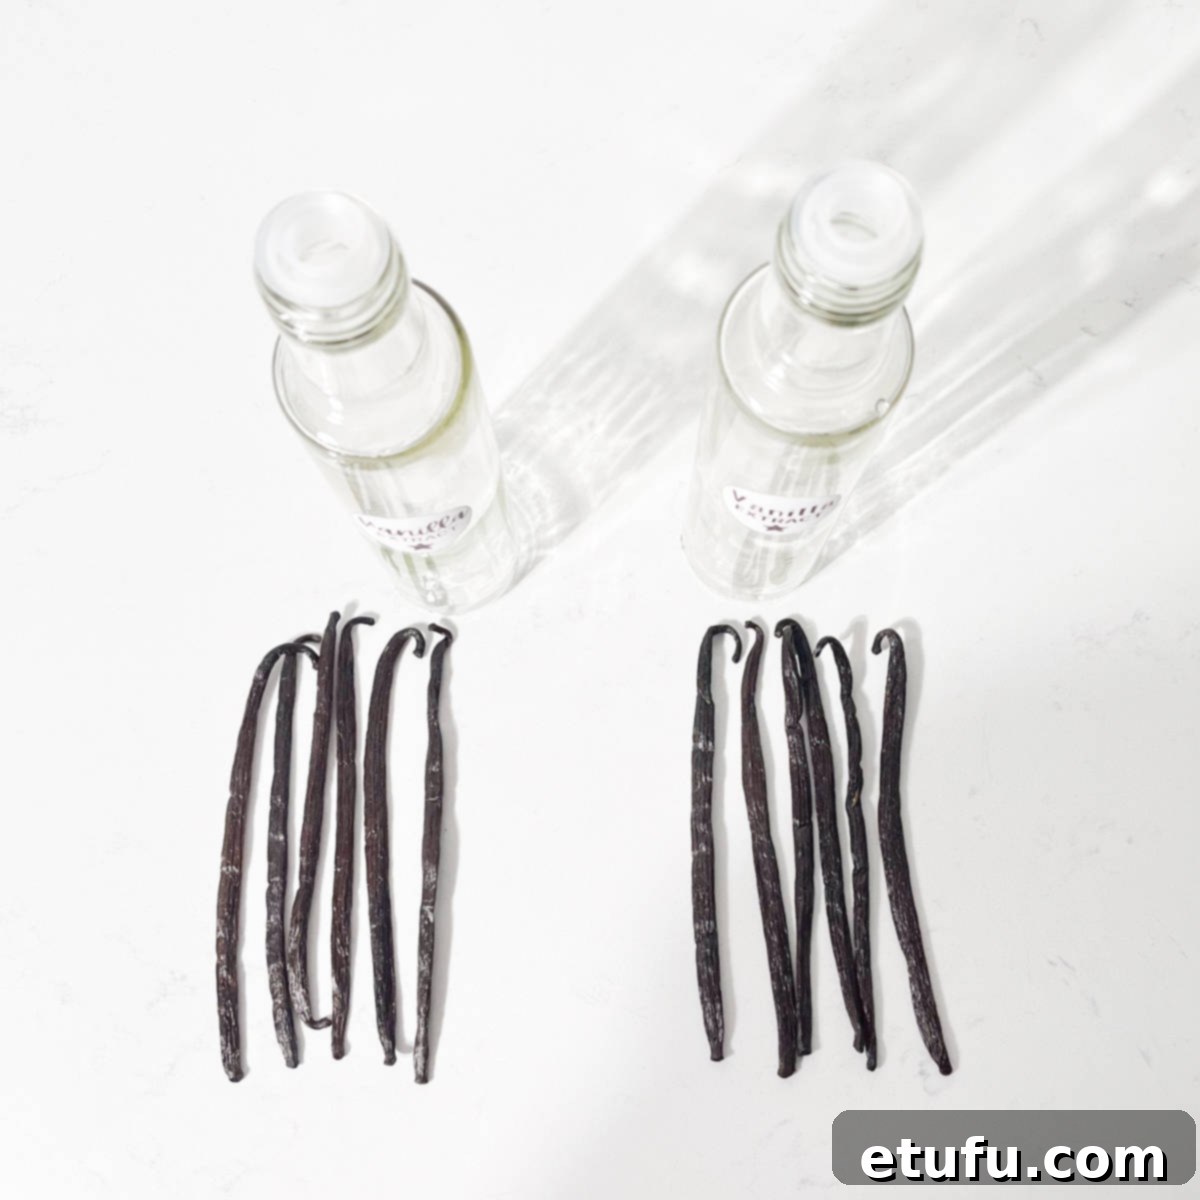
- Prepare Your Bottles: First and foremost, ensure your chosen glass containers are impeccably clean and completely dry. Any residual moisture or impurities could affect the quality and longevity of your extract. Sterilize them by washing in hot, soapy water, rinsing thoroughly, and then allowing them to air dry completely or dry in a low oven.
- Measure Your Vanilla Pods: Carefully weigh out the required amount of vanilla pods according to our recommended ratio: 15 grams of vanilla pods for every 200ml of vodka. This precision ensures a consistent and potent extract.
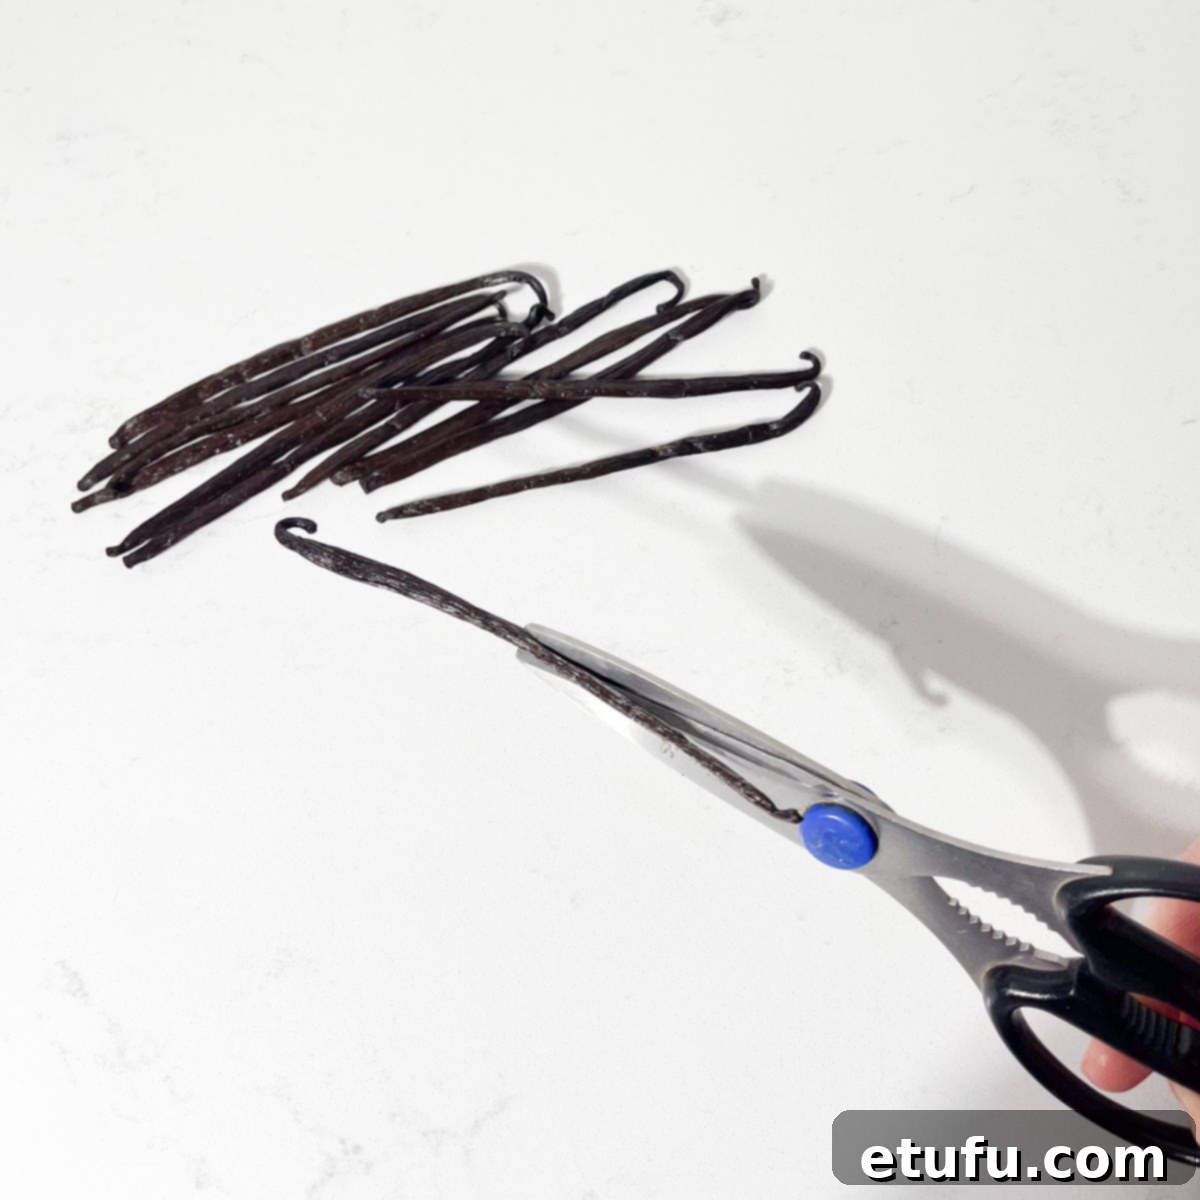
- Slice the Vanilla Pods: Using a sharp pair of kitchen scissors or a paring knife, carefully split each vanilla pod in half lengthwise. This exposes the tiny, fragrant seeds inside and maximizes the surface area for extraction. If the pods are too long to fit comfortably into your bottle, you can also cut them in half crosswise.
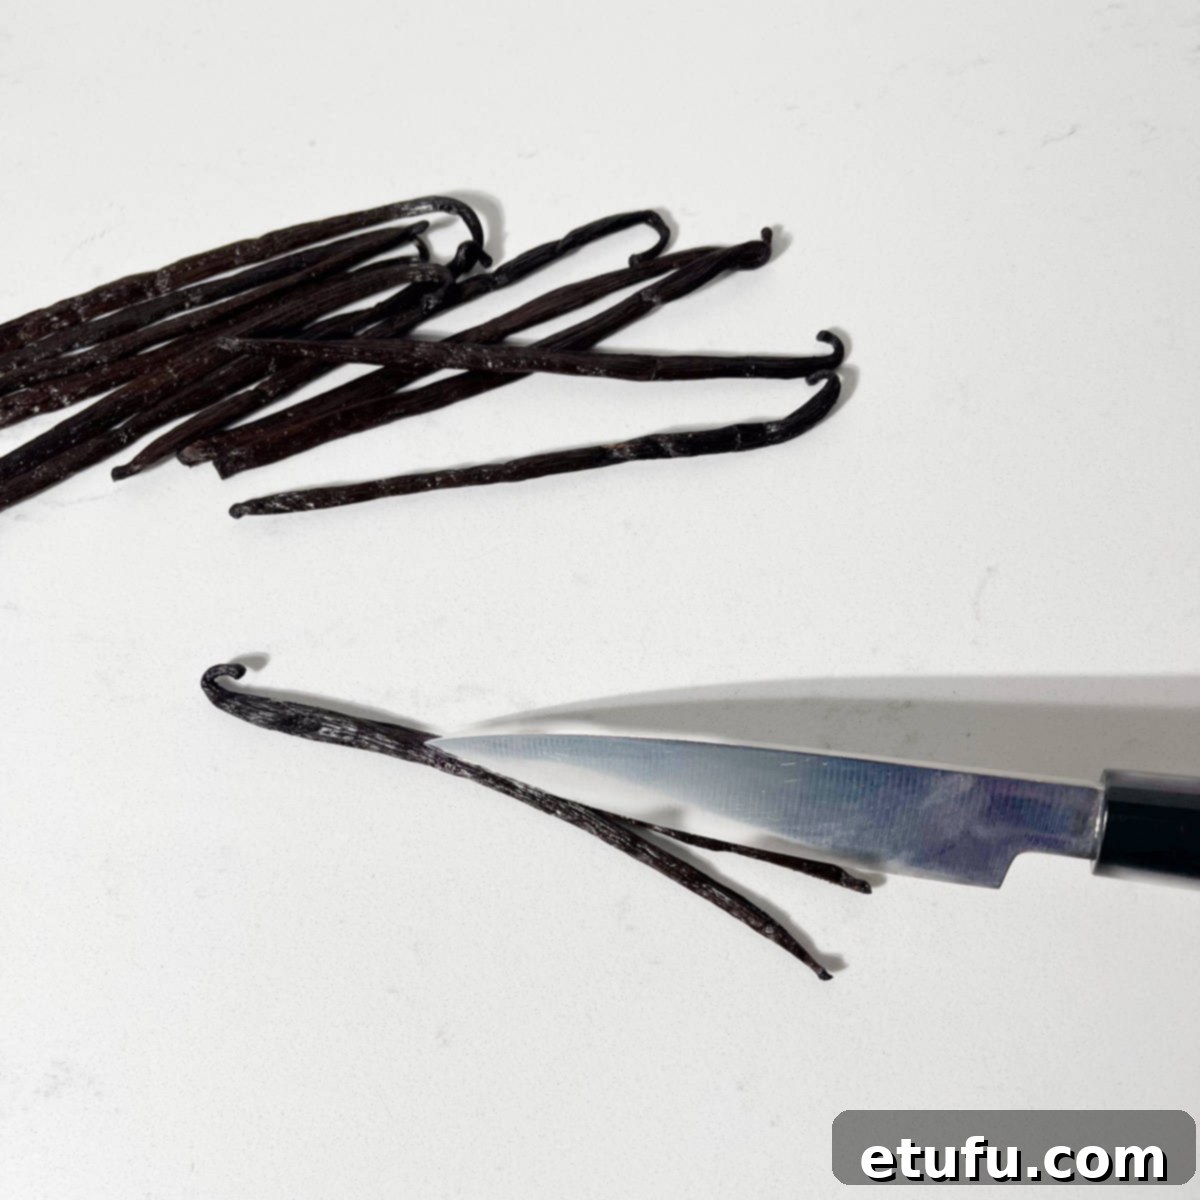
- Alternatively, Use a Paring Knife: A sharp paring knife can also be used to split the vanilla pods. Simply run the tip of the knife down the center of each pod from end to end.
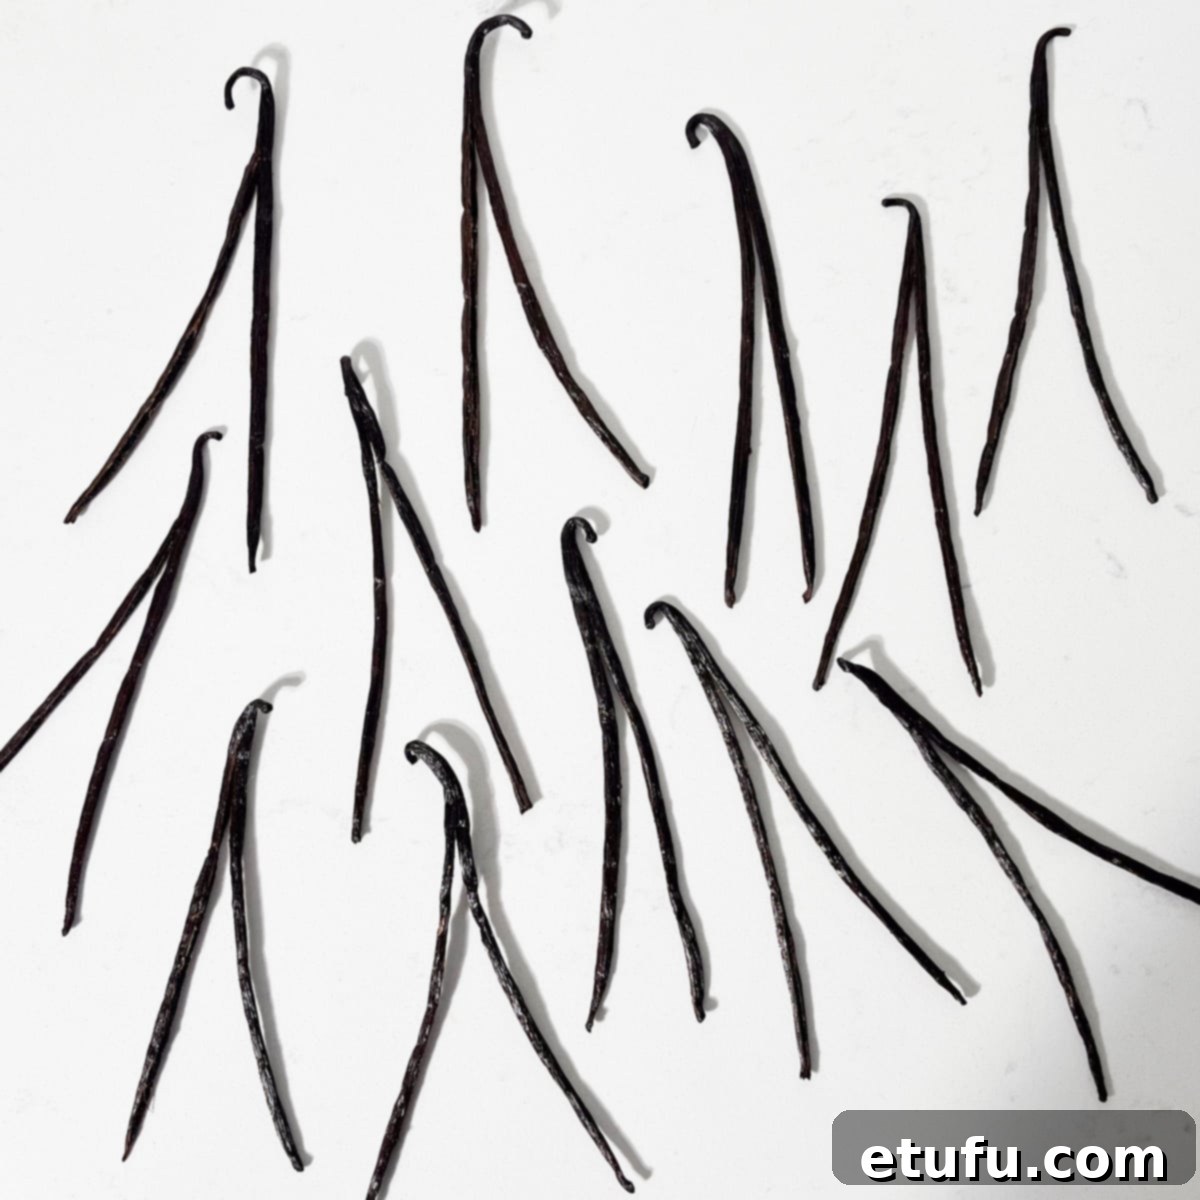
- Partial Split is Fine: You don’t necessarily have to slice the pods completely through. Leaving one end intact can actually make them easier to handle and ensures they stay together as you place them into the bottle.
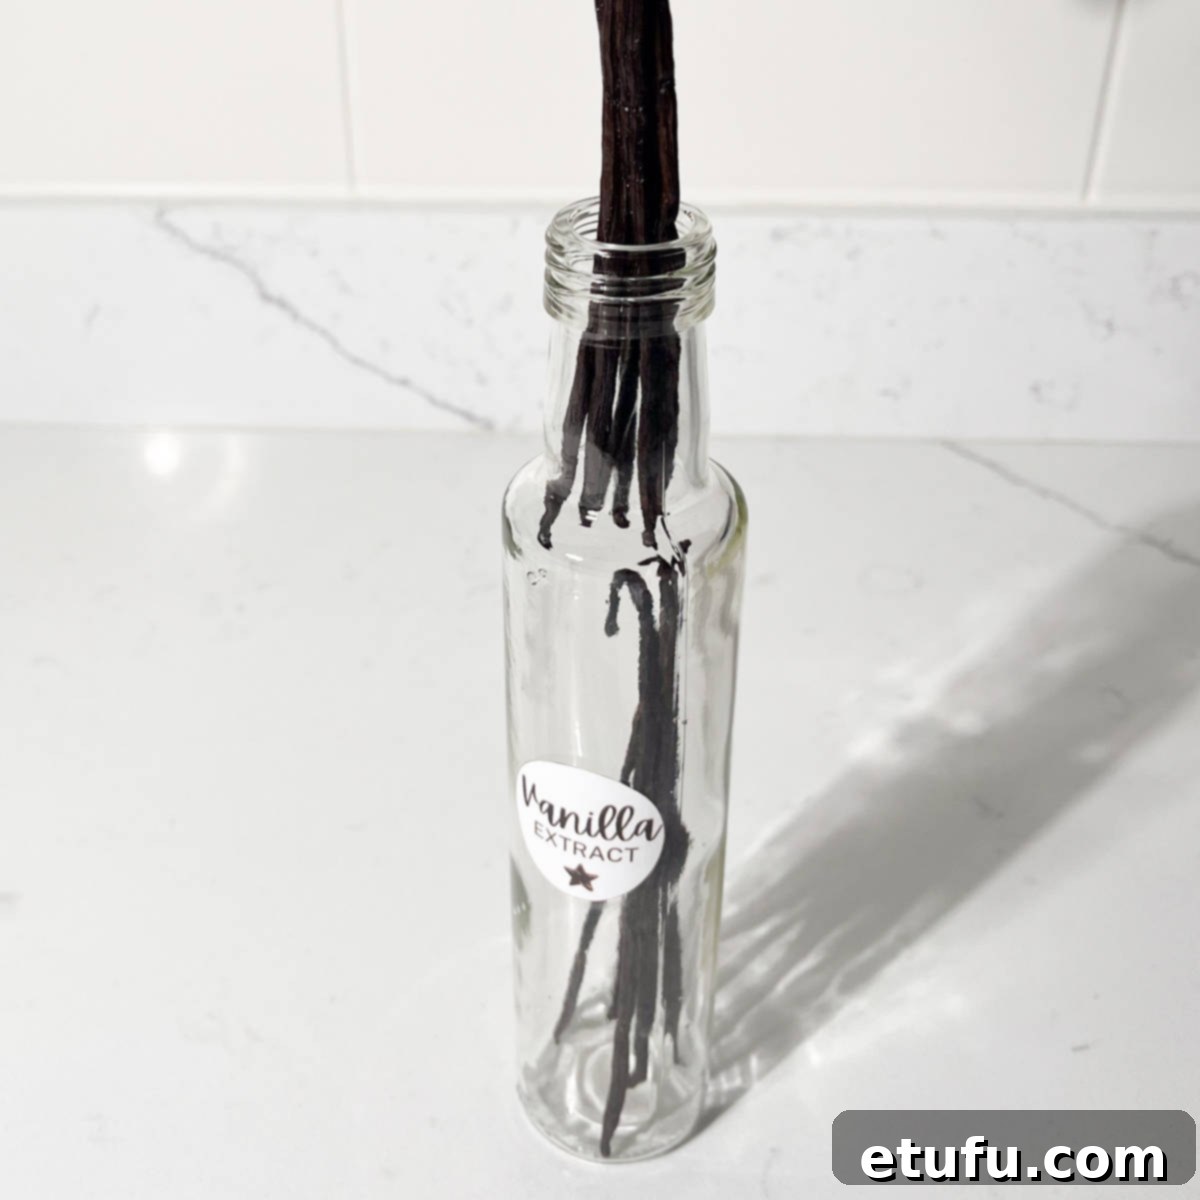
- Insert Pods into Bottle: Gently push the sliced vanilla pods into your prepared glass bottle. Ensure they are arranged in a way that allows them to be fully submerged in the alcohol.
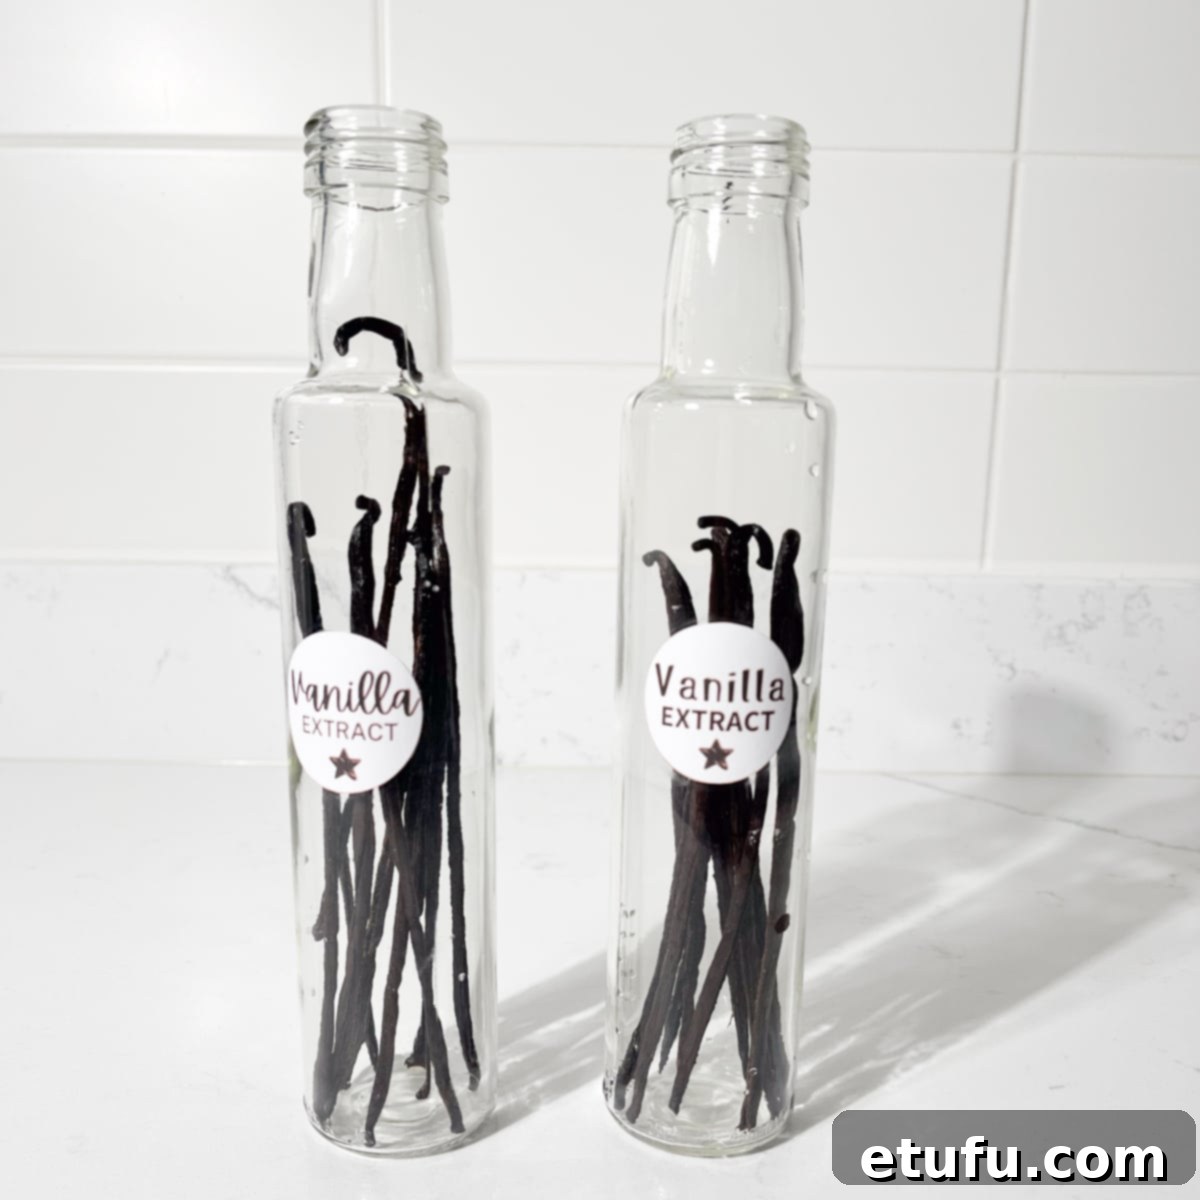
- Check Submersion: Before adding the vodka, double-check that the pods are deep enough inside the bottle to be entirely covered by the liquid. If they appear too long or float above the expected liquid line, remove them and cut them shorter or fold them gently in half to ensure full submersion.
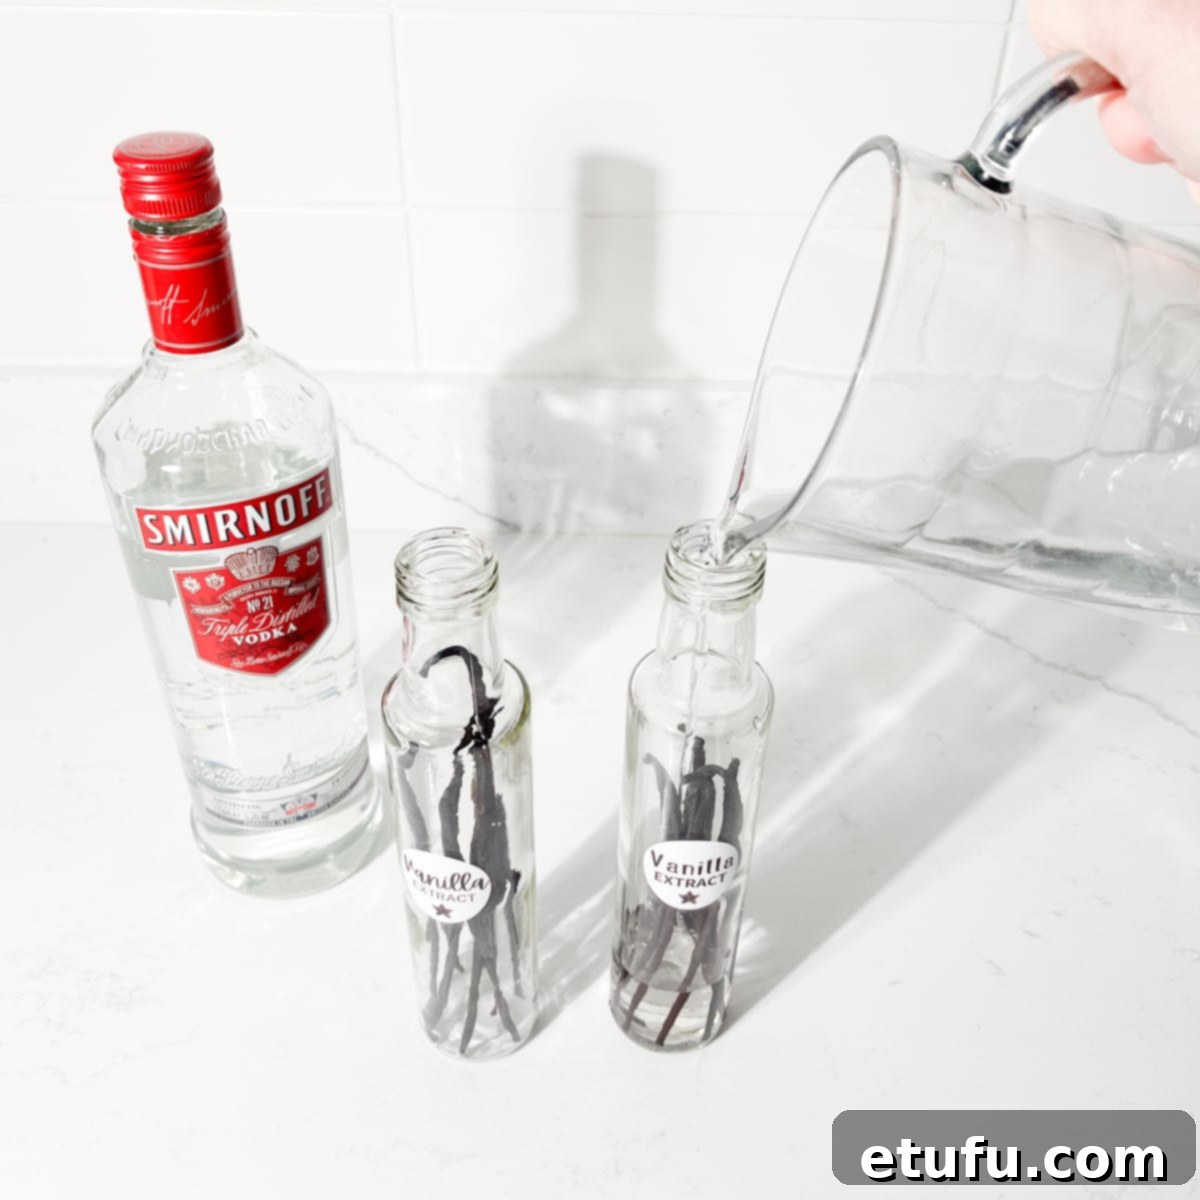
- Add the Vodka: Using a funnel or a steady hand with a jug, carefully fill the bottle with your chosen vodka until the vanilla pods are completely covered.
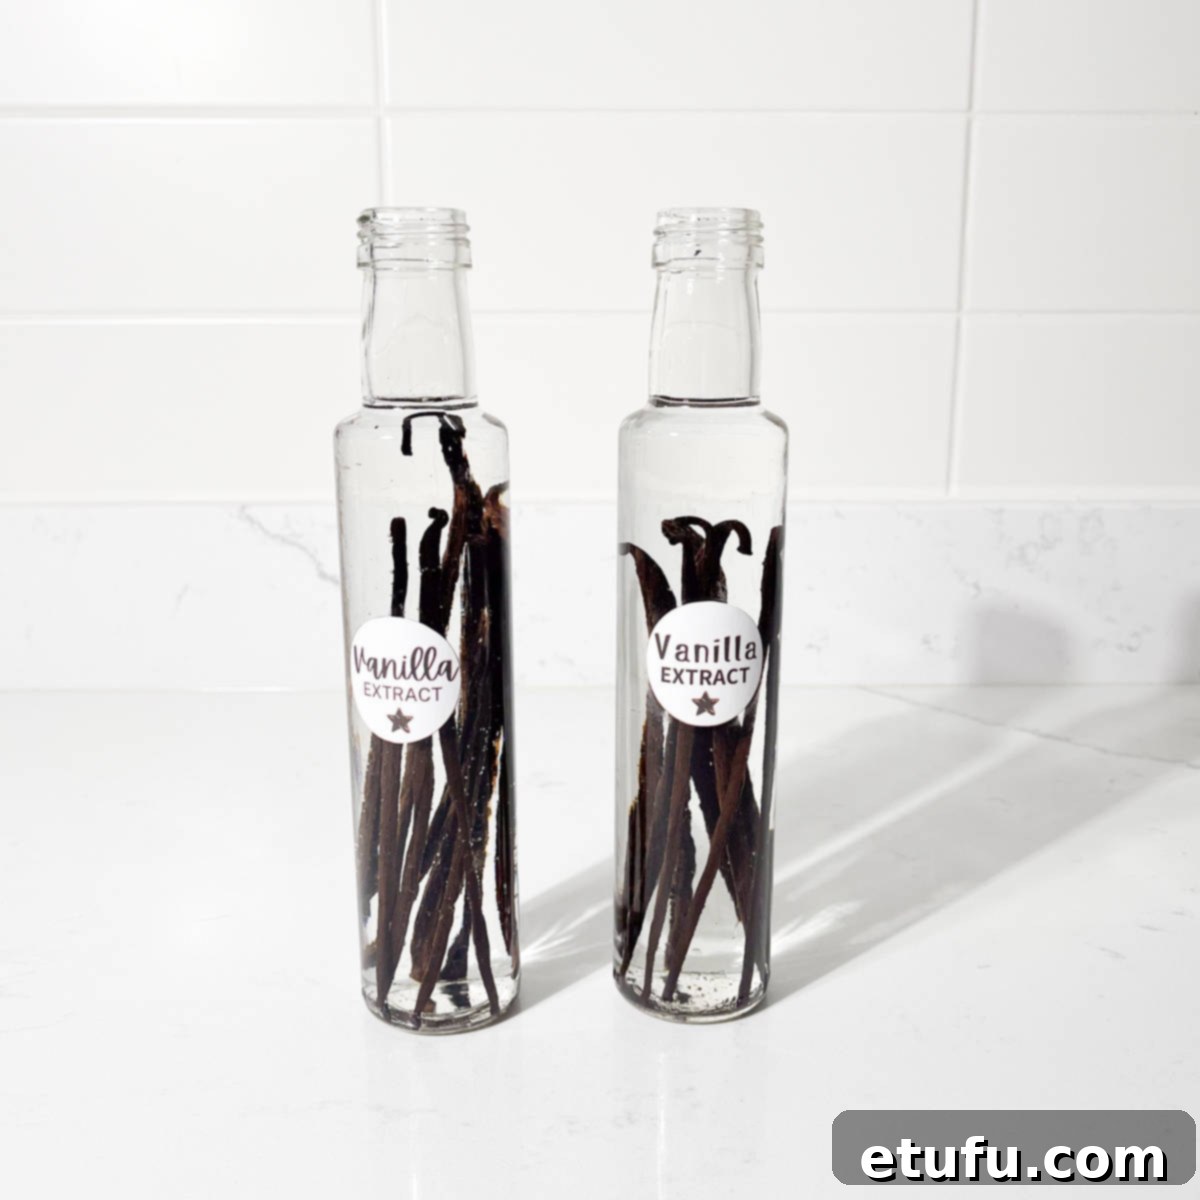
- Leave Headroom: It’s a wise practice to leave a small amount of space at the top of the bottle (known as “headroom”). This allows for easy shaking, which helps distribute the vanilla essence more effectively during the aging process.
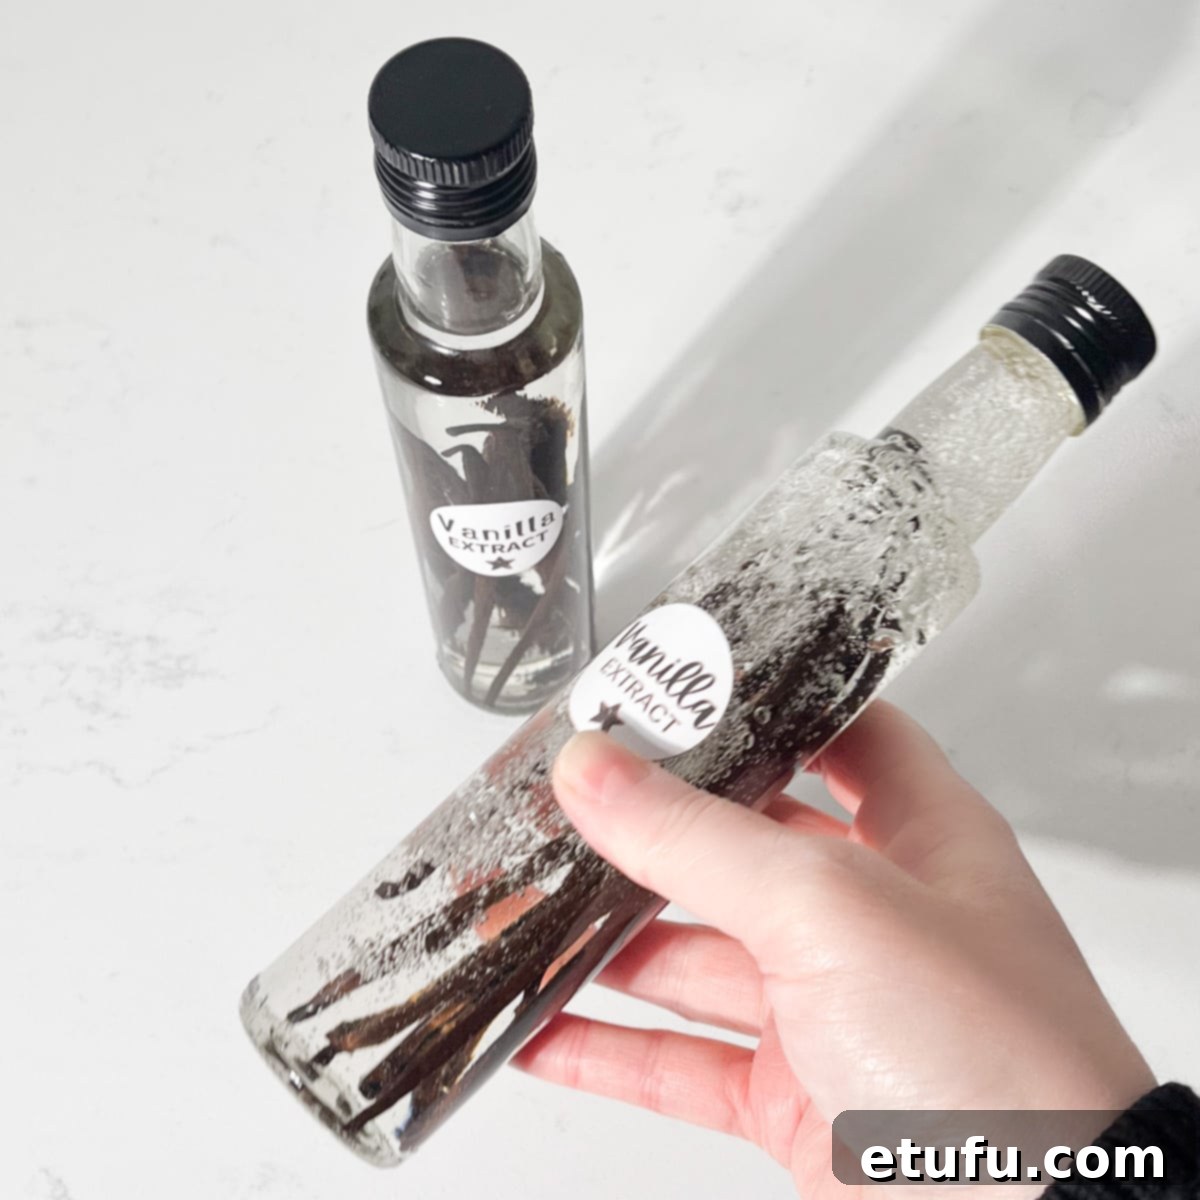
- Seal and Shake: Securely seal the bottle with its lid or stopper, ensuring it’s airtight. Give the bottle a good, vigorous shake to help begin the infusion process and distribute the vanilla seeds.
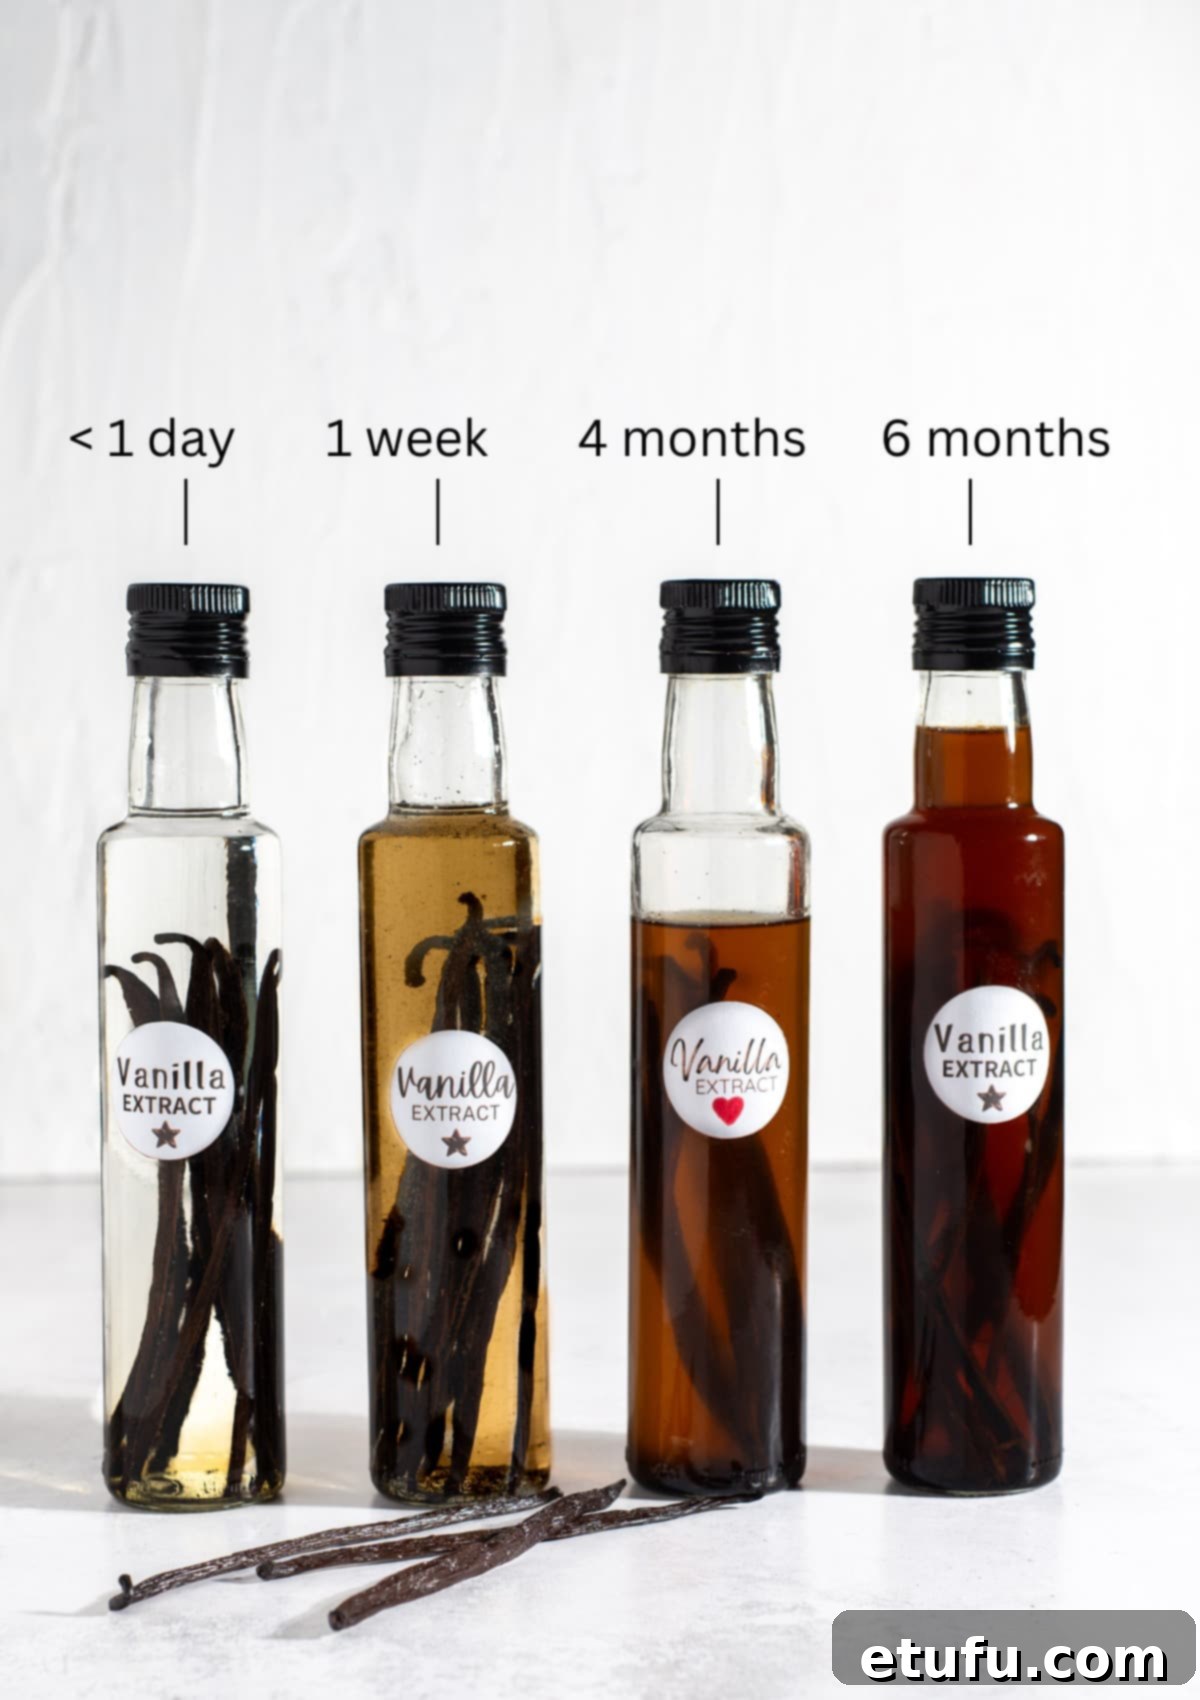
- Store and Age: Store your newly made vanilla extract in a cool, dark place, such as a pantry or kitchen cupboard, away from direct sunlight or fluctuating temperatures. This environment is crucial for optimal flavor development. Make it a habit to give the bottle a good shake once a week for the first few months. Allow it to mature for at least 4 months before first use, but for the most exceptional flavor, ideally let it age for a full year. The longer it ages, the deeper and more complex the vanilla notes will become.
Organising Your Homemade Vanilla Collection
Once you start making your own vanilla extract, you might find yourself with several bottles in various stages of maturation. A little organization goes a long way to ensure you always have a perfectly aged bottle ready for use.
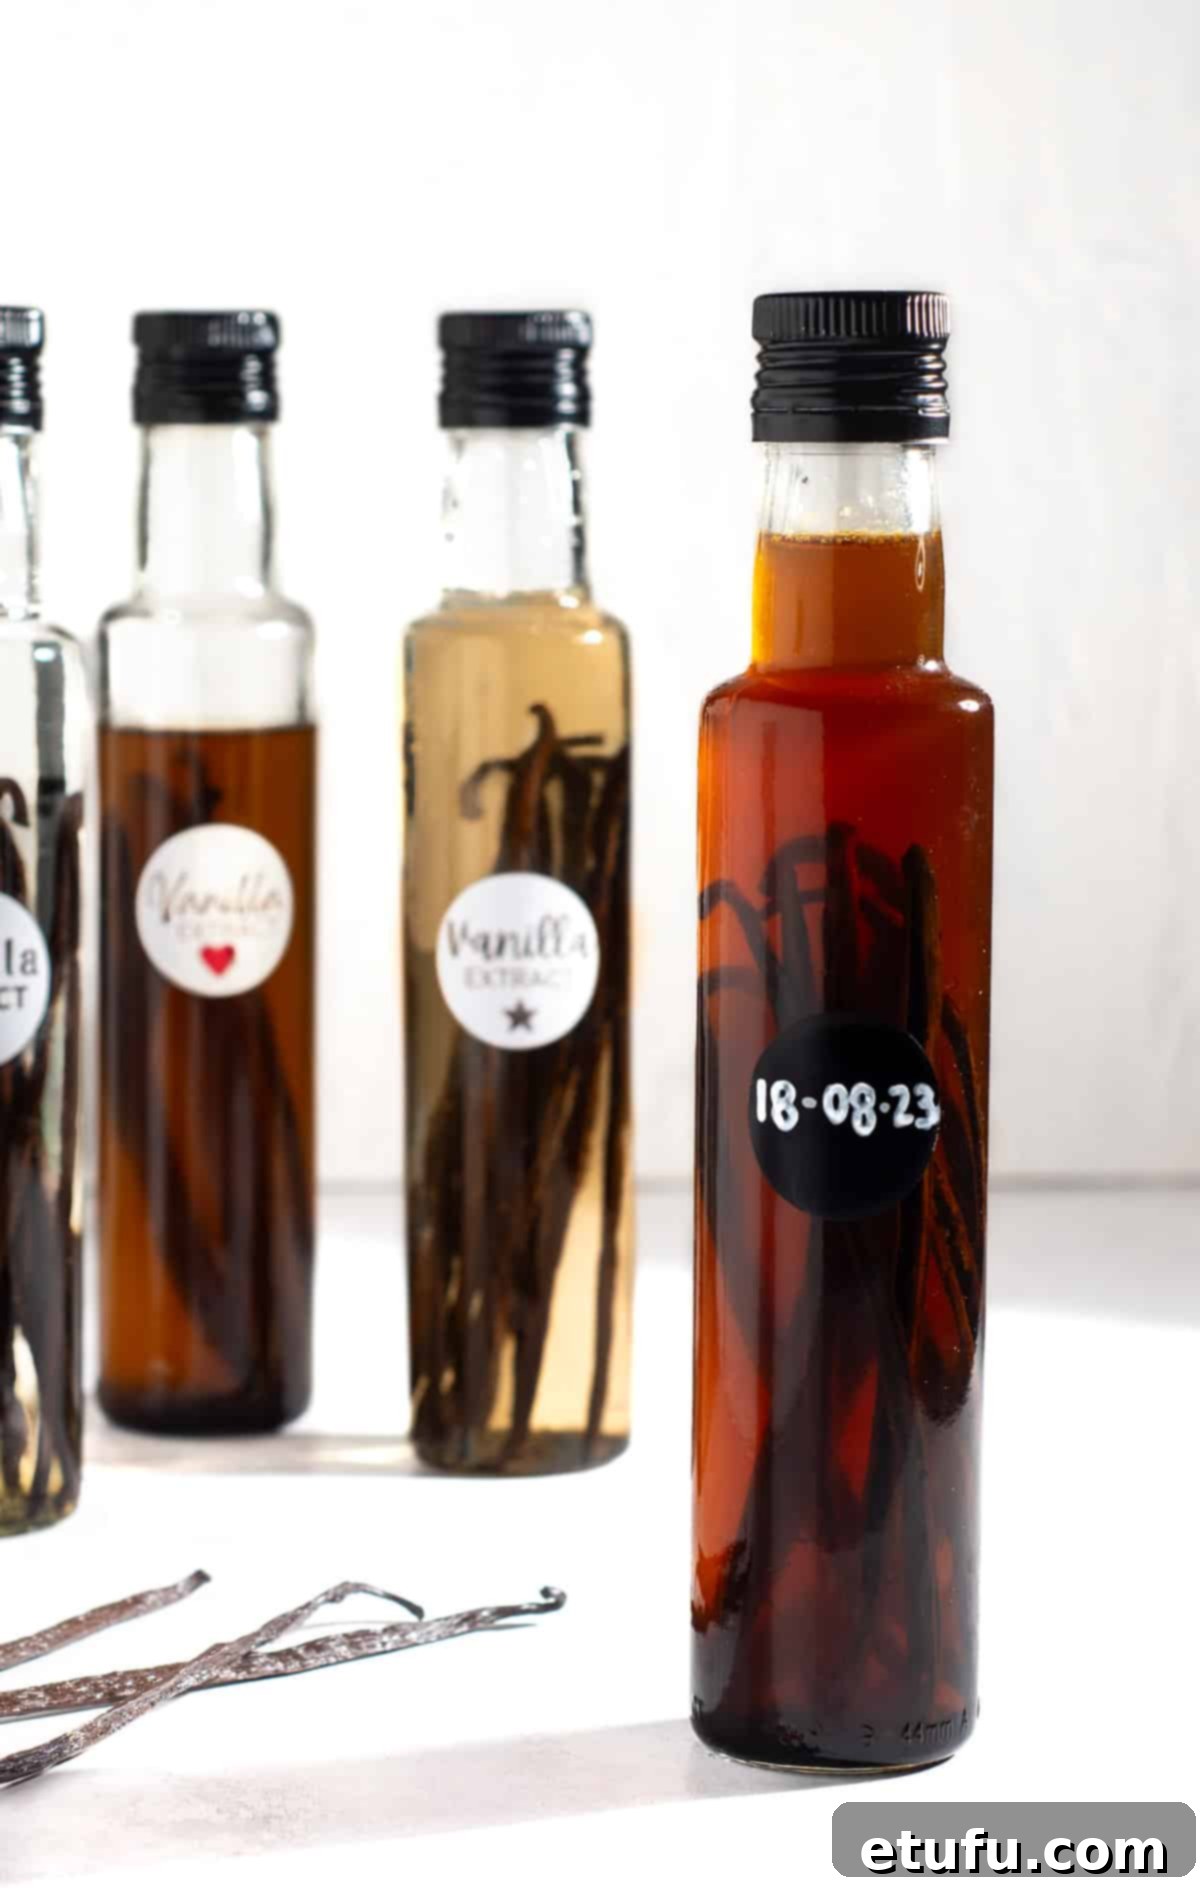
- Date Labeling: When preparing multiple bottles, or initiating a continuous rotation system, it’s absolutely crucial to label each bottle clearly with the date it was started. This simple step allows you to track its age and ensures you know exactly when it’s ready for peak flavor. You can use masking tape, adhesive labels, or even a permanent marker directly on the glass.
- Storage Strategy: Keep all your vanilla bottles in a dedicated cool, dark place, such as a pantry, cupboard, or even a basement. Consistency in temperature and absence of light are key to proper aging. Consider arranging them by date, so the oldest, most mature extracts are always at the front and easily accessible.
- Rotation System: If you’re serious about maintaining a continuous supply of perfectly aged vanilla, consider setting up a rotation. For example, start a new bottle every 3-4 months. By the time your first batch is used, another one will be nearing its peak, ensuring you never run out of delicious homemade extract. This also allows you to experiment with different bean varieties or alcohol types in subsequent batches.
An organized vanilla collection not only saves you time but also guarantees that every drop of extract you use is at its flavorful best, a testament to your patience and crafting skill.
Ageing Vanilla Extract: The Art of Patience
The journey of homemade vanilla extract is a testament to the adage that good things come to those who wait. The aging process is where the true magic happens, transforming simple ingredients into a complex, aromatic masterpiece.
The Unvarnished Truth: Time is Your Best Ingredient
Here’s the honest reality: homemade vanilla extract truly reaches its peak, hitting its stride with the most profound depth and complexity of flavor, after a full year of slow, gentle extraction. During this extended period, the alcohol meticulously draws out all the nuanced aromatic compounds from the vanilla beans, allowing them to meld and mature into something truly extraordinary.
When Can You Start Using It?
The good news is that you don’t *have* to wait an entire year before enjoying your creation. You can certainly begin using your homemade vanilla extract after approximately 120 days (about four months). At this point, it will have developed a noticeable vanilla flavor and will be a vast improvement over imitation extracts.
We’ve been there, eagerly cracking open a bottle after four months, and the taste was already terrific. However, trust us when we say that after a full year, the difference is remarkable. The flavor intensifies, deepens, and becomes incredibly smooth and well-rounded, reaching an entirely new level of sophistication.
Establishing a Continuous Supply: The Vanilla Rotation
The key to enjoying perfectly aged vanilla consistently is to establish a routine. Once you make new bottles each year, the waiting period becomes a non-issue:
- Start a Large Initial Batch: To kick things off, prepare a generous initial batch consisting of several bottles. The number will depend on your household’s vanilla consumption.
- The “First Bottle” Rule: If your anticipation gets the better of you (and it often does!), it’s perfectly acceptable to open your first bottle after 120 days. Use it for your immediate baking needs.
- Maintain the Cycle: Crucially, ensure you have additional bottles that are continuously aging. While you’re enjoying your 4-month-old batch, let others continue their slow maturation. By the time that first bottle is empty, you’ll have another one that has reached the coveted one-year mark, or is well on its way.
By implementing this system, you’ll always have a supply of usable vanilla, with your most exquisite, deeply aged extracts becoming available in due course. Let the passage of time work its magic, and you’ll be rewarded with unparalleled vanilla flavor year after year.
Topping Up and Storing Your Vanilla Extract
One of the most appealing aspects of homemade vanilla extract is its incredible reusability and longevity. Understanding how to properly top up and store your extract will maximize its value and ensure a continuous supply of flavor.
The Art of Topping Up: Extend Your Investment
Topping up your vanilla extract with fresh vodka is a highly recommended practice and an excellent way to extend the life and yield of your initial vanilla bean investment. We consistently get at least a double batch from each bottle we make, simply by regularly replenishing the alcohol.
- How to Top Up: As you use the extract from a bottle, periodically add more vodka to replace the liquid removed. The goal is to always keep the vanilla pods fully submerged in the alcohol. This is crucial for continued extraction and to prevent the pods from drying out or becoming slimy at the exposed top.
- When to Stop: You can continue topping up until you notice the vanilla pods beginning to lose their potency, meaning the extract no longer develops a strong vanilla flavor. This can vary depending on the quality of your beans and how many times they’ve been re-used, but often you can get 2-3 full cycles of extraction from a single batch of pods.
- Revitalizing Your Extract: If the existing pods seem to be weakening, you have a couple of options: you can either introduce a few fresh pods to the bottle alongside the old ones, or, once the old pods are completely spent, remove them and replace them entirely with a new batch.
Unparalleled Shelf Life and Storage
The alcohol in your vanilla extract acts as a superb natural preservative, granting it an exceptionally long shelf life:
- With Pods: Vanilla extract containing the pods can remain usable for several years, often maintaining its quality for 5 years or more if stored correctly in a cool, dark place. The ongoing interaction between the pods and the alcohol ensures continuous flavor development and preservation.
- Without Pods (Fully Extracted): For extracts where the vanilla pods have been removed after full extraction (e.g., after a year), the liquid vanilla extract can essentially last indefinitely! Yes, you read that right – indefinitely! The high alcohol content prevents spoilage, meaning a bottle of pure vanilla extract, once fully matured and strained, can be a culinary heirloom.
Always store your vanilla extract in a cool, dark cupboard or pantry, away from direct sunlight and heat sources. This protects the delicate flavor compounds and prevents premature degradation, ensuring your homemade extract remains vibrant and potent for years to come.
Waste Not, Want Not: Start a Vanilla Mother Jar!
The term “Mother Jar” for vanilla always brings a smile to our faces, but don’t let the whimsical name fool you – it’s a truly ingenious and economical concept for maximizing the value of your precious vanilla beans!
What is a Vanilla Mother Jar?
A Mother Jar is essentially a generously sized glass jar, typically ranging from 1 to 5 liters, designated as a sanctuary for all your spent, leftover, or extra vanilla pods. Instead of discarding vanilla beans that seem to have given their all in a previous batch of extract or after being scraped for their seeds, you give them a new purpose in this special jar. Just toss them in, whether they are off-cuts, a few extra beans, or those “deaded pods” from older extracts, and always ensure they remain fully submerged in alcohol.
Why Start a Mother Jar?
- Ultimate Sustainability: In an era where vanilla prices are significant, a Mother Jar is the epitome of “waste not, want not.” It ensures you squeeze every last drop of flavor and value from those expensive vanilla pods, reducing culinary waste.
- Complex Flavor Development: Surprisingly, some of the most complex and finest vanilla extracts are born in Mother Jars. Over time, the continuous addition of various types and ages of vanilla pods creates a layered, multifaceted extract that can be truly unique. The blend of different vanillin levels and subtle notes from various beans can result in an extraordinary depth of flavor.
- Continuous Extraction: As you keep adding pods and topping up with alcohol, the Mother Jar becomes a living, ever-evolving source of vanilla extract. It’s like a perpetual vanilla soup, constantly infusing and deepening in flavor.
Using Your Mother Jar Extract
How do you know when the extract from your Mother Jar is ready to use, especially when you’re continually adding different pods? Well, you don’t typically follow a strict timeline. Instead, you rely on the most important culinary tool: your taste buds. After a few months of continuous infusion and additions, simply take a small sample and taste it. If the flavor is rich, pleasant, and adequately vanilla-y for your preferences, then it’s ready to use! It’s a very intuitive and flexible process.
Alternative Uses for Spent Vanilla Pods
If a Mother Jar isn’t quite your style, or if you have an abundance of spent pods, here’s another delightful way to utilize them:
Vanilla Sugar: Place your spent vanilla pods (whole or chopped) into a jar of granulated sugar. Over time, the sugar will absorb the residual vanilla aroma and flavor, transforming into a beautiful, subtly fragrant vanilla sugar that’s perfect for baking, sweetening coffee, or sprinkling over fresh fruit. Just remember to periodically shake the jar to distribute the flavor.
The Mother Jar is like the grand finale of your vanilla pod’s journey, ensuring nothing goes to waste and contributing to an endlessly flavorful kitchen.
Recipes That Shine with Homemade Vanilla Extract
Homemade vanilla extract elevates any recipe it touches, bringing a depth of flavor that is simply unparalleled. Here are some of our favorite recipes where your exquisite homemade extract will truly shine:
- Crème Pâtissière (Vanilla Pastry Cream)
- Chocolate Basque Burnt Cheesecake
- Jam and Coconut Sponge Cake
- Tottenham Cake
- Beijinhos – Brazilian Coconut Kisses
- Sequilhos – Cornflour Cookies
- Mascarpone Whipped Cream
- Valentine Sugar Cookies
Recipe: Homemade Vanilla Extract
Homemade Vanilla Extract
We’re here to persuade you to give homemade vanilla extract a shot. If you’re a fan of vanilla and prefer top-notch quality but flinch at the price tag, this recipe is tailor-made for you. Just two simple ingredients and a pinch of patience are all it takes. The end result is absolutely worth your time and initial investment.
Print Recipe
Save
Equipment
- 1 200ml glass bottle – Or 250ml to allow some room for shaking.
- 1 pair of scissors or a sharp knife
- 1 funnel
Ingredients
- 15g whole vanilla pods – Or approximately 5x plump vanilla pods (½ ounce)
- 200 millilitre vodka
Instructions
- First, ensure your bottles are clean and dry.
- Weigh out the required amount of vanilla pods you will need.
(15g whole vanilla pods) - Split each vanilla pod in half lengthwise with a pair of kitchen scissors or a sharp-tipped knife. If they’re too long for the bottle, you can cut them in half crosswise too.
You don’t have to slice the pods all the way through, it’s fine to leave one end intact for easier handling. - Push the pods into the bottle.
Ensure the pods are deep enough inside the bottle to be fully covered with the vodka once you add it. If they look too long, remove them and cut them shorter or fold them in half. - Use a funnel or a jug to fill the bottle with vodka until the pods are completely covered.
It’s a good idea to leave some space at the top of the bottle to allow for shaking.
(200 millilitre vodka) - Seal the bottle tightly and shake it well.
- Store the extract in a cool, dark place like a kitchen cupboard. Give it a good shake once a week and let it mature for at least 4 months, ideally a year.
- When making multiple bottles or starting a rotation, it’s a smart move to label each bottle with the date.
**Nutritional data disclaimer**
Please keep in mind that the nutritional information provided below is calculated by a third party and we cannot guarantee the accuracy. We try our best to give you the most accurate information, but we do not take responsibility for errors that may be present. Also, the nutritional value of the recipe may change depending on the exact brands and products used. We recommend that you consult with a qualified healthcare professional or registered dietitian for personalised advice on your dietary needs.
Nutrition
For food safety advice, including guidance on food allergies
