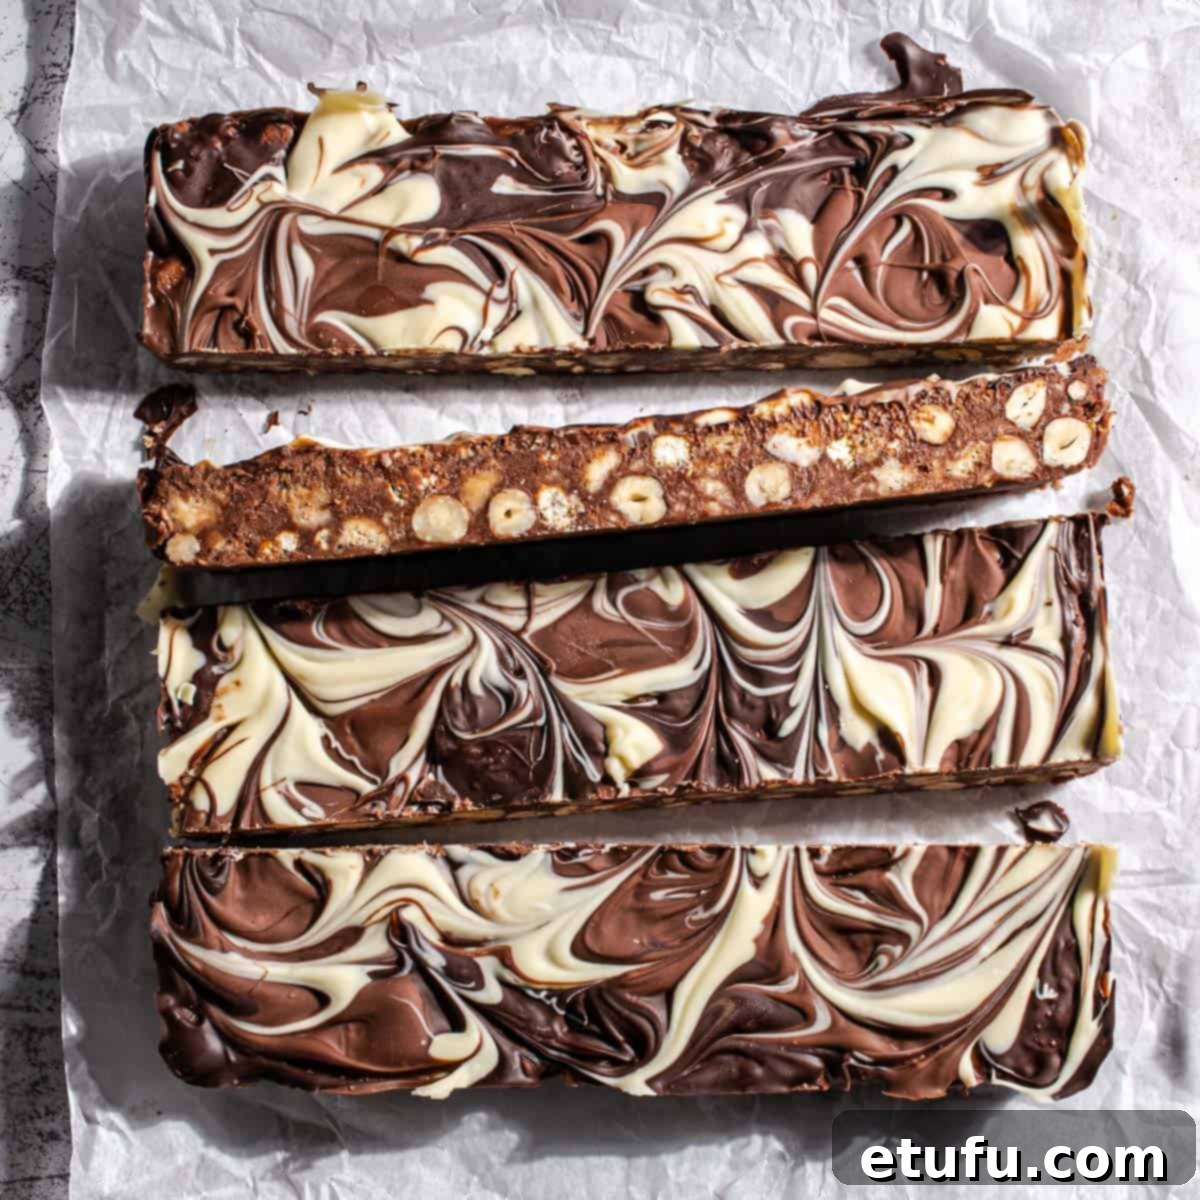
Marbled Chocolate Biscuit Cake: A Royal No-Bake British Delight
Embark on a delightful culinary journey to Great Britain with this exceptionally decadent Marbled Chocolate Biscuit Cake. While many chocolate biscuit cakes rely on simpler ingredients like rich tea biscuits and a basic ganache, this recipe elevates the classic to a truly luxurious experience. It’s a sophisticated no-bake dessert that promises rich flavors and captivating textures, making it perfect for any occasion, from a casual tea time to a grand celebration.
Our unique take features an indulgent blend of buttery shortbread fingers, perfectly roasted hazelnuts, and the irresistible salty crunch of chocolate-coated pretzels. The crowning glory is a stunning triple-chocolate marble topping, which looks far more intricate than its simple preparation suggests. Forget complex baking techniques; the method for these crunchy, chocolatey no-bake bars is wonderfully straightforward: Melt, mix, press, and chill.
A Taste of Royalty: The History Behind the Biscuit Cake
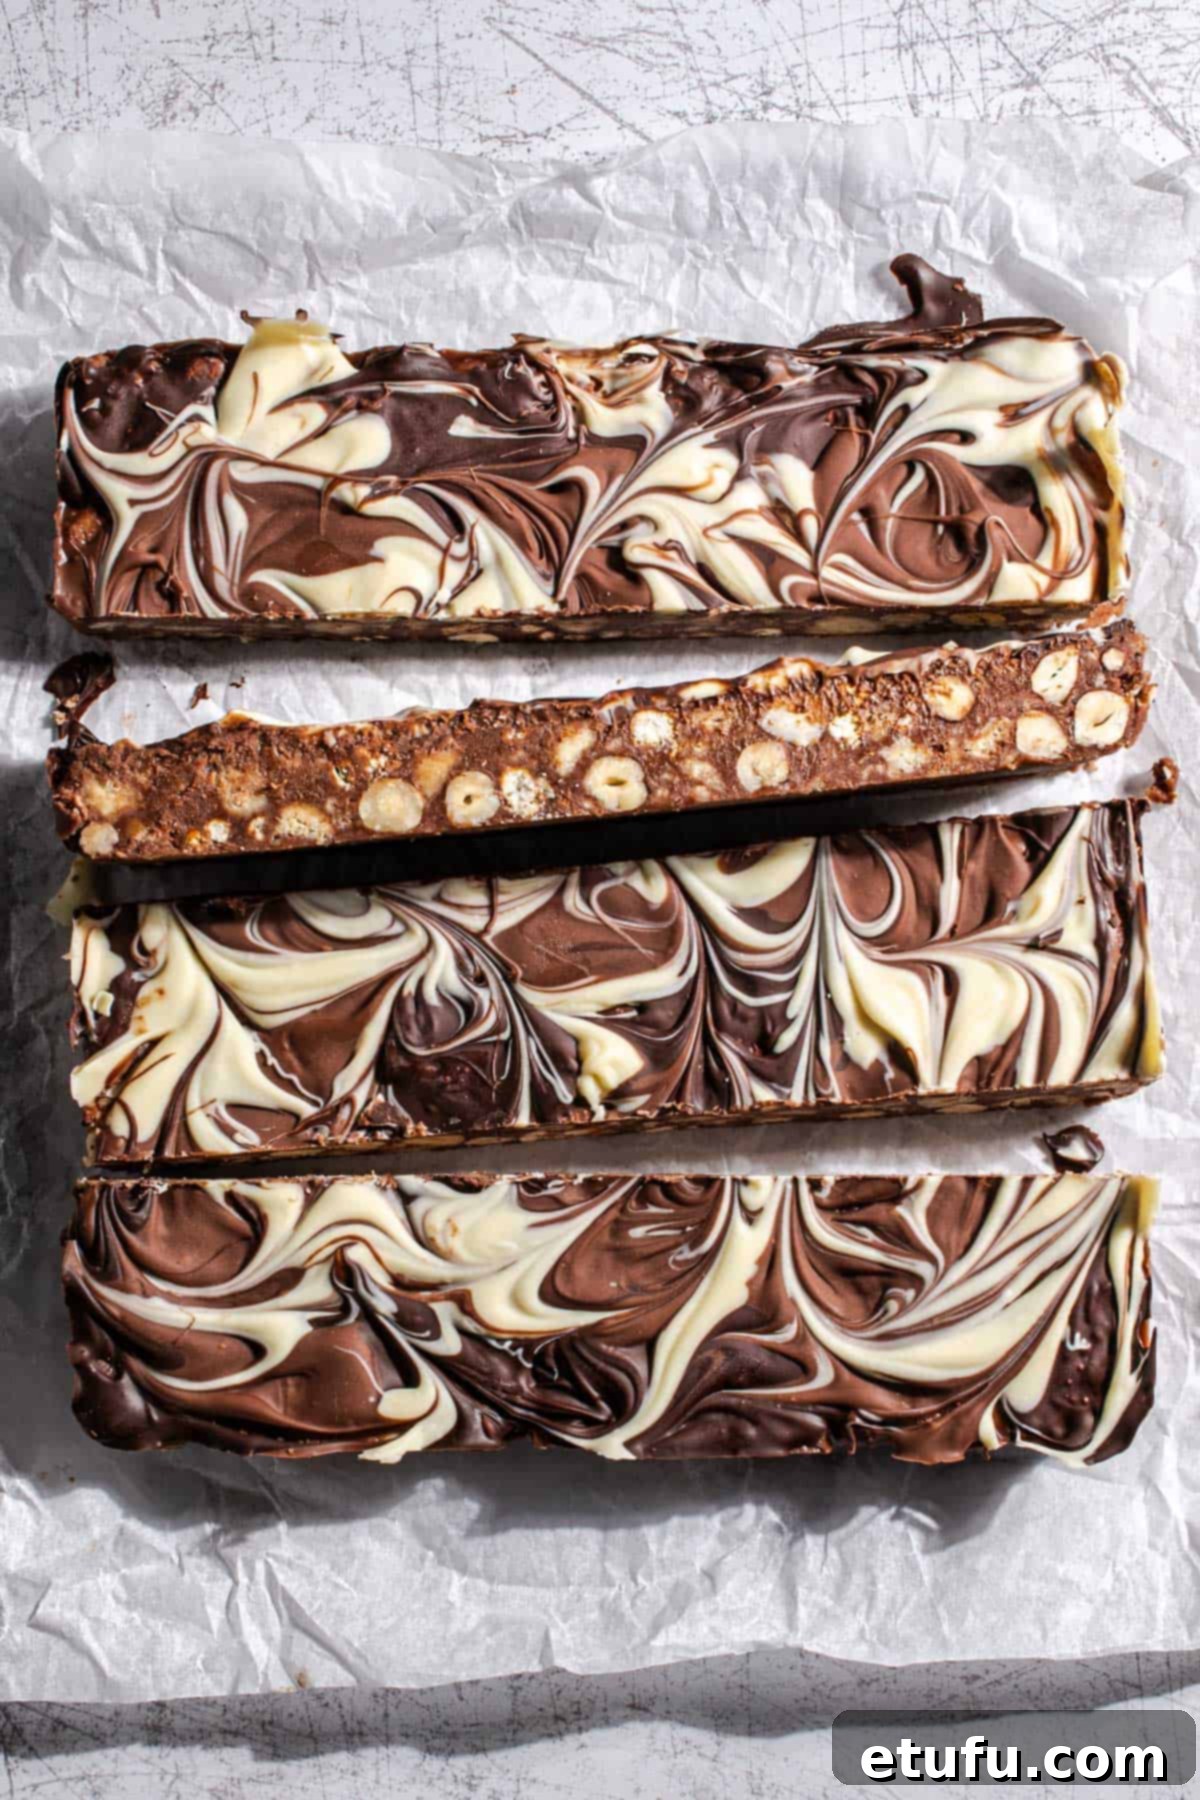
This exquisite chocolate biscuit cake draws its inspiration from a true royal favorite. Rumored to be Queen Elizabeth II’s most beloved treat, a version of this cake has graced Buckingham Palace tea tables for generations. It even held a place of honor at Prince William’s wedding, a testament to its enduring appeal and regal stature. The Queen’s preference for this simple yet elegant dessert highlights its comforting and satisfying qualities.
Our modern rendition honors that regal spirit while injecting contemporary flair. We opt for chunkier shortbread pieces, a generous nutty crunch from roasted hazelnuts, and a visually striking marbled topping. This makes the cake feel both timeless and celebratory, perfect for sharing with friends and family. It’s a dessert that tells a story, blending tradition with a fresh, exciting twist.
Across the globe, you’ll discover delightful cousins to this quintessential British treat, each with its own regional charm and unique ingredients. From the rich and chewy Chocolate Tiffin in Scotland, a dense and satisfying fridge cake, to Australia’s beloved Hedgehog Slice, known for its spiky texture and intense chocolate flavor. Portugal boasts Bolo de Bolacha, a delicate layered cookie cake, while Argentina offers the famous Chocotorta, typically made with chocolate cookies, cream cheese, and dulce de leche. Even Sri Lanka has its own version: a luscious Chocolate Biscuit Pudding. Each variation, while distinct, universally confirms one delicious truth: the combination of biscuits and chocolate is an undeniable match made in heaven, cherished by cultures worldwide.
Why You’ll Love This Marbled Chocolate Biscuit Cake
This Marbled Chocolate Biscuit Cake is more than just a dessert; it’s an experience. Here’s why it’s destined to become your new favorite:
- Effortless Elegance: No Baking Required
Say goodbye to preheating ovens and complex baking steps! This is a true no-bake marvel, requiring nothing more than a fridge to set. It’s the perfect recipe for beginners, busy individuals, or anyone looking for a stress-free dessert solution that still delivers impressive results. - A Symphony of Textures: Luxuriously Layered
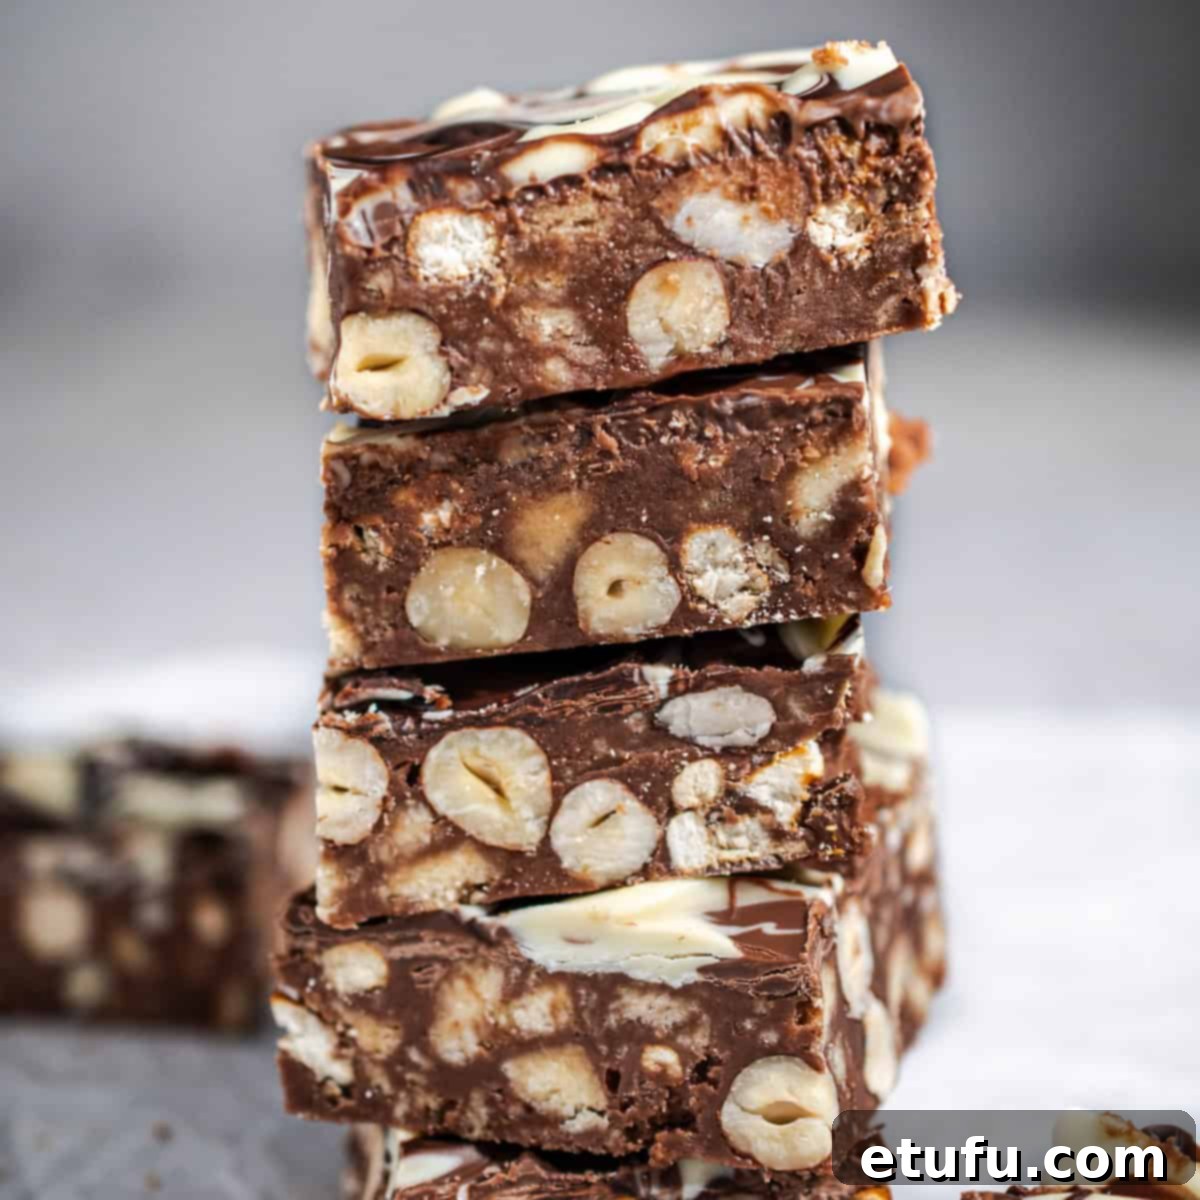
Prepare your palate for an exciting array of textures. Each bite offers a delightful contrast of crunchy shortbread, chewy roasted hazelnuts, the crisp snap of chocolate-coated pretzels, and the smooth, creamy melted chocolate binding it all together. This multi-textured experience elevates it far beyond a simple cake. - Visually Striking: Perfect for Any Occasion
The artistic marbled topping makes this cake a true showstopper. Its elegant swirled design gives it a sophisticated, gourmet appearance, ensuring it’s always party-ready and will undoubtedly impress your guests. It’s a dessert that tastes as good as it looks. - Infinitely Adaptable: Your Canvas for Creativity
This recipe is incredibly forgiving and versatile. Feel free to customize it with your favorite biscuits, nuts, or other delightful add-ins. Whether you prefer a different type of cookie or want to experiment with various nut profiles, this cake can be tailored to your personal taste. - Royally Approved: A British Teatime Tradition
There’s nothing quite like enjoying a dessert with a royal seal of approval. This chocolate biscuit cake is a quintessential British teatime treat, making it a perfect choice for those who appreciate classic elegance and a touch of historical charm in their sweets.
Expand Your No-Bake Repertoire
If you’ve fallen in love with the ease and indulgence of this Marbled Chocolate Biscuit Cake, you’re in for a treat! There are many more fuss-free, no-bake desserts waiting to satisfy your sweet cravings. Explore these equally delicious options to expand your collection of simple yet impressive recipes:
Indulge in the rich and chewy texture of Rocky Road Fudge, packed with marshmallows and biscuits. For something sweetly satisfying, try our Easy Date Squares with Coconut, a delightful blend of sticky dates and aromatic coconut. And of course, if you crave the original inspiration, the Classic Chocolate Tiffin offers a comforting, familiar taste. For a truly unique experience, discover Tinginys, the Lithuanian ‘lazy cookies’ that are charmingly simple yet utterly delicious and offer a delightful twist on no-bake treats.
- The Best Rocky Road Fudge!
- Easy Date Squares Recipe
- Easy Chocolate Tiffin – Step-by-Step Tutorial
- Tinginys – Lithuanian No Bake Cookies
Essential Ingredients & Smart Substitutions for Your No-Bake Cake
Crafting the perfect no-bake chocolate biscuit cake begins with understanding your ingredients. Here’s a detailed guide to the key components and how you can adapt them to your pantry or preference:
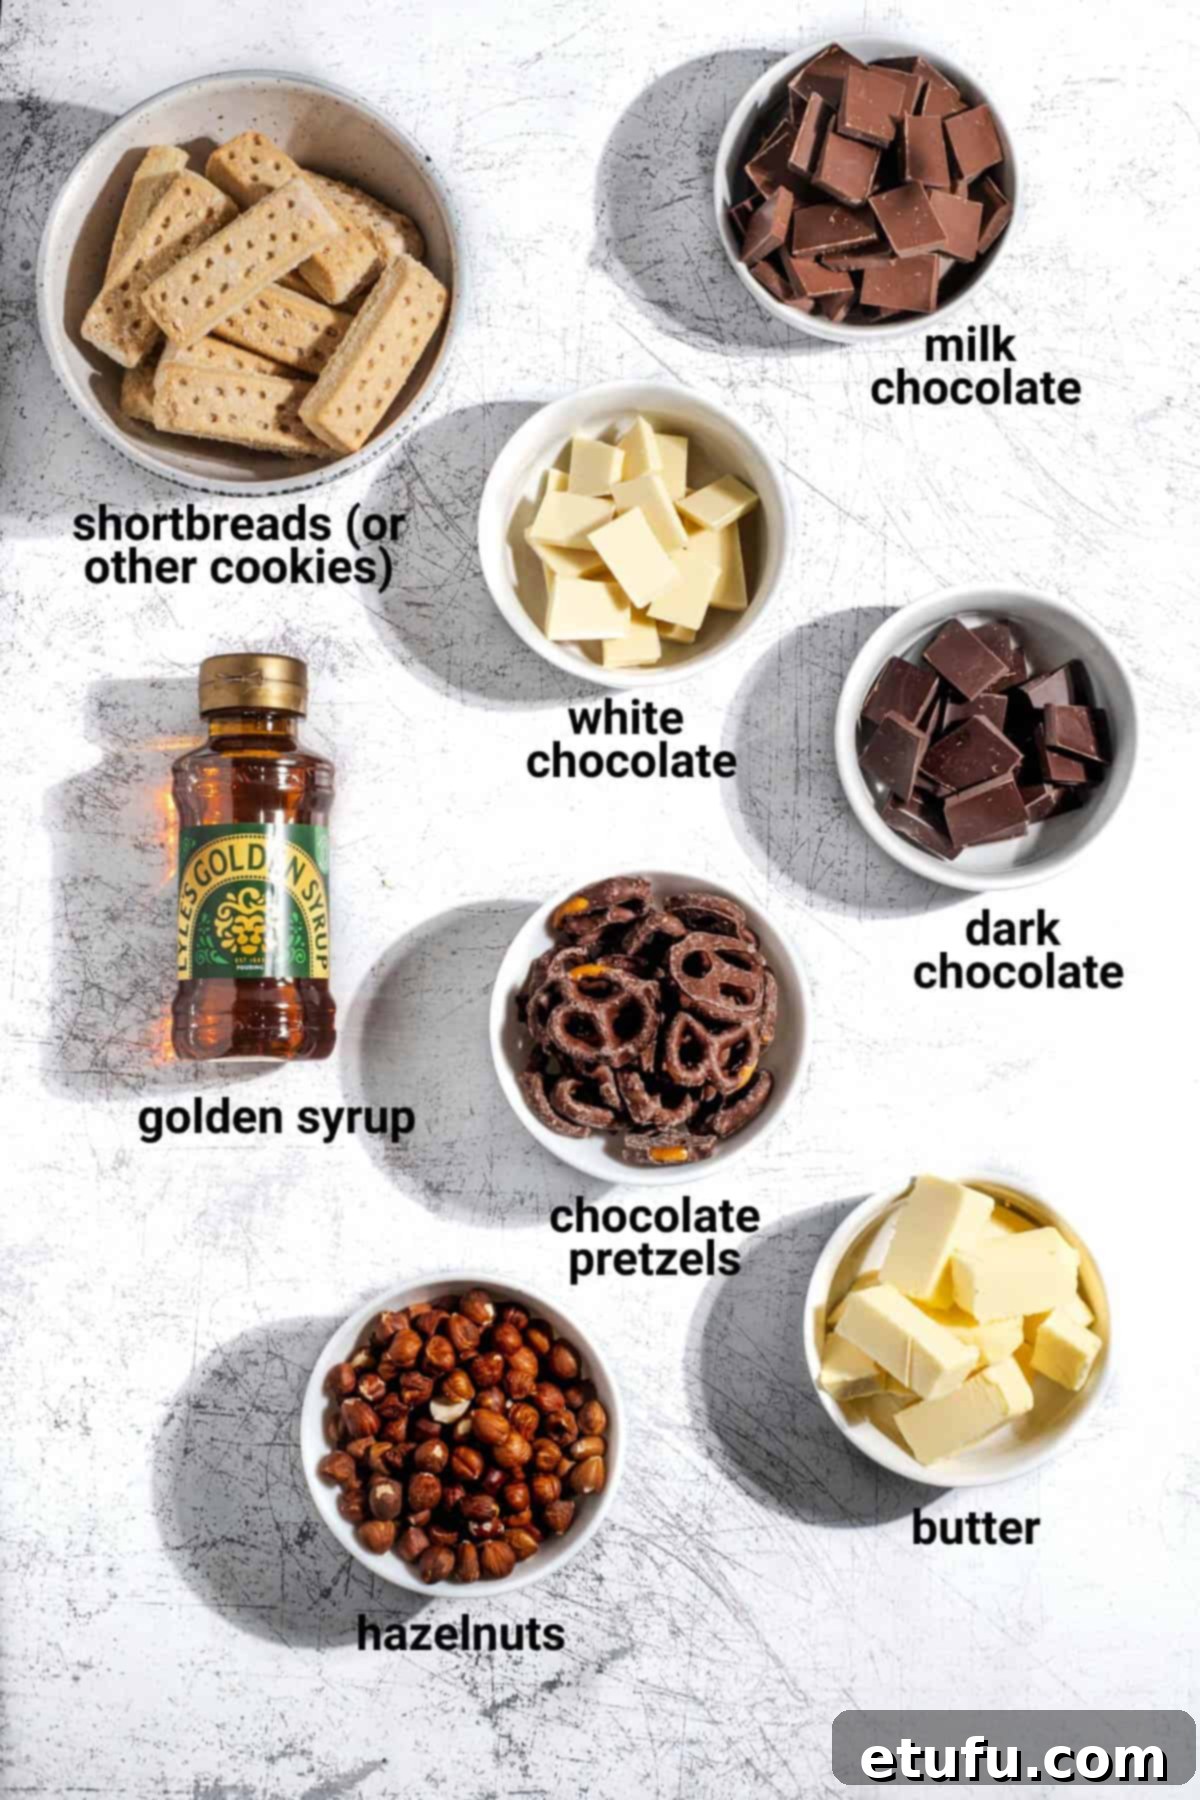
Shortbread Fingers/Cookies: The Buttery Foundation
Shortbread forms the buttery, tender base of this dessert, contributing a delightful melt-in-the-mouth quality. While you can certainly use round shortbread cookies, we specifically recommend shortbread fingers. Their elongated shape allows for chunkier, more substantial pieces when chopped, creating a richer texture and ensuring a satisfying bite in every square. These pieces easily break into irregular ‘squares’, adding visual interest and extra buttery crunch.
If shortbread isn’t readily available or you simply prefer a different flavor profile, feel free to swap them for your favorite plain-ish cookie. The goal is a biscuit that holds its shape well when mixed with the chocolate base and doesn’t overpower the other flavors.
Alternative Biscuit Choices:
- Digestives: A classic British choice, digestives offer a less rich, more malty flavor profile. They absorb the chocolate mixture beautifully and provide a good crumble.
- Graham Crackers: Common in North America, graham crackers lend a distinct honeyed sweetness and a slightly drier texture, which can be a pleasant contrast.
- Oaty Biscuits: For a wholesome, earthy flavor and a more fibrous, chewy texture, oat biscuits are an excellent option. They add a rustic charm to the cake.
Chocolate-Covered Pretzels: The Salty Snap
The addition of chocolate-covered pretzels is a game-changer in this recipe. They introduce a crucial element: a salty snap that brilliantly cuts through the sweetness of the chocolate and provides a unique crunch that differs from the biscuits or nuts. This contrast creates a more complex and addictive flavor profile.
We’ve found brands like Flipz work wonderfully and are widely available in the UK and US. However, any brand of good quality chocolate-covered pretzels will work perfectly. If you prefer a less sweet option, plain pretzels are an excellent substitute; you’ll still get that desirable salty crunch. The key is to avoid chopping them too finely. You want those generous, chunky bits of pretzel to ensure distinct texture pockets throughout the cake.
Golden Syrup: The Golden Binder
Golden syrup is a staple in British baking and plays a vital role in this no-bake cake, acting as both a sweetener and a crucial binding agent. We always reach for Lyle’s Golden Syrup; its distinctive buttery, mellow caramel flavor and thick consistency are simply the gold standard. However, most supermarket own-brand golden syrups will perform perfectly well.
For our readers in the US, Lyle’s is increasingly available at stores like Walmart and various specialty food shops. If you can’t find it, the closest alternative in terms of texture and binding power is light corn syrup, such as Karo. While it won’t impart the same deep, buttery caramel notes, it will ensure your bars set perfectly. To subtly mimic that golden syrup flavor, you can stir in about ½ teaspoon of mild honey or maple syrup alongside the corn syrup.
It’s important to avoid using pure honey or maple syrup on their own as a direct substitute. They are typically thinner in consistency, possess much stronger and more distinct flavors, and can cause the bars to set softer than desired or create an imbalanced taste.
Hazelnuts: The Toasty Crunch
Hazelnuts bring a wonderful deep, toasty flavor and a satisfying crunch to the biscuit cake. We highly recommend using roasted hazelnuts, as the roasting process intensifies their nutty aroma and makes their flavor more pronounced. If possible, purchase them pre-roasted to save time.
Easy Home Roasting Method:
If you have raw hazelnuts, roasting them at home is simple and rewarding. Spread the nuts in a single layer on a baking tray. Bake them in a preheated oven at 180 °C (350 °F) for approximately 8-10 minutes. Make sure to shake the tray halfway through to ensure even roasting. The skins will darken and become loose. While optional, you can rub the warm nuts in a clean tea towel to remove most of the skins for a smoother finish, but it’s not essential for the cake’s flavor or texture.
This recipe includes a generous amount of nuts, so choose a variety you genuinely enjoy. Pecans are another fantastic option here, offering a buttery sweetness that complements the chocolate beautifully. Macadamias would also provide a rich, creamy crunch, adding another layer of indulgence to this delightful no-bake treat.
Crafting Your Marbled Chocolate Biscuit Cake: A Step-by-Step Guide
Creating this impressive no-bake chocolate biscuit cake is a straightforward and enjoyable process. Follow these detailed steps to ensure a perfect result every time.
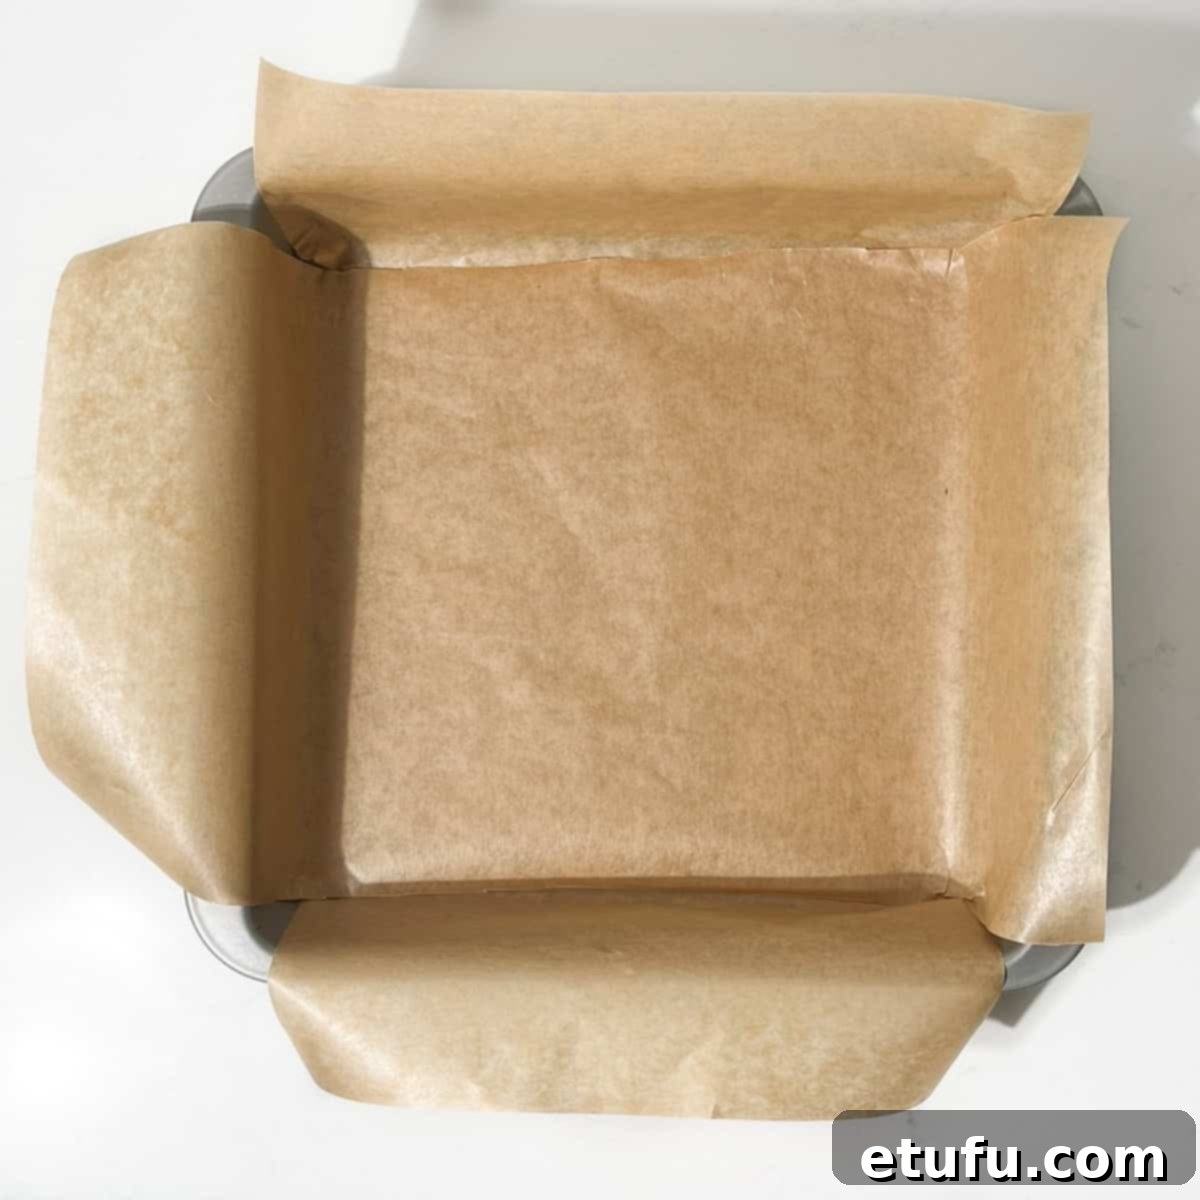
1. Prepare Your Tin: Begin by lining a 20 cm × 20 cm (8″ × 8″) square baking tin with parchment paper. Ensure you leave a slight overhang on all sides; this will make lifting the finished cake out much easier later.
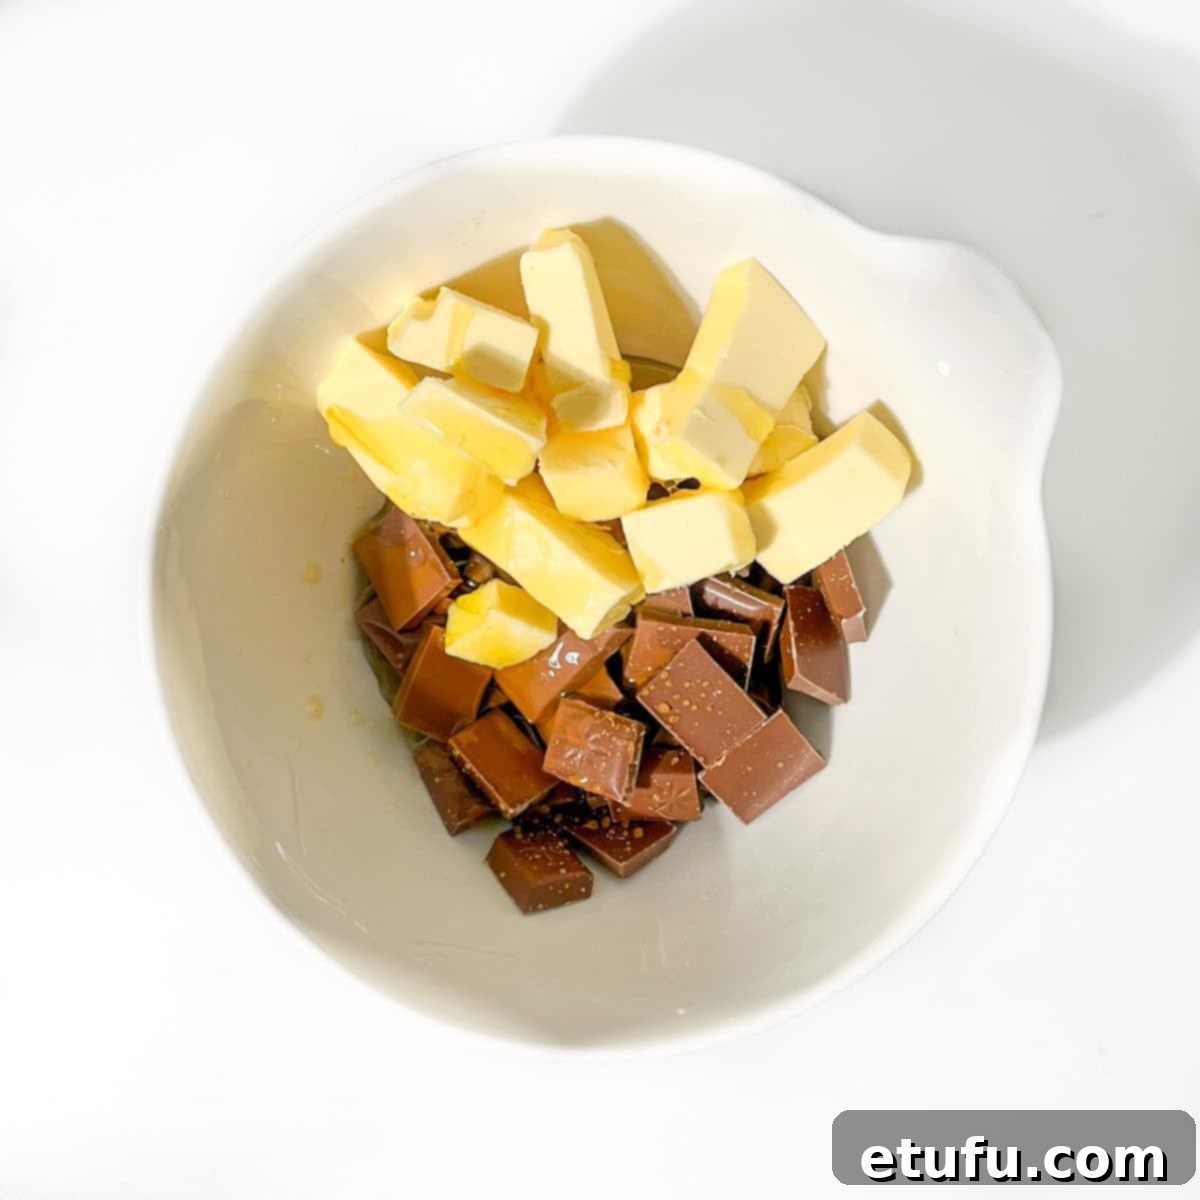
2. Melt the Base Mixture: In a microwave-safe bowl, combine the milk chocolate, butter, and golden syrup. Gently melt them together in short 30-second bursts in the microwave, stirring thoroughly after each interval. Stop when the mixture is almost entirely melted and then continue stirring until it becomes perfectly smooth and homogenous. Be careful not to overheat the mixture, as this can cause the chocolate to seize or the fats to separate.
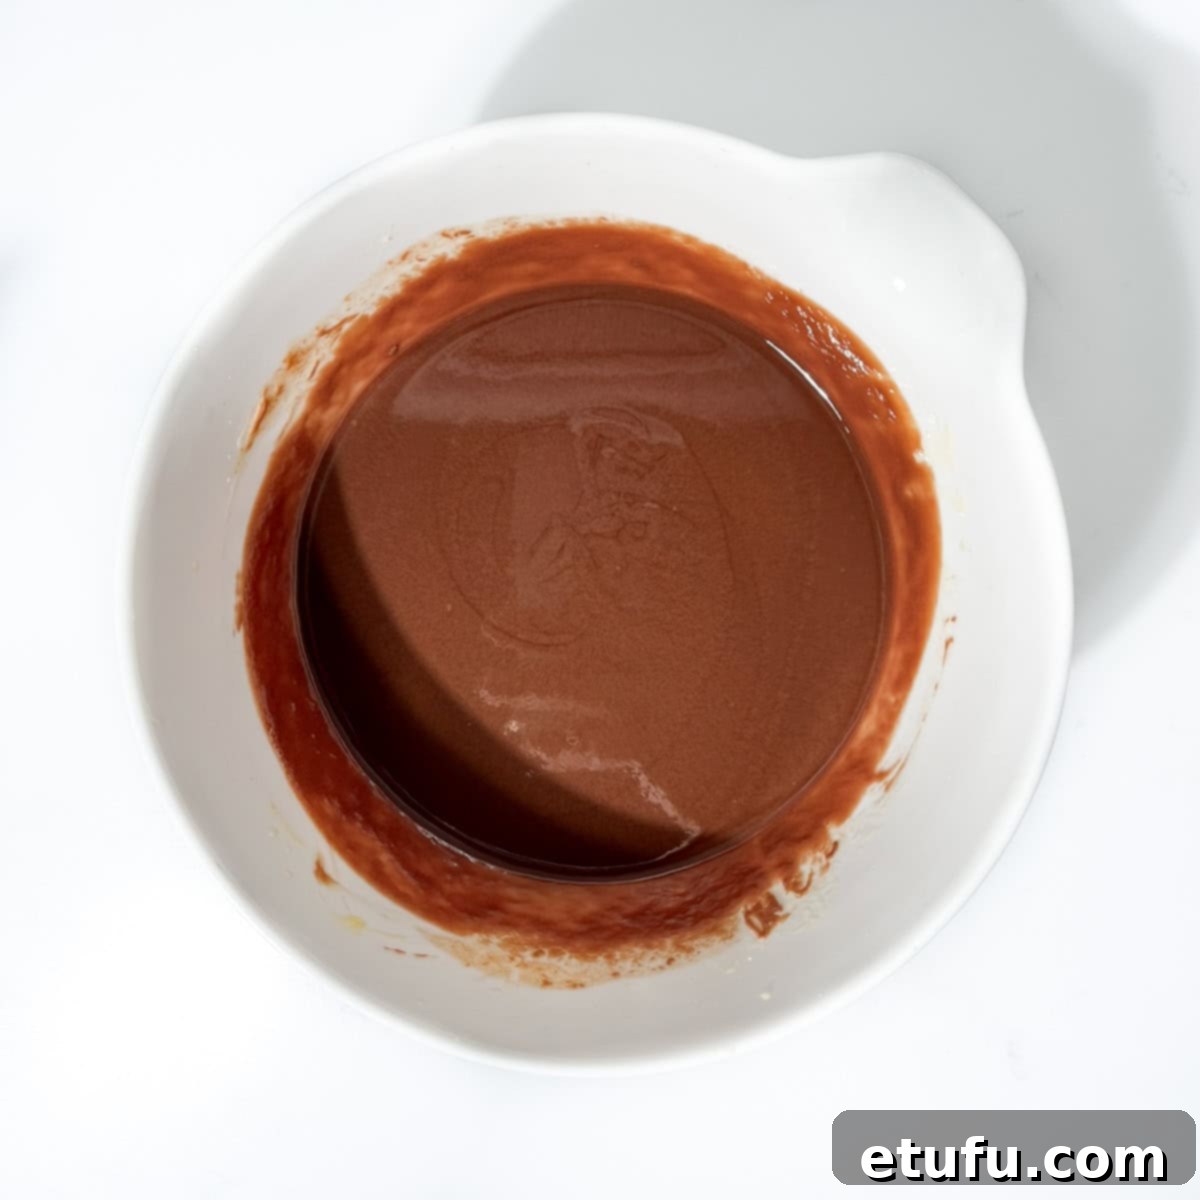
3. Cool the Chocolate: Allow the melted chocolate mixture to cool slightly for 5-7 minutes. This crucial step prevents the warm chocolate from melting your chocolate-covered pretzels prematurely when you combine them. While it’s cooling, you can proceed with preparing the dry ingredients.
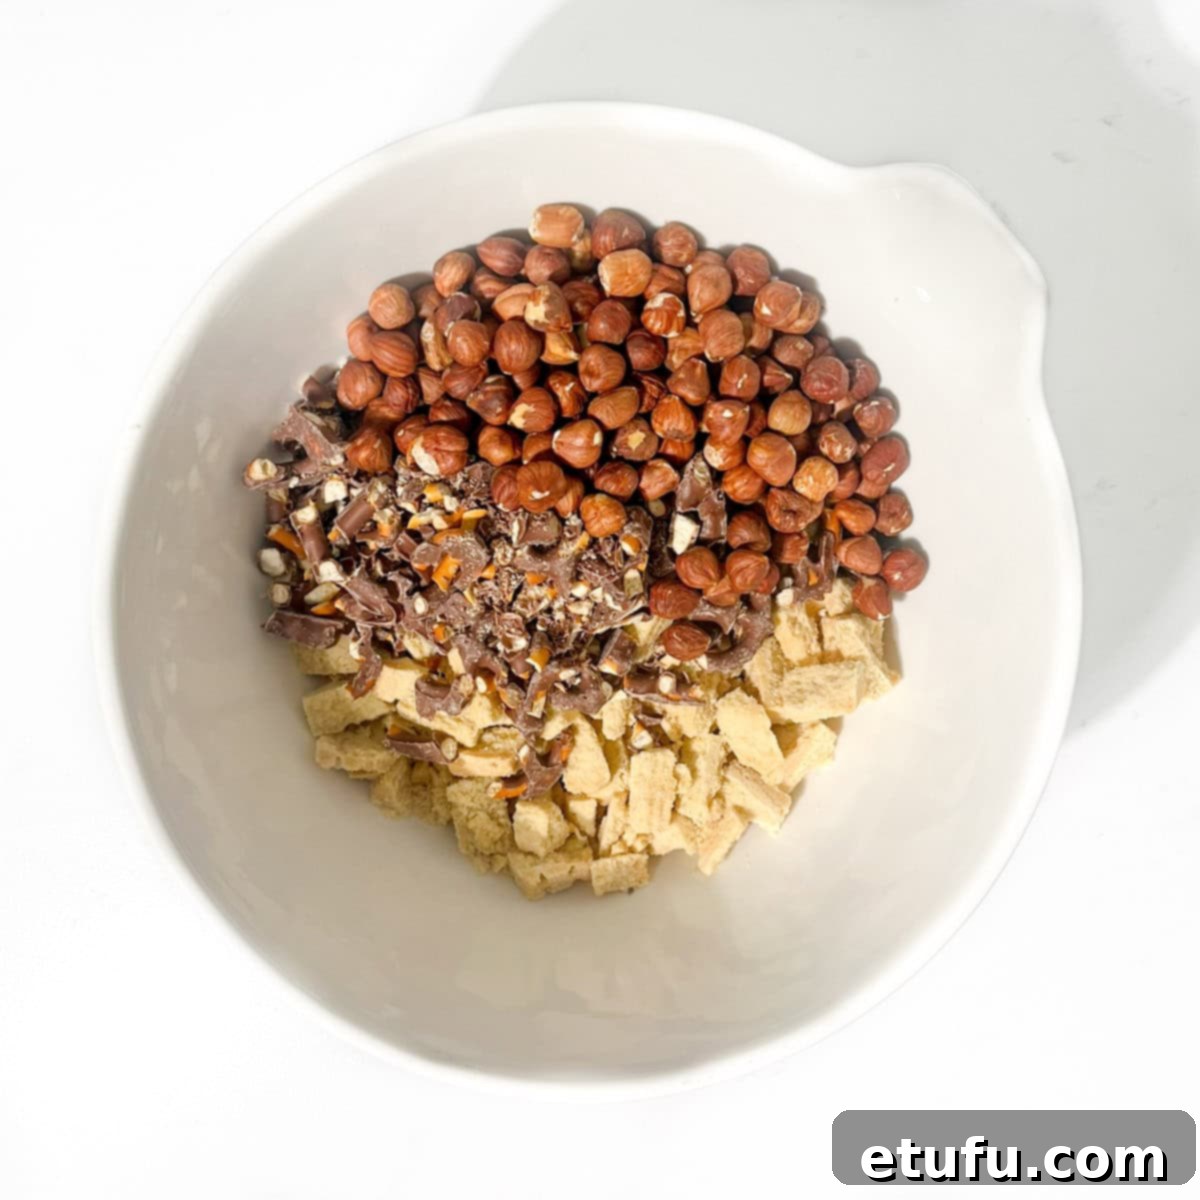
4. Prepare Dry Ingredients: Roughly chop the shortbread fingers, chocolate-covered pretzels, and roasted hazelnuts. For the hazelnuts, aim to leave many of them whole or in larger pieces to maximize textural variety. It’s particularly important not to chop the pretzels too finely; those chunky bits are essential for delivering that satisfying, distinct crunch in the finished cake.
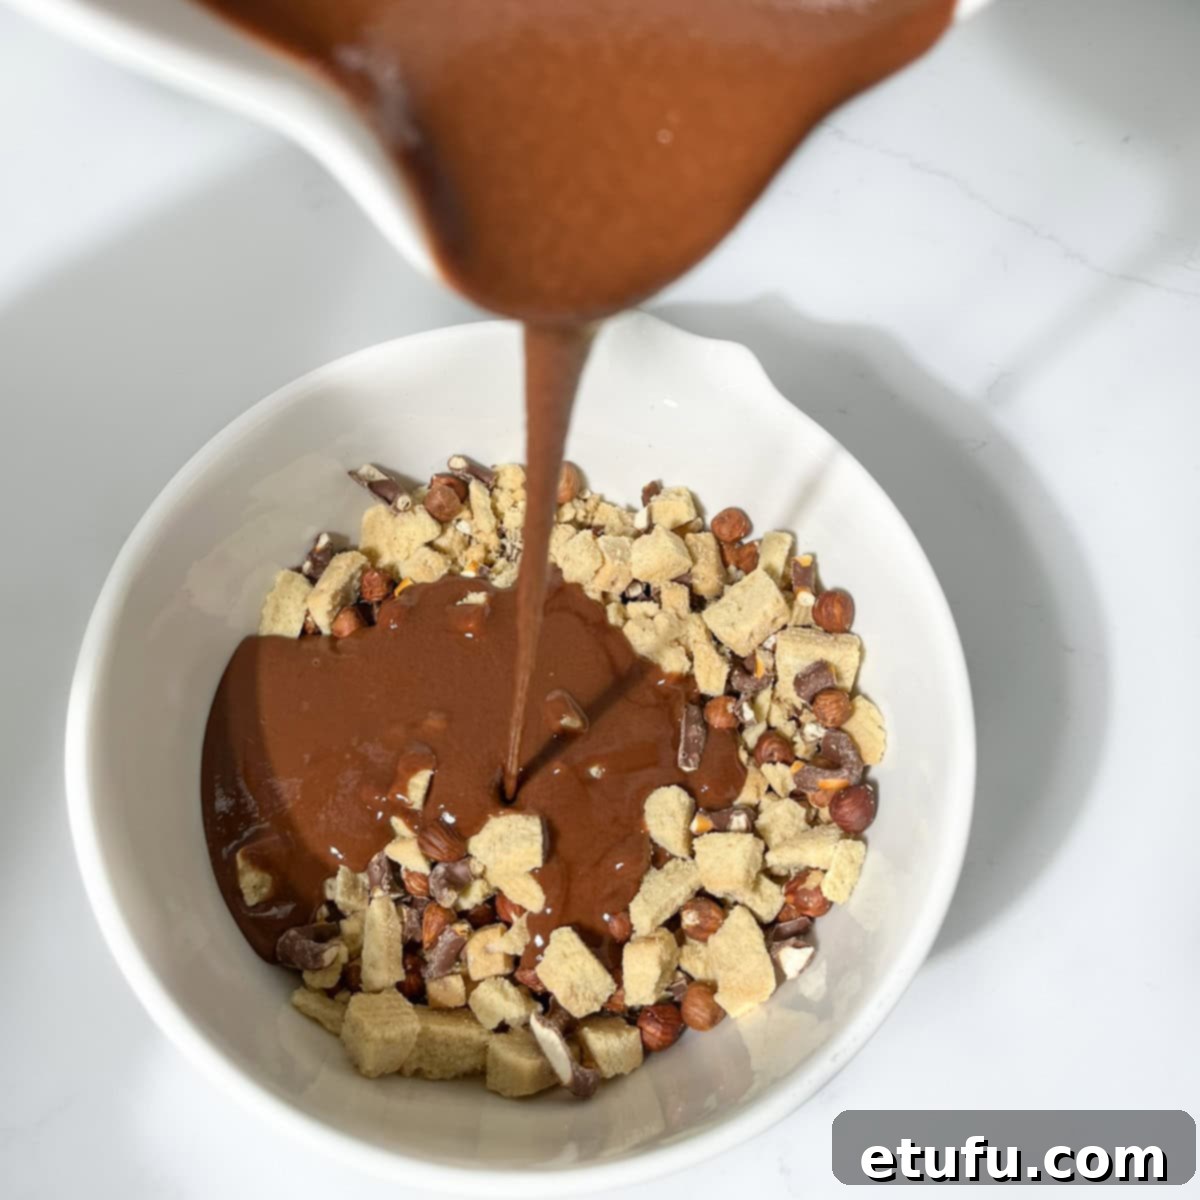
5. Combine Wet and Dry: Pour the slightly cooled chocolate mixture directly over your chopped biscuits, pretzels, and nuts in the large bowl.
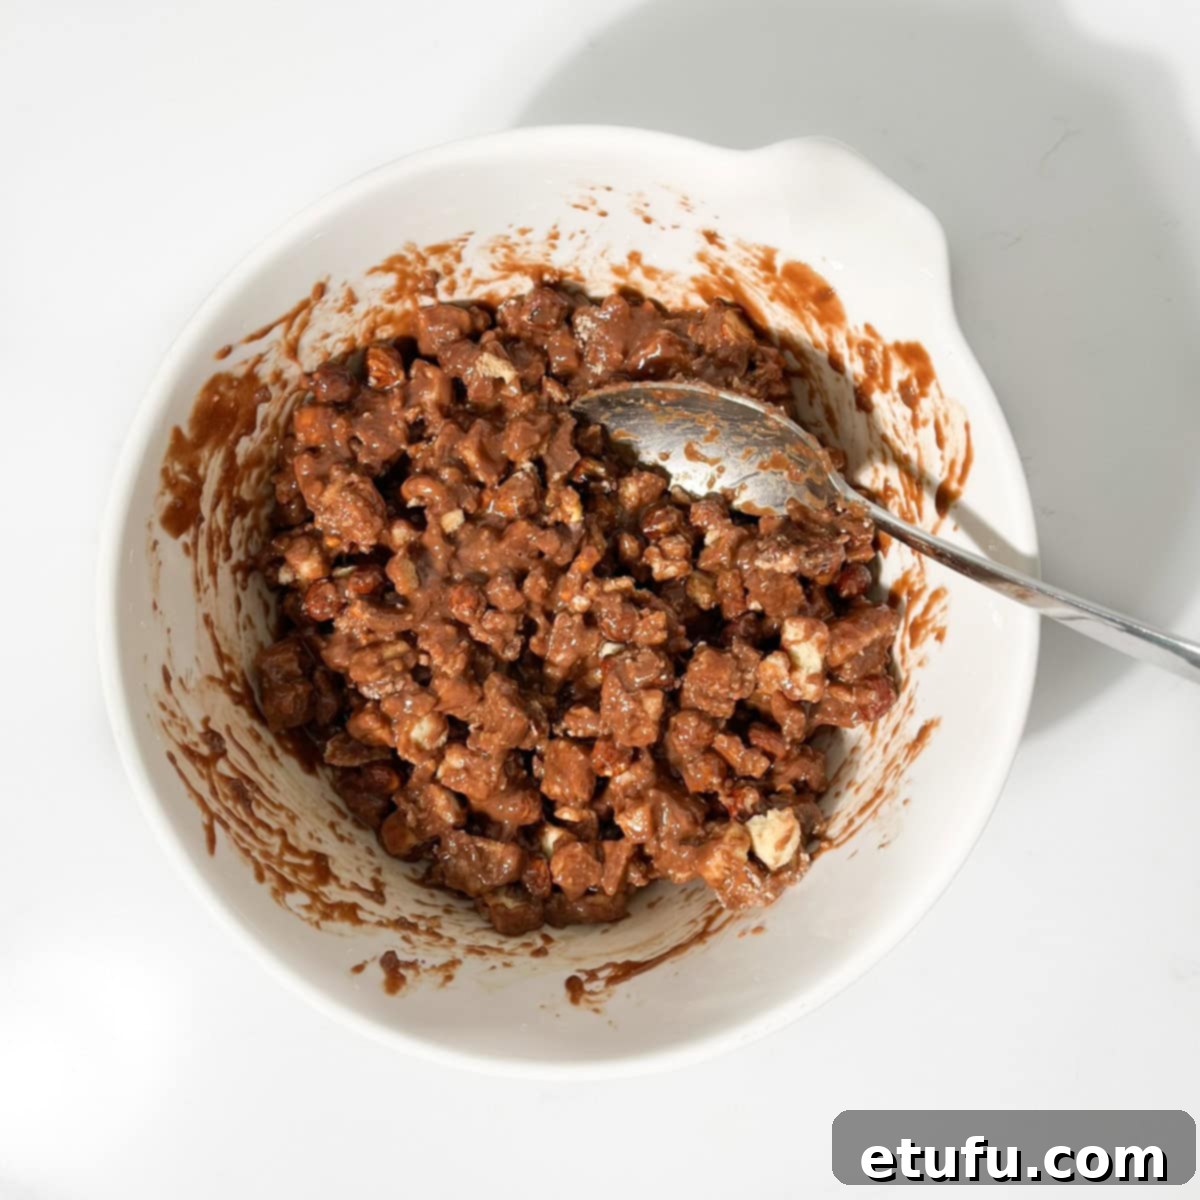
6. Mix Thoroughly: Stir gently but thoroughly until all the dry ingredients are completely and evenly coated with the chocolate mixture. Ensure there are no dry pockets left.
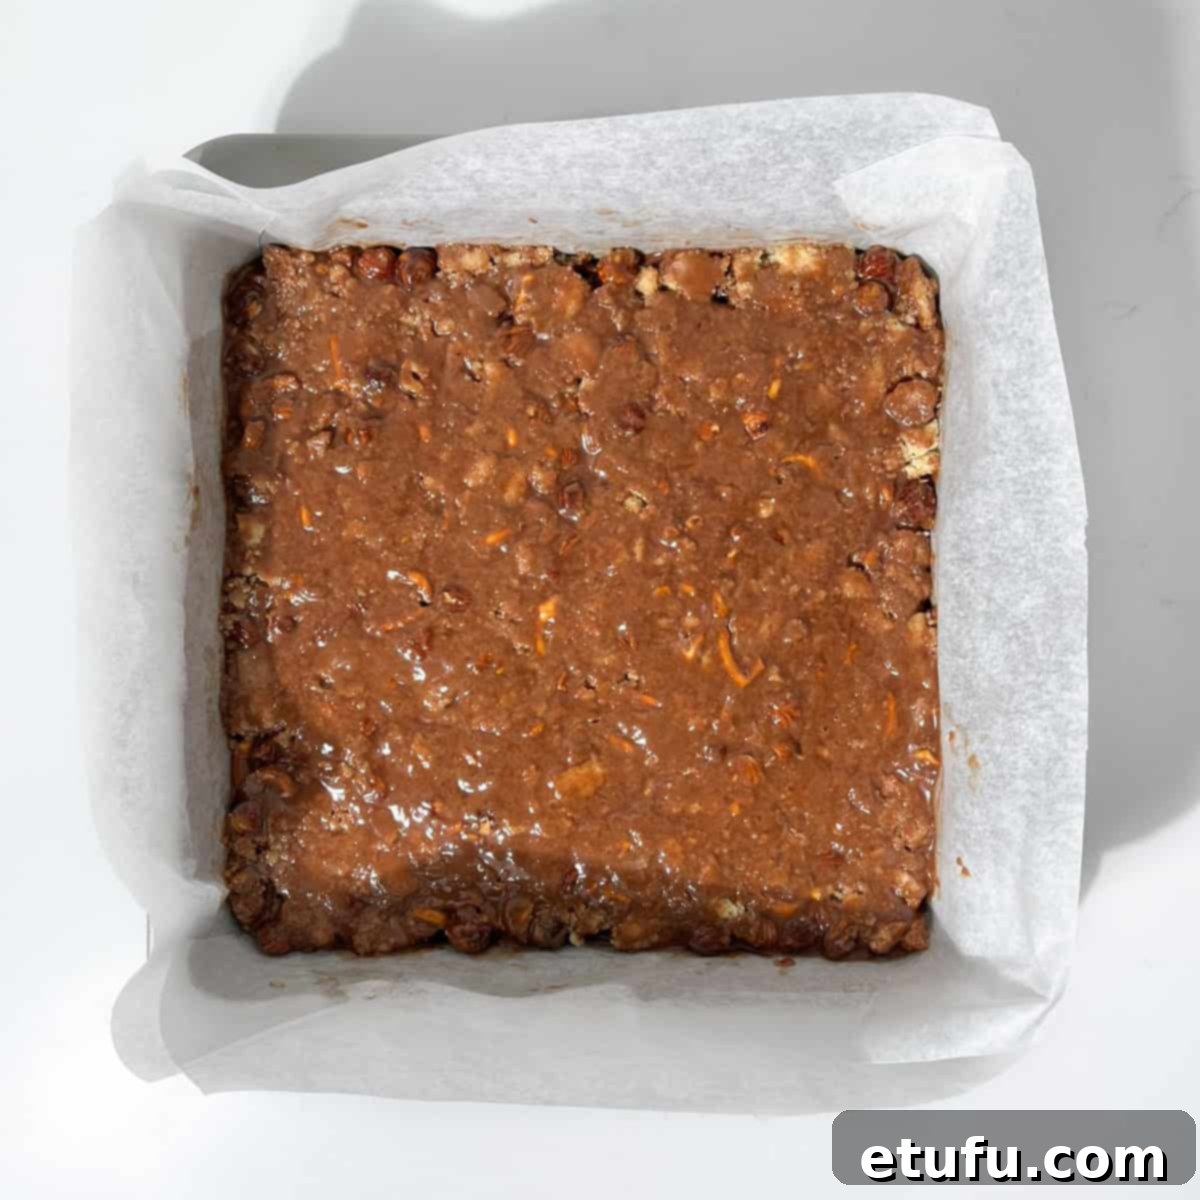
7. Press into Tin: Spoon the mixture into your prepared baking tin. Using the back of a spoon or the flat base of a glass, press the mixture down very firmly and evenly. This compression is key to removing any air gaps and creating a compact, solid base, which will prevent crumbly slices later on.
8. Initial Chill: Chill the compacted base for 1 hour at room temperature, then transfer it to the fridge for an additional 30 minutes. This gradual setting process allows the base to firm up gently, which is essential for preventing the chocolate topping from cracking when applied later.
How to Add the Elegant Chocolate Marble Topping
9. Melt the Topping Chocolates: Place the milk, dark, and white chocolates into three separate microwave-safe bowls. Melt each chocolate individually in short 15-20 second bursts, stirring well after each burst to distribute the heat evenly. Continue until there are only a few small lumps remaining, then stir vigorously until completely smooth. The residual heat will melt any remaining pieces, ensuring a silky, unscorched chocolate. Alternatively, you can melt each chocolate in a heatproof bowl set over a saucepan of barely simmering water, stirring gently.
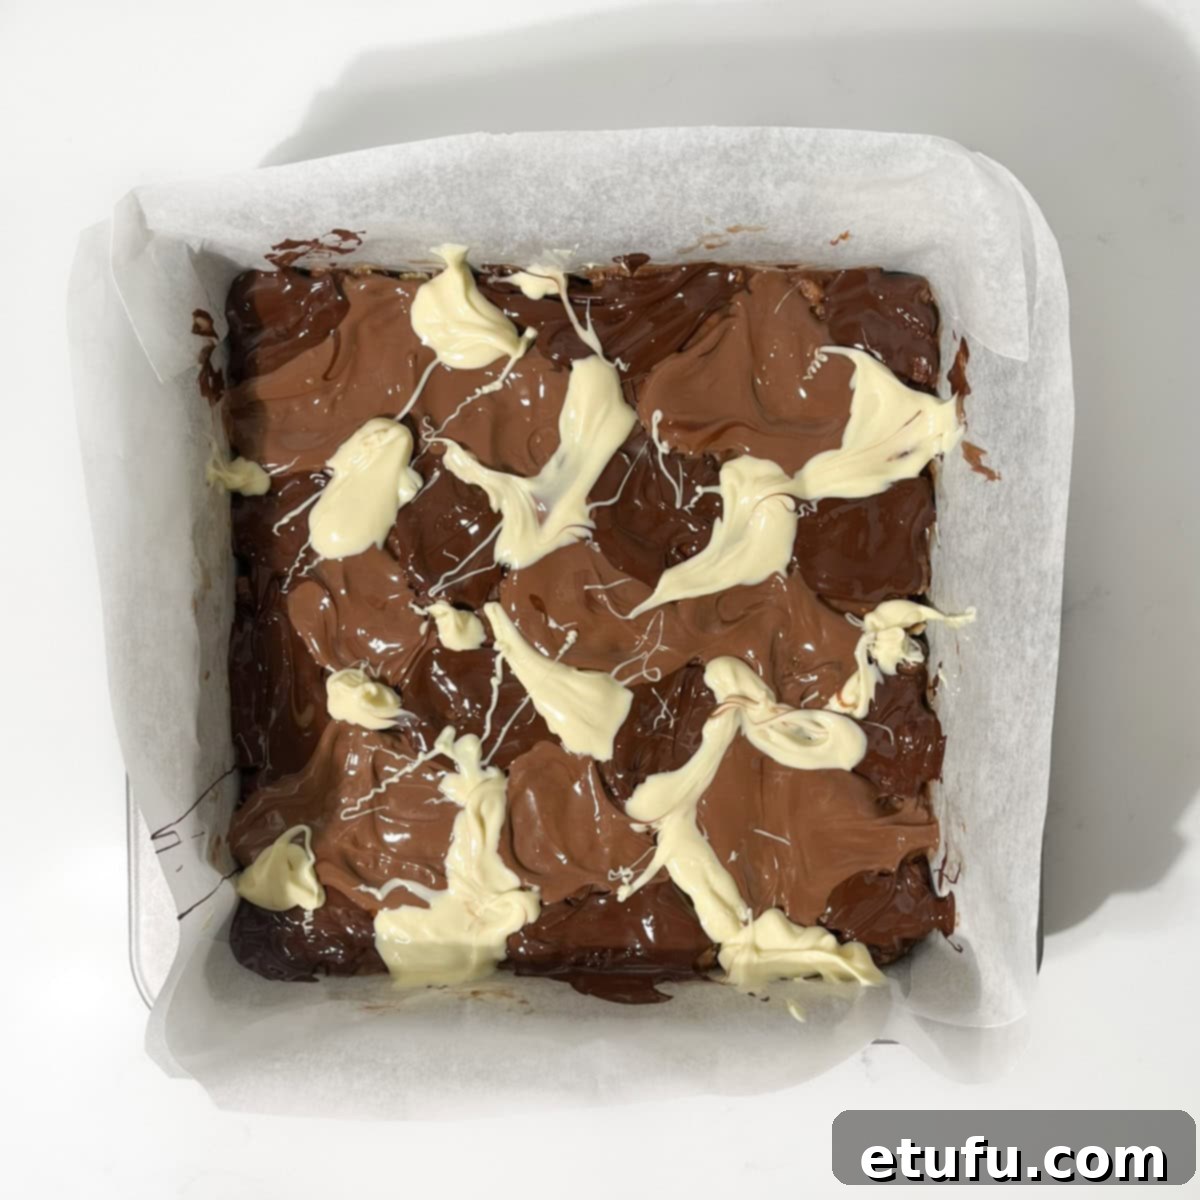
10. Prepare for Marbling: Remove the tin with the chilled base from the fridge and let it sit at room temperature for about 10 minutes. This slight warming prevents the freshly melted topping chocolate from seizing or cracking upon contact with a very cold surface. Working quickly, dollop spoonfuls of each of the three melted chocolates randomly over the surface of the cake base. Gently spread each blob of chocolate so that they touch, ensuring there are no large gaps between the colors. Then, give the tin a light shake to help level the chocolate layer.
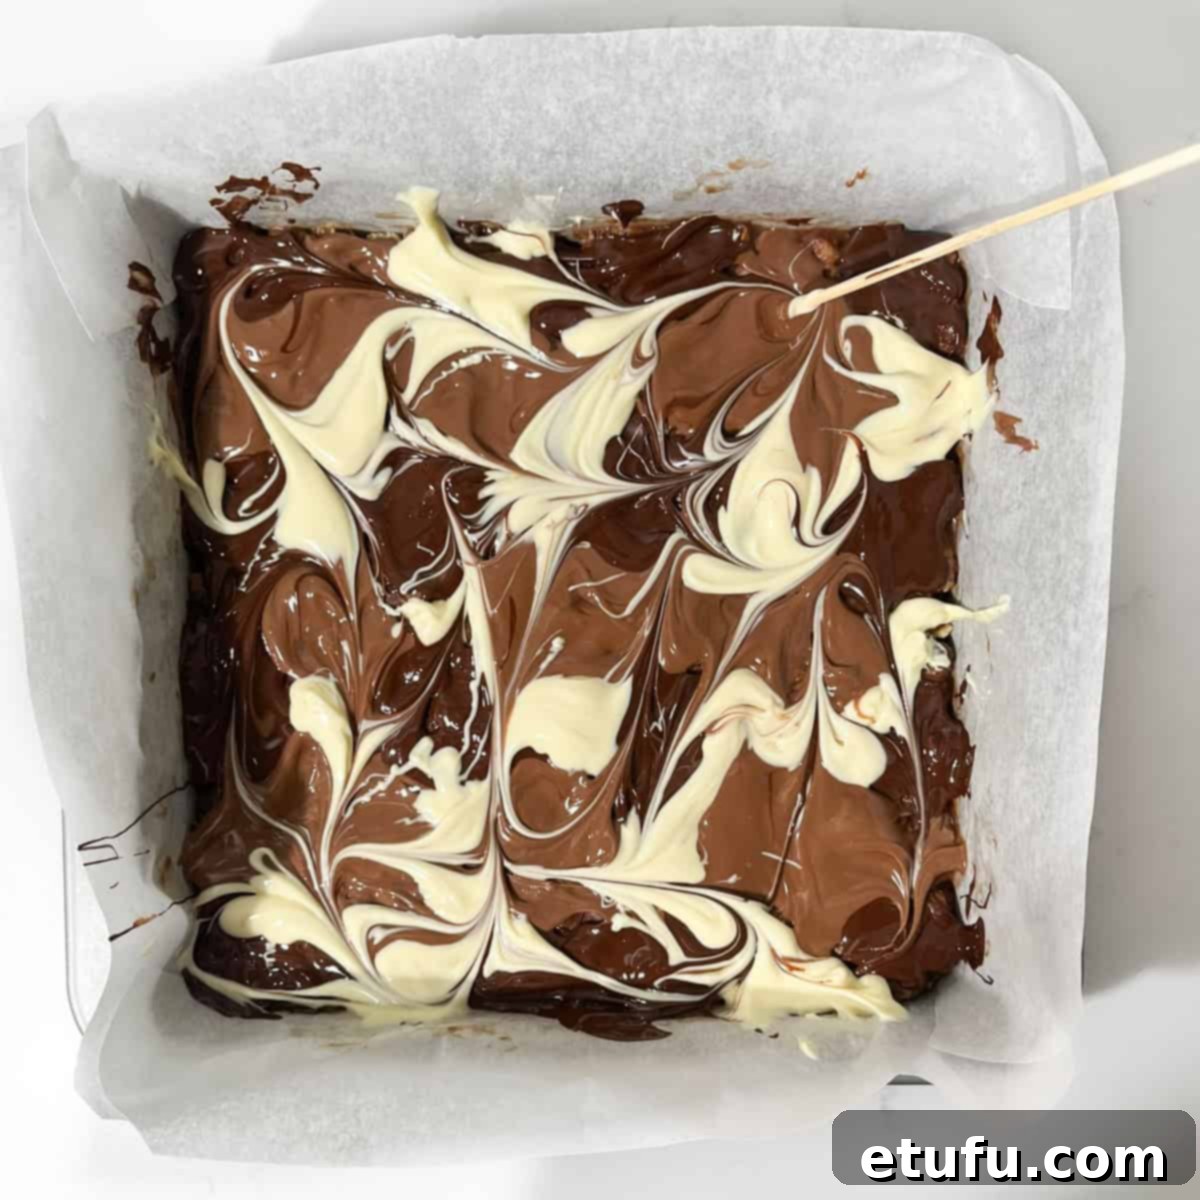
11. Create the Marble Effect: Take a skewer or a toothpick and gently drag it through the various chocolate blobs in random swirls. This will create a beautiful, artistic marbled effect. Once you’re satisfied with the pattern, refrigerate the cake for another 30 minutes, or until the topping is completely firm and set.
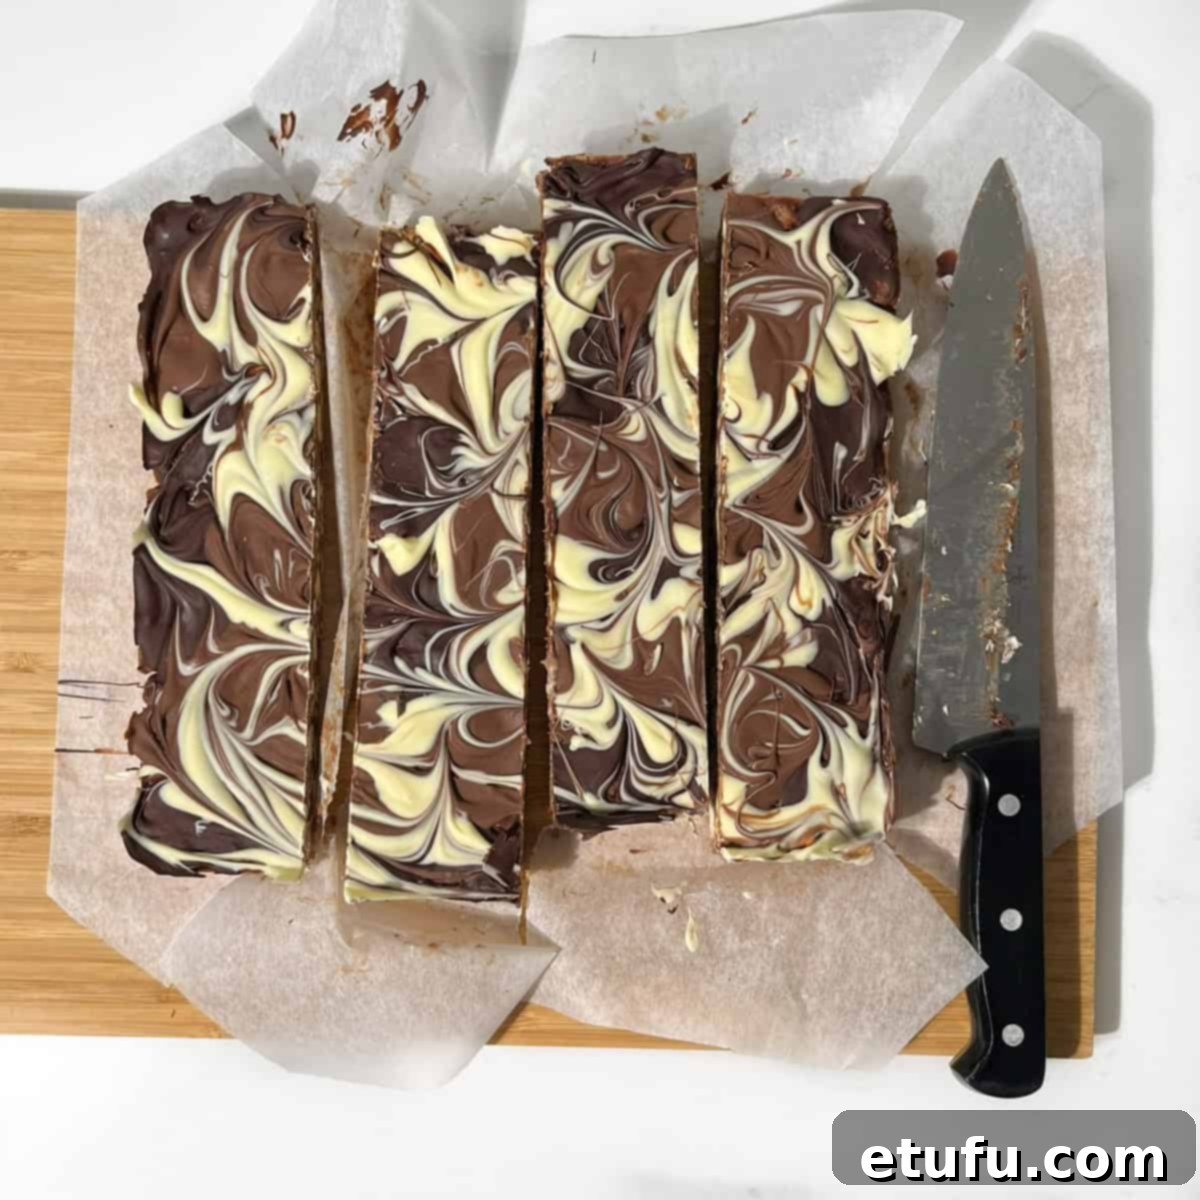
12. Slice and Serve: Once completely set, lift the cake out of the tin using the parchment paper overhang. For impeccably neat squares, use a large, sharp knife. For the cleanest cuts, dip the knife in hot water and wipe it dry between each slice. This technique prevents the chocolate topping from cracking and ensures minimal crumbs, giving you bakery-worthy portions. Serve and enjoy!
Mastering the Art: Top Tips for Your Perfect Chocolate Biscuit Cake
Achieving a flawless no-bake chocolate biscuit cake is simple when you know a few key tricks. Follow these expert tips to ensure your cake is nothing short of perfection:
Avoid Split Chocolate for a Smooth Base
The base of your biscuit cake relies on a perfectly smooth chocolate mixture. Always use gentle heat only when melting the butter, golden syrup, and chocolate. Overheating is the primary culprit for causing fats to separate, which results in a greasy, unappetizing layer on your finished bars. The trick is to stop melting when there are still a few small lumps of chocolate visible. Remove it from the heat and stir continuously; the residual heat will naturally melt these remaining pieces, creating a silky, unified mixture.
Allow for a Gradual Set at Room Temperature First
Resist the urge to rush the setting process by placing your tin straight into a very cold fridge. This sudden temperature shock can cause the chocolate-butter mixture to set unevenly, often leading to unsightly greasy patches on your cake. Instead, allow the base to firm up gradually at room temperature for about an hour. After this initial gentle set, a brief chill in the fridge will complete the process, resulting in a much smoother, cleaner texture throughout the cake.
Prevent Cracks in Your Beautiful Marbled Topping
A common pitfall is pouring warm, freshly melted chocolate onto a rock-hard, fridge-cold cake base. The drastic temperature difference can cause the topping to seize up immediately or, worse, crack as it sets. To avoid this, after the initial chilling, let the cake base stand at room temperature for 5-10 minutes before you apply the marbled topping. This slight warming of the base creates a more accommodating surface for the melted chocolate, allowing it to spread smoothly and set without stress.
Ensure Firm Compression to Prevent Crumbly Slices
No one wants a chocolate biscuit cake that crumbles into pieces when sliced. The key to firm, neat portions lies in the initial compression. When you spoon the mixture into the prepared tin, use the back of a spoon or the flat base of a drinking glass to compress it very firmly and evenly. This thorough packing eliminates air pockets and creates a dense, cohesive base that will slice beautifully and hold its shape, ensuring every piece is perfectly intact.
Achieve Bakery-Worthy Cuts for a Professional Finish
For those crisp, clean, and professional-looking squares, proper slicing technique is essential. Always use a large, sharp knife. To prevent the chocolate from sticking and tearing, dip your knife in hot water and wipe it completely dry between each cut. Slice straight down in a decisive motion, avoiding a sawing motion, which can create jagged edges and crumbs. This simple method guarantees beautifully presented portions every time.
Creative Variations: Customizing Your Chocolate Biscuit Cake
One of the joys of this no-bake chocolate biscuit cake is its adaptability. Feel free to get creative and experiment with these delicious variations to suit your taste or the occasion:
- Citrus Zest or Candied Peel: For a bright, festive touch, fold in 1-2 tablespoons of finely grated orange or lemon zest, or some chopped candied orange or lemon peel into the biscuit mixture.
- Dried Fruit Medley: Add a pleasant chewiness and fruity flavor by incorporating ½ cup of dried cranberries, raisins, chopped apricots, or even glace cherries.
- Warm Festive Spices: Introduce a hint of warmth by stirring a pinch of ground cinnamon, nutmeg, or ginger into the melted chocolate base mixture. This is especially delightful during the holiday season.
- Boozy Adult Version: Elevate your cake with a sophisticated edge by adding 2 tablespoons of your favorite liqueur to the melted chocolate base. Baileys Irish Cream, dark rum, or a hint of brandy all work beautifully.
- Kid-Friendly Fun: To make it a hit with younger crowds, swap out the hazelnuts for fun additions like mini marshmallows, colorful candy-coated chocolates (like M&M’s), or sprinkles.
- Luxury Topping Twist: After applying the marbled topping, drizzle a fine layer of caramel sauce over the top, or sprinkle a few flakes of sea salt for a sophisticated sweet and salty balance.
Dietary Adaptations: Enjoying Your Cake Your Way
This versatile chocolate biscuit cake can be easily adapted to accommodate various dietary needs without compromising on flavor or texture:
Gluten-Free: Simply replace the regular shortbread fingers with gluten-free shortbread or oat biscuits. These are widely available and will work just as well. If your chosen gluten-free biscuits seem particularly dry or crumbly, consider adding an extra tablespoon of golden syrup to the base mixture. This will provide additional binding power and ensure everything holds together beautifully.
Nut-Free: To make this cake safe for those with nut allergies, replace the hazelnuts with an equal amount of additional chocolate-covered pretzels (you can use a mix of plain and chocolate-coated for variety), pumpkin seeds for a different crunch, or simply increase the quantity of biscuits in the recipe. Sunflower seeds can also provide a similar texture. Always ensure all other ingredients (like chocolate and biscuits) are certified nut-free.
Dairy-Free: For a dairy-free version, use a high-quality block-style plant-based butter (avoid spreads, as their water content can be too high) for the base. For both the base and the marbled topping, opt for a dark chocolate with 70% cocoa or higher, as these are typically dairy-free. Be mindful of the water content in plant-based butters; if it’s too high, the chocolate mixture in the base can seize or split. Look for brands specifically designed for baking.
Scaling Up: Doubling the Recipe for Larger Batches
If you’re hosting a larger gathering or simply want more of this delicious cake, doubling the recipe is straightforward. The key is to use an appropriately sized baking tin to maintain the same desired thickness as a single batch made in a 20 cm × 20 cm (8 in × 8 in) pan. You’ll need a pan with roughly double the surface area, which is approximately 800 cm² (124 in²).
Excellent Pan Options for a Double Batch:
- 28 cm × 28 cm (11 in × 11 in): This size is slightly under double the surface area but will work perfectly fine, yielding a slightly thicker slice.
- 22 cm × 36 cm (8.5 in × 14 in): This rectangular pan is very close to the ideal double surface area, producing slices comparable in thickness to the original recipe.
- 23 cm × 35 cm (9 in × 13.75 in): Slightly larger than double, this common brownie pan size also works very well, resulting in slightly thinner but still substantial slices.
Important Tip: Always avoid using a tin that is too small for a doubled recipe. Overfilling the pan will result in significantly thicker bars that will take much longer to set completely, potentially affecting the final texture.
Storage & Freezing: Keeping Your Cake Fresh
Proper storage is key to maintaining the delightful texture and flavor of your chocolate biscuit cake. Here’s how to store and freeze it effectively:
Optimal Storage for Freshness
Once completely set, store the chocolate biscuit cake in an airtight container. Keep this container in a cool, dry cupboard at room temperature. Stored this way, the cake will remain fresh and delicious for 5-7 days. It’s generally best not to refrigerate these bars unless your ambient temperature is very warm (above 24°C or 75°F). Refrigeration can sometimes cause the chocolate to ‘bloom’ (develop a whitish film due to sugar or fat crystallization) or absorb other food smells from your fridge, altering its pristine flavor.
If you must chill the bars due to warm weather, ensure you place baking paper between layers to prevent them from sticking together. Always bring them back to room temperature for about 30 minutes before serving. This allows the chocolate and butter to soften slightly, bringing out the best texture and flavor.
Freezing for Long-Term Enjoyment
This chocolate biscuit cake freezes exceptionally well, making it a perfect make-ahead dessert. To freeze, first slice the cake into individual squares. Wrap each square tightly in baking paper, then further secure it with a layer of cling film (plastic wrap) to prevent freezer burn. Once wrapped, place the individual portions in a freezer-safe bag or an airtight container. The cake can be frozen for up to 2 months.
When you’re ready to enjoy a slice, simply remove the desired number of bars from the freezer. Defrost them unwrapped at room temperature for approximately 30 minutes. This gentle thawing will restore their original texture and make them ready to serve.
Make-Ahead & Transportation: Planning for Perfection
Planning ahead for your special events or gatherings is made easy with this versatile chocolate biscuit cake. Here are some tips to ensure flawless preparation and transport:
The Beauty of Making Ahead
One of the best qualities of this no-bake cake is that it actually benefits from a little resting time. It is ideally made 1-2 days before serving. This allows all the delicious flavors to meld together more deeply, and the various textures to become perfectly cohesive. The slight mellowing of the chocolate and the softening of the biscuits create a more integrated and satisfying eating experience. Prepare it in advance, and you’ll have one less thing to worry about on the day of your event!
Effortless Transportation Tips
If your chocolate biscuit cake is already cut into squares, thoughtful packaging is key to safe transport. Arrange the individual slices in a rigid, airtight container. To prevent them from sticking or smudging, separate each layer with a sheet of baking paper. You can also lay a loose sheet of baking paper directly over the top of the marbled layer for extra protection against any movement during travel.
During transport, especially in warmer conditions, it’s crucial to keep the cake cool. An insulated bag or a small cooler filled with ice packs works wonderfully to maintain the cake’s integrity. Avoid stacking the layers of cake too high, as this can lead to squashing or damage to the delicate marbled topping. With these tips, your beautiful chocolate biscuit cake will arrive at its destination looking as perfect as when it left your kitchen.
Elegant Presentation Ideas
Whether you’re serving this royal-inspired treat for a formal party or a relaxed teatime, presentation can elevate the experience:
- Classic Platter Arrangement: Arrange the neat squares elegantly on a decorative platter, perhaps with a dusting of cocoa powder or a few fresh berries for garnish.
- Tiered Cake Stand Glamour: For a more formal or celebratory display, utilize a tiered cake stand. This adds height and sophistication, making the cake a true centerpiece.
- Artful Towers: Stack 2-3 squares to create small, appealing towers. This adds a sculptural element to your dessert spread.
- Individual Servings: For a polished, individual-serving look, place each square in a mini paper cake case or a small gift box. This is perfect for party favors or an elegant dessert table.
Frequently Asked Questions About Chocolate Biscuit Cake
Absolutely! While the marbled topping offers a unique visual appeal and textural contrast, a simple chocolate ganache is a perfectly classic and delicious alternative. Just pour your prepared ganache over the set biscuit base and allow it to firm up. It will result in a smooth, glossy, and equally indulgent finish.
To add a sophisticated, grown-up twist, consider incorporating a splash of liqueur into the melted chocolate base mixture. Baileys Irish Cream, Cointreau (orange liqueur), or a good quality dark rum all work beautifully. A light sprinkle of flaky sea salt over the finished chocolate topping also adds a wonderful balance to the sweetness and a chic touch.
Yes, absolutely! This recipe is quite flexible. You can easily swap in any plain-ish biscuit or cookie that you enjoy. Round shortbreads, classic digestive biscuits, or even graham crackers will provide a slightly different but equally delicious bite, and the cake will still hold together wonderfully.
To protect your beautiful marbled topping, place the cut squares in a rigid, airtight container with layers separated by baking paper. Lay a loose sheet of baking paper over the top surface of the cake as well to act as a barrier. Keep the container cool during travel, ideally in an insulated bag or cooler, and avoid stacking anything heavy on top to prevent smudging or damage to the delicate marble pattern.
Yes, absolutely! This chocolate biscuit cake is an ideal make-ahead dessert. In fact, it often improves with a little rest. Making it 1-2 days in advance allows the flavors to truly meld and deepen, and the texture to firm up perfectly. Store it in an airtight container at room temperature (or chilled if very warm) until ready to serve.
Marbled Chocolate Biscuit Cake Recipe
Marbled Chocolate Biscuit Cake
Indulge in this royal-inspired no-bake British delight, featuring buttery shortbread, crunchy roasted hazelnuts, salty chocolate-covered pretzels, and a stunning triple-chocolate marble topping. It’s a blissfully simple dessert: Melt, mix, press, chill.
Equipment
- 8″ x 8″ (20cm x 20cm) square baking tin
Ingredients
For the biscuit cake base
- 225 grams (7.9 oz) milk chocolate
- 125 grams (4.4 oz) butter – salted or unsalted
- 125 grams (4.4 oz) golden syrup
- 300 grams (10.6 oz) shortbread fingers – or other cookies of choice like graham crackers/digestives/oaty cookies
- 90 grams (3.2 oz) chocolate-covered pretzels – Like ‘Flipz’
- 150 grams (5.3 oz) hazelnuts, roasted
For the marbled topping
- 80 grams (2.8 oz) milk chocolate
- 80 grams (2.8 oz) dark chocolate
- 80 grams (2.8 oz) white chocolate
Instructions
Make the cake base
- Line a 20 cm × 20 cm (8″ × 8″) square tin with parchment paper, leaving a slight overhang for easy lifting later.
- In a microwave-safe bowl, gently melt the milk chocolate, butter and golden syrup in 30-second bursts, stirring between each. Stop when almost melted and stir until smooth. Overheating can cause the mixture to split.225 grams (7.9 oz) milk chocolate, 125 grams (4.4 oz) butter, 125 grams (4.4 oz) golden syrup
- Let it cool for 5-7 minutes so it doesn’t melt the chocolate pretzels. In the meantime, get on with the rest.
- Roughly chop the shortbread fingers, chocolate-covered pretzels and roasted hazelnuts (leave many hazelnuts whole for texture). Don’t chop the pretzels too finely, as you want chunky bits for added crunch.300 grams (10.6 oz) shortbread fingers, 90 grams (3.2 oz) chocolate-covered pretzels, 150 grams (5.3 oz) hazelnuts, roasted
- Pour the slightly cooled chocolate mixture over the chopped biscuits, pretzels and nuts.
- Stir gently until everything is evenly coated.
- Spoon the mixture into the prepared tin. Press it down firmly with the back of a spoon or the base of a glass to remove air gaps and create an even layer (firm compression prevents crumbly slices later).
- Chill for 1 hour at room temperature, then 30 minutes in the fridge. This gentle set prevents the topping from cracking later.
Add the marbled topping
- Place the milk, dark and white chocolate in three separate microwave-safe bowls. Melt each one individually in 15–20 second bursts, stirring between each burst so the heat distributes evenly.Stop when there are still a few small lumps and stir until smooth. The residual heat will finish melting them. This prevents scorching and keeps the chocolate silky.(Alternatively, melt each chocolate in a heatproof bowl set over a pan of barely simmering water, stirring gently.)80 grams (2.8 oz) milk chocolate, 80 grams (2.8 oz) dark chocolate, 80 grams (2.8 oz) white chocolate
- Remove the tin from the fridge and let it sit at room temperature for about 10 minutes. This prevents the topping from seizing or cracking against a very cold base. Working quickly, dollop spoonfuls of each melted chocolate randomly over the surface. Gently spread each blob so they all touch (no gaps!), then give the tin a light shake to level.
- Drag a skewer or toothpick through the blobs in random swirls to create a marbled effect.Refrigerate for 30 minutes or until firm.
- Lift out using the parchment overhang. Use a sharp, hot knife (dip in hot water, wipe dry) to slice into neat squares, wiping between cuts to prevent cracks or crumbs.
Notes
Top tips for the perfect chocolate biscuit cake
Avoid split chocolate
Use gentle heat only when melting the butter, syrup and chocolate.Overheating causes the fats to separate, leaving a greasy layer on your bars.Stop melting when a few lumps remain and then stir until smooth. The residual heat will finish the job.
Let it set at room temperature first
Putting the tin straight into a cold fridge can shock the chocolate-butter mixture, making the fats set unevenly and leaving greasy patches.Let it firm up at room temperature for an hour, then chill it briefly to finish setting. This gives a smoother, cleaner texture.
Prevent cracks in the topping
If you pour warm melted chocolate onto a rock-hard, fridge-cold base, the sudden temperature difference can make the topping seize or crack.After chilling, let the base stand at room temp for 5–10 minutes before adding the marble topping.
Stop slices from crumbling
When pressing the mixture into the tin, compress it firmly with the back of a spoon or a glass.A well-packed base slices neatly and won’t fall apart.
Get bakery-worthy cuts
Use a large, sharp knife, dipped in hot water and wiped dry between cuts. Slice straight down (don’t saw) for crisp, professional-looking squares.
**Nutritional data disclaimer**
Please keep in mind that the nutritional information provided below is calculated by a third party and we cannot guarantee the accuracy. We try our best to give you the most accurate information, but we do not take responsibility for errors that may be present. Also, the nutritional value of the recipe may change depending on the exact brands and products used. We recommend that you consult with a qualified healthcare professional or registered dietitian for personalised advice on your dietary needs.
Nutrition
For food safety advice, including guidance on food allergies
