How to Make Elegant Butter Rosettes: Elevate Your Dining Experience
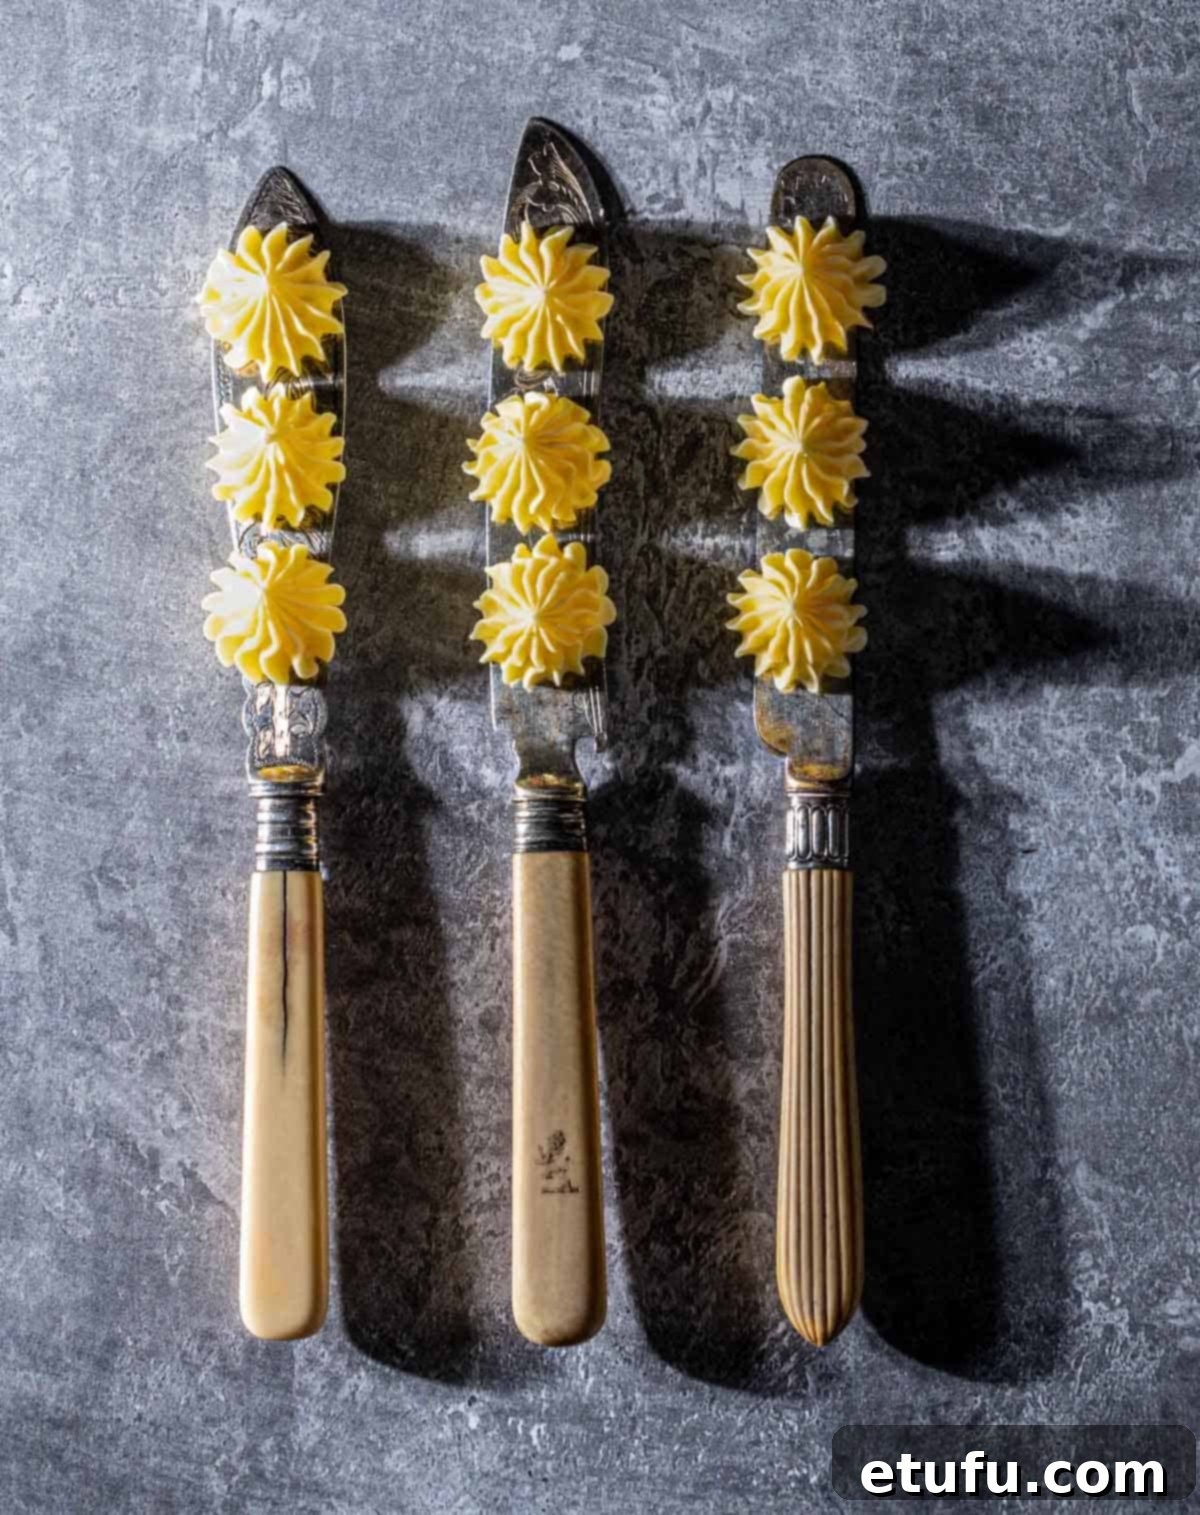
Transforming ordinary butter into a delightful visual treat is simpler than you might imagine. Butter rosettes are individual portions of butter, meticulously piped into charming flower-like shapes. These exquisite morsels aren’t just for show; they offer a touch of refined elegance to any table setting, whether you’re serving them alongside your favorite homemade bread rolls, a crusty artisan loaf, or a freshly baked banana bread.
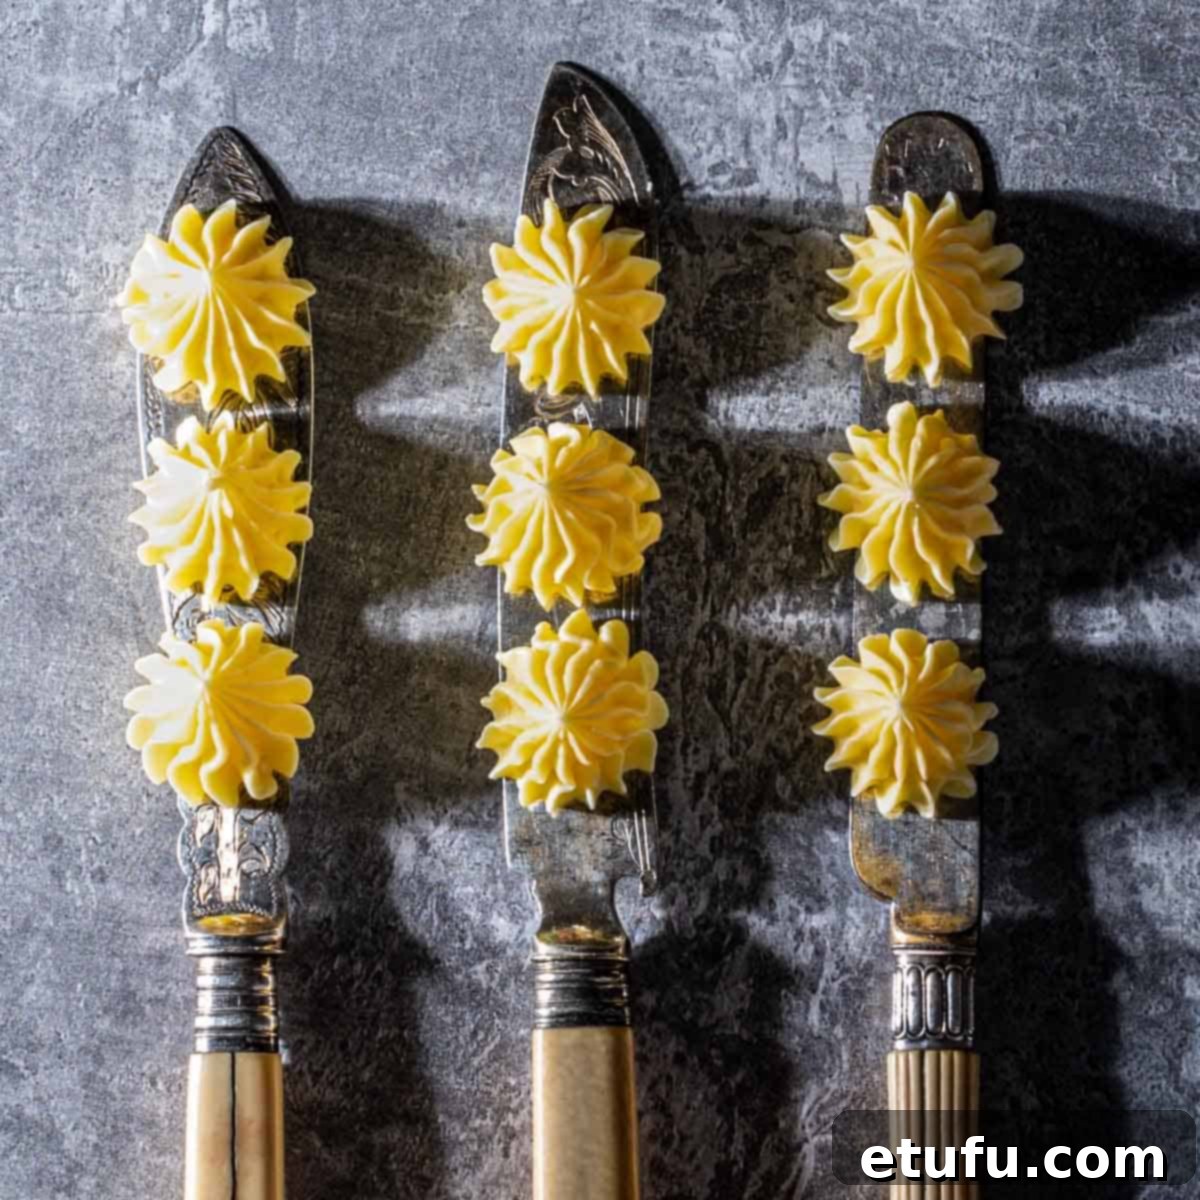
Imagine your guests enjoying their own perfectly formed butter rosette, gracefully presented on a small knife or nestled in a miniature pinch bowl. This thoughtful presentation instantly elevates any meal, making it feel more special and memorable. It’s a small detail that speaks volumes about your hospitality and attention to culinary aesthetics.
While classic butter rosettes are wonderful, don’t hesitate to experiment! For a delightful pairing, try serving them with this perfect 4-ingredient banana bread recipe. Or, for a savory twist, pipe your rosettes using homemade roasted garlic butter – a fantastic compound butter that adds an aromatic depth to any bread or dish.

Why You’ll Love Making These Butter Rosettes
Creating butter rosettes is more than just a culinary technique; it’s a way to enhance your dining presentation with minimal effort and maximum impact. Here’s why these fancy butter portions are a must-try for your next meal:
- Effortless Elegance: You don’t need elaborate tools or specialized molds. A simple star tip and a piping bag are all it takes to transform plain butter into stunning, flower-like shapes that impress every guest.
- Unique Tabletop Presentation: Move beyond the traditional butter dish! Serving individual rosettes offers a sophisticated and unique way to present butter, making each guest feel pampered.
- Excellent Portion Control: Pre-portioned rosettes naturally encourage moderation, helping guests manage their butter intake without feeling deprived.
- Enhanced Hygiene: Individual servings mean no communal dipping, promoting better hygiene and reducing the spread of germs, especially important when entertaining a crowd.
- Waste Reduction & Reusability: Any untouched rosettes can be easily frozen and saved for future use, minimizing food waste and maximizing convenience.
- Simple Yet Special: With just a few straightforward steps, you can elevate a basic condiment into a memorable element of your dining experience, adding a touch of personal flair without stress.
- Customization Opportunities: Easily infuse your rosettes with herbs, spices, or other flavors to complement your meal, adding an extra layer of culinary creativity.
Mastering the Butter: Tips for Perfect Consistency
The secret to perfectly piped butter rosettes lies in the consistency of your butter. It needs to be soft, pliable, and smooth – think of the texture of soft-serve ice cream, smooth buttercream frosting, or even thick toothpaste. Getting this right is crucial for easy piping and beautifully defined shapes.
- Achieving Room Temperature: The simplest method is to leave your butter out of the fridge for a few hours. The exact time will depend on your room temperature; on a warm day, it might take an hour, while in a cooler environment, it could take three to four hours. Press a finger into the butter; if it leaves a dent without being greasy or melting, it’s just right.
- Speeding Up the Softening Process: If you’re short on time, here’s a quick hack:
- Fill a microwave-safe glass bowl with about an inch of water.
- Heat the water in the microwave until it boils and creates steam.
- Carefully remove the hot bowl (use oven mitts!).
- Discard the water and quickly invert the warm bowl over your block of butter on a plate.
- The residual heat and steam trapped under the bowl will gently soften the butter within a few minutes, making it ideal for piping.
Check the butter after 5-10 minutes. It should be soft but not melted.
- Whisking to Perfection: Once softened, use a fork or a small spatula to “squish” and work the butter until it reaches a perfectly smooth, lump-free piping consistency. This step ensures consistent flow through your piping tip and prevents clogs.
- Importance of Smoothness: Any lumps in the butter will hinder smooth piping, leading to inconsistent rosette shapes or even blockages in your piping tip. A silky-smooth texture is key for those crisp, defined edges.
- Choosing Your Butter: While the recipe calls for salted butter, unsalted butter works perfectly too. If using unsalted, consider adding a tiny pinch of fine salt during the softening process to enhance the flavor. High-quality butter often yields better results, as it tends to be creamier and easier to work with.
Selecting and Preparing Your Piping Equipment
The right tools make all the difference in achieving those picture-perfect butter rosettes. Here’s what you need and how to prepare it:
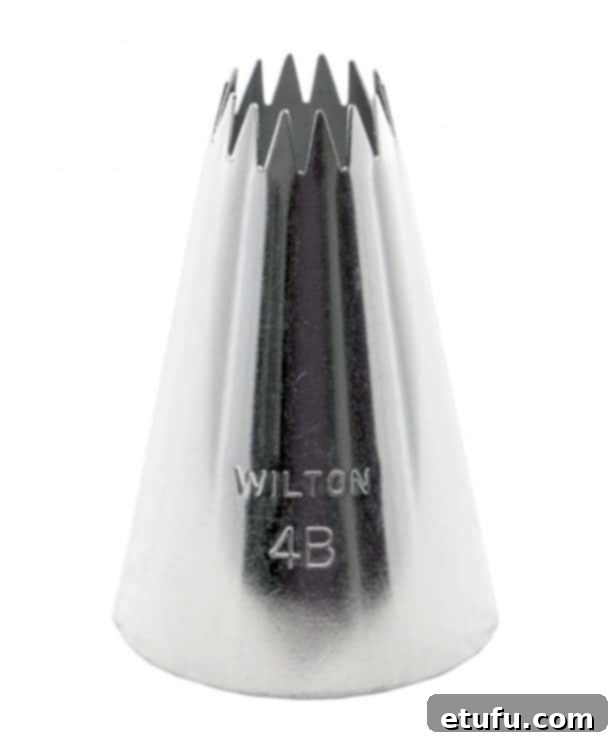
- The Right Piping Tip: We highly recommend using an open star tip with a decent-sized opening for classic rosettes. A Wilton 4B open star tip, with its 10mm opening, is an excellent choice, providing beautiful, defined ridges.

Explore various star tips for different butter shapes and designs, from tighter star patterns to more open, petal-like effects.
- Preparing the Piping Bag:
- Insert your chosen star tip into the piping bag, pushing it down firmly until it’s snug at the bottom.
- Using sharp scissors, carefully cut a hole at the very end of the bag, just large enough for the star tip’s open end to peek through.
- Crucially, ensure that no part of the plastic bag obstructs the star pattern or opening of the tip. This allows the butter to flow freely and the design to come through beautifully defined.

- Hands-Free Filling: To make filling the piping bag a breeze, especially with soft butter, place the bag inside a tall glass or mug with the tip facing downwards. Fold the sides of the bag over the rim of the glass, creating a wide opening. This frees up both your hands to easily spoon in the softened butter without making a mess.

Preparing Your Piping Surface
Having a well-prepared surface is essential for efficient piping and easy transfer of your delicate butter rosettes.
- Lined Baking Sheet: Lay a sheet of wax paper or parchment paper onto a baking sheet. For approximately 30 rosettes, a surface area of about 20cm x 30cm (roughly 8×12 inches) should be sufficient.
- Flattening the Paper: If your wax or baking paper tends to curl up, gently scrunch it into a ball, then smooth it out again. This simple trick helps the paper lie flat, providing a stable and even surface for piping.
- Easy Transfer: Using a baking tray lined with paper is incredibly practical. It allows you to easily move the entire sheet of piped rosettes to the fridge for firming up, and then back out for serving, minimizing handling and preventing damage.
**For comprehensive, step-by-step instructions on how to pipe and set your butter rosettes, please refer to the detailed recipe card below.
Creative Ways to Serve Your Butter Rosettes
Once you’ve mastered the art of piping, unleash your creativity with how you present these buttery beauties. Butter rosettes aren’t just for bread; they can accompany a variety of dishes and add a refined touch to any meal.
- Flavored Creations: Before piping, gently mix finely chopped fresh herbs (like chives, parsley, or dill) or roasted garlic into your softened butter. This adds flavor, color, and an aromatic element to your rosettes. Imagine rosemary butter rosettes with focaccia, or garlic butter rosettes with steak!
- Vintage Charm: For a truly elegant presentation, arrange the firm rosettes on the blades of vintage butter knives or small silver spoons. This adds a sophisticated, old-world charm to your table.
- Individual Pinch Bowls: Provide each guest with their own delicate pinch bowl filled with a few butter rosettes. This personal touch is both hygienic and visually appealing.
- Bread Plate Accent: Place one or two rosettes artfully around the edge of individual bread plates, offering a beautiful garnish that guests can easily access.
- Beyond Bread:
- Steak or Seafood: Place a rosette on top of a freshly grilled steak or pan-seared fish. As it melts, it will create a rich, flavorful sauce.
- Vegetables: Garnish steamed or roasted vegetables with a small rosette for an extra burst of flavor and a touch of elegance.
- Pancakes or Waffles: For a sweet twist, make honey butter rosettes or cinnamon sugar butter rosettes to serve with breakfast pastries.
- Garnish with Sprinkles: A tiny sprinkle of flaky sea salt, black pepper, or a micro-sprig of herb on top of each rosette after it’s firmed up can elevate its appearance even further.
Storage and Shelf Life
One of the many advantages of butter rosettes is their excellent shelf life, allowing you to prepare them in advance and store them for later use.
Any untouched, leftover rosettes can be easily preserved. To store them effectively, arrange single layers of rosettes in an airtight container. Place a piece of wax paper or parchment paper between each layer to prevent sticking. Properly stored, these butter rosettes can be kept in the refrigerator for up to two weeks, or frozen for up to three months.
When ready to use frozen rosettes, simply transfer them to the refrigerator a few hours before serving, or let them sit at room temperature for 15-30 minutes, depending on the desired softness. They will thaw beautifully, ready to impress once more.
Explore Flavorful Butter Variations
While plain butter rosettes are delightful, the real fun begins when you start experimenting with compound butters. Compound butters are simply softened butter mixed with various herbs, spices, citrus zests, or other savory and sweet ingredients. This allows you to create rosettes that perfectly complement your specific meal or occasion.
- Herb Butter: Finely chop fresh herbs like rosemary, thyme, chives, parsley, or basil and mix them into softened butter. Add a touch of minced garlic or lemon zest for extra zing. This is fantastic with grilled meats, roasted vegetables, or a warm baguette.
- Roasted Garlic Butter: Roast whole garlic cloves until soft and sweet, then mash them and mix into your butter. This creates a deeply flavorful butter that’s sublime with anything from steak to pasta. You can find a recipe for Homemade Roasted Garlic Butter here.
- Lemon Herb Butter: Combine lemon zest, a squeeze of lemon juice, and finely chopped herbs for a bright and zesty butter that pairs wonderfully with fish and chicken.
- Spicy Chili Butter: Mix in a pinch of chili flakes, smoked paprika, or a dash of hot sauce for a butter with a kick. Great for corn on the cob or as a spread for spicy sandwiches.
- Honey Cinnamon Butter: For a sweet option, blend honey and ground cinnamon into your softened butter. Perfect for breakfast items like pancakes, waffles, or toast. You can even add a tiny bit of brown sugar for extra sweetness and texture.
- Sun-Dried Tomato & Basil Butter: Finely chop sun-dried tomatoes and fresh basil, then combine with butter. This Mediterranean-inspired butter is excellent with Italian breads or as a base for bruschetta.
Remember to taste your compound butter before piping to adjust seasonings. The possibilities are endless, limited only by your imagination!
Discover More Delicious Spreads and Sauces
If you enjoy elevating your meals with homemade spreads, explore these other fantastic recipes from our kitchen:
- Homemade Roasted Garlic Butter Recipe
- Easy Beetroot Hummus
- Easy Pistachio Pesto
- Rocket Pesto Recipe – Plus 25 Ways to Use It
Recipe: How to Make Butter Rosettes

How to Make Butter Rosettes
Butter rosettes are small portions of butter piped into a beautiful flower-like shape. They add a touch of elegance when served with bread rolls or a special loaf of bread, allowing each guest to enjoy their own individual, fancy butter portion, presented on a knife or in a small bowl.
Rating: 5 out of 5 stars from 47 votes
Print Recipe
Course: Side Dish
Cuisine: International
Prep Time: 10 minutes
Total Time: 10 minutes
Servings: 30 rosettes
Calories: 36 kcal per rosette
Author: Maretha Corbett
Equipment
- 1 open star piping tip, 10mm opening (e.g., Wilton 4B)
- 1 piping bag
- Baking sheet
- Parchment or wax paper
- Spatula or fork
- Tall glass or mug (for filling bag)
Ingredients
- 150 grams (approximately 2/3 cup or 1 stick + 2 tablespoons) salted butter
- A pinch of salt (only if using unsalted butter)
- Optional: finely chopped herbs, minced garlic, citrus zest, or spices for flavored butter
Instructions
- Allow the butter to soften at room temperature for a few hours until it reaches the consistency of soft buttercream or thick toothpaste. For quicker softening, refer to the tips in the “Mastering the Butter” section above.
- Once softened, use a fork or spatula to vigorously squash and mix the butter until it is completely smooth and pliable, with no lumps. This is essential for consistent piping.
- Prepare your piping surface by placing a sheet of wax paper or baking paper (approximately 20cm x 30cm) on a small baking tray. If the paper curls, scrunch and then flatten it to make it lay flat.
- To prepare the piping bag, insert the star tip into the bottom. Cut a hole at the end of the bag, ensuring it’s wide enough for the entire opening of the star tip to be visible and unobstructed by the bag material.
- To make filling easier, place the piping bag inside a tall glass or mug, folding the top edges of the bag over the rim. This holds the bag open and steady.
- Carefully spoon all the softened butter into the prepared piping bag.
- Remove the bag from the glass. If the butter hasn’t reached the tip, lay the bag flat on a clean counter and use a flat object (like a ruler or a Tupperware lid) to gently push the butter down towards the tip.
- Twist the top of the piping bag tightly to keep the butter concentrated towards the tip and maintain even pressure.
- Begin piping small rosettes onto the baking paper. Hold the bag perpendicular to the surface. Apply steady, even pressure, squeezing until the rosette reaches your desired size. Then, stop squeezing and lift the tip straight up to cleanly break away from the butter. Repeat this process until all the butter is used.
- If you make any mistakes or uneven rosettes, simply scrape the butter off the paper and place it back into the piping bag to re-pipe.
- Once all rosettes are piped, carefully place the baking tray into the refrigerator to allow the butter to firm up completely. This will make them easier to handle and serve.
- To serve, gently slide a thin knife or spatula underneath each firm butter rosette and lift it off the paper. They should come off easily without resistance. Arrange as desired on serving knives, in small bowls, or on plates.
**Nutritional Data Disclaimer**
Please note that the nutritional information provided below is an estimate calculated by a third party. We cannot guarantee its absolute accuracy and do not take responsibility for any errors. The nutritional value may vary based on specific brands and products used. For personalized dietary advice, we recommend consulting a qualified healthcare professional or registered dietitian.
Nutrition Facts (per rosette)
Calories: 36 kcal | Carbohydrates: 0.003g | Protein: 0.04g | Fat: 4g | Saturated Fat: 3g | Polyunsaturated Fat: 0.2g | Monounsaturated Fat: 1g | Trans Fat: 0.2g | Cholesterol: 11mg | Sodium: 32mg | Potassium: 1mg | Sugar: 0.003g | Vitamin A: 125IU | Calcium: 1mg | Iron: 0.001mg
For important food safety advice, including guidance on food allergies, please consult official food safety resources.
