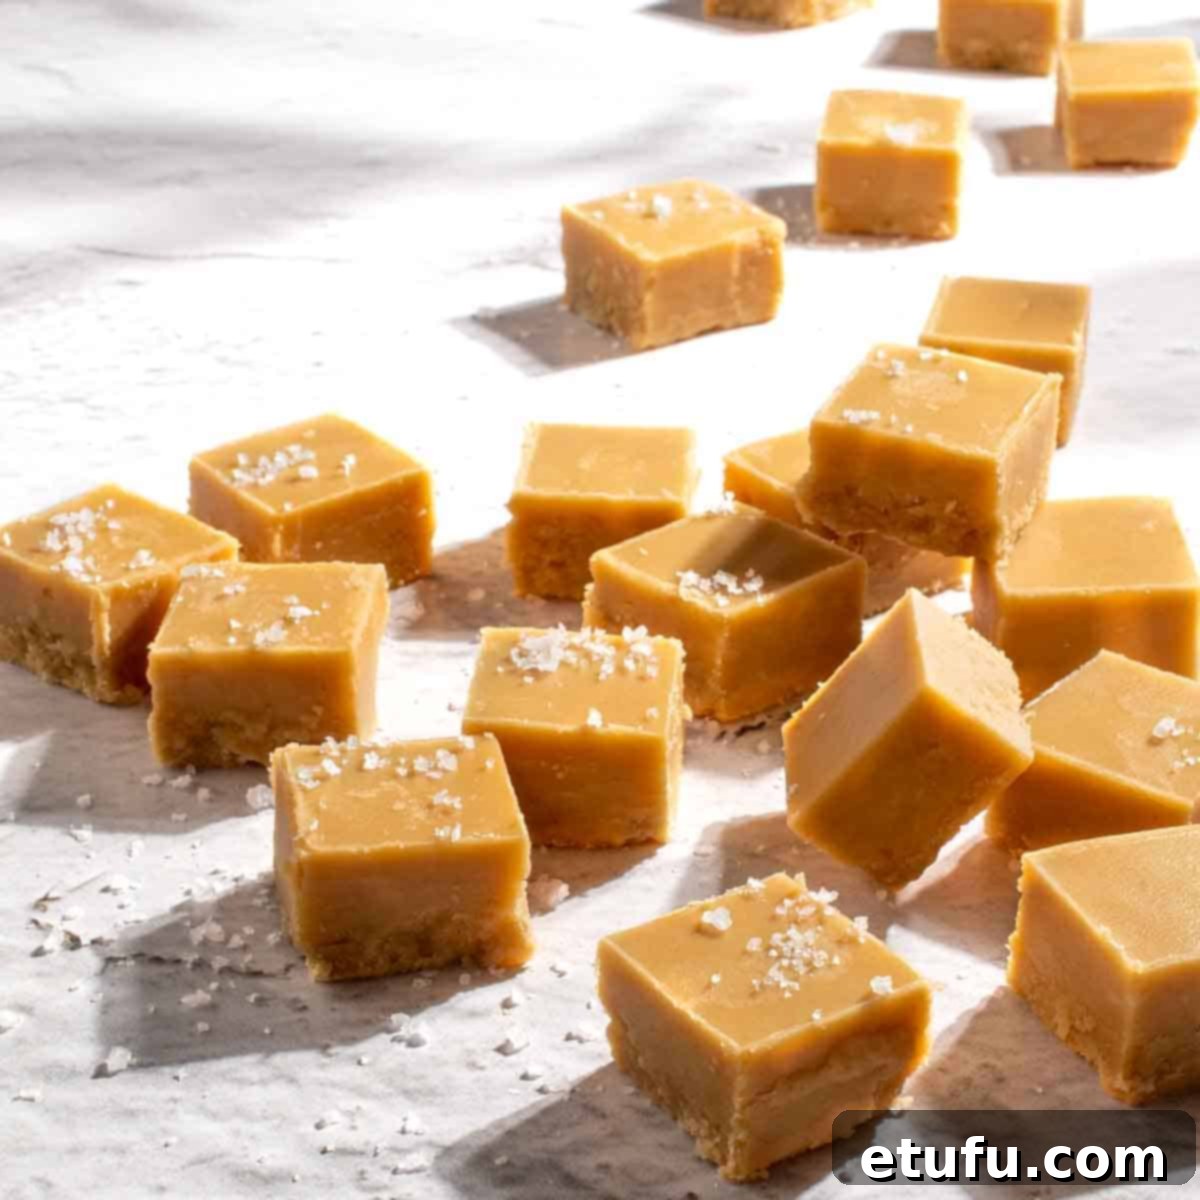
Easy 4-Ingredient Microwave Peanut Butter Fudge: Velvety Smooth & Quick
Prepare to revolutionize your dessert game with this incredibly easy 4-ingredient microwave peanut butter fudge recipe. Forget the traditional, time-consuming methods; this recipe promises smooth, creamy, and rich fudge in mere minutes. It’s the perfect solution for anyone craving a quick sweet treat without the fuss.
This simple peanut butter fudge comes together so fast in the microwave that you might even finish it before your coffee cools down! It’s an absolute game-changer for busy home bakers and dessert enthusiasts alike. Unlike some microwave fudge recipes that can turn out gritty or disappointing, this fool-proof method guarantees a velvety texture every single time, making it a true stand-out.
The secret to its success lies in using icing sugar (also known as powdered or confectioner’s sugar), which effortlessly blends into the other ingredients, ensuring that signature melt-in-your-mouth smoothness. Say goodbye to sugar crystals and hello to pure fudge perfection!
For those who love easy homemade sweets, explore more delightful recipes such as this classic Coconut Ice with Condensed Milk or these luxurious Date Balls.
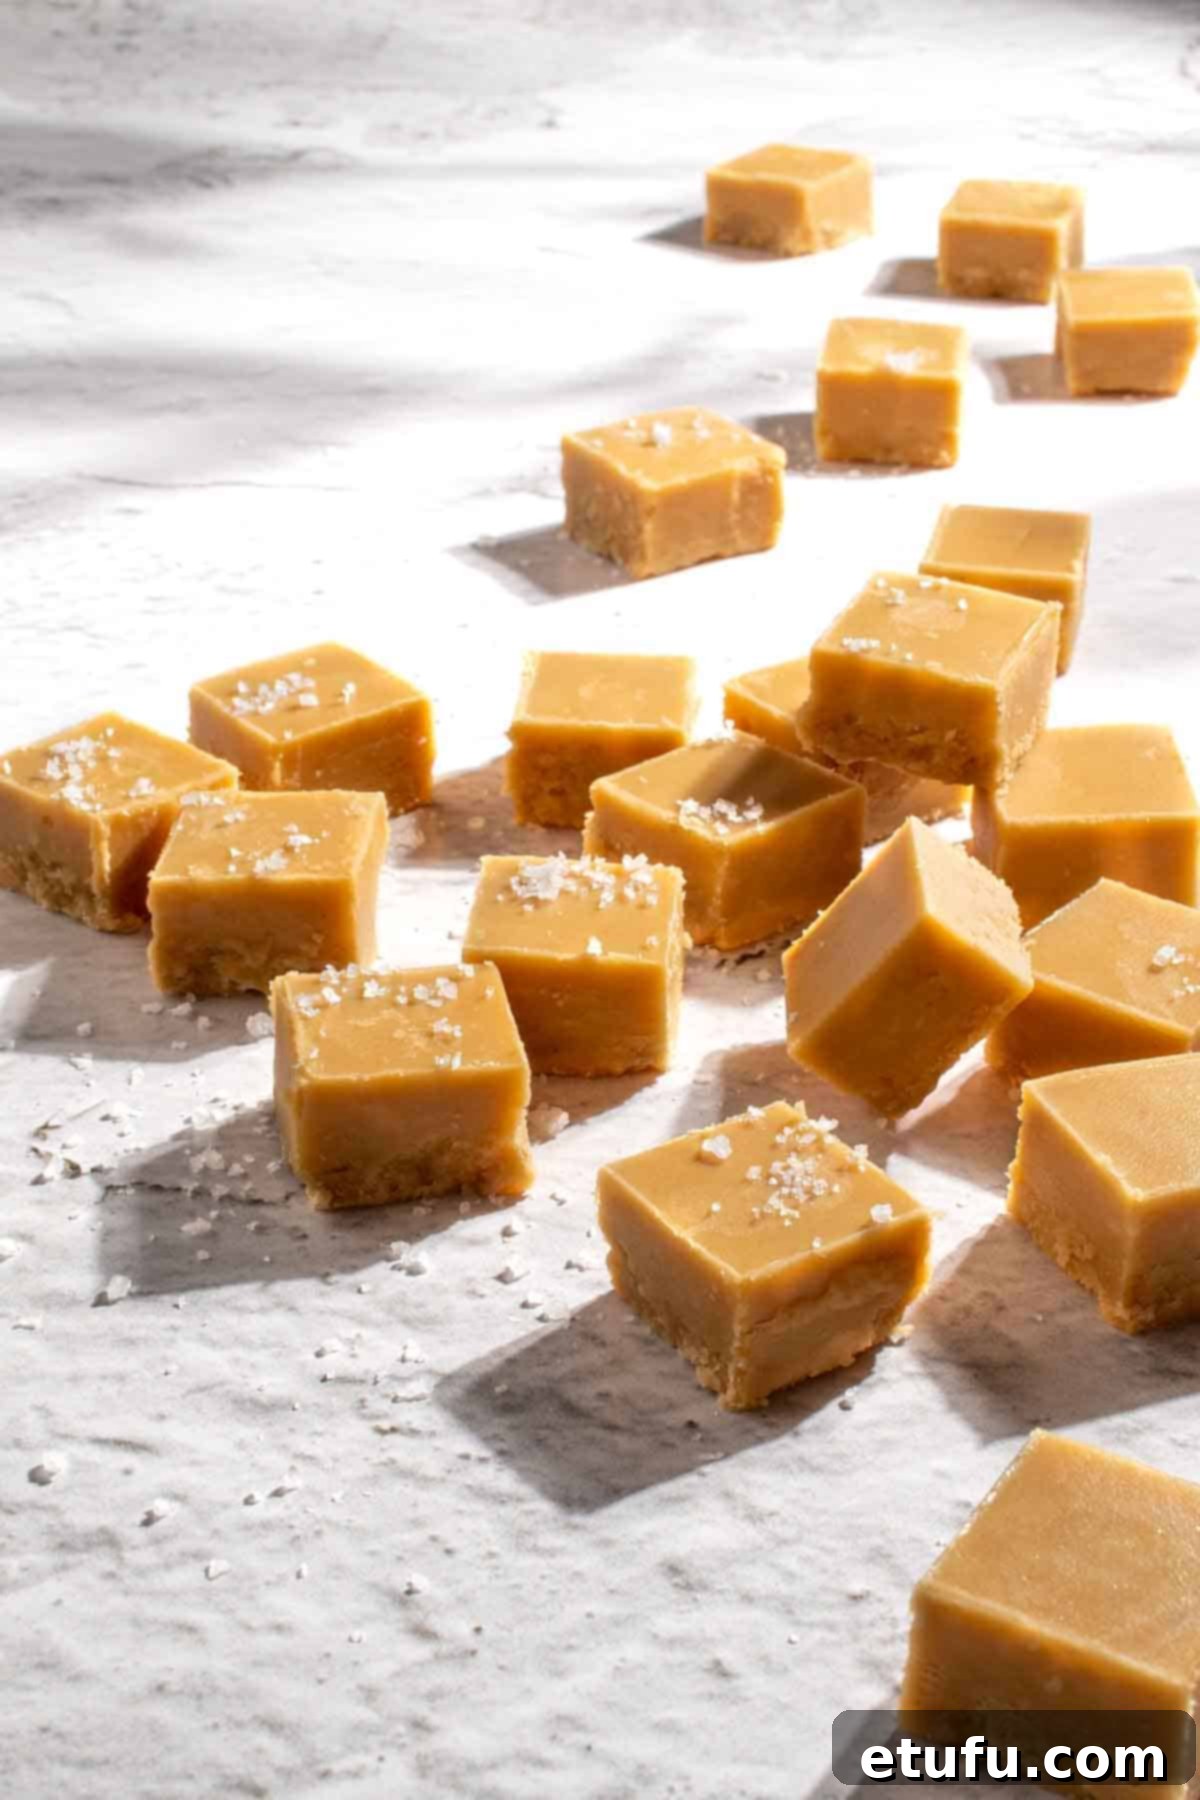
Why You’ll Adore This Microwave Peanut Butter Fudge Recipe
This isn’t just another fudge recipe; it’s a culinary triumph in simplicity and flavor. Here’s why this microwave peanut butter fudge will quickly become your new go-to:
- Minimal Ingredients: With only four basic ingredients, you won’t need to make a special trip to the store. Chances are, you already have everything you need in your pantry! This makes it incredibly accessible for spontaneous baking sessions.
- Lightning-Fast Prep: Requiring just 5 minutes of active preparation time, this recipe is perfect for busy individuals or when you need a quick dessert fix. The microwave does most of the heavy lifting, saving you valuable time.
- A Peanut Butter Lover’s Dream: If you’re a devotee of all things peanut butter, this fudge is tailor-made for you. It boasts an intense, creamy peanut butter flavor that will satisfy any craving.
- Fool-Proof Simplicity: No tricky steps, no complex techniques. This recipe is designed for success, even for beginner bakers. It’s truly hard to mess up, ensuring beautiful results every time.
- Customizable Peanut Butter: Whether you prefer the silky texture of smooth peanut butter or the delightful crunch of its counterpart, this recipe accommodates your preference. Feel free to use your favorite!
- Endless Mix-Ins and Toppings: This fudge is a fantastic base for creativity. Easily incorporate mix-ins like chocolate chips, chopped nuts, or a sprinkling of flaky sea salt to elevate its flavor and texture.
- Velvety Smooth Texture: The star ingredient – icing sugar – guarantees a luxuriously smooth, non-gritty texture that many other microwave fudge recipes fail to achieve. Prepare for a truly decadent experience.
- No Candy Thermometer Needed: Forget about precise temperature monitoring and special equipment. This recipe eliminates the need for a candy thermometer, simplifying the process significantly.
- Perfect for Gifting: Homemade fudge makes for a thoughtful and delicious gift. Its quick preparation time means you can whip up batches for friends, family, or holiday gatherings without stress.
- Kid-Friendly: The straightforward steps make this a great recipe to involve children in the kitchen, fostering a love for baking from an early age.
Essential Ingredients & Smart Substitutions for Perfect Fudge
Achieving that perfect, creamy microwave peanut butter fudge comes down to understanding the role of each of our four simple ingredients. While the recipe is incredibly forgiving, these notes will help you get the best results.
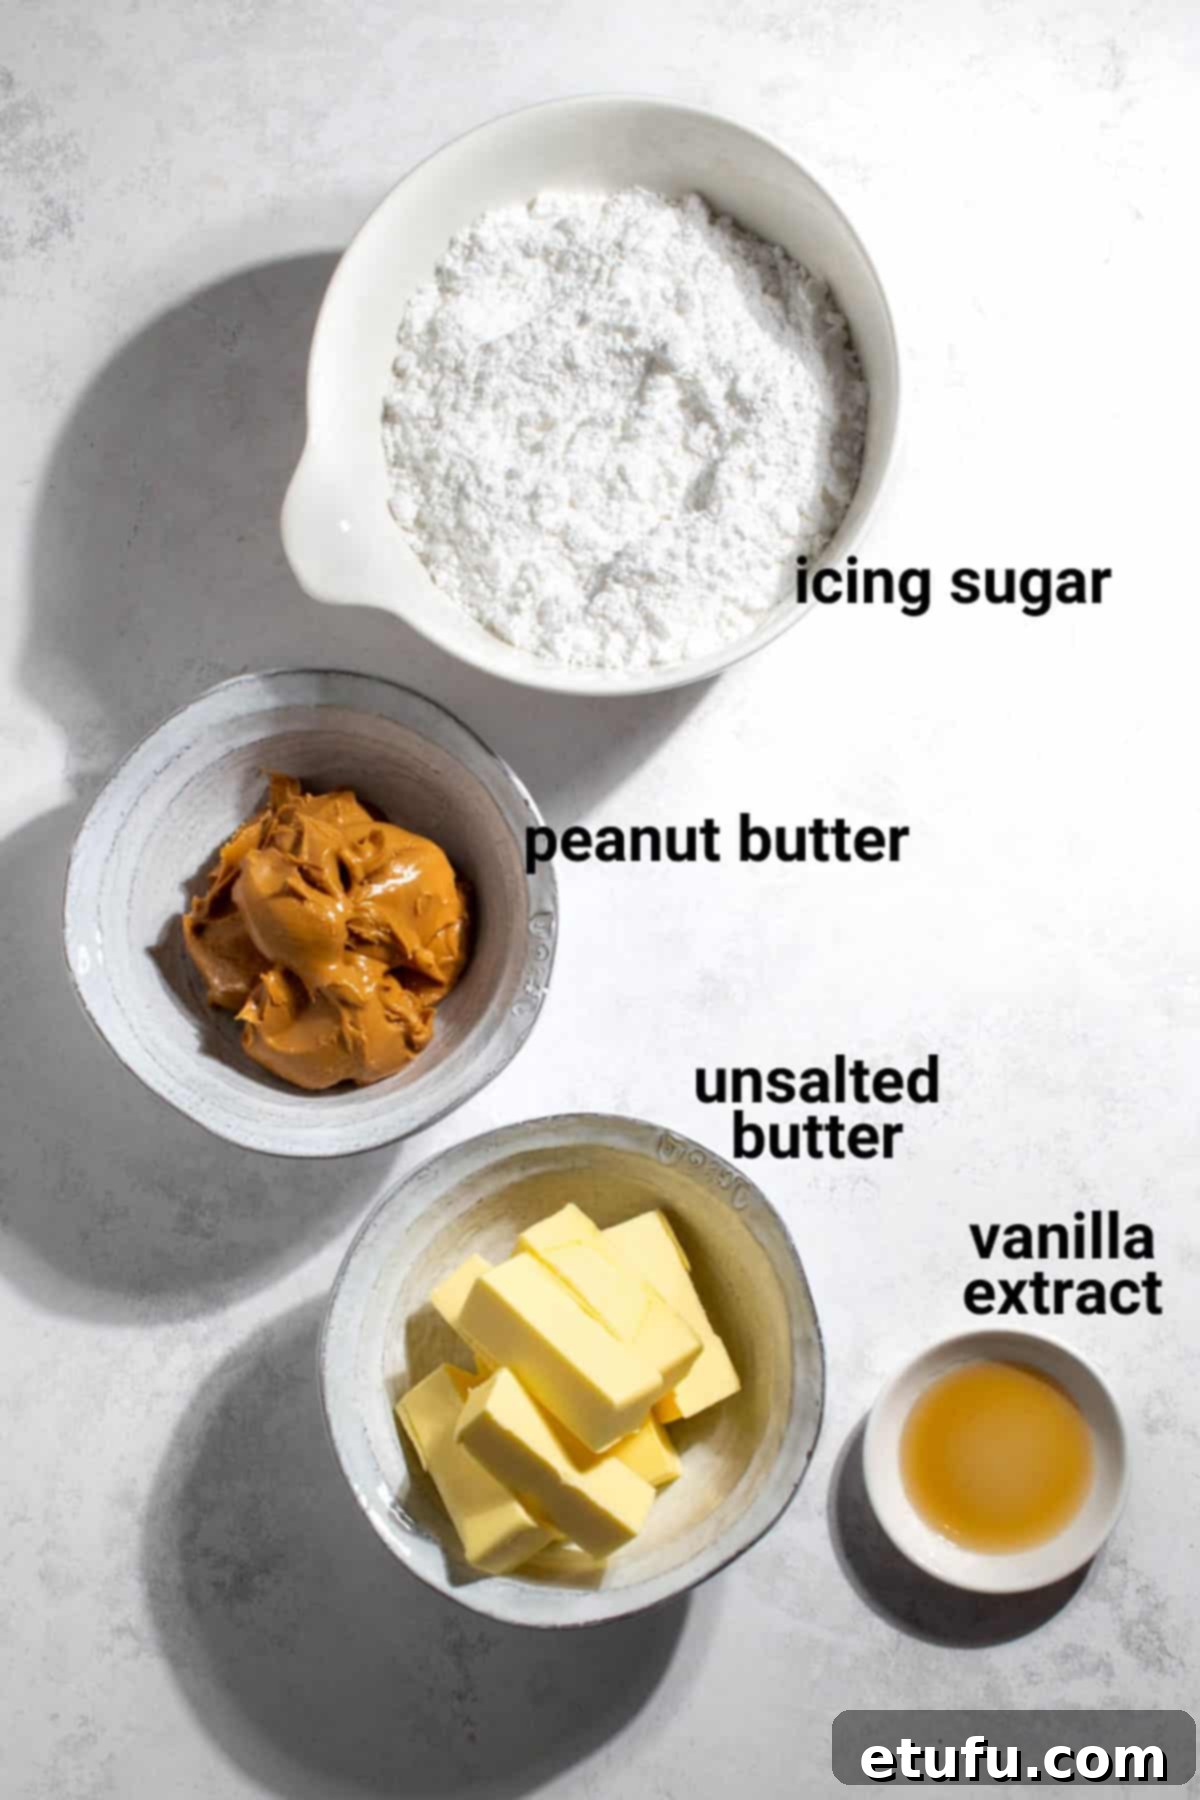
Peanut Butter
For this recipe, we typically opt for smooth peanut butter, as it contributes significantly to the fudge’s desired velvety and creamy texture. The fine consistency helps create a uniform, melt-in-your-mouth experience. However, if you prefer a bit of textural contrast and a more robust bite, feel free to use crunchy peanut butter. Avoid using natural peanut butter that separates easily, as its oil content can sometimes affect the fudge’s setting and texture. If you’re exploring alternatives, almost any other creamy nut butter like almond butter or cashew butter can be substituted, though the flavor profile will naturally change. Ensure they are well-stirred if using natural varieties.
Butter
When it comes to butter, unsalted butter is our top recommendation. Peanut butter often contains a fair amount of sodium on its own, so using unsalted butter allows you to control the overall saltiness of your fudge, preventing it from becoming overly savory. If all you have on hand is salted butter, you can still use it, but be mindful of any additional salt you might consider adding (e.g., a sprinkle of sea salt on top), as the fudge will already have a slightly saltier base. Margarine can be used in a pinch, but for the richest flavor and best texture, real butter is always preferred.
Vanilla Extract
A generous splash of vanilla extract is essential for adding a beautiful depth and warm aroma to the fudge. It enhances the sweet and nutty notes of the peanut butter, creating a more complex and inviting flavor profile. Don’t skip it! If you’re feeling adventurous, you could experiment with other extracts like almond extract for a marzipan-like nuance, or a hint of maple extract for a different autumnal twist.
Icing Sugar
This is truly the secret weapon for achieving that signature smooth, non-gritty fudge texture. Also known as powdered sugar or confectioner’s sugar, icing sugar is finely milled, allowing it to dissolve seamlessly into the warm butter and peanut butter mixture. Unlike granulated sugar, which can recrystallize and create a grainy texture, icing sugar ensures a flawlessly smooth finish. We highly recommend sifting the icing sugar if you can, as this will prevent any small lumps from forming in your final fudge. If you don’t have a sieve or prefer not to sift, make sure to thoroughly break up any visible lumps with a fork or whisk before combining it with the melted ingredients. This extra step will save you from potential grainy surprises and ensure a perfectly smooth batch of fudge.
Step-by-Step: Crafting Your Perfect Microwave Peanut Butter Fudge
Creating this delicious peanut butter fudge is surprisingly simple, thanks to the magic of your microwave. Follow these easy steps for a flawless batch:
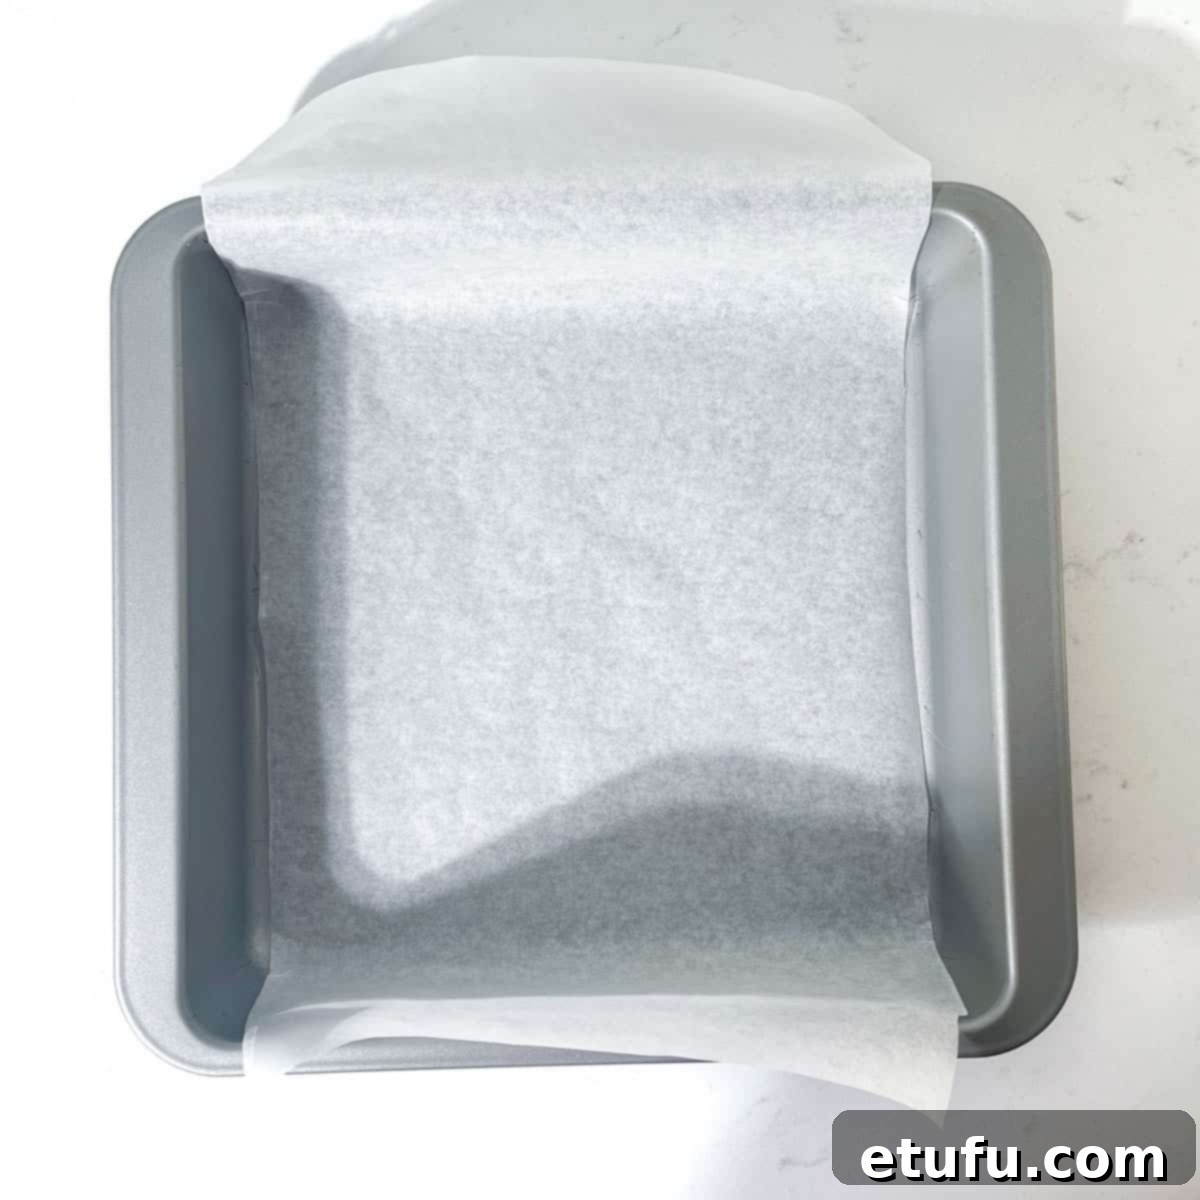
- Prepare Your Pan: First, take a 20cm/8-inch square tin and line it completely with parchment paper. Ensure you leave a generous overhang on all sides. This makes it incredibly easy to lift the set fudge out of the pan later, ensuring a clean removal and minimal mess.
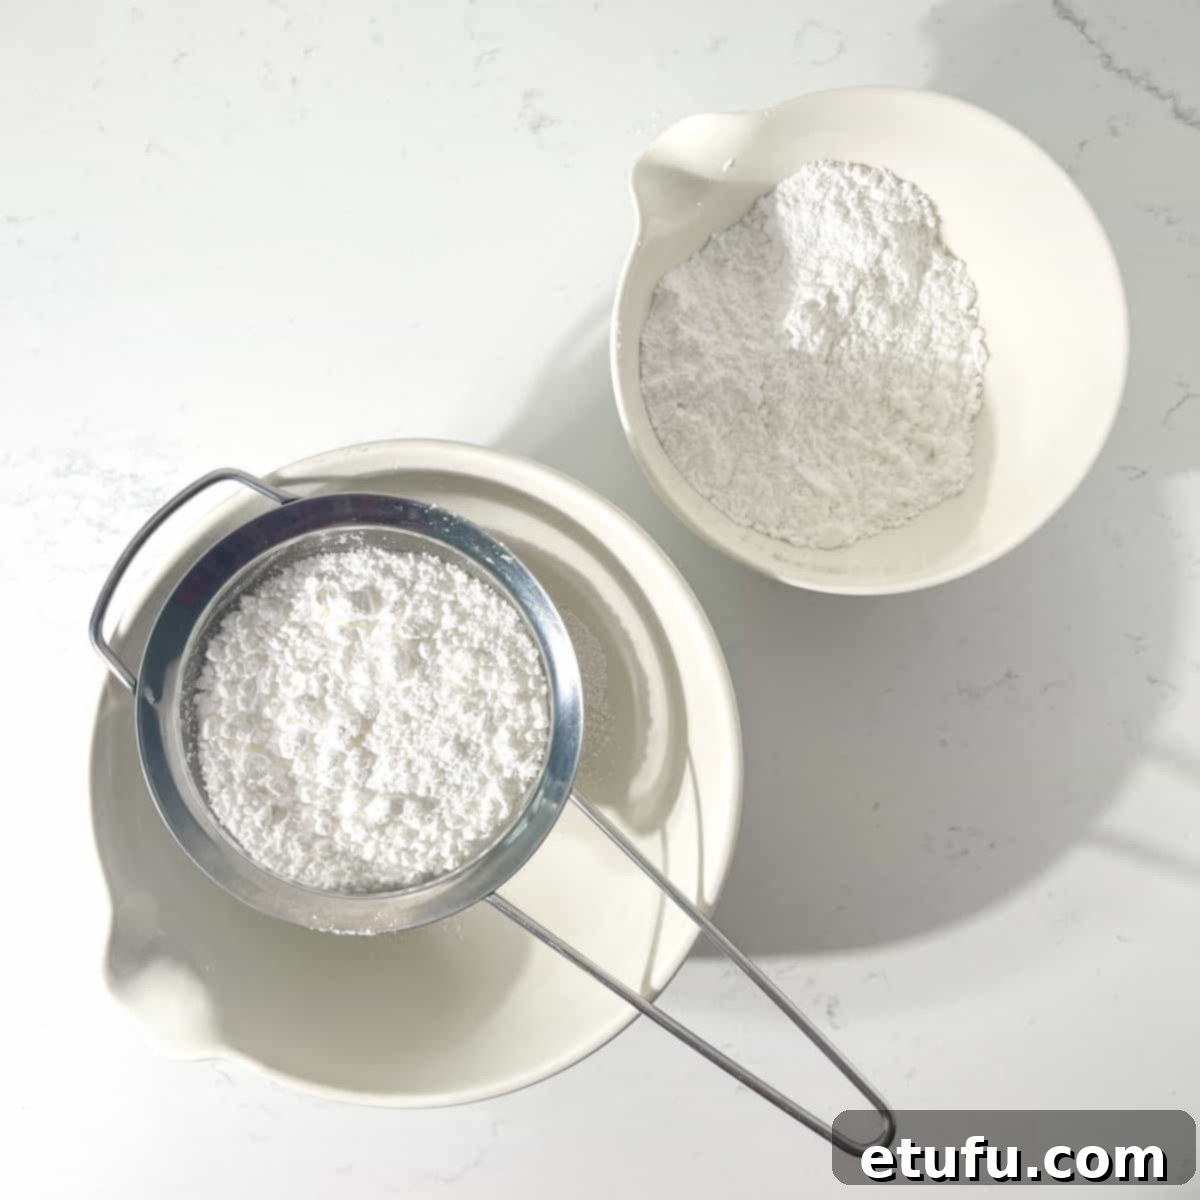
- Prepare the Icing Sugar: Next, sift the icing sugar into a large mixing bowl. Sifting is highly recommended as it breaks up any small lumps, contributing to that ultra-smooth texture. If you don’t have a sieve or choose not to sift, at least use a fork or whisk to thoroughly break up any visible lumps in the sugar before proceeding. This step is crucial for preventing a grainy fudge.
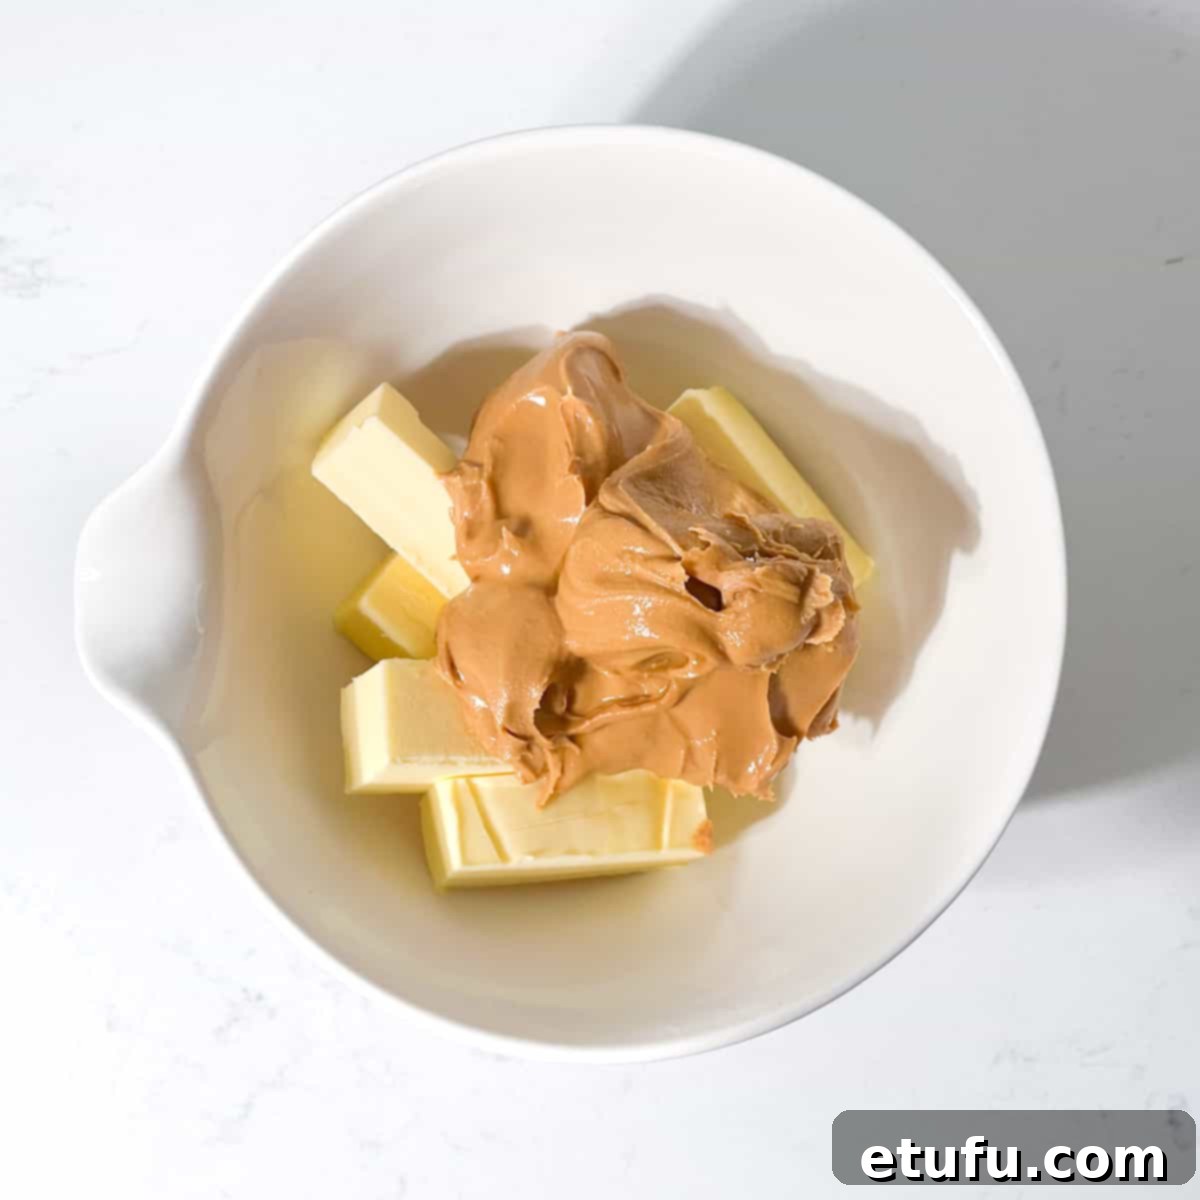
- Melt the Wet Ingredients: In a separate, microwave-safe bowl, combine the unsalted butter, peanut butter, and vanilla extract. Ensure your bowl is large enough to contain the mixture once melted and for stirring.
- Microwave the Mixture: Place the bowl in the microwave and heat for 2 minutes. Pause halfway through (at the 1-minute mark) to stir the mixture. This helps the ingredients melt evenly and prevents scorching. Continue heating until the mixture is completely melted and has a smooth, liquid consistency.
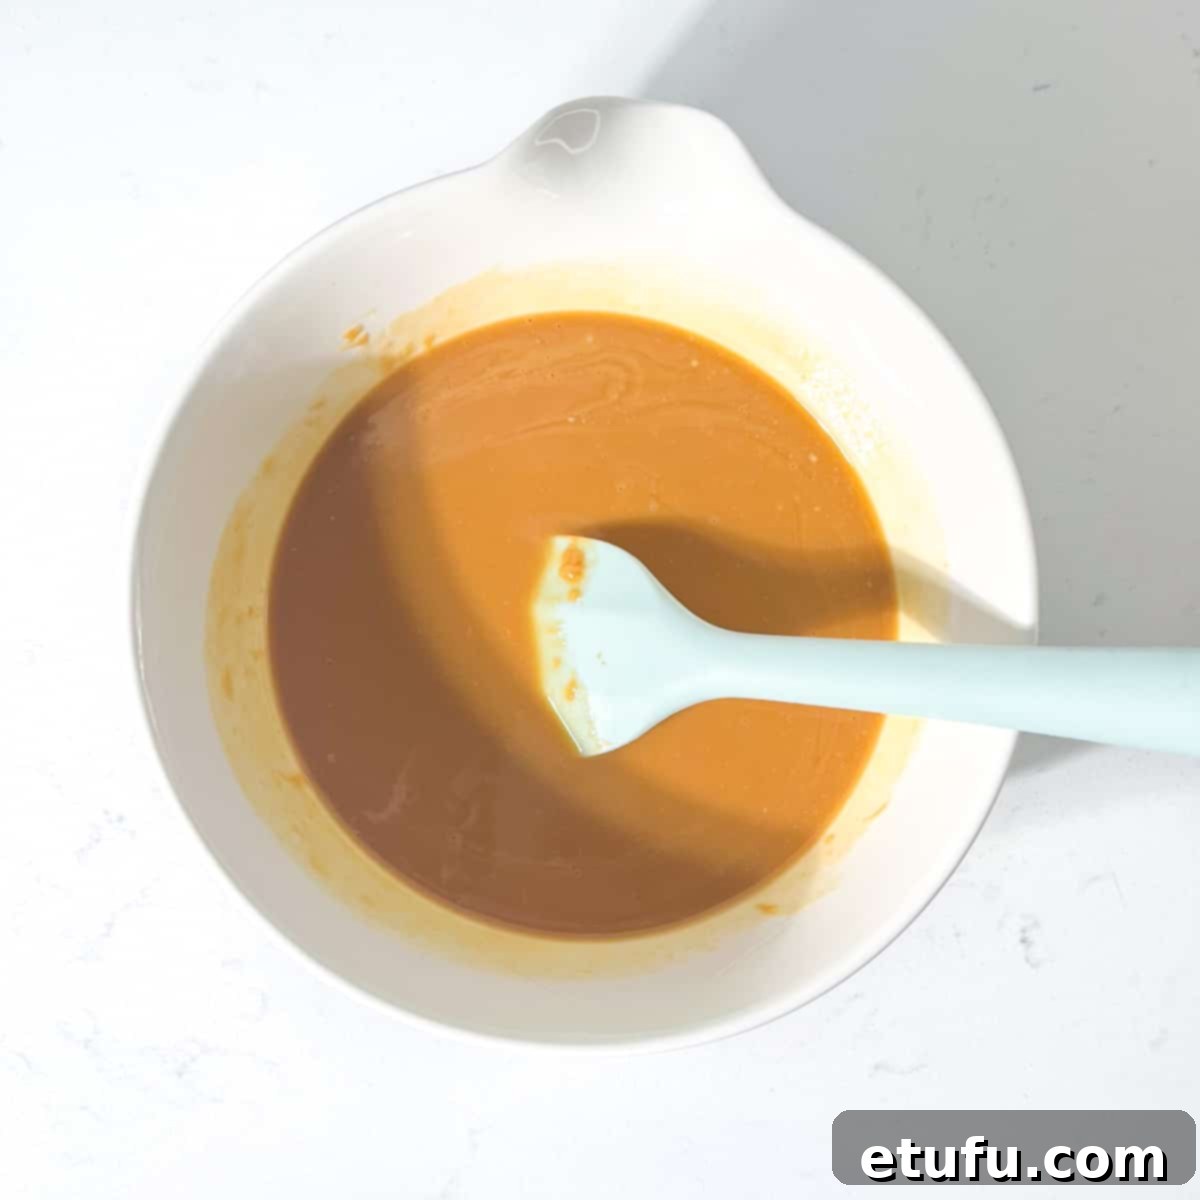
- Stir Until Combined: Once melted, give the mixture a final, good stir with a spatula or spoon until all the ingredients are thoroughly combined and perfectly smooth. There should be no visible streaks or separated elements.
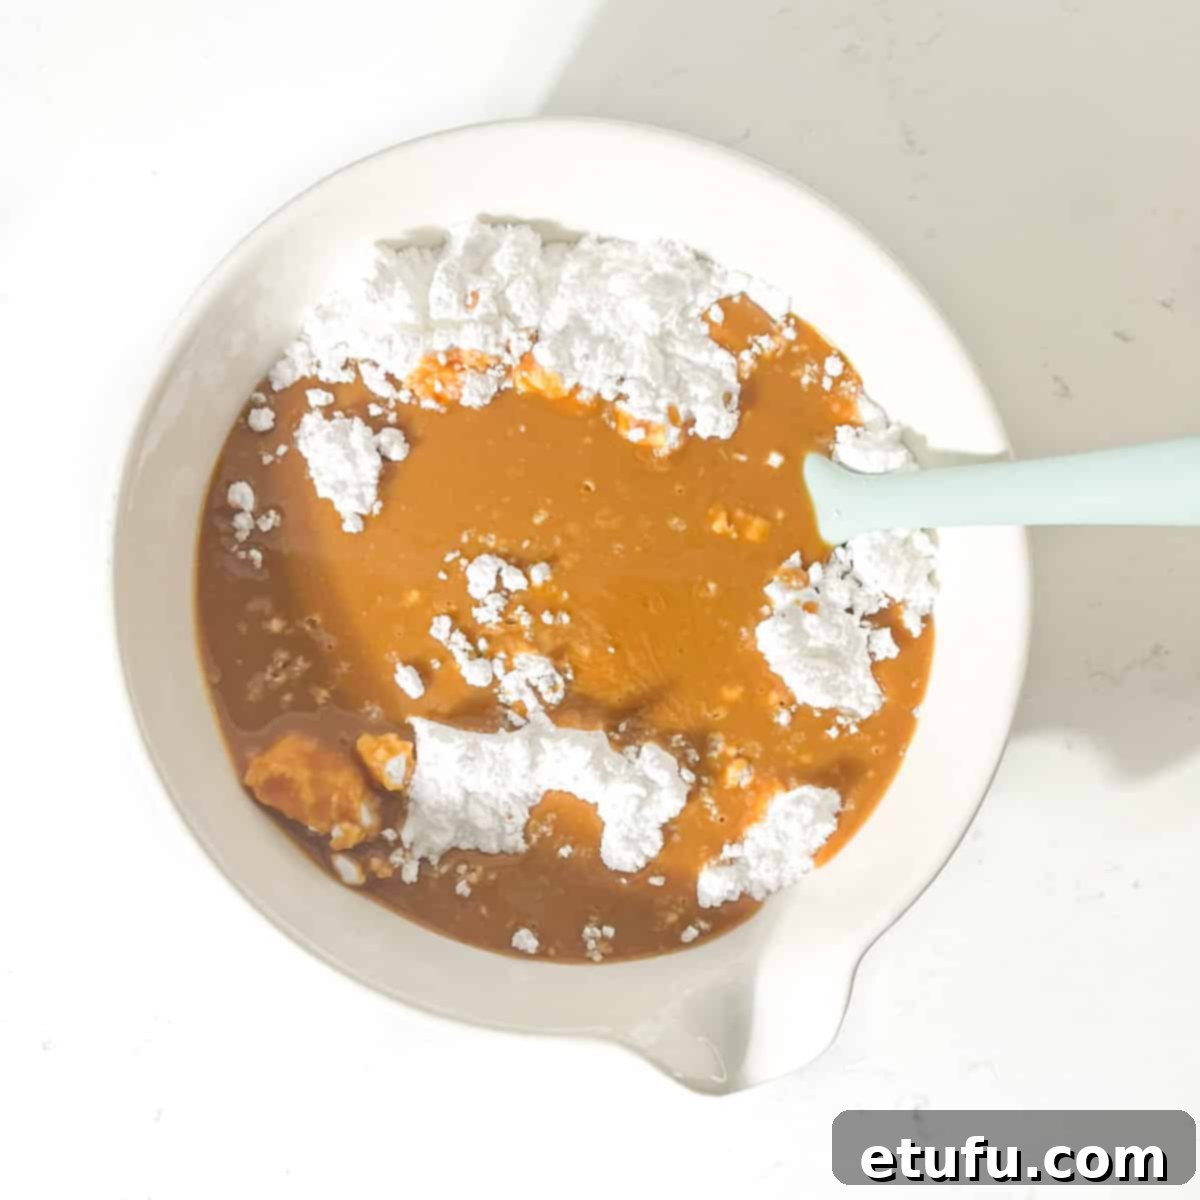
- Combine with Icing Sugar: Carefully pour this warm, melted peanut butter mixture into the large bowl containing the sifted icing sugar.
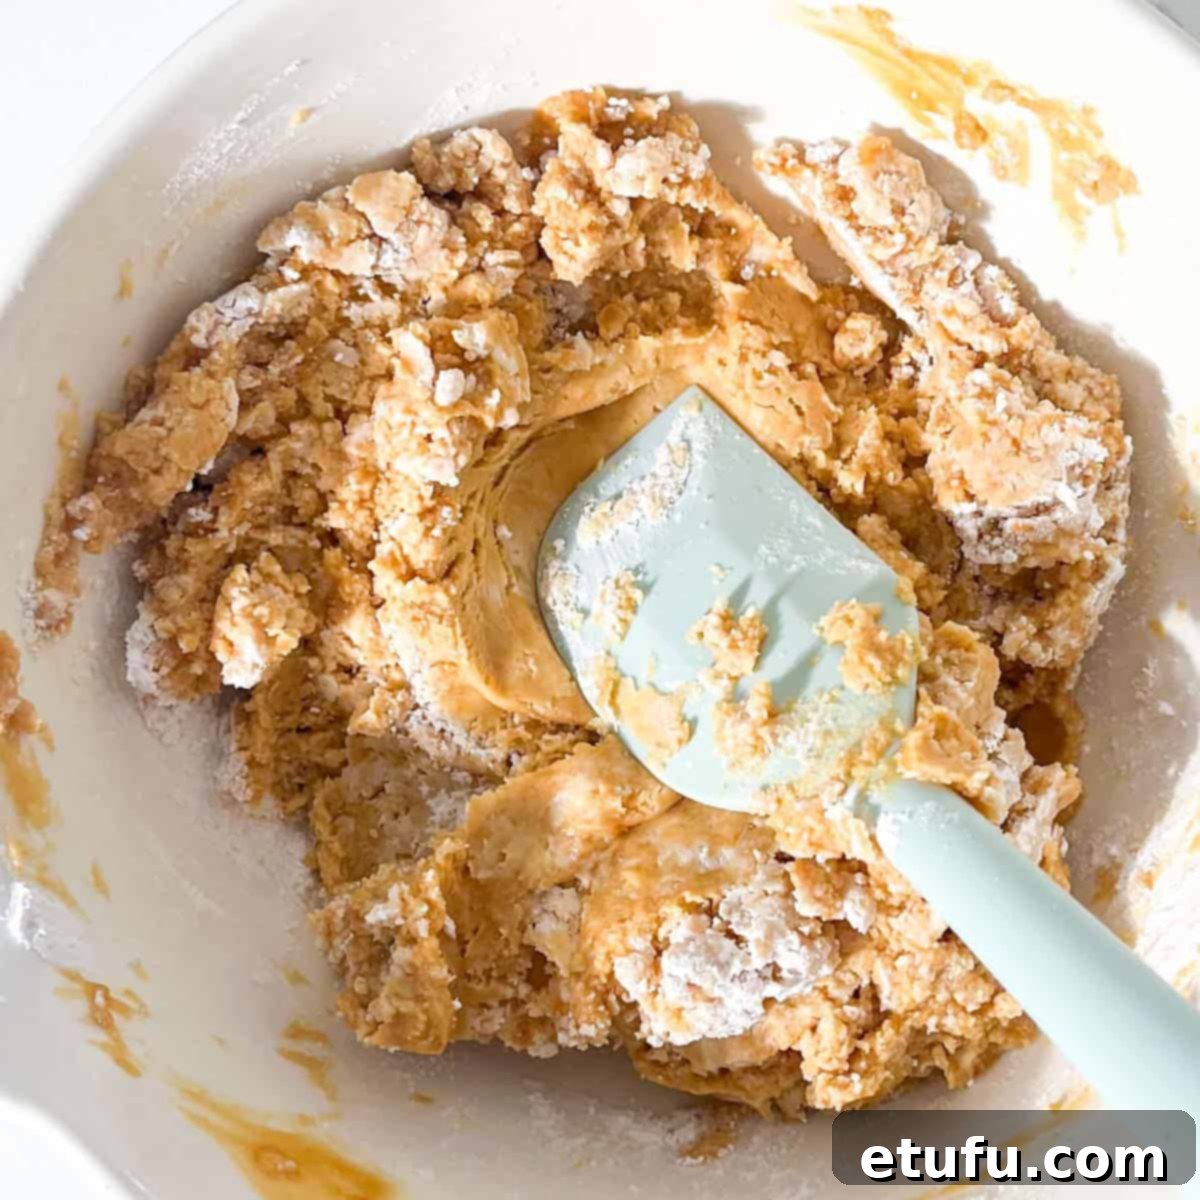
- Mix Thoroughly: Stir everything together vigorously. Make sure to fully incorporate all of the icing sugar, scraping the bottom and sides of the bowl to catch any dry bits. A “squishing motion” with your spatula or spoon can be very effective in pressing the icing sugar into the warm, melted mixture, ensuring a homogenous blend. Continue mixing until you achieve a perfectly even, smooth, and lump-free fudge texture throughout. The mixture should be thick and glossy.
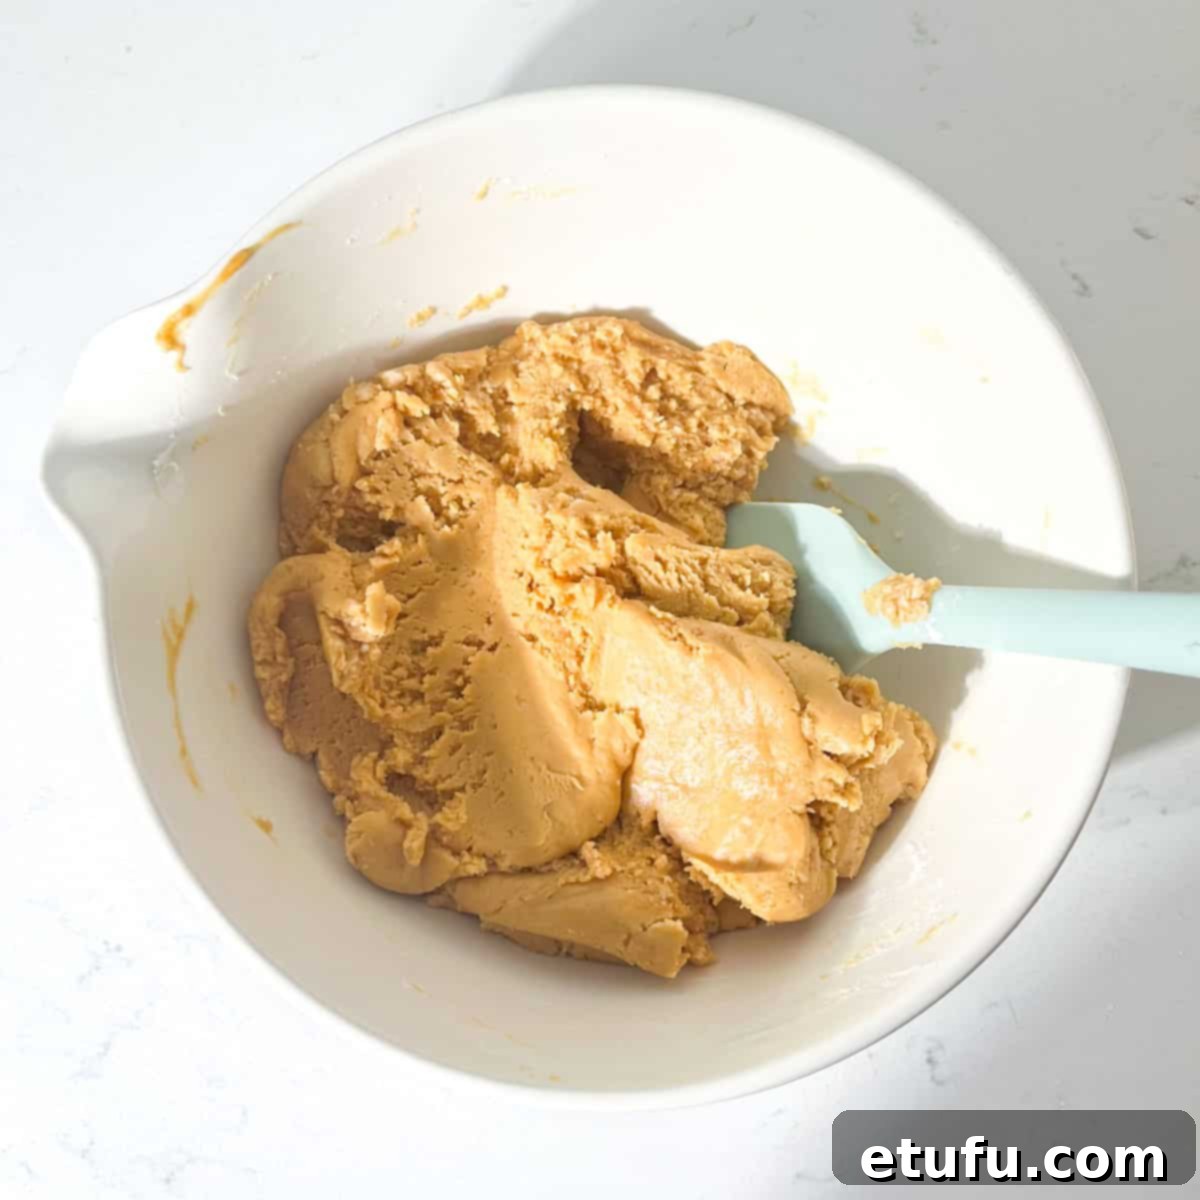
- Transfer to Pan: Spoon the fudge mixture into your prepared tin, ensuring it fills the pan evenly.
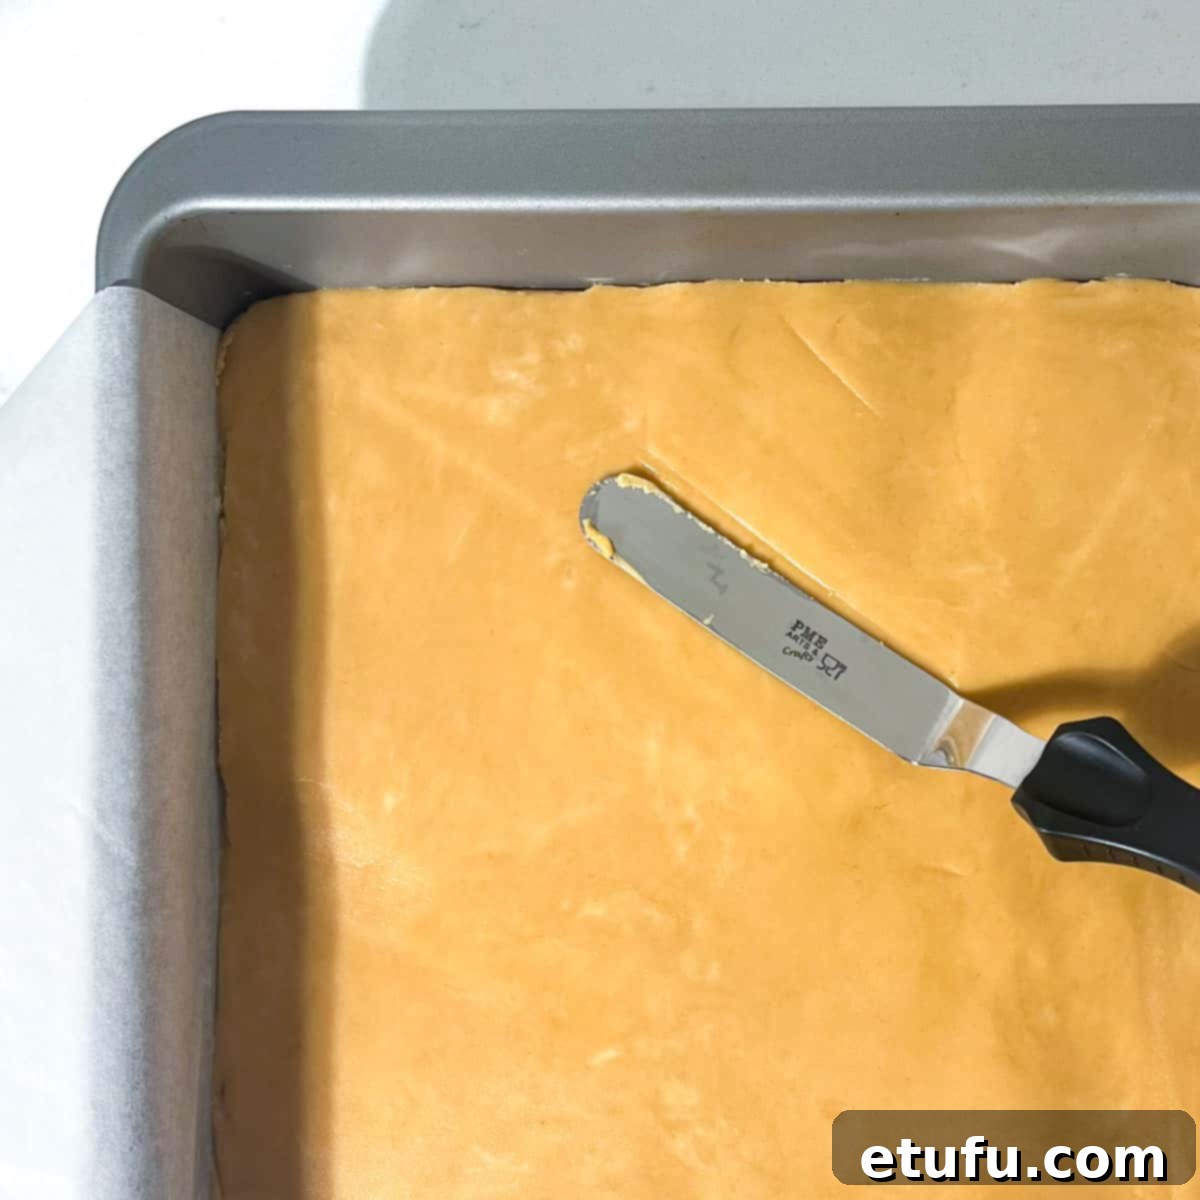
- Smooth the Surface: Gently push the fudge into all the corners of the tin and level off the top to create a smooth, even surface. An offset spatula works wonderfully for this, but the back of a spoon or a small knife will also do the trick.
- Chill to Set: Cover the tin with plastic wrap or aluminum foil and place it in the fridge for at least 1 hour to firm up and cool down completely. For the best, easiest slicing and firmest texture, letting it chill for several hours or even overnight is ideal.
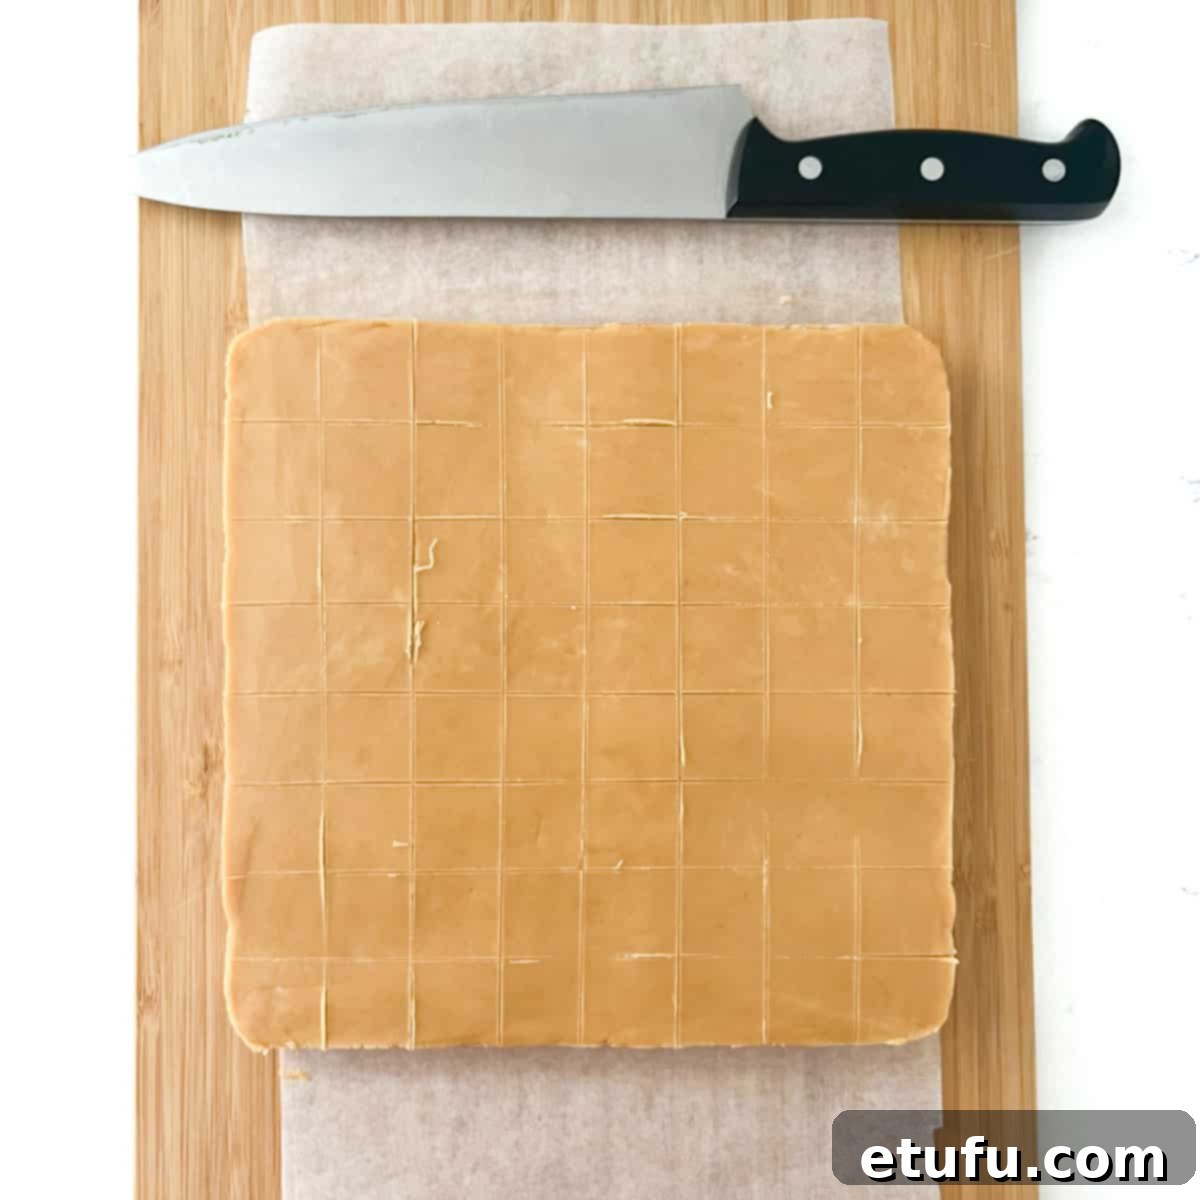
- Score and Slice: Once the fudge is fully set, use the parchment paper overhang to carefully lift the entire slab onto a cutting board. Gently score lines on top where you intend to slice your pieces. This helps guide your knife for neat, uniform cuts.
- Cut into Pieces: Slice the fudge into your desired size. If you aim for 8×8 strips, you’ll yield approximately 64 small, bite-sized squares, perfect for sampling or sharing. For larger, more substantial pieces, cut into 6×6 strips for about 36 squares. For the cleanest cuts, use a large, sharp kitchen knife and wipe it clean between slices.
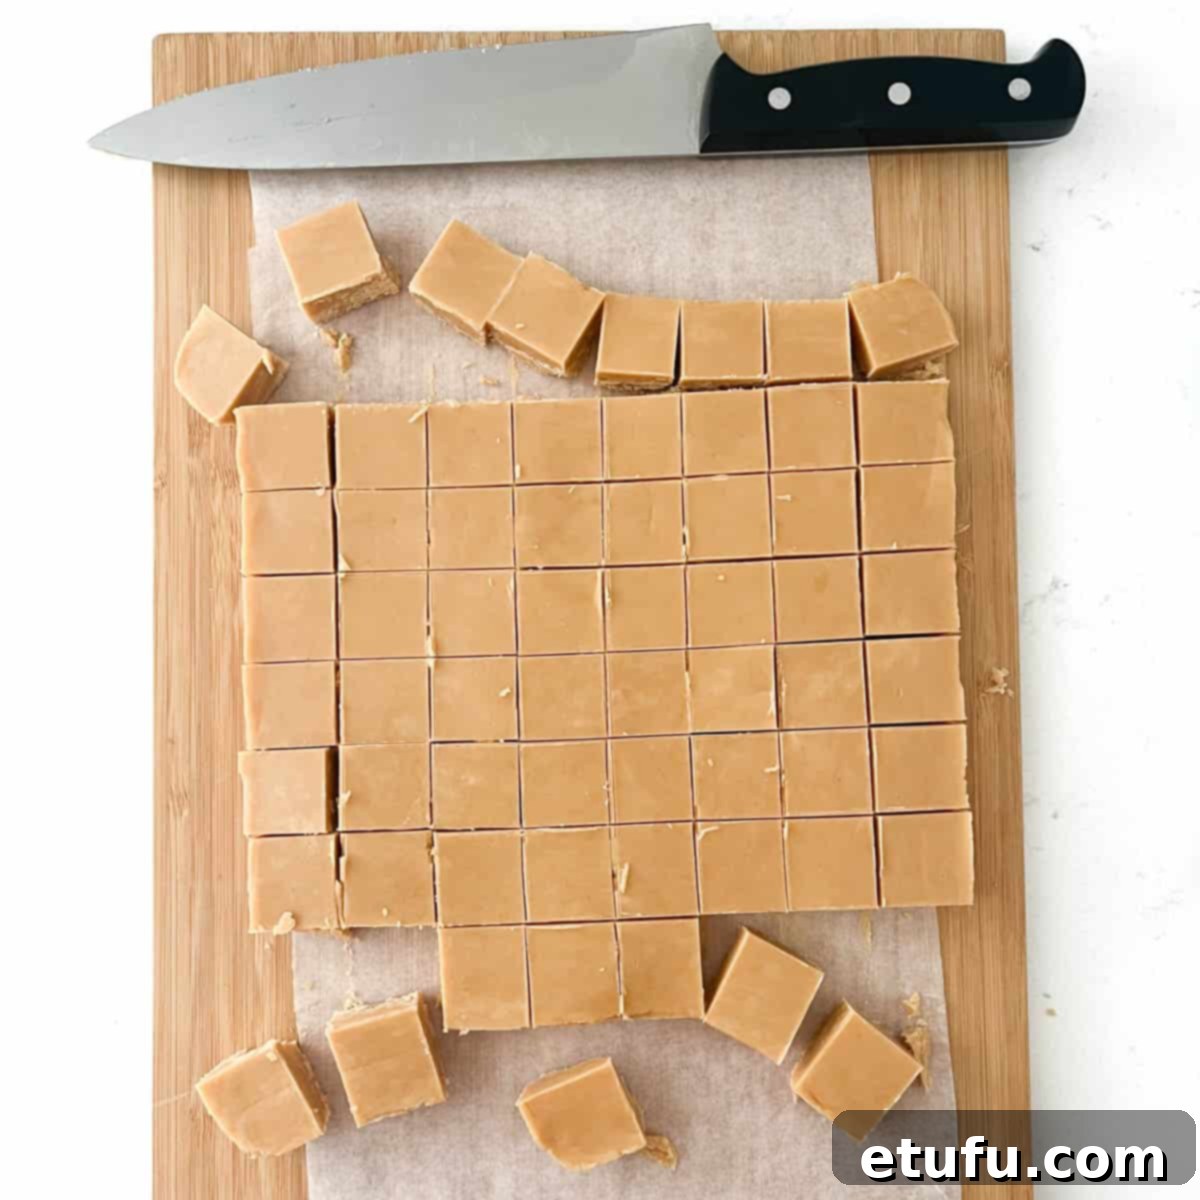
Creative Variations to Elevate Your Peanut Butter Fudge
This delicious, creamy peanut butter fudge is absolutely delightful on its own, but it also serves as a fantastic canvas for your culinary creativity. Here are some exciting ideas for add-ins, swirls, and toppings to customize your fudge:
- Chocolate Lover’s Dream: Stir in milk chocolate chips, dark chocolate chips, or white chocolate chips into the warm fudge mixture before spreading it into the pan. Alternatively, melt a layer of your favorite chocolate and spread it over the fudge before chilling for a classic chocolate-peanut butter layered treat.
- Nutty Perfection: Enhance the peanut flavor by folding in finely chopped roasted peanuts (salted or unsalted) into the mixture. You can also press chopped peanuts, pecans, or walnuts onto the top of the fudge before it sets.
- Sweet & Salty Crunch: For a delightful contrast, sprinkle a pinch of flaky sea salt over the top of the fudge just before chilling. This amplifies the sweetness and adds a gourmet touch.
- Candy Crush: Mix in crushed pretzels for a salty-sweet crunch, or add chopped toffee bits for an extra layer of caramel flavor and chewy texture. Mini marshmallows, M&M’s, or chopped Hershey’s Kisses also make fun additions.
- Swirled Wonders: Create beautiful swirls by adding spoonfuls of Nutella, marshmallow creme (fluff), or even a contrasting fruit jam (like raspberry or strawberry) to the fudge mixture in the pan and gently swirl with a knife before chilling.
- Nut Butter Adventures: While peanut butter is classic, don’t hesitate to swap it out for other creamy nut butters like almond butter, cashew butter, or even sunflower seed butter for a delicious, allergy-friendly alternative.
- Spice It Up: A small pinch of cinnamon or even a tiny dash of cayenne pepper can add an intriguing warmth and depth to the peanut butter flavor, reminiscent of Mexican chocolate.
- Seasonal Sensations: For holidays, consider adding seasonal sprinkles before chilling, or a drop of peppermint extract for a festive Christmas fudge.
- Decadent Dessert Topper: Crumble pieces of the fudge over vanilla ice cream, brownies, or cheesecakes for an instant upgrade to any dessert.
Serving & Gifting: Share the Sweetness!
This microwave peanut butter fudge isn’t just a treat for yourself; it’s also perfect for sharing and makes a wonderful homemade gift. Here are some creative ways to serve and present your delicious fudge:
- Holiday Gifts: Around the holiday season, this fudge makes for perfect gifts. Wrap individual pieces or small clusters in pretty, small boxes, festive gift bags, or clear cellophane tied with a ribbon.
- Easy Dessert for Outings: Pack slices of this fudge for an easy and satisfying dessert for picnics, camping trips, or school lunchboxes. Its sturdy nature makes it great for transport.
- Rustic Fudge Bars: Instead of small individual pieces, slice the fudge into larger bars. Wrap them individually in brown parchment paper or wax paper and tie with some rustic butcher’s string or a decorative ribbon for a charming, homemade look.
- Mason Jar Presentation: A homemade fudge gift looks incredibly pretty layered in a mason jar. Attach a handmade label with a sweet message or the ingredients list.
- Personalized Touch: For an extra thoughtful gesture, tie a small recipe card to your gifted fudge so the recipient can try making it themselves. It’s a wonderful way to share your love for baking.
- Gourmet Gift Basket: Present the fudge in a charming basket alongside other homemade treats like cookies, jams, or hot chocolate mixes for a truly luxurious gift.
- Elegant Bites: For parties or elegant gatherings, place individual fudge squares in colorful cupcake liners or miniature baking cups. This makes them easy to pick up and adds a touch of sophistication.
- Shaped Treats: For themed events or specific holidays, spoon the warm fudge mixture into shaped silicone molds (like hearts for Valentine’s Day, stars for patriotic holidays, or festive shapes for Christmas) before chilling.
- Coffee & Tea Companion: Serve small squares alongside a fresh cup of coffee or tea for a delightful afternoon pick-me-up or after-dinner treat.
Storing Your Homemade Peanut Butter Fudge for Optimal Freshness
Proper storage is key to keeping your delicious microwave peanut butter fudge fresh, soft, and enjoyable for as long as possible. Here’s how to store it:
Room Temperature Storage: You can store this fudge at room temperature for up to one week. Always place it in an airtight container – a rigid plastic or glass storage container with a tight-fitting lid works best. This prevents the fudge from drying out and maintains its creamy texture.
Refrigerated Storage: For extended freshness, store your fudge in the refrigerator for up to three weeks. Again, use an airtight container to protect it from absorbing other odors from the fridge and to prevent it from drying out. Some people prefer the texture of chilled fudge, while others might let it come to room temperature for a few minutes before enjoying.
Preventing Stickiness & Drying: To create an extra barrier against air exposure and prevent pieces from sticking together, lay a sheet of parchment paper or wax paper directly on top of the fudge before sealing the container. If stacking layers of fudge, place a sheet of parchment paper between each layer.
Freezing for Long-Term Storage: Fudge can be frozen for even longer-term storage, up to 3 months. To freeze, wrap the entire block or individual pieces tightly in plastic wrap, then place them in an airtight freezer-safe container or a heavy-duty freezer bag. This double layer of protection helps prevent freezer burn. When you’re ready to enjoy, thaw the fudge overnight in the refrigerator before serving.
Delightful Recipes Using Condensed Milk
If you love sweet treats and have a can of condensed milk handy, explore these other fantastic recipes that utilize this versatile ingredient:
- Condensed Milk Cookies from South Africa
- Easy Coconut Ice Recipe
- Choc Chip Cookies with Condensed Milk
- Marshmallow Fridge Tart
- Iced Coffee with Condensed Milk
- Tinginys – Lithuanian Lazy Cookies
- Dark Chocolate Ice Cream, No-Churn!
- Apple Crumble Tart
- Sequilhos – Brazilian Cornflour Cookies
More Irresistible No-Bake Desserts
- Decadent No-Bake Milkybar Cheesecake
- Easy Biscoff Truffles (4 Ingredients)
- Creamy 3-Ingredient Coffee Mousse (Eggless)
- Easy Coconut Ice Recipe
Recipe Card: Easy Microwave Peanut Butter Fudge
Easy Microwave Peanut Butter Fudge
This speedy microwave peanut butter fudge recipe proves you can create smooth, creamy fudge in mere minutes. With just four ingredients and five minutes of your time, this easy fudge comes together in the microwave before you can even finish your coffee!
Equipment
- 1 20cm/8 inch square tin
- 1 Microwave-safe bowl
- Parchment paper
- Spatula or spoon
Ingredients
- 450 grams icing sugar – (powdered sugar, sifted)
- 250 grams smooth peanut butter – (or crunchy)
- 230 grams unsalted butter
- 1 teaspoon vanilla extract
Instructions
- Line a 20cm/8 inch square tin with parchment paper, ensuring some overhang on the sides for easy removal.
- Sift the icing sugar into a large bowl. If not sifting, use a fork to break up any visible lumps.
- Add the unsalted butter, peanut butter, and vanilla extract to a microwave-safe bowl.
- Microwave for 2 minutes, stirring once halfway through, until melted and liquidy.
- Stir the melted mixture well with a spatula or spoon until thoroughly combined and smooth.
- Pour this melted peanut butter mixture into the bowl of icing sugar.
- Stir everything together, ensuring all icing sugar is fully incorporated, including any at the bottom of the bowl. A squishing motion with the spatula helps combine the sugar into the mixture. Keep mixing until you have an evenly smooth texture throughout.
- Spoon the fudge mixture into the prepared tin.
- Push it into the corners and level off the top. An offset spatula works best for a smooth surface.
- Cover and place the fudge in the fridge for at least 1 hour to firm up and cool down. Longer chilling time (2-4 hours or overnight) yields better results.
- Once set, lift the fudge out onto a cutting board using the parchment paper overhang. Score lines on top to guide your slicing.
- Cut into neat pieces with a large, sharp knife. For 64 small squares, cut 8×8 strips. For 36 larger pieces, cut 6×6 strips.
**Nutritional Data Disclaimer**
Please note that the nutritional information provided below is an estimate calculated by a third party, and we cannot guarantee its absolute accuracy. We strive to offer the most precise information possible, but we do not take responsibility for any potential errors. The nutritional value of this recipe may vary depending on the exact brands and specific products used. For personalized dietary advice, we recommend consulting with a qualified healthcare professional or a registered dietitian.
Nutrition Facts
For food safety advice, including guidance on food allergies
