Delightful Iced Thumbprint Cookies: A Cheerful Twist on a Classic
Thumbprint cookies have long been cherished for their tender, buttery crumb and delightful fillings. While traditional recipes often feature a dollop of jam, this guide introduces a fresh and exciting variation: iced thumbprint cookies. These beauties elevate the classic with smooth, colorful icing, offering a vibrant and cheerful experience that’s perfect for any occasion. Forget sticky fruit preserves; embrace the smooth, melt-in-your-mouth sweetness of a perfectly frosted center.
This recipe strikes an exquisite balance, offering a cookie that’s richer and more delicate than a typical sugar cookie, yet more structured and robust than a fragile shortbread. Each bite delivers a buttery, tender texture that practically melts on your tongue, providing a delightful canvas for a myriad of flavors and colors. The best part? They are incredibly versatile. You can easily customize the icing with your favorite hues, or infuse subtle flavors like zesty lemon, warm almond, or even a hint of peppermint to create a truly unique treat.
Whether you’re a seasoned baker looking for a new favorite or a beginner eager to create impressive yet easy-to-make desserts, these iced thumbprint cookies are an absolute go-to. Their simple charm, combined with endless customization possibilities, makes them ideal for gifting, sharing at gatherings, or simply enjoying with a cup of tea during a quiet afternoon bake. Prepare to impress with these irresistibly pretty and delicious homemade cookies!

Icing vs Jam: Understanding the Filling Distinction
While both jam and icing can create beautiful thumbprint cookies, they offer distinct experiences. The primary difference lies in the application and the resulting texture. Traditional jam-filled thumbprint cookies typically have their fruit filling added before baking. During the baking process, the jam caramelizes slightly and melts into the cookie dough, creating a softer, chewier center that often blends more seamlessly with the cookie itself. The heat can also intensify the fruit flavor.
In contrast, iced thumbprint cookies receive their vibrant filling after baking and cooling. This method ensures the icing remains smooth, pristine, and vividly colored, sitting neatly within the well of the cookie. Adding the icing post-bake allows for a greater degree of artistic control and flavor experimentation. You can achieve cleaner lines, brighter colors, and a wider range of flavors (like citrus, almond, or even chocolate) that wouldn’t hold up well under oven heat. Moreover, the re-pressing technique halfway through baking is key to maintaining those crisp indentations, ensuring your cookies retain their perfect cup-like shape for the icing. The smooth, glossy finish of icing creates a more elegant and customizable cookie that stands out visually.
Recipe Highlights: Why You’ll Love These Cookies
- Buttery, Soft Cookies with a Delicate Crumb: These cookies are crafted to perfection, delivering a rich, buttery flavor and an incredibly tender, melt-in-your-mouth texture. They are exceptionally moreish, making it hard to stop at just one!
- Smooth, Customizable Icing: The magic of these thumbprints lies in their vibrant icing. It’s incredibly fun to color and flavor, allowing you to unleash your creativity and match them to any theme, holiday, or personal preference.
- Maintains Perfect Thumbprint Shape: Thanks to a clever baking trick – re-indenting the cookies midway through their bake – your cookies will hold their perfect cup shape, ensuring a neat and beautiful well for your luscious icing.
- Easy to Make, Even Easier to Customize: This recipe is straightforward and accessible for bakers of all skill levels. Beyond its ease, it offers endless possibilities for customization, from different extracts in the dough to various food colorings and decorative sprinkles on the icing.
- Ideal for Gifting and Sharing: With their appealing appearance and delicious taste, these iced thumbprint cookies are wonderful for sharing with friends and family, packaging as thoughtful gifts, or simply enjoying during a peaceful afternoon baking session.
Craving More Iced Delights? Explore These Recipes…
If you’ve fallen in love with the charm and taste of these thumbprint icing cookies, you’re in for a treat with our other beloved iced biscuit recipes. Each offers a unique texture and flavor profile, perfectly complemented by smooth, decadent icing.
- Classic Gypsy Creams: Crunchy Oat Biscuits: A delightful fusion of wholesome oats and a rich, creamy filling, these biscuits offer a satisfying crunch followed by a smooth, sweet center.
- Classic Romany Creams: Indulge in the iconic South African favorite, featuring a chocolatey coconut biscuit filled with luscious chocolate cream. A truly irresistible classic.
- Casadinhos with Dulce de Leche (Brazilian Wedding Cookies): Experience the delicate sweetness of these Brazilian “little married cookies,” traditionally filled with a rich dulce de leche and often dusted with powdered sugar, or elegantly iced for a special touch.
Each of these recipes showcases how beautiful and versatile iced cookies can be, making them perfect additions to your baking repertoire. They promise delightful textures and flavors that will surely satisfy any sweet tooth.
- Classic Gypsy Creams Recipe – Crunchy Oat Biscuits
- Classic Romany Creams Recipe
- Casadinhos with Dulce de Leche (Brazilian Wedding Cookies)
Key Ingredient Notes and Substitutions for Perfect Cookies
Every great cookie starts with quality ingredients and understanding how each component plays a role. Here’s a breakdown of the key elements for your thumbprint cookies and icing:
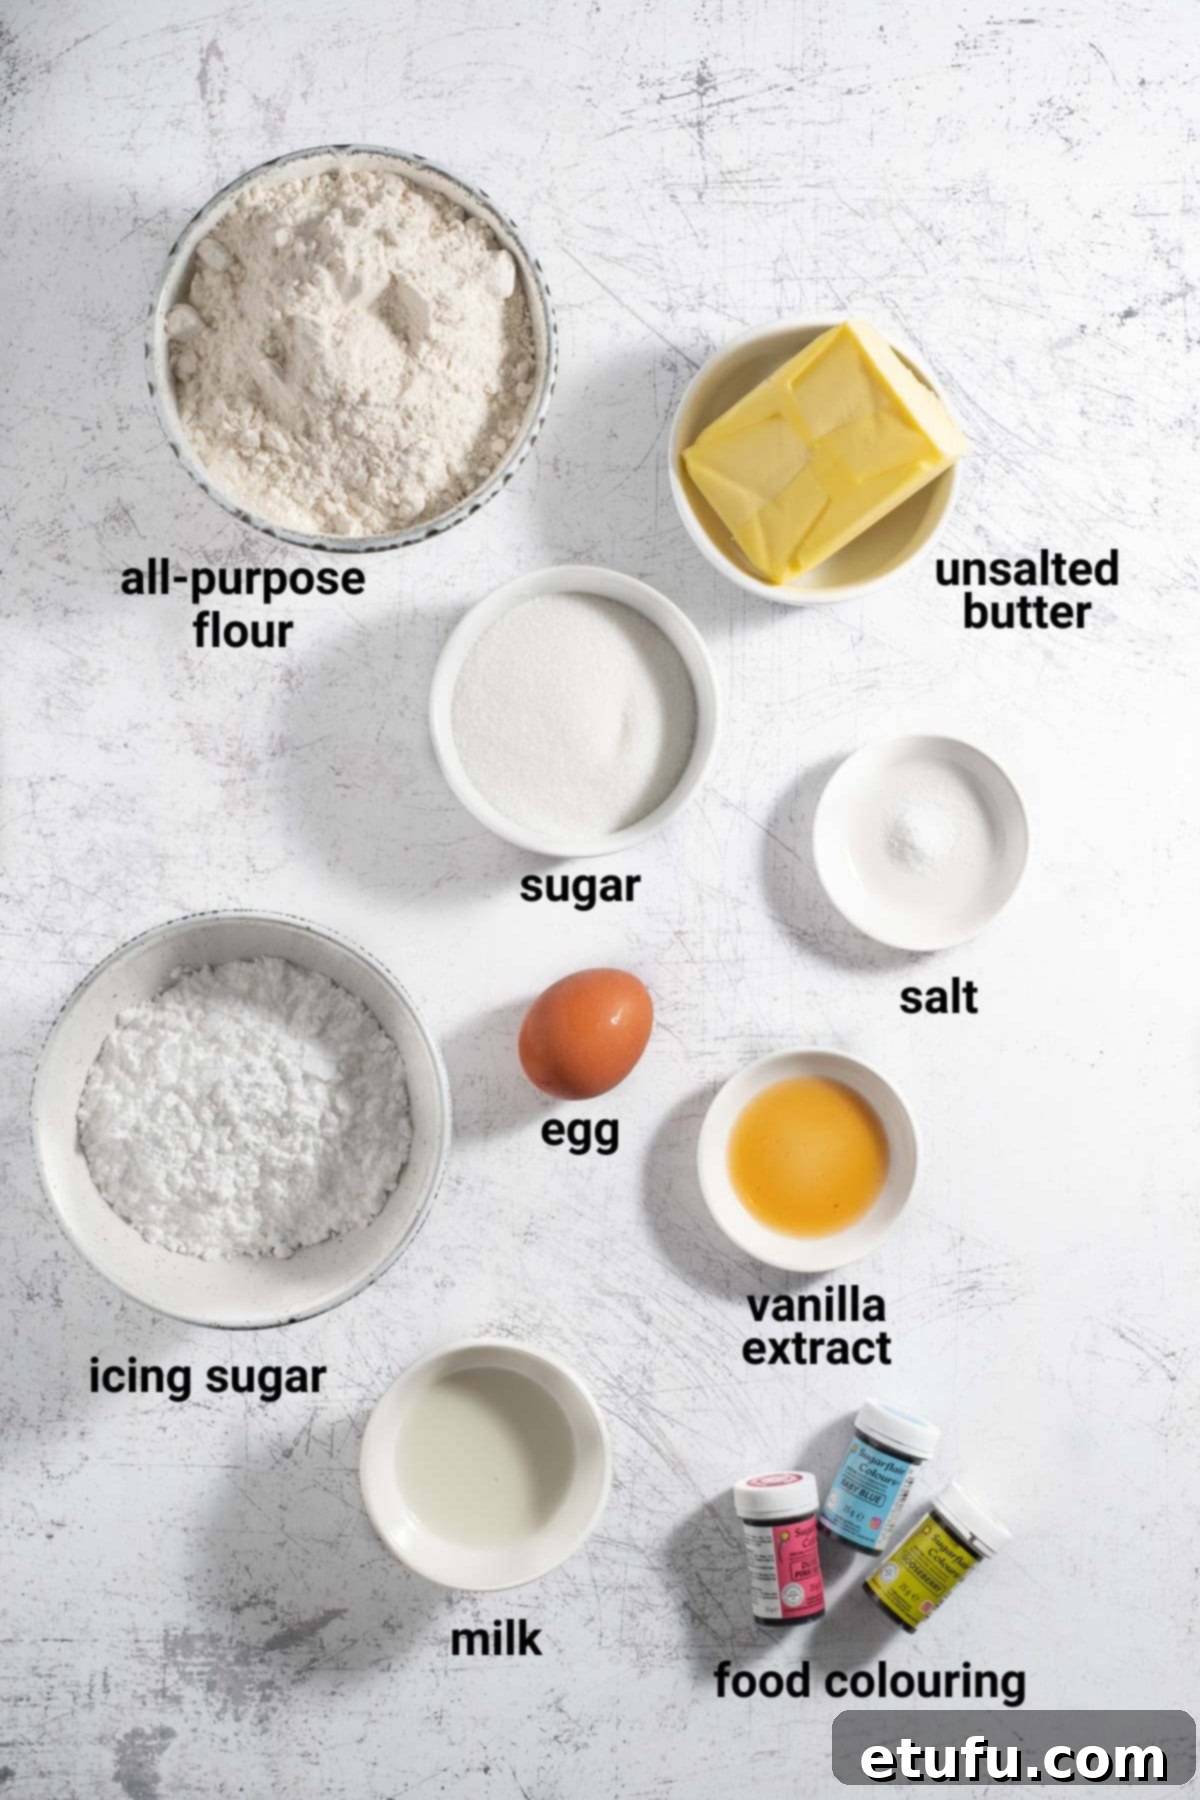
Soft, Unsalted Butter
Using unsalted butter is crucial as it allows you complete control over the salt content in your recipe. If you only have salted butter on hand, simply omit the ¼ teaspoon of added salt from the cookie dough recipe. The butter’s consistency is paramount: it should be soft enough to easily cream with the sugar, meaning it’s pliable and yields to a gentle press of your finger without melting or collapsing into an oily mess. Butter that is too cold will not cream properly, resulting in a dense dough, while butter that is too warm (melting) will lead to a greasy, difficult-to-handle dough that may spread too much during baking.
Granulated Sugar
Granulated sugar provides sweetness and helps create the tender structure of the cookie. When creamed with butter, it incorporates air, contributing to the cookies’ light and fluffy texture. Fine-grained granulated sugar is preferred for a smoother dough. Avoid using powdered sugar in the cookie dough itself, as it can make the cookies too soft and prone to crumbling.
Egg
We use one large egg, typically around 60g (2oz) when still in its shell. It’s vital that your egg is at room temperature. A cold egg can cause the softened butter to seize and curdle, making it challenging to achieve a smooth, evenly mixed dough. Room temperature ingredients emulsify better, leading to a more consistent batter and a superior final texture in your cookies.
Quick Tip:
Forgot to take your egg out in advance? No problem! Simply place the egg (still in its shell) in a bowl of warm (not hot) water for 5-10 minutes. This will quickly bring it to the ideal room temperature for baking.
Vanilla Extract
A good quality vanilla extract is essential for enhancing the overall flavor of your cookies. It adds a warm, sweet, and aromatic depth that complements the buttery dough beautifully. For an extra special touch, consider using vanilla bean paste or even scraping seeds from a fresh vanilla pod for a more intense flavor and visual appeal.
Salt
Just a quarter teaspoon of salt might seem small, but it’s mighty. Salt plays a crucial role in balancing the sweetness of the cookies and enhancing all the other flavors. It prevents the cookies from tasting bland and brings out the richness of the butter and vanilla. If using salted butter, remember to omit this addition.
All-Purpose Flour
All-purpose flour forms the structural backbone of our cookies. It’s important to measure flour correctly, ideally by weight for accuracy, or by spooning it lightly into a measuring cup and leveling it off. Over-measuring flour can lead to dense, dry cookies. Avoid overworking the dough once the flour is added, as this can develop the gluten too much, resulting in tough cookies instead of tender ones.
Icing/Powdered Sugar
For the incredibly smooth, lump-free icing that will perfectly fill your thumbprints, sifting the icing sugar (powdered sugar) is a non-negotiable step. While it might be one of baking’s less glamorous tasks (right up there with scrubbing the mixer), it’s absolutely essential. Sifting breaks up any pesky lumps and ensures a silky-smooth consistency, which is vital for achieving those flawless, polished drops of color on each cookie. Skipping this step often results in a grainy or uneven icing texture that can detract from the cookies’ elegant appearance.
Milk
When thinning your icing, start with no more than 2 tablespoons of milk and add it judiciously, literally a tiny drop at a time. The consistency of icing is very sensitive to liquids, and even a small excess can quickly transform perfectly thick icing into a runny mess. Think of it as painting: you can always add more, but it’s much harder to take it away. Incremental adjustments are key to achieving the ideal pourable yet thick texture.
Food Colouring
While elegant white icing is always an option, the real fun begins when you introduce color! Soft, complementary hues can transform your thumbprint cookies into miniature works of art, perfect for any season or celebration. If you’re curious about the muted, sophisticated tones featured in our images, here’s a guide to the gel food colorings we used:
- Pink: Sugarflair Dusky Pink + a tiny speck of Wilton Brown
- Blue: Sugarflair Baby Blue + a tiny speck of Wilton Brown
- Green: Sugarflair Gooseberry + a tiny speck of Wilton Brown
Quick Tip:
Always opt for gel food coloring over liquid food coloring. Gel colors are highly concentrated, meaning you need very little to achieve vibrant results, and they won’t significantly thin out your icing, preserving its perfect consistency.
Achieving the Perfect Icing Consistency for Flawless Fillings
The success of your iced thumbprint cookies largely hinges on achieving the ideal icing consistency. It’s a fine balance: you want the icing to be liquid enough to settle smoothly and evenly into the cookie’s hollows, creating a glossy, uniform surface, but not so runny that it overflows the edges or soaks into the cookie itself. Think of the texture of runny honey or thick maple syrup – it should be thick, slow-flowing, and self-leveling.
A simple test for perfect consistency is the “ribbon test.” When you lift a spoon full of icing and let a ribbon of it fall back into the bowl, it should disappear and blend back into the surface within 5 to 10 seconds. If it vanishes almost immediately, your icing is too thin and needs more sifted powdered sugar. If it takes longer than 10 seconds, or leaves distinct lines, it’s too thick and requires a tiny bit more milk, added in quarter-teaspoon increments.
If your icing is too thin, it’s prone to spilling over the delicate edges of the thumbprint, especially if the hollow isn’t perfectly even. This can lead to messy cookies and wasted icing. Conversely, if your icing is too thick, it won’t settle smoothly, leaving visible ridges or a dull, textured finish. However, don’t feel constrained – if you prefer a more defined, dimensional look, you can intentionally keep the icing a little thicker and pipe it for a raised, decorative effect. There’s no single “wrong” way, only what best suits your aesthetic preference.
Step-by-Step Guide to Baking Perfect Iced Thumbprint Cookies
Follow these detailed instructions to create beautifully tender and flavorful thumbprint cookies ready for their vibrant icing.
Cookie Preparation:
1. Prepare Baking Sheets: Begin by lining 2-3 large baking sheets with parchment paper. This prevents sticking and ensures easy cleanup. Set them aside.
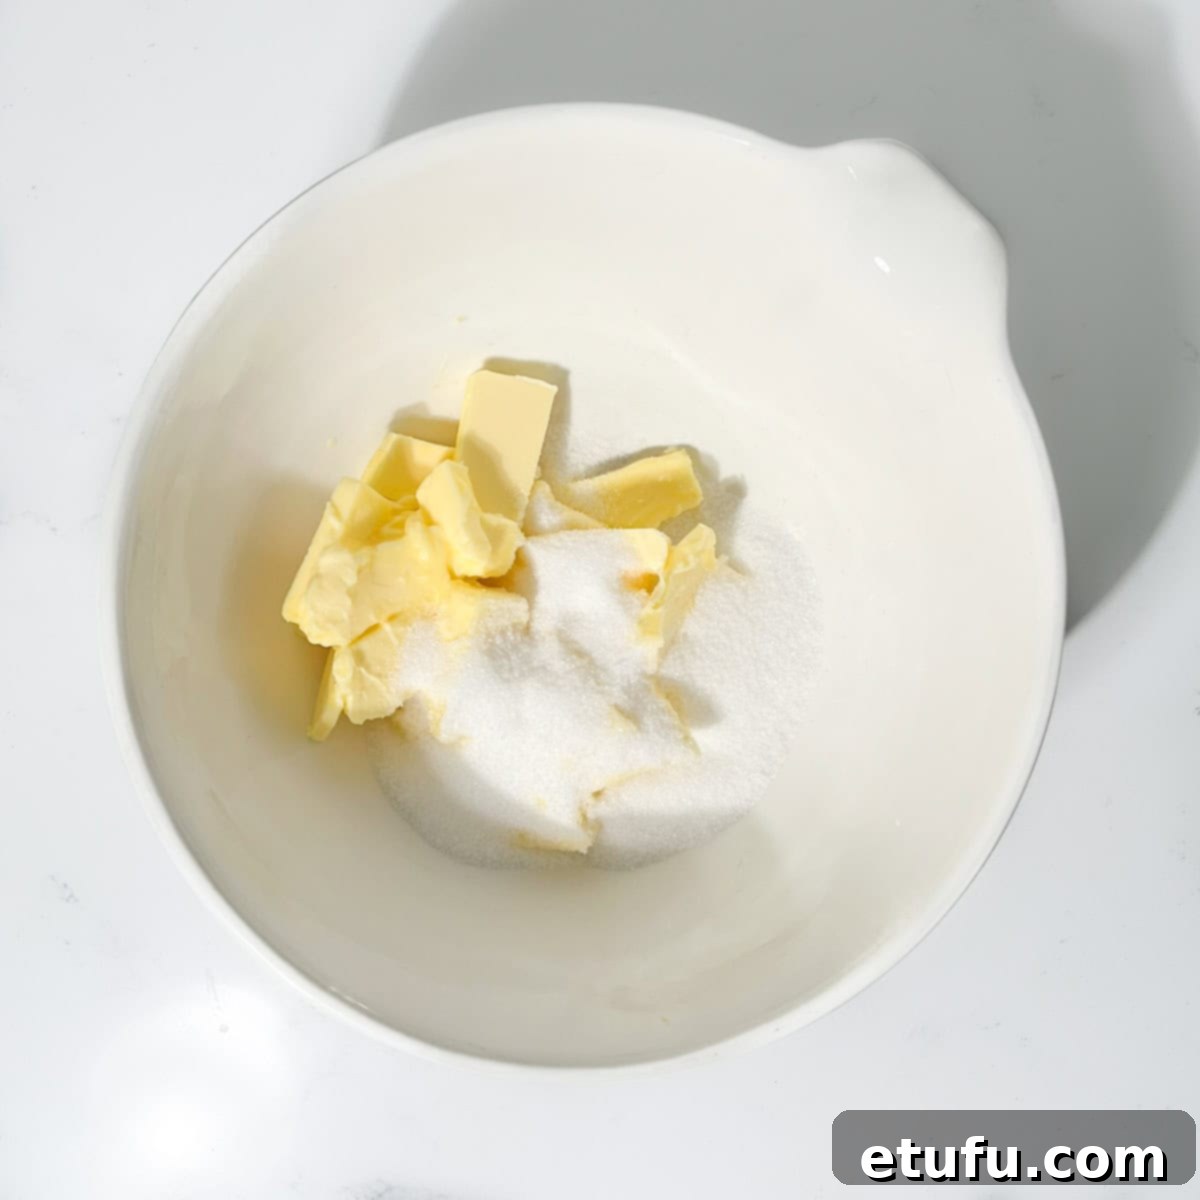
2. Cream Butter and Sugar: In a large mixing bowl, using either an electric hand mixer or a stand mixer fitted with the paddle attachment, beat the softened unsalted butter and granulated sugar together. Cream on medium-high speed for 3-4 minutes, or until the mixture becomes visibly pale in color and fluffy in texture. This step is crucial for incorporating air, which contributes to the cookies’ light crumb.
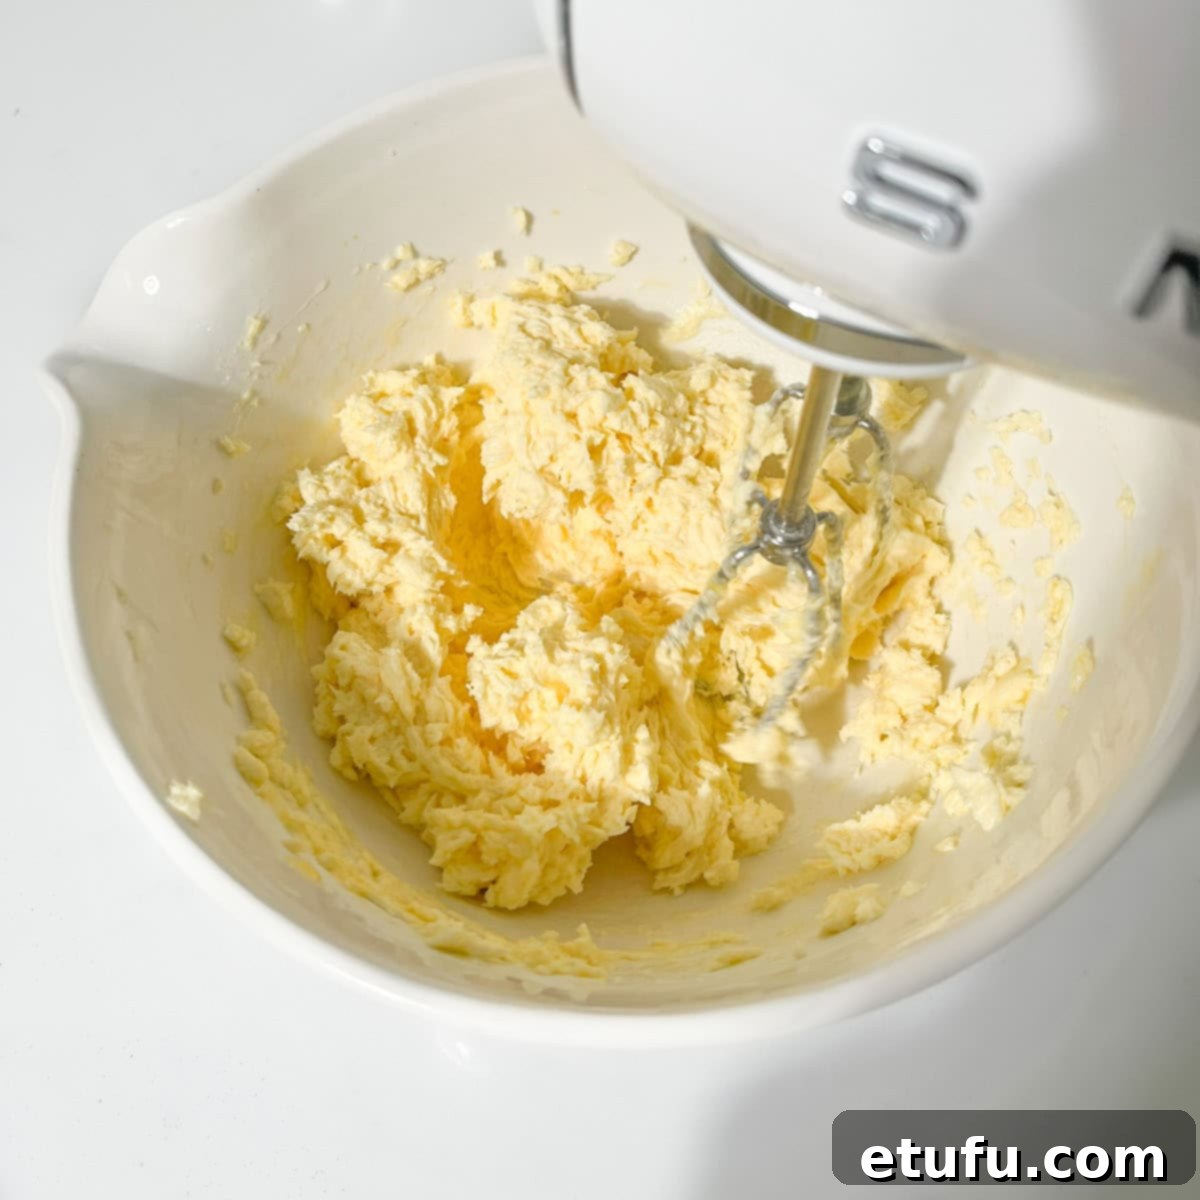
3. Add Wet Ingredients: Incorporate the room-temperature egg, vanilla extract, and salt into the creamed butter and sugar mixture. Mix again on medium speed until all ingredients are thoroughly combined. Don’t be alarmed if the mixture appears slightly curdled at this stage; it’s a normal occurrence and will smooth out with the addition of flour.
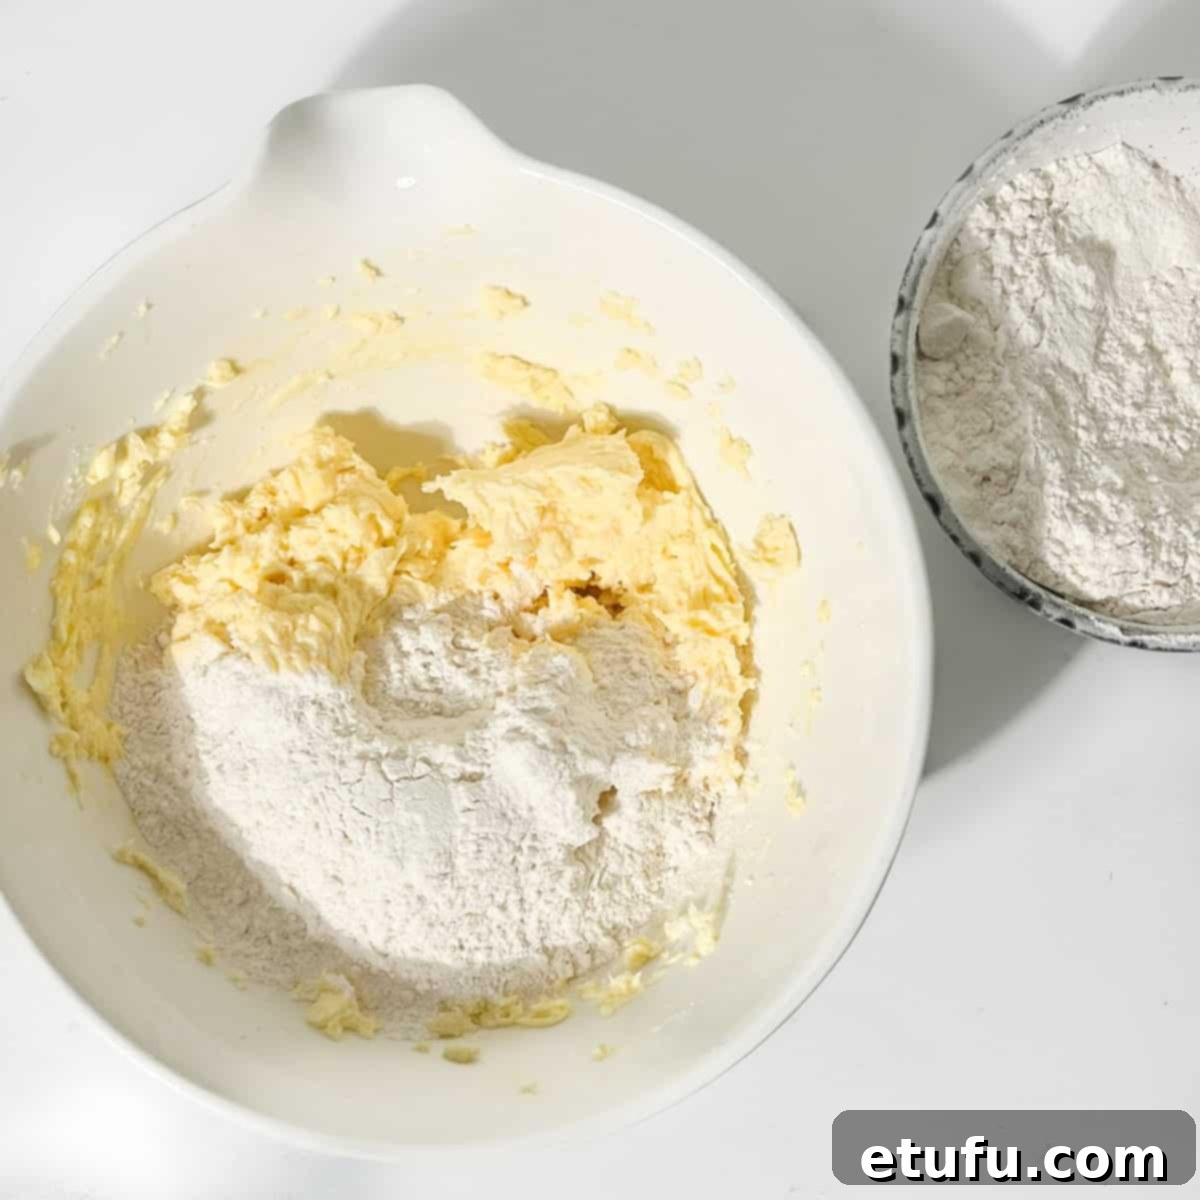
4. Incorporate Flour: Gradually add the all-purpose flour in three separate stages. Beat in the first two additions with your mixer on low speed until just combined. For the final third addition, switch from the mixer to your hands. Gently work the flour into the dough until it just comes together. This prevents overworking the gluten.
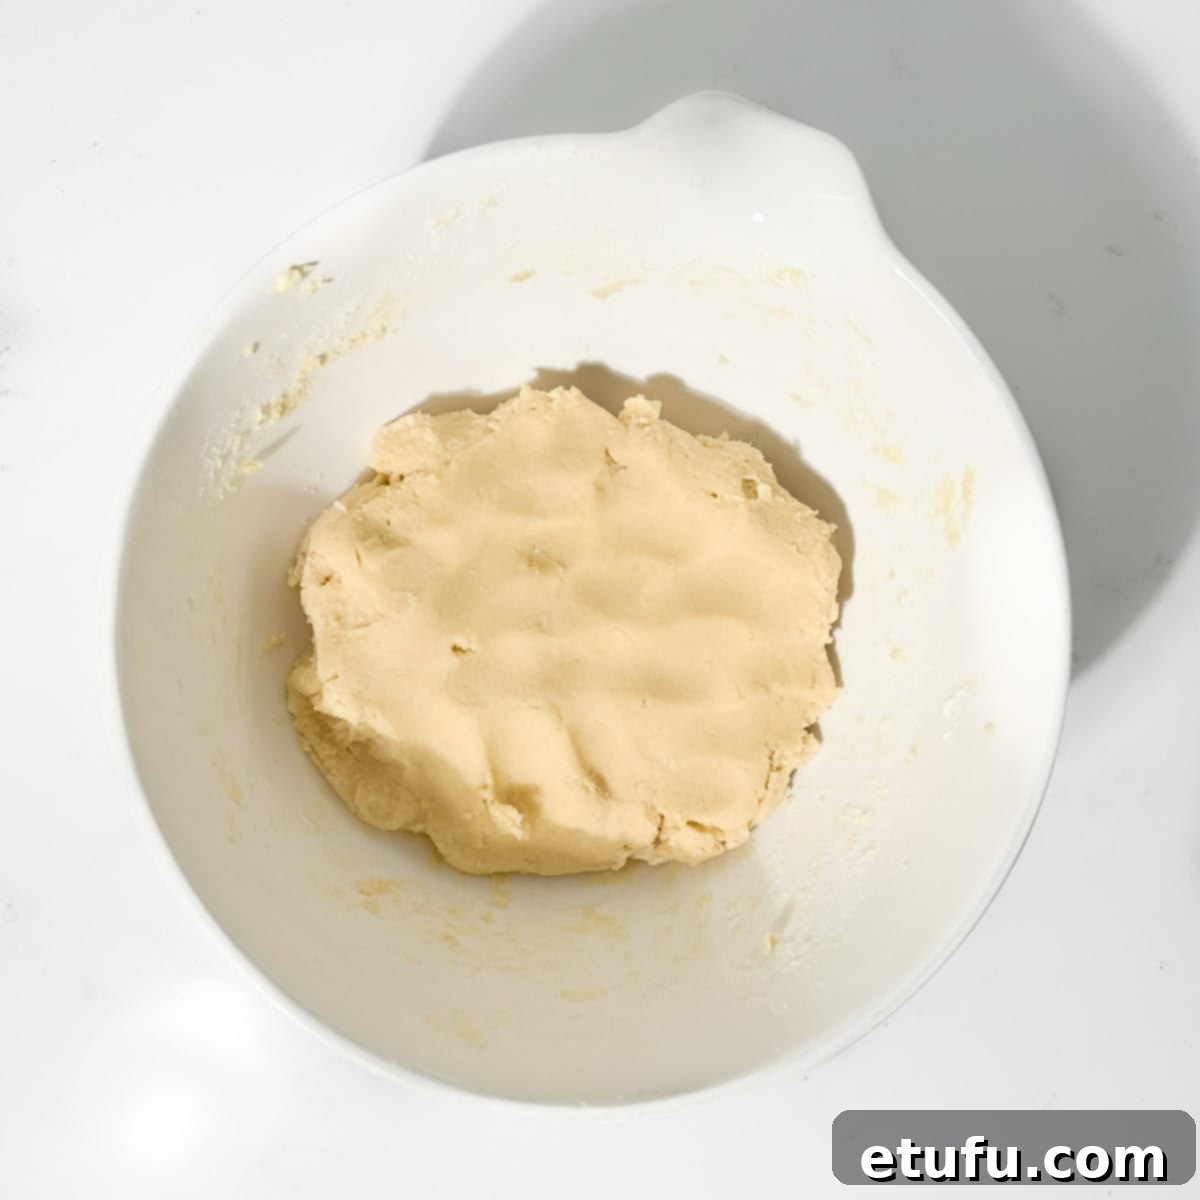
5. Form a Cohesive Dough: Continue mixing by hand with light kneading until you achieve a smooth, cohesive dough. Ensure there are no dry patches of flour remaining at the bottom of the bowl. The key here is to avoid overworking the dough, which can result in tough cookies. The dough should be soft and pliable, not sticky.
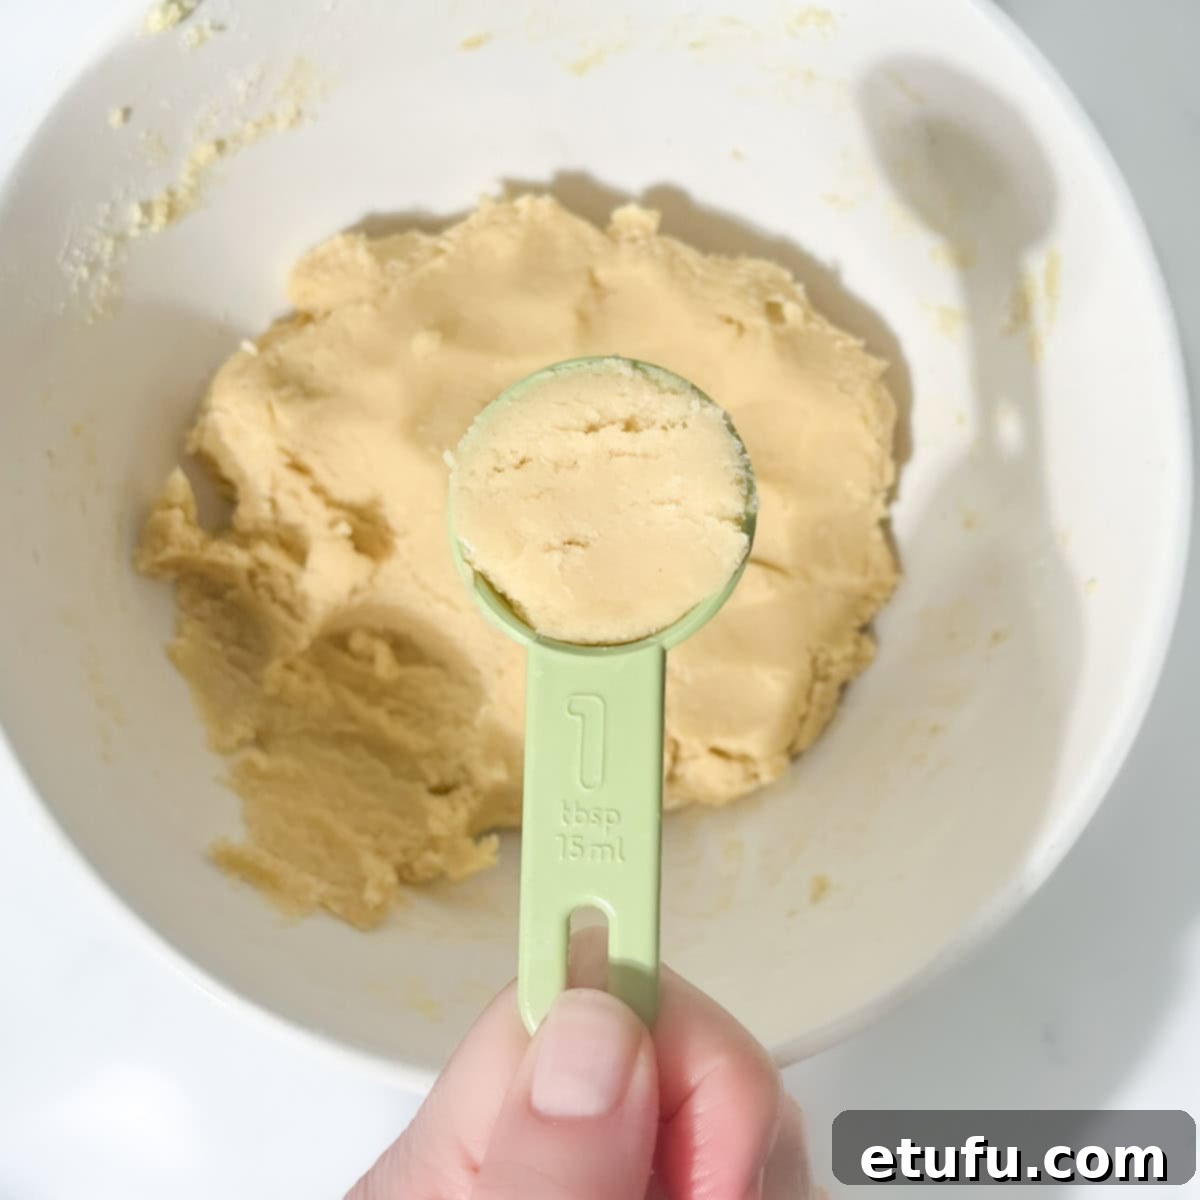
6. Portion and Shape Dough Balls: Scoop level tablespoons of the cookie dough. Roll each portion between your palms to form a smooth, crack-free ball. Ensuring a smooth ball is important for minimizing cracks in the baked cookie. Place the dough balls onto your prepared baking trays, spacing them generously about 3 inches (8cm) apart to allow for proper spreading.
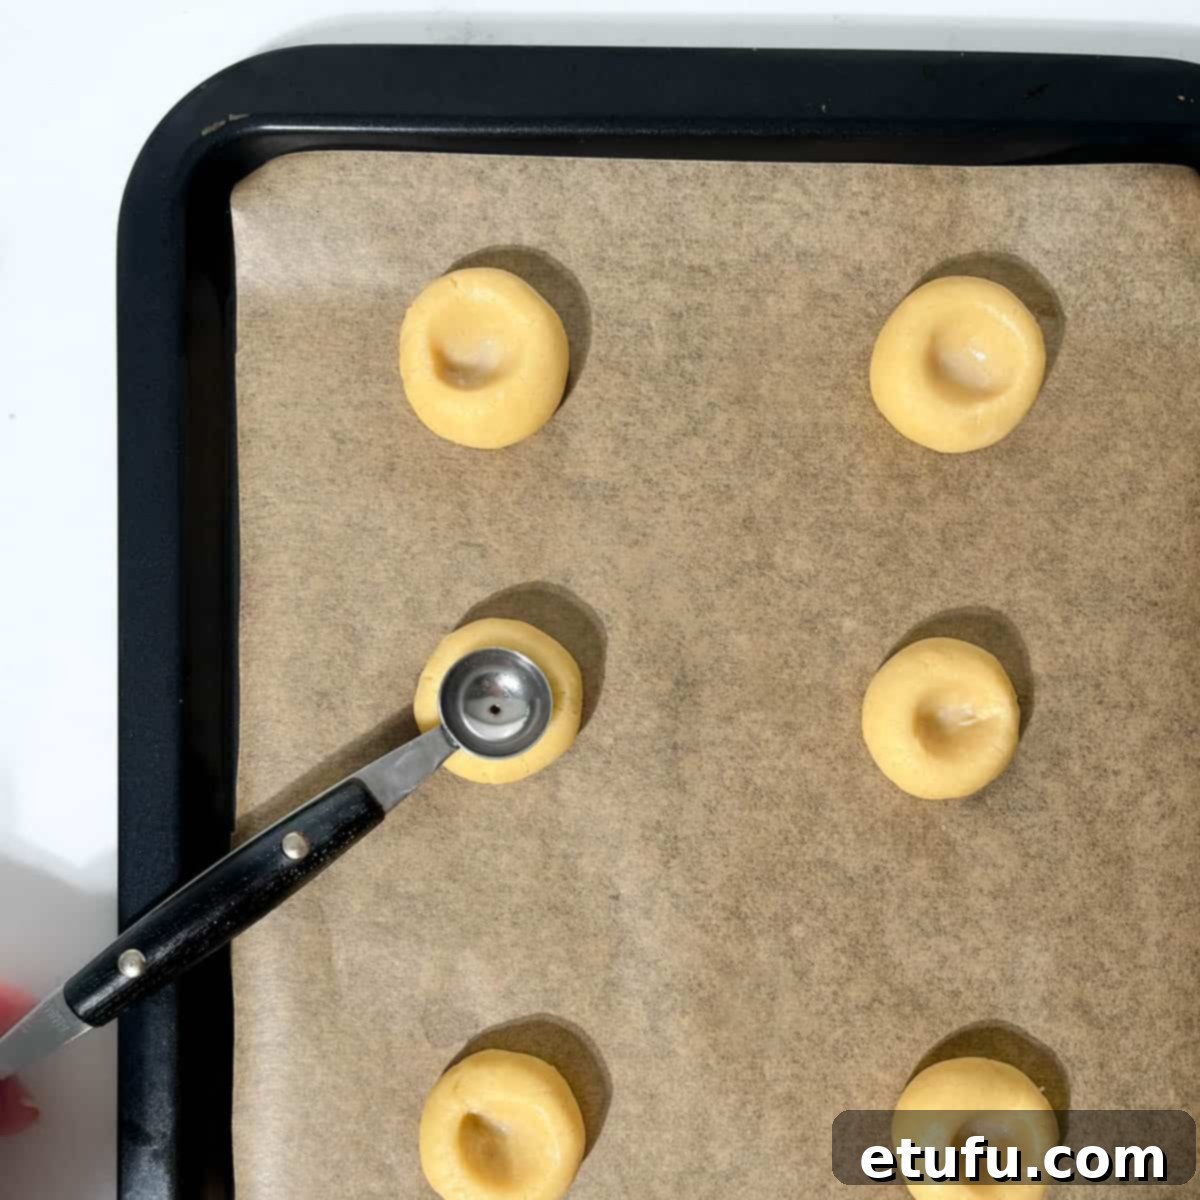
7. Create Indentations: Using a small melon baller, a half-teaspoon measuring spoon, or even your thumb or knuckle, create a neat indentation in the center of each dough ball. Aim for a consistently sized and shaped hollow. If the dough starts to stick to your tool or finger, dip it lightly in water to prevent tearing. This indent will hold your beautiful icing.
8. Preheat Oven: Preheat your oven to 350°F (180°C).
9. Chill Dough: Place the trays with the indented dough balls into the fridge for a quick 10-minute chill. This brief refrigeration helps firm up the butter in the dough, preventing the cookies from spreading too much during baking and ensuring they maintain their crisp, defined shape.
Baking Process:
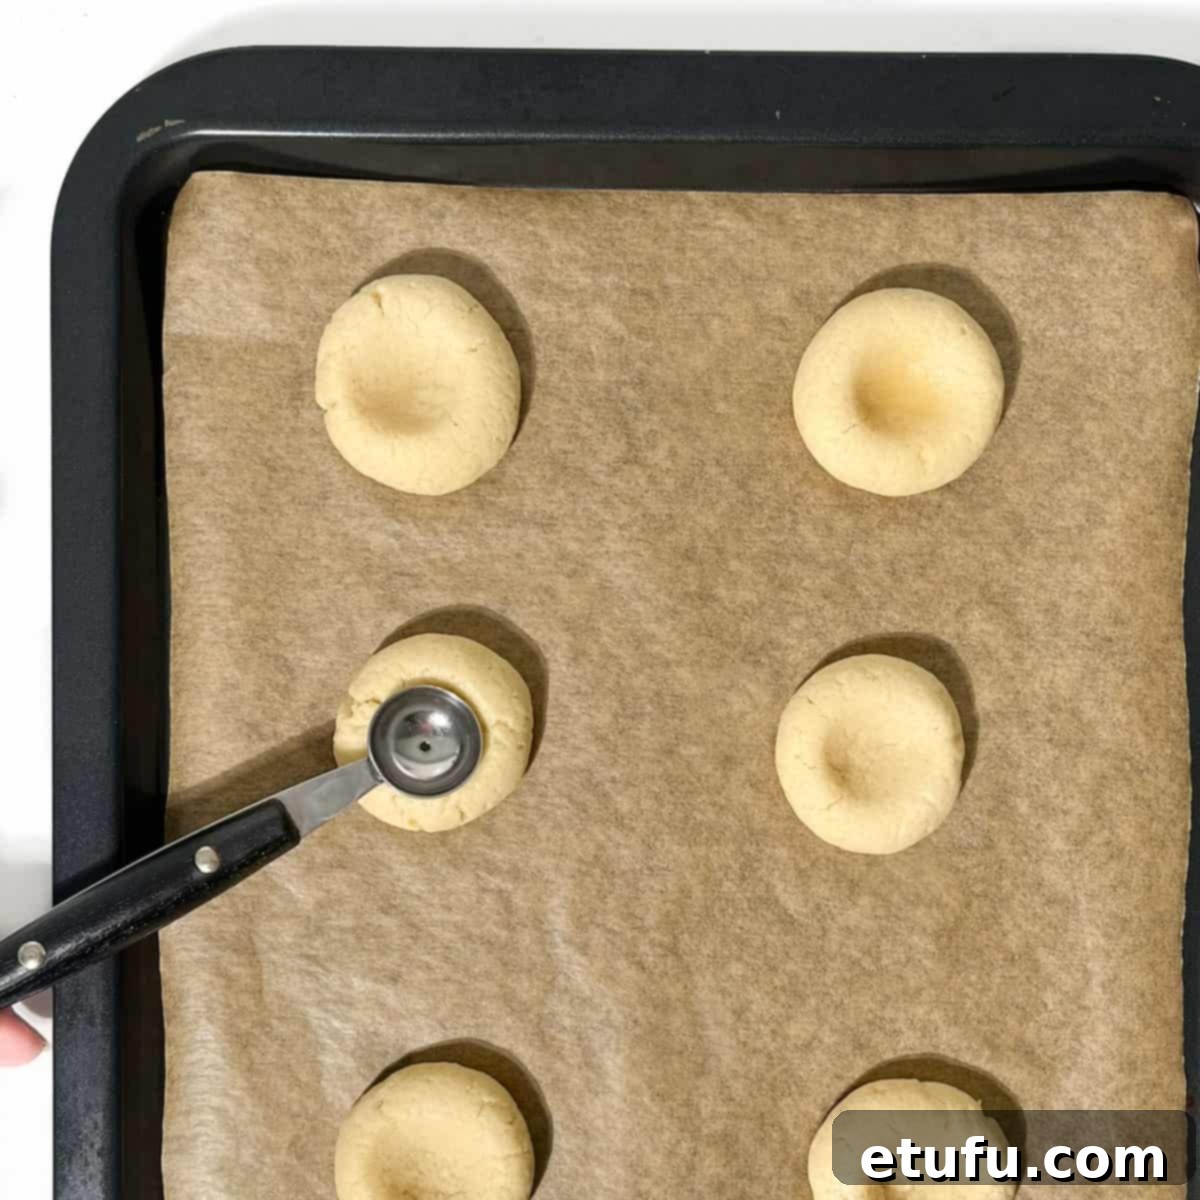
10. Initial Bake and Re-indent: Bake the cookies for an initial 9 minutes. At this point, they will have puffed up slightly, and the indentations may have become less defined. Carefully remove the trays from the oven and gently re-indent each cookie using your melon baller or preferred tool. Return the trays to the oven and continue baking for another 6 minutes, or until the edges are lightly golden brown. The total baking time is typically 15 minutes, but ovens vary, so keep an eye on them.
11. Cool Completely: Once baked, transfer the cookies from the hot baking sheets to a wire rack to cool completely. It is absolutely essential that the cookies are fully cooled before you even think about icing them. Warm cookies will melt the icing, leading to a messy, unattractive finish.
Icing and Finishing:
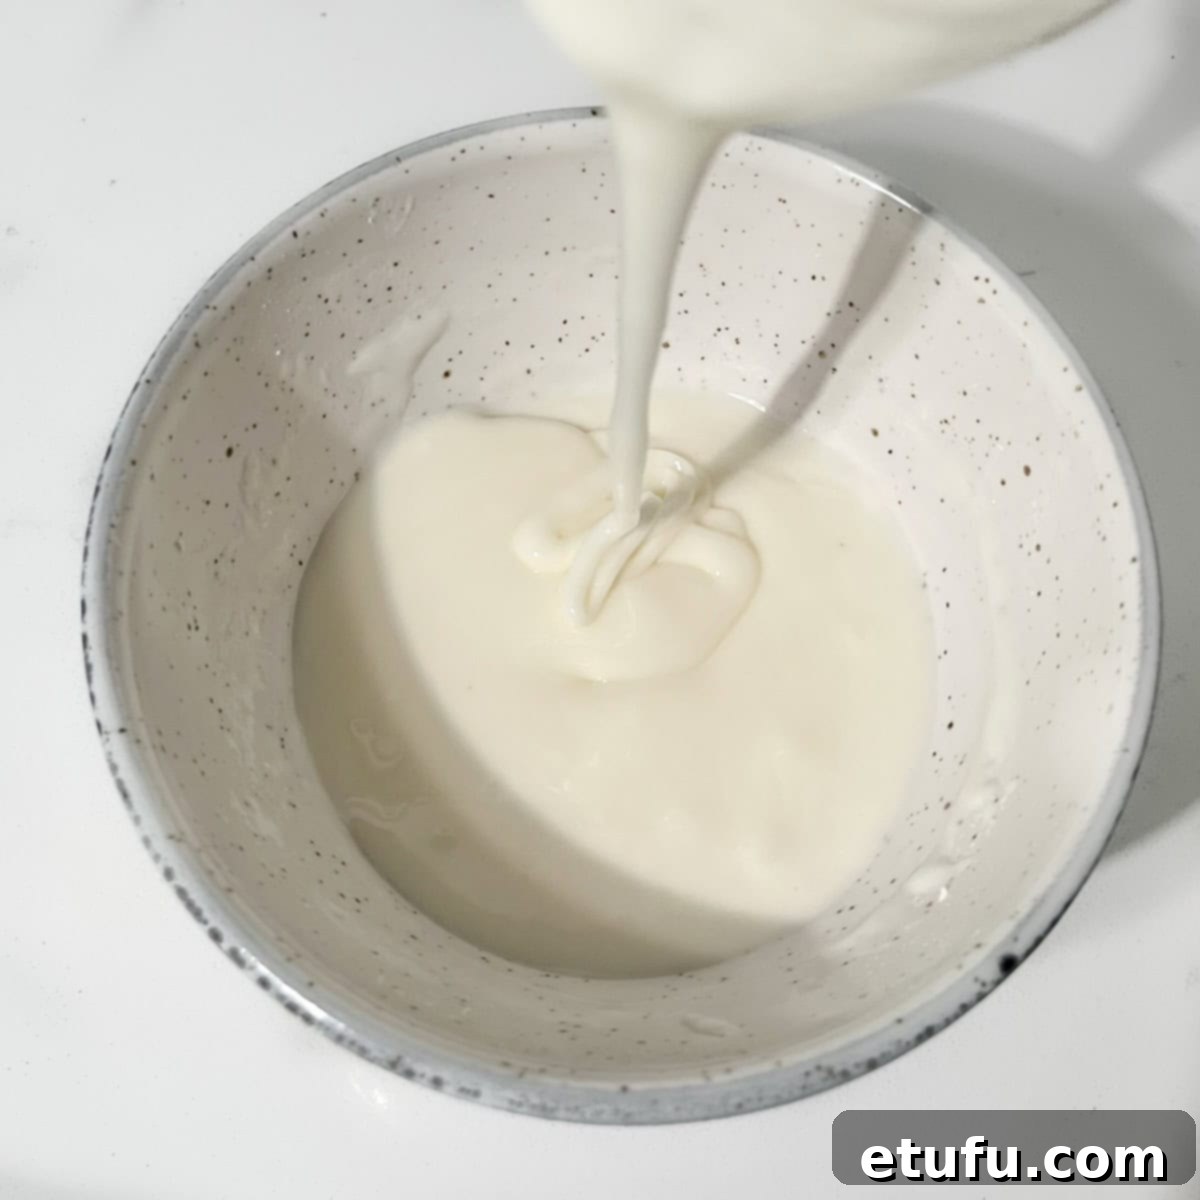
12. Prepare the Icing Base: In a medium bowl, sift the powdered sugar. This ensures a smooth, lump-free icing. Add 2 tablespoons of milk along with the vanilla extract. Stir these ingredients thoroughly until well combined and smooth. Now, carefully adjust the texture by adding milk just ½ teaspoon at a time, stirring well after each addition. You are aiming for a consistency similar to runny honey – thick, but smooth and easily pourable. Refer to our “Perfect Icing Consistency” section for more details.
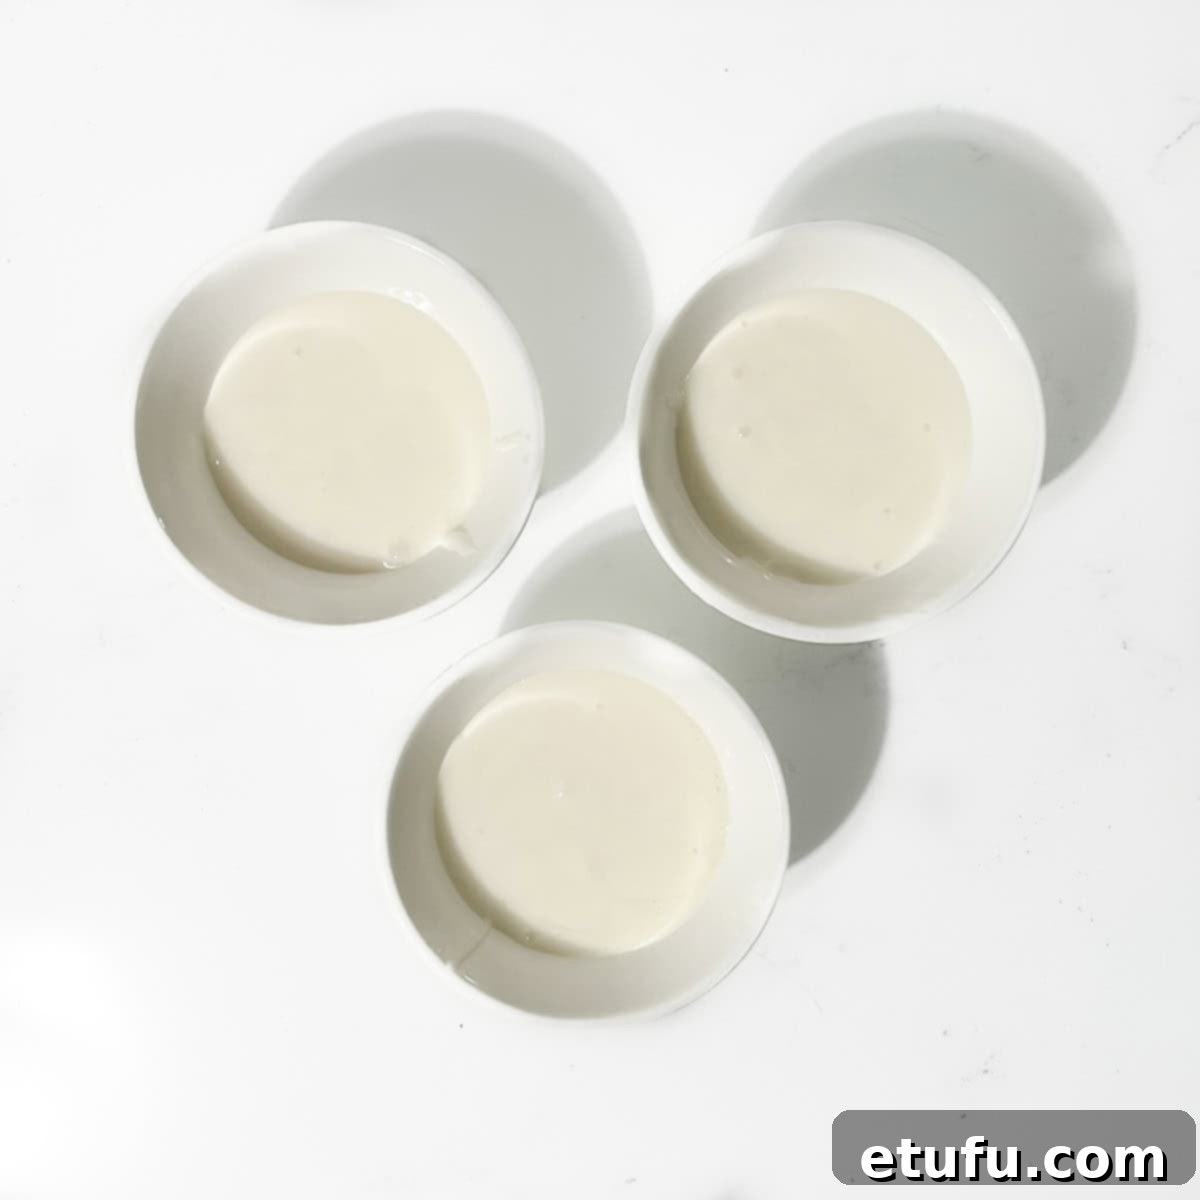
13. Divide and Color Icing: If you plan to use multiple colors, divide the prepared white icing into separate small bowls, one for each color you wish to create. This allows for individual coloring without affecting the entire batch.
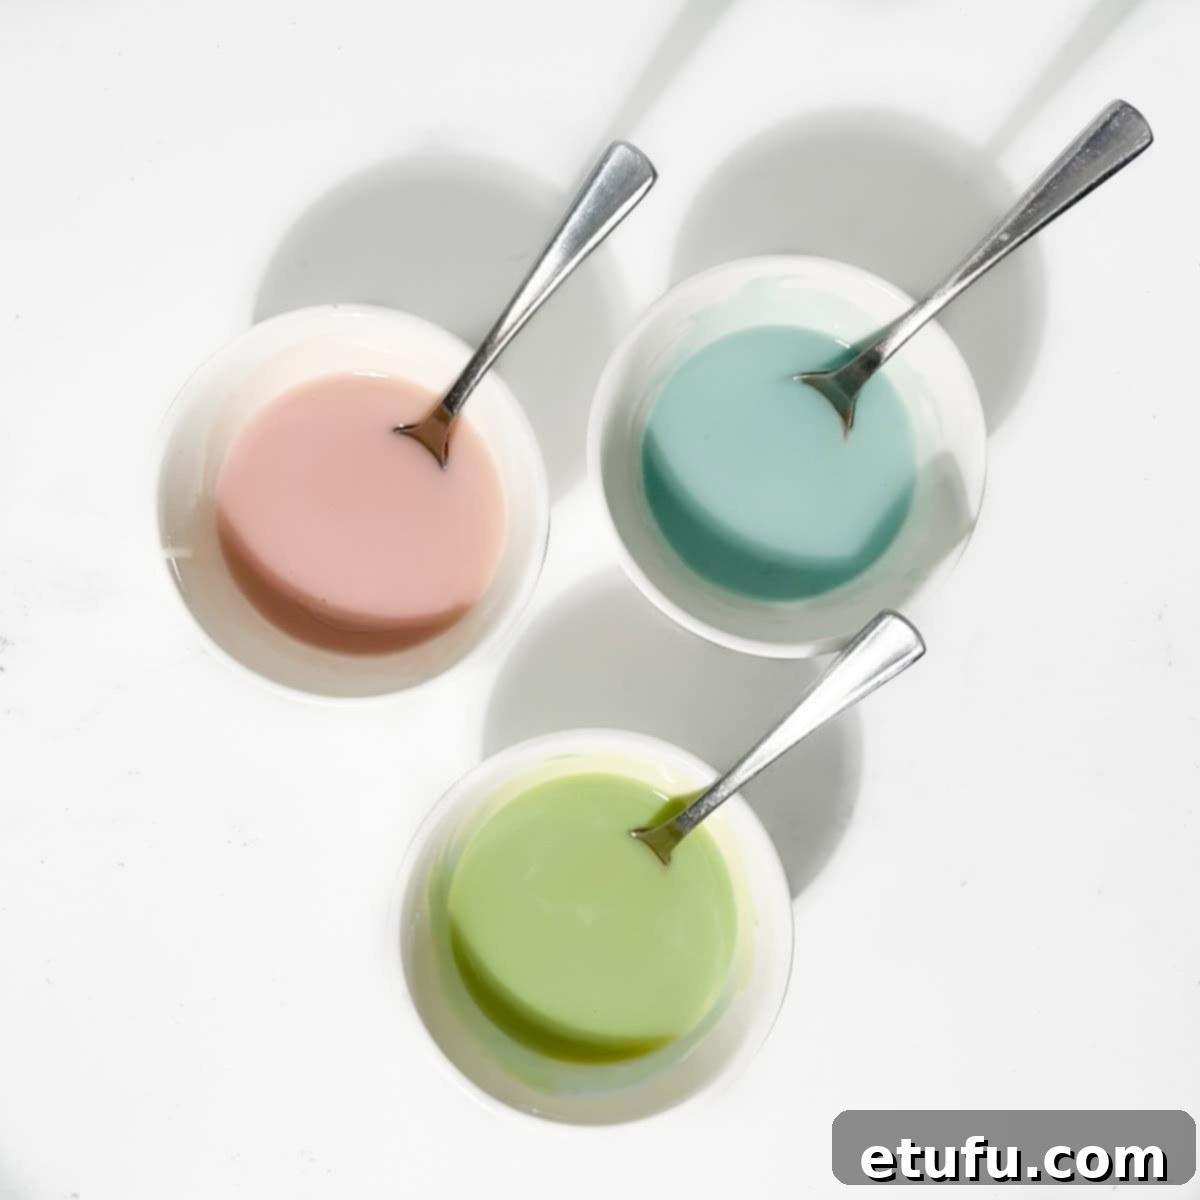
14. Tint with Gel Food Coloring: To each bowl of icing, add a very small amount of gel food coloring using a toothpick tip. Start with a tiny speck, mix thoroughly to see the color, and gradually add more if a deeper hue is desired. Remember, gel colors are highly concentrated, so a little goes a long way. Mix well until the color is uniform.
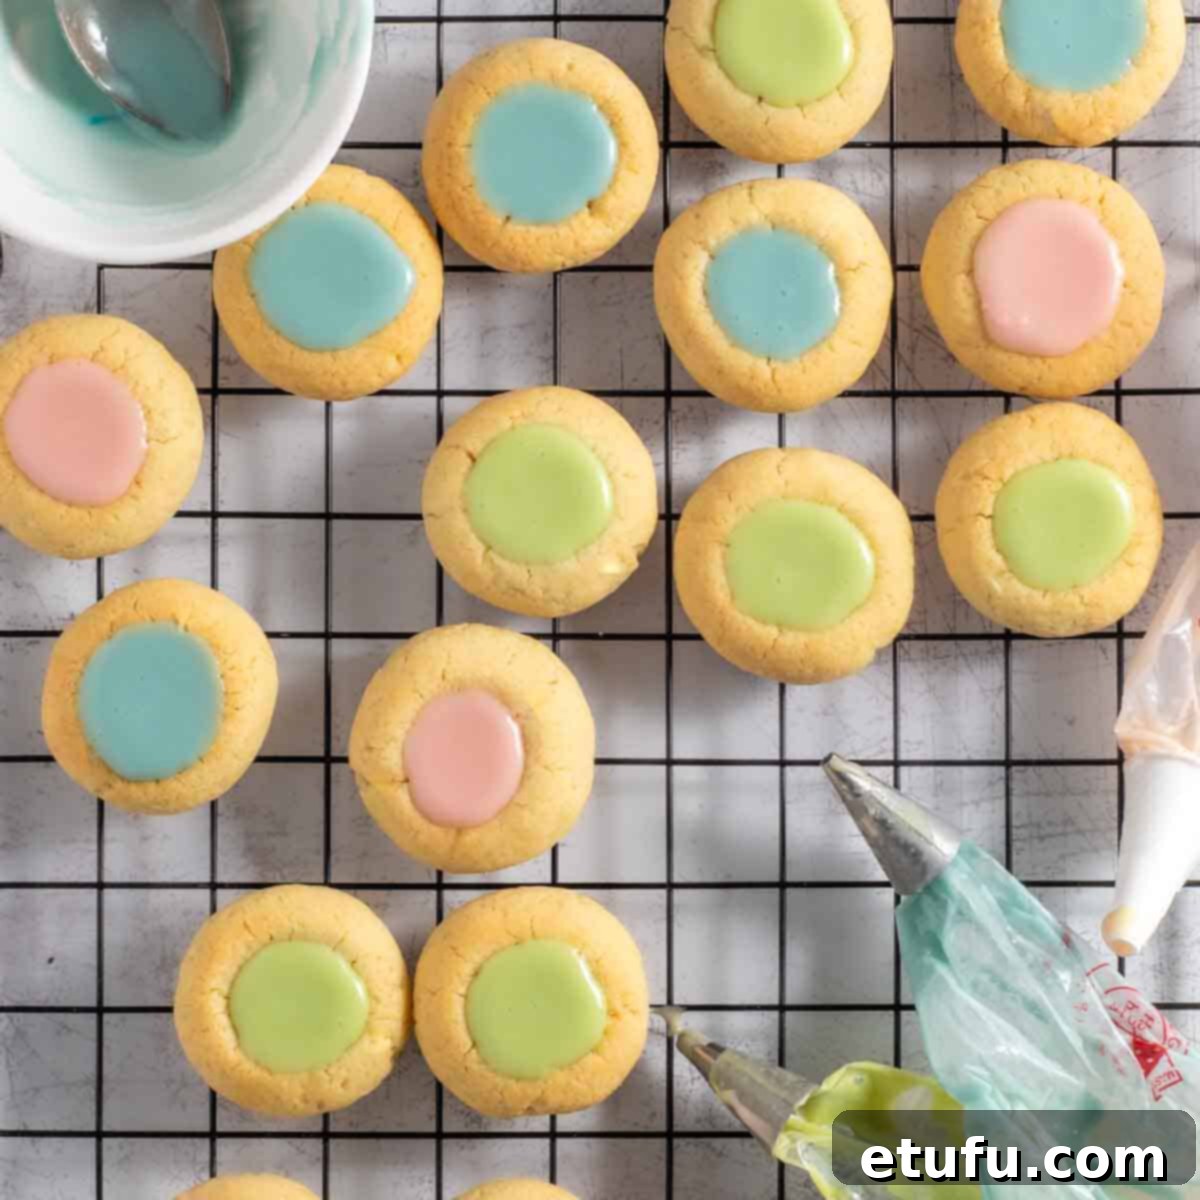
15. Fill and Set: Transfer the colored icing into small piping bags fitted with a small round tip, or simply use a small teaspoon for filling. Carefully fill the indentation of each cooled cookie, filling just to the top edge of the hollow. Avoid overfilling, as this can cause the icing to spill over the sides once it settles. Allow the filled cookies to sit undisturbed at room temperature for a few hours, or ideally overnight, to allow the icing to set completely before stacking or serving. This ensures a firm, glossy finish.
Troubleshooting Common Issues for Perfect Thumbprint Cookies
Even experienced bakers encounter little bumps along the way. Here are solutions to common challenges you might face when making these delightful thumbprint cookies:
How to Minimize Cracks on Your Cookies
Some minor cracking is normal for this type of cookie, especially if the dough is slightly dry. However, you can significantly reduce visible cracks by following these tips:
- Roll Dough Balls Smoothly: Before indenting, ensure each dough ball is perfectly smooth with no visible cracks or seams. Gently roll them between your palms until they are uniform.
- Prevent Dough from Drying: Work relatively quickly when forming and indenting the dough balls. If the dough sits out too long and starts to dry, it becomes less pliable and more prone to cracking when pressed.
- Avoid Chilling Before Indenting: Do not chill the dough *before* making the hollows. Dough that is too firm will resist indentation and is much more likely to crack or crumble when pressed. Chill only after the indentations are made.
- Gentle Repair for Cracks: If small cracks do appear as you create the hollows, don’t despair! Gently pinch them closed and smooth the surface with a lightly damp fingertip. The moisture helps to meld the dough back together.
How to Fix Icing That’s Too Runny
If you’ve accidentally added too much milk and your icing is thinner than desired, it’s an easy fix! Simply add 1-2 tablespoons of sifted powdered sugar at a time, mixing thoroughly after each addition, until the icing reaches your desired thick, pourable consistency. Patience is key here to avoid over-thickening.
How to Store Cookies Without Damaging the Icing
To preserve the pristine, smooth surface of your beautifully iced thumbprint cookies, careful storage is essential:
- Single Layer Storage: We highly recommend storing these cookies in a single layer within an airtight container. This prevents any contact between cookies, which could smudge or stick to the delicate icing.
- Avoid Stacking (Initially): Even once the icing has set, stacking them with parchment paper in between can sometimes leave faint marks or imprints. If you must stack, ensure the icing is completely dry and firm, and use a very light touch with parchment paper.
- Room Temperature is Best: Avoid refrigeration if possible. The humidity and cold temperature in a refrigerator can cause the icing to soften, become sticky, or “sweat,” creating condensation that mars its appearance and texture. Store at cool room temperature for optimal results.
Unleash Your Creativity: Variations and Flavor Twists
These thumbprint icing cookies are incredibly versatile, serving as a perfect canvas for your creative flavor combinations. Don’t hesitate to experiment and make them uniquely your own!
Flavoring the Cookie Dough:
- Citrus Zest: For a bright and refreshing twist, incorporate 1-2 teaspoons of finely grated lemon, orange, or lime zest into the cookie dough with the wet ingredients. The citrus oils add a wonderful aroma and tangy note.
- Nut Extracts: Add a splash of almond extract (½-1 teaspoon) along with the vanilla for a warm, nutty depth. Hazelnut or pistachio extracts could also offer unique profiles.
- Spiced Touch: For a cozy, aromatic cookie, mix in a pinch of ground cinnamon, nutmeg, cardamom, or even a blend of pumpkin pie spice with the flour.
Flavoring the Icing:
- Extract Swaps: Beyond vanilla, experiment with other extracts in your icing. Almond, lemon, peppermint, or even a delicate rosewater can transform the flavor profile entirely. Always add extracts sparingly, a few drops at a time, as they can be potent.
- Coffee or Chocolate: For a richer icing, replace some of the milk with a very small amount of strong brewed coffee (cooled) or a teaspoon of unsweetened cocoa powder (sifted).
- Fruit Juices: Instead of milk, use a small amount of strained lemon, lime, or orange juice to thin the icing and add a tangy, fruity flavor that pairs wonderfully with the sweet cookie.
Decorating Ideas for Iced Thumbprint Cookies
The beauty of these cookies extends to their decorating possibilities. Here are a few ideas to make your cookies truly stand out:
- Single Color Elegance: Keep it classic and refined with a single, elegant icing color. Soft pastel pinks are perfect for Valentine’s Day or baby showers, while pure white icing offers a timeless, sophisticated look for Christmas or winter events.
- Multi-Color Celebrations: Embrace the festive spirit with multiple colors! Use traditional red and green for a vibrant Christmas assortment, or a mix of blue and pink cookies for a fun gender reveal party. Play with shades of green for St. Patrick’s Day or bright primary colors for a child’s birthday.
- Add Some Sparkle and Texture: Take your cookies from pretty to party-ready with a dash of sparkle! Before the icing fully sets, sprinkle on edible glitter, sanding sugar, or small nonpareil sprinkles. You can also pipe a contrasting color or design on top of the set base icing for an extra decorative flourish.
- Edible Decorations: For a more elaborate touch, consider placing small edible pearls, silver dragees, or tiny fondant cutouts in the center of the wet icing for a truly bespoke look.
Storage Tips for Keeping Your Iced Thumbprint Cookies Fresh
To maintain the freshness, texture, and beautiful appearance of your iced thumbprint cookies, proper storage is key. After the icing has fully set (which can take several hours at room temperature), transfer the cookies to an airtight container. We highly recommend storing them in a single layer to prevent any accidental smudging or damage to the delicate icing. If you absolutely must stack them, place a piece of parchment paper or wax paper gently between layers, but be aware that this can sometimes leave faint marks. These cookies will remain deliciously fresh for up to one week when stored at cool room temperature. Avoid refrigerating them, as the cold and moisture can cause the icing to become sticky, dull, or “sweat,” and may also alter the texture of the cookie itself.
Full Recipe Card: Easy Iced Thumbprint Cookies

Easy Thumbprint Icing Cookies
Thumbprint icing cookies offer a delightful, fresh take on a beloved classic buttery biscuit.
Unlike traditional jam-filled versions, these cookies feature a smooth, vibrant icing that brings a cheerful and modern appeal to your dessert table.
This recipe creates a cookie that beautifully marries the tenderness of shortbread with the soft chewiness of a sugar cookie – rich, delicate, and sturdy enough to hold its perfect shape and delicious filling.
Print Recipe
Course: Dessert, Snack
Cuisine: International
Prep Time: 20 minutes
Cook Time: 15 minutes
Fridge Time: 10 minutes
Total Time: 50 minutes
Servings: 36 cookies
Calories: 120 kcal per cookie
Author: Maretha Corbett
Equipment
- 2-3 large baking sheets
- Parchment paper
- Hand mixer or stand mixer
- Large mixing bowls
- Measuring cups and spoons
- Sifter (for powdered sugar)
- Melon baller, half-teaspoon measure, or small round object for indenting
- Wire cooling rack
- Small bowls (for coloring icing)
- Piping bags and small round tips (optional, for precise filling)
Ingredients
For the Cookies:
- 8 ounces (225g) unsalted butter, softened
- 4.7 ounces (135g) granulated sugar
- 1 large egg, at room temperature
- 1½ teaspoons vanilla extract
- ¼ teaspoon salt
- 13.2 ounces (375g) all-purpose flour
For the Thumbprint Frosting:
- 6.4 ounces (180g) powdered sugar (icing sugar), sifted
- 2-3 tablespoons milk (start with 2, add more gradually)
- ½ teaspoon vanilla extract
- Gel food coloring of choice
Instructions
- Line 2-3 baking sheets with parchment paper.
- In a large bowl, beat the soft butter and granulated sugar together with a hand mixer (or stand mixer) for 3-4 minutes until pale and fluffy.
- Add the egg, vanilla extract, and salt. Mix again until fully combined. Don’t worry if the mixture looks slightly curdled; it’s normal.
- Add the all-purpose flour in three stages. Beat in the first two additions until just combined, then use your hands to gently bring the dough together with the final third addition.
- Continue mixing by hand until you have a smooth, cohesive dough with no dry patches at the bottom of the bowl. Avoid overworking the dough to keep cookies tender.
- Scoop level tablespoons of dough and roll each one into a smooth ball with no cracks or seams. Space them about 3 inches (8cm) apart on the prepared trays.
- Make an indentation in the center of each ball using a melon baller, a half-teaspoon measure, or your thumb/knuckle. If needed, dip your tool/finger in water to prevent sticking.
- Preheat the oven to 350°F (180°C).
- Chill the trays in the fridge for 10 minutes. This helps the cookies hold their shape during baking.
- Bake for 9 minutes. Remove from the oven and gently re-indent each cookie (they will have puffed slightly). Return to the oven and bake for another 6 minutes until lightly golden at the edges.
- Cool completely on a wire rack before proceeding to icing.
- To make the icing: Sift the powdered sugar into a bowl. Add 2 tablespoons of milk along with the vanilla extract. Stir well until smooth. Adjust the texture by adding milk just ½ teaspoon at a time, mixing thoroughly until it reaches a consistency similar to runny honey – thick, smooth, and pourable.
- Divide the icing into separate bowls if you are using multiple colors.
- Tint each bowl with a small amount of gel food coloring. Start with a toothpick’s tip, mix well, and adjust as needed to achieve your desired hue.
- Fill the cooled cookies using a small round piping tip or a teaspoon. Fill just to the top of the indent; avoid overfilling to prevent spillage. Let the icing set for a few hours at room temperature (or overnight) before serving.
Notes
The Perfect Icing Consistency
The ideal icing should be just runny enough to settle smoothly into the hollows, without spilling over. Think the texture of runny honey – thick and slow-flowing. When you drizzle a ribbon from a spoon, it should disappear back into itself within 5 to 10 seconds. If it’s too runny, it might overflow, especially if the hollow is slightly uneven. But if you prefer a more defined, piped look, feel free to keep it a little thicker. There’s no wrong way to do it.
Troubleshooting
How to minimize cracks on your cookies
Some cracking is normal, but these tips help keep your cookies smooth:
- Roll the dough balls completely smooth with no seams or cracks.
- Don’t let the dough dry out before making the indentations.
- Avoid chilling the dough before making hollows – too firm dough can crack when indented.
- If cracks do appear while making the hollows, gently pinch them closed and smooth with a damp fingertip.
How to fix icing that’s too runny
If your icing is too thin, simply add 1–2 tablespoons of sifted icing sugar at a time to thicken it back up.
How to store cookies without damaging the icing
We highly recommend storing the cookies in a single layer to keep the icing pristine. Even parchment paper between layers can sometimes leave marks or smudges on the icing. Avoid refrigeration, as it can cause the icing to soften or sweat.
**Nutritional Data Disclaimer**
Please keep in mind that the nutritional information provided below is calculated by a third party and we cannot guarantee its absolute accuracy. We strive to offer the most reliable information possible, but we do not take responsibility for any errors that may be present. Additionally, the nutritional value of the recipe may vary depending on the exact brands and products used in your preparation. For personalized advice on your dietary needs, we recommend consulting with a qualified healthcare professional or registered dietitian.
Nutrition Information
Calories: 120kcal | Carbohydrates: 17g | Protein: 1g | Fat: 5g | Saturated Fat: 3g | Polyunsaturated Fat: 0.3g | Monounsaturated Fat: 1g | Trans Fat: 0.2g | Cholesterol: 19mg | Sodium: 20mg | Potassium: 16mg | Fiber: 0.3g | Sugar: 9g | Vitamin A: 166IU | Calcium: 5mg | Iron: 1mg
For food safety advice, including guidance on food allergies
