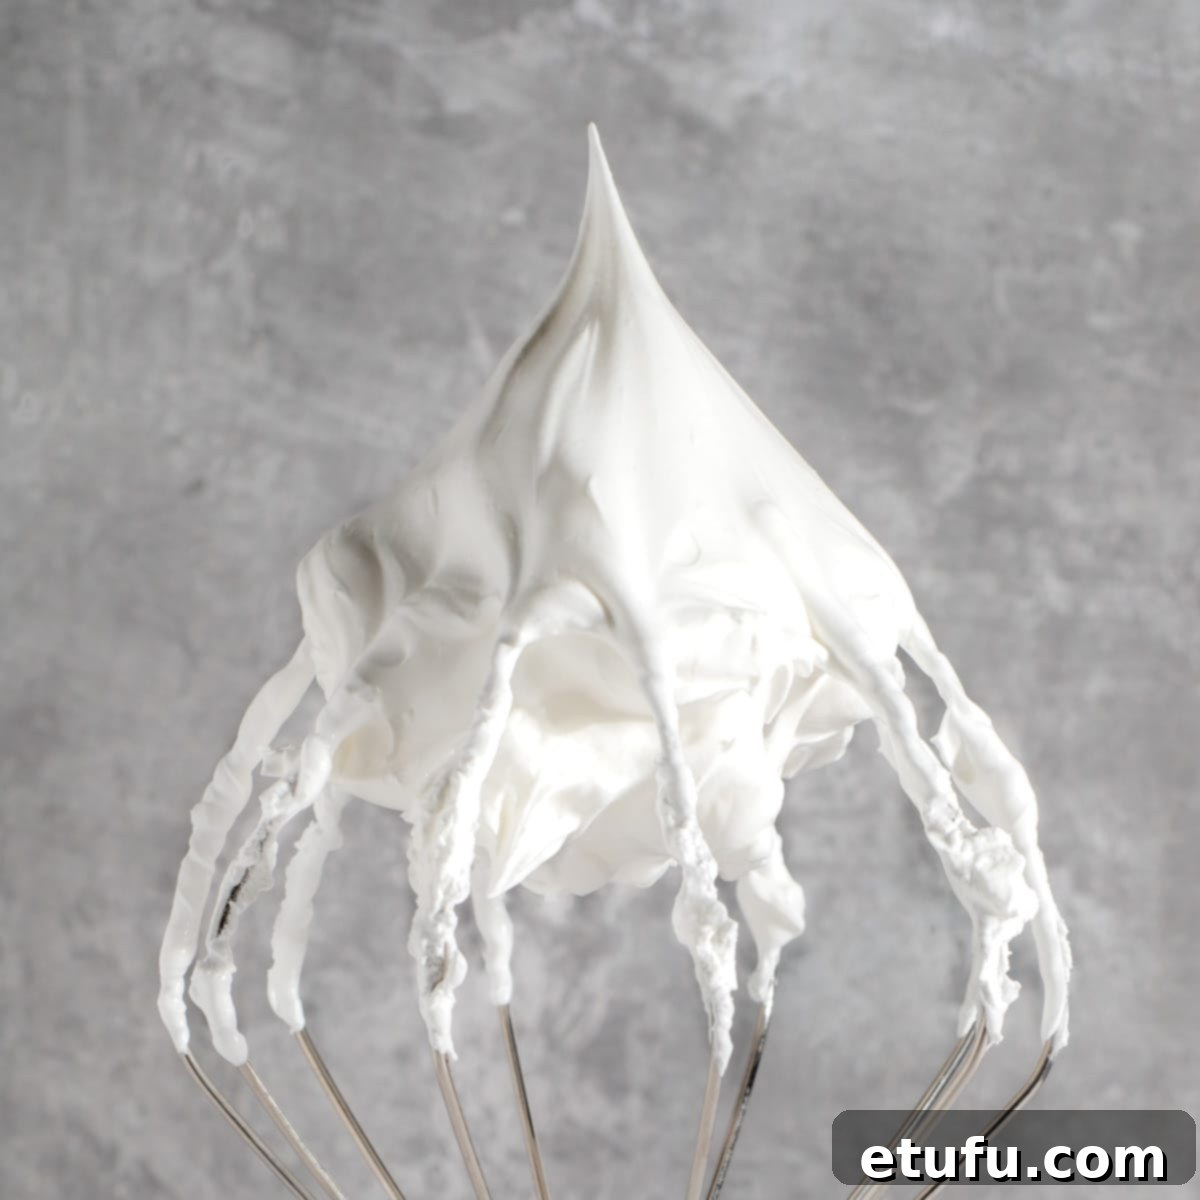
An Epicurean Adventure to: The United States of America – Mastering Homemade Marshmallow Fluff
Imagine a confection so light it feels like a cloud, so creamy it melts in your mouth, and so delightfully flavored it elevates any dessert. This isn’t just a dream; it’s the reality of homemade marshmallow fluff, a versatile sweet treat that’s surprisingly simple to create in your own kitchen. Forget the store-bought versions; our recipe delivers a fresh, airy, and utterly irresistible fluff that’s ready to transform your baking and dessert game.
This remarkable recipe for homemade marshmallow fluff requires just four accessible ingredients, making it an ideal choice for home bakers everywhere. It boasts a plethora of uses in confectionery, from elegant dessert toppings to comforting sandwich spreads. What truly sets our marshmallow fluff apart is its preparation without corn syrup, ensuring that it can be made with ingredients easily found globally, especially in regions where corn syrup might not be a common pantry staple. Moreover, it offers a lighter texture and is generally less caloric than traditional buttercream, all while being significantly easier to prepare.
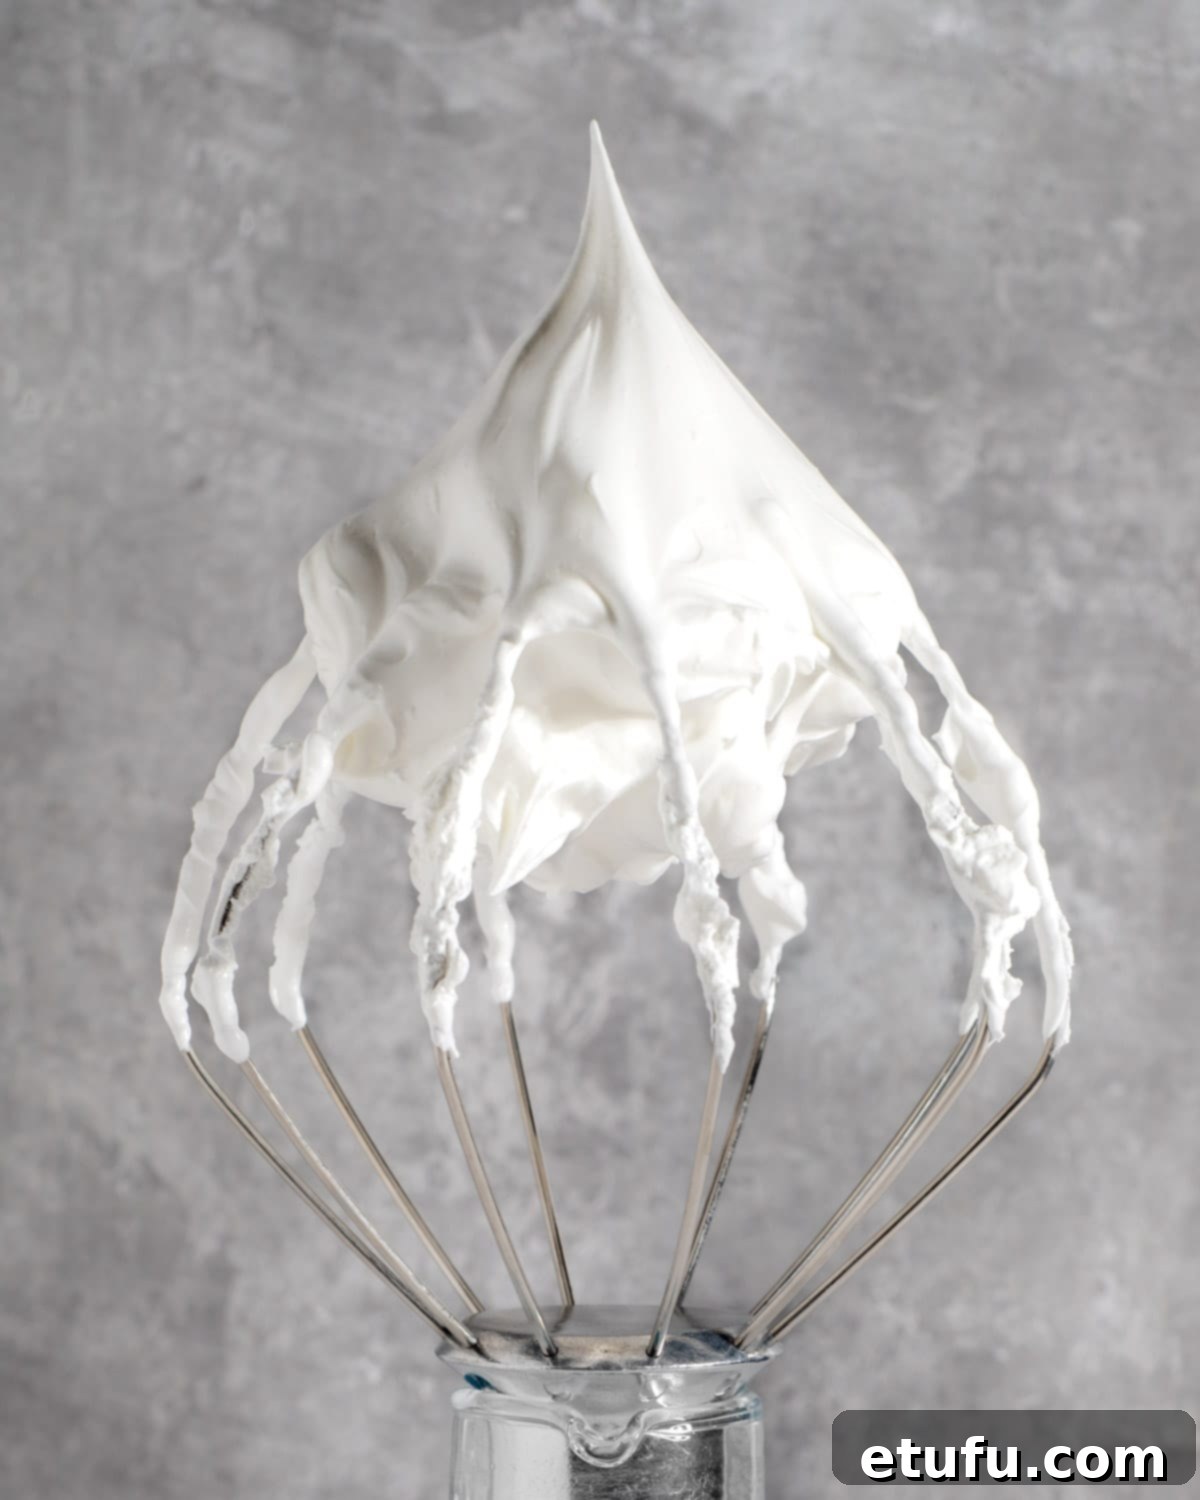
Discover the magic this fluff brings to desserts! For inspiration, explore our delightful marshmallow tart, where this very recipe shines as a beautifully piped and toasted topping. If you’re seeking other effortless and delectable dessert enhancements, don’t miss our creamy Mascarpone cream recipe, perfect for adding a touch of luxury to your sweet creations.
Embrace the joy of crafting this versatile homemade marshmallow fluff. It’s not just a recipe; it’s an invitation to elevate your desserts with a light, fresh, and wonderfully flavorful touch. From sophisticated tarts to everyday treats, this corn syrup-free marshmallow fluff promises to become a cherished addition to your culinary repertoire.
Why You’ll Adore This Homemade Marshmallow Fluff Recipe
There are countless reasons to fall in love with making your own marshmallow fluff. Beyond the sheer satisfaction of creating something delicious from scratch, this recipe offers distinct advantages that make it a standout:
- Unmatched Lightness and Flavor: This marshmallow fluff is incredibly light, airy, and delicately flavored, making it a superior alternative to heavier frostings like buttercream. Its fresh taste is simply unparalleled by anything store-bought.
- Simple, Accessible Ingredients: Requiring only four basic ingredients – egg whites, granulated sugar, cream of tartar, and vanilla extract – this recipe utilizes items commonly found in most kitchens. Importantly, it’s crafted without corn syrup, making it globally accessible and a fantastic option for those seeking alternatives to traditional recipes.
- Perfect for Piping and Toasting: The consistency of this homemade fluff is ideal for piping intricate designs or simple swirls onto your desserts. For an extra layer of flavor and visual appeal, it can be beautifully toasted with a kitchen torch, adding a delightful caramelized crust.
- Diet-Friendly Features: Our marshmallow fluff is naturally gluten-free and dairy-free. By omitting corn syrup and gelatin (often found in commercial marshmallows), it caters to a wider range of dietary preferences while maintaining its delightful texture and taste.
- A Delightful Homemade Gift: Pack this exquisite marshmallow fluff into cute jars, adorn them with a handmade label, and you have a charming, edible gift that sweet lovers will adore. It’s a thoughtful present that showcases your culinary skills.
Each batch of this homemade marshmallow fluff promises a delightful experience, both in its creation and its indulgence. It’s a recipe designed for ease, versatility, and pure enjoyment, destined to become a staple in your kitchen.
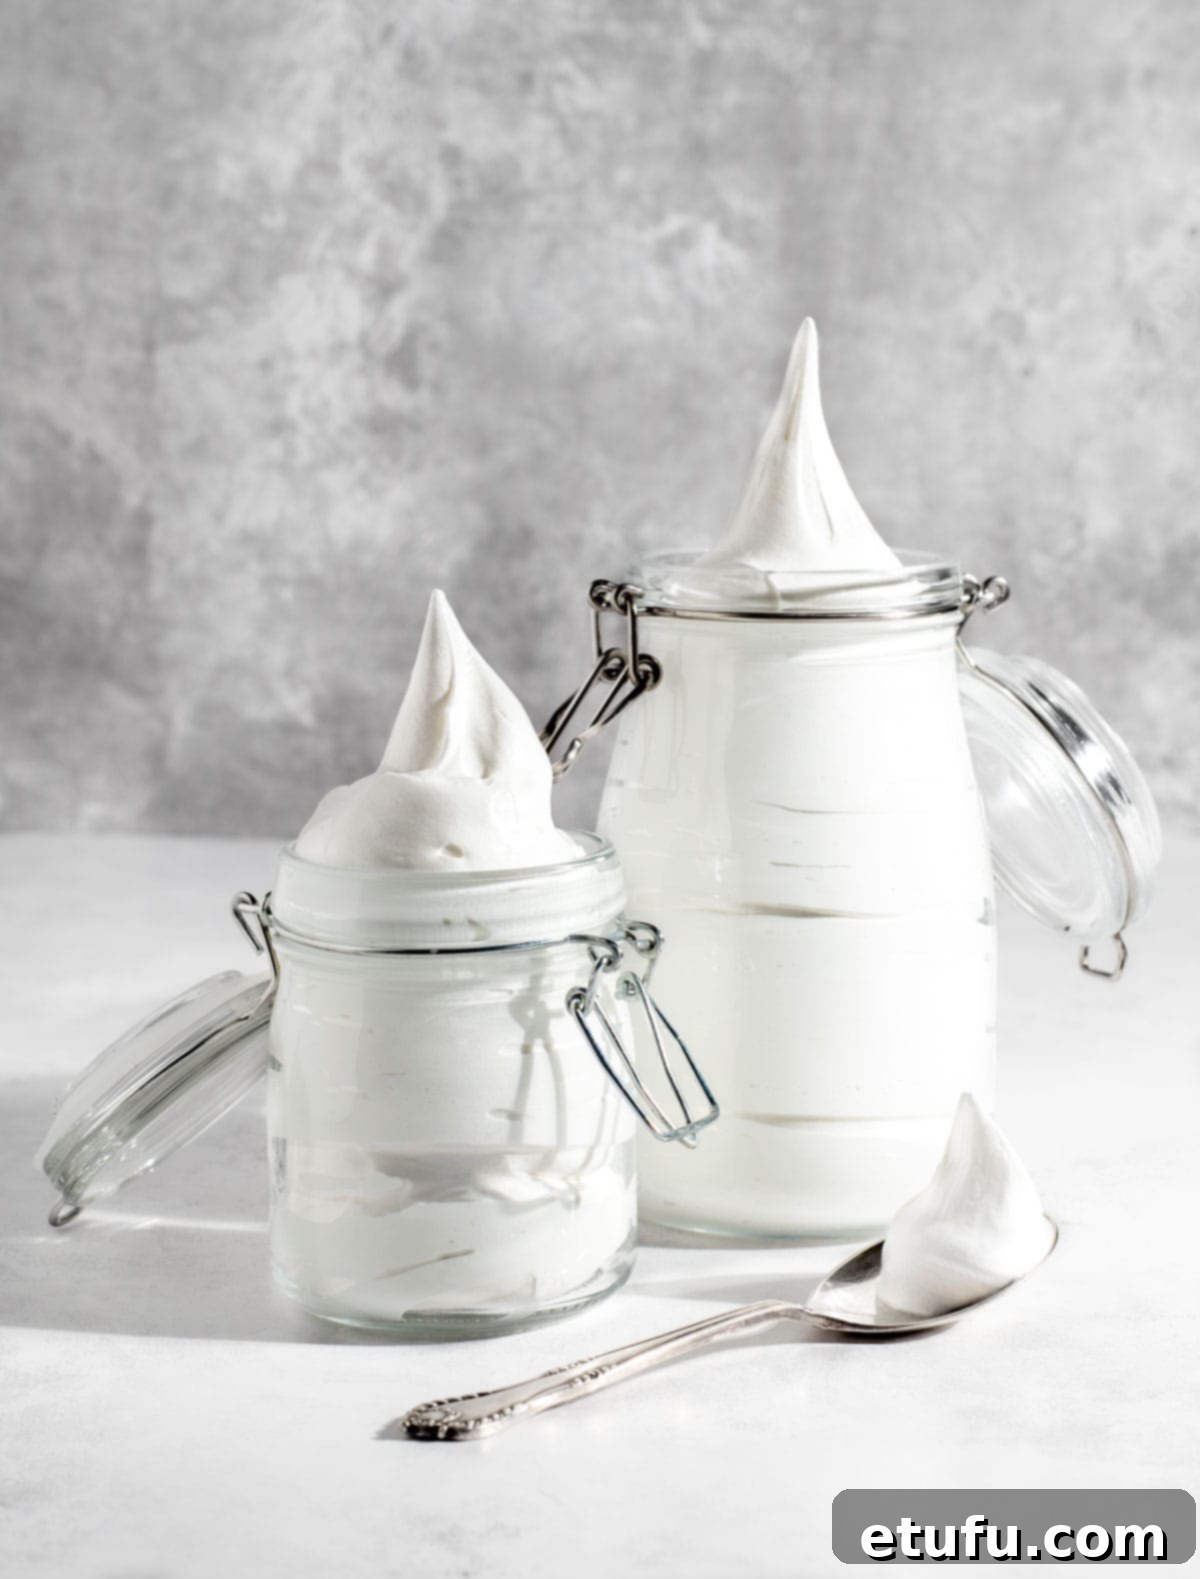
Essential Ingredient Insights and Smart Substitutions for Perfect Marshmallow Fluff
Crafting flawless homemade marshmallow fluff begins with understanding the role of each ingredient. While simple, precision and quality make all the difference. You’ll find the full list of ingredients and precise measurements in the recipe card at the bottom of this post, but let’s delve into what makes these few items so powerful.
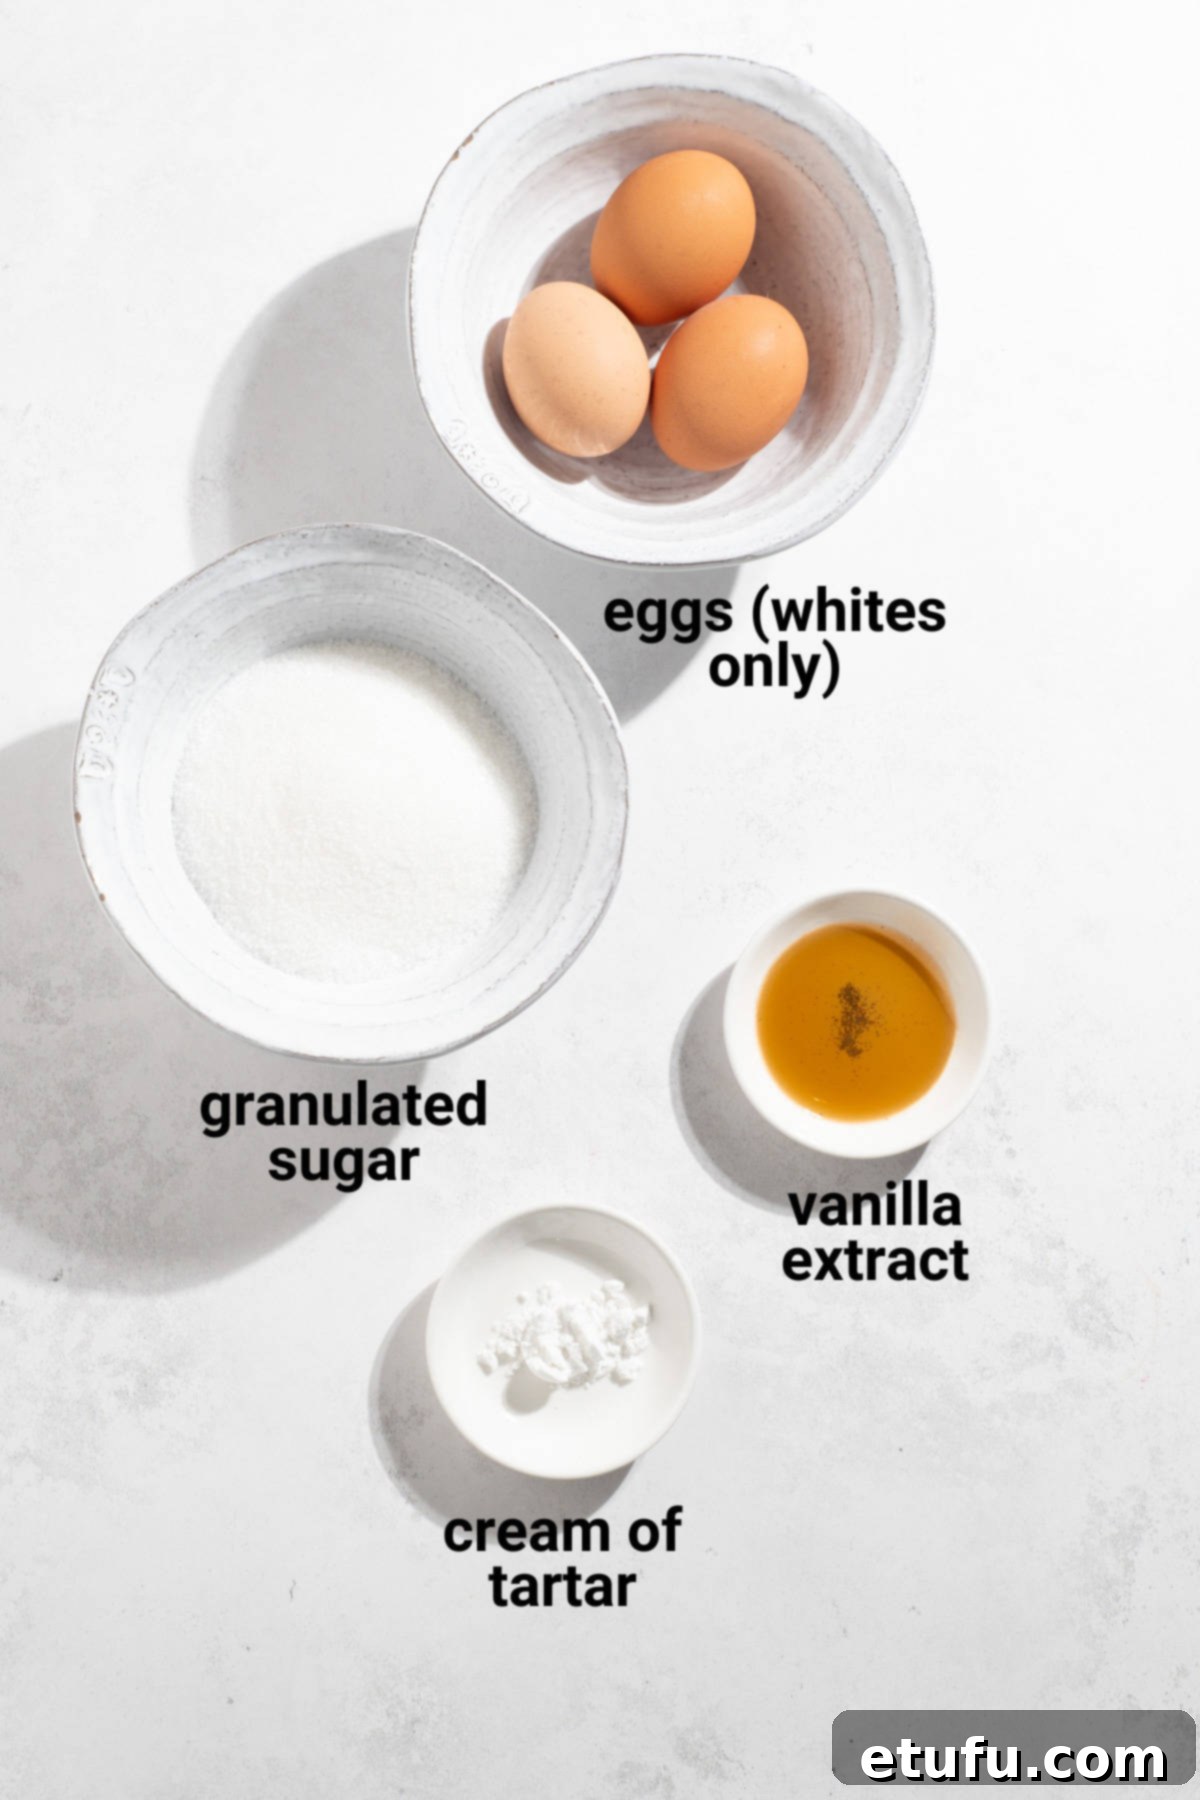
Egg Whites: The Foundation of Fluffiness
Egg whites are the star of this meringue-based confection, providing the crucial structure for that signature airy, cloud-like texture. For optimal results, it is absolutely essential to ensure that no traces of egg yolk contaminate your egg whites. Even the smallest speck of yolk contains fat, which can prevent the egg whites from whipping up into stiff, stable peaks, ultimately compromising the fluff’s texture. Use fresh, large eggs, and take extra care during the separation process (we’ll cover a foolproof method below).
Granulated Sugar: Sweetness and Stability
Sugar not only provides the necessary sweetness but also plays a vital role in stabilizing the whipped egg whites. When heated with the egg whites, the sugar dissolves into a syrup, which then helps create a stable meringue that holds its shape. While granulated sugar is specified, you can also opt for caster sugar (superfine sugar). Its smaller granules will dissolve more quickly, which can slightly speed up the cooking process over the double boiler.
Cream of Tartar: The Meringue’s Best Friend
Cream of tartar is a crucial acidic component in this recipe. Its primary function is to stabilize the whipped egg whites, helping them reach and maintain stiff peaks. It also contributes to the marshmallow fluff’s overall volume and ensures a smooth, non-gritty texture. Do not skip this ingredient, as it significantly impacts the success and stability of your fluff. In a pinch, a tiny amount of lemon juice or white vinegar can serve as a substitute for cream of tartar, but cream of tartar offers the most reliable results.
Pure Vanilla Extract: The Flavor Enhancer
Pure vanilla extract infuses the marshmallow fluff with its classic, comforting aroma and taste. The quality of your vanilla will directly impact the final flavor, so we highly recommend using the best pure vanilla extract you can find and afford. Alternatively, for a truly exceptional and cost-effective option, consider making your own vanilla extract at home. Homemade vanilla offers fantastic quality and allows you to enjoy premium flavor without the premium price tag. For a detailed guide, check out our recipe on how to make your own vanilla extract!
With these key ingredients at hand and a clear understanding of their purpose, you’re well on your way to creating delightful, corn syrup-free marshmallow fluff that will impress everyone.
Essential Equipment for Crafting Homemade Marshmallow Fluff
Gathering the right tools before you begin will ensure a smooth and successful marshmallow fluff-making process. You don’t need highly specialized equipment, but a few key items are essential for achieving that perfect airy texture.
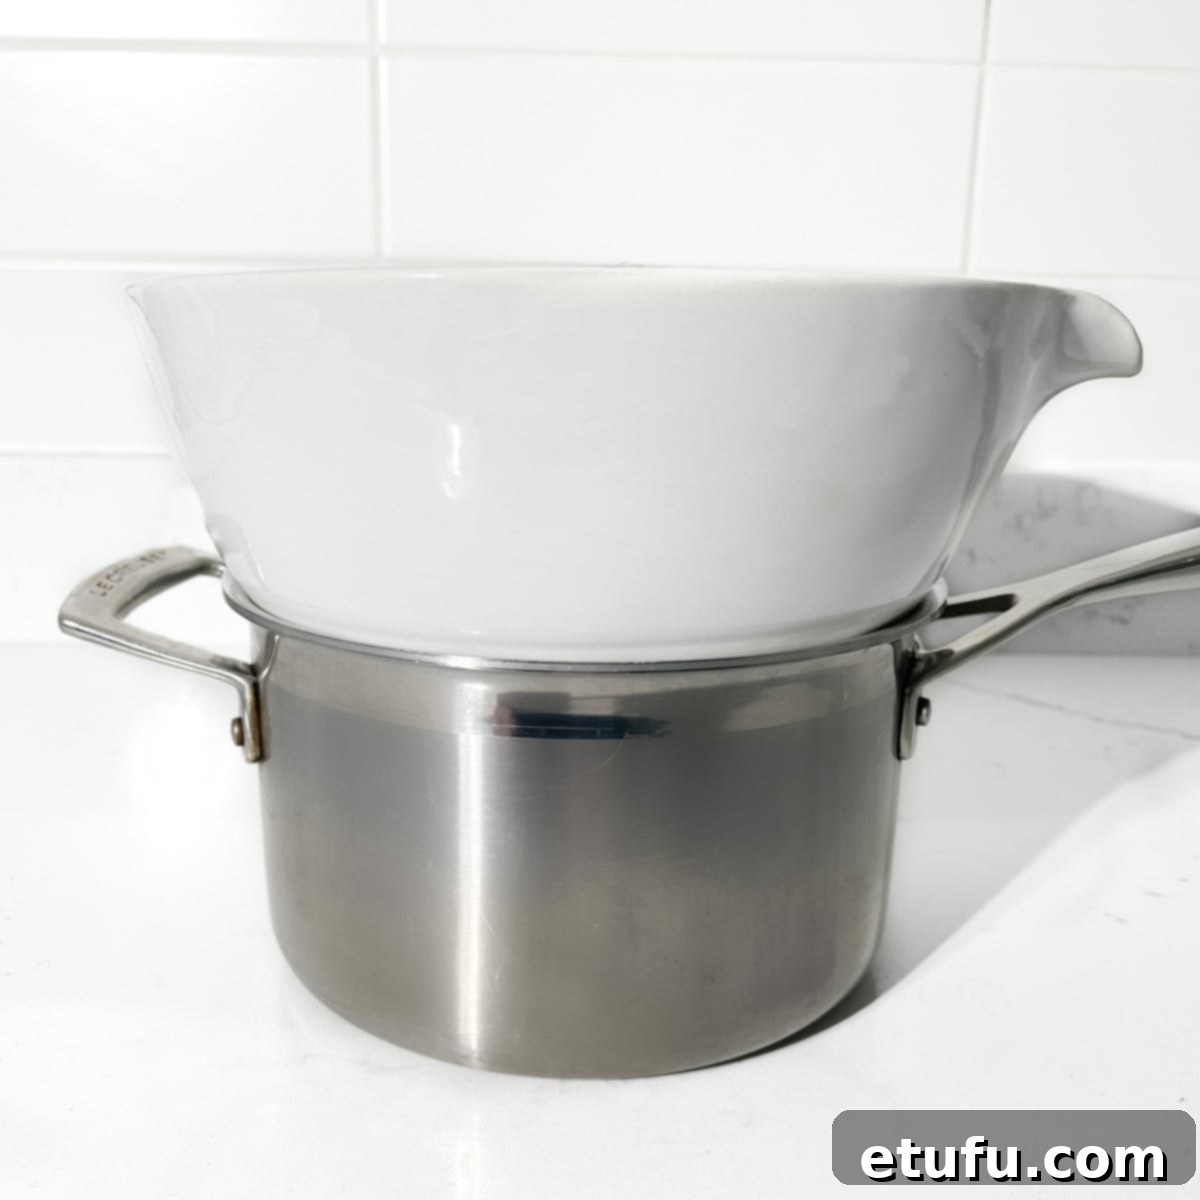
- Heatproof Bowl: A sturdy glass or metal bowl that can withstand heat is crucial. This will be used as the top part of your double boiler setup, where the egg white mixture will be gently cooked. Ensure it’s clean and grease-free to allow the egg whites to whip properly.
- Saucepan: You’ll need a saucepan large enough to comfortably hold the heatproof bowl on top without the bottom of the bowl touching the boiling water. This creates a makeshift double boiler (bain-marie) for gently heating the egg whites and dissolving the sugar, a critical step for food safety and optimal texture.
- Hand Whisk: A simple hand whisk is necessary for continuously stirring the egg white mixture over the heat. This prevents the eggs from scrambling and helps the sugar dissolve evenly, ensuring a smooth syrup.
- Stand Mixer or Electric Hand Mixer: This is where the magic truly happens! A stand mixer with a whisk attachment is ideal for whipping the heated egg white mixture into stiff, glossy peaks. If you don’t have a stand mixer, a powerful electric hand mixer will work just as well, though it might require a minute or two longer of whisking. Ensure your whisk attachment and mixing bowl are impeccably clean and grease-free.
Having these tools ready will streamline your marshmallow fluff creation, making the process enjoyable and ensuring a perfect result every time.
Foolproof Guide: How to Separate Eggs Safely and Effectively
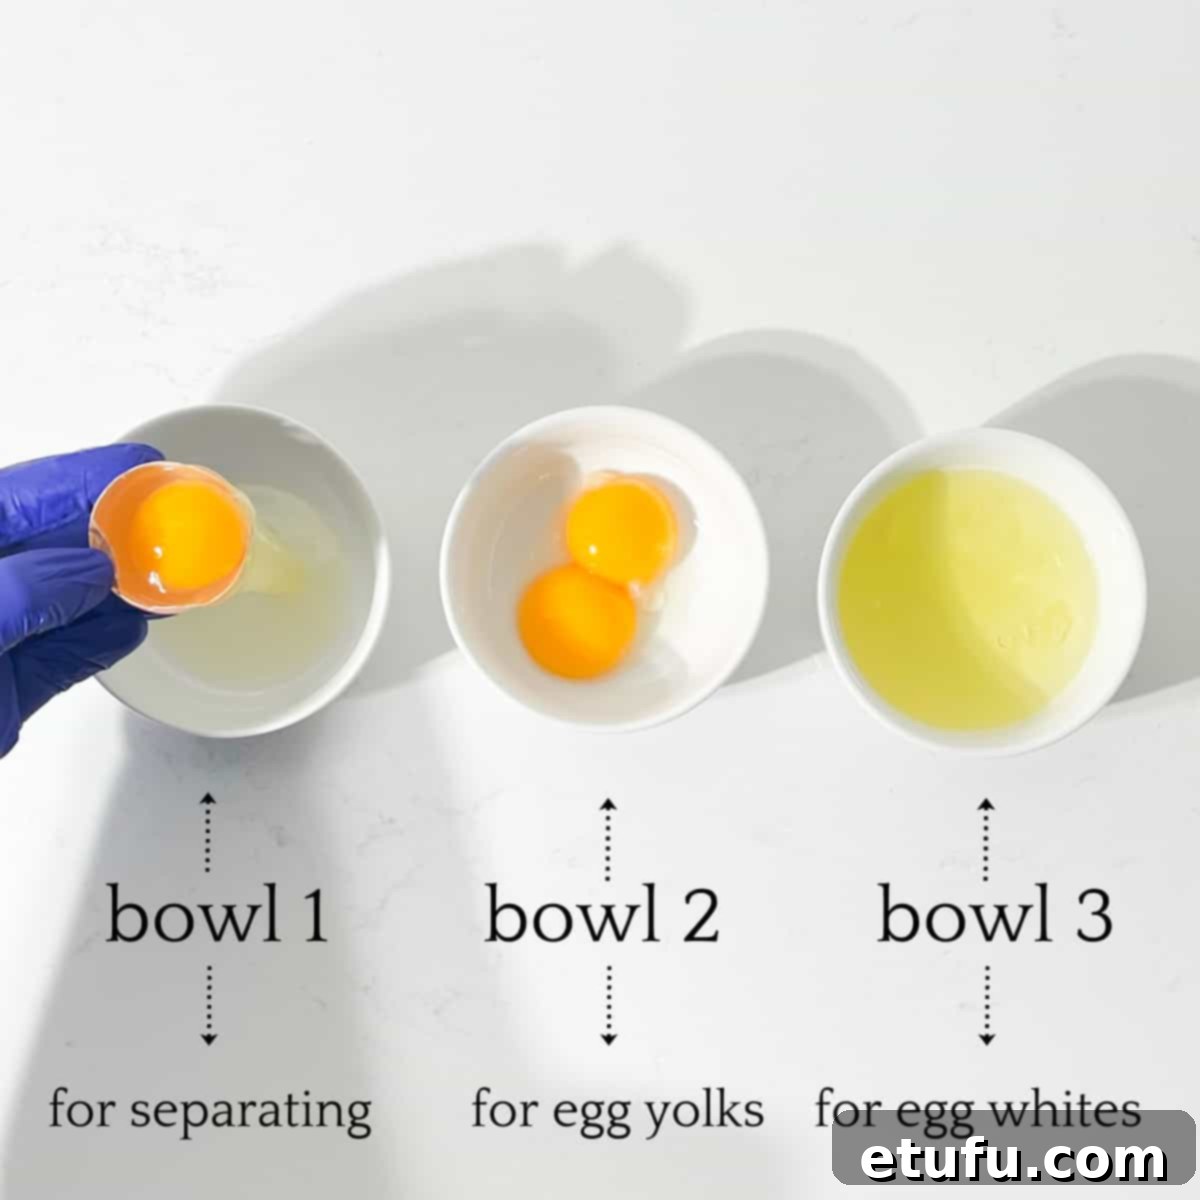
Accurate egg separation is paramount for successful marshmallow fluff, as even a tiny speck of yolk can hinder the egg whites from whipping properly. To ensure the best outcome, we highly recommend the traditional three-bowl method, especially if you’re new to separating eggs or simply want a foolproof approach.
Here’s how to set up and execute this reliable method:
Bowl 1 (The Working Bowl): This bowl is where you will initially crack and separate each individual egg. Its purpose is to catch the egg white while you transfer the yolk, isolating any potential mistakes. Ensure this bowl is clean and dry.
Bowl 2 (The Yolk Repository): Designated exclusively for egg yolks. As you successfully separate each yolk, it goes into this bowl. This prevents any yolk contamination from spreading to your precious egg whites.
Bowl 3 (The Egg White Sanctuary): This bowl is for all the successfully separated egg whites. Once an egg white has been cleanly separated in Bowl 1, it is transferred here. This ensures that even if you accidentally drop some yolk into Bowl 1 with a subsequent egg, your previously separated egg whites in Bowl 3 remain untainted.
The Separation Process, Step-by-Step:
- Take one egg and gently crack it against the side of **Bowl 1**.
- Carefully open the egg over **Bowl 1**, allowing the egg white to fall into the bowl.
- Gently transfer the yolk back and forth between the two halves of the eggshell, letting any remaining egg white drip into **Bowl 1**.
- Once all the white has separated from the yolk, transfer the clean yolk from the shell half to **Bowl 2**.
- Now, carefully pour the single, clean egg white from **Bowl 1** into **Bowl 3**.
- Repeat this process for each remaining egg, ensuring that each egg is separated individually in **Bowl 1** before its white is transferred to **Bowl 3**.
This systematic approach might seem like an extra step, but it’s a small investment of time that saves you the frustration of having to start over if a yolk breaks. By using three bowls, you safeguard the integrity of all your egg whites, guaranteeing the perfect foundation for your fluffy marshmallow delight.
How to Create Irresistible Marshmallow Fluff: A Step-by-Step Guide
Making homemade marshmallow fluff is a rewarding process that combines a touch of science with simple culinary techniques. Follow these detailed steps to achieve a perfectly light, airy, and stable fluff every time.
1. Prepare Your Double Boiler: Begin by placing a saucepan on your stovetop. Fill it with approximately 5 cm (2 inches) of water, ensuring there’s enough water to create steam but not so much that it touches the bottom of your heatproof mixing bowl later. Bring this water to a gentle boil over medium heat.
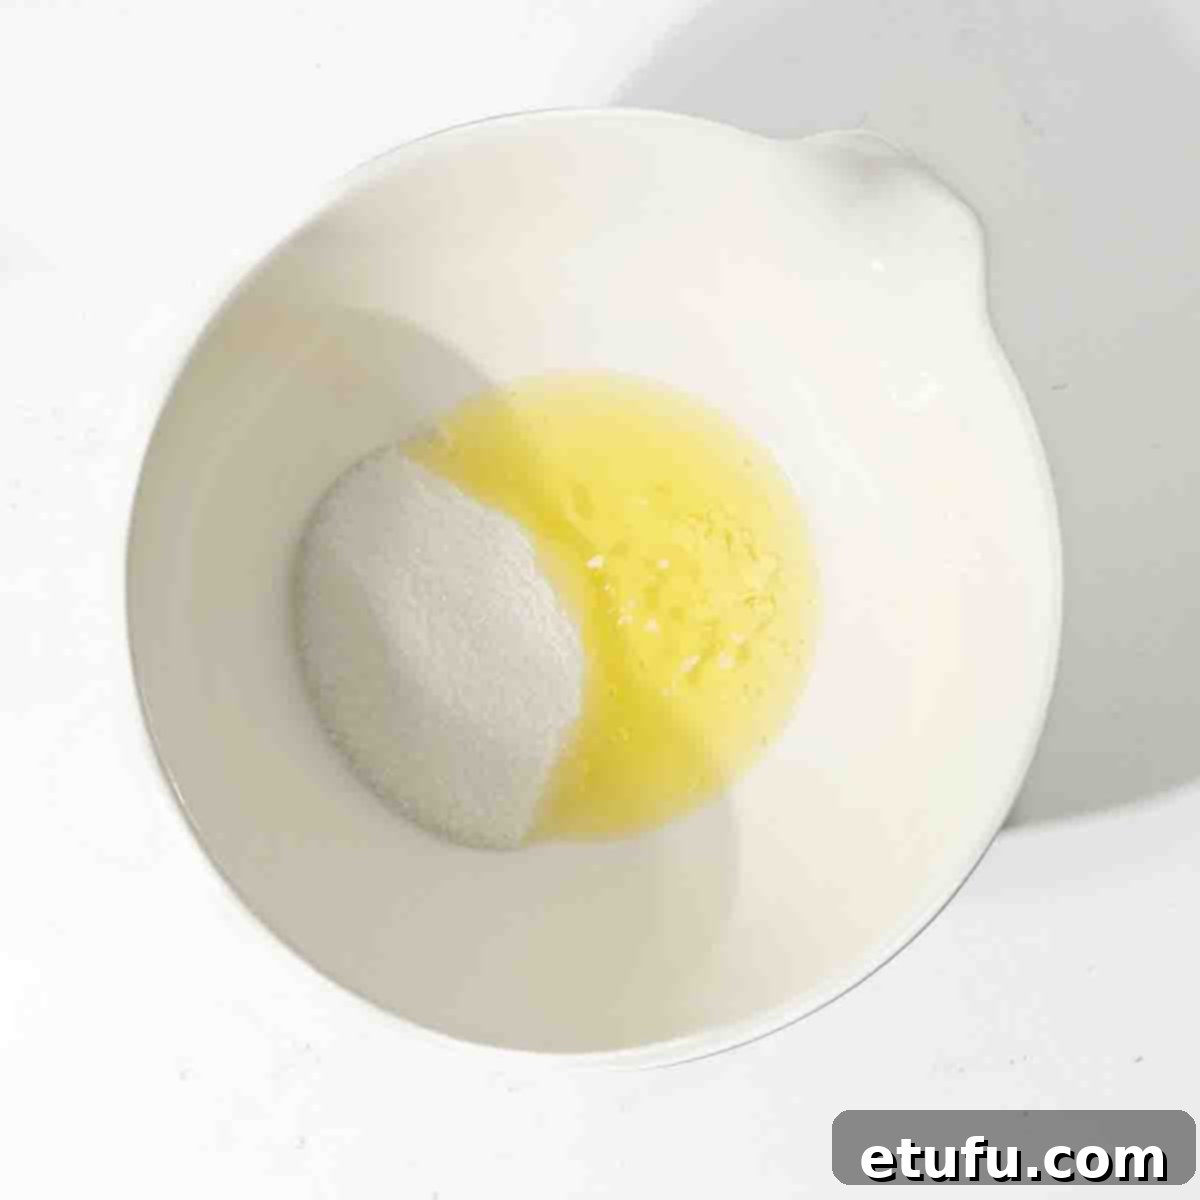
2. Combine Ingredients in Heatproof Bowl: In a meticulously clean, grease-free heatproof bowl, combine your carefully separated egg whites, granulated sugar, and cream of tartar. The bowl should be large enough to comfortably sit on top of your saucepan without its bottom making contact with the boiling water. This indirect heat is crucial for gently cooking the egg mixture.
3. Set Up the Double Boiler: Carefully position the heatproof bowl containing your egg white mixture on top of the saucepan with boiling water. Ensure a snug fit to prevent steam from escaping too readily, but remember, the bowl should not touch the water. This setup acts as a double boiler, or bain-marie, providing even, gentle heat. If you have a dedicated double boiler, you can certainly use that instead.
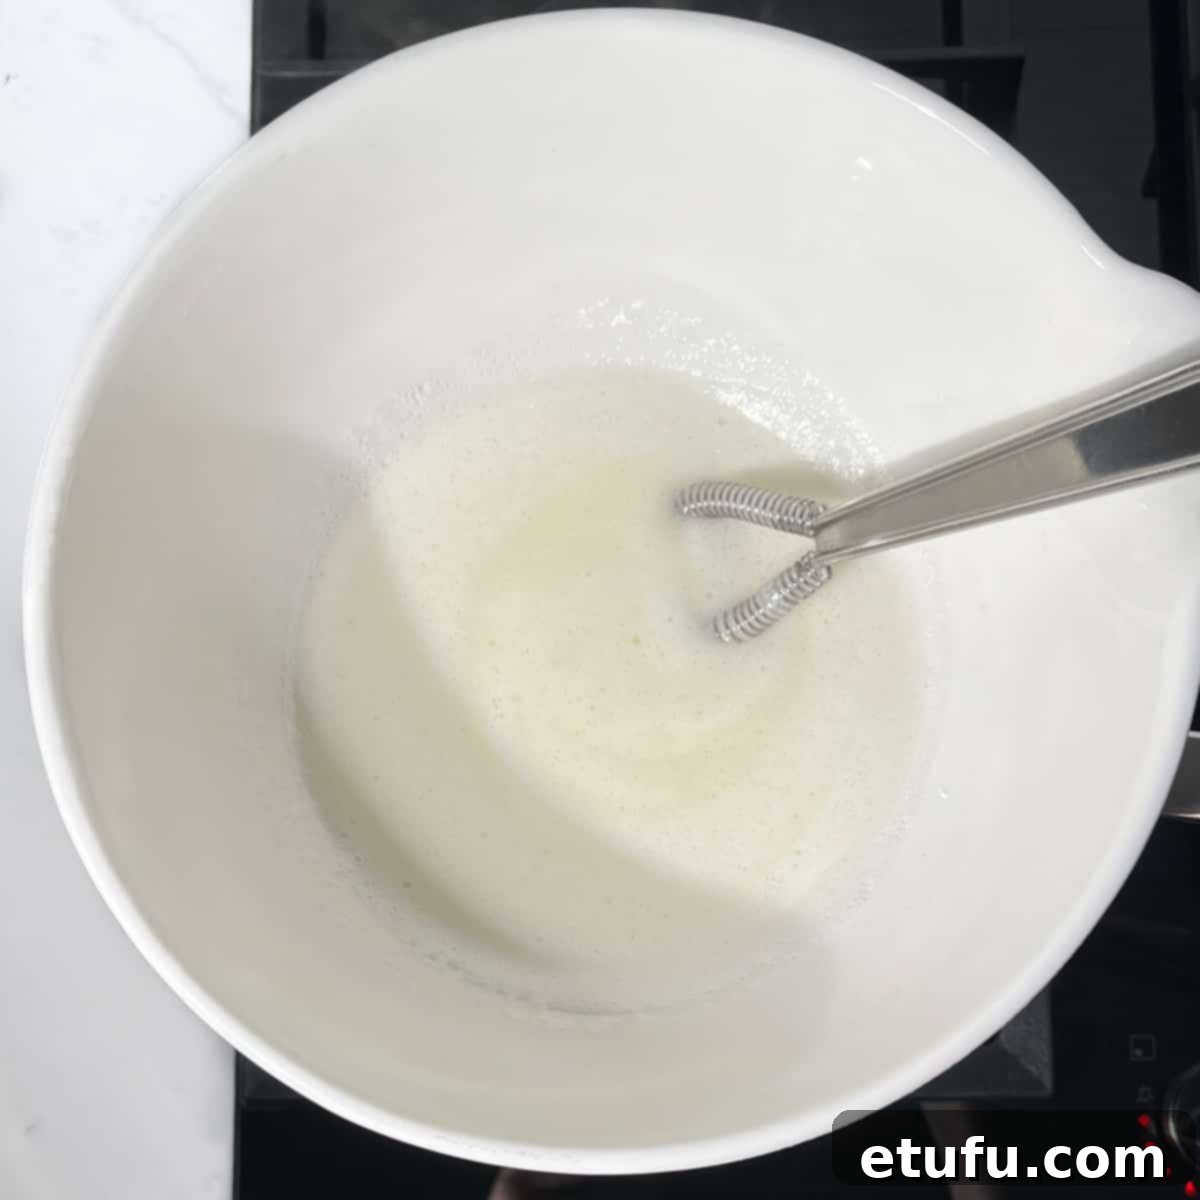
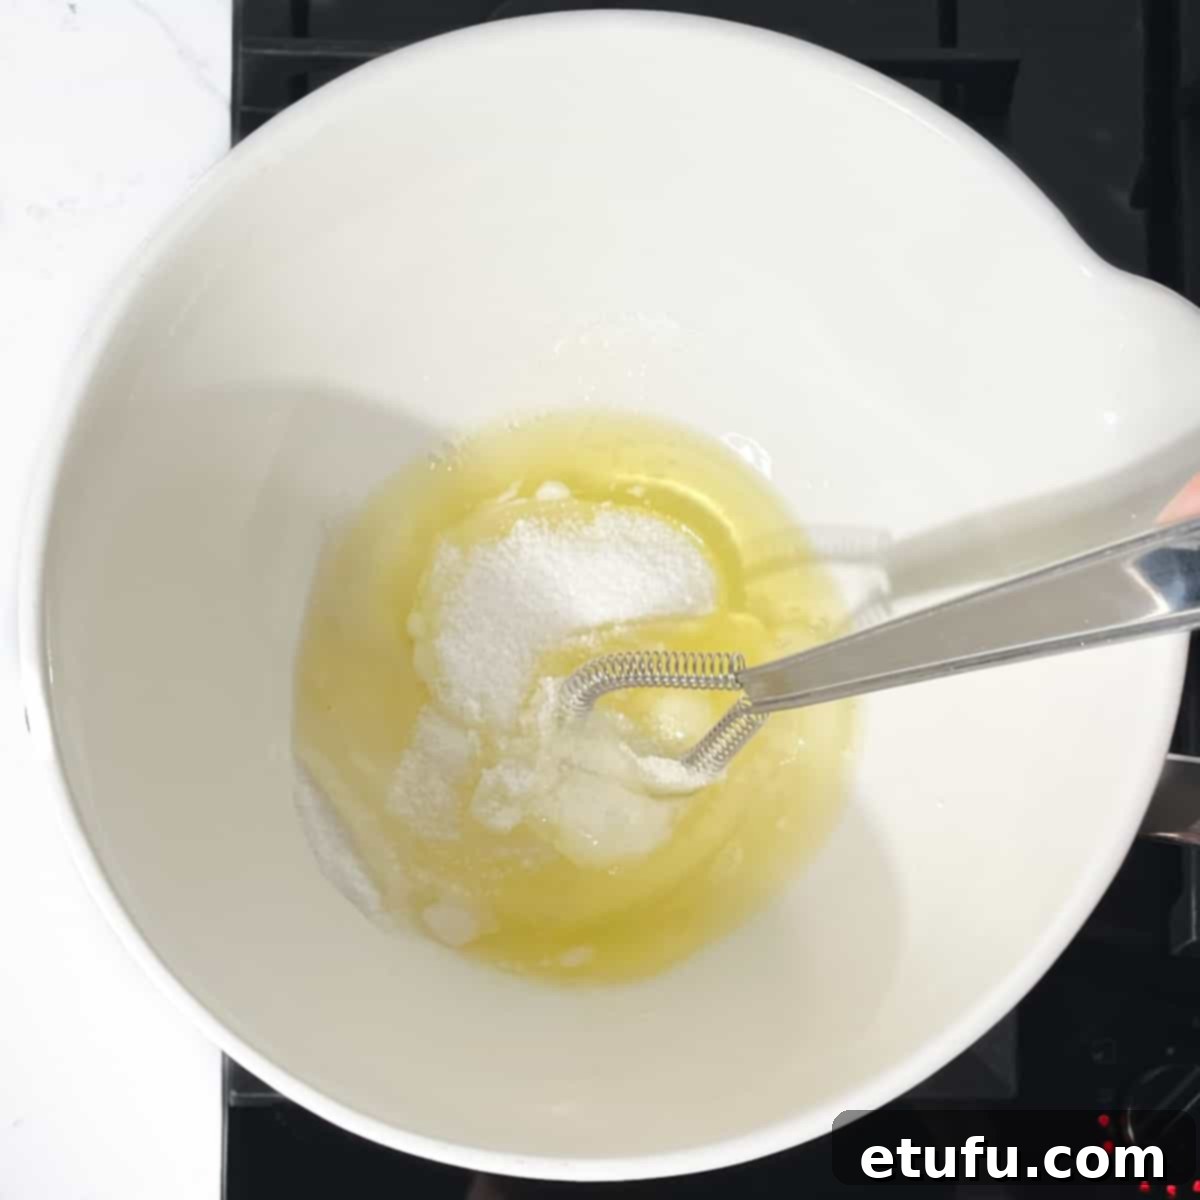
4. Heat and Whisk Continuously: Increase the heat under your saucepan to medium-high. Using a hand whisk, continuously whisk the egg mixture. As it gradually heats up, you’ll observe it becoming frothy and thinning out. This constant whisking is vital to prevent the egg whites from scrambling and to ensure the sugar dissolves evenly into a smooth syrup.
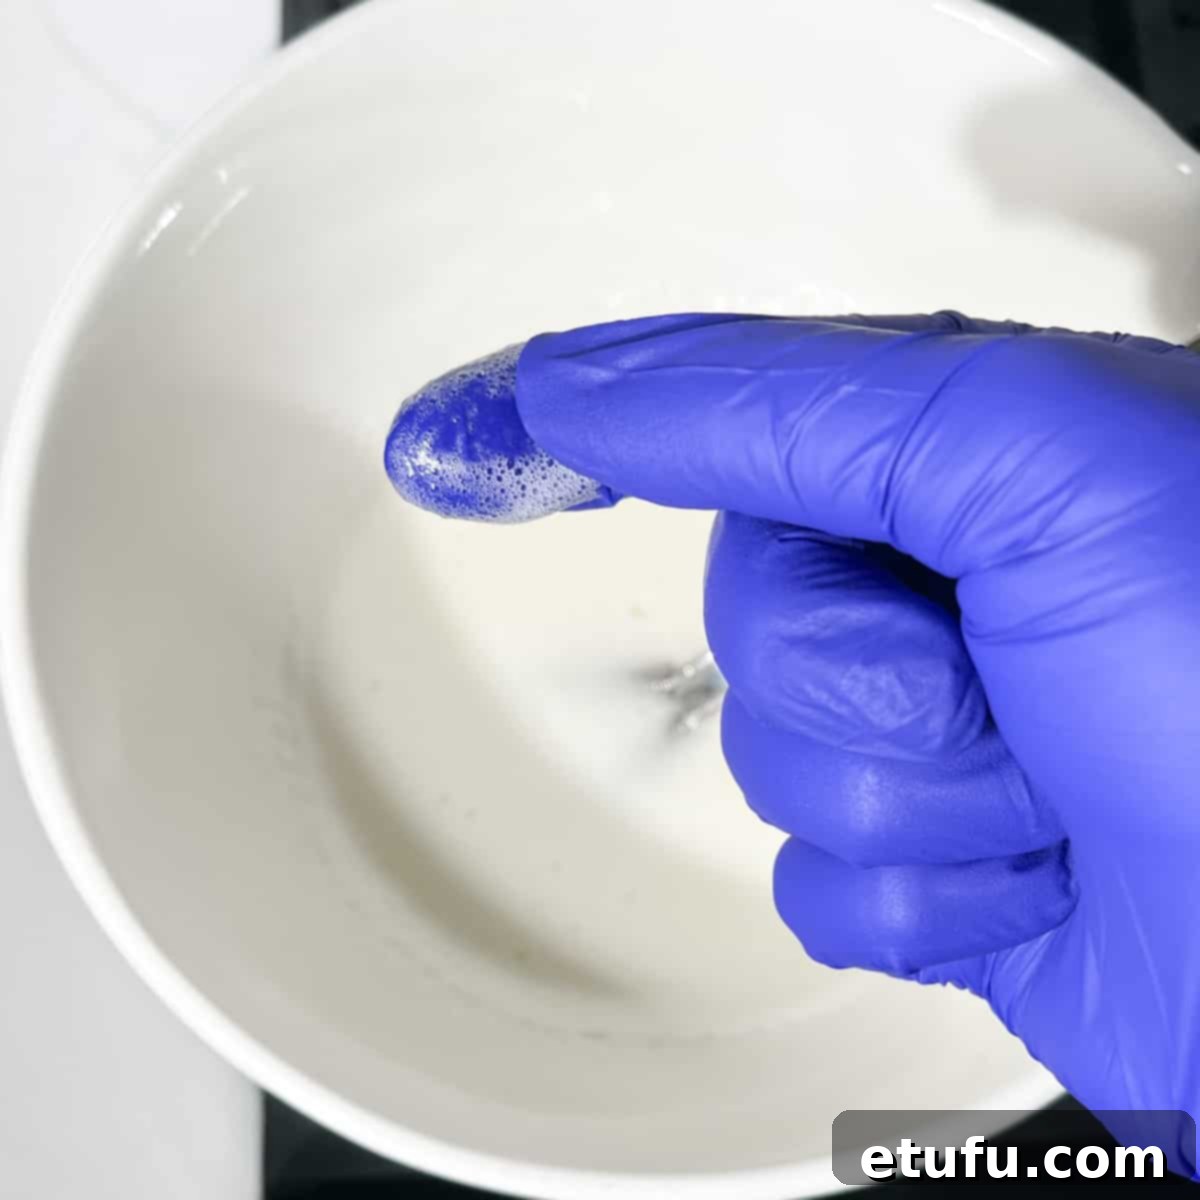
5. Dissolve the Sugar: Continue whisking until the granulated sugar has completely dissolved into the egg white mixture. To verify, carefully dip a clean finger into the mixture (be very cautious, as it will be hot!) and rub a small amount between your thumb and forefinger. It should feel perfectly smooth, with no discernible sugar granules. If you’re using a candy thermometer for precision, the mixture’s temperature should reach 71°C (160°F), which is the pasteurization temperature for eggs.
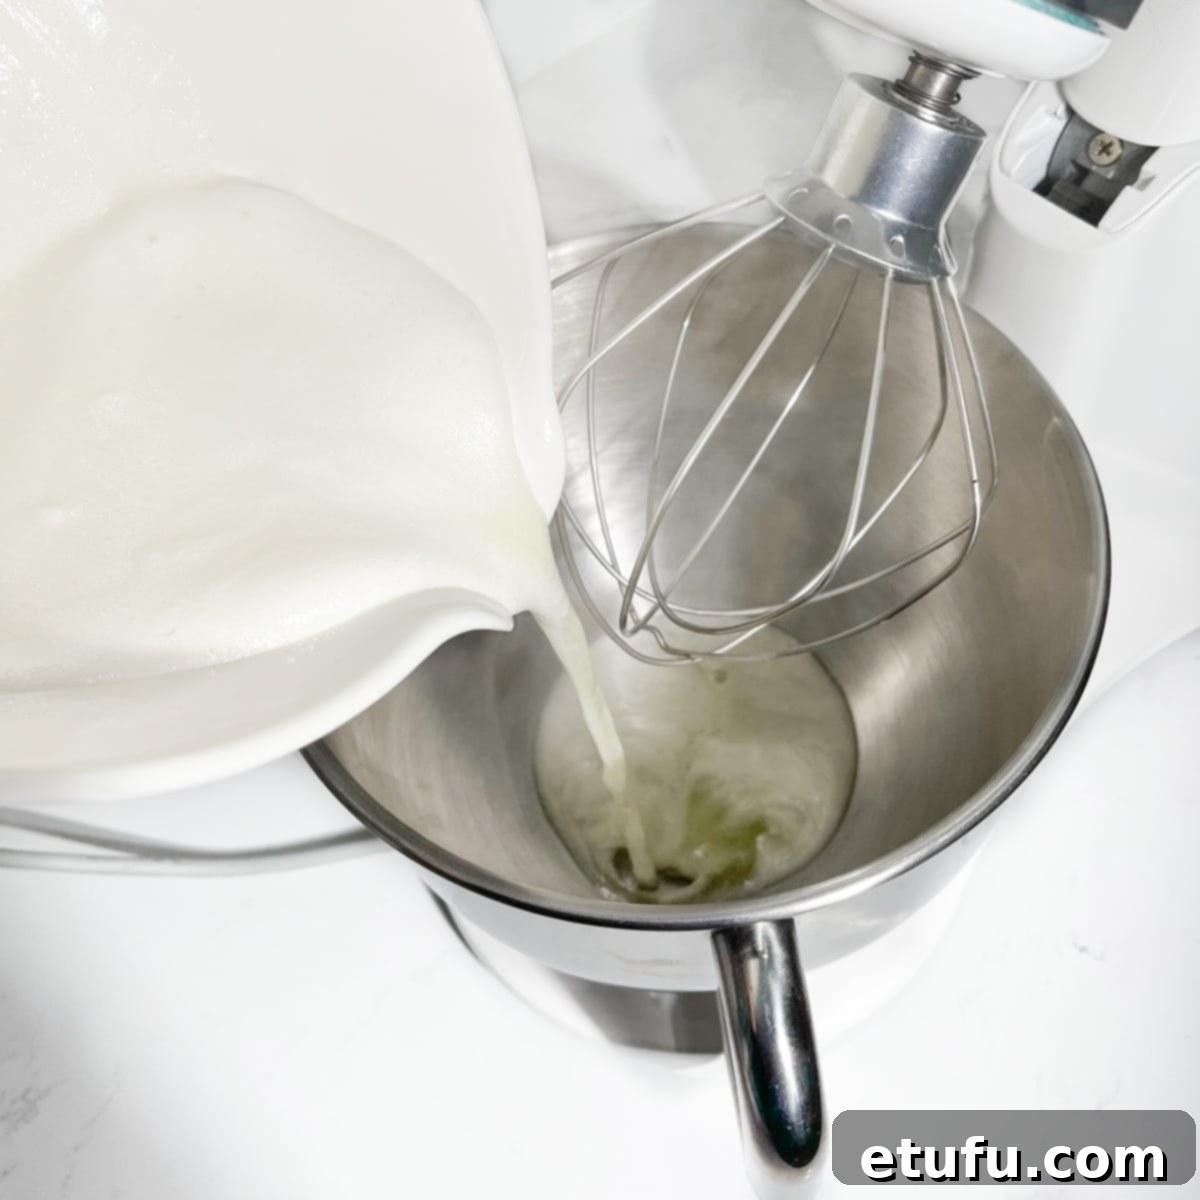
6. Transfer to Mixer: Once the sugar is fully dissolved and the mixture is safely heated, carefully remove the bowl from the saucepan. Immediately pour the hot, glossy syrup into the impeccably clean, grease-free bowl of a stand mixer. If you don’t have a stand mixer, a large, clean bowl and an electric hand mixer will work perfectly – just be prepared for the whipping process to take a little longer, perhaps an additional minute or two, to reach the desired stiff peaks.
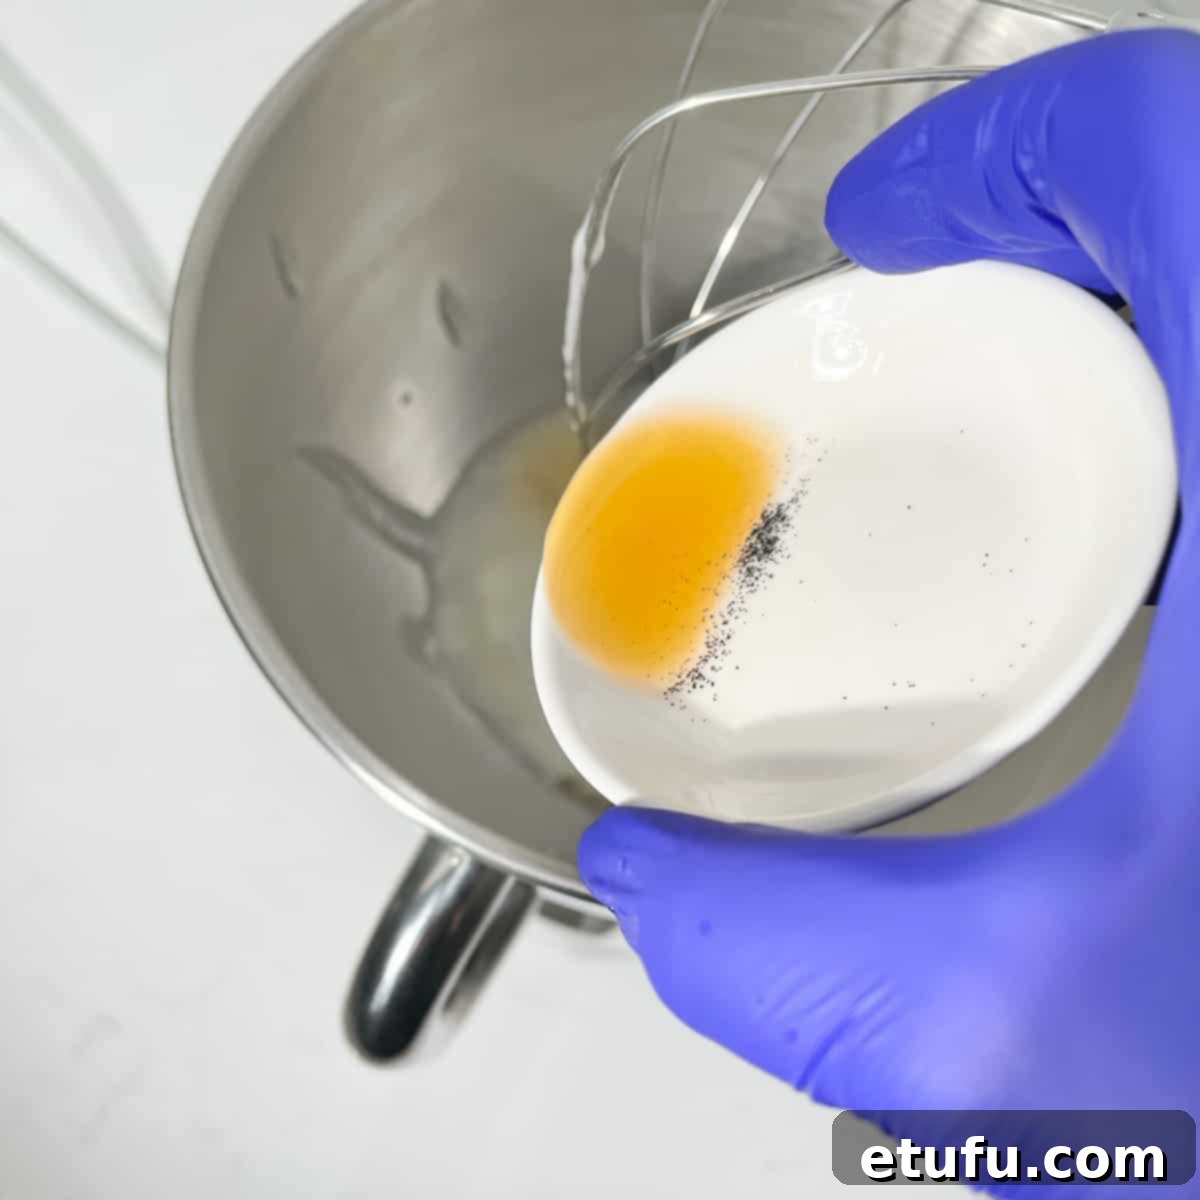
7. Add Vanilla Extract: Pour in the pure vanilla extract. The warmth of the mixture will help to release the vanilla’s aromatic compounds, infusing the fluff with its delightful fragrance.
8. Begin Whipping: Attach the whisk attachment to your stand mixer (or use your electric hand mixer). Start whipping the warm mixture on a high speed. You’ll notice it gradually increasing in volume and becoming whiter.
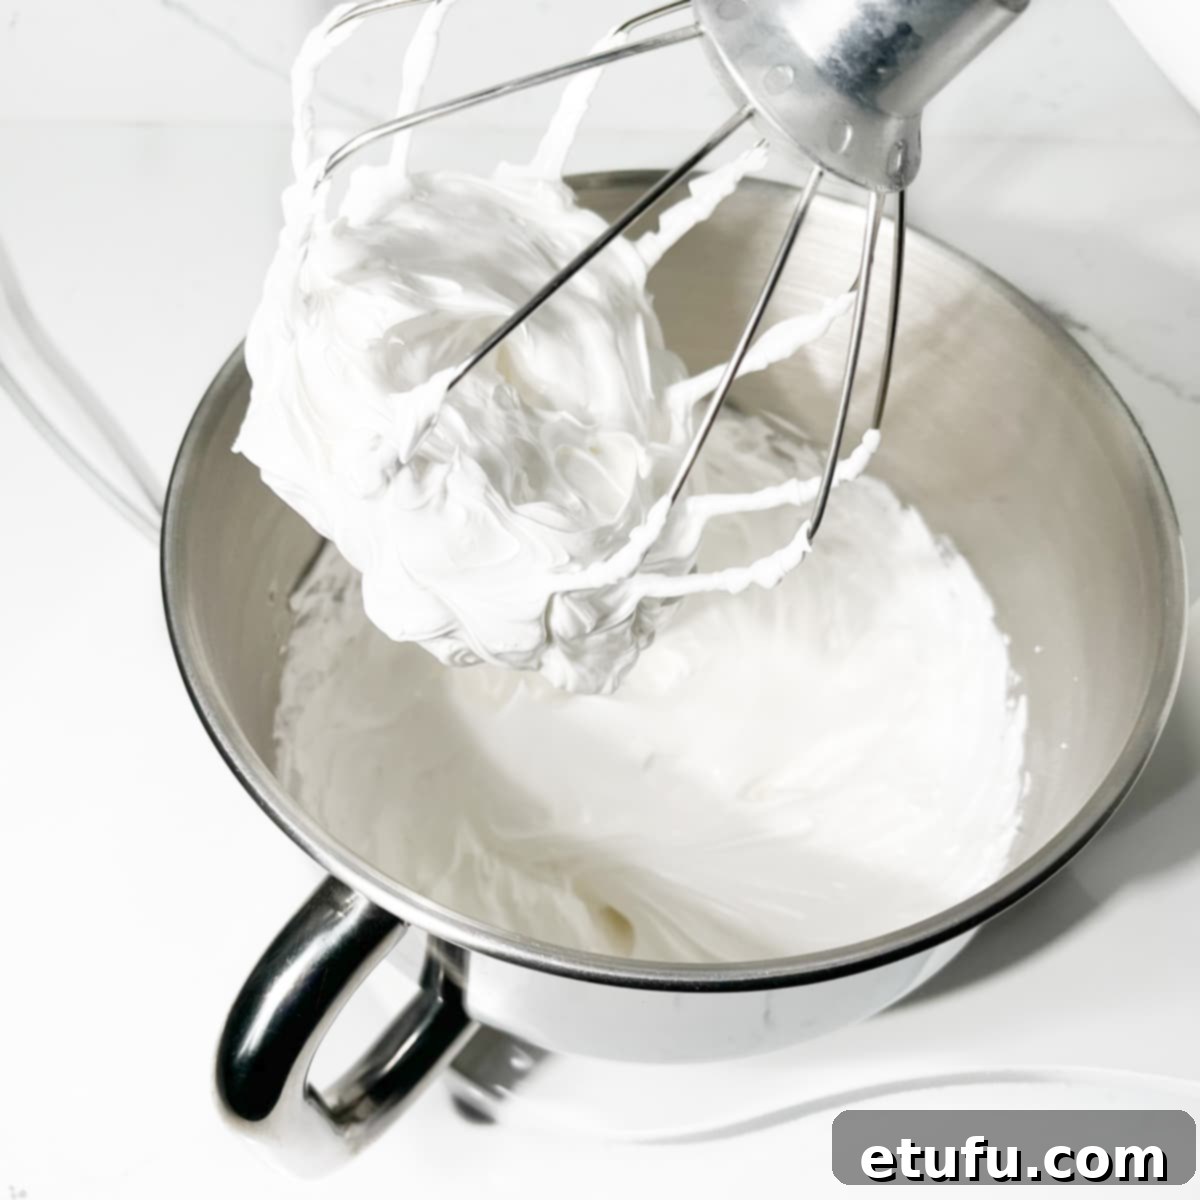
9. Whip to Stiff Peaks: Continue whisking at high speed. The mixture will progressively thicken, transform into a pristine white color, and develop a beautiful glossy sheen. Keep whipping until it forms firm, stiff peaks that hold their shape when the whisk is lifted. This stage typically takes about 5-6 minutes, depending on your mixer’s power and the precise temperature of your mixture. Pay close attention to the texture; stop whisking as soon as these stiff, glossy peaks are achieved to prevent over-whipping.
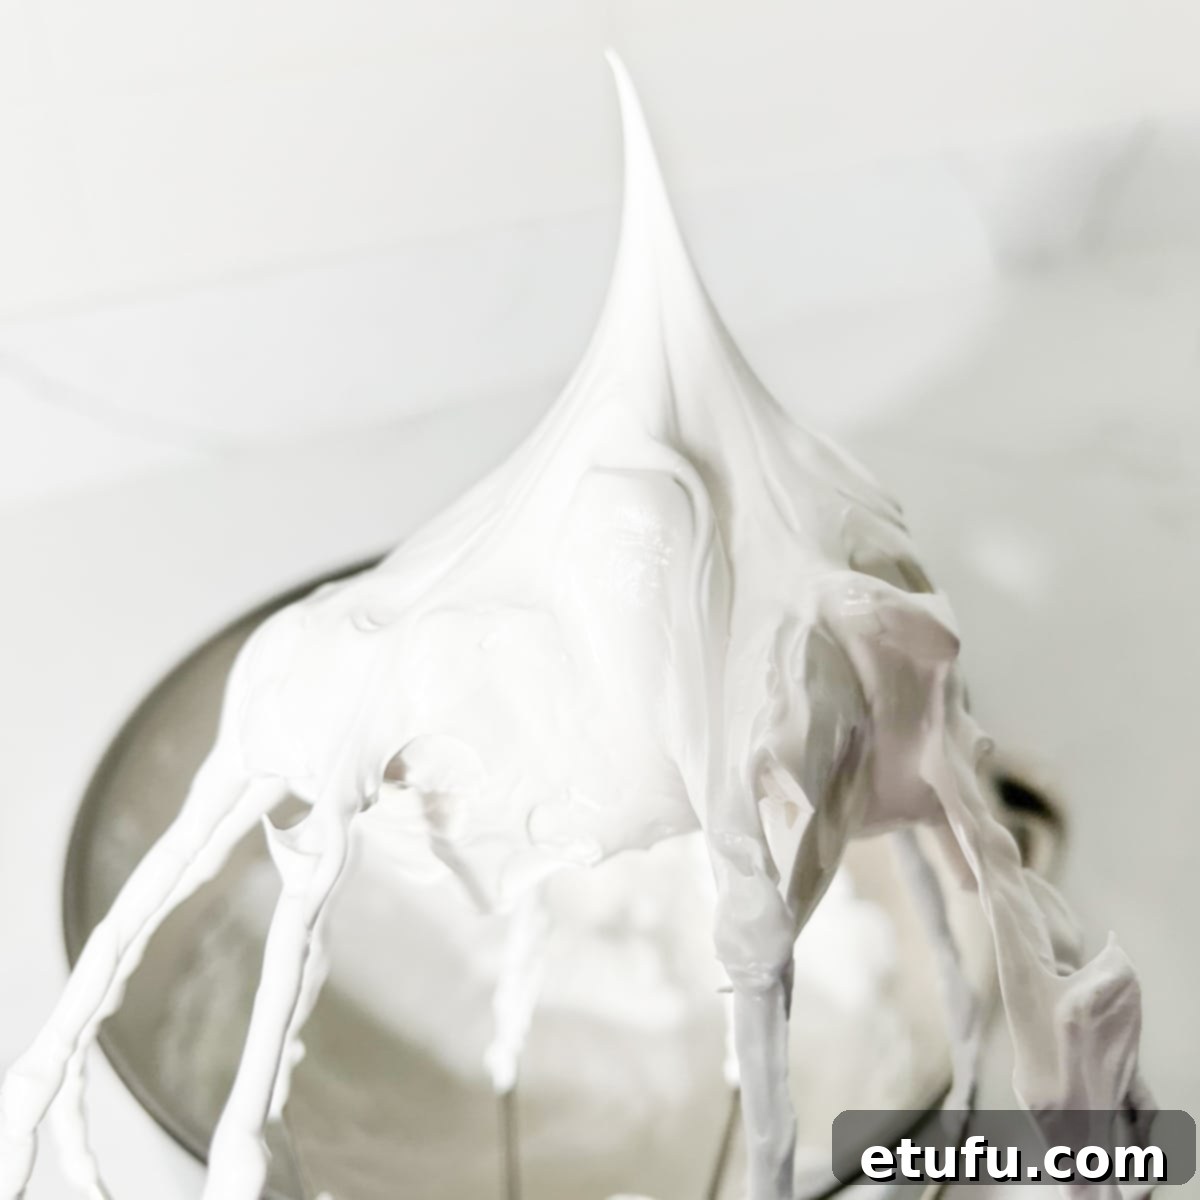
10. Ready to Use: Your homemade marshmallow fluff is now perfectly ready! Once it has cooled to room temperature, you can transfer it to clean, airtight jars for storage or use it immediately for piping, spreading, or mixing into your favorite desserts. Enjoy the delightful, cloud-like texture and incredible versatility of your freshly made creation!
Unleash Your Creativity: Endless Uses for Homemade Marshmallow Fluff
The beauty of homemade marshmallow fluff lies not just in its delightful taste and texture, but in its incredible versatility. This airy, sweet confection can elevate a vast array of sweet treats and is limited only by your imagination. Here are some fantastic ideas to get you started:
- Cake Frosting: Use it as a lighter, more ethereal alternative to traditional buttercream frosting on cakes. It pairs particularly well with rich chocolate cakes or bright lemon cakes, offering a delightful contrast.
- Cupcake Topping: Pipe generous swirls onto cupcakes for an elegant finish. A quick torch can add a lovely toasted marshmallow flavor.
- Tart Decoration: It’s the perfect piped and toasted decoration for a marshmallow fridge tart, adding both visual appeal and a burst of flavor.
- Cookie and Biscuit Filling: Sandwich between two cookies or biscuits for a homemade “whoopie pie” or a soft, chewy treat.
- Hot Cocoa Topping: A generous scoop on top of hot cocoa transforms a simple drink into a luxurious indulgence.
- Trifle Enhancement: Layer it into trifles for an extra layer of sweetness and a soft texture that complements fruits and custards beautifully.
- Fruit Dip: Serve it alongside fresh fruit for a simple, sweet dip that’s sure to be a crowd-pleaser.
- Over Baked Goods: Dollop it on top of warm brownies, cookie dough, or even your morning waffles for an instant upgrade.
- Pumpkin Pie Topping: Replace traditional whipped cream with marshmallow fluff for a unique and festive twist on pumpkin pie, especially delightful when lightly toasted.
- Homemade S’mores: A classic use! Spread it between Graham crackers with a piece of melted chocolate for an easy indoor s’mores experience.
- Lemon Meringue Pie Alternative: While not a true meringue, it can serve as a quick, no-bake topping for lemon pies, offering a similar sweet and tangy balance.
- Milkshake Swirl: Swirl a spoonful into your milkshake or blend it in for an extra creamy, marshmallowy treat.
- Giftable Jars: Package cooled marshmallow fluff in pretty glass jars with a ribbon and a handmade label for charming homemade gifts.
- Fluffernutter Sandwiches: Embrace a true American classic by spreading it generously with peanut butter on bread for a delicious “Fluffernutter” sandwich.
- Ice Cream Sundae Topping: A dollop on ice cream, sprinkled with peanuts, chocolate chips, and a drizzle of caramel sauce, creates an instant gourmet sundae.
- Rice Krispie Treats: The primary ingredient for classic chewy Rice Krispie treats.
- Viral TikTok “Booty Dip”: Use it as a key component in this popular, fun, and easy dessert dip.
- Fantasy Fudge: Incorporate it into a Fantasy fudge recipe for added creaminess and flavor.
- Cocktail Ingredient: For the adventurous, use it in alcoholic beverages like this Blackberry Cream Soda for a sweet, frothy twist.
From everyday snacks to special occasion desserts, homemade marshmallow fluff is a simple addition that brings immense joy and flavor. Don’t hesitate to experiment and find your new favorite way to enjoy this delightful confection!
Optimal Storage for Homemade Marshmallow Fluff
Proper storage is key to maintaining the airy texture and fresh taste of your homemade marshmallow fluff. While it’s a joy to make, it also requires a bit of care to ensure it lasts as long as possible.
When stored correctly in a sealed jar or an airtight container, homemade marshmallow fluff can typically remain fresh and delightful in the refrigerator for approximately 2 to 3 weeks. Ensure the container is completely sealed to prevent any air from drying out the fluff or introducing unwanted odors from other foods in the fridge.
It’s important to keep marshmallow fluff away from warm temperatures. Do not leave it exposed at room temperature for more than 4 hours, especially in a warm environment, as it will quickly begin to lose its delicate texture, become less fluffy, and potentially even liquefy. This degradation is due to the meringue base, which is sensitive to heat and prolonged exposure to air.
Unfortunately, homemade marshmallow fluff is generally not suitable for freezing. The freezing and thawing process tends to break down its delicate structure, causing it to become watery and lose its signature airy consistency. For the best experience, enjoy your fluff fresh within its recommended refrigeration period.
Frequently Asked Questions About Homemade Marshmallow Fluff
Yes, you absolutely can double all the ingredients if you wish to prepare a larger batch of this delicious marshmallow fluff. However, consider the capacity of your mixer. If you have a large, powerful stand mixer, it should comfortably handle the increased volume and whip it just as effectively as a single batch. For smaller mixers, it might be safer to make two separate batches to ensure optimal whipping and consistent texture.
Absolutely! This homemade marshmallow fluff is a fantastic canvas for various flavor additions. During the whipping process, you can easily incorporate a few drops of food-grade flavor extracts like almond, peppermint, coconut, or even a touch of citrus zest, such as lemon or orange zest, for a brighter profile. Start with a small amount and taste as you go to achieve your desired flavor intensity.
Yes, coloring the marshmallow fluff is a fun way to customize it for different occasions or themes! Add a tiny amount of gel food coloring to the mixture as you are whipping it. Gel colors are concentrated and won’t thin out the fluff as liquid food coloring might. Add incrementally until you reach your desired hue.
You’re right, there’s a strong resemblance! This marshmallow fluff recipe is essentially a type of cooked meringue, specifically similar to Swiss meringue, but without the addition of butter. The key difference from a traditional French meringue (often just whipped raw egg whites and sugar) is that the eggs in this recipe are gently cooked over a double boiler with sugar before whipping. This process pasteurizes the eggs for safety and creates a much more stable, glossy, and less fragile fluff compared to raw meringues, which are typically baked or torched after whipping.
Unfortunately, marshmallow fluff is not well-suited for freezing. The delicate structure, which gives it its signature airy and fluffy texture, tends to break down during the freezing and thawing process. This can result in a watery, deflated, and less appealing consistency. For the best quality and enjoyment, it’s recommended to consume homemade marshmallow fluff within its refrigerated shelf life.
No, unlike solid marshmallows that contain gelatin to help them set and maintain a firm shape, this homemade marshmallow fluff recipe is made without gelatin. This means it will retain its soft, creamy, and spreadable consistency even after cooling and refrigeration. It won’t harden into a solid form, making it perfect for spooning, spreading, and piping.
Absolutely, toasting marshmallow fluff with a kitchen torch is highly encouraged! It’s one of the best ways to enhance its flavor and appearance. Torching adds a wonderful caramelized crust and a smoky, toasty marshmallow flavor that is truly irresistible. It also makes your kitchen smell wonderfully sweet and inviting. Just be sure to do so carefully and watch closely to prevent burning.
Yes, marshmallow fluff pipes beautifully! It works especially well with larger, round piping tips, creating elegant swirls and dollops on cakes and cupcakes. However, due to its soft and airy nature, it’s not ideal for intricate, precision piping that requires very sharp edges or fine details, as the fluff is simply too soft to hold such delicate shapes perfectly.
Marshmallow fluff is a proud culinary creation hailing from the mighty United States of America. Its delightful origins trace back to the ingenious mind of Archibald Query, a confectioner from Somerville, Massachusetts. Query developed a unique recipe for a fluffy, marshmallow-like substance that was easily spreadable and versatile enough for various treats and sandwiches. In 1917, he sold this groundbreaking recipe to Durkee-Mower Inc., a company that then began mass-producing and distributing the product under the now-iconic name “Marshmallow Fluff.” We certainly owe a debt of gratitude to Archie for this sweet innovation!
Yes, marshmallow fluff and marshmallow cream are essentially the same delightful confection. These terms are often used interchangeably to describe a creamy, spreadable sweet made from whipped egg whites, sugar, and flavorings (sometimes corn syrup is included, but not in our recipe!). Both have a signature fluffy texture and are perfect for spreading on sandwiches or using as an ingredient in various desserts. While different brands might have minor variations in texture or sweetness, they generally refer to the same beloved product.
More Delightful No-Bake Recipes You’ll Love
If you enjoyed the ease and deliciousness of this marshmallow fluff, you’re in for a treat with these other fantastic no-bake recipes. Perfect for when you want something sweet without heating up the oven!
- Decadent No-Bake Milkybar Cheesecake
- Easy Biscoff Truffles (4 Ingredients)
- Easy Microwave Peanut Butter Fudge
- No-Bake Biscoff Slices
Recipe Card: Homemade Marshmallow Fluff (Corn Syrup Free)
Homemade Marshmallow Fluff without Corn Syrup
★
★
★
★
🖨️Print Recipe
Equipment
- 1 Heatproof bowl
- 1 saucepan (large enough to hold the heatproof bowl above the water without it touching the bottom)
- 1 Hand whisk
- 1 Stand mixer or electric hand mixer (with whip attachment)
Ingredients
- 3 large egg whites
- ¾ cup granulated sugar (150g/177ml)
- ½ teaspoon cream of tartar
- 1 teaspoon pure vanilla extract
Instructions
- Place a saucepan on the stovetop, fill it with about 5 cm (2 inches) of water and bring it to a boil.
- In a heatproof bowl (large enough to sit on top of the saucepan without touching the water) combine the egg whites, granulated sugar and cream of tartar.3 large egg whites, ¾ cup (US cup) granulated sugar, ½ teaspoon cream of tartar
- Position the bowl on top of the saucepan with boiling water.
(Alternatively, you can use a double boiler.)
- Increase the heat to medium-high and hand-whisk the egg mixture continuously. As it heats, it will become frothy and thinner.
- Keep whisking until the sugar has fully dissolved into the egg-white mixture.
To check, dip a clean finger into the mixture and rub it between your fingers. It should feel smooth with no sugar granules. Be cautious, as the mixture will be hot.
If you’re using a candy thermometer, the temperature should read 71C/160F.
- Once the sugar has dissolved, carefully pour the hot syrup into the grease-free bowl of a stand mixer.
If you don’t have a stand mixer, no worries – an electric hand mixer will do the trick! Transfer the hot mixture to a large, grease-free bowl before whisking. Just be prepared for it to take a minute or two longer to reach stiff peaks.
- Add the vanilla extract.1 teaspoon pure vanilla extract
- Using the whisk attachment, start whisking the warm mixture at a high speed.
- Keep whisking until the mixture thickens, turns pure white and forms stiff peaks.
Depending on your method and equipment speed, it should take about 5-6 minutes of whisking to achieve stiff, glossy peaks.
Keep an eye on the texture and stop whisking once the fluff reaches this stage.
- Your marshmallow fluff is now ready to use. Once it has cooled to room temperature, transfer it to clean jars or use it directly for piping or spreading.
Notes
Yes, you can double the ingredients if you want to batch-process this recipe. However, ensure your mixer’s bowl is large enough to handle the increased volume and can still whip it effectively to stiff peaks.
Can you add flavors to the fluff?
Absolutely! During the whipping process, incorporate a few drops of your chosen food-grade flavor extract or a bit of citrus zest (like lemon or orange) for a delightful variation.
Can you color it?
Yes, you can add a small amount of gel food color to the mix as you are whipping it to achieve your desired shade.
**Nutritional Data Disclaimer**
Please keep in mind that the nutritional information provided below is an estimate calculated by a third party, and we cannot guarantee its complete accuracy. We strive to provide the most reliable information possible, but we do not take responsibility for any potential errors. The nutritional value of this recipe may vary based on the exact brands and products used. We highly recommend consulting with a qualified healthcare professional or registered dietitian for personalized advice regarding your dietary needs and any specific concerns.
Nutrition
For comprehensive food safety advice, including guidance on food allergies, please refer to reliable sources such as Food.gov.uk.
Discover More Delicious Recipes from the US
Delve deeper into the culinary traditions of the United States with these tempting recipes, ranging from breakfast delights to comforting desserts and savory classics.
- Easy Cruffins (Croissant-Muffin Hybrid)
- Lemon Meringue Pie with an Easy Biscuit Base
- Learn How to Make the Classic American Club Sandwich
- Irresistible Condensed Milk Chocolate Chip Cookies
- Delicious Raspberry and White Chocolate Blondies
- Classic Chocolate Chip Cookies (Without Brown Sugar)
- The Perfect 4-Ingredient Banana Bread
- Old Fashioned Peanut Butter Cookies (Eggless)
- Gigi Hadid Pasta: The Viral Spicy Vodka Pasta Recipe
