An Epicurean Adventure to the United Kingdom: Discovering the Charm of No-Bake Coconut Ice
Step into a world of vibrant color and nostalgic sweetness with our incredibly easy, no-bake Coconut Ice recipe. This delightful British confectionery is a feast for both the eyes and the palate, boasting a beautiful two-tone pink and white appearance reminiscent of a classic 1980s bake sale treat – in the absolute best possible way!
Forget the complexities of boiling sugar or fussing with candy thermometers. Our simplified recipe harnesses the magic of condensed milk, making it a dream for beginner bakers and seasoned sweet makers alike. With just three core ingredients and a mere 10 minutes of preparation, you can whip up a batch of these irresistible coconut delights that are perfect for any occasion. It’s a completely no-cook method, ideal for getting kids involved in the kitchen or for quickly preparing a crowd-pleasing dessert for parties, bake sales, or thoughtful homemade gifts.
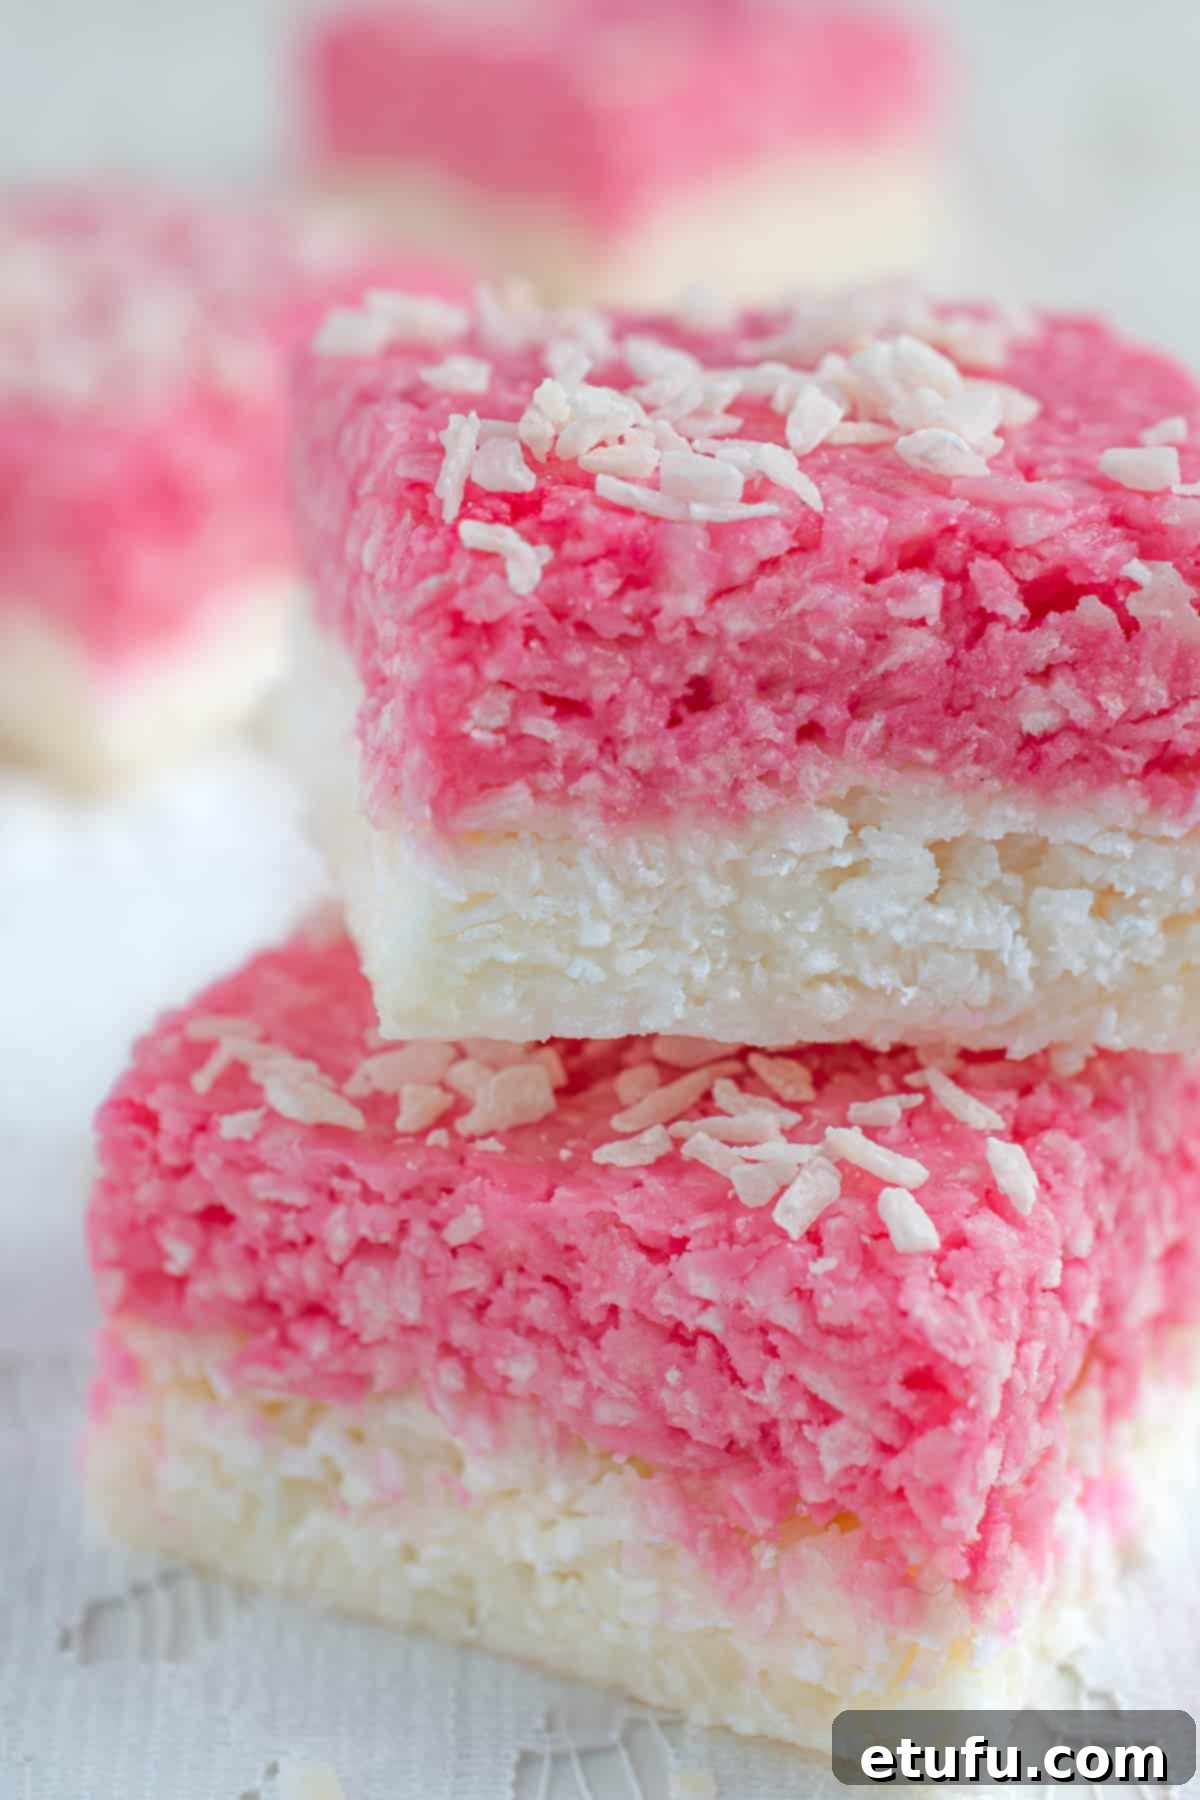
A Sweet Journey Through Time: The History of Coconut Ice
The enchanting sweet known as Coconut Ice first graced British tables in the late 1800s, emerging from the heart of Victorian Britain. Originally cherished as a simple, homemade confection, its delightful taste and appealing appearance quickly made it a household favorite. This humble sweet soon embarked on an international journey, finding enthusiastic second homes and loyal followings across Australia, New Zealand, and South Africa.
Today, Coconut Ice remains an enduring classic, evoking fond memories and bringing smiles to generations. It’s a staple at school fêtes, church bake sales, and family gatherings, holding a special place in the collective memory of many childhoods. Its timeless appeal lies in its straightforward ingredients, ease of preparation, and irresistibly sweet, chewy texture. This beloved treat isn’t just candy; it’s a bite of history, a slice of nostalgia, and a testament to the simple joys of homemade goodness. Dive into making your own batch and become part of this delicious legacy.
If you’re captivated by brightly colored, delicious treats, you might also enjoy exploring this blush pink strawberry lassi. Or, for those who simply adore the rich creaminess of condensed milk in anything and everything, don’t miss out on this delightful iced coffee with condensed milk!
Why You’ll Love This Easy Coconut Ice Recipe
Our no-bake coconut ice isn’t just a treat; it’s a testament to simplicity and deliciousness. Here’s why this recipe will quickly become a favorite in your kitchen:
- Effortlessly Quick & Simple: With a mere 10 minutes of hands-on prep time and absolutely no cooking required, this recipe is perfect for busy schedules or spontaneous sweet cravings. Say goodbye to complicated culinary techniques!
- Minimal Ingredients: You only need three staple ingredients (plus a touch of food coloring for that iconic look) to create this fantastic confectionery. Simple pantry items are all it takes.
- Rich, Irresistible Flavor: Sweetened condensed milk is the secret to its luscious, deeply sweet flavor and wonderfully chewy texture. Each bite is a delightful explosion of coconut goodness.
- A Classic Retro Charm: This isn’t just candy; it’s a nostalgic trip back in time. Coconut Ice is a timeless treat that appeals to all ages, bringing back cherished childhood memories for many.
- Dietary Friendly & Kid-Approved: Naturally gluten-free, this sweet is also fantastic for getting children involved in the kitchen. Its simple steps and vibrant colors make it a fun project for little helpers.
- Versatile for Every Occasion: Whether you’re planning for Christmas festivities, an elegant baby shower, a local bake sale, or simply looking for a fun addition to lunchboxes, Coconut Ice fits seamlessly into any event.
- No-Fuss Preparation: There’s no stove, no oven, and no candy thermometer needed. This truly no-bake recipe removes all the stress often associated with homemade sweets.
- Excellent Shelf Life: Stored properly, your homemade Coconut Ice can last for up to a month, making it an ideal make-ahead treat for gifting or future enjoyment without the last-minute rush.
- Endlessly Customizable: Get creative with flavors, colors, and shapes! This recipe is a fantastic canvas for your culinary imagination, allowing for personalized twists that suit any preference or theme.
Essential Ingredient Notes & Smart Substitutions for Perfect Coconut Ice
Understanding your ingredients is key to achieving perfect Coconut Ice every time. While this recipe is incredibly simple, a few insights can ensure your success.
**For the precise measurements, please refer to the detailed recipe card located at the bottom of this post.
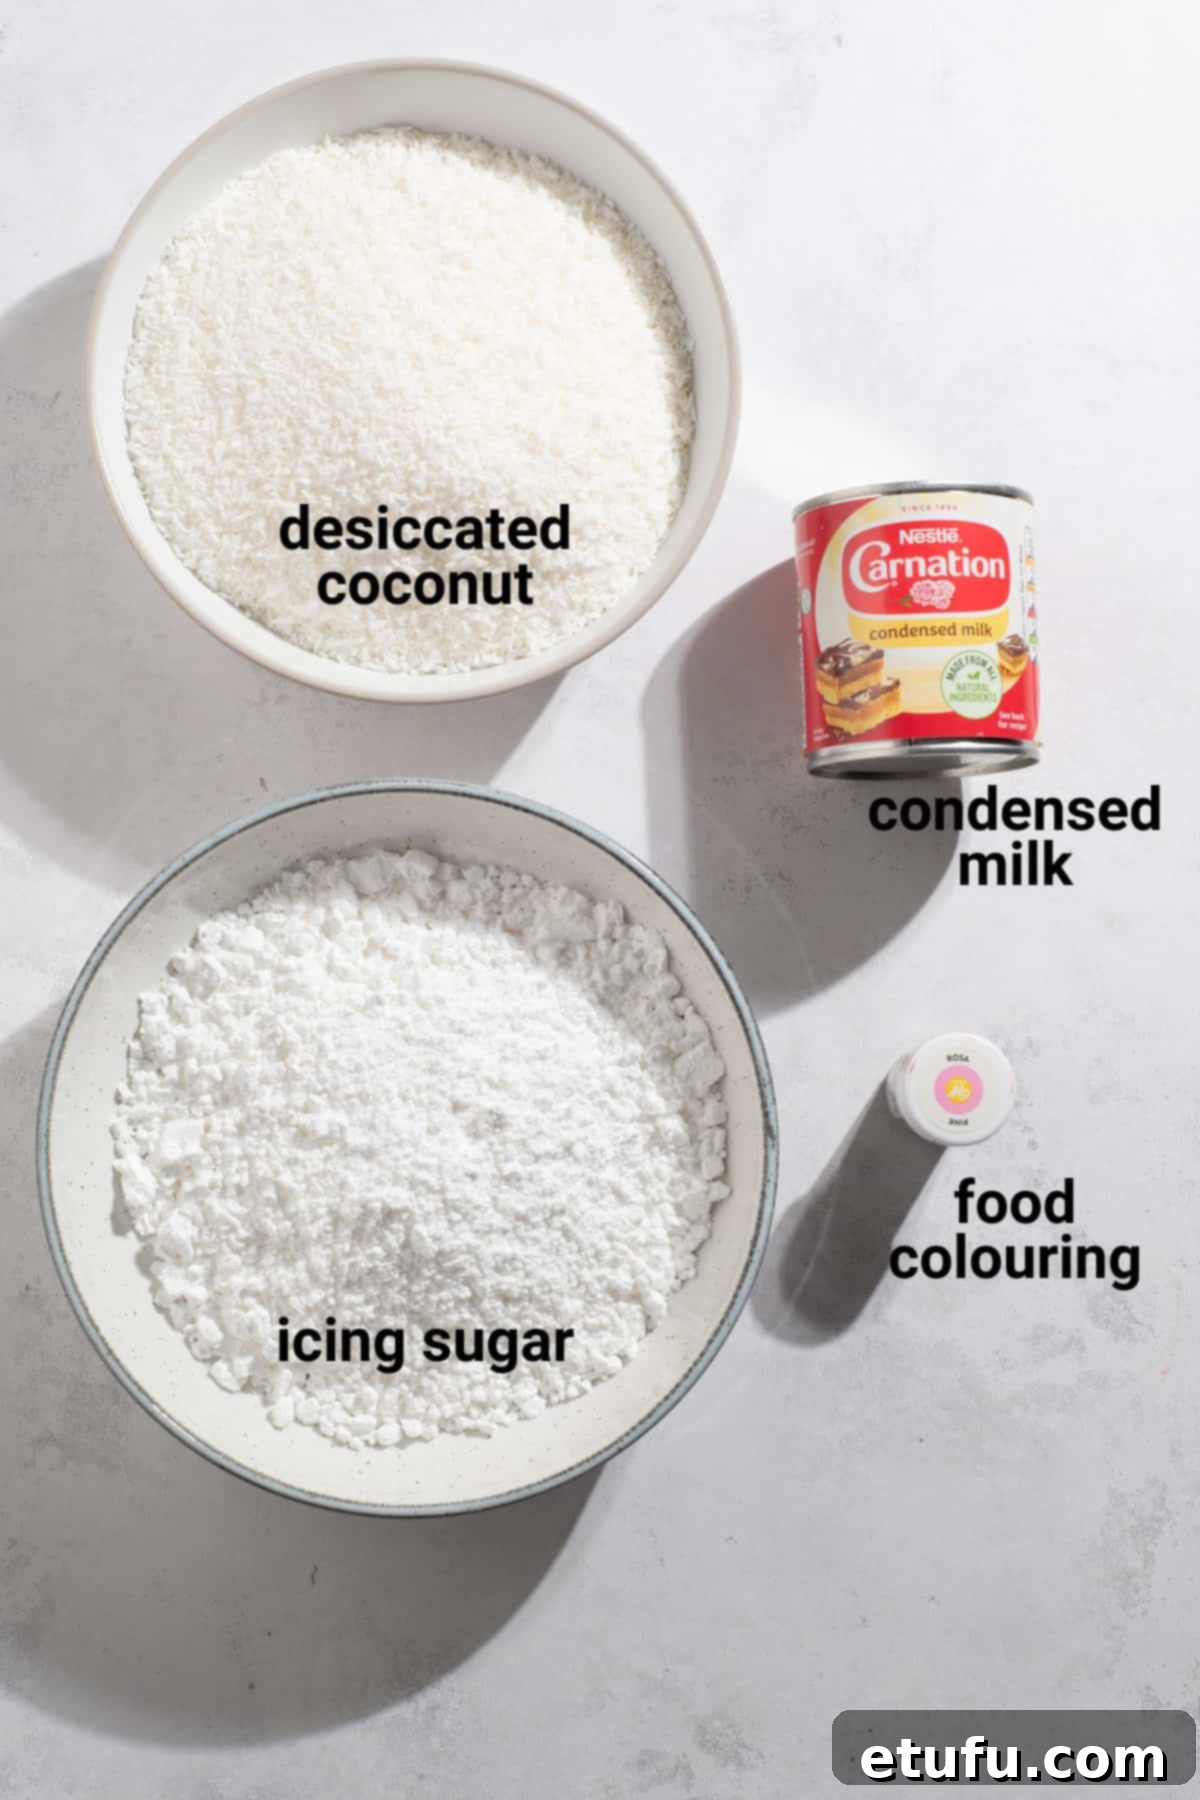
Sweetened Condensed Milk
This is the cornerstone of our no-cook Coconut Ice, providing its signature sweetness and binding texture. It’s crucial to use sweetened condensed milk, not evaporated milk, as they are entirely different products. Cans of condensed milk can vary slightly in weight depending on your geographic location. Our recipe typically calls for a standard 397g (approximately 14 oz) can. Don’t stress too much about a few grams difference; a small variation won’t significantly impact the final quality or setting of your coconut ice. The high sugar content in condensed milk is what allows this confection to set firmly without any cooking.
Desiccated Coconut
For the authentic texture of Coconut Ice, desiccated coconut is essential. This refers to finely shredded, unsweetened dried coconut flesh. You’ll find it readily available in most baking aisles, typically clearly labeled as ‘desiccated coconut’. It’s important not to confuse it with larger coconut flakes or shredded coconut, which have a coarser texture and might not absorb the condensed milk as effectively, leading to a different consistency in your final product.
Icing Sugar (Confectioners’ Sugar / Powdered Sugar)
Also universally known as confectioners’ sugar or powdered sugar, icing sugar plays a vital role in giving the coconut ice its smooth, firm structure and additional sweetness. Its fine powdery consistency blends seamlessly with the other ingredients, preventing a grainy texture. Ensure you sift your icing sugar before adding it to the mixture to remove any lumps, which will guarantee a perfectly smooth and uniform final product.
Pink Food Coloring
The iconic pink layer is what gives Coconut Ice its cheerful, retro appeal. You have the flexibility to use either gel or liquid food coloring for this recipe. Gel food colorings are more concentrated, so start with a tiny amount and gradually add more until you achieve your desired hue. Whether you prefer a delicate rose quartz pink or a vibrant, bold hot pink reminiscent of 1980s fashion, the choice is yours. As an alternative, a very small drop of red food coloring can also yield a lovely pink shade.
Optional Flavor Enhancer: Vanilla Extract
For an extra layer of aromatic depth, consider adding a teaspoon of pure vanilla extract to your mixture. Vanilla complements the sweet coconut flavor beautifully, elevating the overall taste profile of your Coconut Ice. This small addition can make a noticeable difference in the complexity of the flavor.
Step-by-Step Guide: Crafting Your Perfect No-Bake Coconut Ice
Follow these simple instructions to create beautiful, delicious coconut ice with ease:
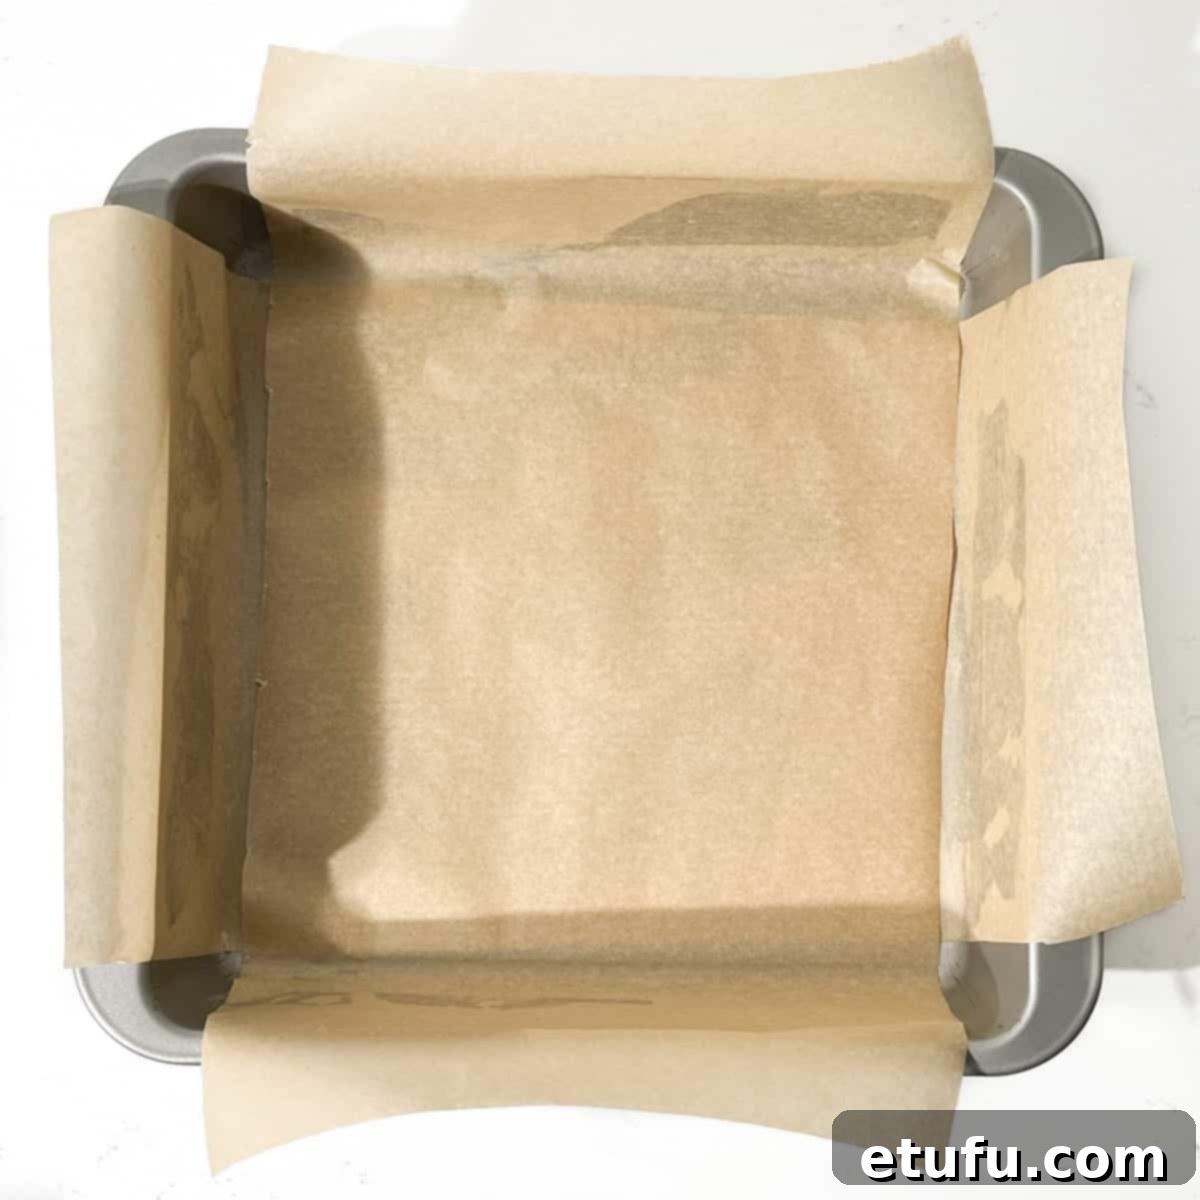
- Prepare Your Baking Tray: Begin by lining a 20cm x 20cm (8″ x 8″) square baking tray with parchment paper. If you prefer thicker slices of coconut ice, you can opt for a slightly smaller tray. However, we do not recommend using a tray larger than 20cm x 20cm, as this will result in slices that are too thin. To make removal easier later, ensure you leave a slight overhang of baking paper on the sides. This overhang will act as handles, allowing you to lift the entire slab of set coconut ice effortlessly.
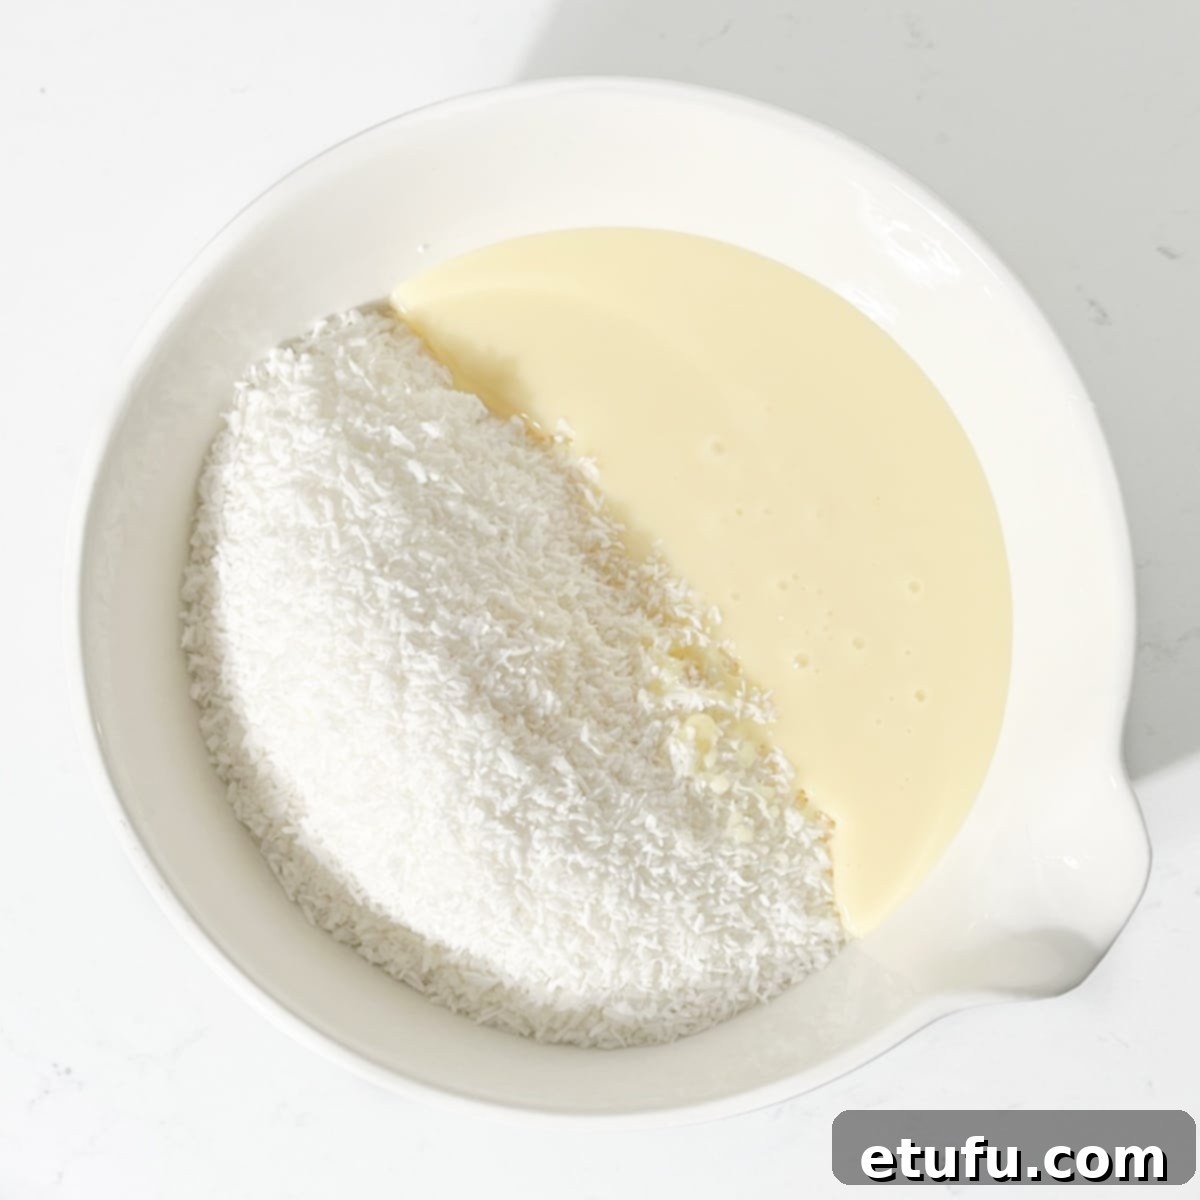
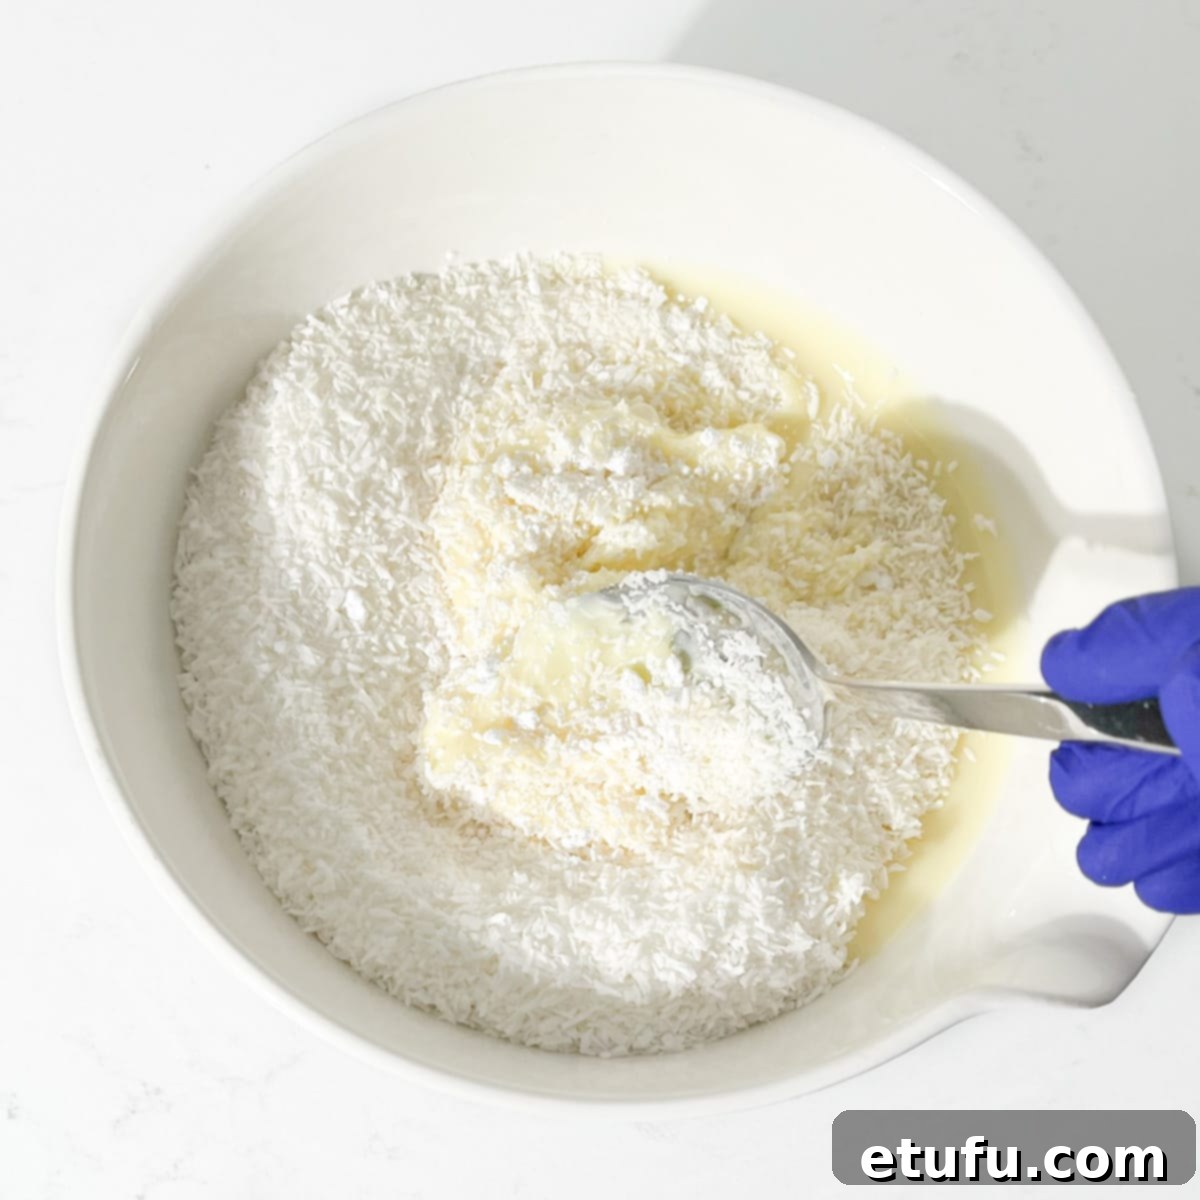
- Combine Dry Ingredients: In a large, spacious mixing bowl, combine the desiccated coconut, icing sugar, and sweetened condensed milk. Hold back the food coloring for now, as it will be added in a later step.
- Initial Mixing: Start by combining the ingredients with a large, sturdy spoon. At first, the mixture will appear quite stiff and dry. Don’t be alarmed; this is perfectly normal. Continue stirring until the ingredients begin to come together and form a crumbly, cohesive mass.
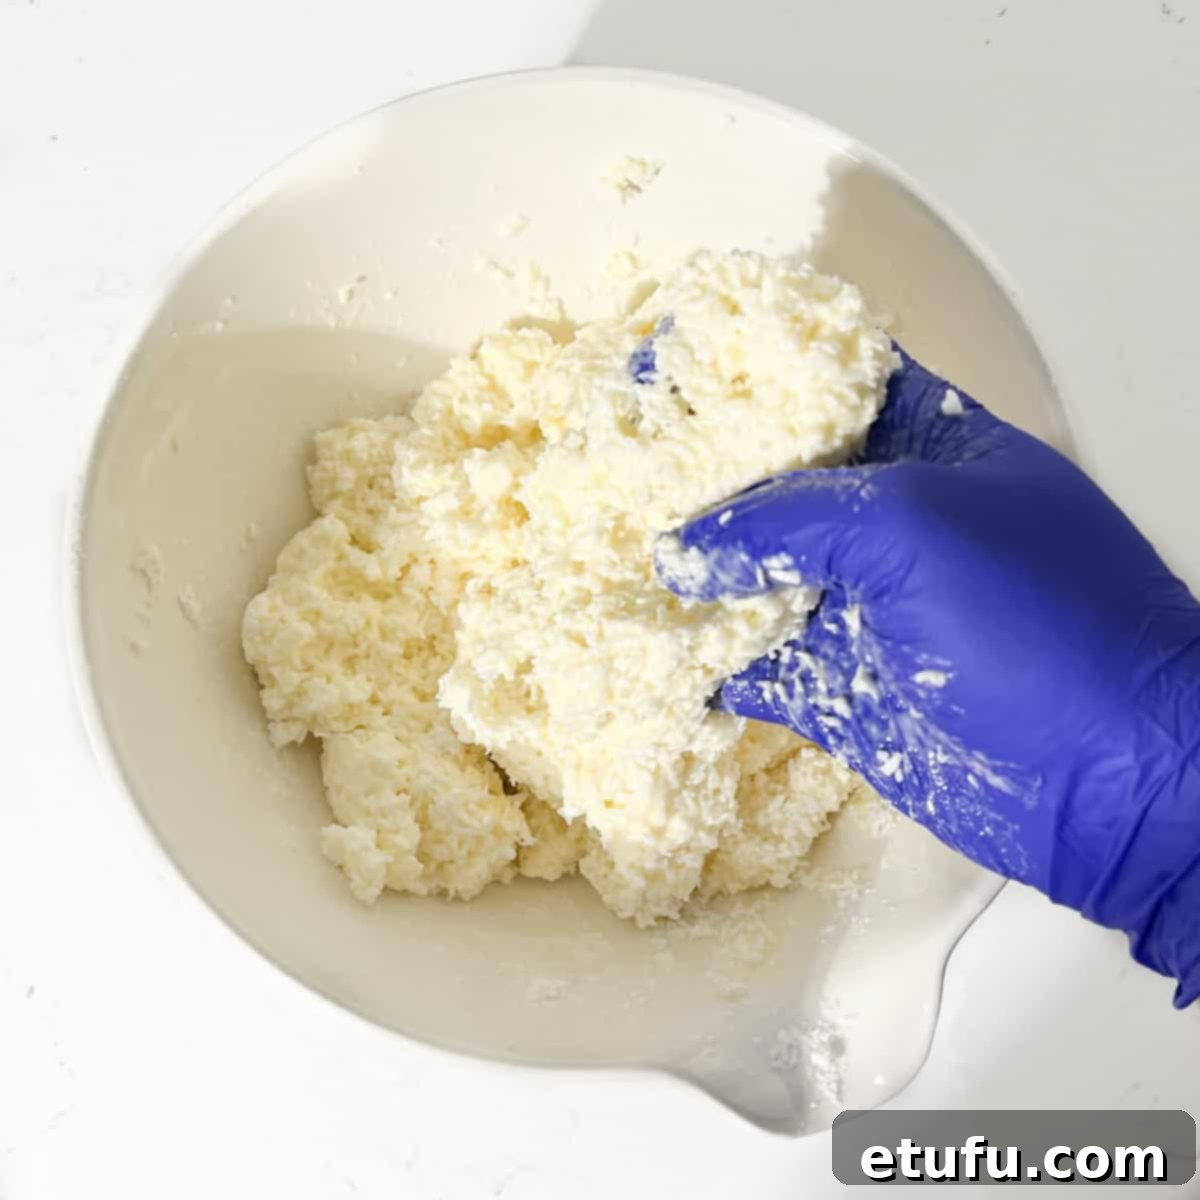
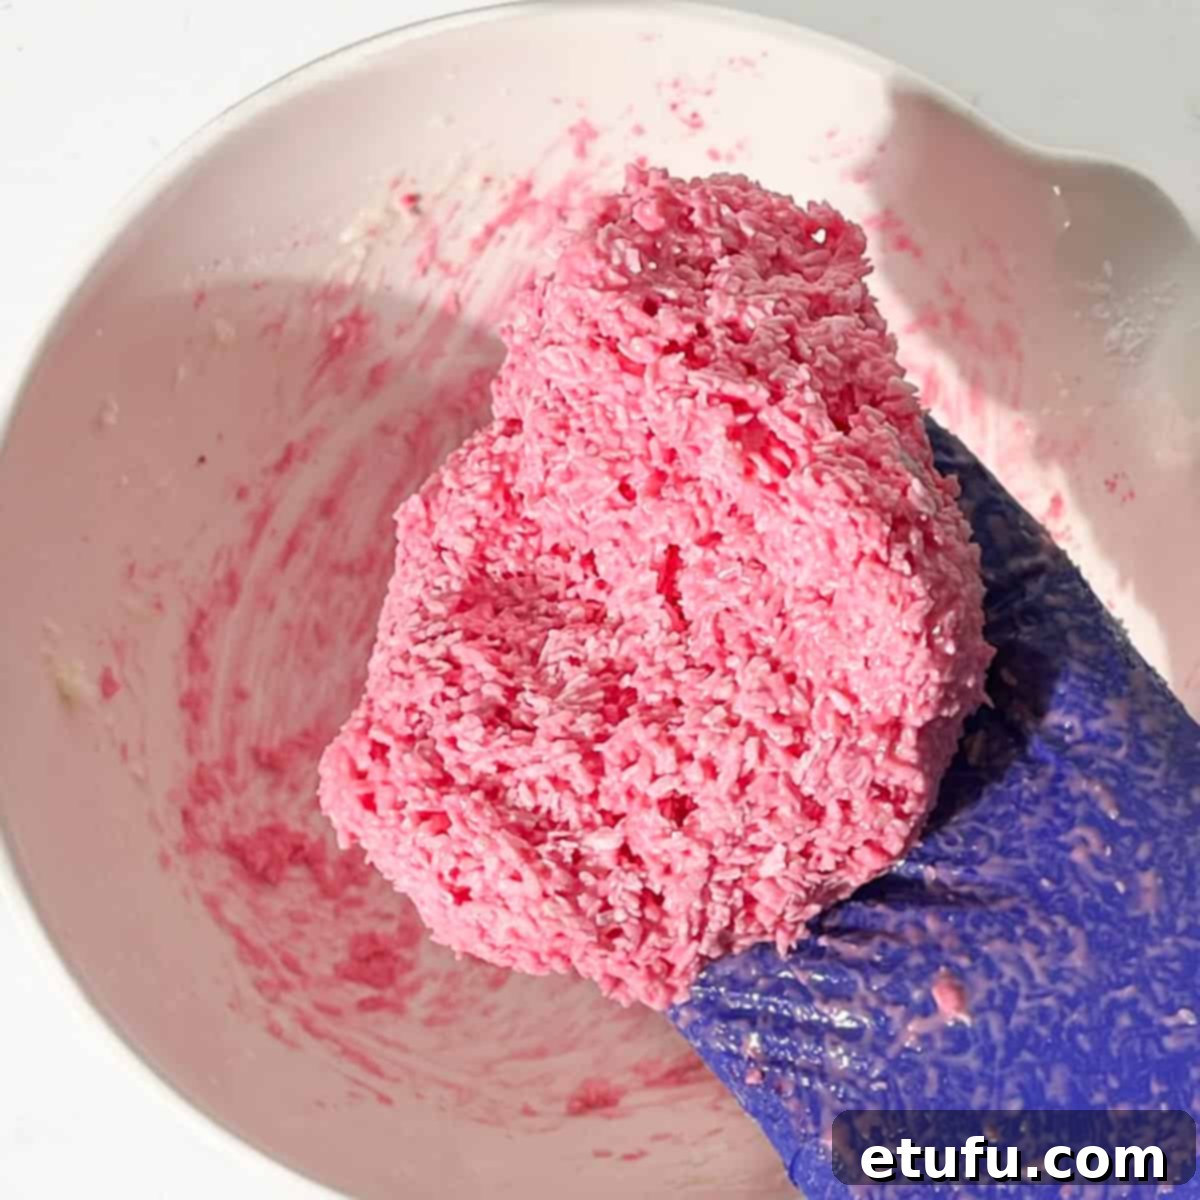
- Hands-On Mixing: Set aside your spoon and get ready to get your hands dirty – this is where the real magic happens! Dive in with your hands and really work the mixture. Don’t be gentle; this step requires a bit of “elbow grease” to fully incorporate the condensed milk. Squish, press, and knead the mixture firmly until it forms a dense, pliable dough-like consistency. If you prefer, wear rubber gloves to keep your hands clean.
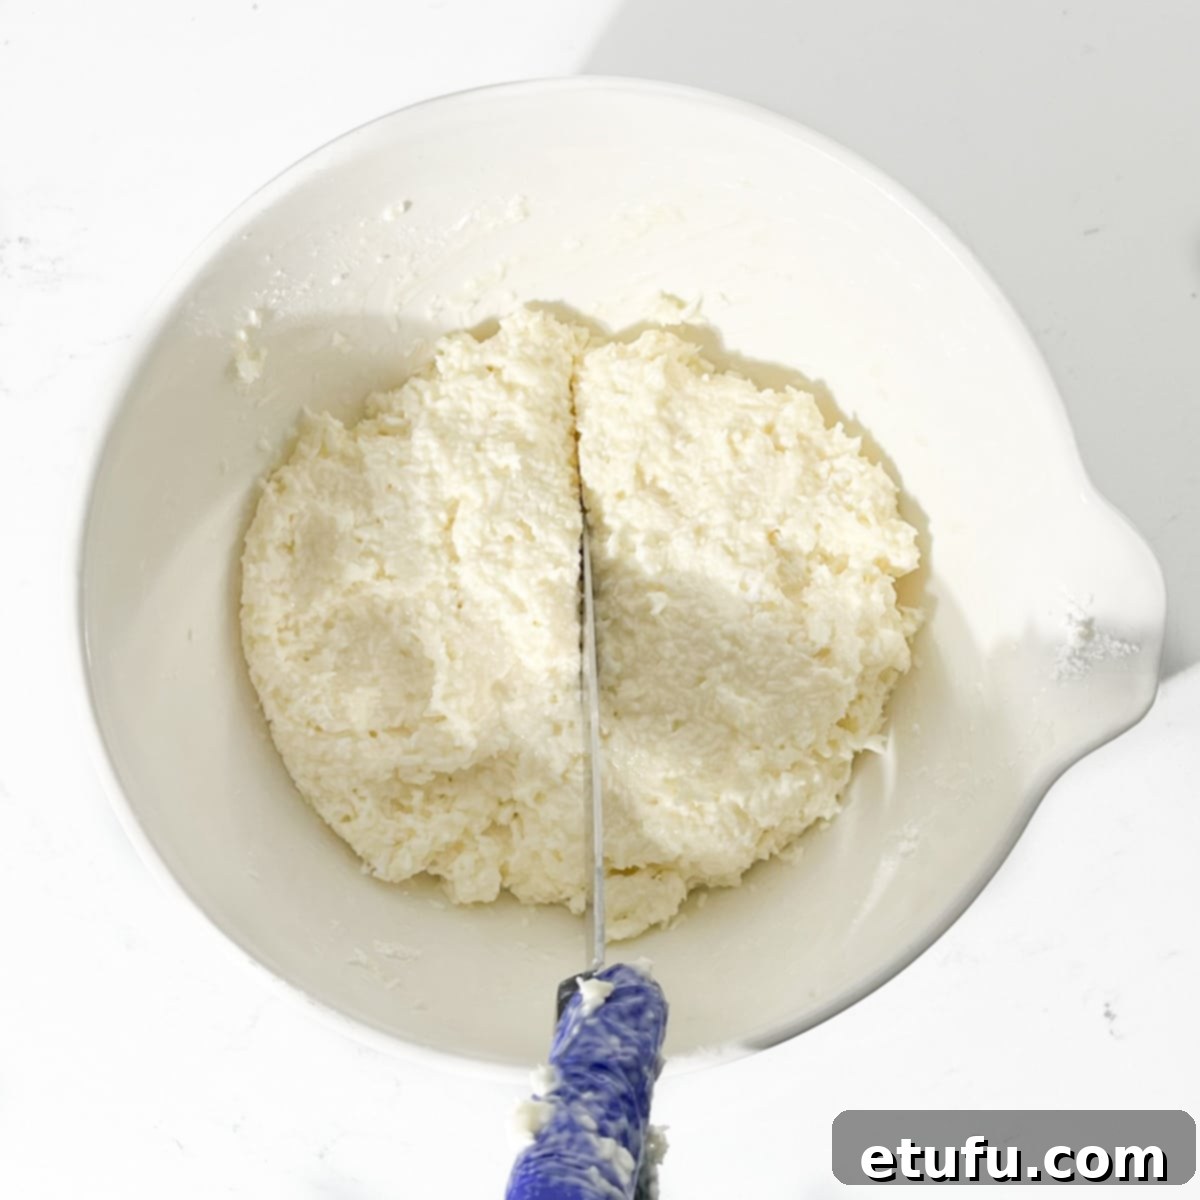
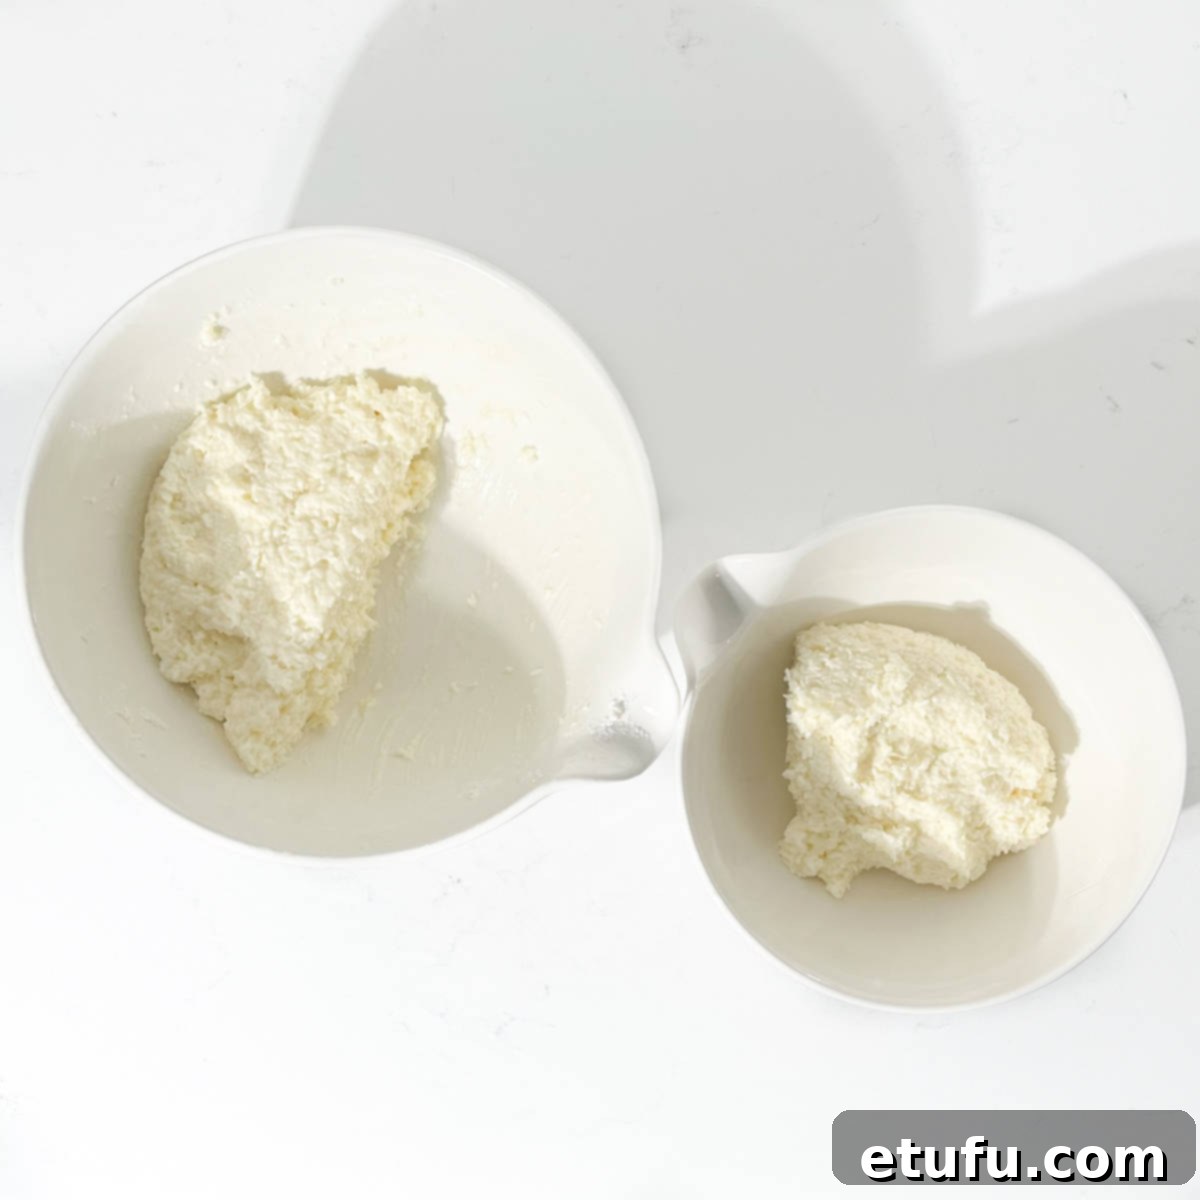
- Divide the Mixture: Carefully divide the well-combined coconut mixture into two equal halves. For precise and evenly sized pink and white layers, you can use a kitchen scale to weigh each half. This ensures a professional and aesthetically pleasing finish.
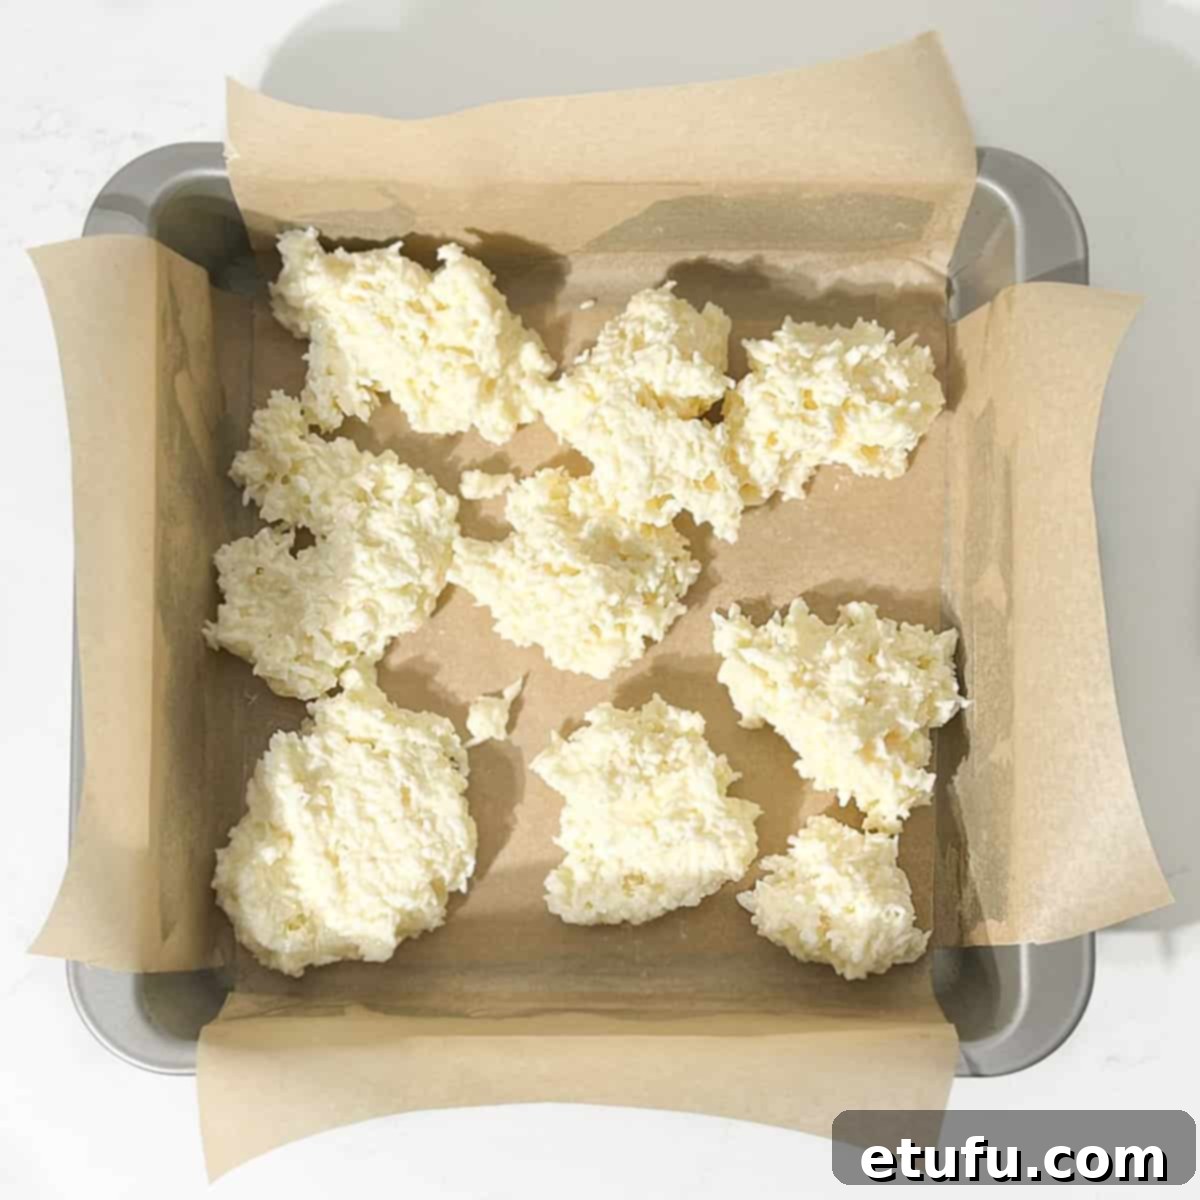
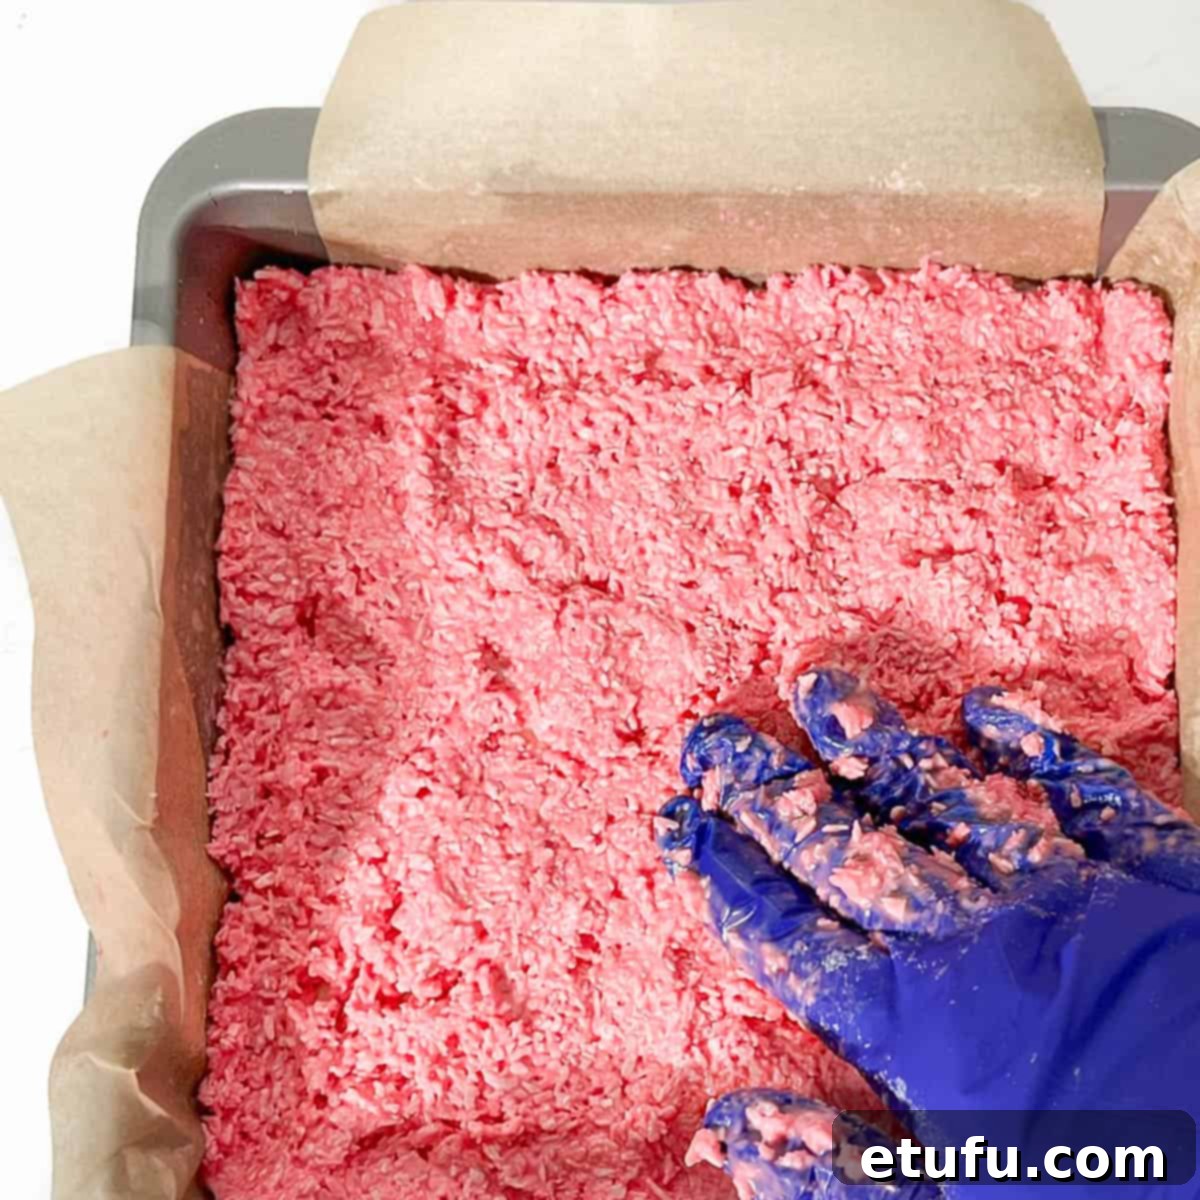
- Form the White Layer: Take one half of the mixture (this will be your white layer) and break it into smaller pieces. Distribute these pieces evenly across the bottom of your prepared baking tin. Using your fingertips, press the mixture down very firmly and evenly into the base of the tin, ensuring there are no gaps or loose areas.
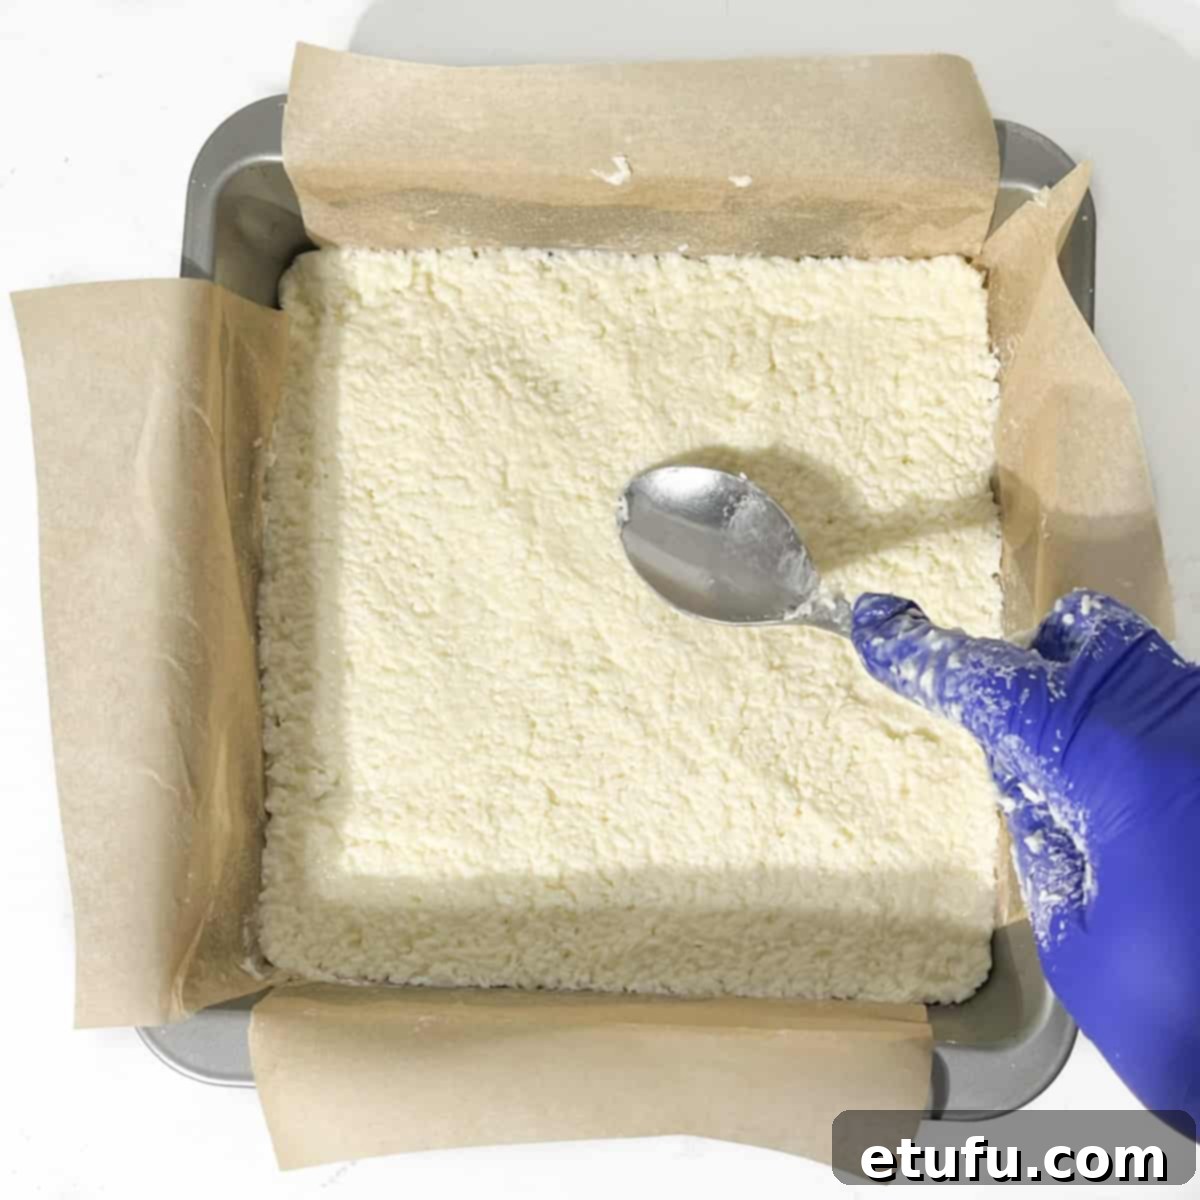
- Smooth the White Layer: Once the mixture is pressed down, use the back of a metal spoon to smooth out the surface of the white layer. This creates a clean, flat foundation for the pink layer and contributes to the overall neatness of your coconut ice.
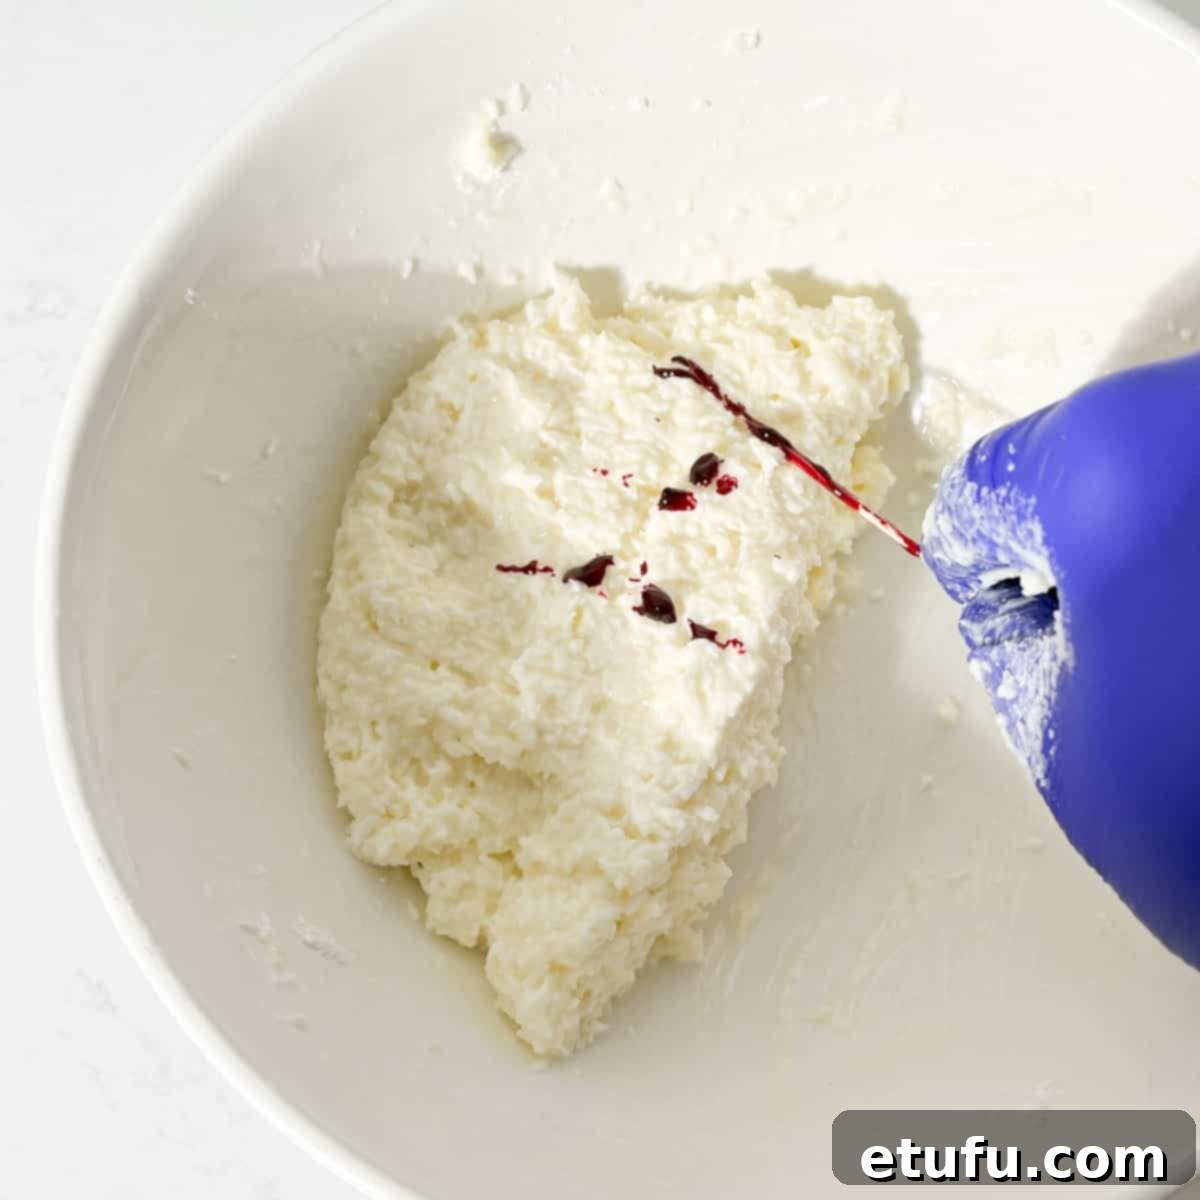
- Color the Second Half: Add a small amount of pink food coloring to the remaining half of the coconut mixture. Start with just a few drops, as you can always add more to intensify the color.
- Distribute the Pink Layer: Just as you did with the white layer, take the pink mixture and break it into small pieces. Gently distribute these pieces evenly over the smoothed white layer in the baking tin. This time, handle it with a bit more care to avoid disturbing the white layer underneath.
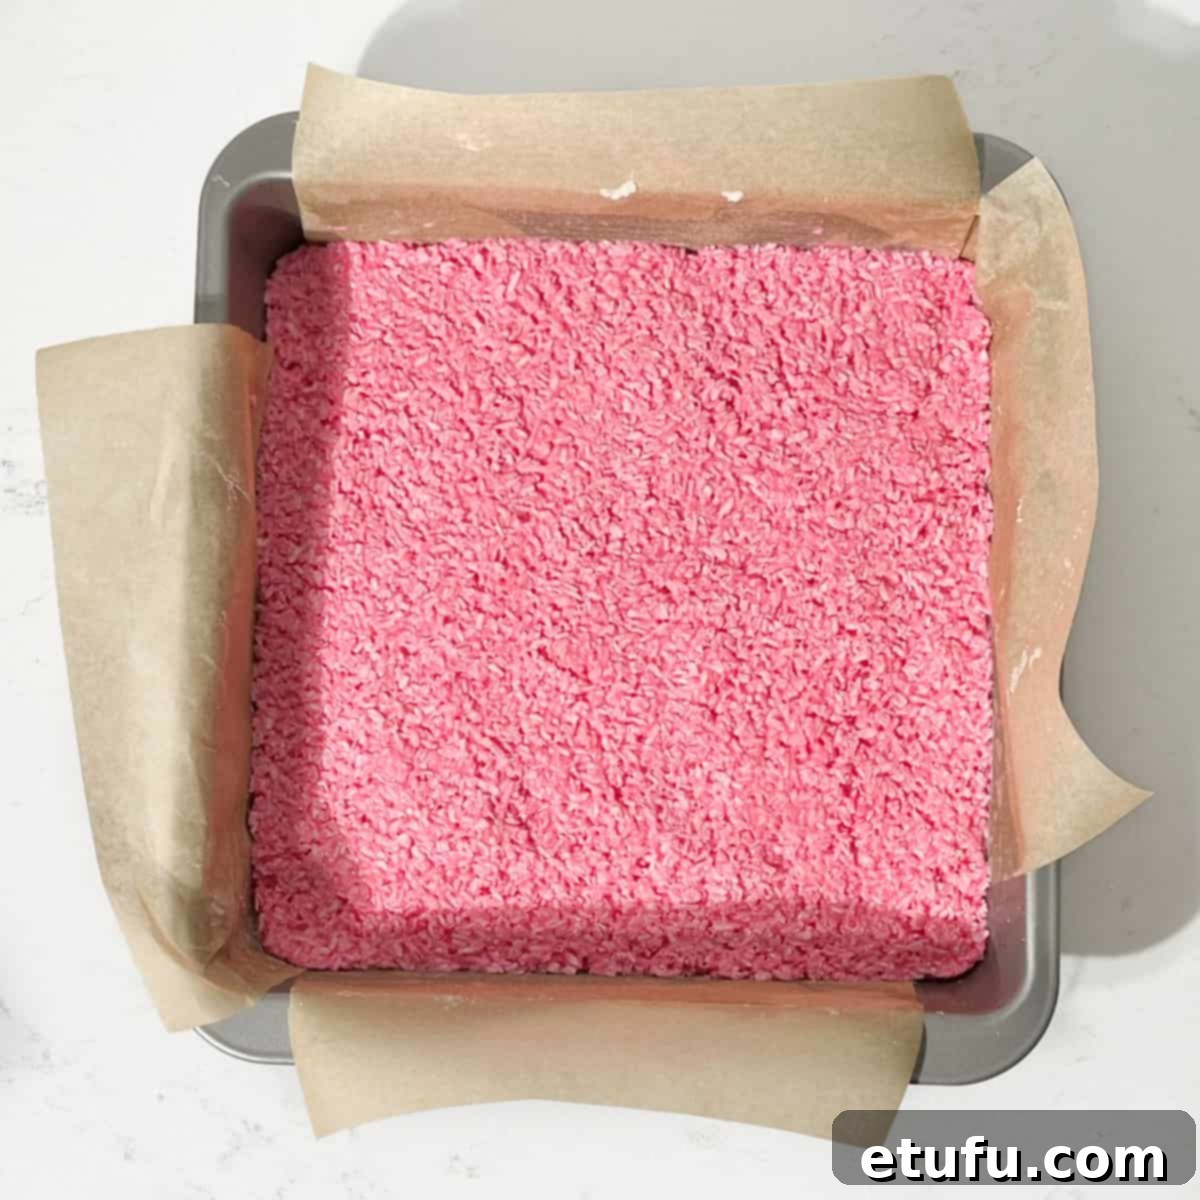
- Smooth the Pink Layer: Use the back of a clean metal spoon to gently but firmly smooth out the top pink layer. Ensure it is evenly spread and firmly pressed onto the white layer, creating a clean, two-tone effect.
- Chill and Set: Once both layers are in place and smoothed, cover the baking tin tightly with cling film (plastic wrap). Place the tin into the refrigerator for a minimum of 6 hours. For best results and the firmest set, leaving it to chill overnight is highly recommended. This crucial step allows the condensed milk to firm up, creating the perfect chewy texture.
- Slice and Serve: After the coconut ice has fully set, carefully lift the entire block out of the tin using the parchment paper overhang. Transfer it to a clean cutting board. Using a sharp knife, slice the block into small squares or any other desired shapes. For exceptionally clean cuts, wipe your knife with a damp cloth between each slice.
Expert Tips for Achieving Perfect Coconut Ice Every Time
While this recipe is incredibly straightforward, a few clever tricks can elevate your Coconut Ice from good to absolutely perfect:
Optimal Mixing Technique
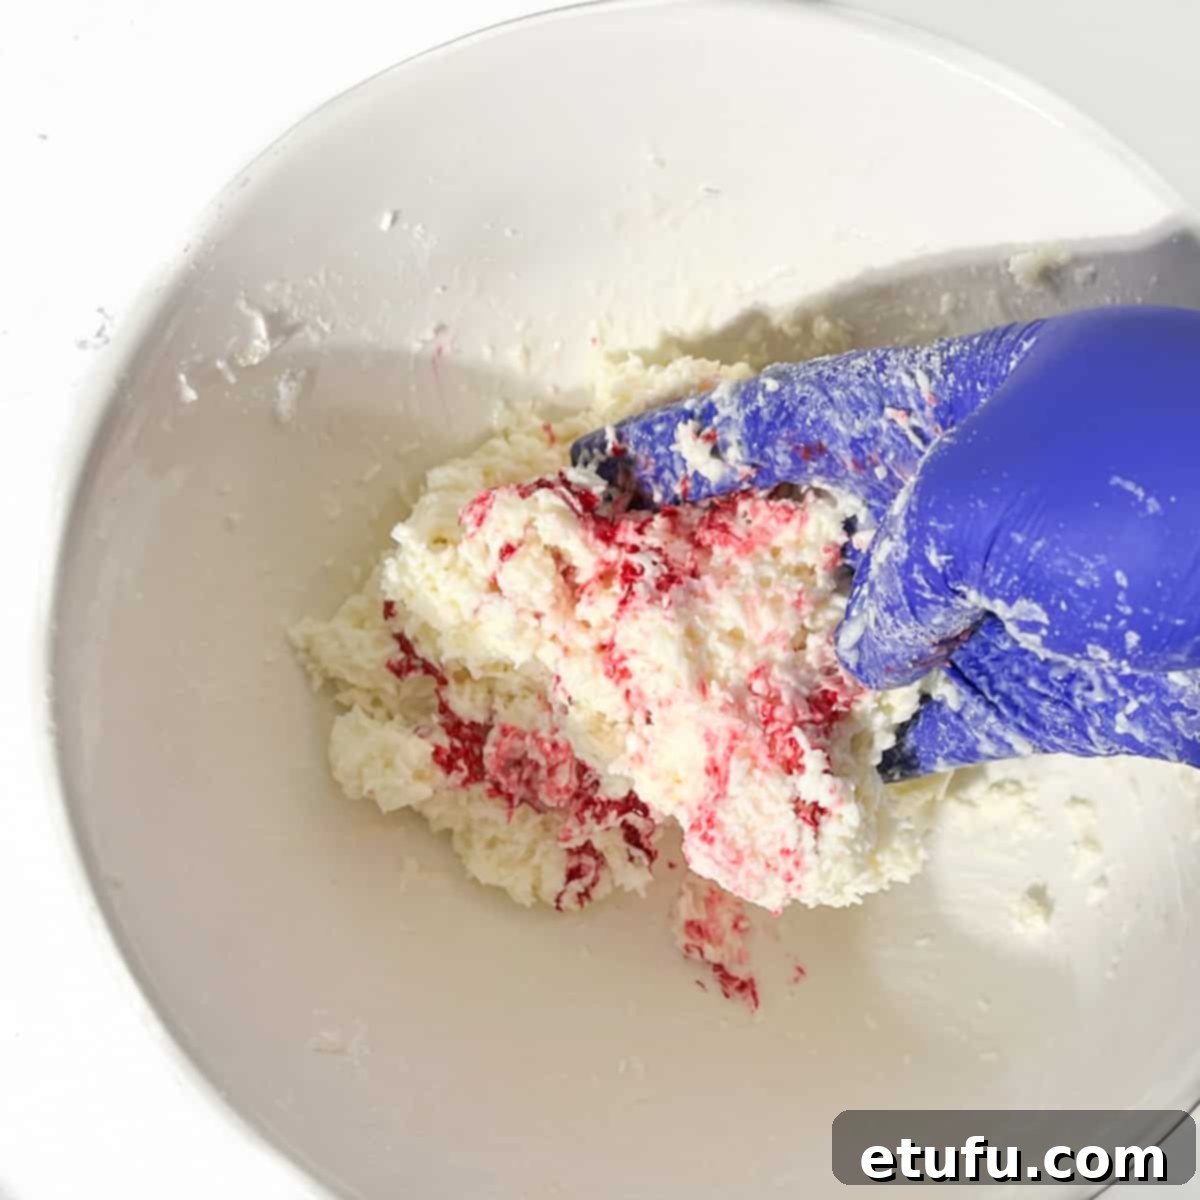
The coconut mixture can be quite dense and sticky. You’ll find it far easier and more effective to mix it by hand rather than with a spoon. Your hands provide the necessary strength and warmth to properly combine the ingredients into a pliable dough. If you’re concerned about mess or potential food coloring stains on your hands, wearing disposable rubber gloves is a great solution (though rest assured, food coloring typically washes off easily with soap and water).
Ensuring Even Pink and White Layers
For that classic, neat two-tone appearance, precision matters. After thoroughly mixing all ingredients and before adding color, divide the mixture into two equal portions. Using a kitchen scale to weigh each half will guarantee perfectly even layers, resulting in beautifully uniform and professional-looking squares once cut.
Smart Spreading in the Tin
When pressing the mixture into the baking tin, avoid dumping one large lump. Instead, break the mixture into smaller clumps and scatter them across the bottom of the tin. This technique allows for easier and more even distribution, preventing dense patches or uneven layers and ensuring a consistent thickness throughout your coconut ice slab.
Achieving a Smooth Top Surface
For a beautifully polished finish on your top pink layer, slightly wet your fingertips with a little water. Then, gently press down on the surface of the coconut ice. The moisture helps to smooth out any small bumps or unevenness, leaving you with a perfectly flat and inviting top layer.
The Overhang Trick for Easy Removal
When lining your baking tin with parchment paper, always ensure you leave a generous overhang on two opposite sides. This simple yet effective tip makes a world of difference when it comes time to remove the set coconut ice. Once chilled and firm, you can simply grasp the paper overhang and lift the entire block cleanly out of the tin, ready for effortless slicing.
Storage for Maximum Freshness
One of the many benefits of homemade Coconut Ice is its excellent shelf life, making it a perfect make-ahead treat or gift. To maintain its optimal texture and flavor:
Store your coconut ice squares in an airtight container. When refrigerated, they will stay wonderfully fresh and firm for up to a month. While refrigeration is not strictly necessary to prevent spoilage (due to the high sugar content), keeping them in the fridge will ensure they remain firm and retain their ideal chewy consistency. Storing them at room temperature, especially in warmer climates, may result in a slightly softer texture, though they will still be delicious.
Freezing Coconut Ice for Long-Term Enjoyment
Yes, Coconut Ice freezes beautifully! This makes it an ideal candidate for batch preparation or extending its shelf life even further. You can freeze coconut ice for up to three months without compromising its quality. To prevent the squares from sticking together, we highly recommend layering them in an airtight freezer-safe container with sheets of foil or baking paper in between each layer. When you’re ready to indulge, simply remove the desired amount of coconut ice from the freezer and allow it to defrost at room temperature for a few hours. They will be as delicious as freshly made!
Make-Ahead Magic for Stress-Free Occasions
Coconut Ice truly shines as a make-ahead dessert, offering unparalleled convenience for a variety of events – whether it’s for a nostalgic bake sale, a vibrant retro-themed party, or as heartfelt homemade gifts. Once you’ve sliced your set coconut ice into individual squares, careful storage is key to preserving their pristine condition.
For best results, store the cut squares in a single layer within a shallow, airtight container. If you need to stack them, always place a piece of baking paper or parchment paper between each layer. This prevents them from sticking together and helps maintain their tidy, distinct layers. This proactive approach allows you to prepare your treats well in advance, eliminating any last-minute rush and ensuring you have a delightful, ready-to-serve confection on hand.
Creative Variations and Charming Gifting Ideas for Coconut Ice
Unlock your creativity with Coconut Ice! Beyond its classic form, this versatile sweet can be adapted for endless fun and makes for truly thoughtful gifts.
- Fun Shapes: While classic squares are always a hit, get inventive! Cut your set coconut ice into bars, charming hearts, or use small cookie cutters to create playful shapes that are perfect for holidays, children’s parties, or themed events.
- Decadent Chocolate-Dipped: Elevate your Coconut Ice by dipping the bottoms or fully coating the squares in melted dark, milk, or white chocolate. The rich chocolate complements the sweet coconut beautifully, adding an extra layer of indulgence.
- Truffles or Lolly Pops: For a bite-sized treat, roll the mixture into small balls to create delicious coconut truffles. For an even more whimsical option, insert lollipop sticks into these balls before chilling and dipping them in chocolate, perhaps with a sprinkle of colorful edible decorations.
- Exciting Flavor Options: Introduce new dimensions of flavor! Gently fold in a teaspoon of lemon zest or orange zest to either the white or pink layer for a bright, citrusy lift. A few drops of rose water can also impart a delicate, floral aroma, transforming the classic taste into something uniquely sophisticated.
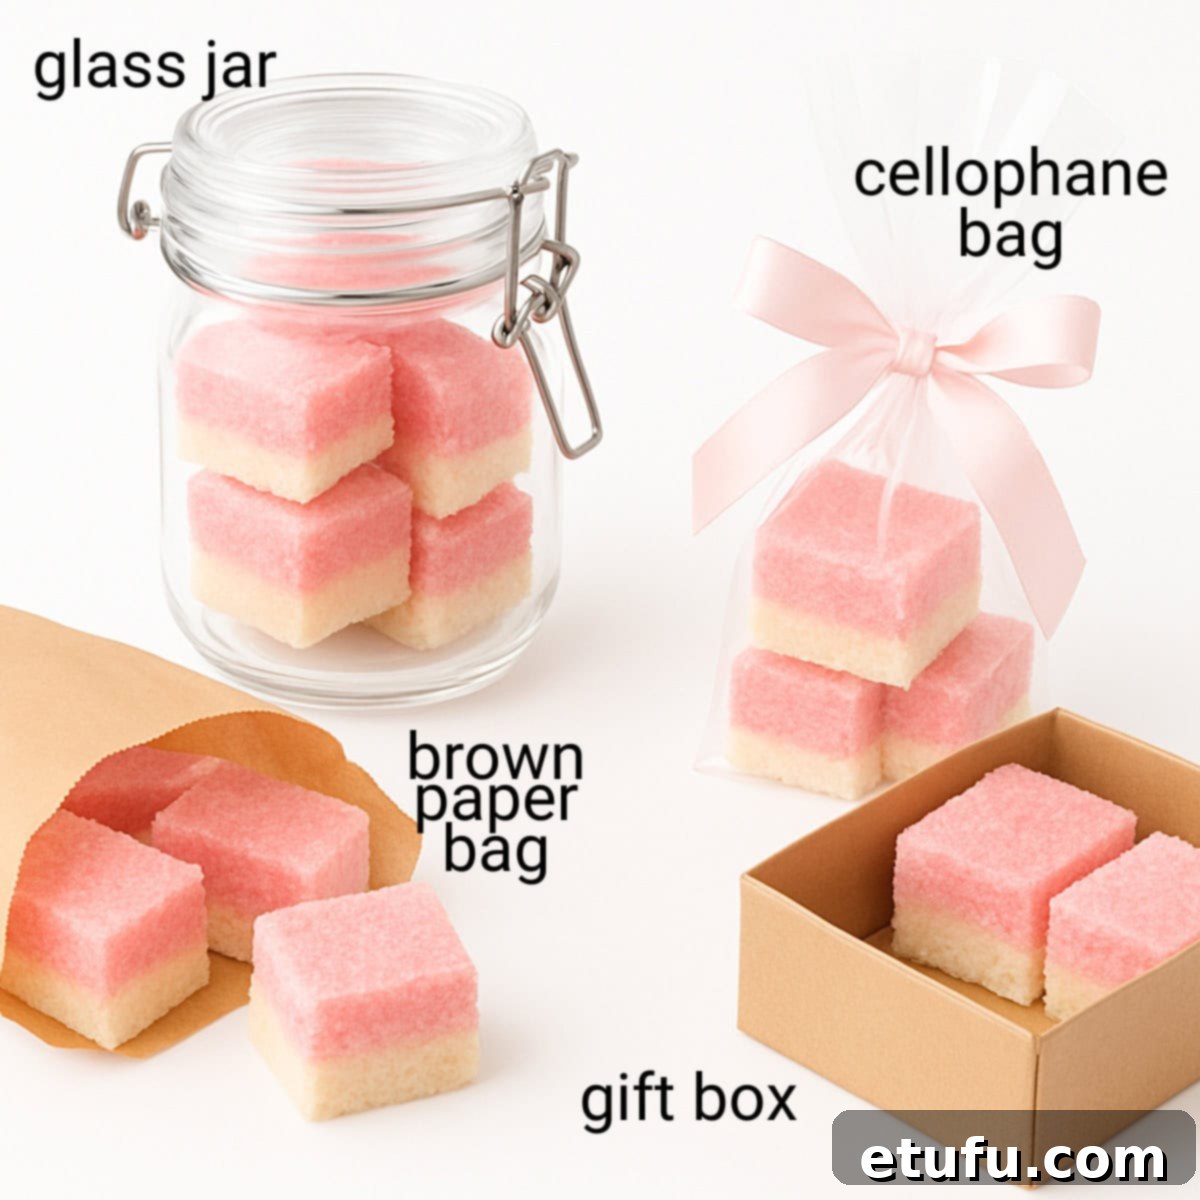
- Charming Gift Wrap Ideas: Homemade Coconut Ice makes for a truly special gift. Package them elegantly in mini glass jars, traditional paper sweet bags, clear cellophane tied with a decorative ribbon, or small treat boxes lined with parchment paper. Personalize with a tag and share the sweetness!
Vibrant Color Variations for Special Occasions
Transform your Coconut Ice to suit any holiday or celebration by simply changing the food coloring!
- Halloween: Create spooky treats with striking black and orange layers.
- Christmas: Opt for festive red and green layers, or make an all-white batch dusted with edible silver glitter for a frosty, elegant look.
- Valentine’s Day: Embrace romance with varying shades of red and pink coconut ice.
- St. Patrick’s Day: Celebrate with different shades of vibrant green layers.
- Baby Showers: Perfect for gender reveals or themed parties with blue and white, or charming all-pink variations.
- 4th of July (or other national holidays): Construct an impressive three-layered confection featuring red, white, and blue.
Dietary Swaps and Options for Everyone to Enjoy
This versatile Coconut Ice recipe can be easily adapted to accommodate various dietary needs, ensuring everyone can enjoy this delightful treat.
Vegan Option:
To create a delicious vegan version of Coconut Ice, simply swap the regular sweetened condensed milk for coconut condensed milk. This increasingly popular alternative is readily available in many larger supermarkets and online. Its natural coconut flavor beautifully complements the desiccated coconut in the recipe, and it sets just as reliably without any cooking, making for an equally firm and satisfying vegan sweet.
Gluten-Free:
You’ll be pleased to know that this recipe is naturally gluten-free! None of the core ingredients—desiccated coconut, icing sugar, or sweetened condensed milk—contain wheat or gluten. However, for those with severe gluten sensitivities or allergies, it’s always a good practice to double-check the labels on your specific brands of icing sugar and food coloring to ensure they are certified gluten-free, as cross-contamination can sometimes occur in manufacturing facilities.
Dairy-Free:
Achieving a completely dairy-free Coconut Ice is as simple as making the vegan swap. By using coconut condensed milk as mentioned above, you eliminate all dairy components from the recipe. Since there’s no butter or regular milk involved in the original recipe, this substitution makes it effortlessly dairy-free, allowing more people to enjoy this classic treat.
FAQ: Your Questions About Coconut Ice Answered
Coconut Ice is a sweet with a rich history, first appearing in an 1888 British cookbook titled The Complete Indian Housekeeper and Cook. It quickly gained popularity as a simple yet elegant homemade confection, often served as a delightful pick-me-up during afternoon teas. Its origins are intertwined with the British Empire, where tropical ingredients like coconut became more accessible.
The iconic two-tone pink and white appearance of Coconut Ice is primarily decorative, contributing to its charming and nostalgic appeal. The color doesn’t impact the flavor, but it became a strong tradition because it simply looks pretty and festive, making it particularly attractive for bake sales, parties, and holiday tables. It adds a visual dimension that enhances the overall enjoyment of this classic sweet.
The name “Coconut Ice” is more whimsical than literal. It is believed to have been inspired by the pristine, opaque white layer of the confection, which resembles a block of ice. This playful naming convention adds to the charm of the sweet, differentiating it from other coconut-based treats.
Ensuring your Coconut Ice sets firmly is straightforward when you adhere to the specified ingredient ratios. The high sugar content in sweetened condensed milk is key to its setting properties, so no additional liquid is needed. The most important steps are to mix the ingredients thoroughly and firmly by hand until well combined, press the mixture down tightly and evenly into your prepared tin, and then allow it to chill completely. A minimum of 6 hours in the refrigerator is essential, but leaving it overnight will guarantee the firmest and best results.
Absolutely! Coconut Ice freezes exceptionally well, making it an excellent option for long-term storage or preparing ahead for future events. You can freeze it for up to 3 months without any loss of quality. For best results, layer the squares between sheets of baking paper or foil in an airtight freezer-safe container. To enjoy, simply remove the desired amount from the freezer and allow it to thaw at room temperature for a few hours until soft enough to eat.
For perfectly crisp and clean-cut slices, ensure the entire slab of Coconut Ice is thoroughly chilled and completely firm before attempting to cut it. Utilize the parchment paper overhang to gently lift the entire block out of the tin onto a stable cutting surface. Use a sharp, thin-bladed knife, and for the cleanest edges, wipe the blade clean with a damp cloth or kitchen paper between each cut. This prevents sticking and ensures each piece looks as good as it tastes.
Delightful Recipes Using Sweetened Condensed Milk
Condensed milk is a magical ingredient that adds richness and sweetness to a myriad of desserts. If you loved making Coconut Ice, you’ll surely enjoy exploring these other fantastic recipes that feature this versatile pantry staple:
- Iced coffee with condensed milk
- Easy Marshmallow tart
- Apple crumble tart recipe
- Peppermint Crisp Tart
- Condensed milk cookies from South Africa
- Tan Slice
- Milo Dinosaur
- Choc chip cookies with condensed milk
- Tinginys – Lithuanian Lazy Cookies
- Dark chocolate ice cream, no churn!
- Easy peanut butter microwave fudge
- Sequilhos – Brazilian cornflour cookies
Recipe: Easy No-Bake Coconut Ice with Condensed Milk
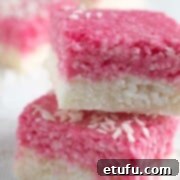
Easy Coconut Ice with Condensed Milk
This is a remarkably easy recipe for the classic pink and white sweets known as Coconut Ice. It requires just three simple ingredients and a dash of food coloring, with no cooking or baking involved. This delightful confectionery comes together in no time and is perfect for a quick treat or a fun kitchen project.
Course: Dessert
Cuisine: British, International
Prep Time: 10 minutes
Fridge Time: 6 hours (minimum)
Total Time: 6 hours 10 minutes
Servings: 15 medium-sized squares
Calories: 281 kcal
Author: Maretha Corbett
Equipment
- 20cm x 20cm x 5cm (8”x8”x2”) square tin
Ingredients
- 1 can sweetened condensed milk (circa 395g)
- 250 grams icing sugar
- 300 grams desiccated coconut
- Few drops pink food colouring
Instructions
- Line a 20cm x 20cm (8″ x 8″) baking tray with parchment paper. If you prefer thicker slices, use a smaller tray. Avoid using a larger tin, as the slices will be too thin. Top tip: Leave a slight overhang of paper to easily lift the set coconut ice later.
- In a large bowl, add all the ingredients except for the food colouring: condensed milk, icing sugar, and desiccated coconut.
- Begin by combining the mixture with a large spoon. It might seem stiff and dry initially, but it will come together as you mix.
- Set the spoon aside and use your hands to bring the mixture together. This step requires firm kneading and squishing to ensure everything is well combined. Wear rubber gloves if desired.
- Divide the mixture into two equal halves. For precise layers, you can weigh each half.
- Take one half (for the white layer) and break it into smaller pieces. Arrange and press these firmly across the bottom of the prepared baking tin with your fingertips, ensuring an even spread. Use a metal spoon to smooth the layer out.
- Add a small amount of pink food colouring to the remaining half of the mixture.
- Work the colouring thoroughly into the mixture by hand. Squish and knead until the color is evenly distributed throughout.
- Similar to the white layer, distribute small pieces of the pink mixture over the white layer. Gently spread it evenly and smooth it out using the back of a clean metal spoon.
- Cover the coconut ice with cling film and place the tin in the fridge for a minimum of 6 hours to allow it to set completely.
- Once set, carefully lift the entire block of coconut ice from the tin onto a cutting board using the parchment paper overhang. Slice it into small squares or your desired shapes.
Notes
For more detailed tips on mixing, achieving even layers, spreading, smoothing, and easy removal, please refer to the “Tips for Perfect Coconut Ice” section above.
For food safety advice, including guidance on food allergies
**Nutritional Data Disclaimer**
Please keep in mind that the nutritional information provided below is calculated by a third party, and we cannot guarantee its absolute accuracy. We strive to offer the most precise information possible, but we do not take responsibility for any potential errors. Additionally, the nutritional value of this recipe may vary depending on the exact brands and products used. For personalized dietary advice, we recommend consulting with a qualified healthcare professional or a registered dietitian.
Nutrition
Calories: 281kcal | Carbohydrates: 36g | Protein: 3g | Fat: 15g | Saturated Fat: 13g | Polyunsaturated Fat: 0.2g | Monounsaturated Fat: 1g | Cholesterol: 9mg | Sodium: 41mg | Potassium: 207mg | Fiber: 3g | Sugar: 32g | Vitamin A: 70IU | Vitamin C: 1mg | Calcium: 80mg | Iron: 1mg
