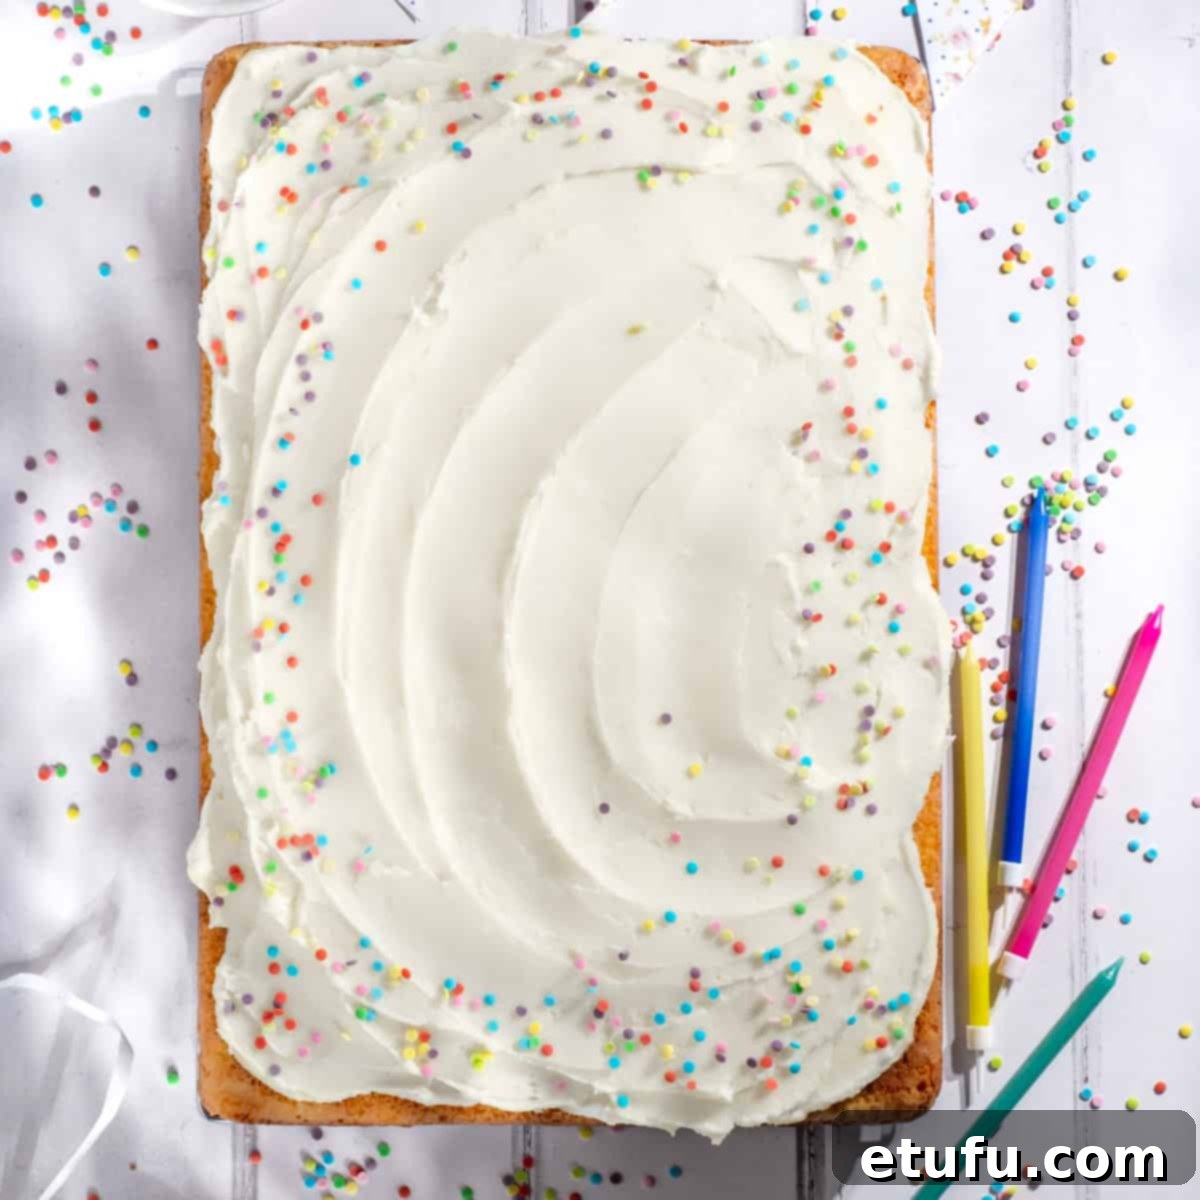
The Ultimate Moist & Fluffy Vanilla Tray Bake with Easy Buttercream Frosting
Who can resist the timeless allure of a truly fluffy, wonderfully moist, and exquisitely tender vanilla tray bake? Adorned with a generous layer of rich, creamy vanilla buttercream frosting and cheerful pastel sprinkles, this classic dessert is an irresistible delight that brings joy to any occasion.
In our household, it’s a temptation that’s simply too good to pass up! This easy vanilla sheet cake isn’t just a treat; it’s a celebration of simple, comforting flavors.
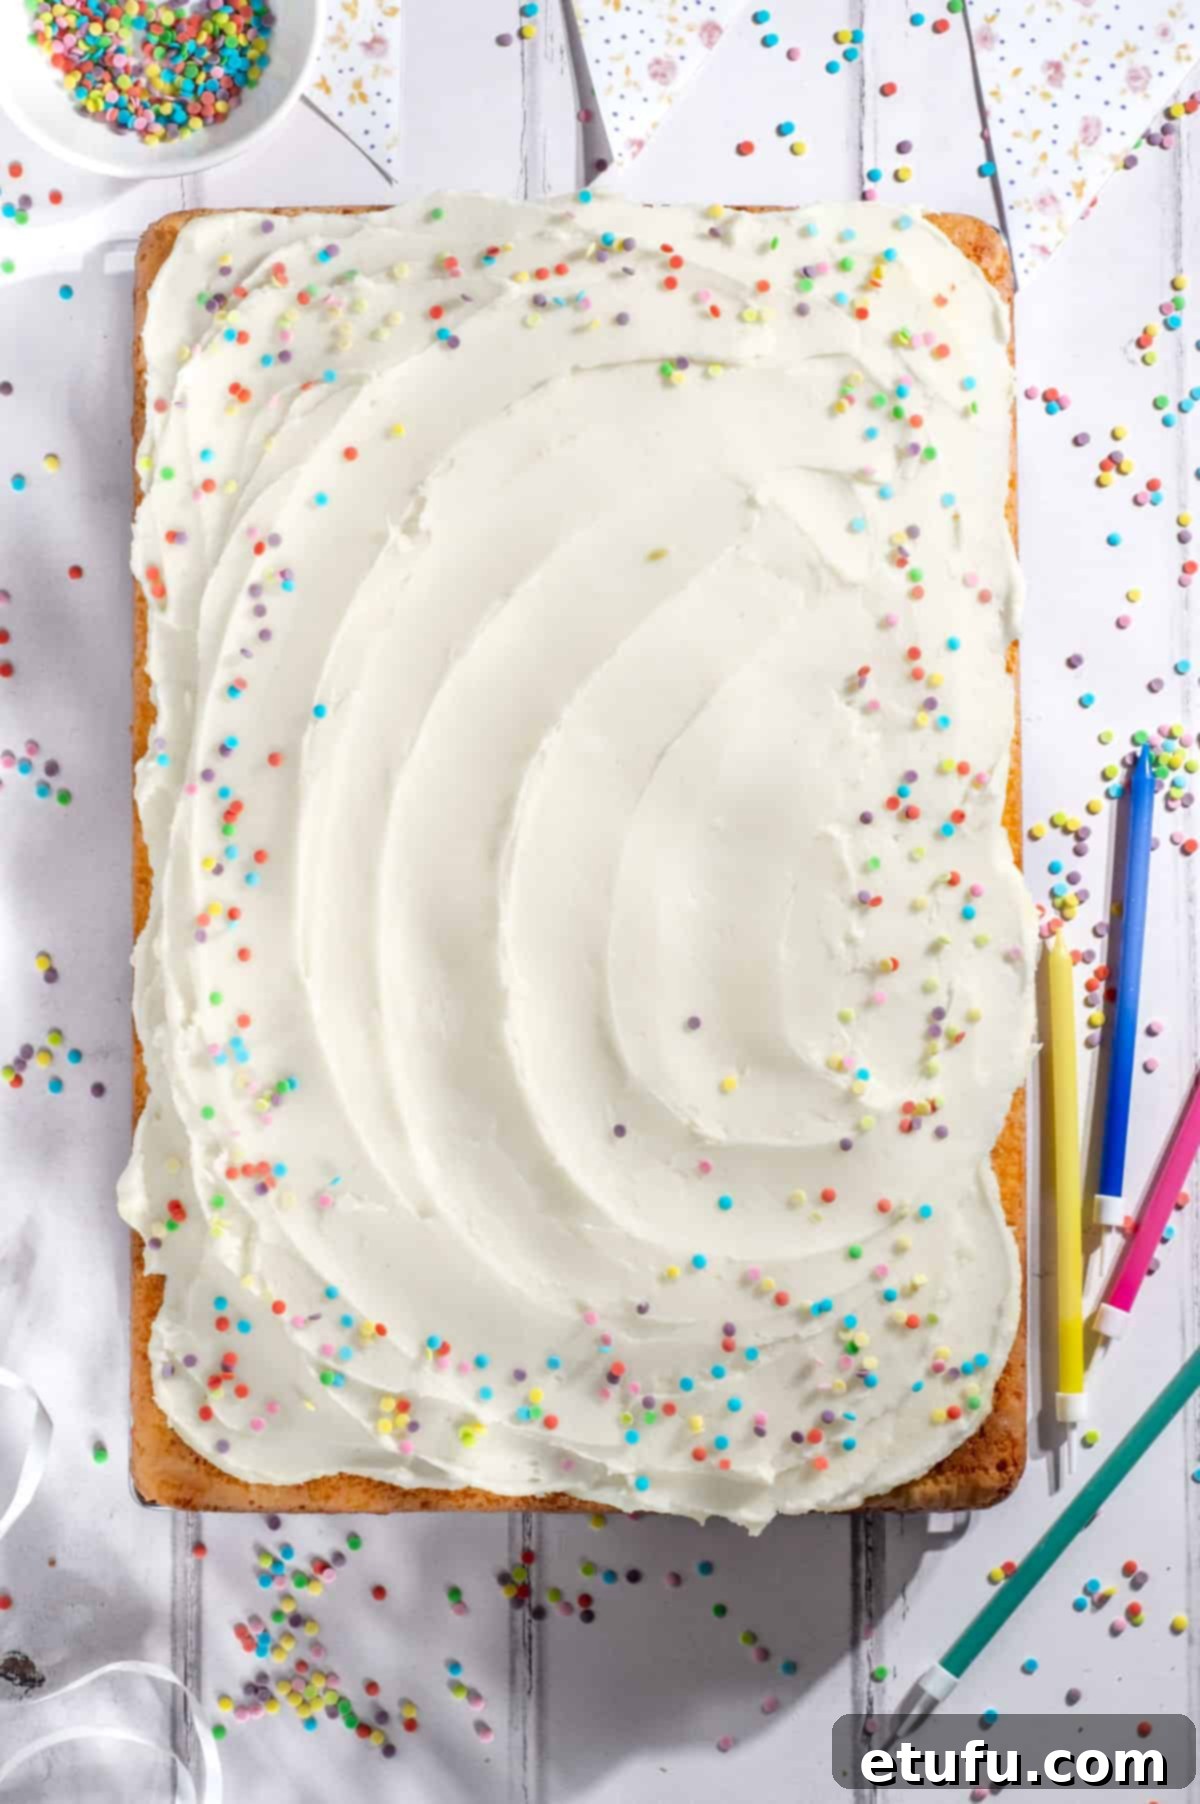
Your Go-To Foolproof Vanilla Sheet Cake Recipe
This vanilla tray bake recipe is designed to be wonderfully straightforward and utterly foolproof, making it the perfect choice for bakers of all skill levels. Whether you’re embarking on your very first baking adventure or you’re a seasoned pro looking for a reliable classic, our easy-to-follow, step-by-step instructions guarantee success every single time. We’ve meticulously included all the essential tips and clever tricks you’ll need to transform simple ingredients into a surefire hit that will impress everyone.
The Secret to Supreme Moisture: Using Oil in Your Vanilla Cake
What truly sets this vanilla sheet cake apart from many traditional recipes is its ingenious use of oil instead of butter. This choice offers distinct and significant advantages for creating sponge cakes that remain incredibly moist and tender over time. Oil prevents excessive gluten development, which is crucial for achieving that highly sought-after, melt-in-your-mouth soft crumb. Unlike butter, which can make cakes denser and prone to drying out faster, oil ensures a consistently plush and tender texture that lasts for days, making this the ideal moist vanilla cake.
A Versatile Classic for Every Occasion
This vanilla sheet cake is the ultimate all-rounder, adaptable to nearly any event or craving. It’s absolutely perfect as a delightful birthday cake, a crowd-pleasing addition to bake sales, a thoughtful office treat, or simply a well-deserved indulgence at home. Who truly needs a grand reason to bake a cake this good? It’s more than just a dessert; it’s pure joy on a plate, bringing smiles with every bite. Its universal appeal makes it a staple for any baker’s repertoire, confirming its place as an easy vanilla cake recipe for any time.
The versatile vanilla sponge base featured in this recipe also forms the foundation for some of our other beloved classic treats, including our old-fashioned school cake recipe for Jam and Coconut Sponge and the vibrantly pink Tottenham Cake, showcasing just how adaptable and delicious this simple base truly is.
Why You’ll Adore This Vanilla Tray Bake Recipe
- Unmatched Texture: Experience a brilliantly moist, fluffy, and tender sheet cake that truly melts in your mouth – a hallmark of the best homemade vanilla cake.
- Beginner-Friendly Baking: Our clear, easy step-by-step instructions make this tray bake perfect for both complete beginners and experienced bakers seeking a fuss-free recipe.
- Long-Lasting Moisture: Thanks to the clever use of oil instead of butter, the cake stays incredibly moist for longer, without ever compromising on its delicious vanilla flavor, ensuring a superior oil-based vanilla cake.
- Timeless Elegance: Simple yet elegant, this vanilla tray bake is a true classic that never goes out of style, guaranteed to be a hit every time.
- Perfect for Any Occasion: From casual family desserts to festive gatherings, this versatile cake is always appropriate and always loved. It’s the ideal fluffy vanilla cake for any celebration.
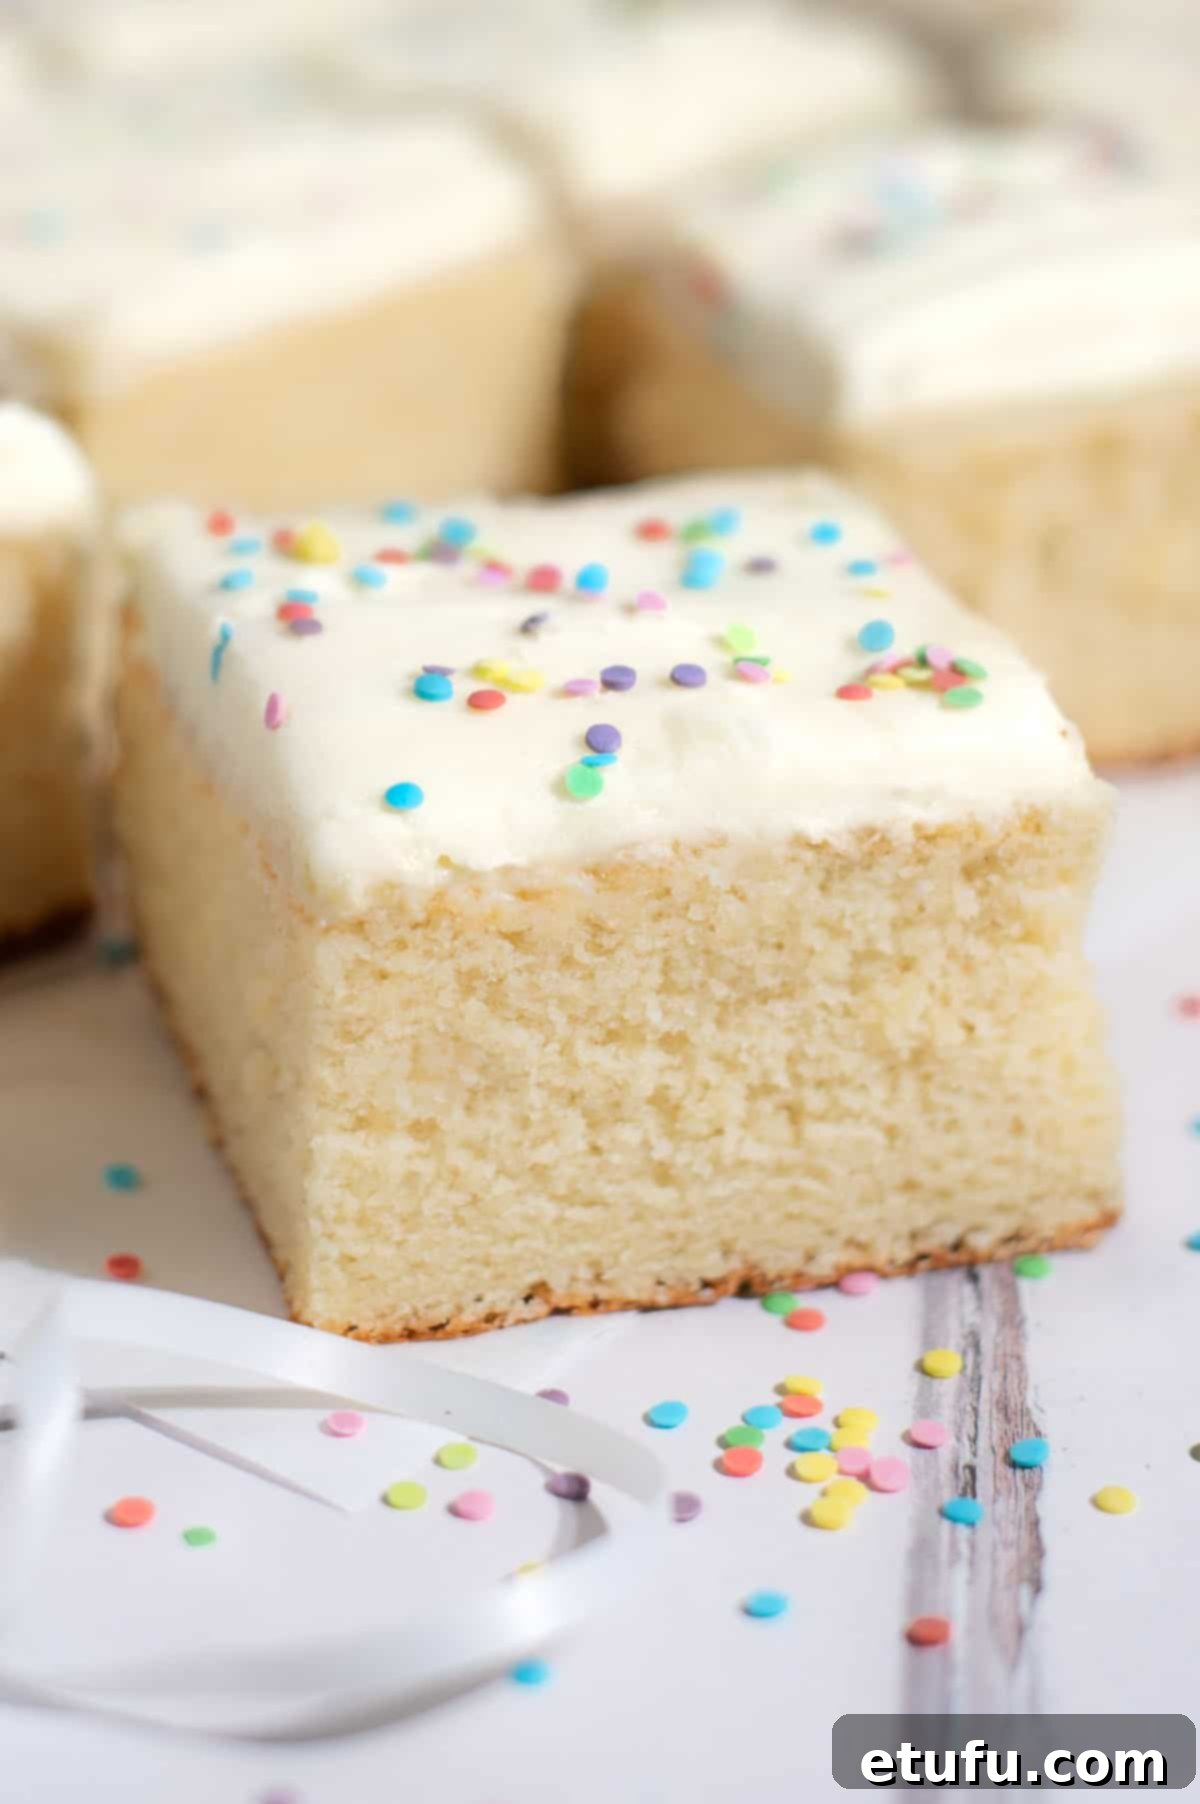
Key Ingredients and Smart Substitutions for Your Vanilla Sheet Cake
To achieve the best results with your homemade vanilla cake, understanding each ingredient’s role is key. Here’s a detailed look at what you’ll need and potential adjustments, ensuring your easy vanilla cake recipe turns out perfectly.
**Please refer to the complete recipe card at the bottom of this post for the full list of ingredients with precise measurements.
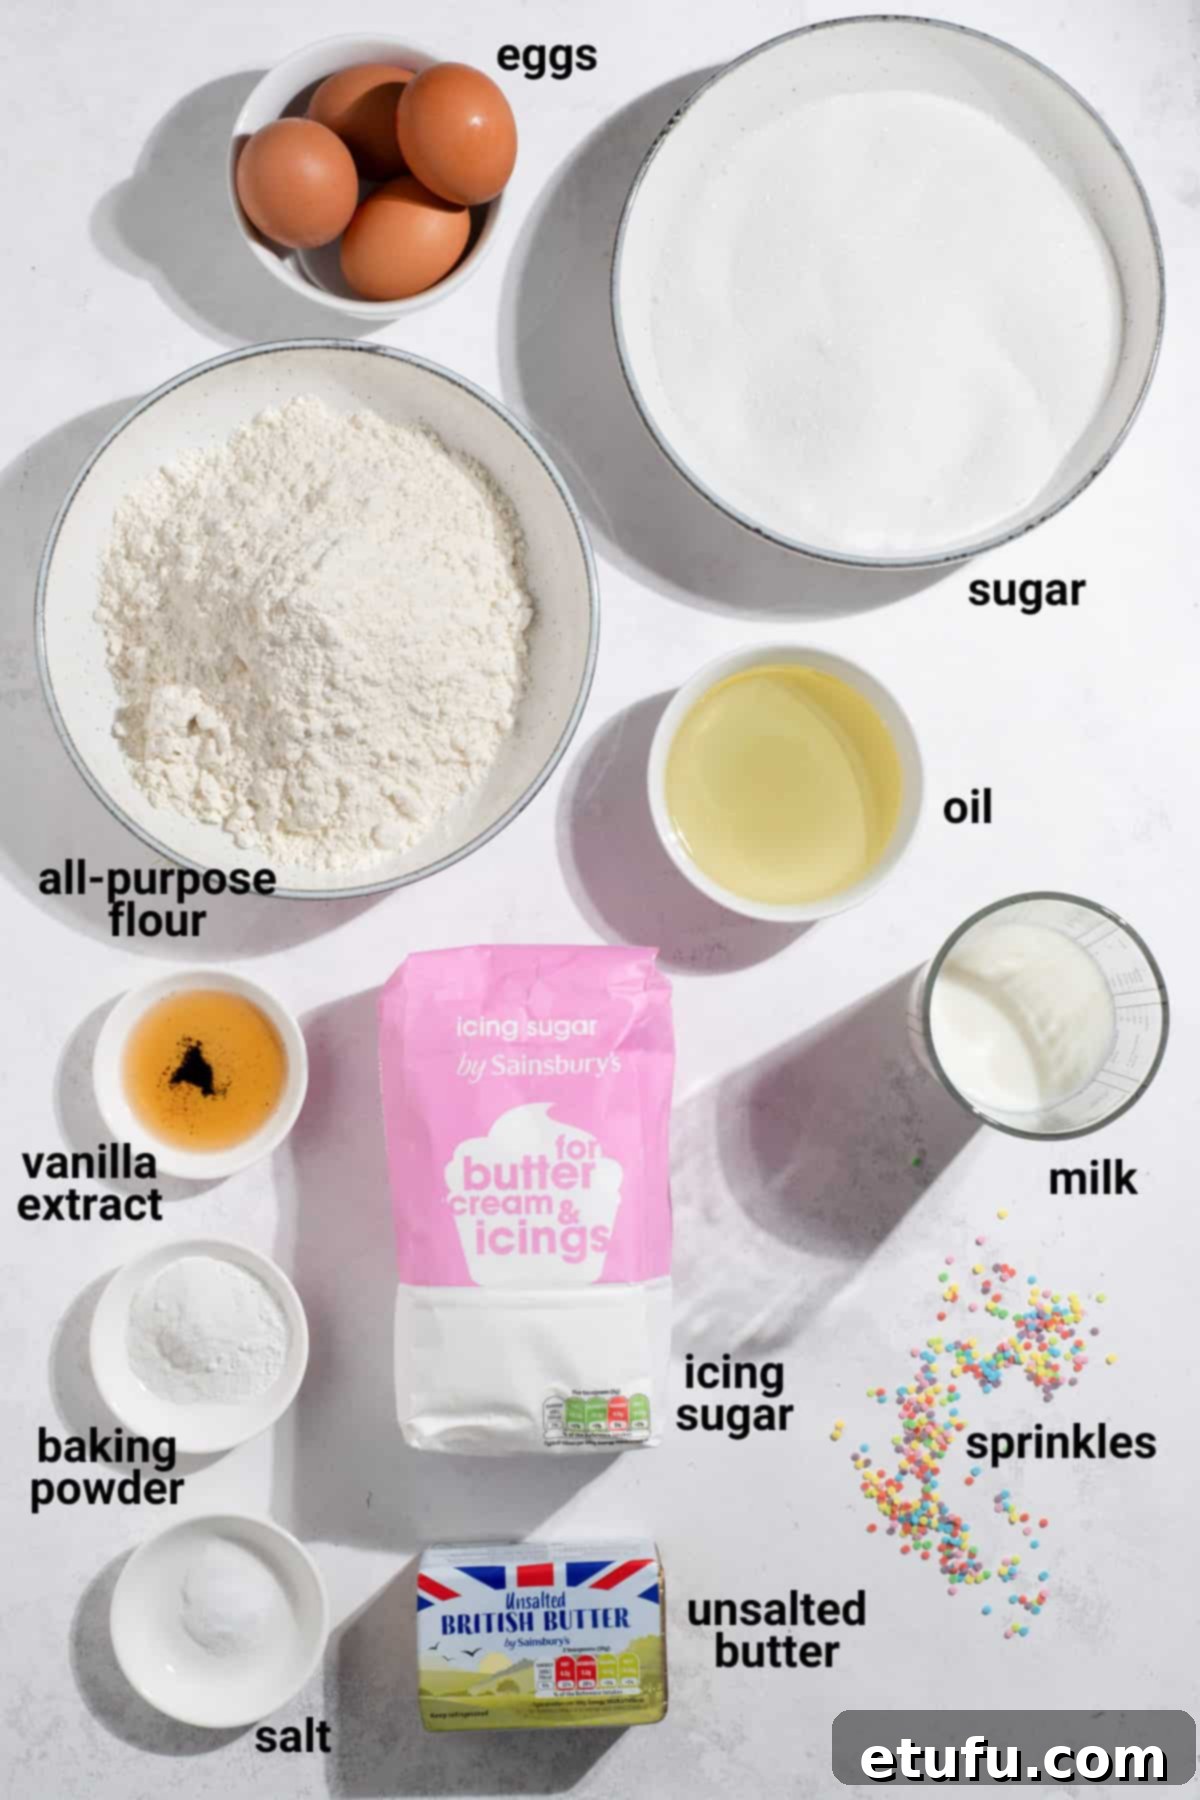
Eggs: The Foundation of Fluffiness
You will need four large eggs, ideally at room temperature, each weighing approximately 62g (with the shell on). Don’t worry if your eggs are a few grams over or under; the recipe is forgiving. Using room-temperature eggs is a vital detail for making light and airy sponge cakes. When eggs are at room temperature, their proteins are more relaxed, allowing them to whip up to a greater volume and blend into the batter far more smoothly and uniformly. This emulsification is crucial for trapping air, which helps the cake rise evenly and contributes to a delicate, tender, and uniform crumb structure. To quickly warm fridge-cold eggs, simply place them in a bowl of warm (not hot!) water for about 5-10 minutes before use.
Sugar: Sweetness and Structure
Plain, white granulated sugar works exceptionally well in this easy cake recipe, providing the perfect balance of sweetness and aiding in the cake’s structure. Its fine crystals dissolve well during the beating process, contributing to a smooth batter. Caster sugar (superfine sugar) can also be used if you prefer, as its finer granules dissolve more quickly, but it is not strictly essential for the success of this particular recipe. Avoid using powdered sugar (icing sugar) in the cake batter itself, as it can affect the texture.
Oil: The Secret to Long-Lasting Moisture
For this recipe, opt for a flavourless, neutral oil such as vegetable oil or sunflower oil. The use of oil offers significant advantages over butter in sponge cakes, particularly for achieving a truly moist vanilla cake. Since oil is liquid at room temperature, it keeps cakes moist and tender over an extended period, preventing them from drying out quickly. Oil also inhibits excessive gluten development in the flour, which results in a softer, more delicate crumb – a key characteristic of a fluffy vanilla cake. Its neutral taste ensures that the pure vanilla flavor of the cake truly shines through, without any competing fatty notes. Furthermore, oil is often a more economical choice compared to butter, making this recipe budget-friendly.
Baking Powder: The Leavening Agent
You might initially be surprised or even alarmed to see that this cake recipe calls for one whole tablespoon of baking powder. Rest assured, this measurement is absolutely correct and essential for achieving the incredible lift and fluffy texture of our vanilla tray bake. Baking powder is a chemical leavening agent that reacts with moisture and heat to produce carbon dioxide gas, creating air pockets within the batter that cause the cake to rise. Please measure it carefully: scoop a generous heap and then use the straight edge of a butter knife or a small spatula to level it off precisely. This exact amount ensures your cake will rise beautifully and have that perfect airy quality.
Unsalted Butter (for the Buttercream): Rich & Creamy
For the luxurious vanilla buttercream frosting, we highly recommend unsalted butter. Using unsalted butter gives you complete control over the salt content in your frosting, allowing you to season it perfectly. However, if you only have salted butter on hand, there’s no need to worry! Simply omit adding the quarter teaspoon of salt specified for the buttercream in the recipe. Crucially, ensure the butter is soft but not melted. It should be pliable enough that you can easily press your finger into it and make a distinct indent. This consistency is vital for whipping up light and airy buttercream that spreads smoothly.
Essential Equipment for Your Fluffy Vanilla Cake
Having the right tools makes all the difference in baking. Here’s what you’ll need for this easy vanilla cake recipe, ensuring a smooth and enjoyable baking process:
- Electric Mixer: An electric hand mixer or a stand mixer (with the paddle attachment for the buttercream and whisk attachment for the cake batter) is highly recommended for thoroughly beating the eggs and sugar, and for achieving a smooth, fluffy buttercream. This will save you a lot of arm work and ensure consistent results.
- Mixing Bowls: You’ll need a couple of good-sized mixing bowls for separating wet and dry ingredients and for making the buttercream. Ideally, one large bowl for the cake batter and a medium-sized one for the frosting.
- Rectangular Baking Tin: A baking tin of approximately 33cm x 23cm (13 x 9 inches) is ideal for this recipe, yielding a perfectly proportioned tray bake.
- Size Matters: A larger tin will result in a flatter cake, and you may need to reduce the baking time. Conversely, a slightly smaller cake tin will yield a thicker cake, which might require a few extra minutes in the oven. Always keep an eye on your cake and test for doneness with a cake tester.
- Measuring Tools: A digital kitchen scale for precise ingredient measurements (especially for flour and sugar), and a set of quality measuring cups and spoons for liquids and smaller quantities.
- Spatulas and Whisk: A flexible rubber spatula is indispensable for scraping down bowls and gently folding ingredients, while a wire whisk is useful for combining liquids and dry ingredients.
- Cooling Rack: Essential for cooling your cake evenly after baking. Placing the hot cake directly on a solid surface can trap steam, making the bottom soggy. A wire rack allows air circulation all around.
- Parchment Paper: For lining your baking tin, as detailed in the next section.
How to Perfectly Line a Rectangular Baking Tin for Your Vanilla Tray Bake
Properly lining your baking tin is crucial for preventing sticking and ensuring your cake releases easily and cleanly. Follow these simple steps for a neat and effective lining:
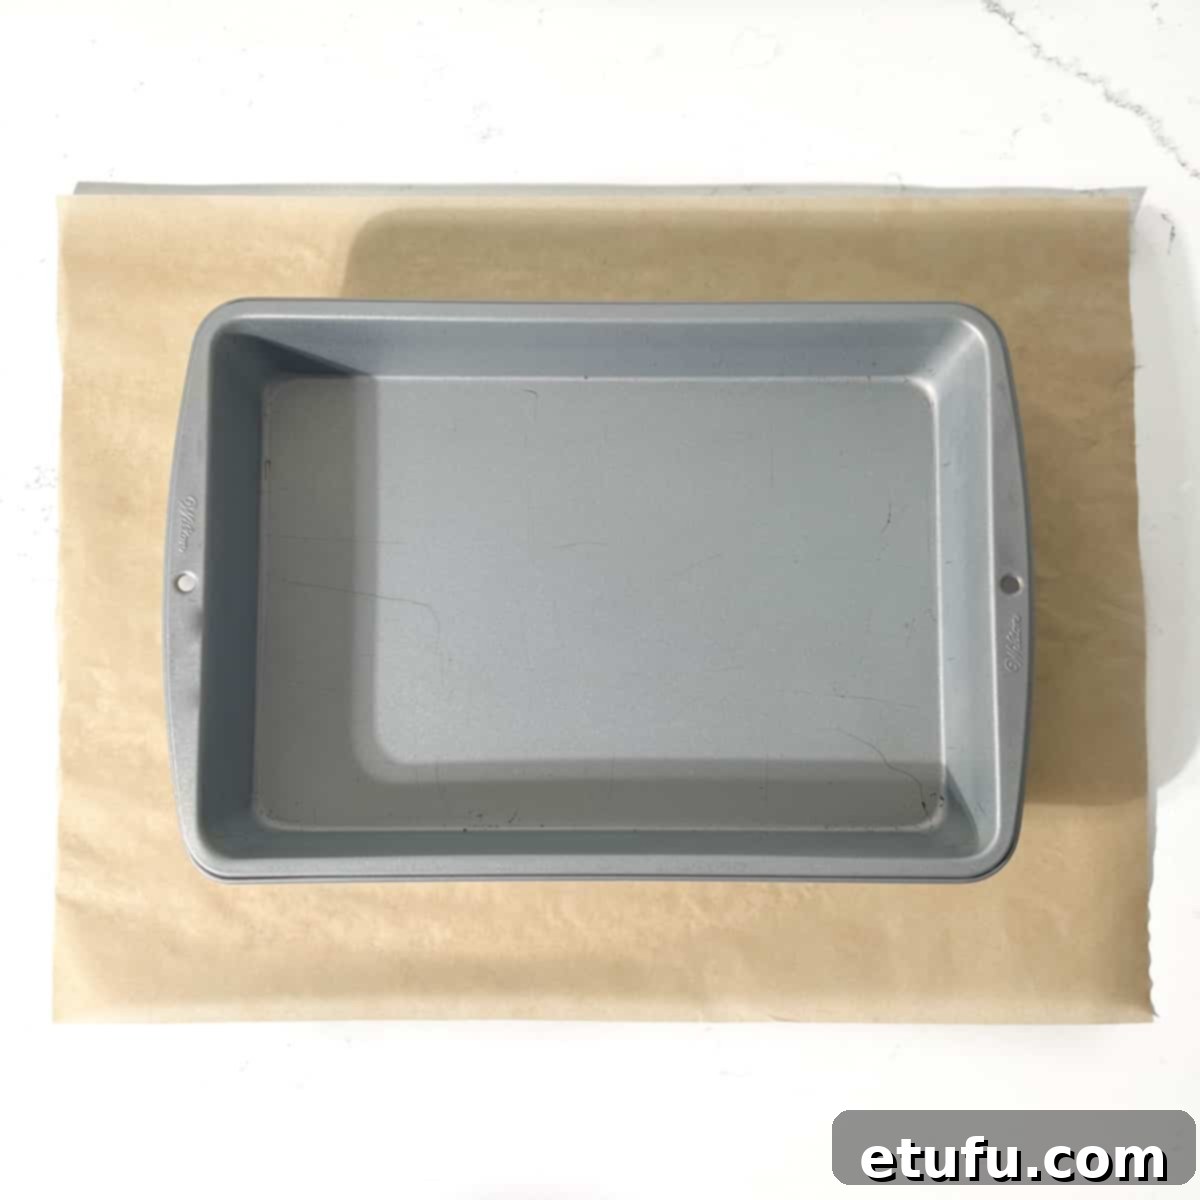
- Prepare the Paper: Place your rectangular baking tin on a large piece of baking paper (parchment paper). Cut around it, leaving a generous border of about 8-10cm (3-4 inches) on all sides. This extra paper will form the sides of your lining, allowing for an overhang that prevents the cake from baking directly against the metal.
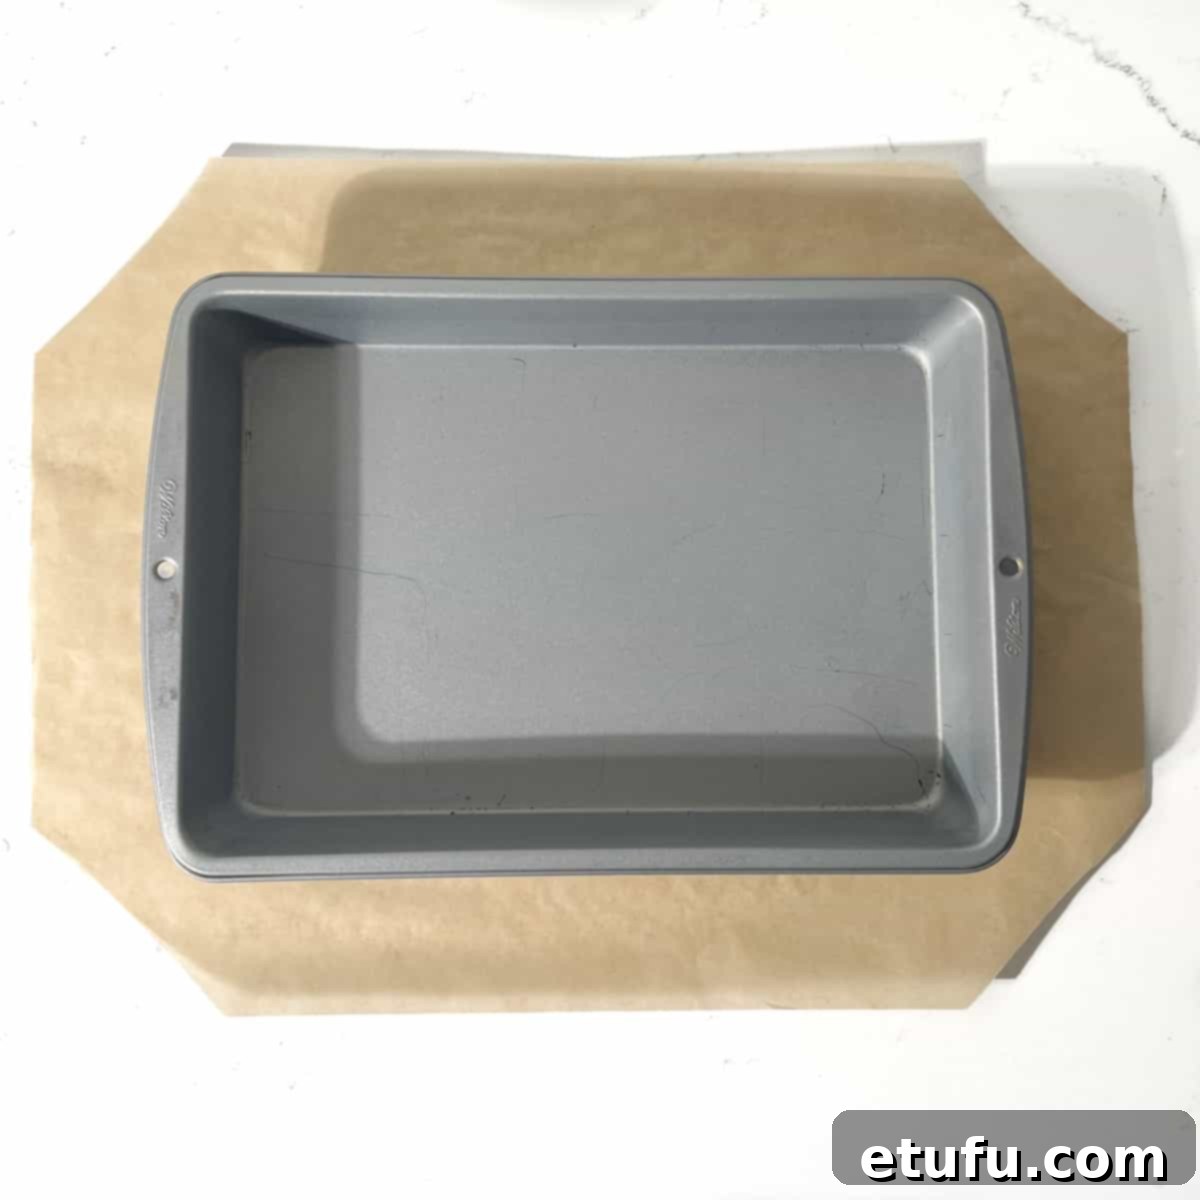
- Trim the Corners: To eliminate excess paper that would otherwise bunch up and create creases, cut off the four corners of the parchment paper. Make sure to leave about 4cm (1.5 inches) between the edge of the paper and where the corner of the tray would be. This creates four distinct flaps on each side of the paper.
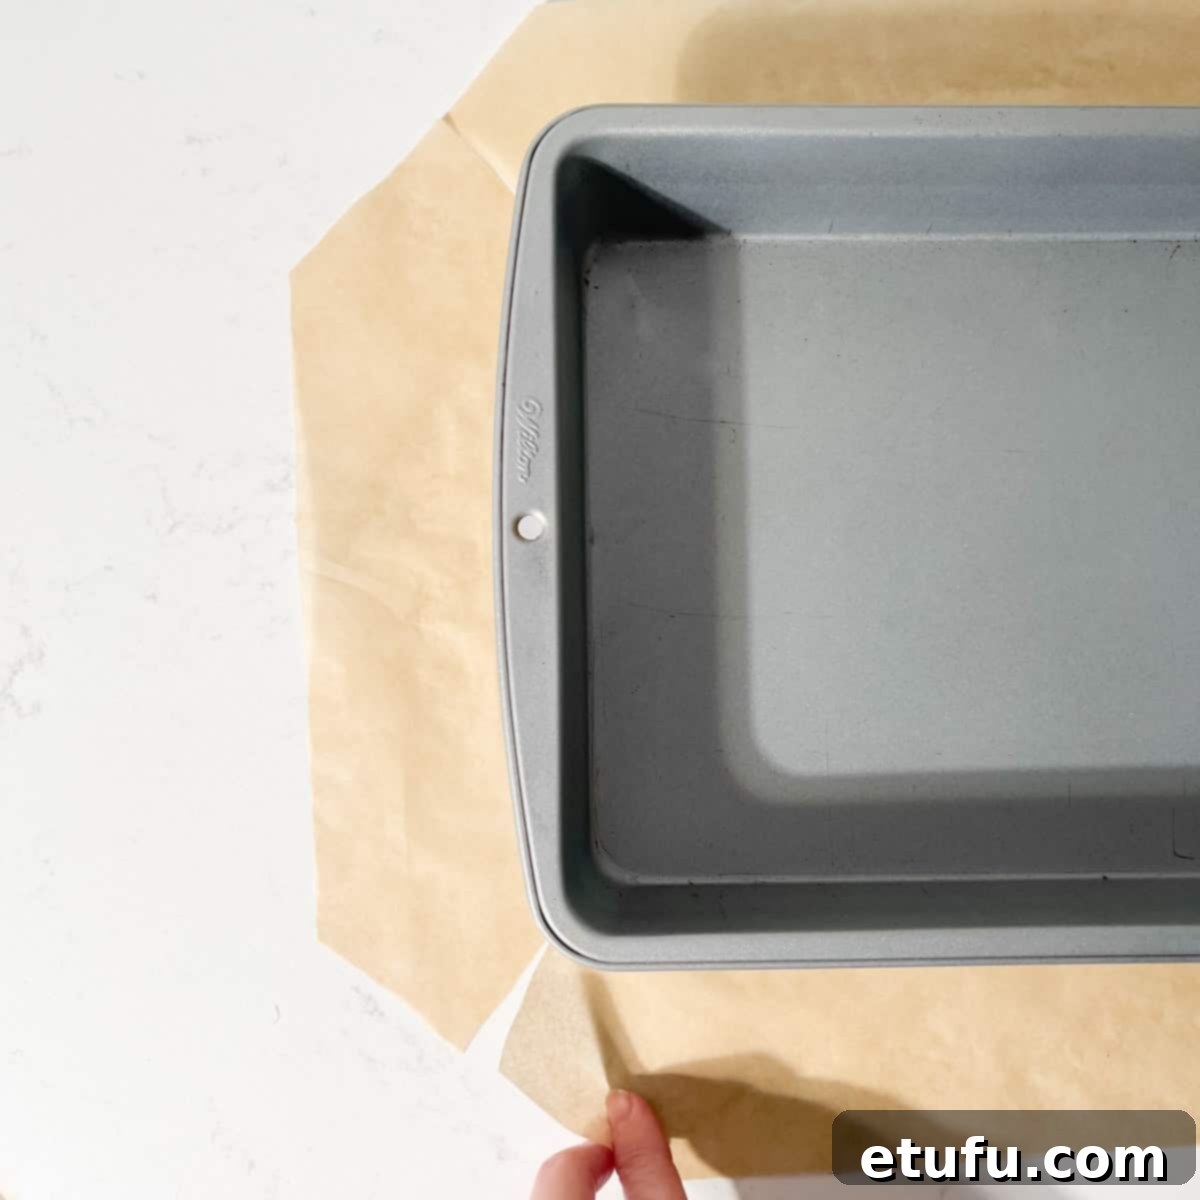
- Diagonal Slits: On each corner of the paper, make a diagonal slit that is perpendicular to the edge of the paper. Cut these slits right up to the corner of where the tray would sit (as shown in the image above). These slits will allow the paper to fold neatly around the corners of the tin without tearing.
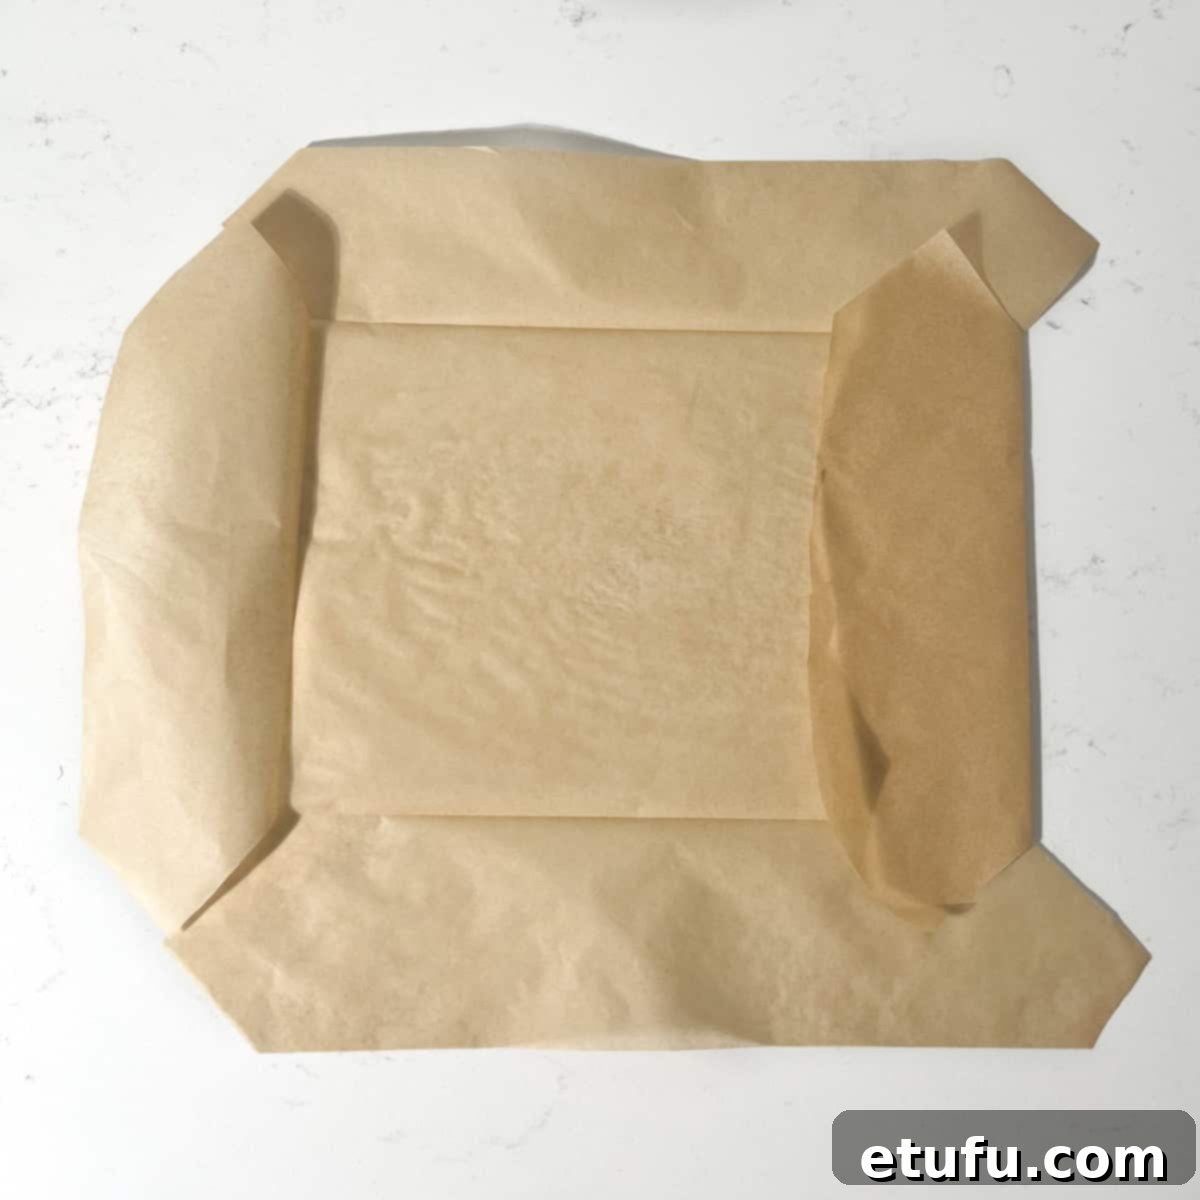
- Pre-Fold the Paper: Remove the baking tin and carefully fold the paper along the lines that will form the base and sides of the tin. Fold each side inwards towards the center, to the depth of the cuts made in the previous step (as shown above). This crucial step pre-shapes the paper to fit the tin neatly and prevent wrinkles and uneven edges once it’s placed inside.
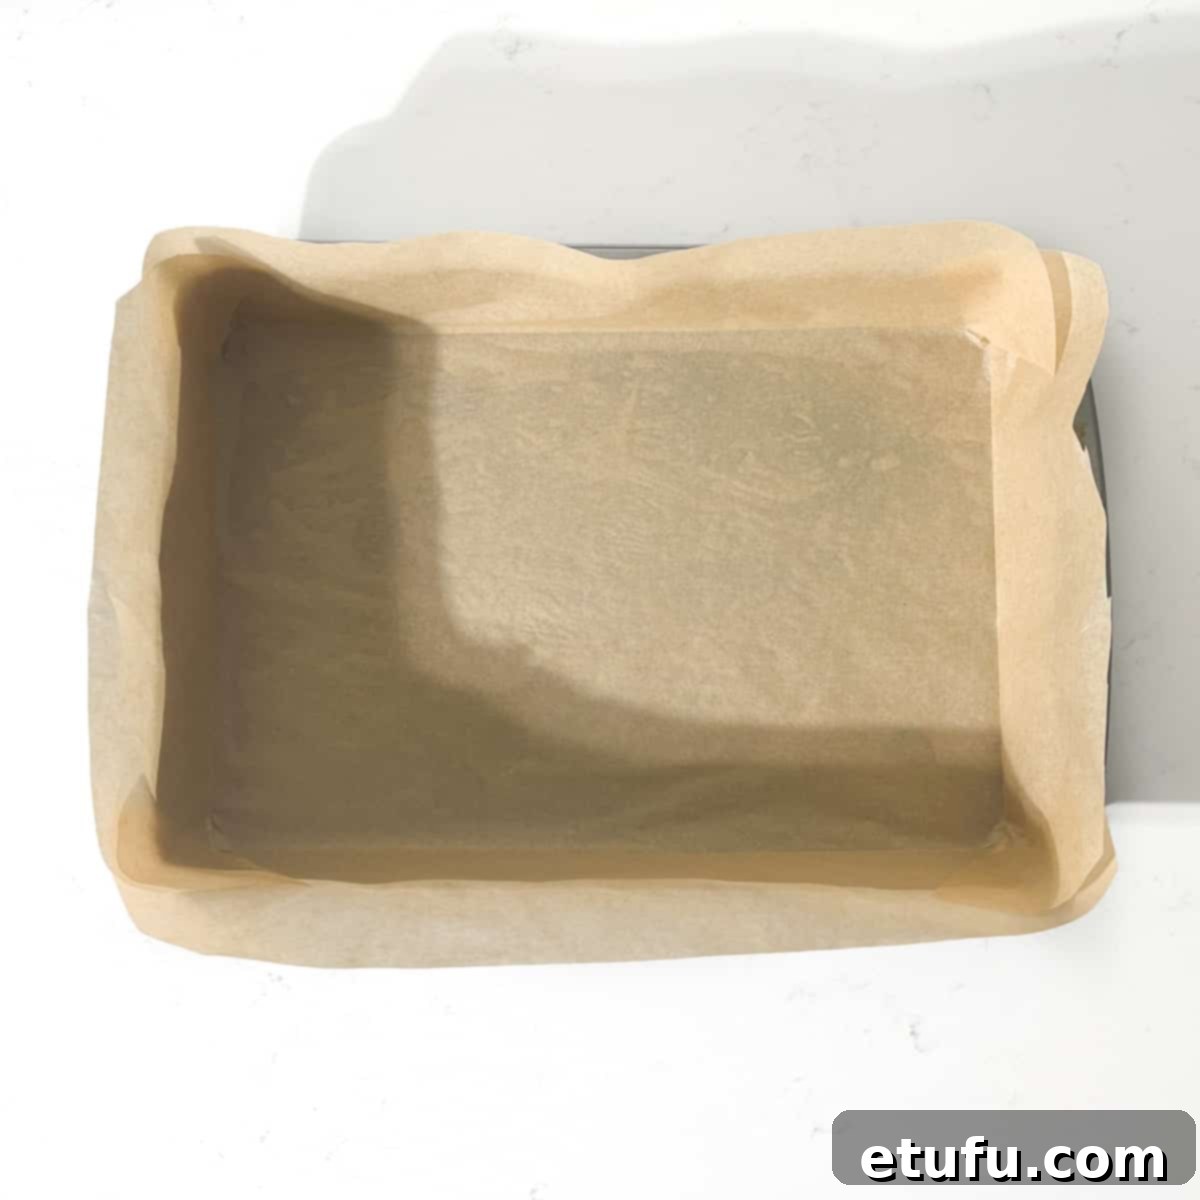
- Fit into the Tin: Gently lower the pre-folded baking paper into the tin. Press it firmly into the corners and against the sides. It should fit perfectly due to the folds you made in the previous step, creating a smooth and secure lining that will perfectly hold your vanilla cake batter.
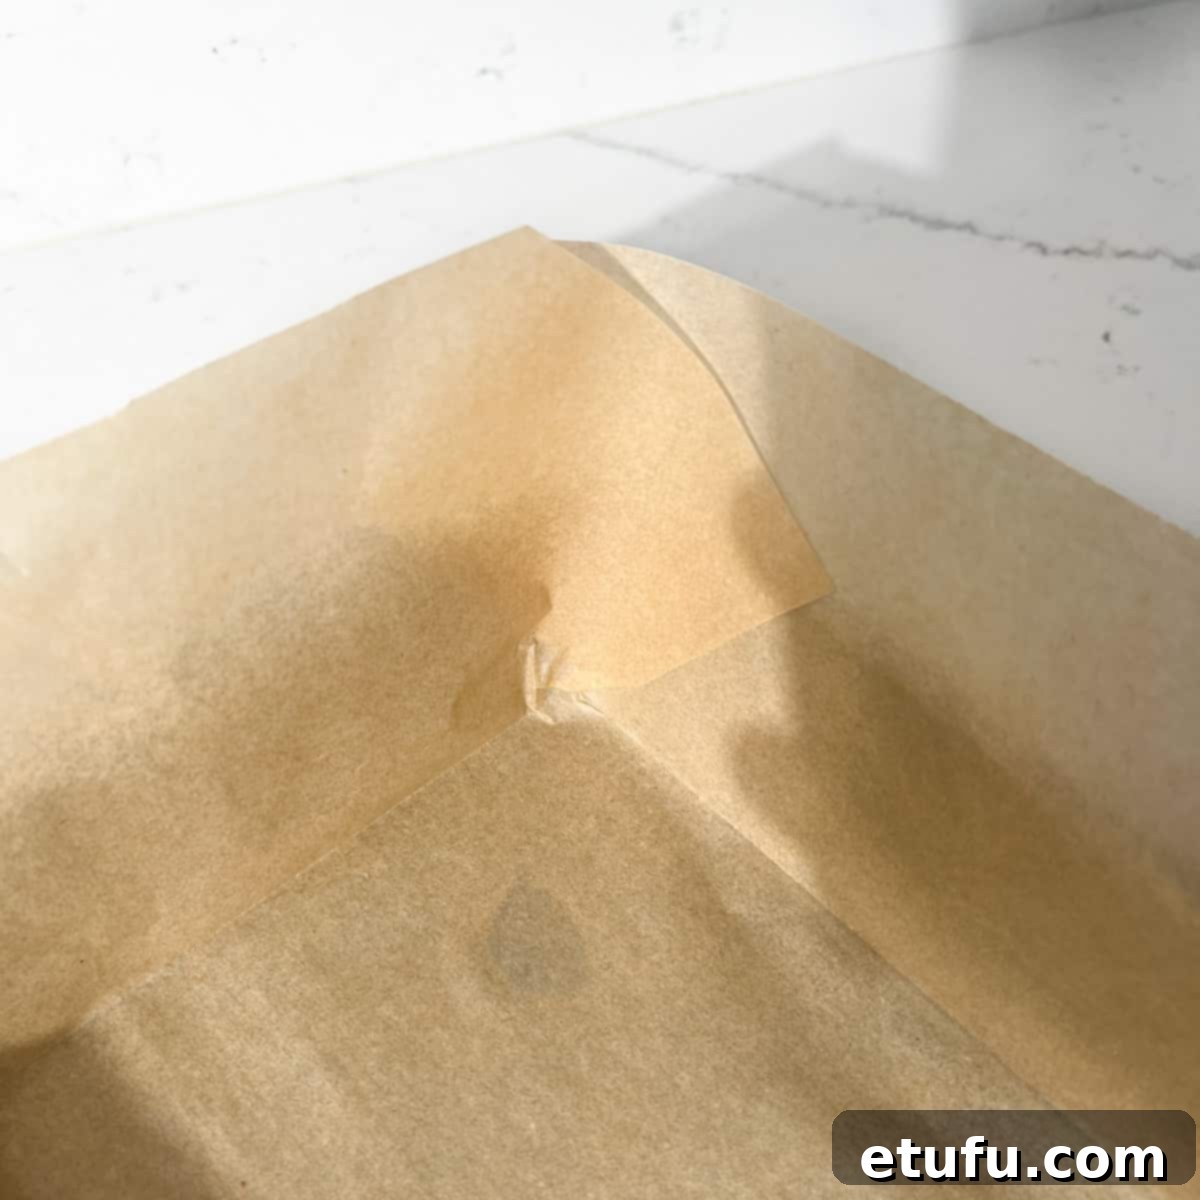
- Overlap and Secure: Allow the cut corners of the baking paper to overlap as shown in the picture above. This creates secure sides, ensuring that no batter can seep underneath the paper during baking and that your cake retains its perfect rectangular shape. Your tin is now perfectly prepared for your homemade vanilla cake!
Step-by-Step Guide: Crafting Your Perfect Vanilla Tray Bake
Prepping for Success
- Bring Eggs to Room Temperature: For optimal results, remove your eggs from the fridge approximately 30 minutes before you plan to start baking. Alternatively, if you’re short on time, place the fridge-cold eggs in a bowl of warm (not hot!) water for about 5 minutes to quickly bring them to room temperature. This step is crucial for a light and even crumb, as room-temperature eggs emulsify better.
- Prepare the Milk: Gently heat the milk in the microwave or a small saucepan until it just begins to simmer. Once it reaches this point, remove it from the heat and allow it to cool down to a lukewarm temperature. You should be able to comfortably insert a clean finger into it without any discomfort or burning. This warm milk helps activate the baking powder and creates a tender crumb.
- Line Your Baking Tin: Following the detailed instructions provided in the ‘How to Perfectly Line a Rectangular Baking Tin’ section above, meticulously line your chosen baking tin (approximately 33cm x 23cm) with baking paper. This ensures a clean release for your finished cake and prevents sticking.
Making the Fluffy Vanilla Cake Batter
- Preheat Oven: Preheat your oven to 170℃ (338℉) / Gas Mark 3. Allow it sufficient time (at least 15-20 minutes) to reach and stabilize at the correct temperature, as a properly preheated oven is essential for even baking and proper cake rise.
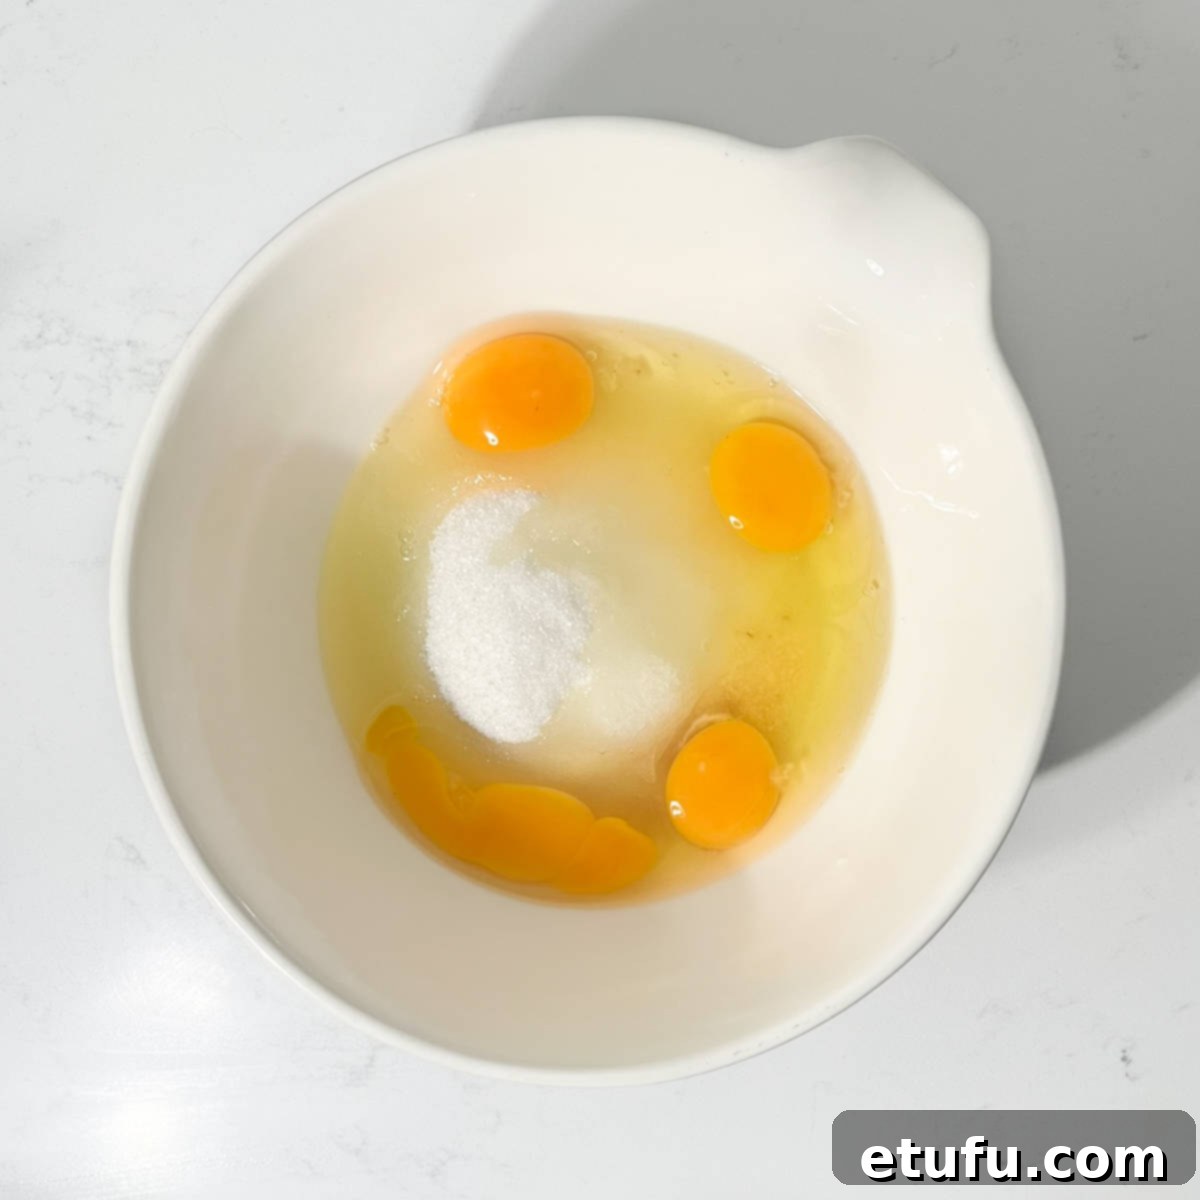
- Combine Wet Ingredients (Initial): In a large mixing bowl, combine the granulated sugar, room-temperature eggs, and vanilla extract. Ensure your bowl is clean and dry.
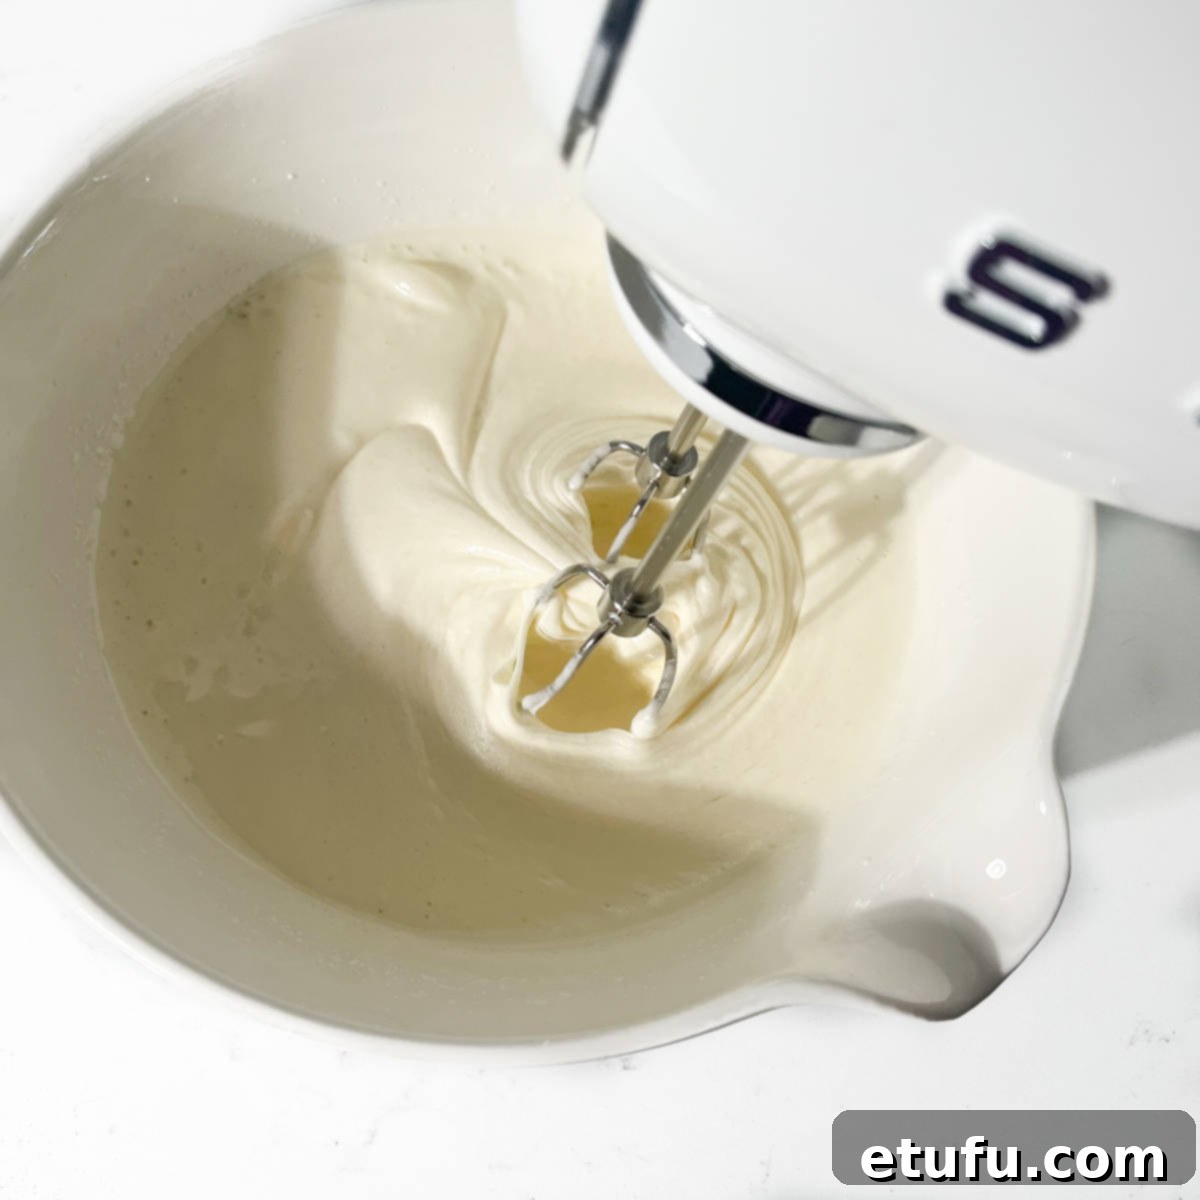
- Whip Until Light and Fluffy: Using an electric hand mixer or a stand mixer (with the whisk attachment), beat the sugar, eggs, and vanilla extract together vigorously. Continue beating until the mixture becomes thick, very pale in color, and significantly increased in volume. You should notice distinct “ribbon” trails left by the beaters when lifted. This crucial step incorporates ample air into the batter and will take a minimum of 5 minutes of continuous beating, possibly longer depending on your mixer. Don’t rush this, as it’s key for a fluffy vanilla cake!
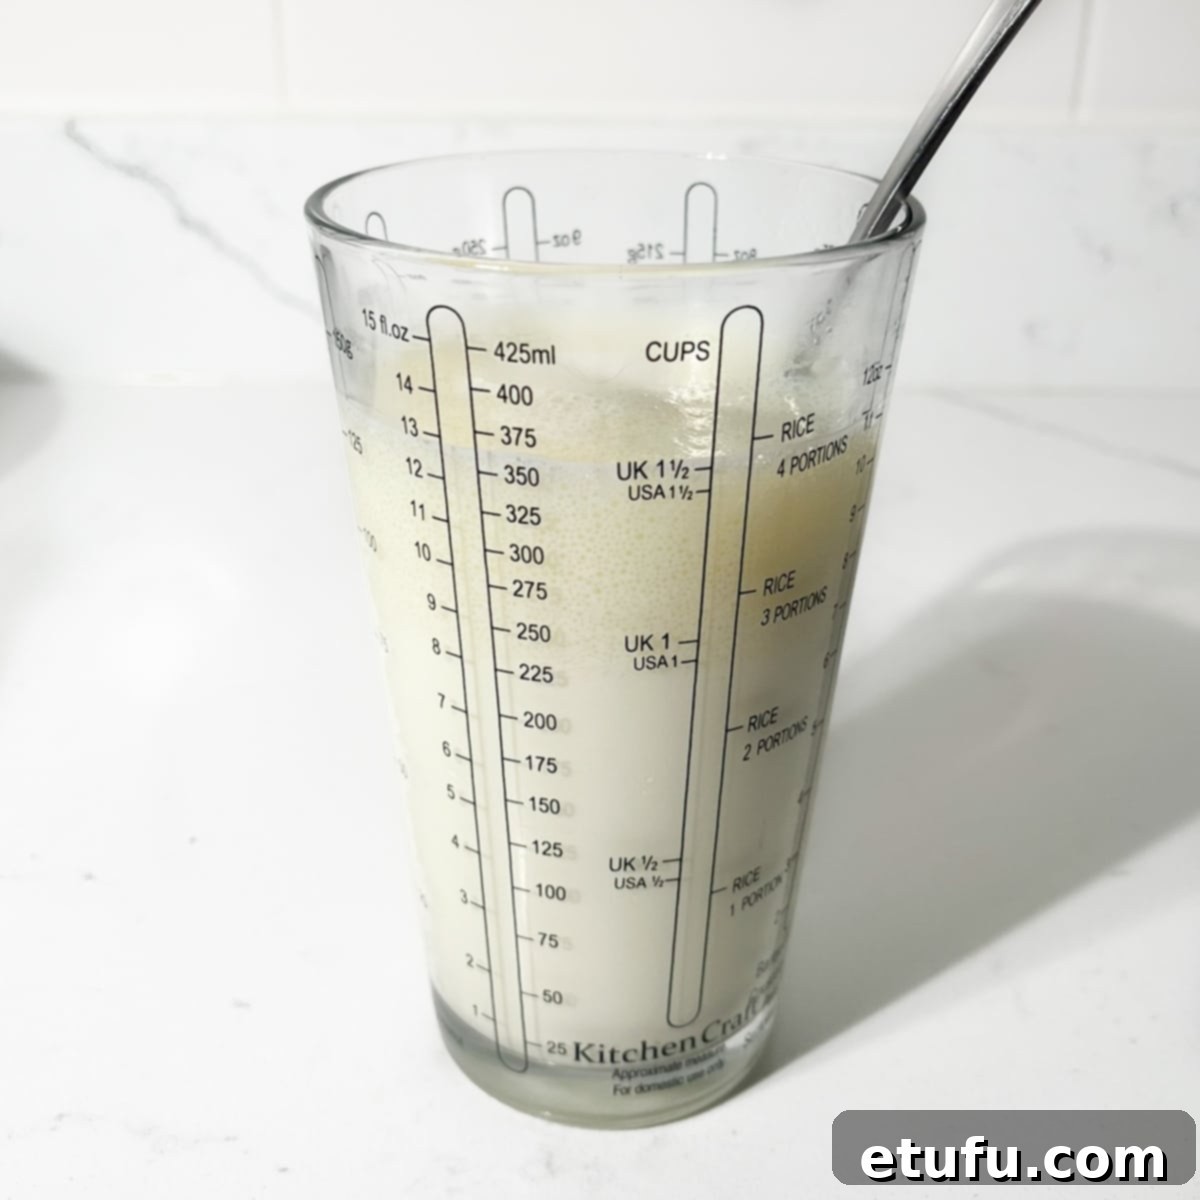
- Prepare Liquid Mixture: In a separate smaller bowl or a measuring jug, combine the neutral oil and the lukewarm milk. Whisk them together thoroughly with a fork until they are reasonably well blended and emulsified.
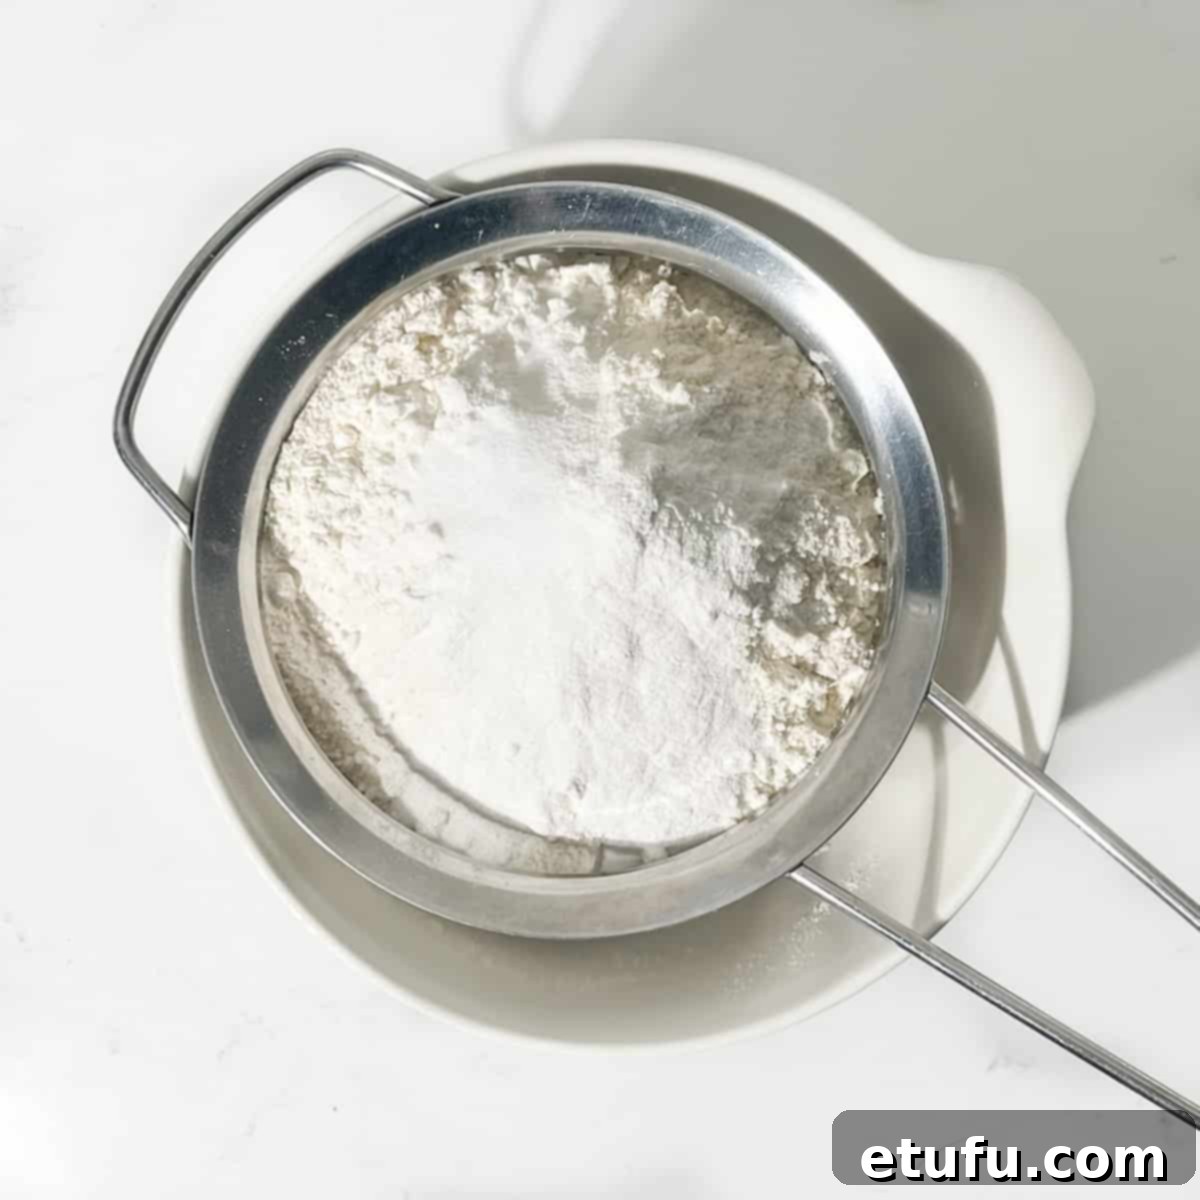
- Sift Dry Ingredients: In a third bowl, sift together the all-purpose flour (plain flour), baking powder, and salt. Sifting helps to aerate the flour, removing any lumps and ensuring it disperses evenly throughout the batter, contributing to a lighter texture.
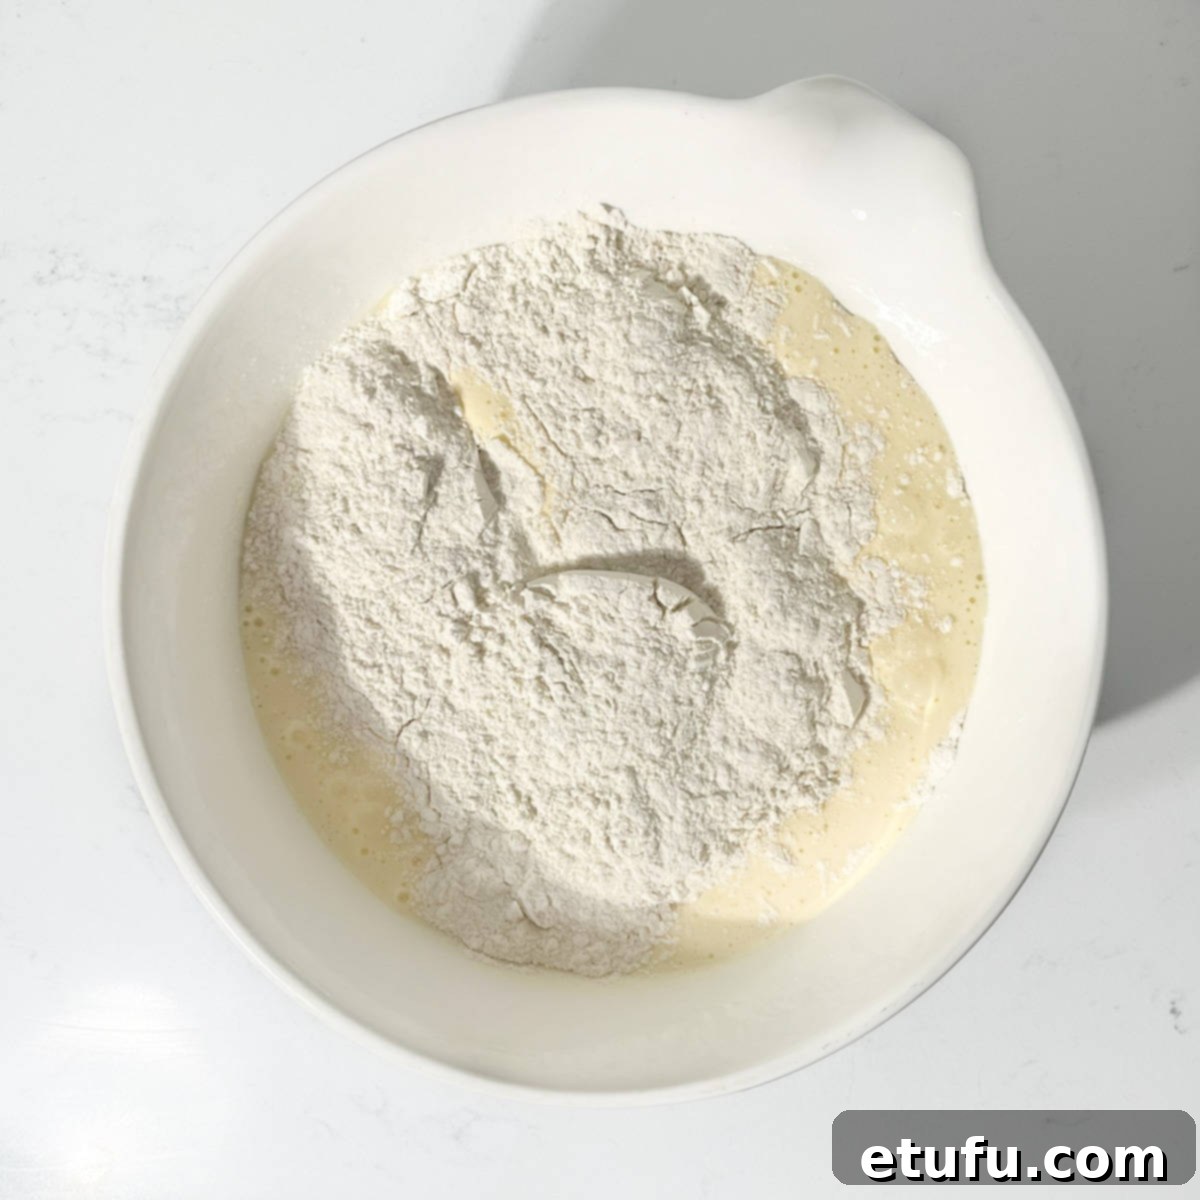
- Alternate Mixing (First Dry Addition): Add approximately half of the sifted flour mixture to the pale, fluffy egg and sugar mixture. Using your electric hand mixer or stand mixer, beat on a very low speed. Mix just until the dry ingredients are barely incorporated and no streaks of flour remain. Be careful not to overmix at this stage, as it can make the cake tough.
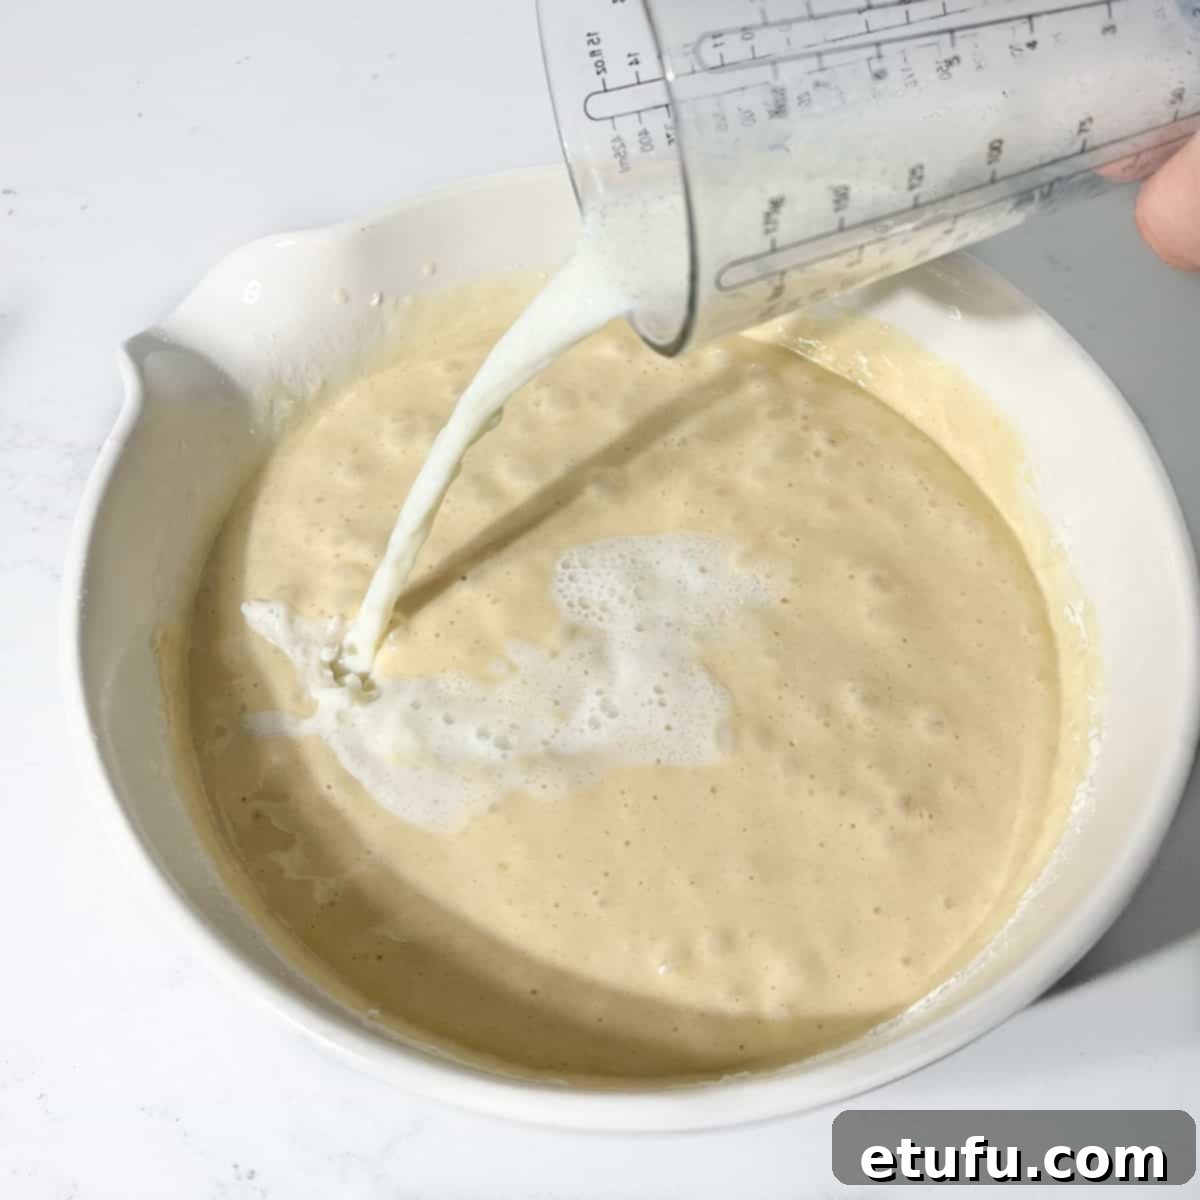
- Alternate Mixing (First Liquid Addition): Next, add half of the milk and oil mixture to the batter. Beat again at a low speed, just until the liquids have been incorporated. Again, avoid overmixing.
- Repeat and Finish Batter: Repeat these steps one more time for the remaining half of the flour mixture and the remaining half of the liquid ingredients. Beat on low speed after each addition, ensuring you stop mixing as soon as the ingredients are combined. Overbeating can develop gluten, leading to a tougher cake, which we want to avoid for a tender crumb in your moist vanilla cake.
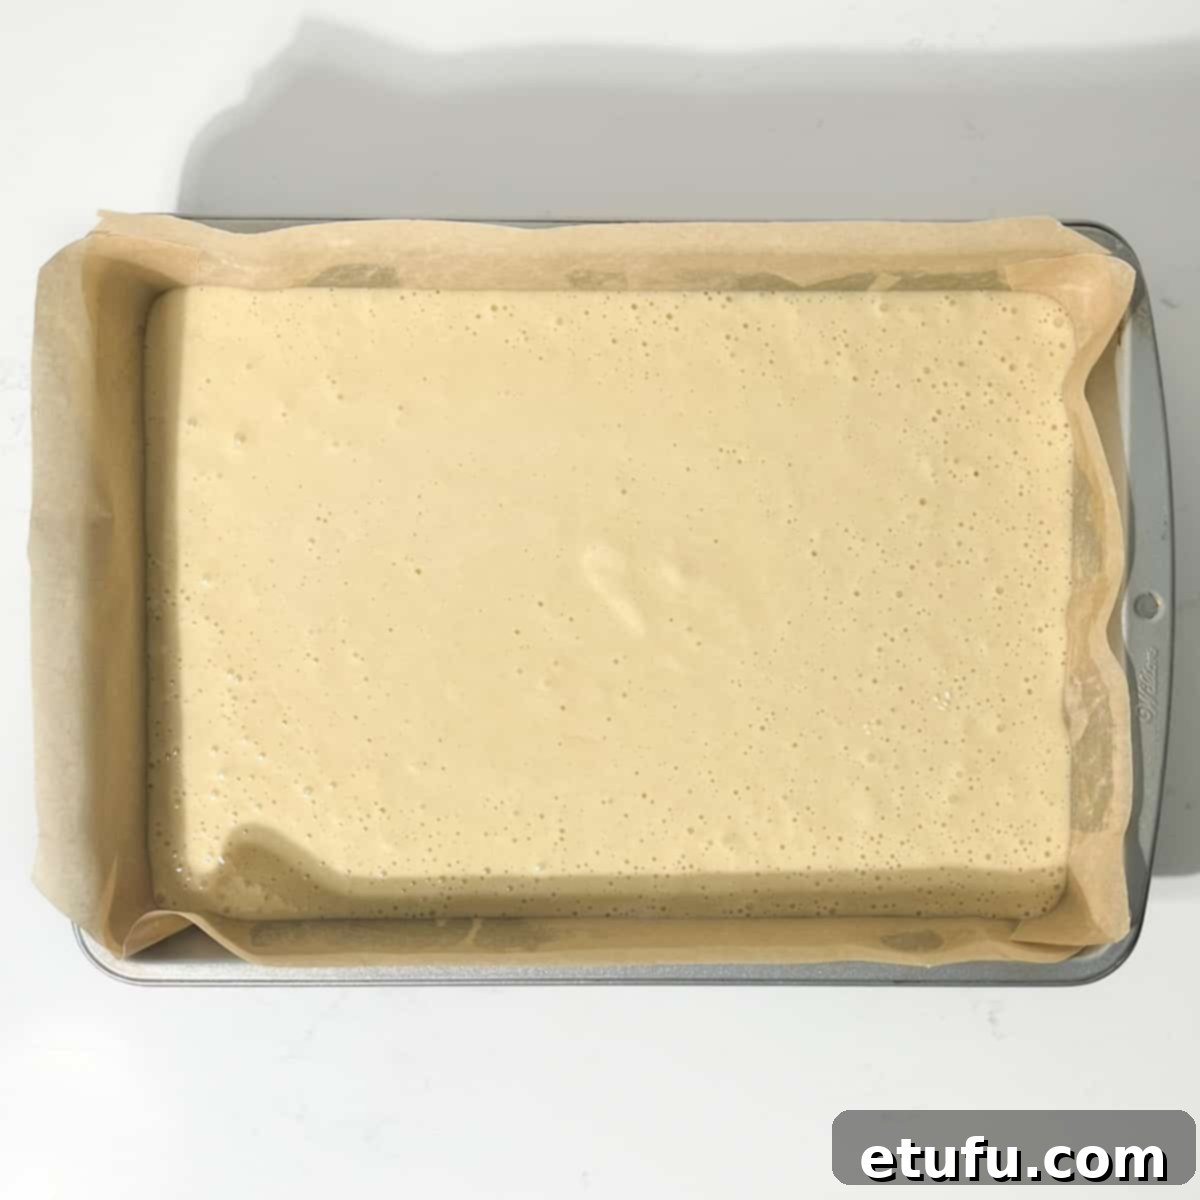
- Pour and Tap: Carefully pour the finished cake batter into your meticulously prepared baking tin. Gently tap the tin on your counter a few times. This simple action helps to release any trapped air bubbles, ensuring a more even and smoother bake with fewer large holes.
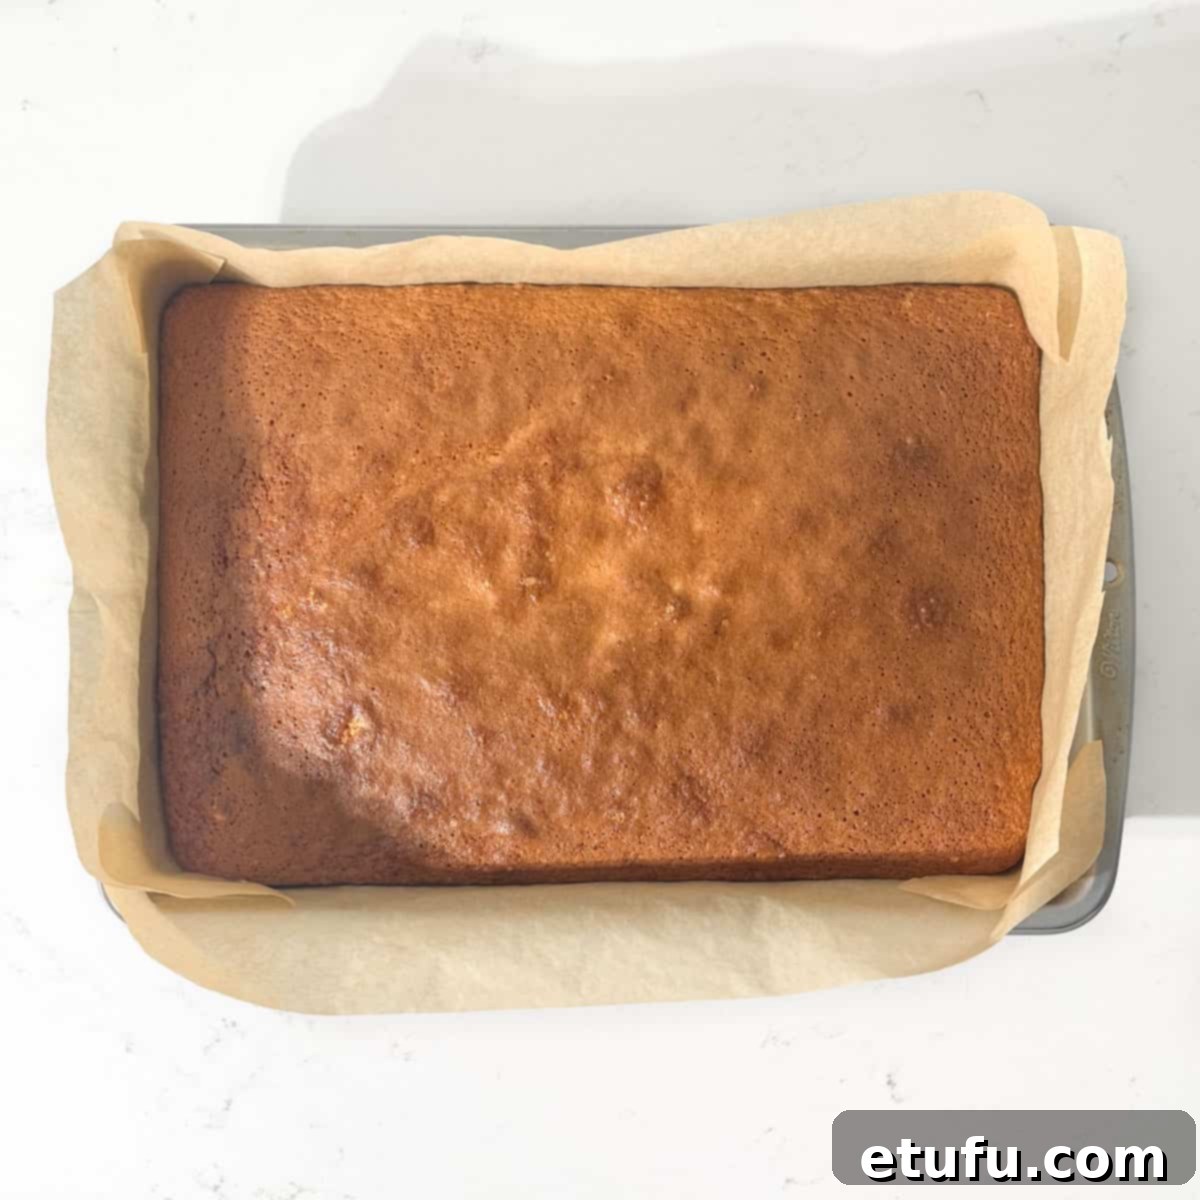
- Bake to Perfection: Place the tin on the middle oven shelf and bake for approximately 35-40 minutes. The cake is done when its top is golden brown, springs back gently when lightly touched in the center, and a wooden skewer or cake tester inserted into the middle comes out clean. Start checking for doneness at 35 minutes. If your oven tends to run hot, consider testing earlier, around 30 minutes, or initially setting your oven to a slightly lower temperature to prevent over-baking.
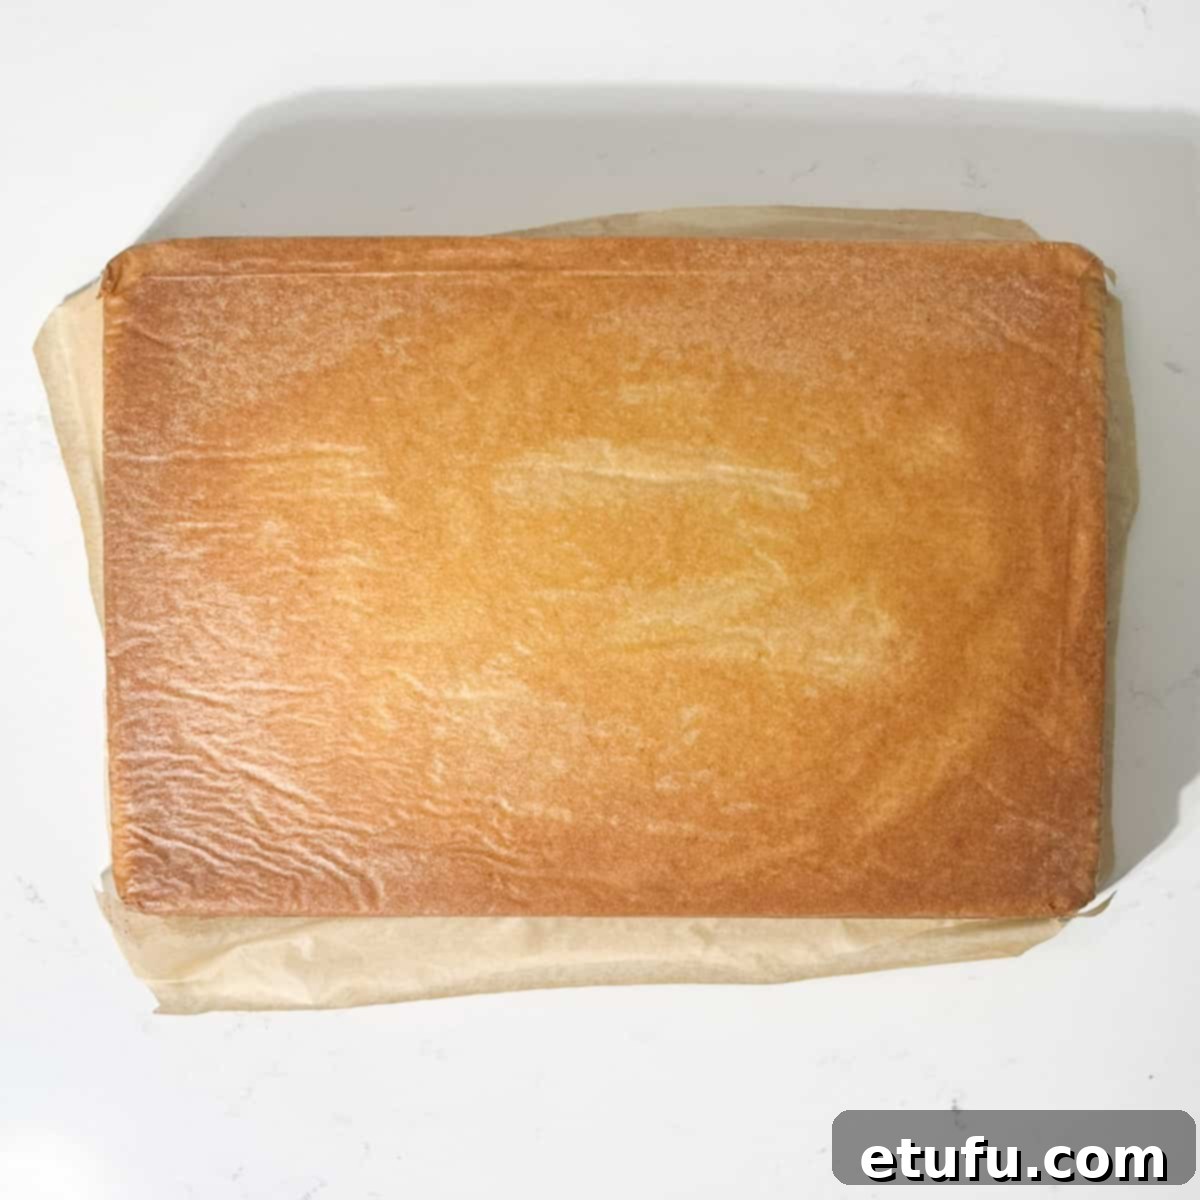
- Cool in Tin, Then Flip: Allow the freshly baked cake to cool in its tin for at least 20 minutes. This resting period helps the cake to firm up and prevents it from breaking when handled. After 20 minutes, carefully flip the cake upside down onto a wire cooling rack to continue cooling completely.
- Remove Parchment and Cool Completely: Carefully peel off the parchment paper from the cake, paying extra attention to the corners where the cake might have baked into the folds. Set the cake aside on the wire rack to cool completely. This is essential before frosting; attempting to frost a warm cake will result in melted, runny buttercream.
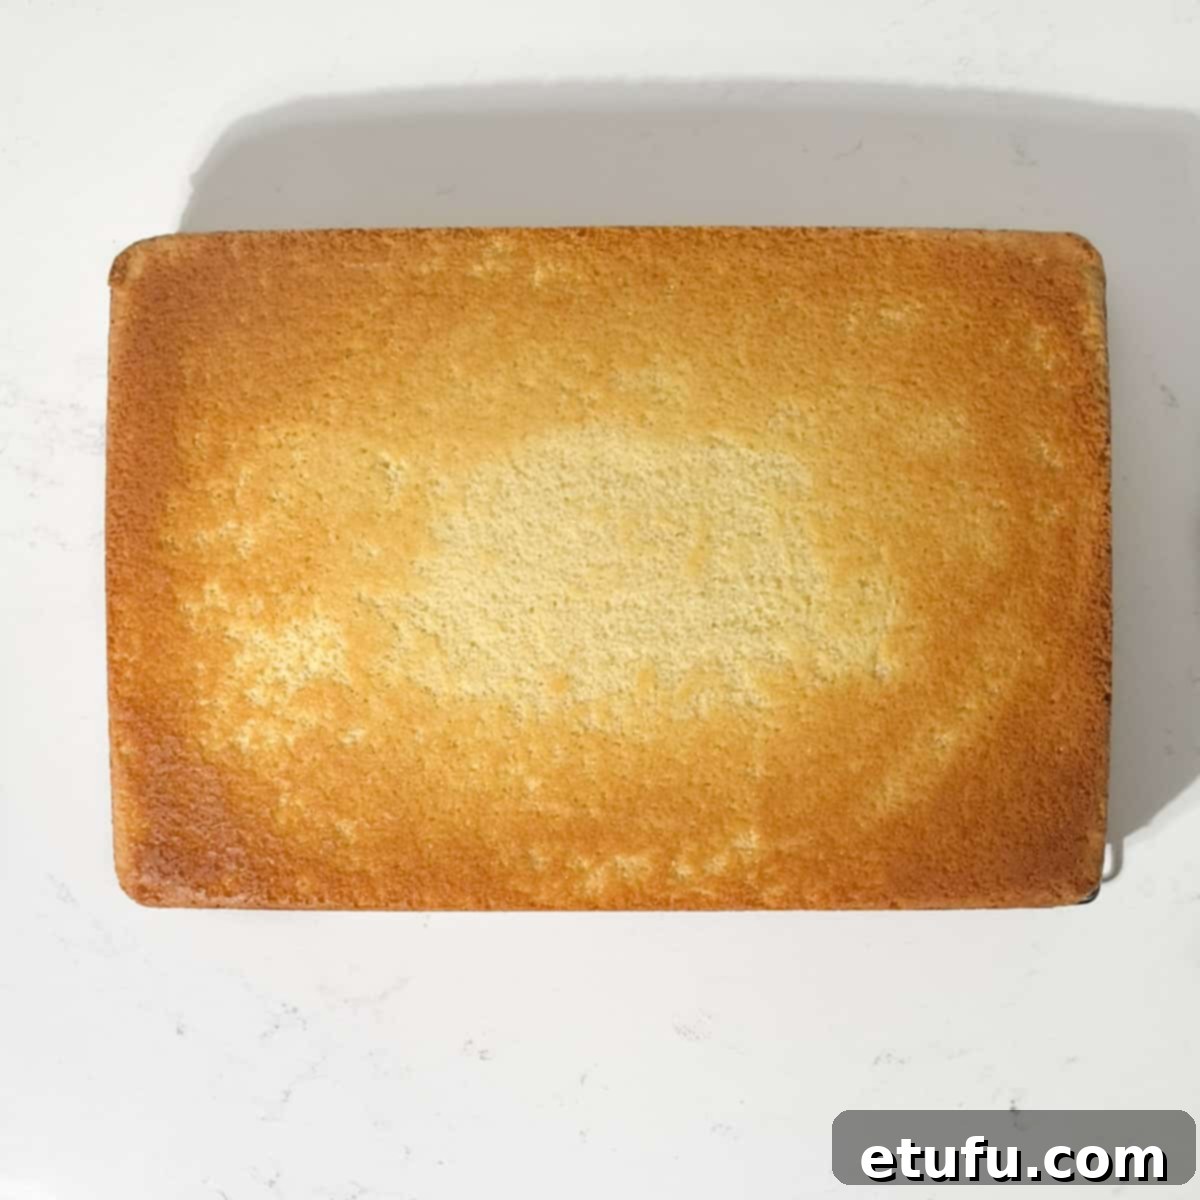
Note: We will be frosting the cake on its bottom side (which is now facing up). This ensures a smoother and perfectly flatter surface for applying your creamy vanilla buttercream frosting, creating a professional finish.
Making the Silky Vanilla Buttercream Frosting
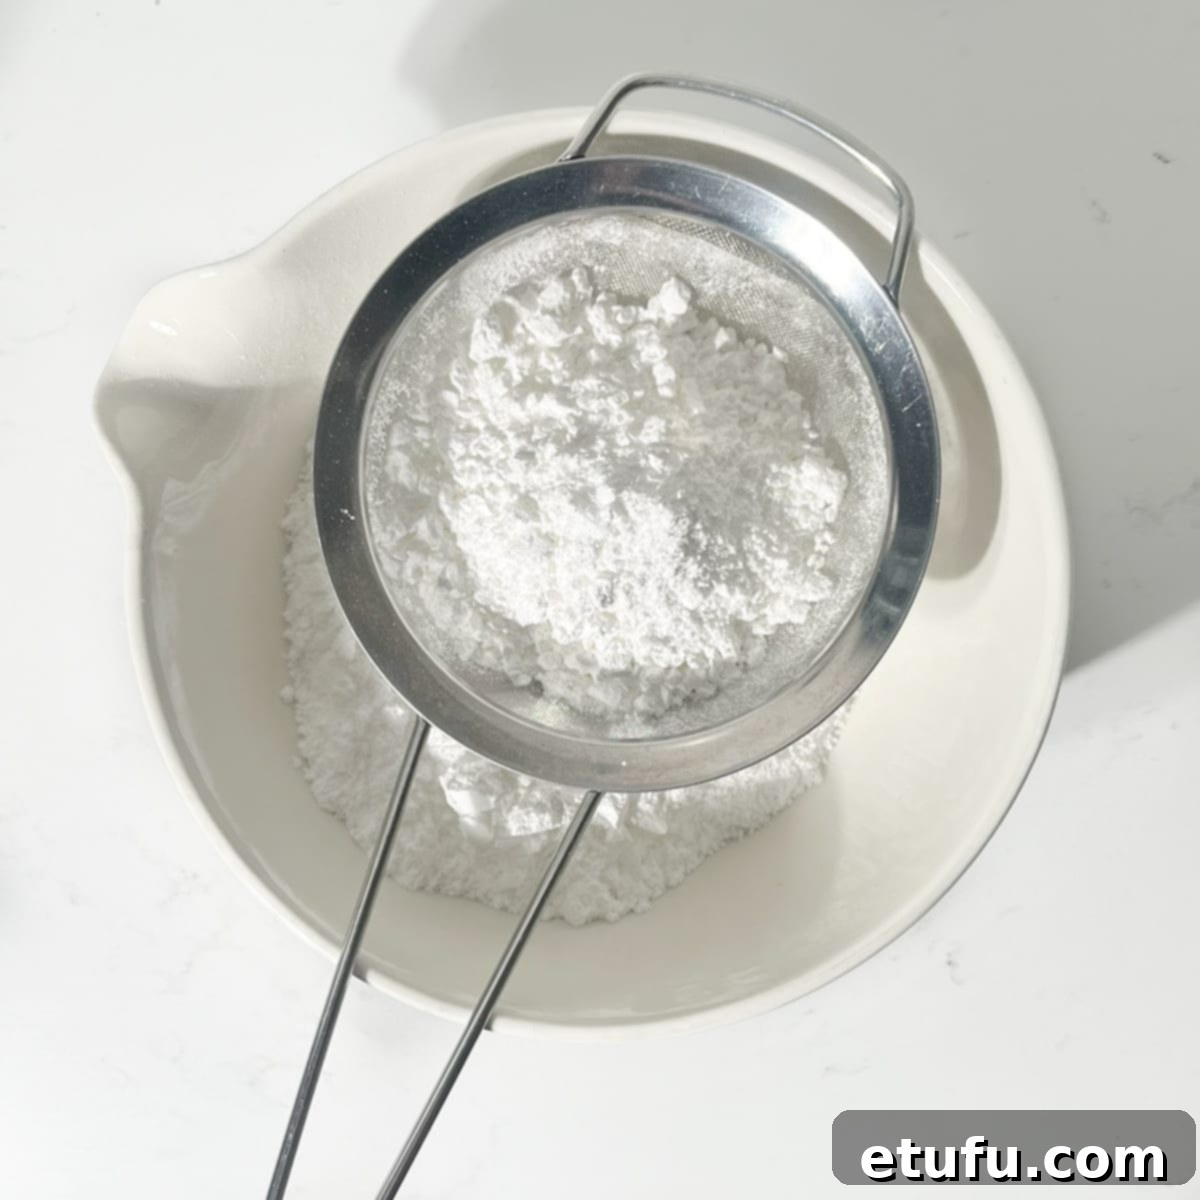
- Sift Icing Sugar: Sift the icing sugar (powdered sugar) and salt into a large bowl. Set it aside.
Note: While sifting icing sugar might seem like a small chore, it is the absolute secret to achieving a lump-free, velvety smooth buttercream. Don’t skip this step, especially if your icing sugar has been stored for a while!
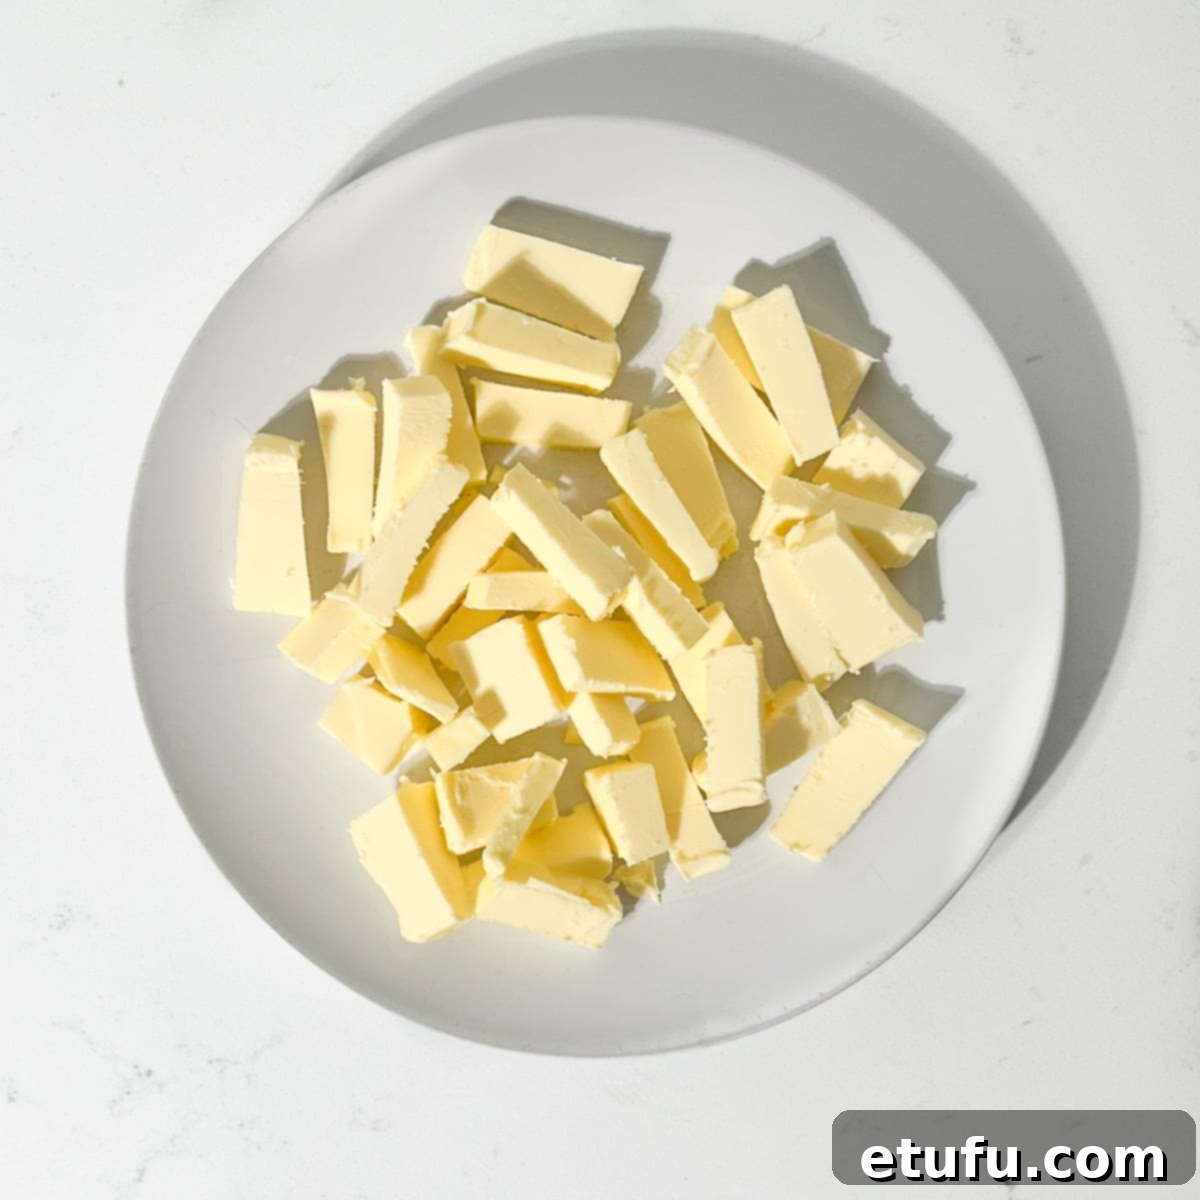
- Prepare Butter: Cut the room-temperature unsalted butter into smaller, manageable pieces. This will significantly aid in easier and more even mixing, allowing the butter to whip up more quickly and uniformly.
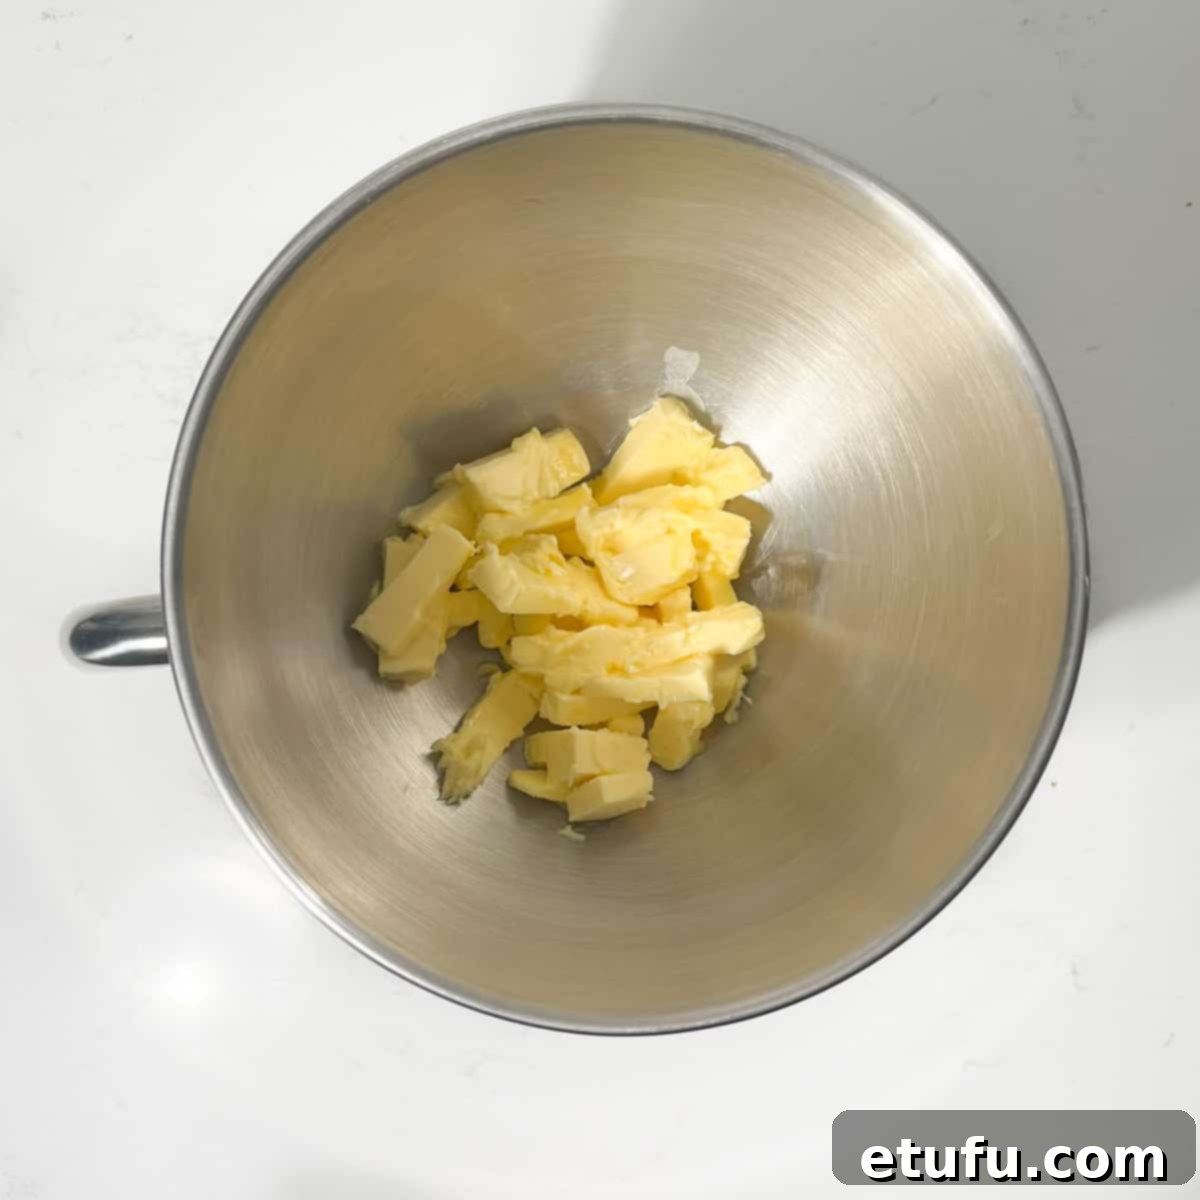
- Start Mixing Butter: Add the cubed softened butter to the bowl of your stand mixer (using the paddle attachment, not the whisk) or a large mixing bowl if you’re using a handheld electric mixer with regular beaters. The paddle/beater attachment incorporates less air, resulting in a denser, smoother frosting, perfect for a vanilla buttercream frosting.
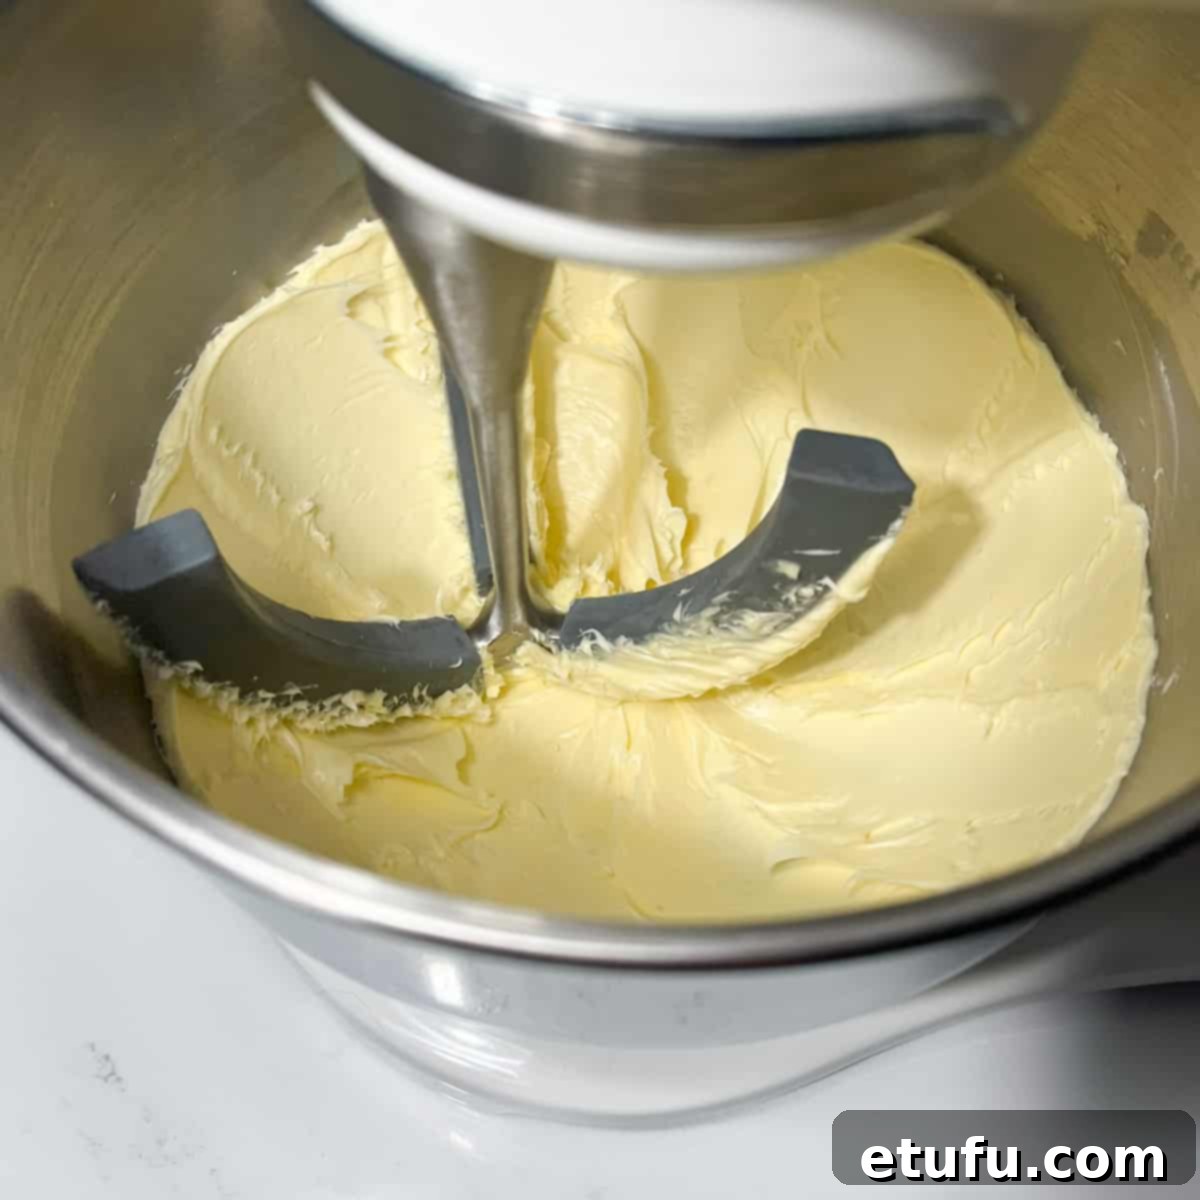
- Whip the Butter: Whip the butter on medium speed until it becomes noticeably soft, light, and fluffy, and has lightened in color. This typically takes around 2 minutes. Stop the mixer and use a rubber spatula to scrape down the sides and bottom of the bowl, ensuring everything is evenly mixed.
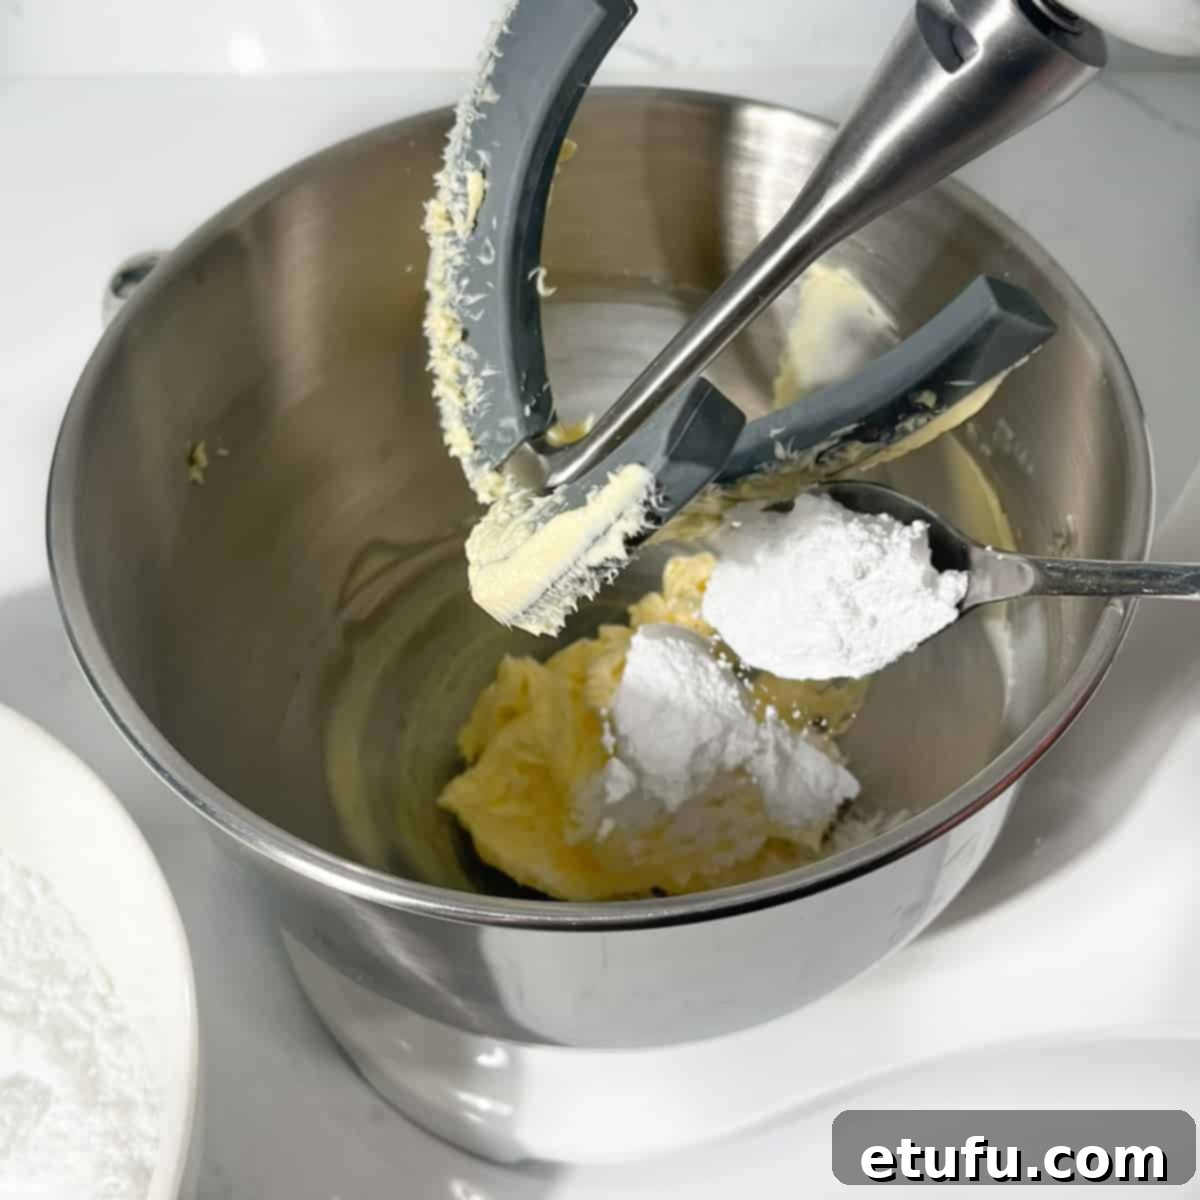
- Gradually Add Icing Sugar: With the mixer set to a medium-low speed, begin adding the sifted icing sugar, two tablespoons at a time. Beat thoroughly between each addition, allowing about 15 seconds for the sugar to be fully incorporated before adding the next batch. This gradual process prevents a sugar cloud and helps achieve the right smooth consistency. Continue this process until all the icing sugar has been added.
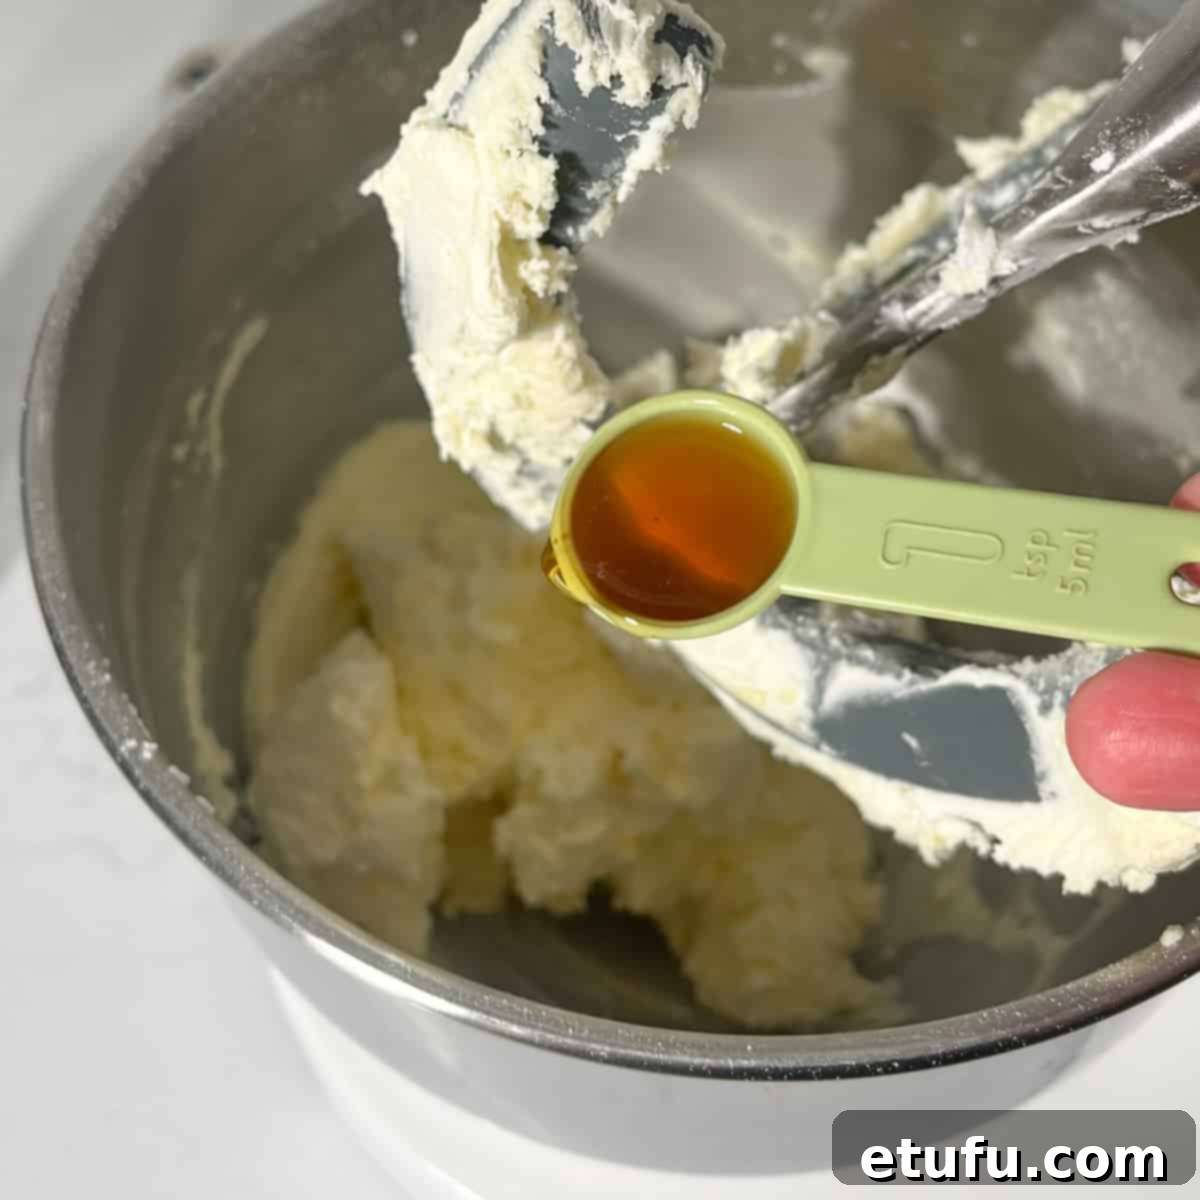
- Add Vanilla Extract: Once all the icing sugar is mixed in, scrape down the bowl one more time to gather any unmixed ingredients. Add the vanilla extract and beat for approximately 30 seconds until it is fully combined and fragrant.
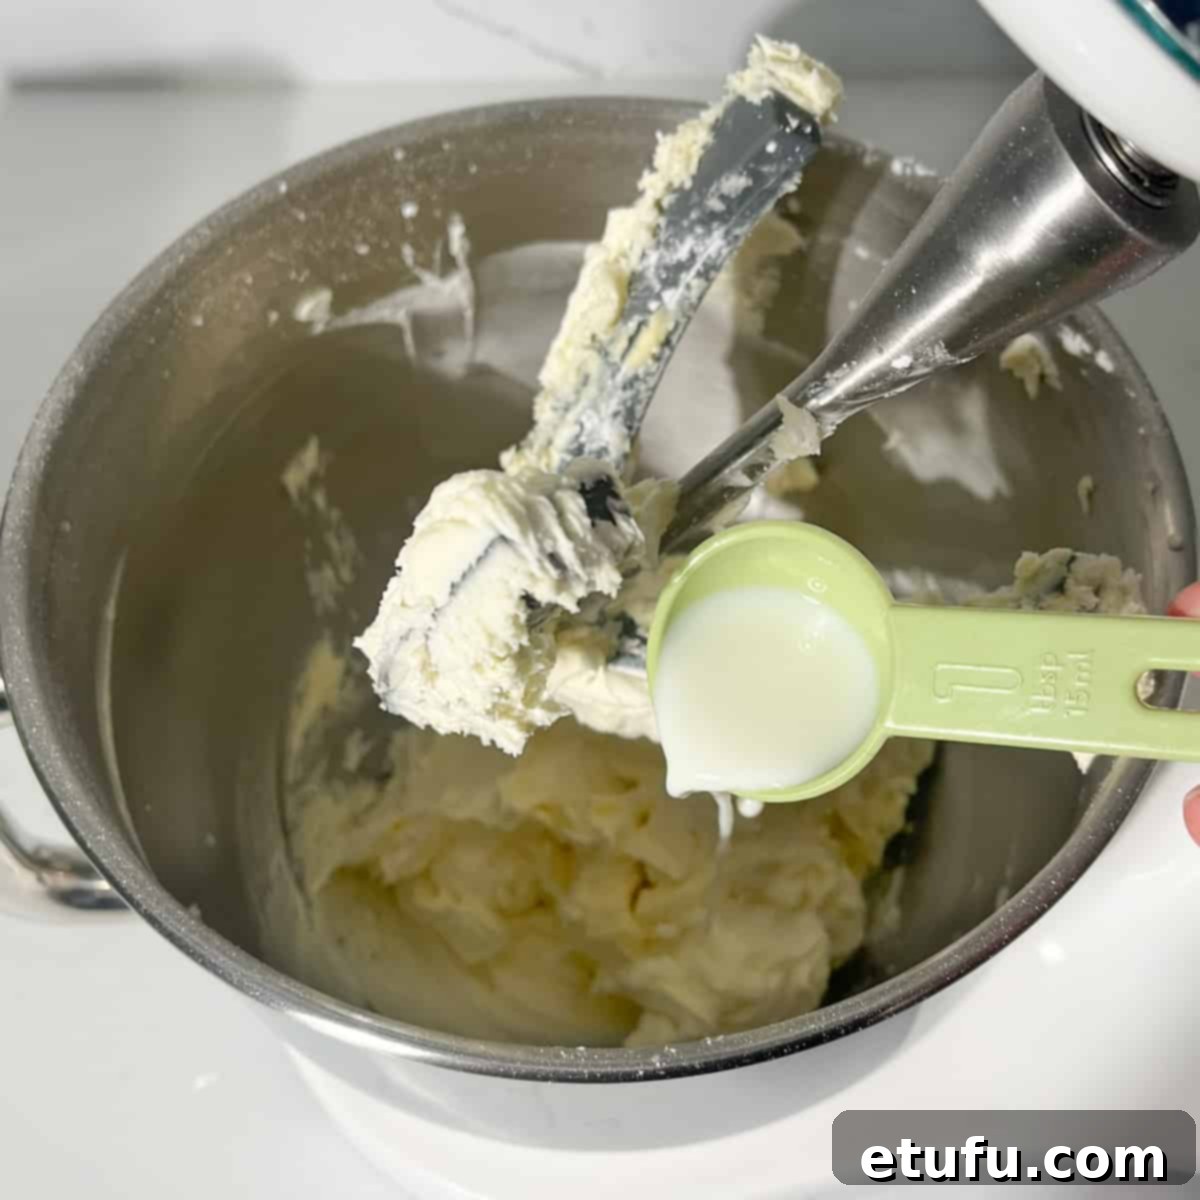
- Adjust Consistency: Check the consistency of your buttercream. If you prefer it thinner or more spreadable (e.g., for piping), add a tablespoon of cream or milk at a time, beating after each addition. Continue adding small amounts of liquid until your buttercream reaches your desired smooth and creamy consistency. You will likely need at least a couple of tablespoons to reach the perfect spreadable texture.
- Final Beat (Brief): Beat the buttercream for just 1 more minute on medium speed. Be careful not to overbeat at this stage, as too much beating can introduce excessive air bubbles, which can make your buttercream less smooth and harder to spread evenly.
Decorating Your Vanilla Tray Bake
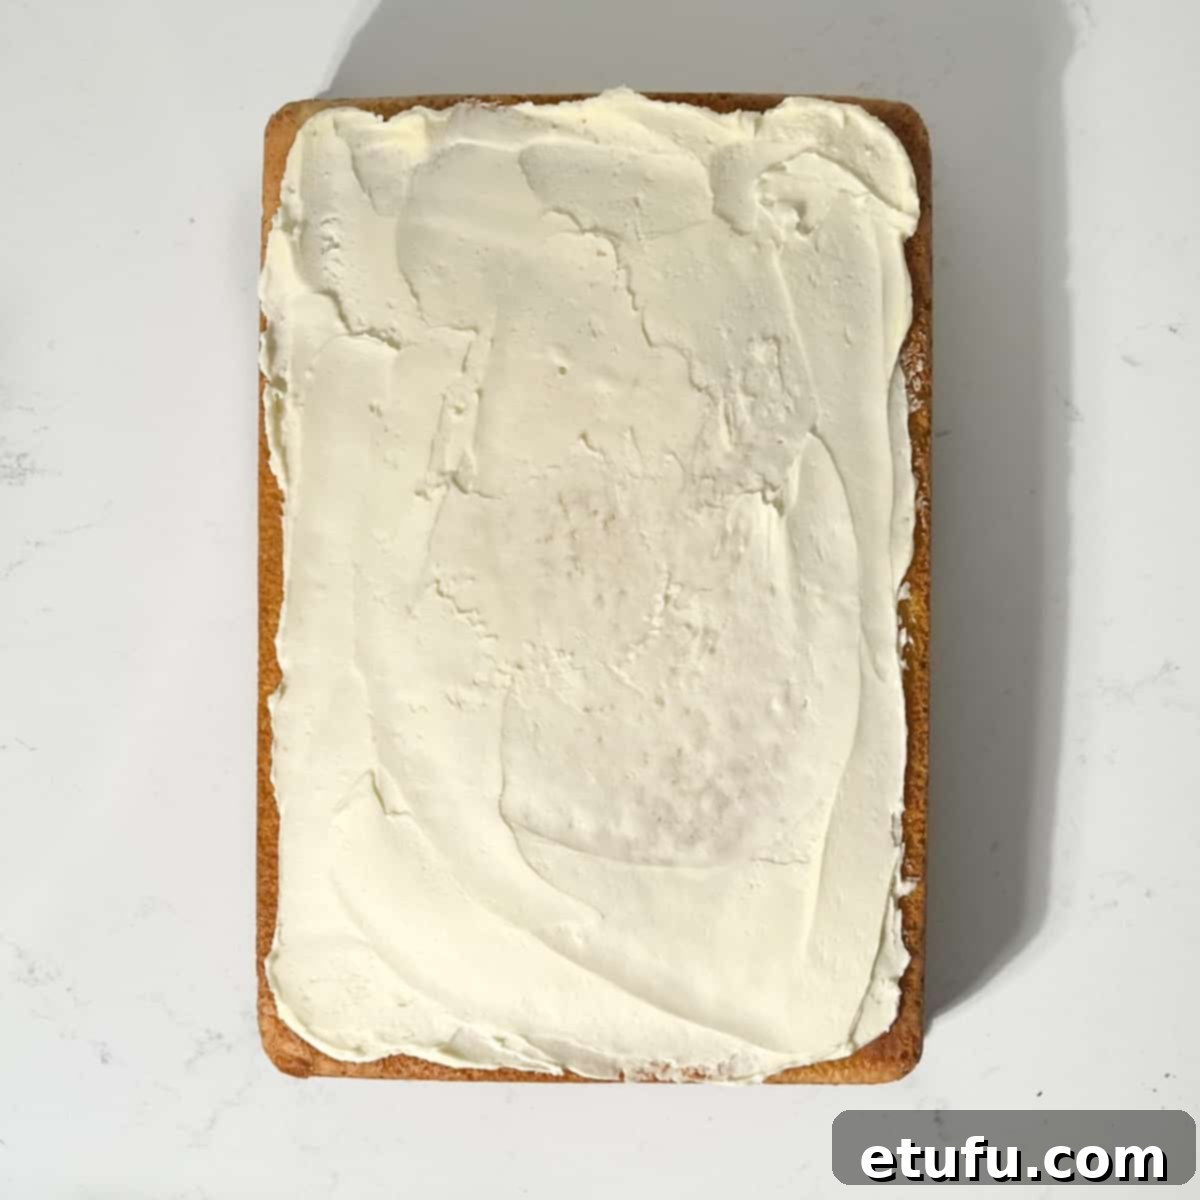
- Apply Crumb Coat: Once the vanilla cake has cooled completely, spread a very thin layer of buttercream over the entire surface using an offset spatula or a knife. This initial layer, known as a “crumb coat,” effectively traps any loose crumbs, preventing them from appearing in your final, pristine layer of buttercream. For best results and a firmer crumb coat, chill the cake for 10-15 minutes in the refrigerator after applying this layer.
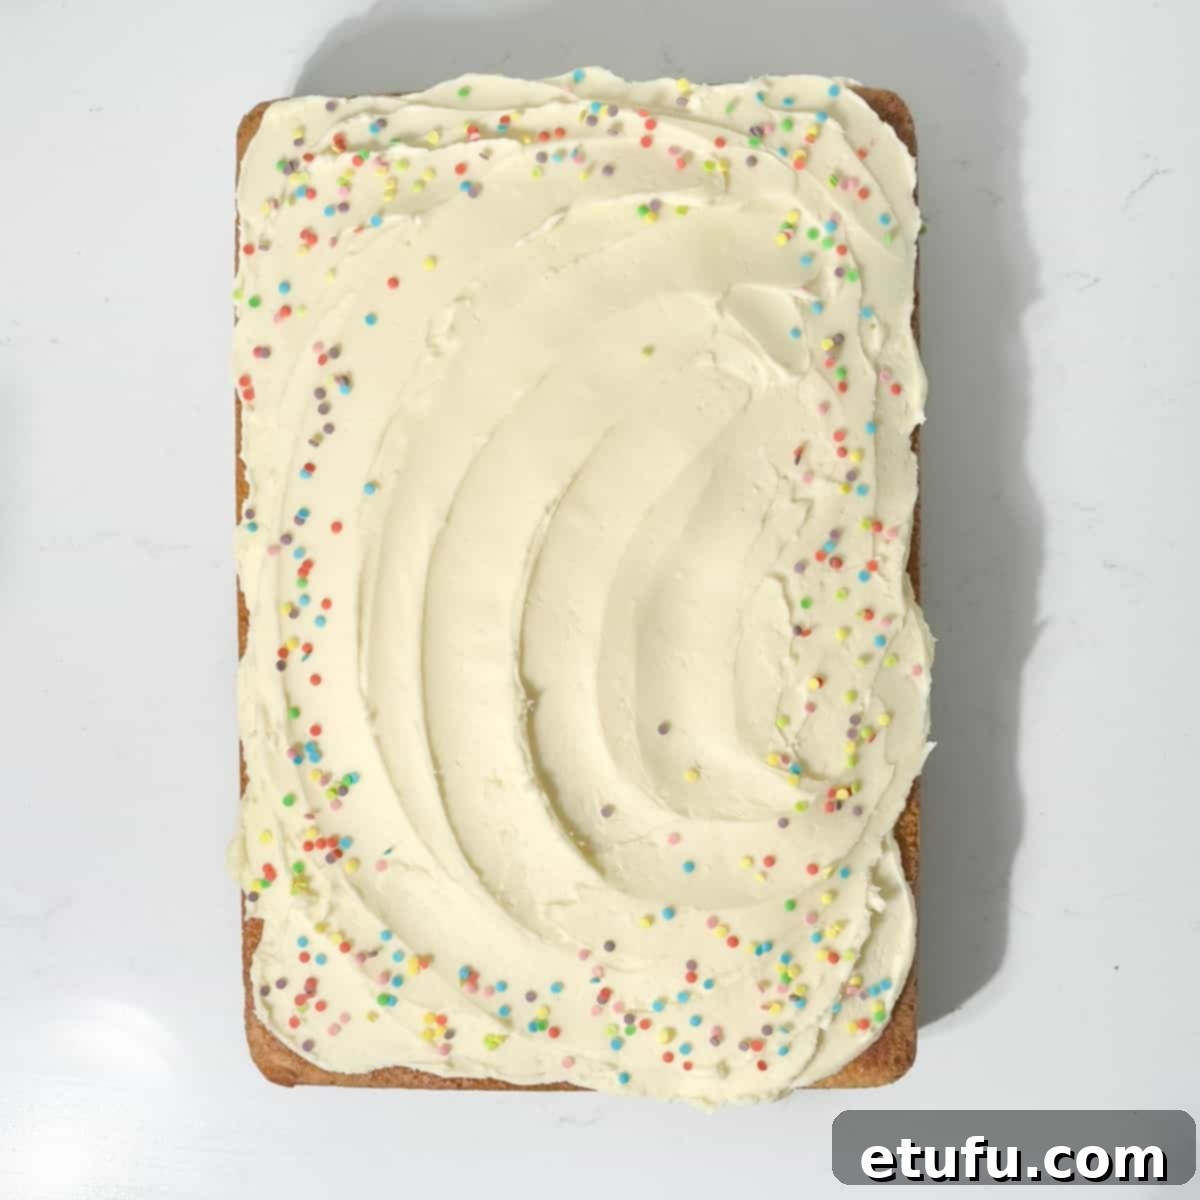
- Final Frosting and Sprinkles: Once the crumb coat is set (if you chilled it), spread the remaining buttercream evenly over the top and sides of the cake, creating a smooth and appealing finish. Finally, generously finish it off with your favorite rainbow sprinkles to add a festive and delightful touch. Slice, serve, and enjoy your perfectly decorated moist vanilla cake!
Expert Tips for Your Best Vanilla Tray Bake Ever
Achieving baking perfection is all about the details. Here are some invaluable tips to ensure your vanilla sheet cake turns out flawlessly every time, from the tender crumb to the smooth vanilla buttercream frosting:
Precision with a Scale and Measuring Spoons
Baking is often a science, and accuracy is paramount. Consider investing in a reliable digital kitchen scale for dry ingredients (like flour and sugar) and a high-quality set of measuring spoons for liquids and leavening agents (like baking powder and vanilla extract). Precise ingredient measurements play a crucial role in achieving the perfect texture, rise, and overall cake perfection. Eyeballing measurements can lead to inconsistencies that affect the final product.
The Importance of Room Temperature Eggs
For the best possible results, always remember to allow fridge-cold eggs to reach room temperature before incorporating them into your batter. Cold eggs are less viscous and don’t emulsify as effectively with other ingredients, leading to a less cohesive batter and potentially a denser cake. Room-temperature eggs, on the other hand, blend seamlessly, trap more air during whipping, and contribute significantly to creating wonderfully tender and evenly rising cakes. You can easily achieve this by removing the eggs from the fridge about 30 minutes beforehand or, for a quicker method, placing them in a bowl of warm (not hot!) water for approximately 5-10 minutes.
Thoroughly Beat the Eggs and Sugar
This is a step you absolutely should not rush! Dedicating 5 minutes or even more to thoroughly beat the eggs and sugar mixture is fundamental for a truly fluffy vanilla cake. This extensive beating process incorporates a substantial amount of air into the mixture, transforming it into a light, pale, and fluffy consistency. Using an electric mixer is highly beneficial here, as it helps to whip in copious amounts of air, which is the primary leavening agent for a tender, high-rising cake. Remember: well-beaten eggs directly translate to a wonderfully tender and airy crumb.
Gently Does It: Avoiding Overmixing
Once you begin adding the flour and liquid components, a gentle hand is key. Overmixing the batter can rapidly deflate those essential air bubbles you worked so hard to incorporate, and it also overdevelops the gluten in the flour. This leads to a tough, chewy, and dry cake, which is the opposite of what we want for a moist vanilla cake. Handle the batter with care, mixing only until no specks of dry flour are visible, then stop immediately. A rubber spatula can be useful for the final gentle folds.
Mastering Your Oven’s Quirks
Every oven has its own personality, and understanding its unique behavior is vital for consistent baking. Take the time to get to know your oven’s unique quirks – whether it runs hotter or cooler than its dial suggests, or if it has hot spots. If you notice inconsistencies, don’t hesitate to tweak your bake times and temperatures accordingly for optimal results. Always trust your instincts and perform visual tests: look for a springy top, golden-brown edges, and use a clean cake tester (a wooden skewer or toothpick) inserted into the center as reliable indicators of doneness. When in doubt, it’s generally safer to bake at a slightly lower temperature for a bit longer, within reason, to prevent over-baking and drying out your cake.
The Art of Mastering Buttercream: Patience is Key!
For the smoothest, silkiest vanilla buttercream frosting, a little patience and attention to detail go a long way:
- Sift Your Icing Sugar: Always take the time to sift your icing sugar (powdered sugar). This is especially important if it’s been sitting in your cupboard for a while, as it tends to clump. Sifting ensures a perfectly smooth, lump-free frosting.
- Whip Butter First: Begin by beating your softened butter on its own until it’s light, fluffy, and pale in color. This aerates the butter, creating a better, more voluminous base for your frosting.
- Gradual Sugar Addition: Be patient and add the sifted icing sugar bit by bit, allowing each addition to fully incorporate before adding more. This prevents a sugar cloud and helps achieve the right consistency.
- Avoid Over-Beating (After Sugar): Once all the icing sugar and vanilla are mixed in, don’t beat the buttercream for more than an additional minute. Excessive beating at this stage can introduce too much air, leading to unwanted air bubbles that can make your buttercream look less smooth and more porous.
- Smooth Out Air Bubbles: If you do notice any sneaky air bubbles in your finished buttercream, simply grab a rubber spatula and vigorously push and smear the icing against the sides of the bowl. This action helps to release trapped air, resulting in a wonderfully smooth and professional-looking frosting.
- Careful with Liquid: Be extra careful when adding milk or cream to adjust the consistency; a little truly goes a long way. If you’re uncertain about the amount, it’s often best to add the liquid and then hand-mix it with a rubber spatula. This method provides a better “feel” for the consistency compared to continuously using a stand mixer, allowing for finer control over your simple vanilla buttercream.
Delicious Variations for Your Vanilla Sheet Cake
While this classic vanilla cake is perfect as is, feel free to get creative and experiment with these delightful variations to make your homemade vanilla cake unique:
- Citrus Zest: For a bright, zesty twist, skip the vanilla extract in the cake batter and instead add the finely grated zest of 1-2 lemons or oranges. The citrus will infuse the cake with a refreshing aroma and flavor that pairs beautifully with the sweet base.
- Elevated Vanilla Flavor: Intensify the vanilla experience by swapping the vanilla extract with vanilla bean paste or the seeds scraped from one fresh vanilla pod. These options offer a richer, more complex vanilla profile and visible flecks of vanilla bean throughout your fluffy vanilla cake.
- Other Flavor Extracts: Explore different flavor profiles by incorporating other extracts. Try almond essence for a nutty undertone, or orange extract (in addition to or instead of zest) for a vibrant citrus kick. Peppermint, coconut, or even a hint of rum extract can also create exciting new flavors.
- Alternative Frostings: The versatile sponge cake base pairs beautifully with a variety of frostings and icings. Consider a tangy mascarpone cream, a light and airy marshmallow fluff, a rich chocolate ganache, or even a simple lemon glaze for a different experience.
- Fresh Fruit Topping: Once frosted, elevate your cake with fresh fruit. Sliced strawberries, raspberries, blueberries, or mixed berries create a beautiful and flavorful topping, adding a touch of freshness and color that complements the vanilla buttercream frosting.
- Chocolate Chip Delight: For a classic crowd-pleaser, fold in 1 cup of mini chocolate chips into the batter just before pouring it into the tin. This adds a delightful texture and chocolatey bursts to every bite.
- Marble Effect: For a fun visual and flavor, reserve a small portion of the batter (about 1 cup), mix it with 2 tablespoons of cocoa powder, and then swirl it into the main vanilla batter in the pan before baking for a marble effect.
Can You Bake This Vanilla Cake in Round Tins?
Absolutely! This versatile vanilla batter is perfect for creating a classic layer cake. The recipe yield will make two beautiful 8-inch round cakes, perfect for stacking and decorating. When baking in round tins, adjust your oven settings slightly: bake at 170℃ (338℉) / Gas Mark 3 for approximately 25-30 minutes, or until a cake tester inserted into the center comes out clean and the edges are golden brown.
Can You Make Vanilla Cupcakes from This Recipe?
Yes, you certainly can! This robust vanilla cake batter is wonderfully suited for making cupcakes, providing a tender and moist base. The recipe will yield approximately 24 delightful vanilla cupcakes, making them perfect for parties or individual treats. To bake them, prepare a muffin tin with cupcake liners, preheat your oven to 170℃ (338℉) / Gas Mark 3 and bake for 20-25 minutes, or until they are golden brown and a toothpick inserted into the center of a cupcake comes out clean.
Storage Tips for Your Vanilla Tray Bake
To keep your delicious vanilla tray bake fresh and flavorful for as long as possible, follow these optimal storage guidelines:
- Room Temperature: Store the frosted vanilla tray bake cake in an airtight container at room temperature for up to 3 days. It’s crucial to ensure the container is truly airtight to prevent the cake from drying out. Keep it away from direct sunlight, excessive heat (like near an oven), and moisture, as these can degrade the cake’s texture and frosting quality.
- Refrigeration (if necessary): While not strictly necessary for this cake, if your kitchen is particularly warm or humid, or if your buttercream contains fresh cream, you may refrigerate the cake. Bring it back to room temperature for at least an hour before serving for the best flavor and texture.
- Freezing (Unfrosted Cake): For longer storage, you can freeze the unfrosted cake. Once the baked cake has cooled completely, wrap it tightly in several layers of plastic wrap, then an additional layer of aluminum foil. This double-layer protection is essential to prevent freezer burn and absorb any potential odors. Freeze for up to 2 months.
- Thawing: To thaw a frozen cake, transfer it to the refrigerator overnight. This slow thawing process helps maintain the cake’s moisture and texture. Once fully thawed, you can then frost it with fresh buttercream and decorate as desired. We do not recommend freezing the cake with the buttercream already on, as the frosting’s texture can change upon thawing, potentially becoming grainy or watery.
Explore More Delicious Cake Recipes
If you loved this vanilla tray bake and are eager to expand your baking repertoire, be sure to explore our other tempting cake recipes. Each one offers unique flavors and textures to delight your palate:
- Tottenham Cake
- Jam and Coconut Sponge
- Spiced Apple Cake
- Sticky Jamaican Ginger Cake
- Tunisian Orange and Almond Cake
- The Best Sultana Cake
- Toscakaka – Swedish Cake
- Moist Chocolate Orange Cake
Recipe Card: Easy Vanilla Tray Bake
Vanilla Tray Bake
This vanilla tray bake recipe is wonderfully straightforward and foolproof. What sets this cake apart is its clever use of oil instead of butter. The choice of oil offers distinct advantages for sponge cakes, keeping them moist and preventing excessive gluten development for that sought-after soft crumb.
Print Recipe
Dessert, Snack
International
15 minutes
40 minutes
55 minutes
24
squares or 12 large squares
308
kcal
Maretha Corbett
Equipment
- 1 circa 33cm x 23cm (13×9 inch) sheet pan
- Electric hand mixer or stand mixer
- Mixing bowls (2-3)
- Measuring cups and spoons, digital kitchen scale
- Rubber spatula, whisk
- Wire cooling rack
Ingredients
For the Cake
- 4 large eggs – at room temperature, approx. 62g per egg in its shell.
- 250 millilitre (1 US cup + 1 tbsp) milk – whole or semi-skimmed. Heated until simmering, then cooled to lukewarm.
- 360 grams (12½ oz) granulated sugar
- 2 teaspoons vanilla extract
- 100 millilitre (0.4 US cup) neutral oil – such as vegetable or sunflower oil.
- 360 grams (12½ oz) all-purpose flour
- 1 tablespoon baking powder
- ½ teaspoon salt
For the Vanilla Buttercream
- 450 grams (1 lb) icing sugar, sifted – also known as powdered sugar.
- ¼ teaspoon salt – omit if using salted butter.
- 225 grams (½ lb) unsalted butter – softened at room temperature.
- 1 teaspoon vanilla extract
- 2-4 tablespoons cream/milk – to adjust consistency.
- Sprinkles of choice – measured by heart, for decoration.
Instructions
Prepping
If the eggs are fridge-cold, remove them from the fridge approximately 30 minutes before you start to bake. Alternatively, place the eggs in a bowl of warm water for 5 minutes to bring them to room temperature more quickly.
Heat the milk in the microwave or a small saucepan until it starts to simmer. Allow it to cool to a lukewarm temperature that you can insert a clean finger into without burning.
Line the baking tin with baking paper (refer to the ‘How to Perfectly Line a Rectangular Baking Tin’ section above for detailed instructions and the baking tin size).
To Make the Cake
Preheat the oven to 170℃ (338℉) / Gas Mark 3.
Add the granulated sugar, room-temperature eggs, and vanilla extract to a large mixing bowl.
Using an electric hand mixer or stand mixer, beat the sugar, eggs, and vanilla extract together until the mixture is thick, fluffy, and very pale in colour. You should notice trails in the mixture left by the beaters. This will take a minimum of 5 minutes of beating.
In a separate bowl or jug, combine the neutral oil and lukewarm milk. Whisk together with a fork until reasonably well blended.
Sift together the all-purpose flour, baking powder, and salt in a bowl.
Add half of the sifted flour mixture to the eggs and sugar mixture and beat on a very low speed using an electric hand mixer or a stand mixer. Stop as soon as the dry ingredients have been incorporated.
Next, add half of the milk and oil mixture and beat again at a low speed. Stop as soon as the liquids have been incorporated.
Repeat these steps one more time for the remaining flour and liquid ingredients. Beat on low speed after each addition and be careful not to overbeat.
Pour the cake batter into the prepared tin and tap it gently on the counter a few times to remove any air bubbles.
Bake on the middle oven shelf for 35-40 minutes until the top of the golden brown cake springs back when touched and a tester inserted in the centre comes out clean. Test doneness at 35 minutes. If your oven runs hot, test earlier at 30 minutes or use a lower oven temperature to begin with.
Let the baked cake cool in the tin for at least 20 minutes before flipping it upside down onto a cooling rack.
Carefully peel off the parchment paper, paying extra attention to the corners where the cake might have baked into the folds of the paper. Set the cake aside to cool fully while you make the buttercream.
Note: We will frost the cake on the bottom side, which is why we turned it upside down. This ensures a smoother and flatter surface for the buttercream.
To Make the Buttercream
Sift the icing sugar and salt into a large bowl and set aside.
Note: Sifting icing sugar may be a bit of a chore but it’s the secret to a lump-free, velvety buttercream!
Cut the softened butter into smaller pieces to make mixing easier. Add the cubed butter to the bowl of a stand mixer or a large mixing bowl if you’re using a handheld electric mixer.
Note: Use the regular beater (paddle) attachment, not the whisk.
Whip the butter until it’s soft and fluffy, around 2 minutes. Scrape down the bowl.
At medium speed, start adding the icing sugar two tablespoons at a time. Beat between each addition until all the sugar is incorporated, which takes about 15 seconds each time.
After all the icing sugar is mixed in, scrape down the bowl once more and add the vanilla extract. Beat for approximately 30 seconds.
Check the consistency of the buttercream. If you prefer it thinner, add a tablespoon of cream or milk and beat again. Keep adding small amounts of liquid until it reaches your desired consistency. You will likely need a couple of tablespoons at least.
Beat for just 1 more minute. Too much beating can introduce too much air into the buttercream, making it less smooth.
Decorating the Cake
Once the cake has cooled, spread a thin layer of buttercream over the surface. This acts as a crumb coat, stopping any crumbs from appearing in your final layer of buttercream. For best results, chill for 10-15 minutes after the crumb coat to set it.
Spread the remaining buttercream evenly over the cake and finish it off with your favourite sprinkles. Slice, serve, and enjoy!
Notes & Expert Tips
This section consolidates additional tips and advice for perfecting your vanilla tray bake, ensuring a delightful baking experience and a truly fluffy vanilla cake.
Use a Scale and Measuring Spoons
For precise ingredient measurements and consistent results, we highly recommend using a reliable digital kitchen scale and high-quality measuring spoons. Accuracy is key for achieving cake perfection!
Bring Eggs to Room Temperature
Always ensure fridge-cold eggs reach room temperature before baking. This allows them to blend smoothly into the batter, contributing to a tender, evenly rising cake. You can achieve this by removing them from the fridge about 30 minutes beforehand or placing them in warm water for 5 minutes.
Beat the Eggs and Sugar Thoroughly
Do not rush this step! Beating the eggs and sugar for a minimum of 5 minutes (or more) makes them light and fluffy, incorporating ample air for the ultimate lift. Well-beaten eggs lead to a tender crumb.
Gently-Gently Does It with Batter
Overmixing the batter can deflate vital air bubbles and overdevelop gluten, resulting in a tough cake. Mix with care, stopping as soon as no specks of flour are visible.
Know Your Oven
Understand your oven’s unique characteristics. If it runs hot or cool, adjust bake times and temperatures accordingly. Trust visual cues like a springy top and use a cake tester to confirm doneness. When in doubt, it’s safer to bake at a lower temperature for a longer period.
Mastering Buttercream: Patience Pays Off!
Sift icing sugar to prevent lumps. Beat butter until fluffy before gradually adding sugar. Don’t overbeat once everything is mixed (no more than a minute) to avoid excess air bubbles. If air bubbles appear, smooth them out by pressing the icing against the bowl with a rubber spatula. Add milk or cream sparingly for consistency; a little goes a long way, and hand mixing offers better control for your simple vanilla buttercream.
**Nutritional Data Disclaimer**
Please keep in mind that the nutritional information provided below is calculated by a third party and we cannot guarantee its absolute accuracy. While we strive to offer the most accurate information possible, we do not take responsibility for any potential errors. Furthermore, the nutritional value of this recipe may vary depending on the exact brands and products used for your ingredients. We highly recommend consulting with a qualified healthcare professional or registered dietitian for personalized advice regarding your specific dietary needs.
Nutrition Information
Calories:
308
kcal
|
Carbohydrates:
46
g
|
Protein:
3
g
|
Fat:
13
g
|
Saturated Fat:
6
g
|
Polyunsaturated Fat:
2
g
|
Monounsaturated Fat:
5
g
|
Trans Fat:
0.3
g
|
Cholesterol:
53
mg
|
Sodium:
205
mg
|
Potassium:
49
mg
|
Fiber:
0.4
g
|
Sugar:
34
g
|
Vitamin A:
299
IU
|
Calcium:
54
mg
|
Iron:
1
mg
For important food safety advice, including guidance on food allergies and handling practices, please refer to official food safety resources.
