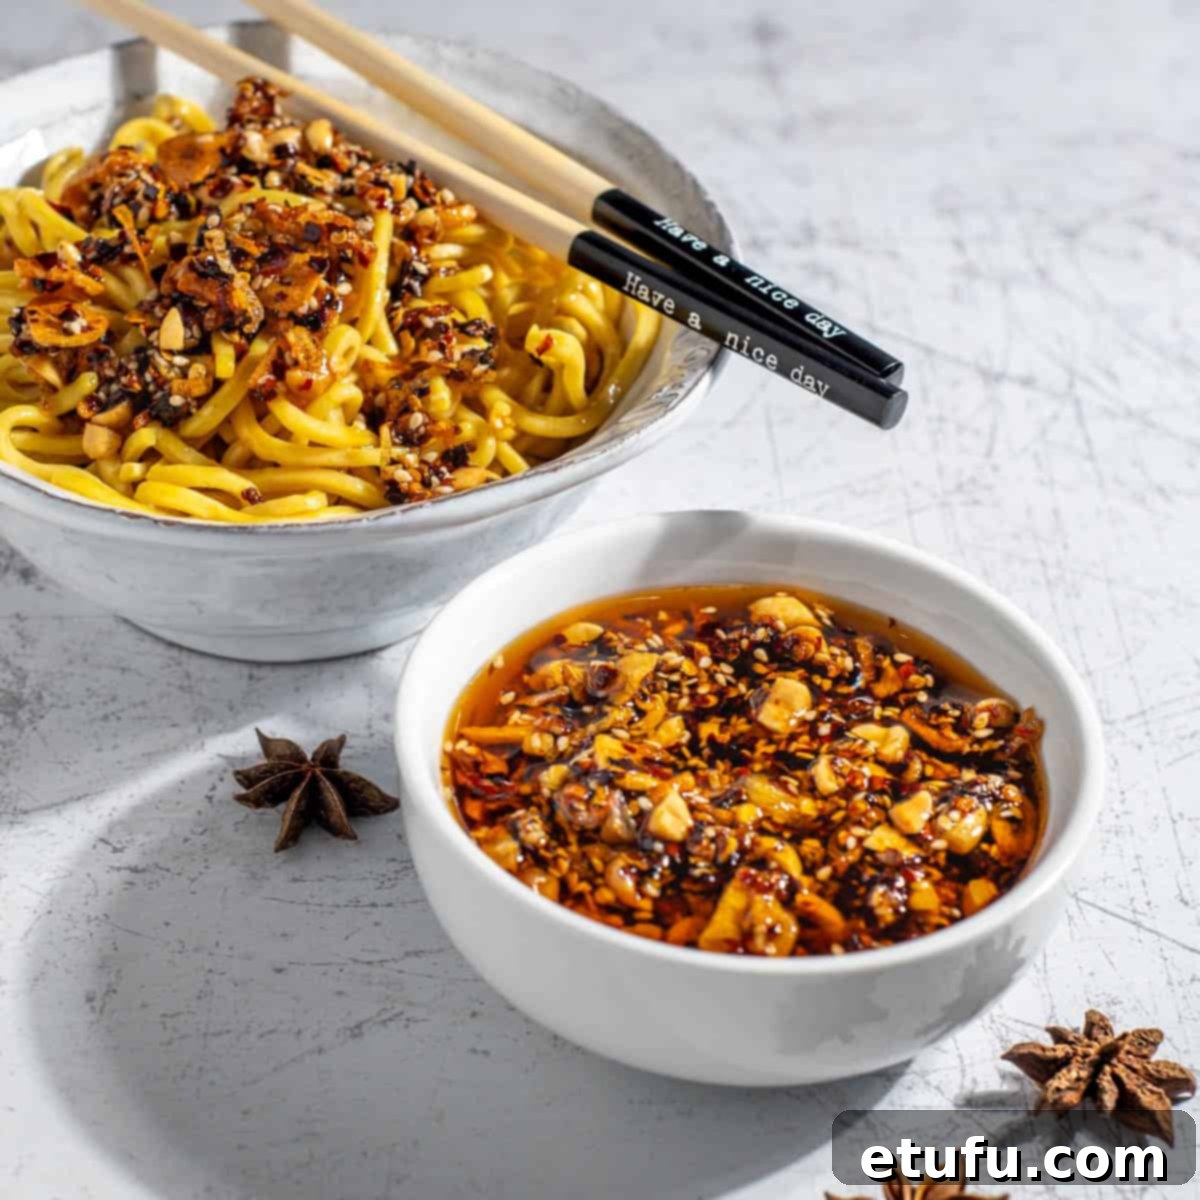
Unleash Flavor: Your Guide to Crafting the Ultimate Homemade Crispy Chilli Oil
In the culinary world, few condiments spark as much excitement and transform dishes quite like chilli crisp. This beloved crunchy, spicy, and deeply savory oil is a true game-changer. Imagine your scrambled eggs elevated to gourmet status, your everyday noodles singing with an explosion of flavor, and plain rice becoming an irresistible delight. For those of us who have scoured supermarket aisles in search of that perfect jar, only to be met with disappointment, the journey often leads to a rewarding realization: making your own crispy chilli oil at home is not just possible, it’s profoundly satisfying.
Our own quest began with a series of culinary adventures, some more successful than others. We won’t delve into the specifics of “batch three,” a valiant but ultimately misguided attempt involving overly burnt garlic and a texture that defied description. However, through persistent experimentation, we meticulously refined our technique. The result is a homemade crispy chilli oil that boasts an incredible crunch, an abundance of complex flavor, and the sheer convenience of using readily available ingredients. This recipe cuts through the complexity often associated with gourmet condiments, proving that exceptional taste doesn’t require a specialist grocery store or an exotic ingredient list. It’s remarkably similar to the best store-bought varieties, yet offers the invaluable bonus of complete control over ingredients, ensuring a pure, delicious, and pantry-friendly creation.
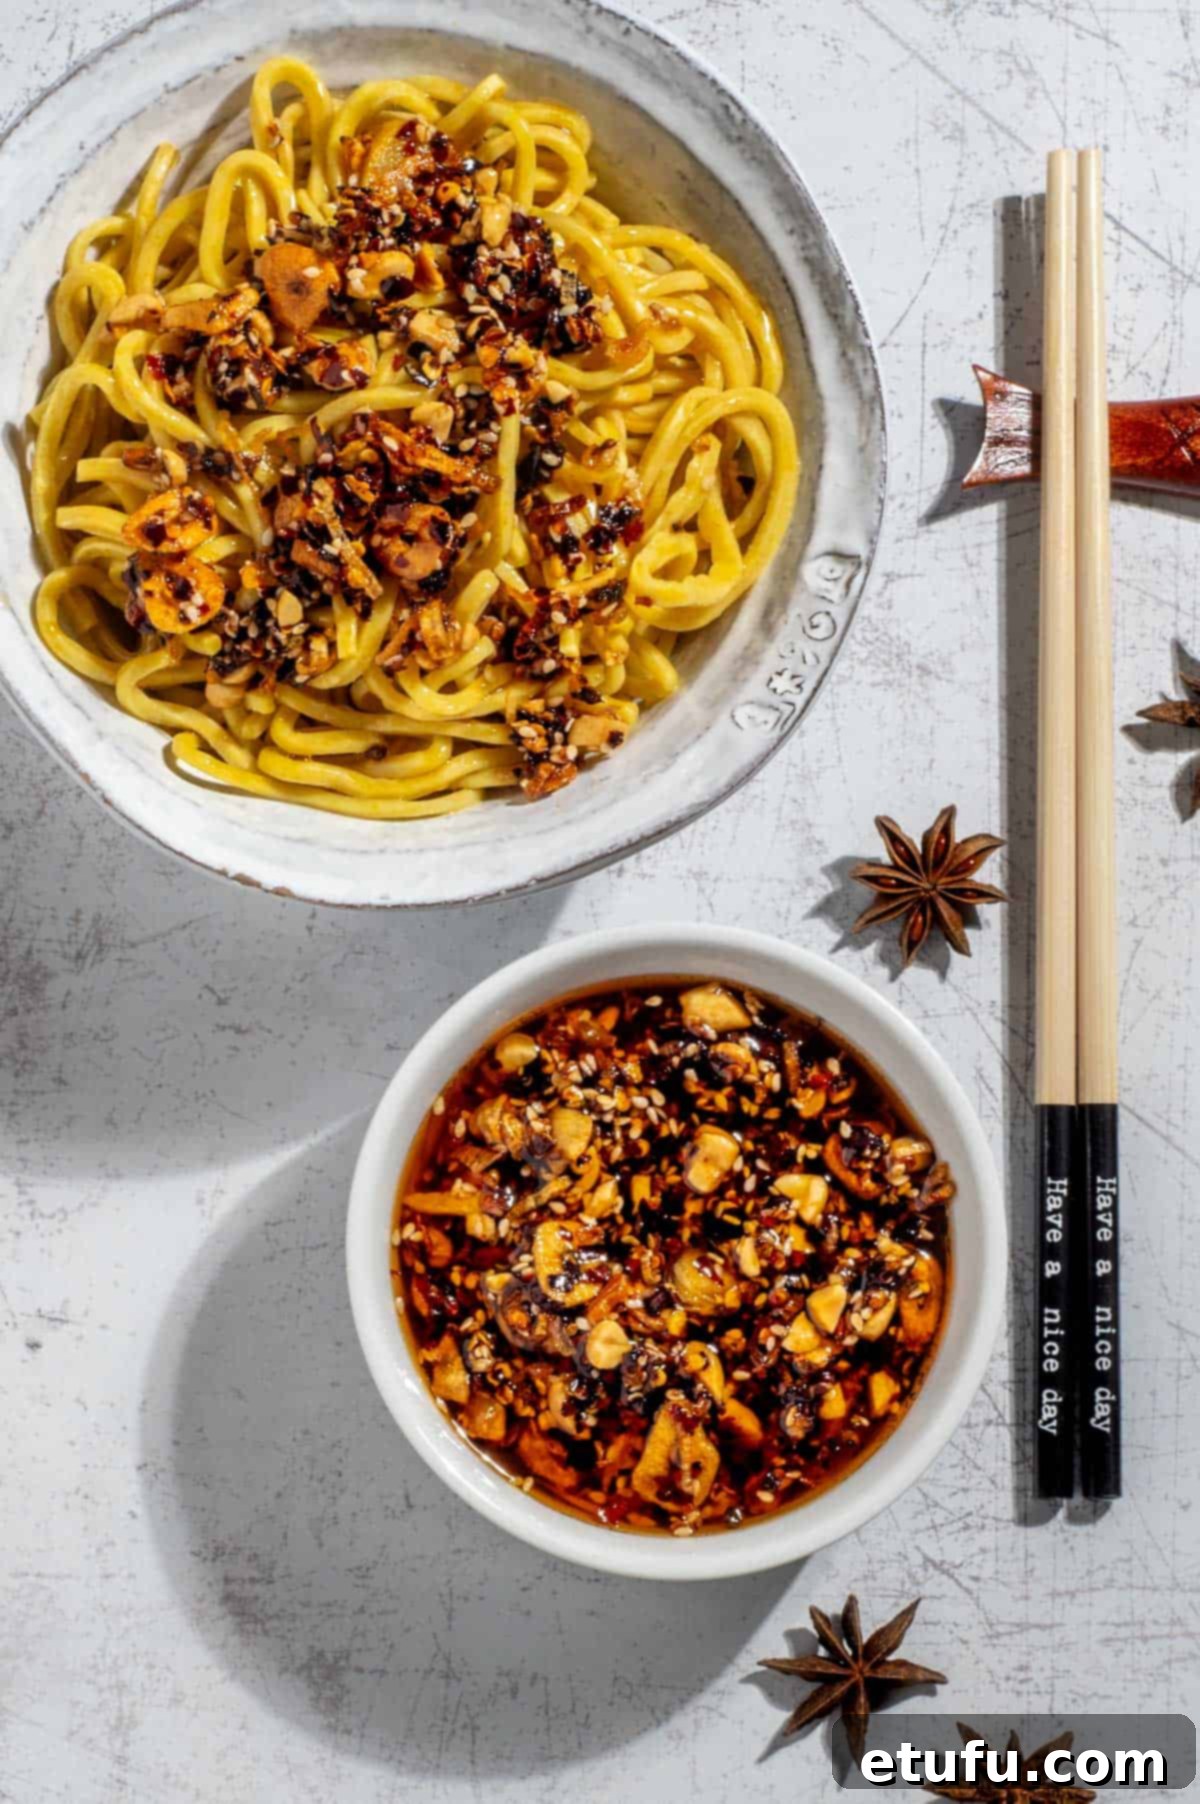
What Exactly is Crispy Chilli Oil?
Often referred to as chilli crisp, spicy chilli crunch, spicy garlic crisp, or simply garlic chilli oil, this extraordinary condiment is far more than just oil with a hint of heat. It’s a symphony of textures and flavors – a magnificent medley featuring golden, intensely aromatic garlic and shallots, perfectly toasted nuts, fragrant sesame seeds, and a harmonious blend of warm spices, all gently steeped in a high-quality, aromatic oil. The essence of crispy chilli oil lies in its delightful balance: it’s robustly punchy, deeply savory, and carries just enough sweetness to keep you coming back for more. It’s an addictive concoction where irresistible texture meets a satisfying warmth, culminating in a flavor profile that borders on obsession.
The versatility of chilli crisp knows almost no bounds. Imagine a generous spoonful dolloped onto perfectly fried or scrambled eggs, stirring it through a bowl of steaming noodles for an instant flavor upgrade, using it as a vibrant dipping sauce for dumplings, or spreading it thinly onto a slice of toasted bread for a surprising kick. It truly complements almost anything you can think of. (While some adventurous souls claim to enjoy it on vanilla ice cream, adding a touch of delightful chaos to an otherwise serene dessert, we recommend starting with savory applications first!)
A Culinary Confession: Our Approach to Chilli Oil
We understand that the world of authentic cuisine often comes with established traditions and “rules.” Our crispy chilli oil recipe, while respectful of its origins, takes a slightly more adaptable path. This isn’t a rigid cultural manifesto; rather, it’s a celebration of crispy chilli oil made accessible and utterly delicious for everyone. It’s designed to be straightforward, forgiving, and packed with an undeniable flavor punch. If you’re seeking an ultra-traditional, historically rigid recipe, our apologies – this might not be your perfect match. But if you’re looking for bold flavor, satisfying crunch, and an easy method, we invite you to embrace what we lovingly call “dinner heresy.”
Why Embark on the Homemade Crispy Chilli Oil Journey?
The quest for exceptional crispy chilli oil often begins with a frustration for what’s available commercially. Store-bought options frequently fall short, often being either excessively oily, disappointingly bland, or simply nonexistent when you crave a jar with abundant crunch and a lighter oil base. Furthermore, while the internet abounds with tantalizing recipes, many call for obscure ingredients – think smoked ghost chillies blessed by monks at sunrise – which are impractical for the average home cook. Our goal was to create a recipe that delivers a truly bold and authentic flavor experience without the hassle. This rendition is precisely that: a perfectly crunchy, deeply savory chilli oil that isn’t excessively greasy, made with ingredients you can confidently find at your local supermarket, and easily adaptable to your personal taste preferences.
Outstanding Features of Our Crispy Chilli Oil Recipe
- Speedy Preparation: This incredibly flavorful condiment comes together in approximately 30 minutes, making it perfect for last-minute cravings or meal prep.
- Unrivalled Crunch: Experience the delightful texture of ultra-crispy garlic, shallot, and peanut bits that are the hallmark of a truly great chilli oil.
- Flavor First: Our recipe prioritizes a rich, nuanced flavor profile, delivering more than just a blast of heat. It’s a complex dance of savory, sweet, and spicy notes.
- Accessible Ingredients: Say goodbye to specialty store hunts. Every ingredient in this recipe is common and easy to find at any standard grocery store.
- Effortlessly Customisable: Tailor the experience to your palate. Easily adjust the spice level, experiment with different nuts, or swap out the base oil to create your signature blend.
- Excellent Shelf Life: Stored properly in the refrigerator, your homemade crispy chilli oil will remain fresh and delicious for up to a month, ready to enhance countless meals.
Elevate Your Meals: Inspiring Recipes to Pair with Crispy Chilli Oil
Once you’ve mastered the art of homemade crispy chilli oil, a world of culinary possibilities opens up. This versatile condiment isn’t just an enhancer; it’s a star player in its own right. For an incredible depth of umami, drizzle it over a satay chicken stir fry. Imagine a delightful crunch-on-crunch sensation by spooning it generously over crispy crumbed mushrooms. And for those moments when comfort food calls for an unexpected fiery kick, let it ooze out of a perfectly made sourdough toasted cheese sandwich. Prepare to transform everyday dishes into extraordinary culinary experiences.
- Satay Chicken Stir Fry
- Crumbed Mushrooms Recipe (Breaded Mushrooms)
- The Best Sourdough Grilled Cheese Sandwich (Tips and Tricks)
Mastering the Blend: Key Ingredient Notes and Savvy Substitutions
Understanding each component of your crispy chilli oil is crucial to achieving its optimal flavor and texture. Here’s a detailed look at the key ingredients and how to make the best choices for your homemade batch.
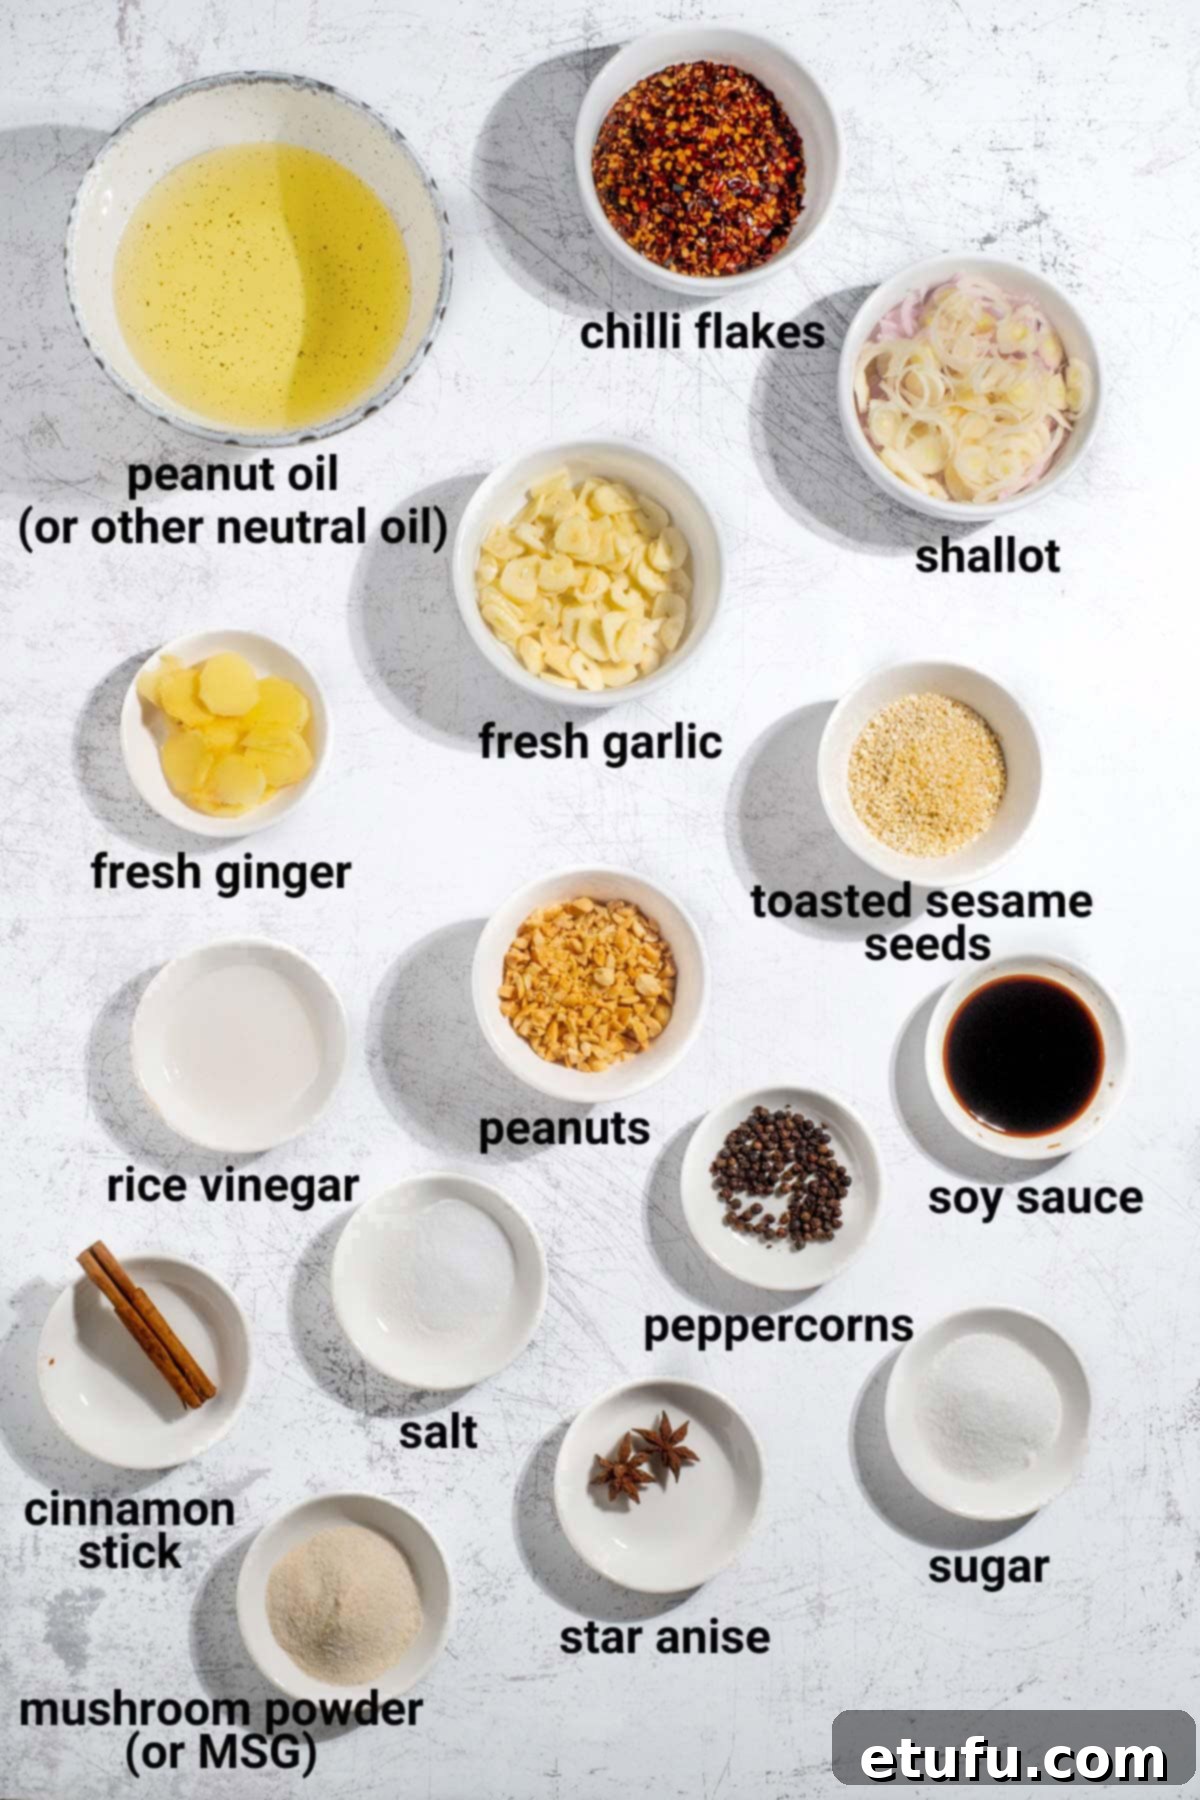
The Foundation: Choosing the Right Oil
The oil you select forms the base of your chilli crisp, carrying and infusing all the wonderful flavors. We highly recommend peanut oil for its distinct advantages: a remarkably high smoke point that stands up well to gentle, prolonged heating, a subtle nutty undertone that complements the other ingredients without dominating, and its exceptional ability to allow the aromatics to truly shine. It’s perfectly suited for the slow, gentle infusion process required to extract maximum flavor and create those delightful crispy bits.
However, your choices aren’t limited to peanut oil. Many neutral oils with high smoke points can work beautifully, offering flexibility without compromising quality.
Excellent Oil Choices for Chilli Oil:
- Peanut Oil: Our top recommendation. It offers a delicate nutty flavor, maintains stability at high temperatures, and is ideal for achieving perfect crispiness.
- Sunflower Oil: A fantastic alternative with a light, clean flavor profile that won’t overpower the spices. It’s widely available and a reliable choice.
- Canola Oil: A budget-friendly option that’s mild in flavor and performs exceptionally well for frying and infusing.
- Grapeseed Oil: Known for its neutral and clean taste, grapeseed oil is a slightly pricier but wonderfully light option that lets other flavors truly pop.
Oils to Steer Clear Of:
- Olive Oil: While a staple in many kitchens, olive oil’s strong, distinctive flavor will clash with the traditional profile of chilli crisp. Moreover, its relatively low smoke point means it can easily turn bitter or burn during the prolonged heating needed for infusion.
- Coconut Oil: Avoid this due to its heavy, very distinctive flavor that would completely hijack the intended taste. It also tends to become unpleasantly claggy and solid when cold, affecting the texture of your chilli crisp.
- Sesame Oil: Although tempting for its rich, toasted aroma, sesame oil is far too intense to be used as the primary base oil. Its robust flavor would overwhelm all other ingredients. Instead, save it as a finishing drizzle, added sparingly at the end for an extra layer of toasty depth if desired.
Quick Tip: Monitor Oil Temperature Carefully
When using any oil other than peanut oil, especially if you’re new to making chilli crisp, pay extra close attention to your heat levels. Some oils can transition rapidly from a perfect golden simmer to burnt bitterness if the temperature climbs too high. A gentle shimmer, not smoke, is what you’re aiming for.
The Heart of the Heat: Chilli Flakes Explained
The type of chilli flakes you select is arguably the most impactful decision, directly influencing the final flavor, vibrant color, and heat intensity of your crispy chilli oil. This is where your personal preference truly comes into play, allowing for endless customization.
The Everyday, Readily Available Option (Our Go-To):
If you’re standing in front of your spice rack with a generic supermarket jar of crushed red pepper flakes, rest assured – these are perfectly acceptable and will yield a delicious chilli crisp! These common flakes, typically made from dried cayenne or bird’s eye chillies, offer a good level of heat and a straightforward, pleasant base flavor. Just be aware that they often pack more punch than their appearance suggests, so start with the recommended amount and adjust for future batches.
Elevate Your Game: Exploring Gourmet Chilli Flakes
For those with access to an Asian grocer or a well-stocked international food aisle, a world of exciting chilli flakes awaits, allowing for a more nuanced flavor profile:
- Gochugaru (Korean Chilli Flakes): These flakes are celebrated for their vibrant red hue, fruity undertones, and relatively mild heat. They impart that beautiful, rich color to your oil without overwhelming your palate with ferocity, making them ideal if you prioritize flavor over intense spice.
- Sichuan Chilli Flakes: Made from roasted Chinese chillies, these flakes introduce a wonderful smoky depth and a unique, slow-building heat that gently lingers on the tongue. An added bonus: their robust nature makes them less prone to burning quickly compared to more delicate varieties.
Alternatively, some enthusiasts prefer to toast and crush whole dried chillies themselves. This method offers ultimate control over freshness and grind size. Popular dried chilli varieties for this purpose include:
- Facing Heaven Chillies (Chao Tian Jiao): Offering a medium heat, these chillies are known for their floral and subtly smoky notes, adding a delicate complexity.
- Tien Tsin Chillies: Small but mighty, these provide a sharp, fiery kick that demands respect.
- Puya or Arbol Chillies: These deliver a bold heat while still retaining good flavor, making them a balanced choice for a spicy chilli oil.
If using whole dried chillies, use kitchen scissors or a spice grinder to chop them into flakes. Exercise caution and go easy on the quantity unless you are certain you desire an intense level of heat.
The Best of Both Worlds: Blending Your Chilli Flakes
Why choose just one when you can blend? Experiment with different varieties to achieve your ideal heat-to-flavor ratio. A common and delicious blend is half Gochugaru for color and fruity notes, combined with half generic chilli flakes for a more direct heat. Or, add a mere pinch of Sichuan flakes to your supermarket variety for a subtle, smoky whisper that truly transforms the profile.
Crucial Tip: Prevent Chilli Burn
Chilli flakes are delicate and can burn very quickly in hot oil, leading to an acrid, bitter taste. Always pour your hot oil when it’s shimmering gently, not actively smoking. To test the temperature, drop in a single flake; it should sizzle softly. If it crackles violently or immediately darkens, your oil is too hot – remove it from the heat and allow it to cool slightly before proceeding.
The Aromatic Foundation: Fresh Garlic, Ginger, and Shallots
These fresh aromatics are the very heartbeat and soul of your crispy chilli oil, contributing layers of pungent, sweet, and savory notes, along with the essential crispy texture. Most of your active preparation time will be dedicated to carefully slicing these ingredients. Patience is truly a virtue here; thin, even slices are paramount for consistent cooking and the ultimate crunch. Once these are prepared, the rest of the recipe is remarkably straightforward.
A critical word of caution during the cooking phase: constant vigilance is key. As soon as the garlic, ginger, and shallots achieve a beautiful, warm golden blonde hue, immediately remove the pan from the heat. These aromatics will continue to cook rapidly in the residual heat of the oil. Allowing them to darken past this golden point will quickly lead them from perfectly crispy and flavorful to undeniably bitter and burnt. It is a very fine line, so err on the side of caution.
After you’ve carefully strained the hot oil over your dry chilli base, resist the urge to immediately return these newly fried, crispy gems to the mixture. Instead, spread them out in a single layer on a plate lined with kitchen paper. This crucial step allows them to cool completely and crisp up properly, developing that highly coveted, satisfying shatter that defines exceptional chilli crisp. Once fully cooled and crisp, then, and only then, stir them back into your chilli oil. They will infuse your creation with an irresistible golden crunch and an unparalleled flavor punch that makes this condiment so wonderfully addictive.
Layering Flavor: Whole Spices for Infusion
Whole spices like peppercorns, star anise, and cinnamon play a crucial supporting role, quietly weaving layers of complexity and aromatic depth into the oil without ever stealing the spotlight. They are added purely for infusion and are typically removed before bottling, leaving behind only their fragrant essence.
For an exciting twist, consider swapping out black peppercorns for Sichuan peppercorns. These unique berries will impart a distinctive buzzy, numbing sensation (ma la) that is characteristic of Sichuan cuisine, adding another dimension to your chilli oil.
Further Infusion Add-ins (Remember to Remove Before Bottling!):
- Cloves: Use with extreme sparingly; just 1 or 2 whole cloves are enough, as their flavor is very potent and can easily dominate.
- Bay Leaves: Add earthy and subtly herbal notes, providing a grounding aroma.
- Dried Orange Peel: A wonderful addition for a sweet, slightly bitter edge that harmonizes beautifully with the chilli. Ensure it’s thoroughly dried to avoid introducing moisture.
- Coriander Seeds: When lightly toasted, these contribute a warm, citrusy, and subtly nutty flavor.
- Green Cardamom Pods: Lightly crush 2-3 pods to release their aromatic seeds, adding a bright, sharp-sweet lift to the oil.
The Umami Bomb: Mushroom Powder and Its Alternatives
Mushroom powder is your secret weapon for an intense burst of umami – that deeply savory, fifth taste that rounds out the spice, amplifies the notes of nuts and garlic, and provides an irresistible “moreish” quality. It’s often referred to as a natural flavor enhancer.
You can typically find high-quality mushroom powder in well-stocked grocery stores, Asian supermarkets, or health food shops, usually located near dried mushrooms or spice blends. It’s a fantastic ingredient to keep on hand, as it works wonders in countless dishes, from soups and stews to gravies and sauces.
Many traditional and modern recipes for chilli oil utilize MSG (Monosodium Glutamate) to achieve a similar umami effect. You are absolutely welcome to use MSG if you prefer. MSG is simply the purest form of umami and is perfectly safe for consumption, despite outdated and largely disproven myths surrounding its safety. However, if you are sensitive or simply wary, there are excellent alternatives.
If mushroom powder isn’t available, or you’re looking for another pantry-friendly option, crumbling in a chicken stock cube (or even a vegetable stock cube for a vegetarian version) can provide a similar salty-savory boost. While it won’t taste *exactly* the same as mushroom powder, it will contribute a welcome layer of depth.
No MSG, no mushroom powder, no stock cube? Don’t fret! You can simply omit this ingredient. Your chilli crisp will still be incredibly delicious and flavorful, though it might lack that profound, intense savory depth that an umami enhancer provides. It will still be a fantastic homemade condiment.
DIY Mushroom Powder: A Simple Secret
Making your own mushroom powder is incredibly easy and ensures maximum freshness. Simply take dried mushrooms (shiitake or porcini varieties work exceptionally well for their deep umami flavor), place them in a blender or spice grinder, and blitz until you achieve a fine powder. Store it in an airtight container, and it will be ready to enhance anything you cook!
The Crunch Factor: Peanuts and Their Peers
For us, peanuts are the unsung heroes of crispy chilli oil – the absolute MVP. They introduce a rich, deeply roasted nuttiness and an unparalleled extra layer of crunch that transforms merely “good” chilli crisp into an irresistible, “can’t-stop-eating-it” experience. There’s a magical synergy between the satisfying snap of the peanuts, the gentle warmth of the chilli, and the crispy sweetness of the garlic. It just works, creating a symphony of textures and flavors.
We prefer to chop the peanuts finely, ensuring they integrate beautifully with the sesame seeds and other fried bits, yet still retain enough texture to stand out. The ideal consistency is not too powdery, not too chunky – just right for mingling.
Always opt for roasted, unsalted peanuts if possible; raw peanuts lack the depth of flavor you want. And yes, feel free to measure with your heart if the specified 4 tablespoons feel a bit stingy! Just remember that increasing the amount of peanuts will make your chilli crisp appear “drier.” If you’re going heavy on the nuts, consider adding a little extra oil at the beginning of the infusion process to maintain the desired consistency.
Nutty Alternatives for Your Chilli Oil:
- Cashews: These will offer a softer bite compared to peanuts, but still provide a lovely, buttery richness that complements the spice.
- Almonds: For the best flavor, lightly toast whole or slivered almonds before chopping them finely. They offer a delicate, slightly sweet crunch.
- Toasted Sunflower Seeds: An excellent nut-free option that still delivers a satisfying crunch and a pleasant, earthy flavor. Toast them lightly to enhance their taste.
Crafting Your Chilli Crisp: Step-by-Step Instructions
Phase 1: Prepare the Chilli Base
This initial step involves combining all the dry ingredients and liquid seasonings that will form the intensely flavorful core of your crispy chilli oil. Laying out your ingredients beforehand ensures a smooth process.
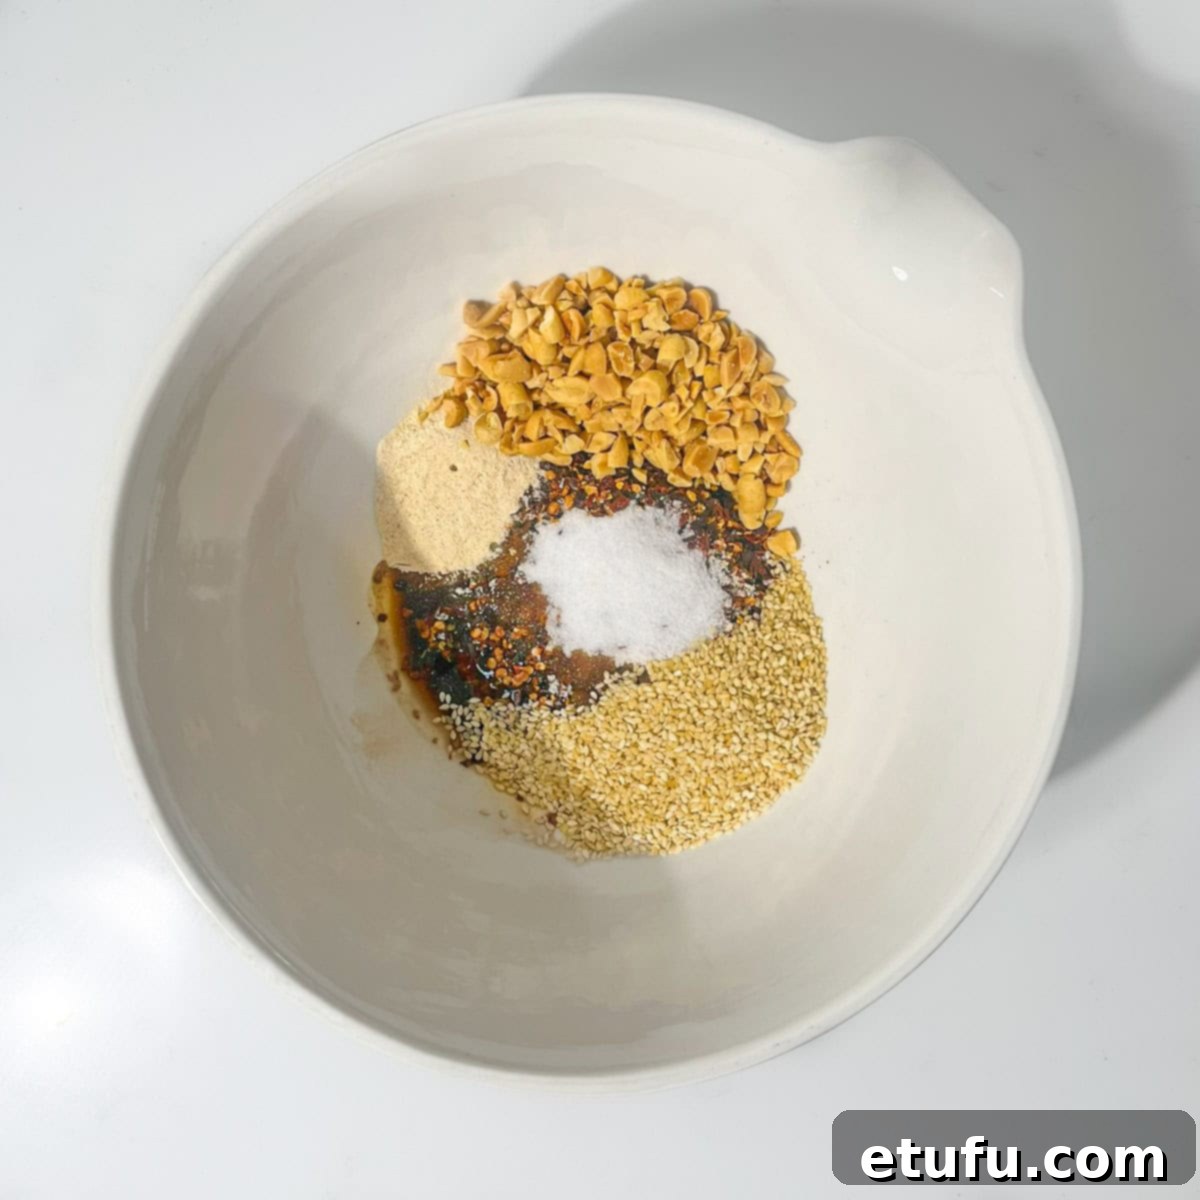
1. In a large, heatproof bowl, combine the chilli flakes, salt, sugar, mushroom powder (or your chosen umami enhancer), soy sauce, rice vinegar, toasted sesame seeds, and finely chopped roasted peanuts. Ensure your bowl is genuinely heatproof, as very hot oil will be poured into it.
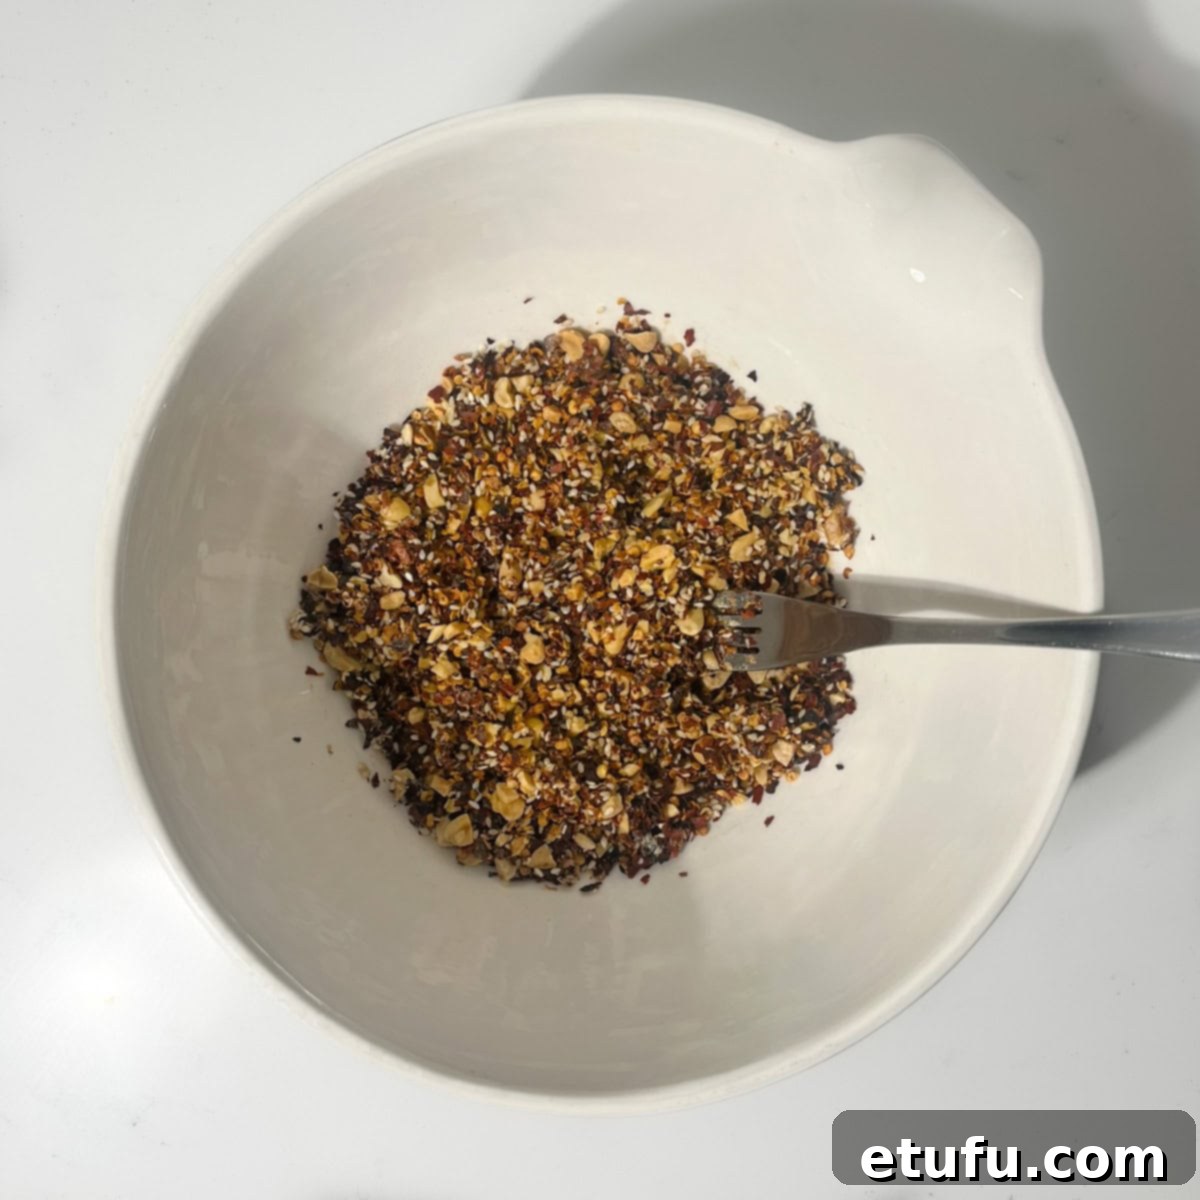
2. Stir all the ingredients together thoroughly until they are well combined. This ensures an even distribution of flavor in your final product. Once mixed, set this bowl aside in a safe location. We recommend placing it inside a clean kitchen sink; this precaution will contain any potential splatters when the hot oil is added, making cleanup much easier.
Phase 2: Infuse the Oil with Aromatics and Spices
This stage is crucial for extracting the deep flavors from your fresh aromatics and whole spices, creating the fragrant oil base for your chilli crisp. Remember that patience and gentle heat are your best allies here.
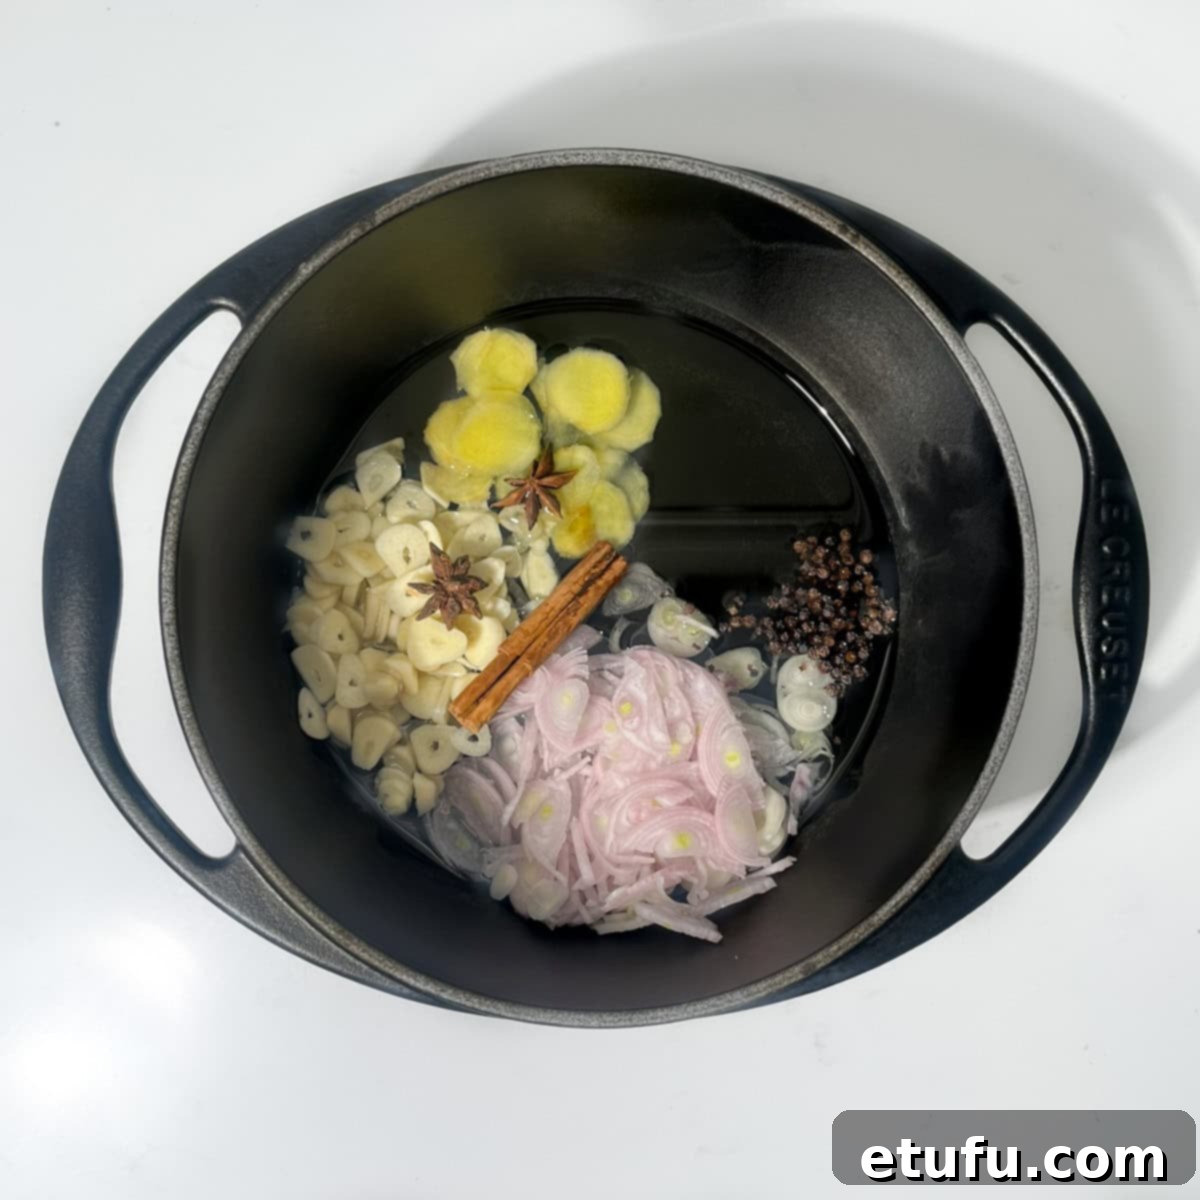
3. Pour your chosen oil (peanut or another neutral, high smoke point oil) into a heavy-bottomed saucepan. Add the finely sliced shallots, garlic cloves, fresh ginger, cinnamon stick, star anise, and black peppercorns directly into the cold oil. Starting with cold oil allows the aromatics to infuse more gently and evenly.
4. Place the saucepan over **medium-low heat**. Allow the contents to bubble away very **gently** for approximately **13-15 minutes**. Stir the mixture occasionally to ensure even cooking and prevent sticking. The critical goal here is to achieve a beautiful golden blonde color for the aromatics – they should be crisp and fragrant, not brown, and absolutely not burnt. Burnt aromatics will impart a bitter flavor to your entire batch of chilli oil. Keep a very close eye on the color, as they can transition quickly.
Phase 3: Strain and Crisp Up
This step separates the infused oil from the cooked aromatics and ensures your crispy bits achieve maximum crunch.
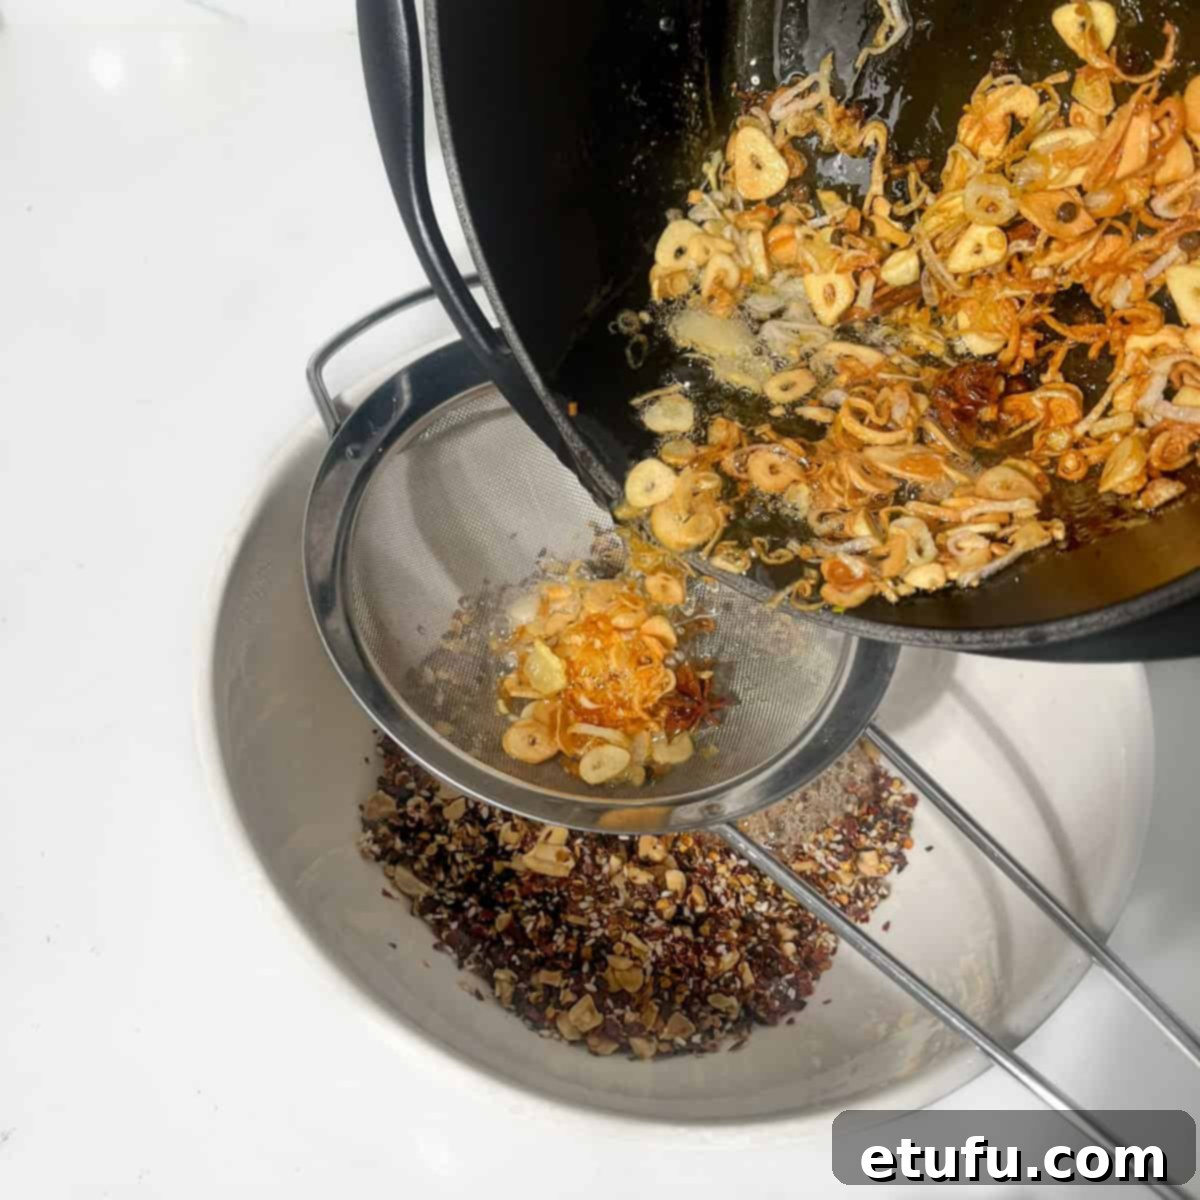
5. Carefully pour the hot, infused oil through a fine-mesh sieve directly into your prepared chilli base bowl. Be extremely cautious during this step, as the hot oil will sizzle and bubble vigorously upon contact with the chilli flakes and other ingredients. The sieve will catch all the large aromatics and whole spices.
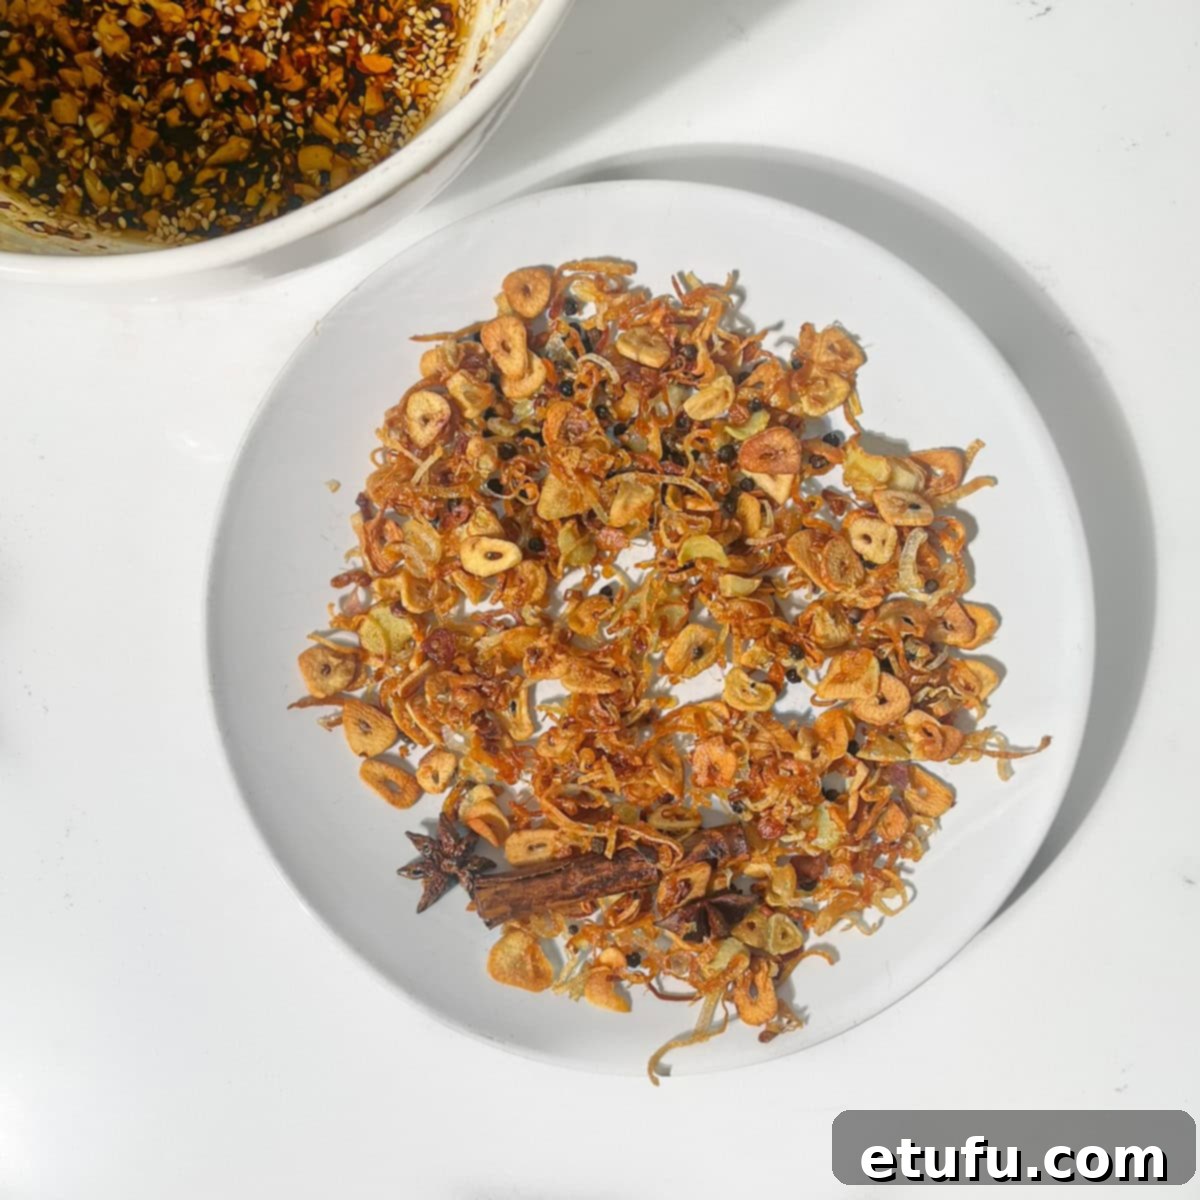
6. Immediately after straining the oil, tip all the fried aromatics (shallots, garlic, ginger) left in the sieve onto a plate lined with a few sheets of kitchen paper. Spread them out evenly in a thin layer. Allow them to cool completely and crisp up properly, which will take approximately **10 minutes**. This cooling period is essential for achieving that delightful, shatteringly crisp texture.
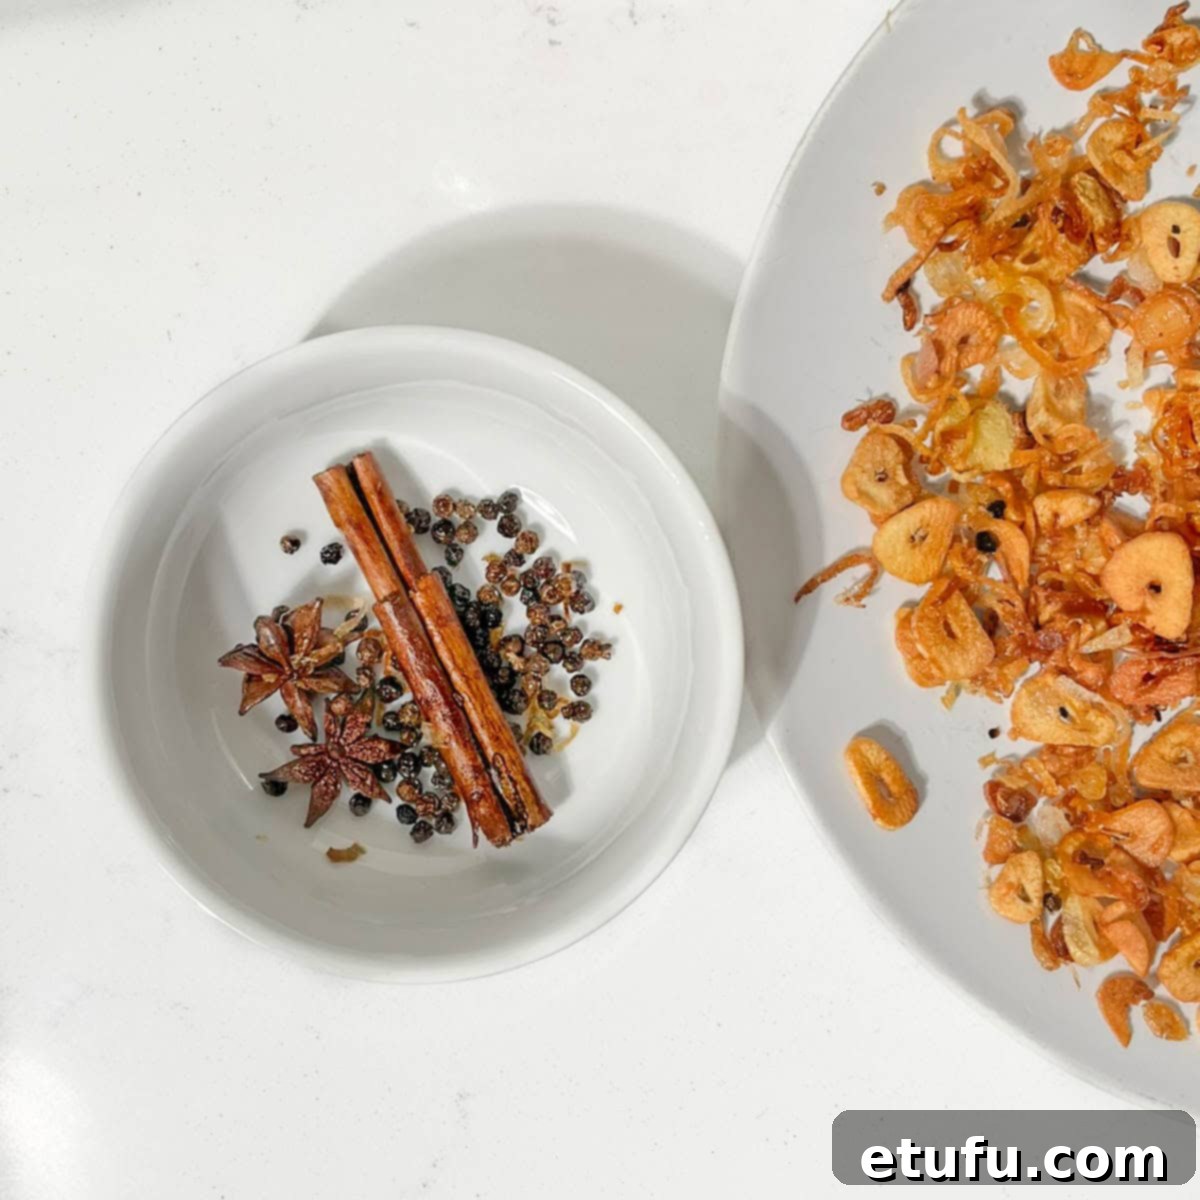
7. Once the oil and aromatics have cooled completely (this is important for preserving crispiness and preventing bitterness), carefully fish out and discard the cinnamon stick, star anise, and most of the black peppercorns. Don’t worry if a few peppercorns remain; they add a subtle background note. You can also remove the ginger pieces at this point if you prefer a smoother texture without fibrous bits.
Phase 4: Combine and Store
The final steps involve bringing all the components together and preparing your delicious homemade crispy chilli oil for enjoyment.
8. Gently stir the now ultra-crispy garlic, shallots, and any ginger you decided to keep back into the chilli mixture in the bowl. Mix well to ensure the crunchy bits are evenly distributed throughout the oil and chilli flakes.
9. Allow the entire mixture to cool down completely to room temperature before transferring it to clean, airtight storage jars. This final cooling prevents condensation inside the jar, which can lead to sogginess. Store your finished crispy chilli oil in the refrigerator for optimal freshness and safety, where it will keep for up to a month.
Exciting Variations to Customize Your Chilli Oil
One of the joys of making crispy chilli oil at home is the endless potential for customization. Here are a few ideas to inspire your next batch:
- Amplify the Heat: For those who crave an extra fiery kick, simply add more chilli flakes to your base mixture. A pinch of cayenne pepper can also provide a sharper, more intense heat.
- Introduce the Sichuan Buzz: For a unique sensory experience, toss in a teaspoon or two of ground Sichuan peppercorns during the oil infusion phase. They deliver a distinctive “ma la” (numbing and tingling) sensation that’s wonderfully addictive.
- Nutty Substitutions: No peanuts? No problem! Experiment with other nuts like finely chopped cashews for a buttery texture, or toasted, chopped almonds for a more delicate crunch. For a nut-free option, crispy fried shallots or even toasted sunflower seeds make excellent additions.
- Tangy Twist: If you appreciate a subtle acidity to cut through the richness, a final splash of high-quality black vinegar (like Chinkiang vinegar) stirred in at the end can add a delightful tangy dimension.
The Ultimate Culinary Companion: How to Enjoy Your Crispy Chilli Oil
This versatile condiment is a game-changer for almost any meal. Prepare to discover new favorites as you incorporate it into your daily cooking:
- Egg-cellent Pairing: Spoon it generously over any type of egg – fried, scrambled, poached, or boiled. For us, eggs simply aren’t complete without a vibrant dollop of chilli crisp!
- Noodle and Rice Nirvana: Stir it through hot noodles or spoon it over steamed rice for an instant flavor upgrade that’s deeply satisfying.
- Dumpling and Wonton Dipper: Serve it as a pungent and flavorful dipping sauce for your favorite dumplings, wontons, or spring rolls.
- Roasted Vegetable Revelation: Drizzle it over roasted vegetables like sweet potatoes, mushrooms, carrots, or broccoli for an unexpected depth of flavor and texture.
- Sauce and Spread Enhancer: Swirl it into mayonnaise, hummus, tahini dressing, or even avocado toast for an extra layer of savory spice.
- Toast Transformation: Don’t knock it until you’ve tried it! A simple slice of toast becomes an exciting snack with a spread of chilli crisp – absolutely no shame in enjoying this simple pleasure.
Expert Tips for Crispy Chilli Oil Perfection
Achieving truly exceptional crispy chilli oil involves mastering a few key techniques. These tips will guide you towards a perfect batch every time:
1. Precision Slicing: The Foundation of Crunch:
The magical texture in crispy chilli oil largely depends on the delicate, even crispiness of the garlic, shallots, and ginger. Invest your time in slicing these aromatics as thinly and uniformly as possible using a sharp knife. Inconsistent chunks will cook unevenly – some burning, others remaining soft – thereby compromising that coveted crunch. For foolproof results and ultimate precision, consider using a mandoline slicer with a safety guard.
2. Temperature Control is Paramount: Low and Slow is the Way to Go:
Be mindful that the “medium-low” setting on your stovetop might differ significantly from ours. The key to gently crisping the garlic and shallots without burning them is very gentle, consistent heat. If your stove runs hot, use a heat diffuser or select the absolute lowest heat setting you can manage. When in doubt, always opt for a slower, lower approach – it’s far safer and yields better results than rushing the process. If you observe any smoke or hear a vigorous crackling sound (like a bonfire), immediately remove the pan from the heat and allow the oil to cool slightly before resuming.
3. Cold Start Advantage: Heat Everything Together:
Instead of heating the oil first and then adding the aromatics, start with a cold pan. Add your oil, garlic, shallots, ginger, and whole spices all together. This gradual warming process allows the aromatics to slowly release their flavors into the oil, infusing it more thoroughly and evenly without the risk of immediate scorching. This gentle infusion is crucial for achieving that perfect golden crispiness.
4. The Power of a Heavy-Bottomed Pan:
The type of pan you use significantly impacts the success of your chilli oil. Thin, lightweight pans tend to heat unevenly, creating hot spots that can quickly burn delicate aromatics like garlic before others are even golden. A heavy-bottomed pan, such as cast iron or a thick stainless steel pot, distributes heat much more evenly, giving you greater control and making it easier to achieve that uniform, golden crisp.
5. Patience with Cooling: The Secret to Lasting Crunch:
Do not underestimate the importance of proper cooling for your crispy bits. After straining, spread the fried aromatics (garlic, shallots, ginger) in a thin, single layer on paper towels or a plate. Allow them to cool completely to room temperature. Skipping this crucial step or rushing it will trap moisture, leading to soggy, rather than delightfully crunchy, additions to your chilli crisp. They should be brittle to the touch once fully cooled.
6. The Chilli Flake Thermometer: Test Before You Pour:
Before pouring your piping hot infused oil over the chilli base, perform a quick temperature test. Drop a tiny pinch of chilli flakes into the hot oil. If they sizzle gently and release their aroma without immediately turning dark, the temperature is perfect. If they explode into a violent sizzle or rapidly darken, the oil is too hot. This excessive heat will scorch your main batch of chilli flakes, resulting in a bitter, unpleasant taste. Remove the pan from the heat and let the oil cool for a minute or two before retesting.
7. Be Mindful of Residual Heat:
Even after you remove the pan from the burner, the hot oil and the pan itself will retain significant heat, continuing to cook the aromatics. This is why it’s critical to remove the pan from the heat once your garlic and shallots reach that perfect golden blonde stage. If you’re unsure, it’s always better to err on the side of caution and remove the pan slightly earlier rather than waiting too long, preventing any accidental burning.
8. Smart Storage: Small Batches for Freshness:
Consider storing your homemade chilli crisp in smaller jars rather than one large container. This strategy is excellent for food safety and flavor preservation. If, for any reason (and this is a crucial reminder: always use a clean spoon when scooping from your jar to prevent contamination!), one small batch were to spoil, you wouldn’t risk wasting the entire creation. Plus, enjoying smaller, freshly opened jars often means you experience the chilli crisp at its peak crunch and flavor more frequently.
Storage Guidelines for Optimal Freshness
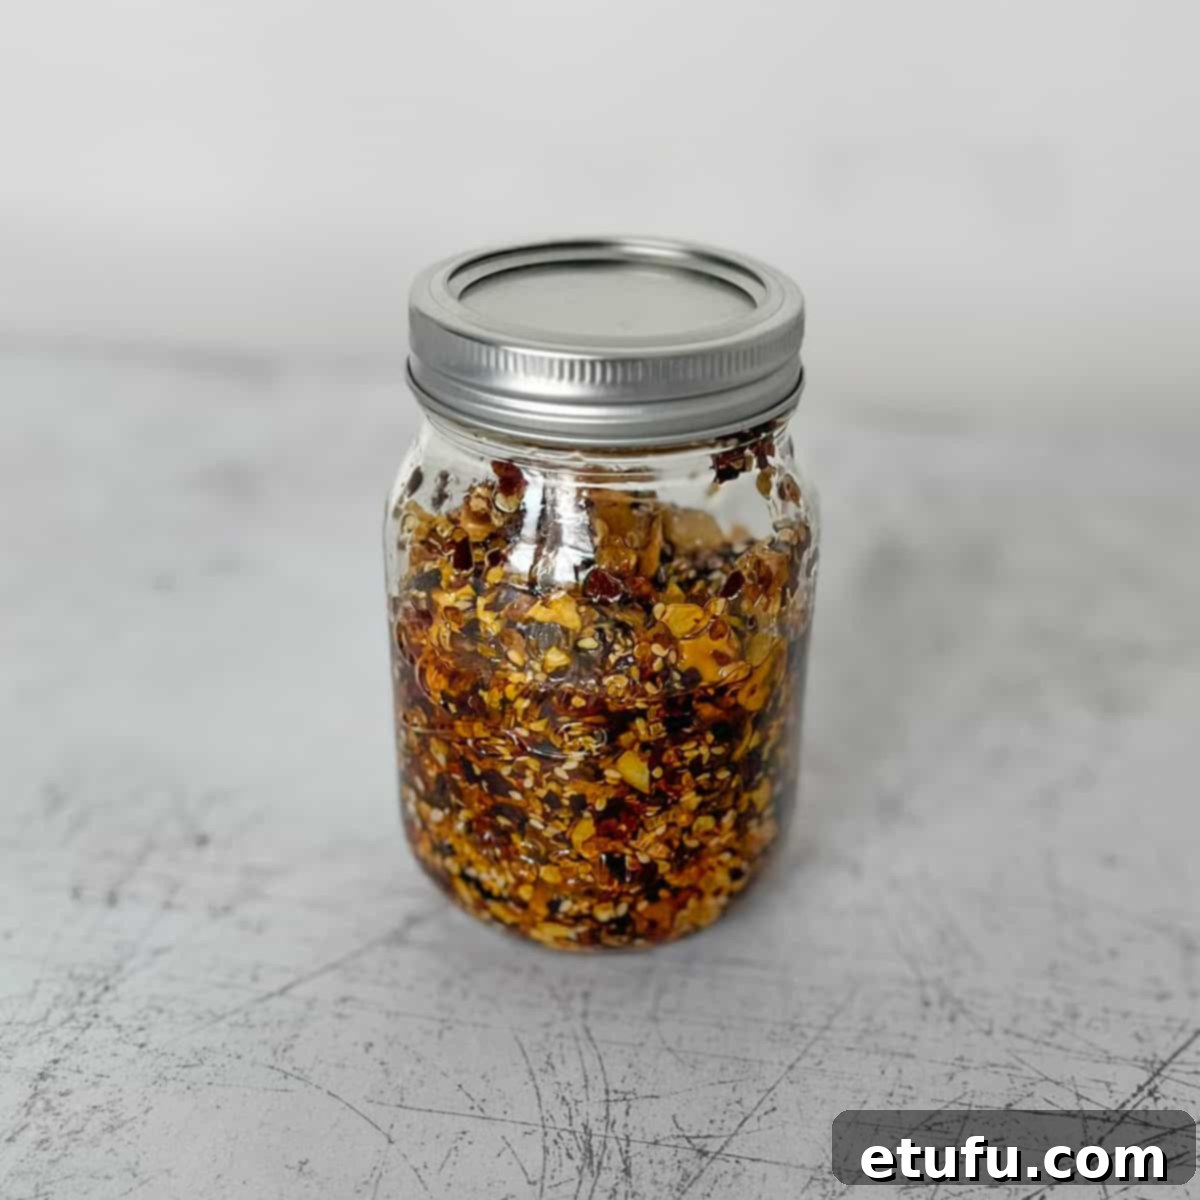
To ensure the safety and longevity of your delicious homemade crispy chilli oil, proper storage is essential. Transfer the completely cooled chilli crisp into a clean, sterilized, airtight glass jar. Store this jar in the refrigerator, where it will maintain its quality and freshness for up to a month. Because this recipe uses fresh ingredients like garlic, shallots, and ginger, refrigeration is crucial to prevent bacterial growth and ensure food safety. You might notice the oil solidifying or becoming very thick when cold; this is entirely normal for oils like peanut or sunflower oil. Simply take the jar out of the fridge about 10-15 minutes before you plan to use it, and the oil will gradually loosen up, allowing for easy scooping and stirring.
Frequently Asked Questions About Crispy Chilli Oil
While you technically can omit them, doing so will significantly diminish the complex flavor and irresistible crispy texture that defines authentic crispy chilli oil. These aromatics are fundamental to its character. If you’re truly in a bind, you could stir store-bought crispy fried onions into the chilli base before pouring the oil, which would add some texture. However, it won’t replicate the depth and aroma of freshly fried shallots. As for the garlic, we strongly advocate for keeping it in the oil infusion. It provides a savory sweetness and aromatic foundation that is simply irreplaceable. Adding extra dried garlic powder to the chilli base isn’t a true substitute for the fresh ingredient’s nuanced flavor and texture after infusion.
Due to the moisture content present in fresh ingredients like garlic, ginger, and shallots, it is always safest to store your homemade crispy chilli oil in the refrigerator. This minimizes the risk of bacterial growth and extends its shelf life significantly.
Bitterness in chilli oil is almost always a sign that the oil got too hot, or that the garlic and shallots were overcooked. Fresh garlic, in particular, transitions very quickly from a delightful golden crisp to an unpleasantly bitter burnt state. Maintaining a consistently low and gentle heat during the infusion process is crucial to prevent this. Always aim for a warm, golden blonde color, and remove the pan from the heat promptly once achieved.
Our particular recipe leans towards a more crunchy, less oily consistency, prioritizing the crispy bits. If you find your batch feels too dry for your preference, you can easily adjust this for your next batch by adding a little more oil (up to 1½ cups) at the start of the infusion process. However, proceed slowly and add incrementally, as too much oil can make the chilli crisp greasy and potentially diminish the crunch. Finding your perfect oil-to-crunch balance might take a slight adjustment over a couple of batches.
Absolutely not! This is a completely normal occurrence, especially for oils like peanut or sunflower oil, which have higher saturated fat content and naturally solidify when exposed to cold temperatures. Your chilli oil is perfectly fine. Simply remove the jar from the refrigerator and let it sit at room temperature for about 10-15 minutes, or until the oil softens sufficiently for you to stir and scoop it easily.
The primary enemy of crispiness is moisture. To maintain that satisfying crunch, ensure that all fried aromatic bits (garlic, shallots, ginger) are completely cool and thoroughly dry before you mix them back into the chilli oil mixture. Furthermore, always use a clean, dry spoon every single time you dip into your jar. Introducing even a tiny amount of moisture from a wet spoon can significantly accelerate the loss of crispiness over time.
Recipe

Easy Crispy Chilli Oil with Roasted Peanuts
This recipe closely mimics the quality of premium store-bought versions, offering the added benefit of knowing exactly what goes into it. It’s a flavor powerhouse, easy to make, and utilizes common pantry staples.
Print Recipe
Save
Saved!
Side Dish
Chinese, International
15 minutes
15 minutes
5 minutes
35 minutes
1
300ml jar
2919
kcal
Maretha Corbett
Prevent your screen from going dark
Equipment
- 1 heavy-based saucepan
- 1 large heatproof bowl
- Storage jars of choice
Ingredients
For the chilli base
-
▢
½
cup
chilli flakes –
everyday chilli flakes, or Gochugaru, or Sichuan -
▢
½
teaspoon
salt -
▢
2
teaspoons
sugar -
▢
1
tablespoon
mushroom powder –
or MSG, or 1 x crumbled chicken stock cube -
▢
2
teaspoons
soy sauce -
▢
1
teaspoon
rice vinegar -
▢
3
tablespoons
toasted sesame seeds -
▢
4
tablespoons
roasted peanuts, chopped –
measured before chopping
For the oil infusion
-
▢
1
cup
peanut oil (or other neutral oil) –
up to 1½ if you like more oil -
▢
2.6
ounces
(75g) shallot, finely sliced in rings or half rings -
▢
10
garlic cloves, finely sliced -
▢
1
inch
(2.5cm) fresh ginger, finely sliced -
▢
1
cinnamon stick -
▢
2
star anise -
▢
1
teaspoon
black peppercorns –
or Sichuan peppercorns
Instructions
Mix the chilli base
- Add the chilli flakes, salt, sugar, mushroom powder, soy sauce, vinegar, sesame seeds and chopped peanuts to a large heatproof bowl.½ cup chilli flakes,
½ teaspoon salt,
2 teaspoons sugar,
1 tablespoon mushroom powder,
2 teaspoons soy sauce,
1 teaspoon rice vinegar,
3 tablespoons toasted sesame seeds,
4 tablespoons roasted peanuts, chopped - Stir everything together and set the bowl somewhere safe. Once the hot oil is poured over, it may splatter (we place ours inside the kitchen sink).
Infuse the oil
- Add oil, shallots, garlic, ginger, cinnamon, star anise and peppercorns to a saucepan.1 cup peanut oil (or other neutral oil),
2.6 ounces (75g) shallot, finely sliced in rings or half rings,
10 garlic cloves, finely sliced,
1 inch (2.5cm) fresh ginger, finely sliced,
1 cinnamon stick,
2 star anise,
1 teaspoon black peppercorns - Set it over medium-low heat. Let everything bubble away gently for 13-15 minutes, giving it a stir now and then. The goal is golden blonde, not brown, and definitely not burnt.
IMPORTANT: Keep a very close eye on the colour!
Strain
- Pour the hot oil through a sieve directly onto the chilli base. Be careful, it will sizzle and bubble.
- Tip everything left in the sieve onto a plate lined with kitchen paper and spread it out to cool and crisp up – about 10 minutes.
- Once it’s cooled completely, fish out the cinnamon stick, star anise, and most of the peppercorns (a few stragglers are fine). You can pull out the ginger too if you’re not keen on the texture.
Combine
- Stir the crispy garlic, shallots, and any ginger you’re keeping back into the chilli mixture.
- Let it cool completely before jarring. Store it in the fridge for up to a month.
Notes
Top tips
1. Slice thin, but steady – don’t rush the aromatics:
The magic in chilli crisp is in the texture of the garlic, shallots, and ginger. Use a sharp knife and take your time slicing thin, even pieces.
Uneven chunks can burn or undercook, ruining that perfect crunch.
Bonus: a mandoline with a guard makes this foolproof!
2. Temperature control is everything – low and slow wins the race:
Your stovetop’s “medium-low” varies wildly from mine.
Use a heat diffuser or lowest heat setting you can muster to gently crisp the garlic and shallots.
If you see smoke or hear crackling like a bonfire, dial it back immediately.
No need to heat the oil first – heat everything together:
Add the oil, garlic, shallots, ginger, and spices to the pan cold and warm them gently together.
This slower, gradual heat helps the aromatics release flavour evenly without burning, giving you that perfect golden crunch.
4. Use a heavy-bottomed pan:
Thin pans heat unevenly and make it harder to keep the garlic golden instead of burnt. A heavy pan spreads the heat more evenly.
5. Patience with cooling – don’t rush the crunch:
Let the crispy bits cool fully on paper towels or a plate, spread out in a thin layer. If you skip this, your chilli crisp could turn soggy instead of crunchy.
6. Test the oil temperature before pouring:
Use a tiny pinch of chilli flakes as a thermometer. If they crackle gently, perfect.
If they explode in a violent sizzle, the oil is too hot and will burn your ingredients and bitterness will creep in.
7. Keep an eye on residual heat:
After removing from heat, the oil will keep cooking the aromatics in the pan. If you’re unsure, remove pan from burner a little early rather than late.
8. Store in small batches:
You might want to keep smaller jars, so if something goes off (don’t stick dirty spoons into your jar!), you don’t waste the whole batch.
Plus, it means fresher chilli crisp more often!
**Nutritional data disclaimer**
Please keep in mind that the nutritional information provided below is calculated by a third party and we cannot guarantee the accuracy. We try our best to give you the most accurate information, but we do not take responsibility for errors that may be present. Also, the nutritional value of the recipe may change depending on the exact brands and products used. We recommend that you consult with a qualified healthcare professional or registered dietitian for personalised advice on your dietary needs.
Nutrition
Calories:
2919
kcal
|
Carbohydrates:
114
g
|
Protein:
39
g
|
Fat:
279
g
|
Saturated Fat:
47
g
|
Polyunsaturated Fat:
96
g
|
Monounsaturated Fat:
123
g
|
Cholesterol:
0.2
mg
|
Sodium:
5155
mg
|
Potassium:
3399
mg
|
Fiber:
57
g
|
Sugar:
24
g
|
Vitamin A:
37111
IU
|
Vitamin C:
17
mg
|
Calcium:
850
mg
|
Iron:
30
mg
For essential food safety advice, including comprehensive guidance on food allergies, always consult official food safety resources.
