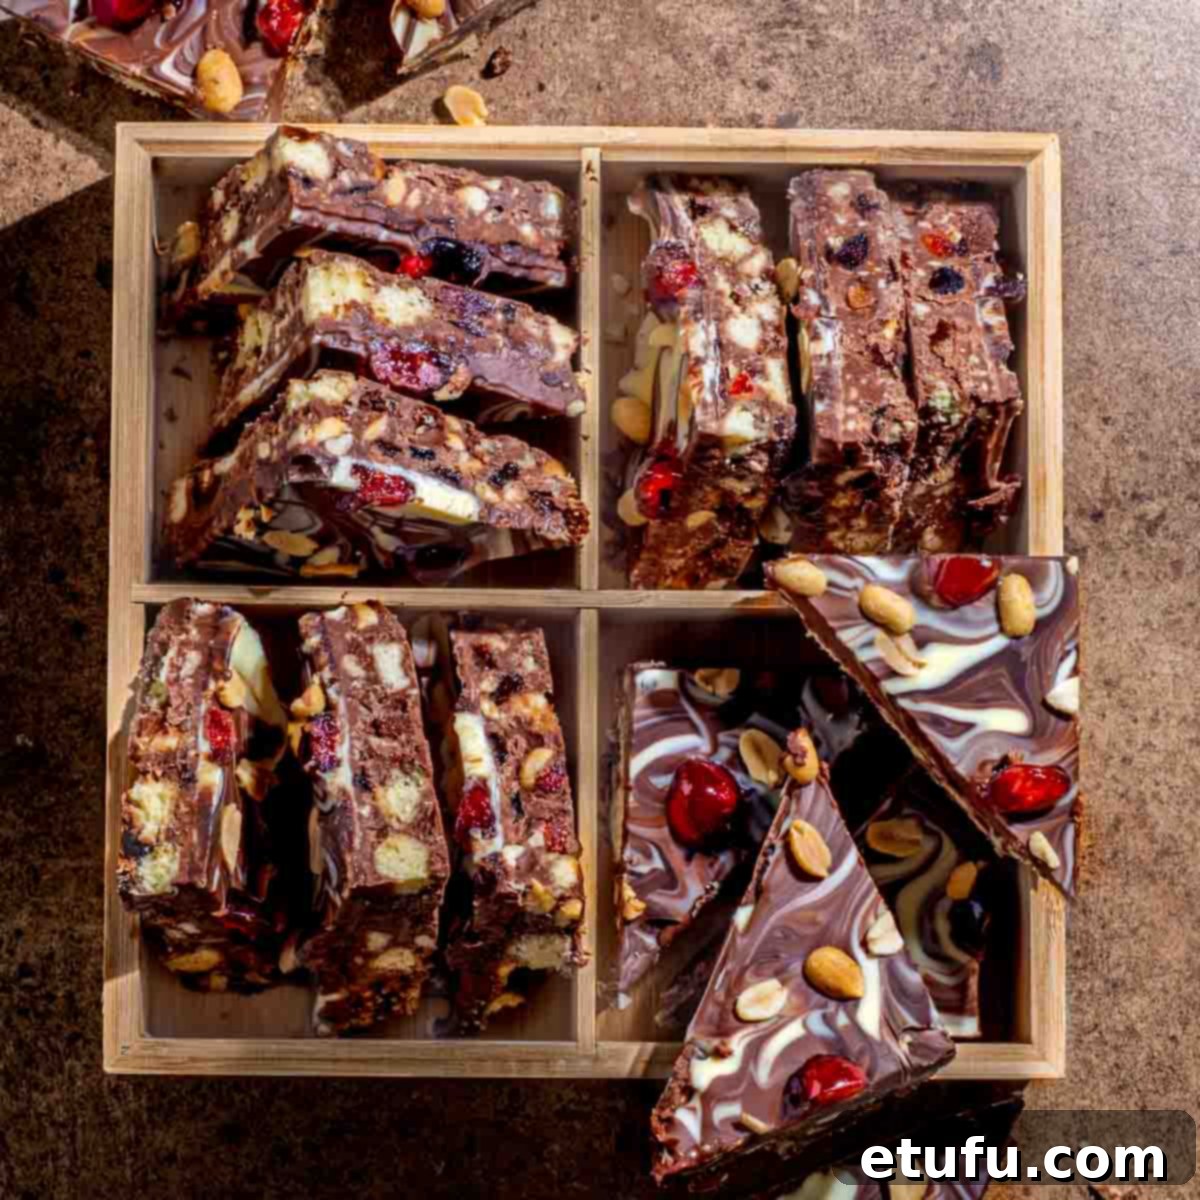
The Ultimate Guide to Scottish Chocolate Tiffin: An Easy No-Bake Delight
Embark on a delightful culinary journey to the United Kingdom with a classic Scottish sweet treat that’s as simple to make as it is utterly delicious: Chocolate Tiffin. Often mistaken for its Indian namesake, which is a light afternoon meal, Scottish chocolate tiffin is a distinctly different, rich, no-bake traybake that has charmed generations. Imagine a delightful medley of crushed biscuits, plump raisins (or other fruits), and luscious melted chocolate, all combined into a fudge-like slice. It’s a confectionary masterpiece born in the early 1900s from a bakery in Troon, Scotland, and has remained a cherished part of Scottish tradition ever since.
This crowd-pleasing dessert requires no oven, making it incredibly accessible for bakers of all skill levels. It’s a staple in quaint Scottish cafes, a celebratory dish during Burns Night festivities, a popular item at bake sales, and an essential component of a leisurely afternoon tea. Its effortless preparation and irresistible flavor make it a true sweetheart among sweet treats.
In this comprehensive guide, we’re not just sharing a recipe; we’re elevating the traditional chocolate tiffin experience. We’re moving beyond the more common use of cocoa powder, opting instead for a generous amount of pure milk chocolate to create an intensely rich and smooth base. To introduce a sophisticated balance of flavors and textures, we’re incorporating a subtle hint of nuttiness with salted peanuts, which perfectly complements the sweetness. For a burst of vibrant color and a delightful chew, we’re adding succulent glace cherries, scattered like tiny ruby gems throughout the mixture. The final, yet crucial, touch that truly celebrates its Scottish heritage is replacing the conventional digestive biscuits with buttery shortbreads, infusing every bite with a melt-in-your-mouth richness unique to Scotland.
Below, you’ll find a detailed, step-by-step guide to crafting this exquisite Scottish Chocolate Tiffin, ensuring a perfect result every time. Get ready to create a truly memorable no-bake dessert that will captivate friends and family alike.
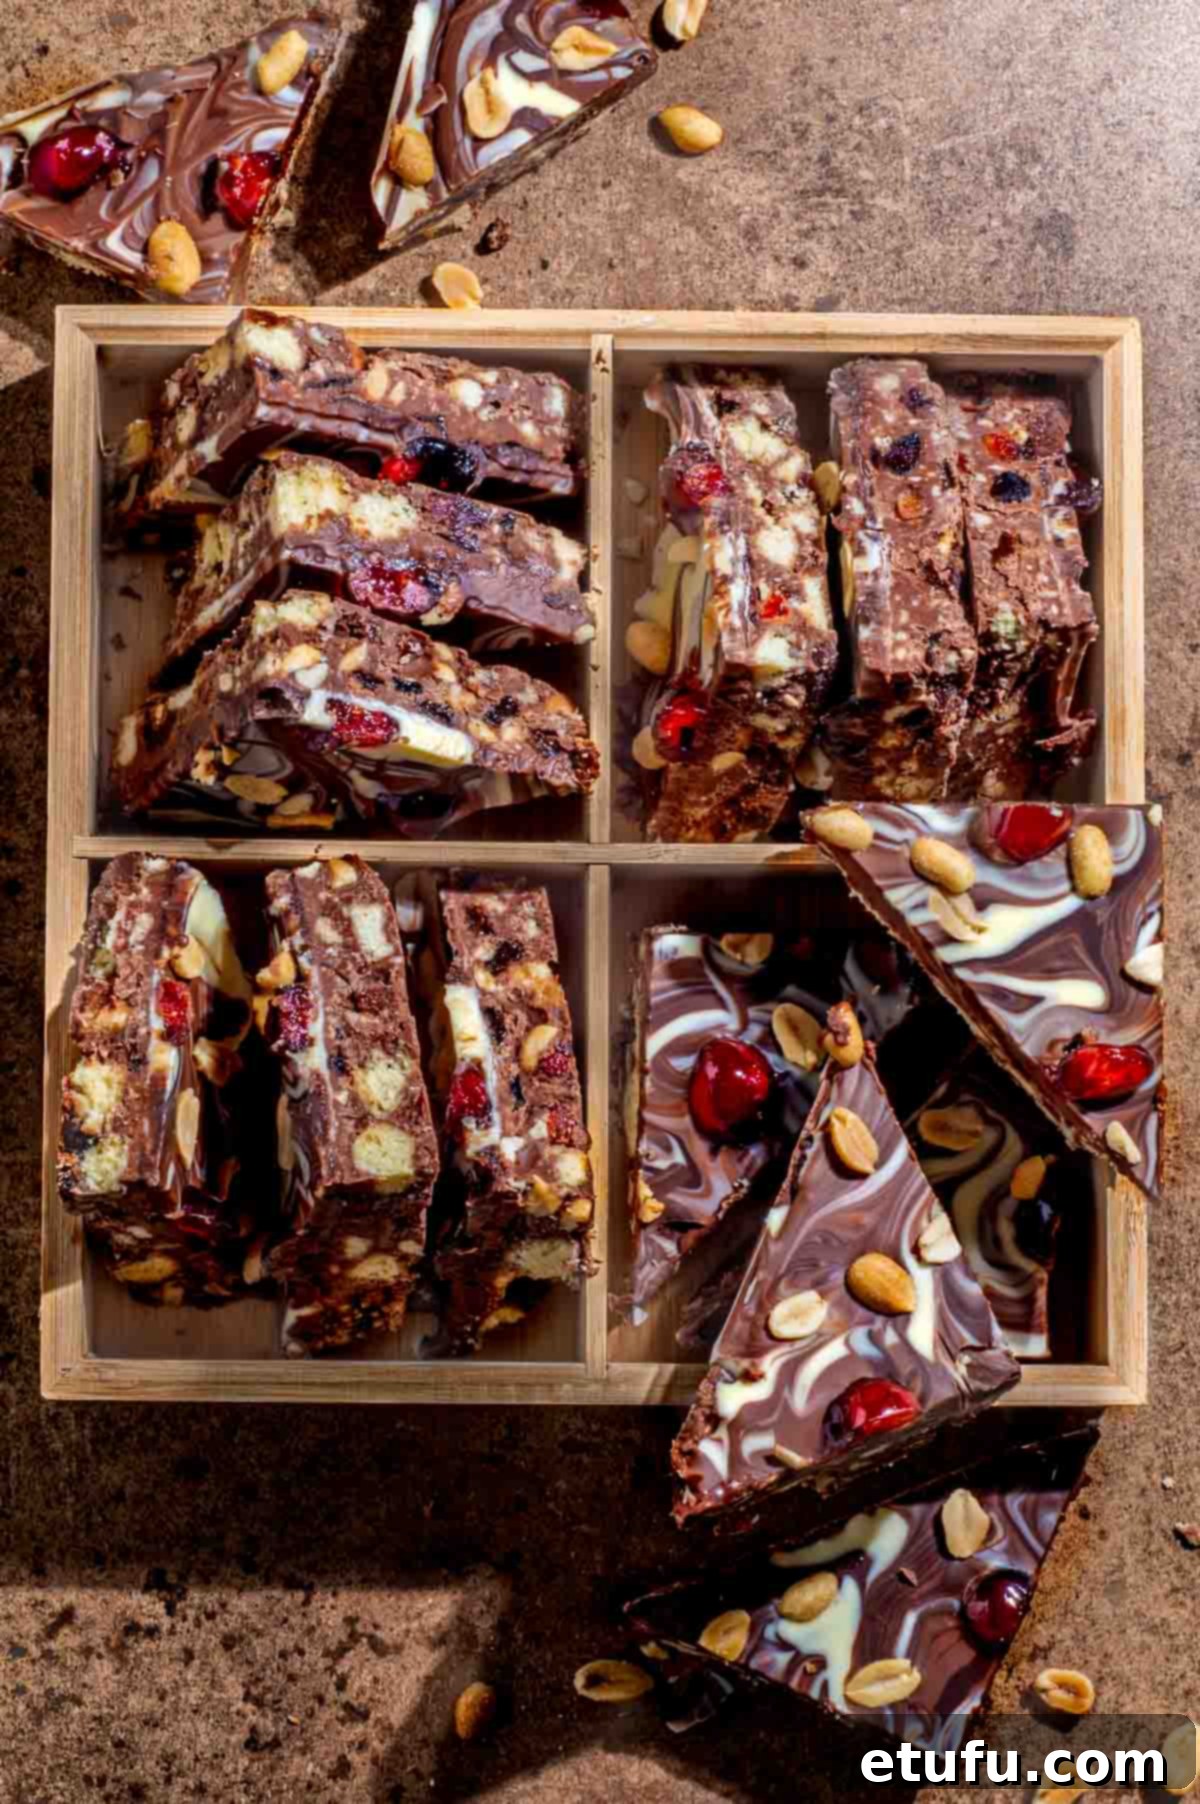
Fast Facts – The United Kingdom

| Location | The United Kingdom (UK) is an island nation situated in North-western Europe, renowned for its rich history, diverse culture, and stunning landscapes. It comprises four distinct countries: England, Scotland, Wales, and Northern Ireland. Its strategic location has historically played a significant role in global trade and exploration. |
| Capital | London, a vibrant global city, serves as the capital of both England and the United Kingdom. It is a hub for finance, culture, fashion, and history, attracting millions of tourists each year with iconic landmarks like the Tower of London, Buckingham Palace, and the British Museum. |
| Language | While English is the most widely spoken language, the United Kingdom boasts a fascinating linguistic tapestry. In addition to Welsh, prominently spoken in Wales, the UK is home to twelve other indigenous languages, including the melodic Gaelic of Scotland, the ancient Cornish language, the unique Manx, and the distinct Scots language. Furthermore, three distinct sign languages are recognized, reflecting a commitment to inclusivity. Cornish, unfortunately, remains among the least commonly used languages, with efforts underway to revitalize it. |
| Population | As of recent estimates, the United Kingdom has a population of approximately 67 million people. This diverse population contributes to the UK’s multicultural fabric, making it a melting pot of traditions, cuisines, and perspectives from around the world. |
| Trivia | Edinburgh, the enchanting capital of Scotland, is celebrated not only for its architectural grandeur and vibrant arts scene but also for its spine-chilling history. Its ancient cobbled streets and historic closes are steeped in eerie tales and ghostly legends, earning it a reputation as one of the UK’s most haunted cities. Edinburgh Castle, perched majestically atop a volcanic rock, is particularly renowned for its paranormal activity. Visitors and staff alike have reported encounters with a phantom headless drummer, the spectral figures of wandering prisoners in its dungeons, and even the ghost of a loyal dog. These chilling stories add another layer of intrigue to Scotland’s rich cultural heritage. |
Why You’ll Adore This Easy Chocolate Tiffin Recipe
This isn’t just another no-bake recipe; it’s a celebration of simplicity, flavor, and texture. Here’s what makes our elevated Chocolate Tiffin recipe truly special and why it’s destined to become a firm family favorite:
- Minimal Prep Time: Who doesn’t love a delicious dessert that comes together in a flash? This recipe requires just 15 minutes of active preparation, making it perfect for busy schedules, impromptu gatherings, or when a sweet craving strikes without warning. The quick prep means more time enjoying and less time slaving in the kitchen.
- Pure Chocolate Indulgence: Unlike many traditional tiffin recipes that rely on cocoa powder, our version goes all-in with pure, rich milk chocolate for the base. This ensures an unparalleled depth of flavor and a sumptuously smooth, melt-in-your-mouth texture that cocoa powder simply can’t replicate. It’s a truly decadent chocolate experience.
- Perfectly Balanced Sweetness with a Crunch: We’ve thoughtfully incorporated salted peanuts into the mixture. The subtle saltiness provides a brilliant contrast to the sweetness of the chocolate and dried fruits, preventing the tiffin from being overly sugary. Furthermore, the peanuts add a delightful crunch, introducing an exciting textural dimension to every bite.
- Mesmerizing Marbled Topping: Learn the secret to creating a stunning, swirled marble chocolate topping that transforms your tiffin from a simple traybake into an elegant showstopper. This artistic touch is surprisingly easy to achieve and adds a professional flourish that will impress your guests.
- Endlessly Customizable: This recipe is incredibly versatile, allowing you to tailor it to your personal preferences or what you have on hand. Don’t like raisins? Swap them! Want different nuts? Go for it! This “fridge cake” is designed for creativity, inviting you to experiment with your favorite biscuits, fruits, and nuts for a unique twist every time.
- Globally Accessible – No Golden Syrup Needed: We understand that certain specialty ingredients can be hard to find depending on your location. That’s why our recipe cleverly avoids the use of golden syrup, a common ingredient in many British traybakes, making it globally accessible without compromising on flavor or texture. This ensures anyone, anywhere, can enjoy the magic of homemade chocolate tiffin.
Key Ingredient Notes and Smart Substitutions
To create the most delicious and authentic Scottish Chocolate Tiffin, understanding your ingredients is key. While the recipe is forgiving, selecting the right components can truly elevate your end result. Below, we delve into the core ingredients and offer smart substitutions to cater to various tastes and dietary needs.
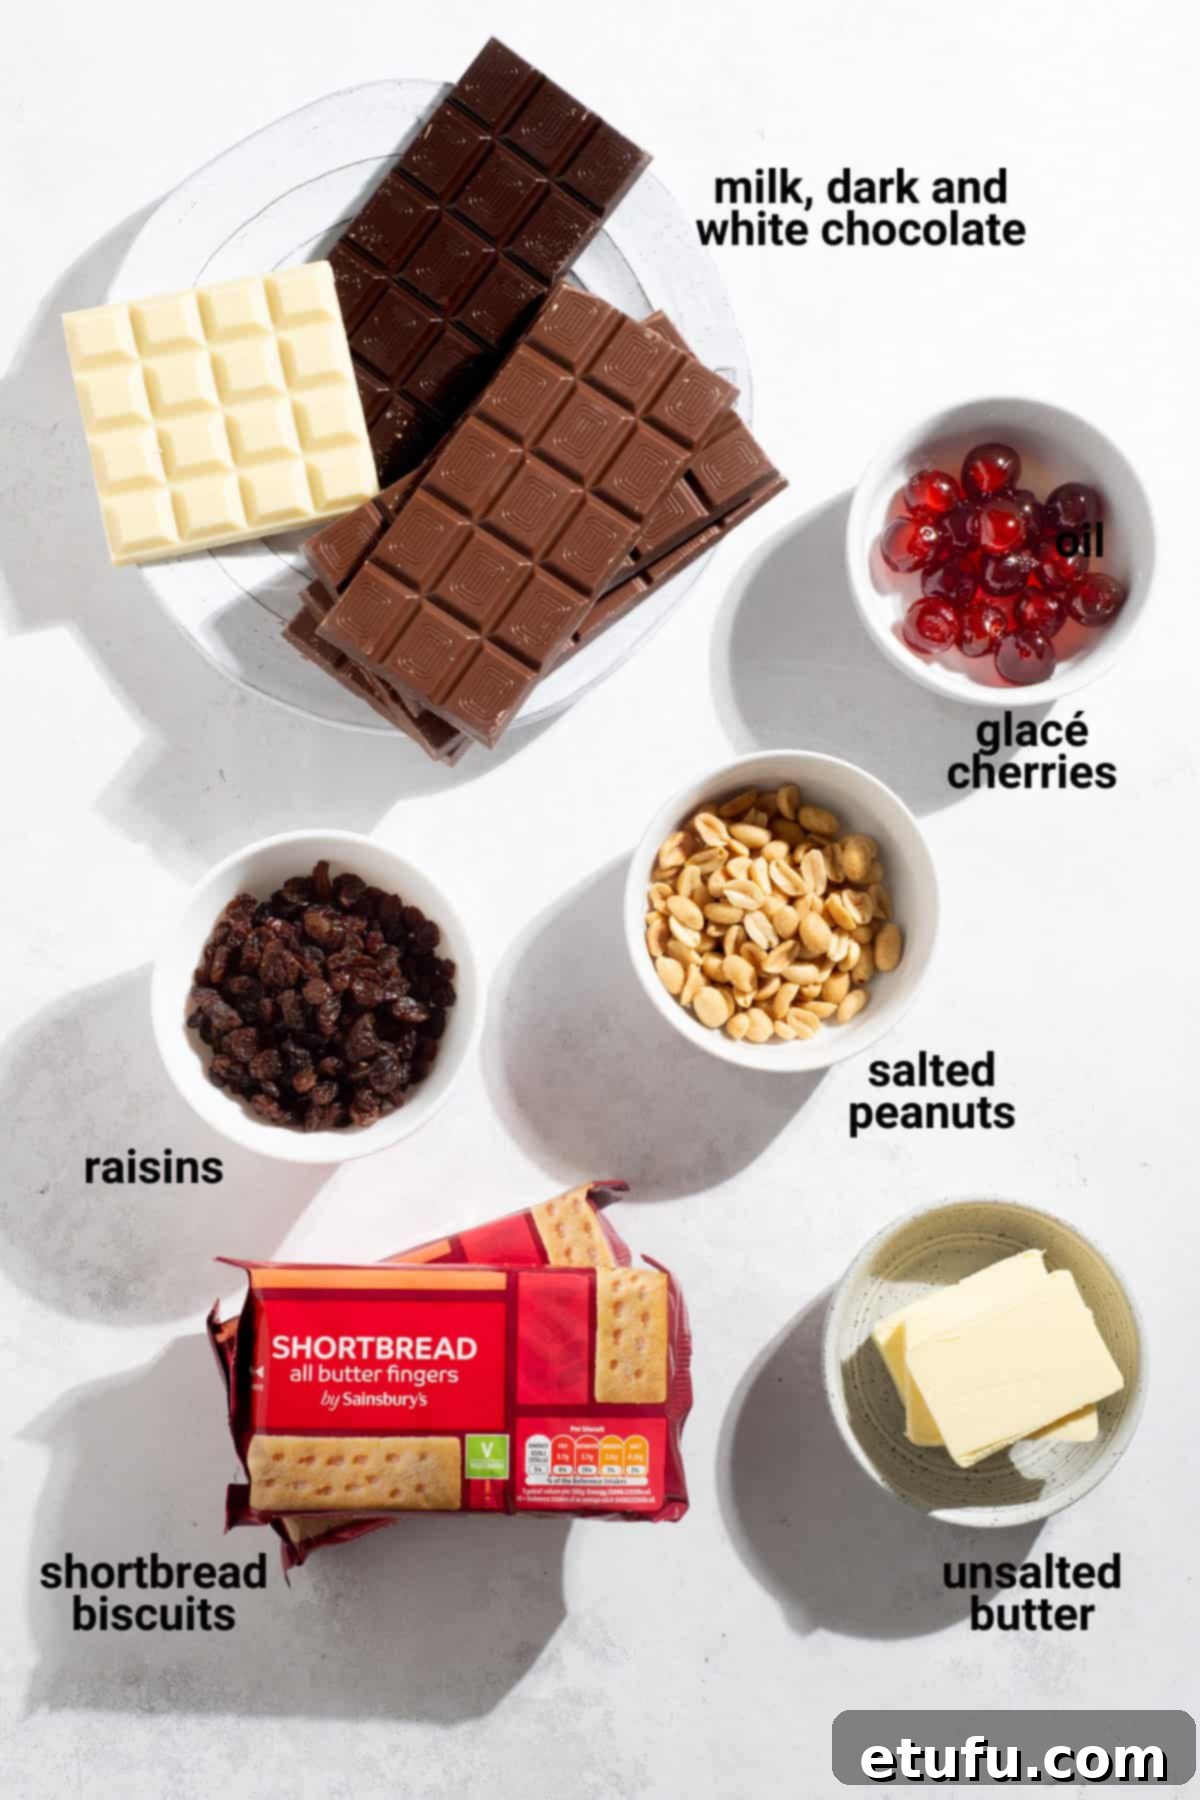
**For the precise measurements and complete list of ingredients, please refer to the detailed recipe card at the bottom of this post.
The Chocolate Selection
Chocolate is undeniably the star of our tiffin. This recipe calls for a substantial amount of chocolate slabs: a generous 400g of milk chocolate for the rich, decadent base, and an additional 100g each of milk, white, and dark chocolate to craft the visually stunning marbled topping. Don’t feel pressured to splurge on gourmet brands! Budget-friendly supermarket chocolate, such as Aldi’s affordable 100g slabs, works absolutely wonderfully. In the tiffin base, the chocolate primarily acts as a binder and flavor carrier for the other delightful add-ins. Its primary role is to create that luscious, cohesive texture.
However, if you’re in the mood to treat yourself, a higher-quality chocolate like Lindt will certainly lend an even more luxurious taste to your tiffin. The choice ultimately depends on your budget and desired level of indulgence. For the topping, the different chocolate types (milk, white, dark) create beautiful contrast for the marble effect, so choose varieties with good melting properties.
Choosing Your Biscuits: The Shortbread Advantage
Traditionally, many tiffin recipes feature plain digestive biscuits. However, we’re deliberately shaking things up by opting for buttery shortbreads – a proud nod to Scottish culinary heritage. Shop-bought shortbreads are perfectly fine and deliver an exceptional flavor and texture. Unlike digestives, shortbreads contribute a rich, buttery depth that beautifully complements the chocolate.
Crucially, we don’t advocate for crushing your biscuits into fine crumbs. Instead, we recommend breaking them into small, irregular pieces by hand or chopping them with a knife. This intentional approach ensures you get delightful chunky bits in every bite, adding an extra layer of satisfying crunch and textural interest that sets this tiffin apart.
If shortbread isn’t available or you prefer a different profile, feel free to substitute with other plain biscuits. Excellent alternatives include classic digestives, Graham Crackers for a hint of vanilla, or Rich Tea biscuits. For those seeking a distinctive, caramelized flavor, experiment with Lotus Biscoff biscuits. In fact, if you love Biscoff, you might enjoy this recipe for Lotus slices, which shares a similar no-bake methodology and delightful texture with tiffin bars.
Delightful Add-ins: Flavor and Texture Boosters
The beauty of tiffin lies in its versatility when it comes to inclusions. These “add-ins” are where you can truly personalize your fridge cake:
- Raisins: These classic dried fruits add a chewy sweetness. They can be easily swapped with sultanas or golden raisins for a slightly different flavor profile. If dried fruit isn’t your preference, they can be omitted entirely without detracting from the overall deliciousness of the tiffin.
- Glace Cherries: A secret indulgence for many, glace cherries contribute a lovely juiciness, vibrant color, and a distinctive candied sweetness. They sit elegantly like tiny ruby gems within the tiffin. If glace cherries aren’t to your taste, feel free to substitute them with dried cherries, dried cranberries (for a tangier note), or even chopped dried apricots.
- Salted Peanuts: The salted peanuts are a masterstroke in this recipe. They introduce a crucial balance to the inherent sweetness of the chocolate and fruit, preventing it from becoming cloyingly rich. Their satisfying crunch also adds a fantastic textural contrast. If peanuts aren’t suitable, you can substitute them with other nuts like pistachios for a vibrant green hue, creamy cashews, rich pecans, or earthy walnuts. Choose roasted and salted nuts for the best flavor balance.
How to Make Perfect Chocolate Tiffin: A Step-by-Step Guide
Creating this irresistible Scottish Chocolate Tiffin is a straightforward and rewarding process. Follow these detailed steps to ensure a flawless, delicious result every time. Remember, the key is careful preparation and patience during the setting time.
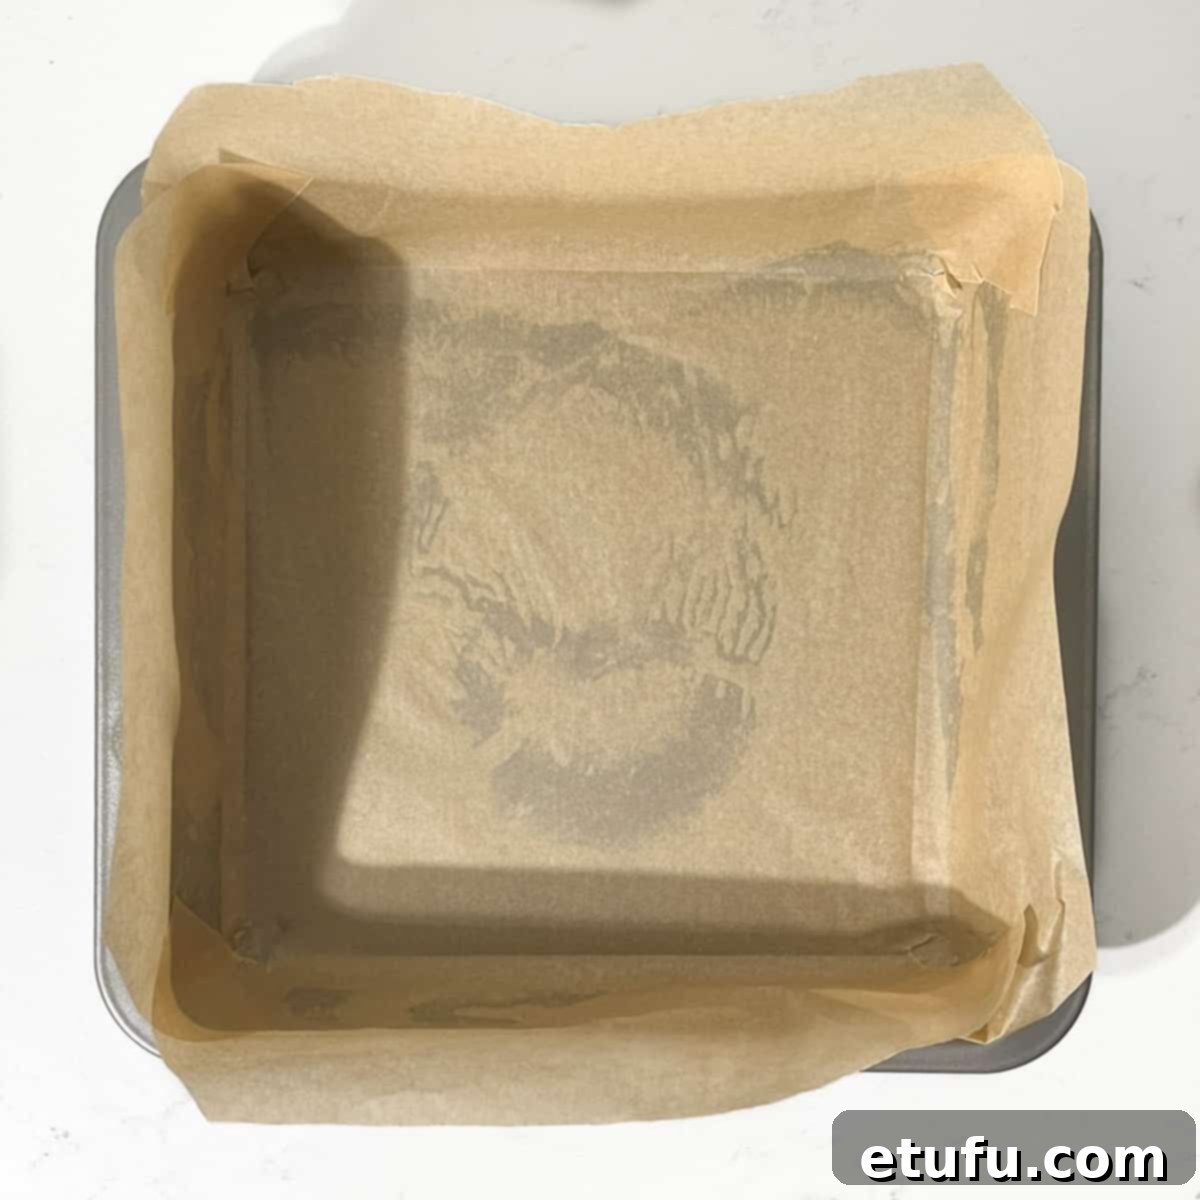
- Prepare Your Baking Tin: Begin by lining a 20cm x 20cm (8″ x 8″) square baking pan with parchment paper. This step is absolutely essential for easy removal of your set tiffin. Make sure to leave a slight overhang of paper on all sides; this will act as “handles” to effortlessly lift the tiffin out of the pan once it’s firm.
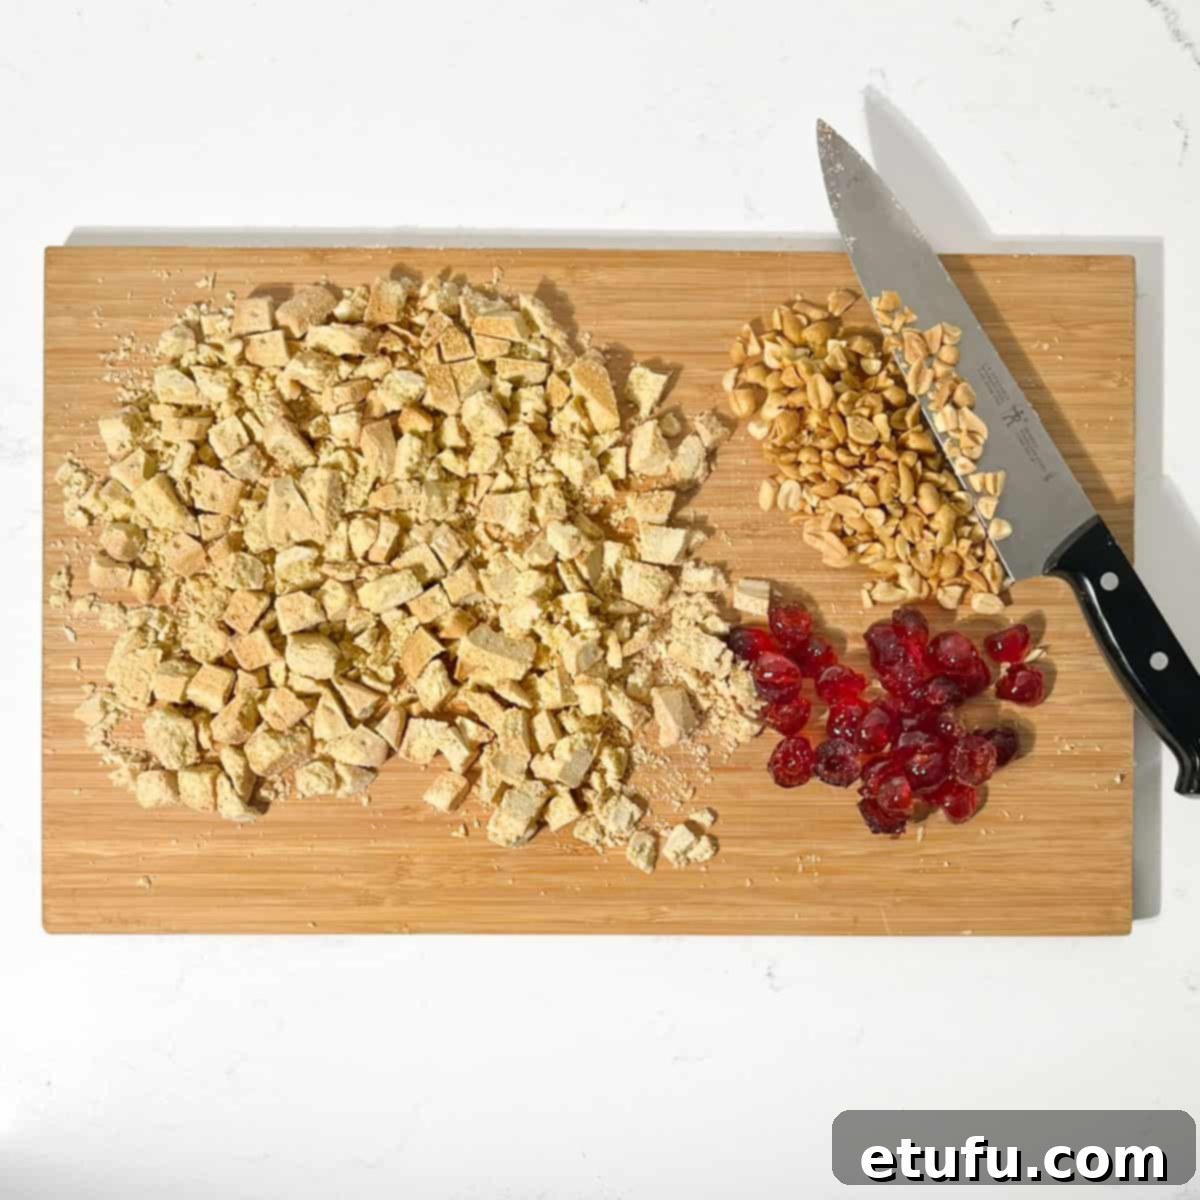
- Chop Your Dry Ingredients: On a clean cutting board, roughly chop the shortbread biscuits into varying small to medium-sized pieces. Don’t aim for fine crumbs; embrace the chunky texture! Next, chop the glace cherries into smaller bits and coarsely chop the salted peanuts. Set all these prepared ingredients aside in a bowl for easy mixing later.
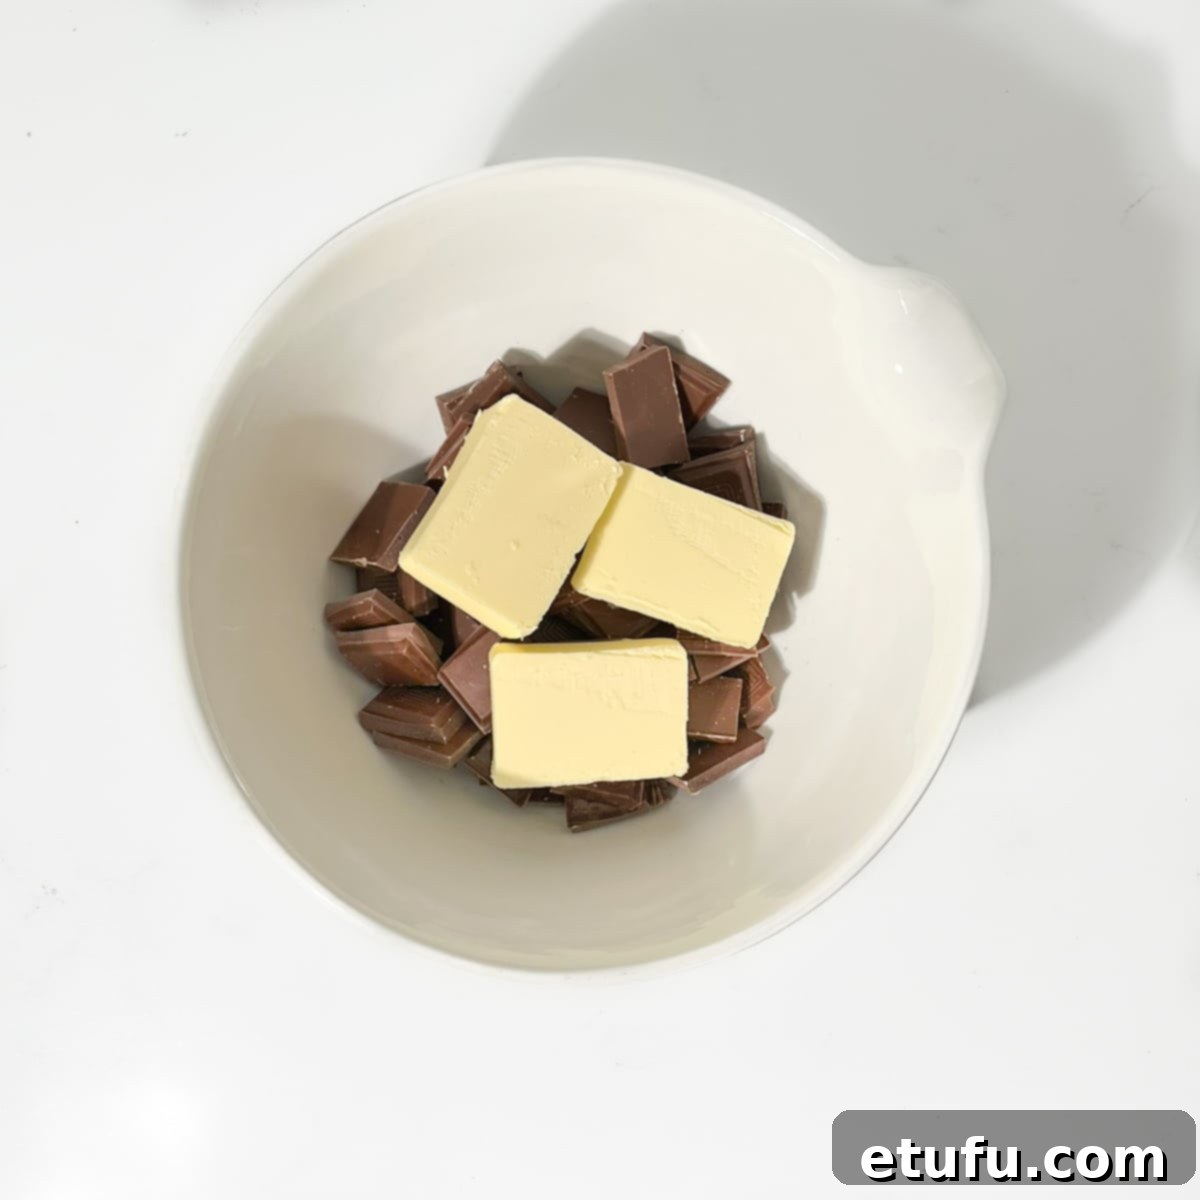
- Melt the Chocolate Base: Break the 400g of milk chocolate into smaller pieces and place them in a large, microwave-safe mixing bowl. Add the unsalted butter to the same bowl.
- Achieve Smooth Melt: Microwave the chocolate and butter mixture in 30-second intervals. After each burst, remove the bowl and stir thoroughly with a sturdy spoon or spatula. Continue this process until both the butter and chocolate are completely melted and combined into a smooth, glossy mixture. Be careful not to overheat the chocolate, as this can cause it to seize.
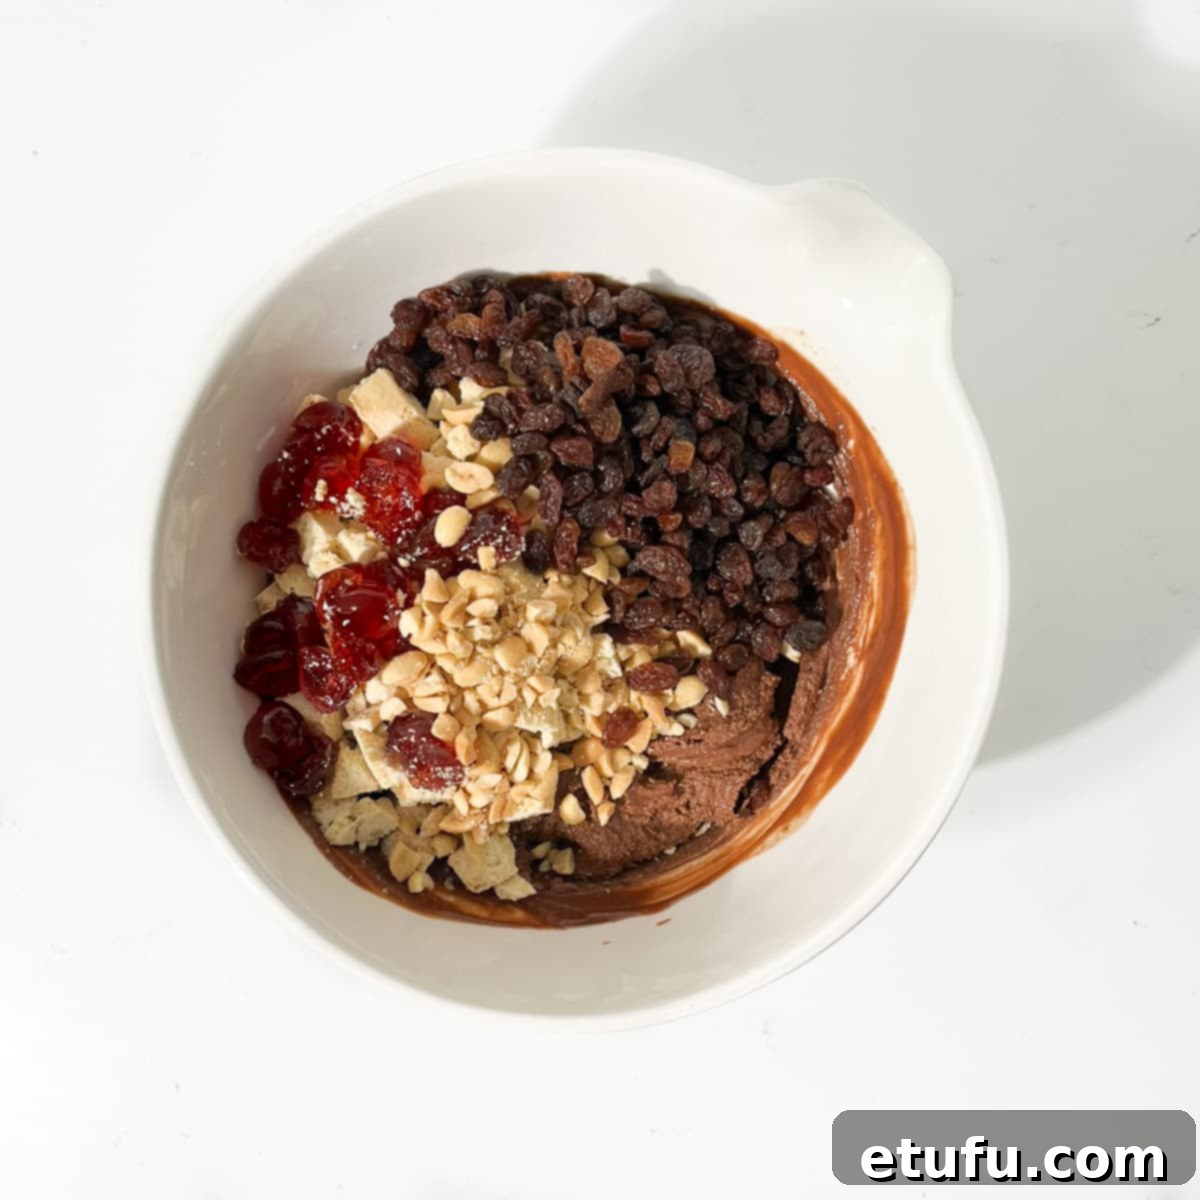
- Combine Ingredients for the Base: Add all your pre-chopped shortbread pieces, glace cherries, salted peanuts, and raisins to the bowl with the melted milk chocolate and butter mixture.
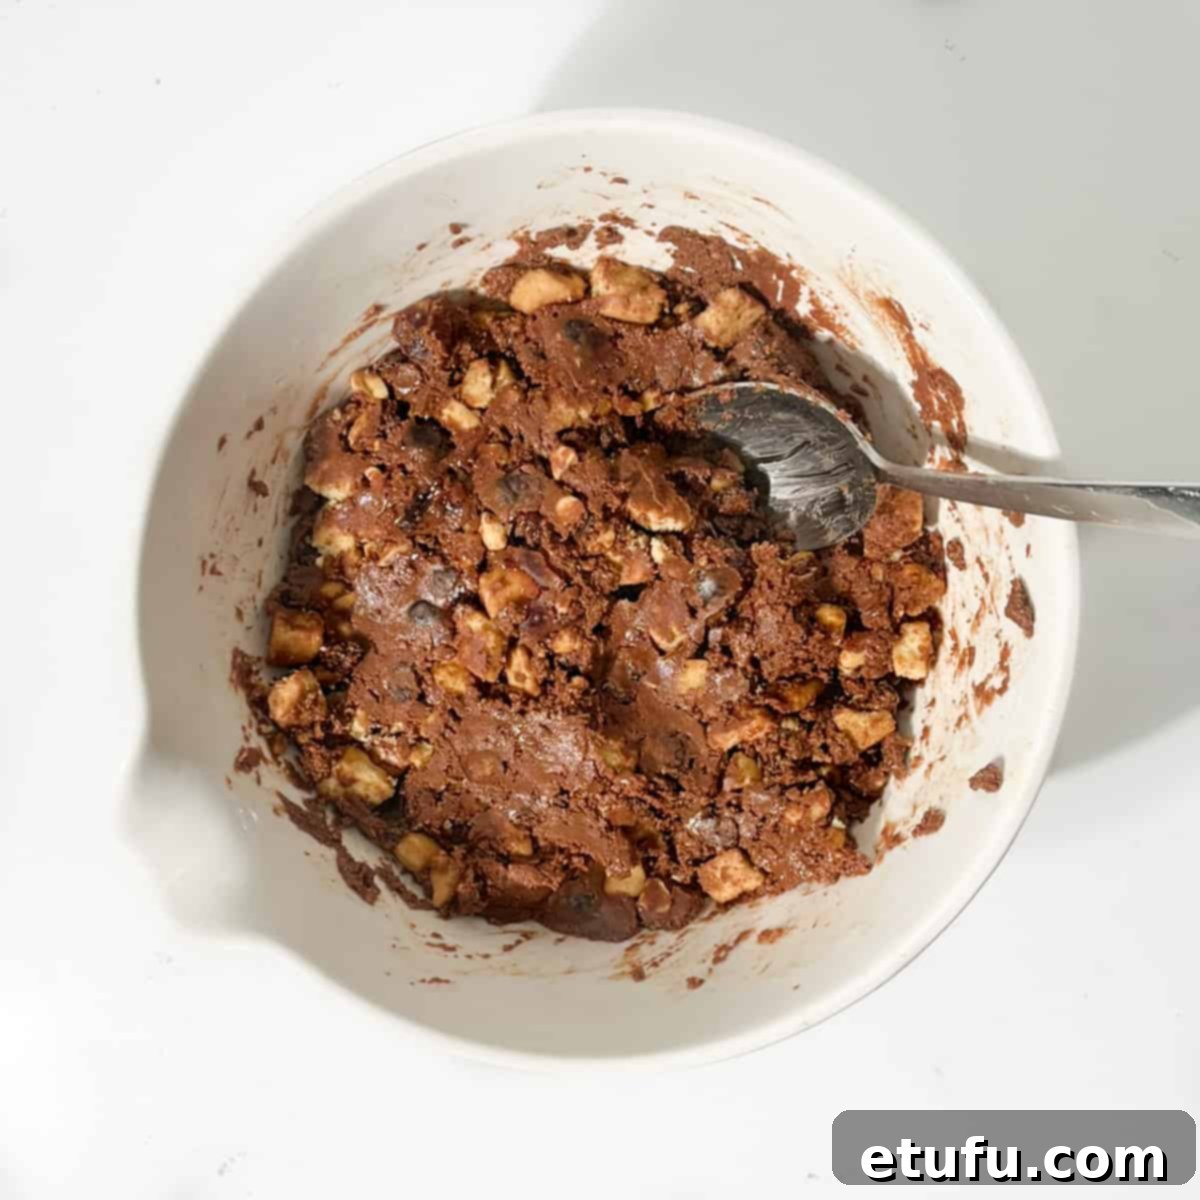
- Mix Thoroughly: Fold all the ingredients together with enthusiasm! Don’t be afraid to use a bit of “elbow grease” here; the mixture is quite thick, and a robust stirring motion is necessary. Ensure that every single piece of biscuit, fruit, and nut is thoroughly coated in the rich chocolate mixture. A firm squishing motion against the side of the bowl with a large, sturdy spoon or spatula works wonders to achieve an even coating.
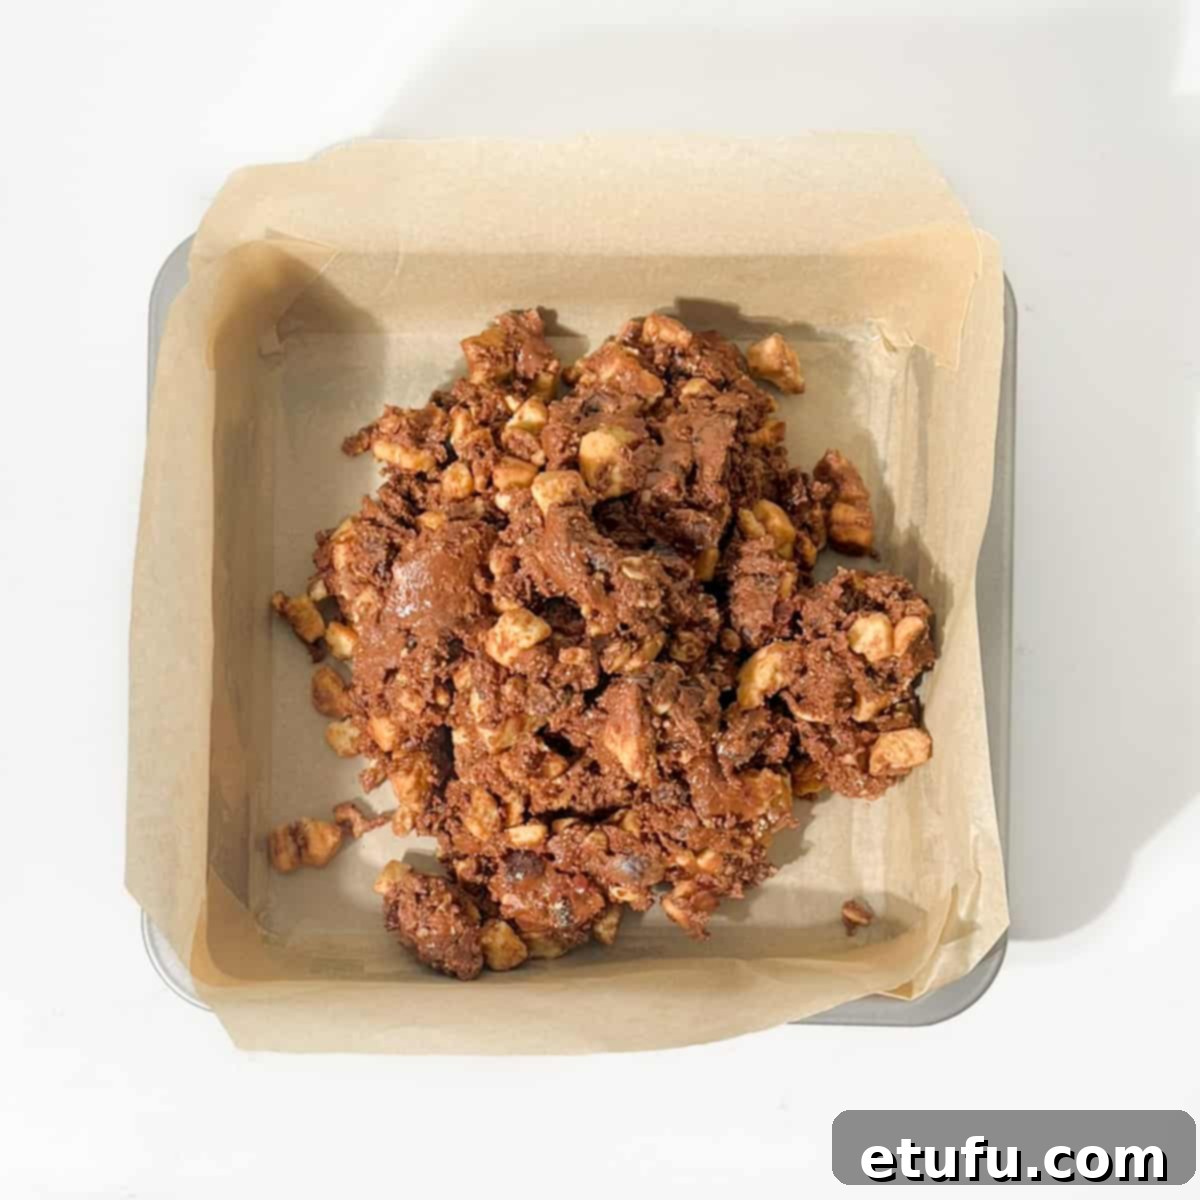
- Press into the Tin: Carefully transfer the entire tiffin biscuit mixture into your prepared, parchment-lined baking tin. Using the back of the same large, sturdy spoon or your hands (if you don’t mind getting a little messy!), firmly press the mixture down. Work it meticulously into all the corners and ensure the surface is as even and compact as possible. This compression is key to a well-set tiffin that holds its shape.
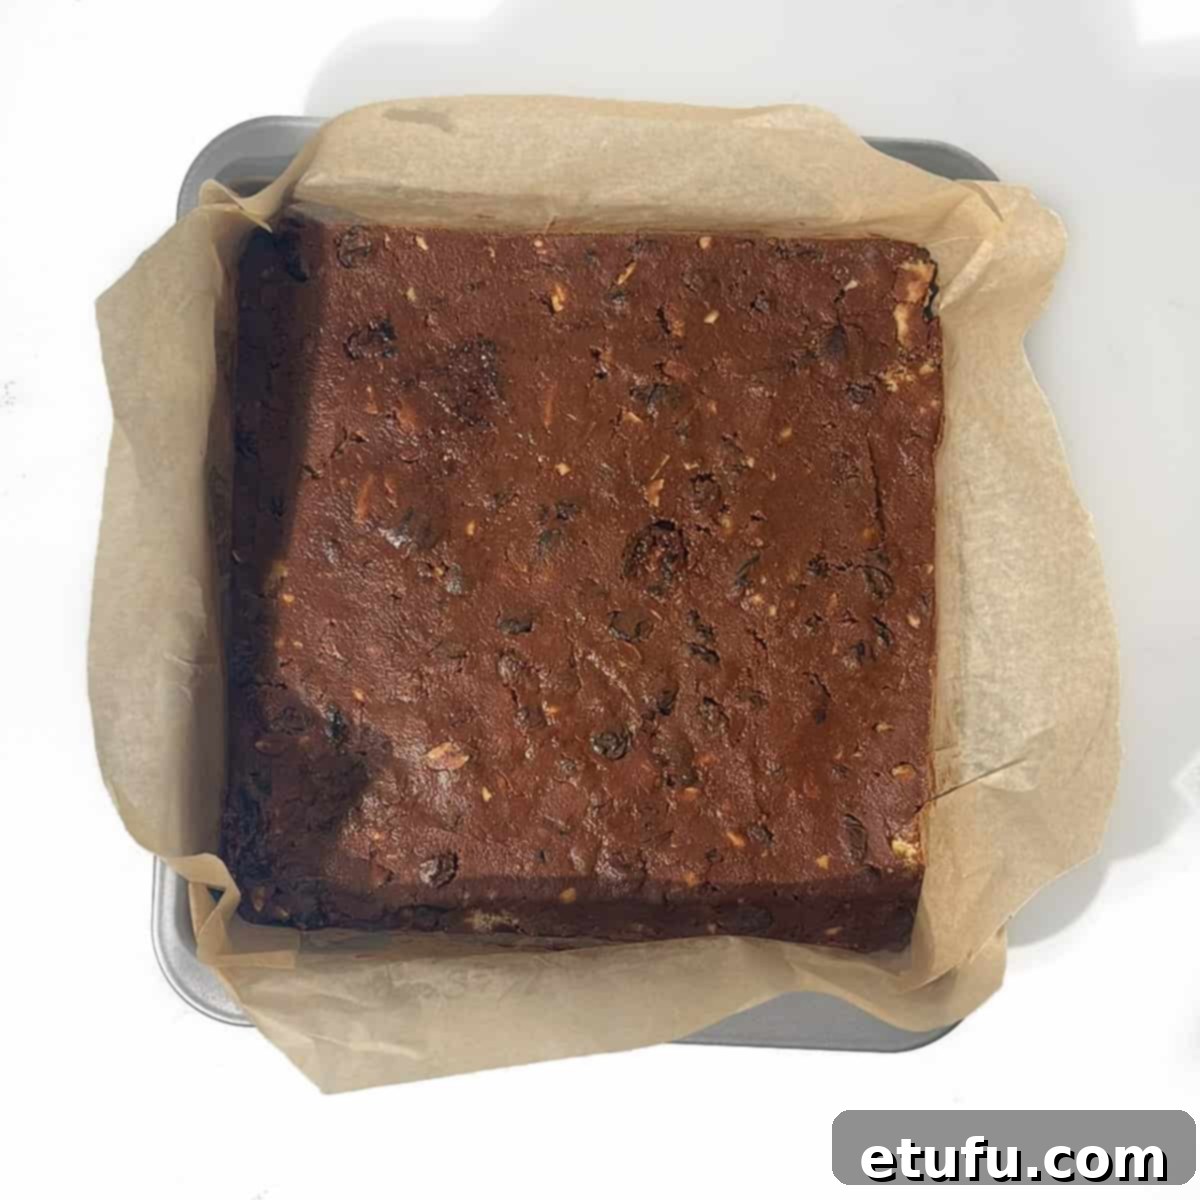
- Smooth the Surface: Once the mixture is evenly distributed, use the back of your spoon to smooth out the top surface of the tiffin. If you encounter any stubborn large pieces of biscuit sticking up, gently crush them down into the chocolate mixture with the spoon to create a relatively flat and even base for your topping. Set the tin aside while you prepare the marbled layer.
Adding the Marbled Chocolate Layer: A Touch of Elegance
This decorative topping not only adds visual appeal but also another layer of rich chocolate flavor. Here’s how to create that beautiful marbled effect:
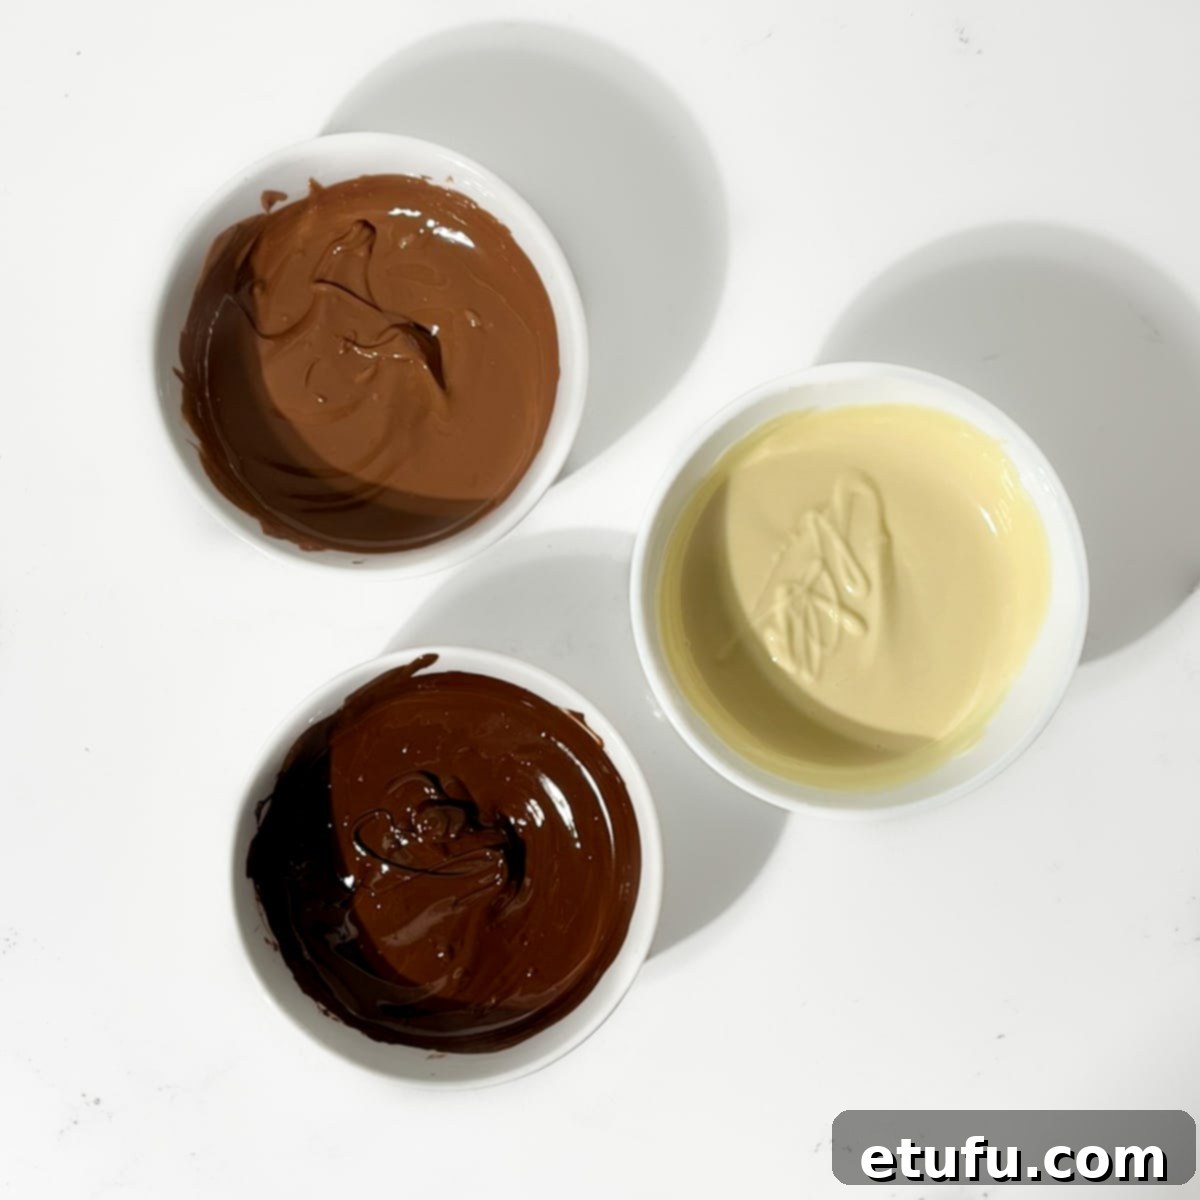
- Melt Topping Chocolates: In three separate, small microwave-safe bowls, melt 100g each of dark chocolate, milk chocolate, and white chocolate. Use the same 30-second burst method as before, stirring well after each interval, until each chocolate is fully melted and has a smooth, runny consistency. If you prefer, a bain-marie (double boiler) method on the stove-top can also be used for a more controlled melt.
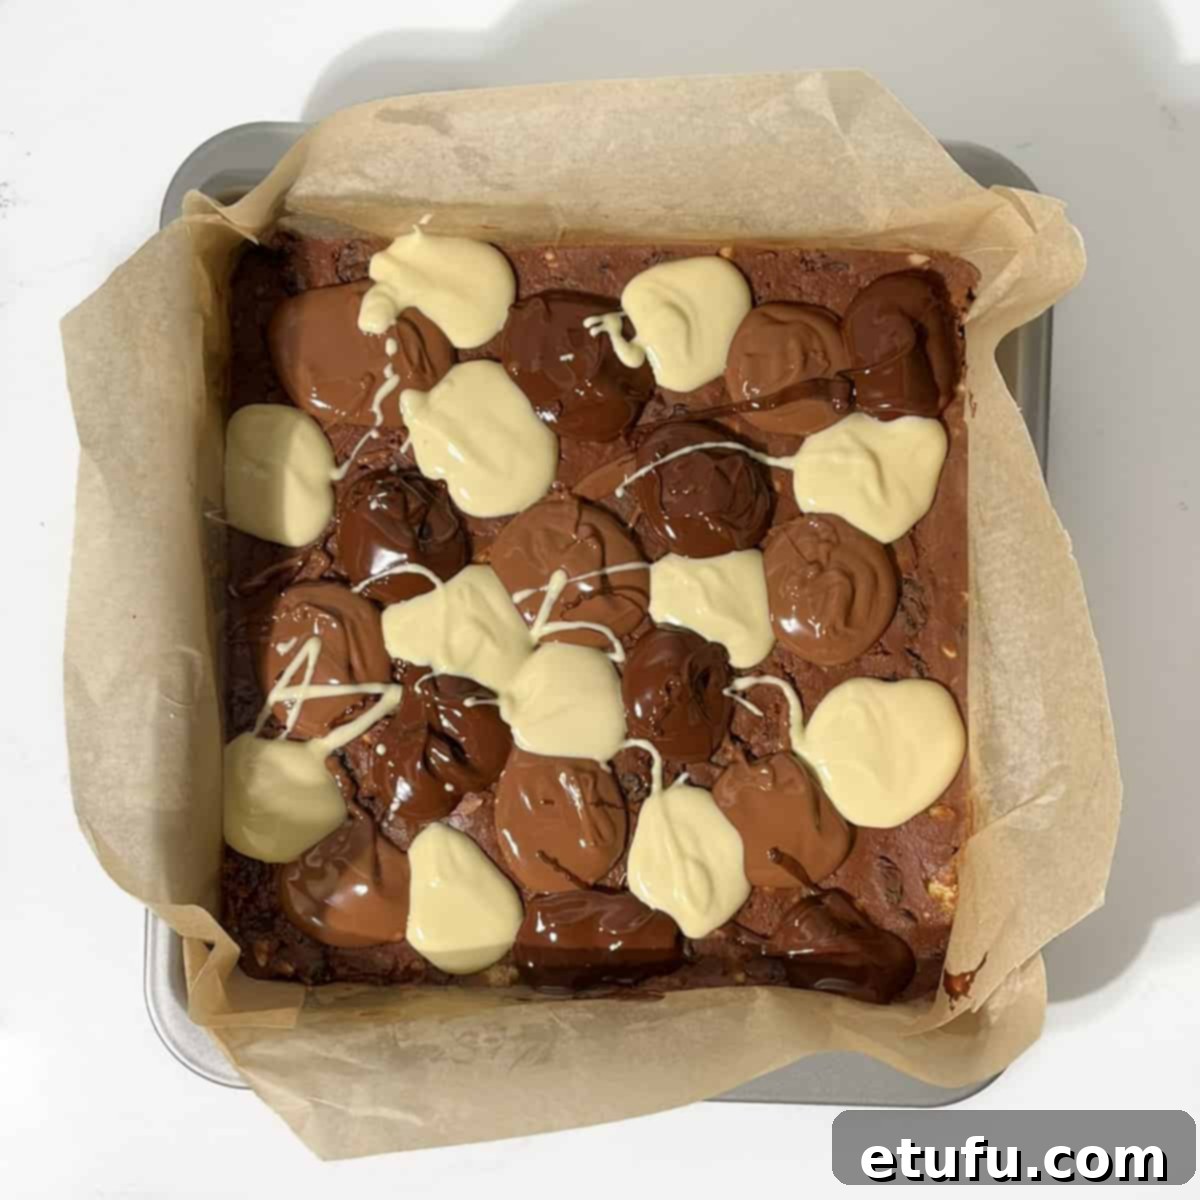
- Dollop the Chocolates: Take spoonfuls of each melted chocolate (dark, milk, and white) and randomly dollop them across the surface of the set tiffin base. Aim for an uneven distribution to create an organic, marbled look.
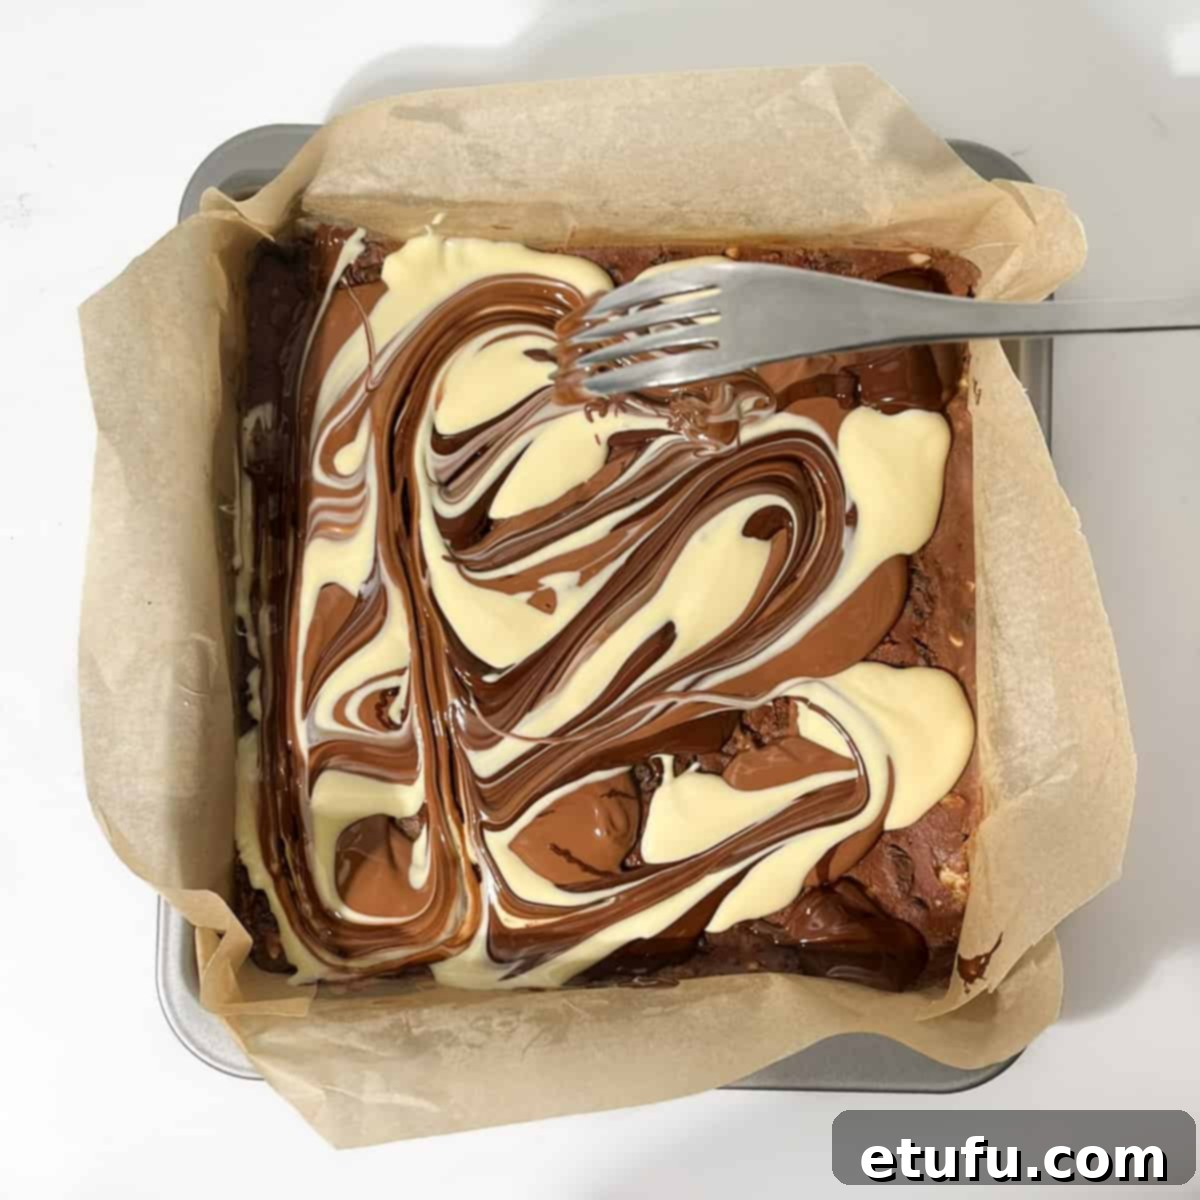
- Create the Marble Effect: Gently use the tip of a fork, a skewer, or even a small palette knife to swirl the different melted chocolates together. Be careful not to over-mix; just a few strokes will create beautiful, artistic swirls and prevent the colors from blending into a uniform muddy shade.
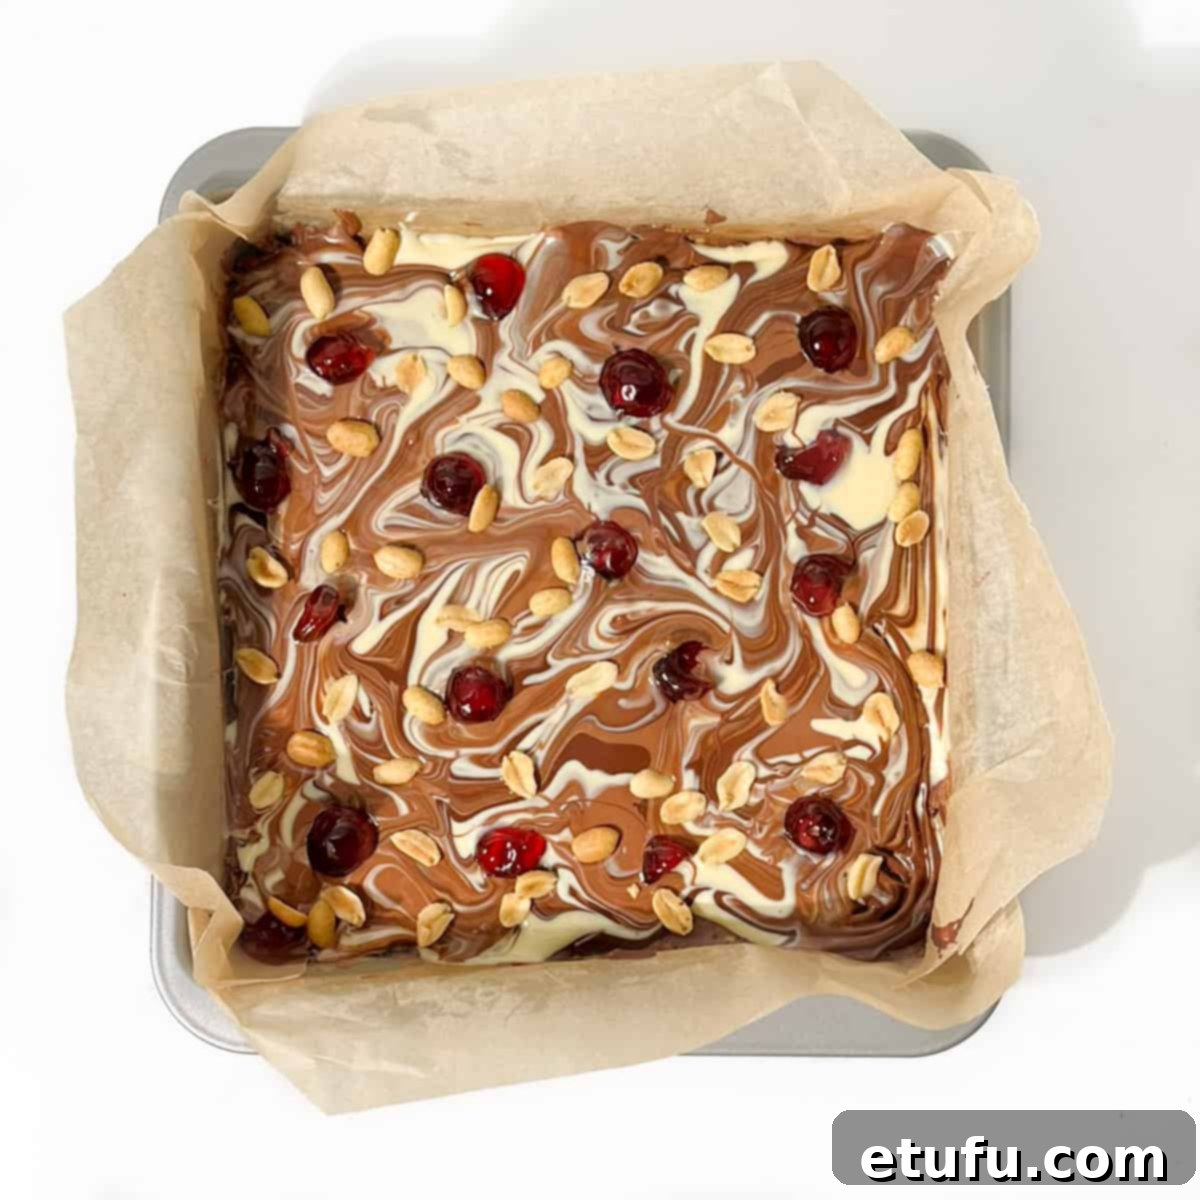
- Garnish and Chill: While the chocolate topping is still warm and pliable, if desired, dot additional pieces of halved glace cherries and a few extra salted peanuts across the surface. This adds an extra layer of visual appeal and texture. Once garnished, carefully place the entire tray in the fridge for a minimum of 2 hours. This crucial chilling time allows the tiffin to firm up completely, making it easy to slice cleanly.
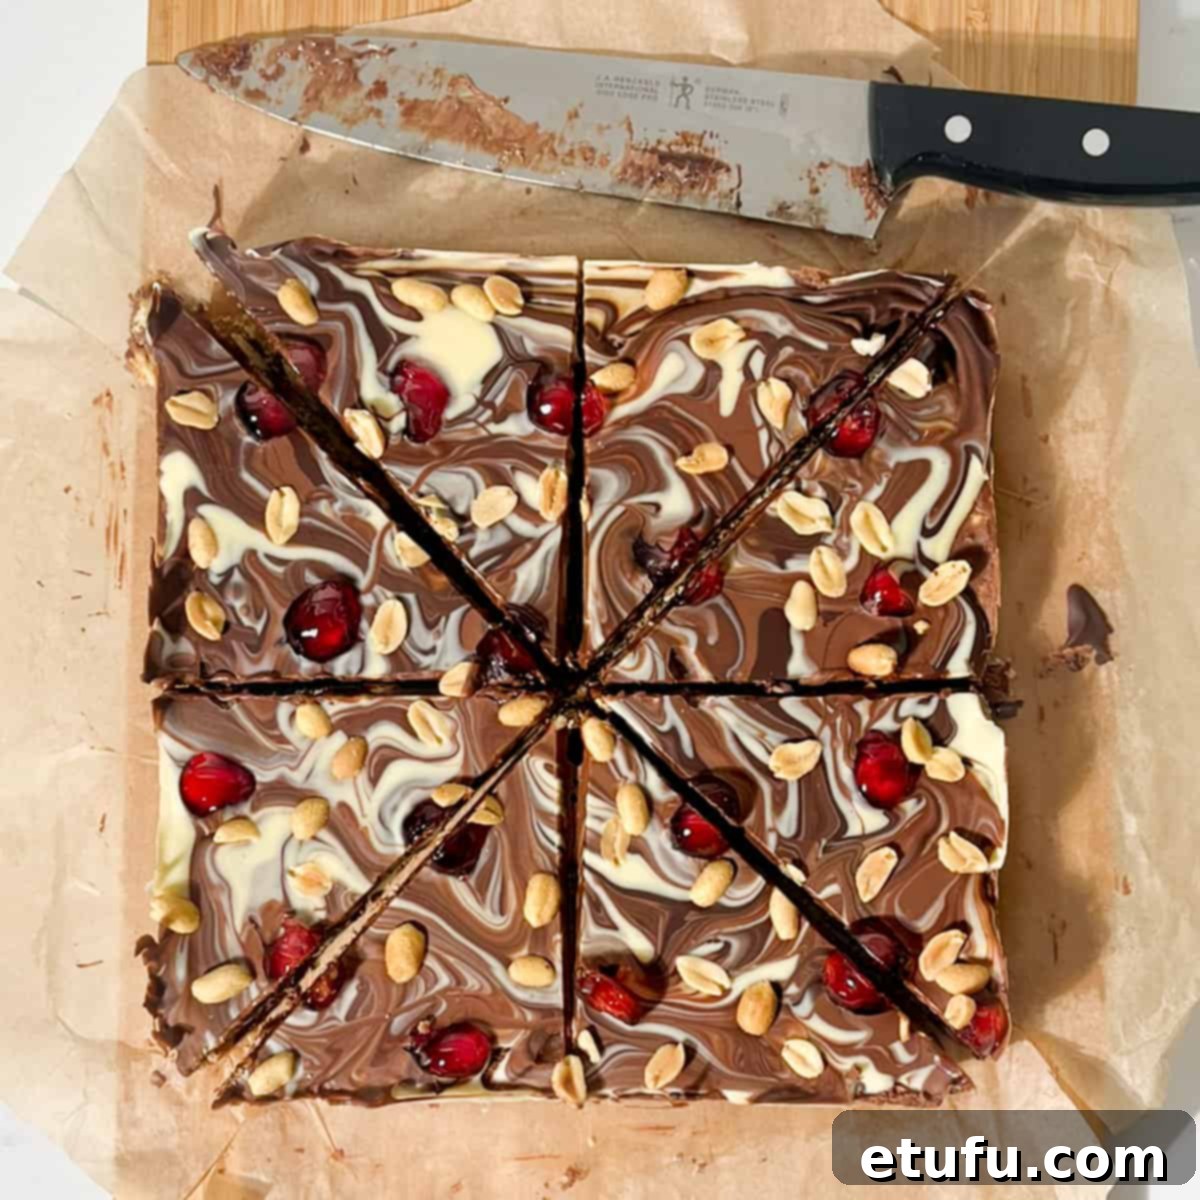
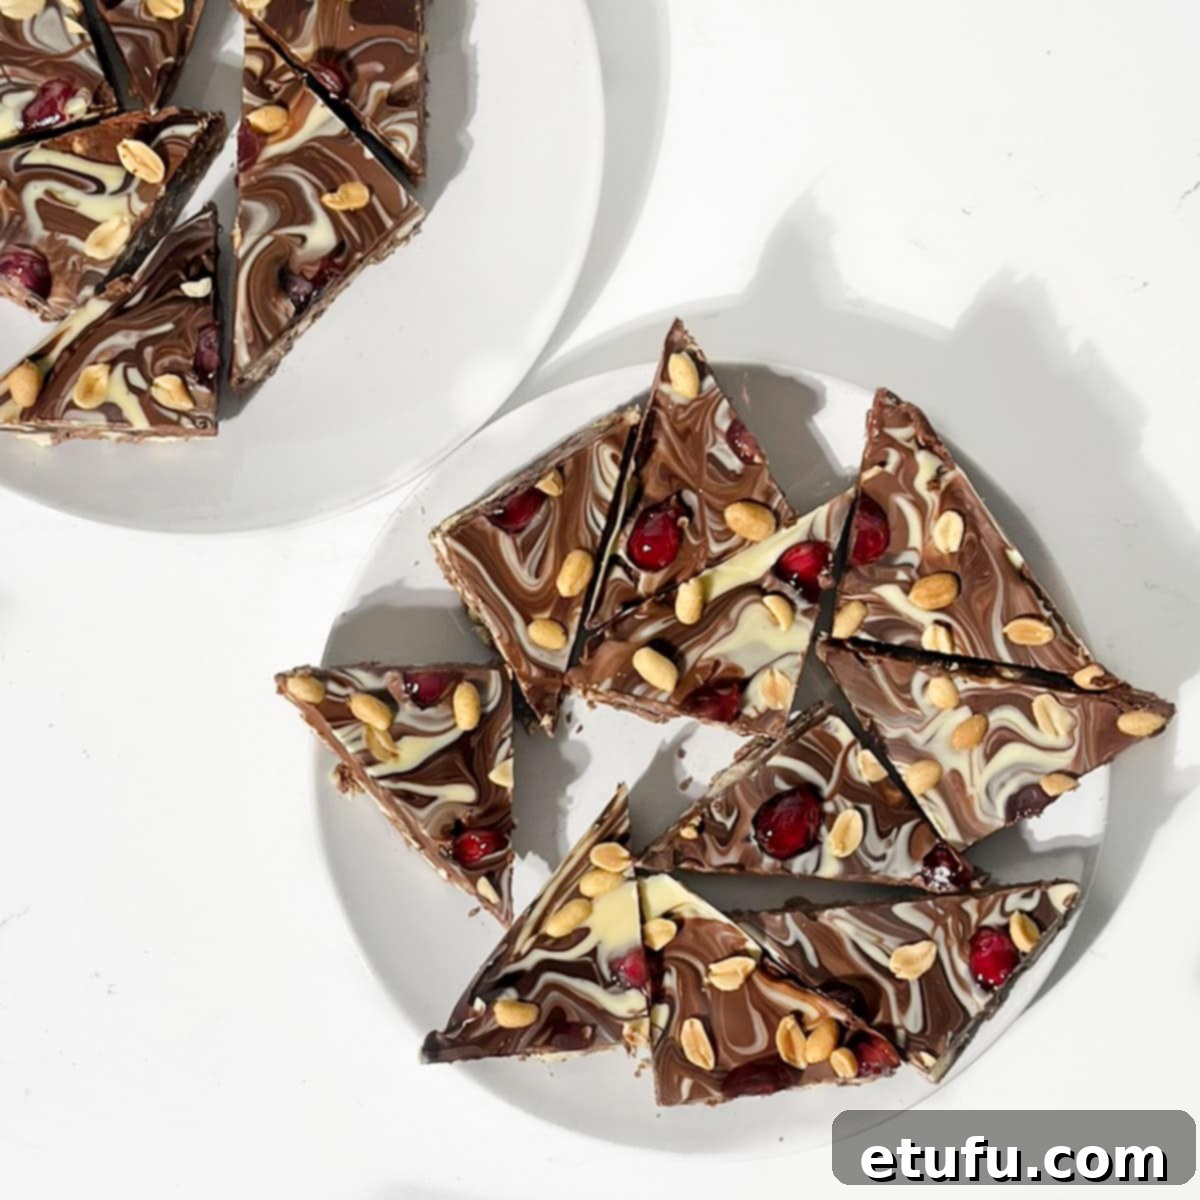
- Slice and Serve: Once the tiffin is thoroughly set and firm, lift it from the tray using the parchment paper overhangs and transfer it to a sturdy chopping board. Use a large, sharp knife to slice the tiffin into your desired shapes – classic squares, elegant bars, or playful triangles. If you notice the chocolate topping beginning to crack during slicing, a useful trick is to dip your knife into a jug of very hot, almost boiling, water, wipe it completely dry, and then make your cuts. The warm blade will glide through the chocolate much more smoothly. Serve these delightful slices with a comforting cup of tea and enjoy!
Creative Variations for Your Chocolate Tiffin
One of the many joys of Chocolate Tiffin is its incredible adaptability. This no-bake wonder is a fantastic canvas for culinary creativity. Feel free to experiment with different additions to customize your tiffin to suit any occasion or preference. Here are some inspiring ideas to get you started:
- Infuse with Alcohol: For an adult twist, consider adding two tablespoons of rich Bailey’s Irish Cream liqueur to the melted chocolate base. Alternatively, for a more traditional Scottish touch, soak your raisins (or sultanas) in a splash of whisky for a few hours prior to incorporating them into the mixture. This adds a delightful, sophisticated depth of flavor.
- Diverse Dried Fruits: Beyond raisins and sultanas, a whole world of dried fruits awaits! Experiment with golden raisins, tangy dried cherries or cranberries, sweet chopped dried apricots, or even soft, chewy dried prunes and dates for varying textures and flavors.
- Nutty Delights: While salted peanuts are wonderful, other nuts can bring their unique characteristics. Try crunchy pecan nuts, earthy walnuts, creamy macadamia nuts, or vibrant green pistachios. For a different texture, lightly toast your nuts before adding them to enhance their flavor.
- Exciting Other Add-ins: Get creative with confectionery! Chunks of soft fudge or chewy toffee pieces can add a buttery caramel dimension. During the festive season, crushed mint candy canes add a refreshing zing. For a playful touch, incorporate Maltesers, Mint Aero balls, or colorful Smarties for a burst of chocolatey fun and varied textures.
- Decorative Toppings: Elevate the visual appeal of your tiffin even further. After applying the marbled chocolate layer, sprinkle with chocolate sprinkles, elegant chocolate shavings, mini chocolate chips, crunchy cookie crumbs (perhaps from extra shortbread), or small pieces of fudge or toffee before chilling.
Troubleshooting: How to Prevent Tiffin Cracking When Slicing
It can be disheartening when your perfectly set chocolate tiffin cracks as you try to slice it. While not every batch will crack (it often depends on the specific chocolate used and the ambient temperature of your kitchen), there are several effective strategies to ensure clean, beautiful slices:
- Bring to Room Temperature: The most common reason for cracking is cutting a tiffin that is too cold. After removing your tiffin from the fridge, allow it to sit out at room temperature for 15-30 minutes before attempting to slice. This allows the chocolate to soften slightly, making it more pliable and less prone to snapping.
- The Hot Knife Trick: If cracks still appear, or if your kitchen is particularly cool, this technique is a game-changer. Fill a tall jug with boiling water. Dip a large, sharp knife into the hot water, allowing the blade to warm up. Immediately wipe the knife completely dry (water and melted chocolate do not mix!). The warm, dry blade will glide through the chocolate topping with ease, creating clean, crisp cuts. Repeat this process for each slice for the best results.
- Gentle Pressure: Apply steady, even pressure when cutting, rather than trying to force the knife through quickly. A slow, deliberate cut is often more effective than a hurried one.
- Score First: For very precise cuts, you can lightly score the top of the tiffin with your knife to mark out your slices before committing to the full cut. This can guide your blade and reduce the chance of wandering or cracking.
- Kitchen Torch (Advanced): For experienced bakers, a kitchen torch can be used carefully to warm the blade of your knife. Hold the flame briefly along the cutting edge, then wipe clean before slicing. Exercise extreme caution if using this method.
By following these tips, you can ensure your delicious chocolate tiffin always looks as perfect as it tastes!
Tiffin vs. Rocky Road: What’s the Difference?
Chocolate Tiffin and Rocky Road are often confused, and it’s easy to see why! Both are delightful no-bake fridge cakes that share many similarities in their preparation methods and core ingredients. They both typically feature a rich chocolate base combined with crushed biscuits and various sweet additions. However, there’s a subtle yet distinct difference that sets them apart:
- Marshmallows are Key: The primary distinguishing factor lies in the inclusions. Rocky Road almost always includes mini marshmallows, which soften slightly within the chocolate and add a unique chewy texture and a distinct sweetness. These pillowy soft additions are a hallmark of Rocky Road.
- Tiffin’s Traditional Focus: Tiffin, on the other hand, traditionally does not contain marshmallows. Its character is defined by the combination of biscuits, dried fruits (like raisins or sultanas), and sometimes nuts. The texture is generally more dense and fudge-like, without the soft, springy chew of marshmallows.
While modern variations might blur the lines, with some tiffin recipes incorporating marshmallows, and some Rocky Road recipes skipping them, the presence of marshmallows remains the most reliable indicator of a classic Rocky Road. Essentially, if it has marshmallows, it’s probably Rocky Road; if it doesn’t, it’s likely a Tiffin!
Storing Your Homemade Chocolate Tiffin for Maximum Freshness
Proper storage is essential to keep your delicious Chocolate Tiffin fresh, flavorful, and perfectly textured. This no-bake treat is excellent for making ahead, and with the right storage, you can enjoy it for an extended period.
- Room Temperature Storage: For optimal freshness and that classic fudge-like texture, store your tiffin in an airtight container at cool room temperature. It will remain delicious for 3-5 days. Ensure it’s kept away from direct sunlight or heat sources, which could cause the chocolate to soften too much.
- Refrigeration: If you prefer a firmer tiffin, or if your kitchen is particularly warm, you can store it in an airtight container in the fridge for up to 2 weeks. Be aware that chilling will make the tiffin firmer, and it’s best enjoyed after allowing it to sit at room temperature for 10-15 minutes before serving to soften slightly and enhance the flavors.
- Freezing for Long-Term Enjoyment: Chocolate Tiffin freezes exceptionally well, making it a perfect make-ahead dessert. Wrap individual slices or the entire slab tightly in clingfilm (plastic wrap), then place it in an airtight freezer-safe container or a heavy-duty freezer bag. It can be frozen for up to two months. When you’re ready to indulge, simply remove the tiffin from the freezer and let it thaw in the fridge for several hours, or on the counter for about an hour, until it reaches your desired consistency.
With these simple storage tips, you’ll always have a delightful piece of Scottish Chocolate Tiffin ready to enjoy!
Explore More Irresistible Traybakes
If you’ve fallen in love with the simplicity and deliciousness of our Chocolate Tiffin, you’re in for a treat! Traybakes are a fantastic category of desserts, offering convenience and a wide range of flavors. Here are some other popular traybake recipes you might enjoy:
- Easy Date Squares with Coconut: A chewy, sweet, and comforting classic.
- Tan Square – Easy Caramel Slices: Layers of shortbread, luscious caramel, and chocolate.
- Peanut Brittle (Pé de Moleque): A crunchy, sweet, and nutty Brazilian delight.
- Tinginys – Lithuanian Lazy Cookies: A unique and easy no-bake cookie bar.
- Raspberry and White Chocolate Blondies: Chewy, sweet, and bursting with fruity flavor.
- Biscoff Cake Slices (No-Bake): For lovers of caramelized biscuit flavor in a convenient slice.
- Easy Mars Bar Slice: A rich, indulgent treat made with everyone’s favorite chocolate bar.
- Easy Coconut Ice with Condensed Milk: A vibrant, sweet, and simple confectionery.
- Jam Crumble Bars: A delightful combination of sweet jam and a buttery crumble topping.

Chocolate Tiffin
We are elevating our recipe by skipping the more traditional use of cocoa powder and going all-in with pure milk chocolate.
Print Recipe
Save
Equipment
- 1 20cm x 20cm (8″ x 8″) square tin
Ingredients
For the Tiffin Base
- 400 grams milk chocolate
- 100 grams unsalted butter
- 250 grams shortbread biscuits (roughly chopped)
- 100 grams raisins or sultanas
- 80 grams glace cherries (halved or chopped)
- 50 grams salted peanuts (coarsely chopped)
For the Chocolate Swirl Topping
- 100 grams milk chocolate
- 100 grams dark chocolate
- 100 grams white chocolate
- Glace cherries for decoration – about 8 cherries, halved
- Peanuts for decoration
Instructions
- Line a 20cm x 20cm (8″ x 8″) square tray with parchment paper. It’s essential to line the tray and leave a slight overhang of paper. This will be a big help when it comes to effortlessly removing the tiffin later on.
- Roughly chop the shortbread, glace cherries and salted peanuts. Set aside.
- Break up 400g of milk chocolate into a large mixing bowl, then add the butter.
- Microwave in 30-second bursts, stirring after each, until the butter and chocolate are fully melted. Mix them well together until smooth.
- Add the chopped shortbreads, cherries, peanuts and raisins to the melted chocolate mixture.
- Fold all the ingredients together vigorously. There’s no need to be gentle as it takes a bit of elbow grease. Ensure all the pieces are well-covered in the chocolate. A firm squishing motion with a large, sturdy spoon works wonders.
- Tip the tiffin mixture into the prepared tin. Using the same large, sturdy spoon, press the mixture down firmly, working it into all the corners to create an even, compact base.
- Smooth the top of the tiffin with the back of a spoon. For any stubborn large pieces of biscuit sticking up, crush them into the chocolate with the spoon to create a flat surface. Set aside.
- In three separate bowls, melt 100g each of dark, milk and white chocolate in the microwave. Make sure the chocolate is fully melted and has a smooth, runny consistency. If you prefer, you can use a bain-marie or double boiler on the stove-top to melt the chocolate instead.
- Randomly dollop spoonfuls of each melted chocolate across the surface of the tiffin base.
- Use a fork or the tip of a palette knife to gently swirl the melted chocolates together for a beautiful marbled effect. Avoid over-mixing.
- While the chocolate topping is still warm, dot additional pieces of halved glace cherries and a few extra peanuts across the surface for decoration.
- Place the tray in the fridge for a minimum of 2 hours to allow the tiffin to fully set and firm up.
- Once the tiffin is completely set, lift it from the tray using the parchment paper overhang and place it on a chopping board. Use a large, sharp knife to slice the tiffin into squares, bars or triangles. If you notice the chocolate topping is breaking, dip the knife into a jug with boiling water, wipe it completely dry, and then make the slices. Enjoy with a comforting cup of tea!
**Nutritional Data Disclaimer**
Please keep in mind that the nutritional information provided below is calculated by a third party and we cannot guarantee its absolute accuracy. We strive to offer the most accurate information possible, but we do not take responsibility for any potential errors. Additionally, the nutritional value of the recipe may vary depending on the exact brands and specific products used. We highly recommend that you consult with a qualified healthcare professional or registered dietitian for personalized advice tailored to your individual dietary needs.
Nutrition
For food safety advice, including guidance on food allergies, please refer to official food safety guidelines.
More Delightful Snacks On-The-Go
Looking for more convenient and delicious treats perfect for snacking or a quick breakfast? These recipes are designed for ease and portability, ensuring you always have a tasty bite ready when you’re on the move:
- Fluffy Buttermilk Blueberry Muffins: A classic breakfast treat, moist and bursting with blueberries.
- Fudgy Triple Chocolate Muffins: For the ultimate chocolate lover, rich and deeply satisfying.
- Easy 3-Ingredient Lemonade Scones: Incredibly simple scones, perfect with cream and jam.
- Raspberry and White Chocolate Blondies: Chewy, sweet, and tangy, a perfect afternoon pick-me-up.
- The Best Sultana Cake Recipe: A traditional, fruit-filled cake, wonderfully moist and flavorful.
- Sticky Jamaican Ginger Cake: A warmly spiced, incredibly moist, and wonderfully sticky cake.
- Easy Date Squares with Coconut: A wholesome and satisfying bar, full of natural sweetness.
- Banana Muffins with Chocolate Chunks and Pecans: A comforting combination of banana, rich chocolate, and crunchy nuts.
- Our Favorite Banana Bread with Only 4-Ingredients: Surprisingly simple, yet perfectly moist and delicious banana bread.
More Sweet Treats from the United Kingdom
The United Kingdom boasts a rich tapestry of traditional desserts, each with its own history and charm. If you’ve enjoyed this taste of Scottish Tiffin, delve deeper into the sweet side of British baking with these beloved classics:
- Classic Gypsy Creams Recipe: Crunchy Oat Biscuits: Simple yet addictive oat biscuits, a staple for tea time.
- Eve’s Pudding Recipe with Spices and Caramelised Apples: A comforting baked apple dessert topped with a light sponge.
- Festive Sherry Trifle Recipe: Classic English Trifle: Layers of sponge, fruit, jelly, custard, and cream – a celebratory British dessert.
- Sticky Jamaican Ginger Cake: A rich, dark, and intensely spiced ginger cake that’s wonderfully moist.
- Easy Fruity Flapjacks Recipe: Chewy oat bars, often packed with dried fruit, perfect for a hearty snack.
