Tottenham Cake: A Timeless British Vanilla Sponge with Cheerful Pink Icing
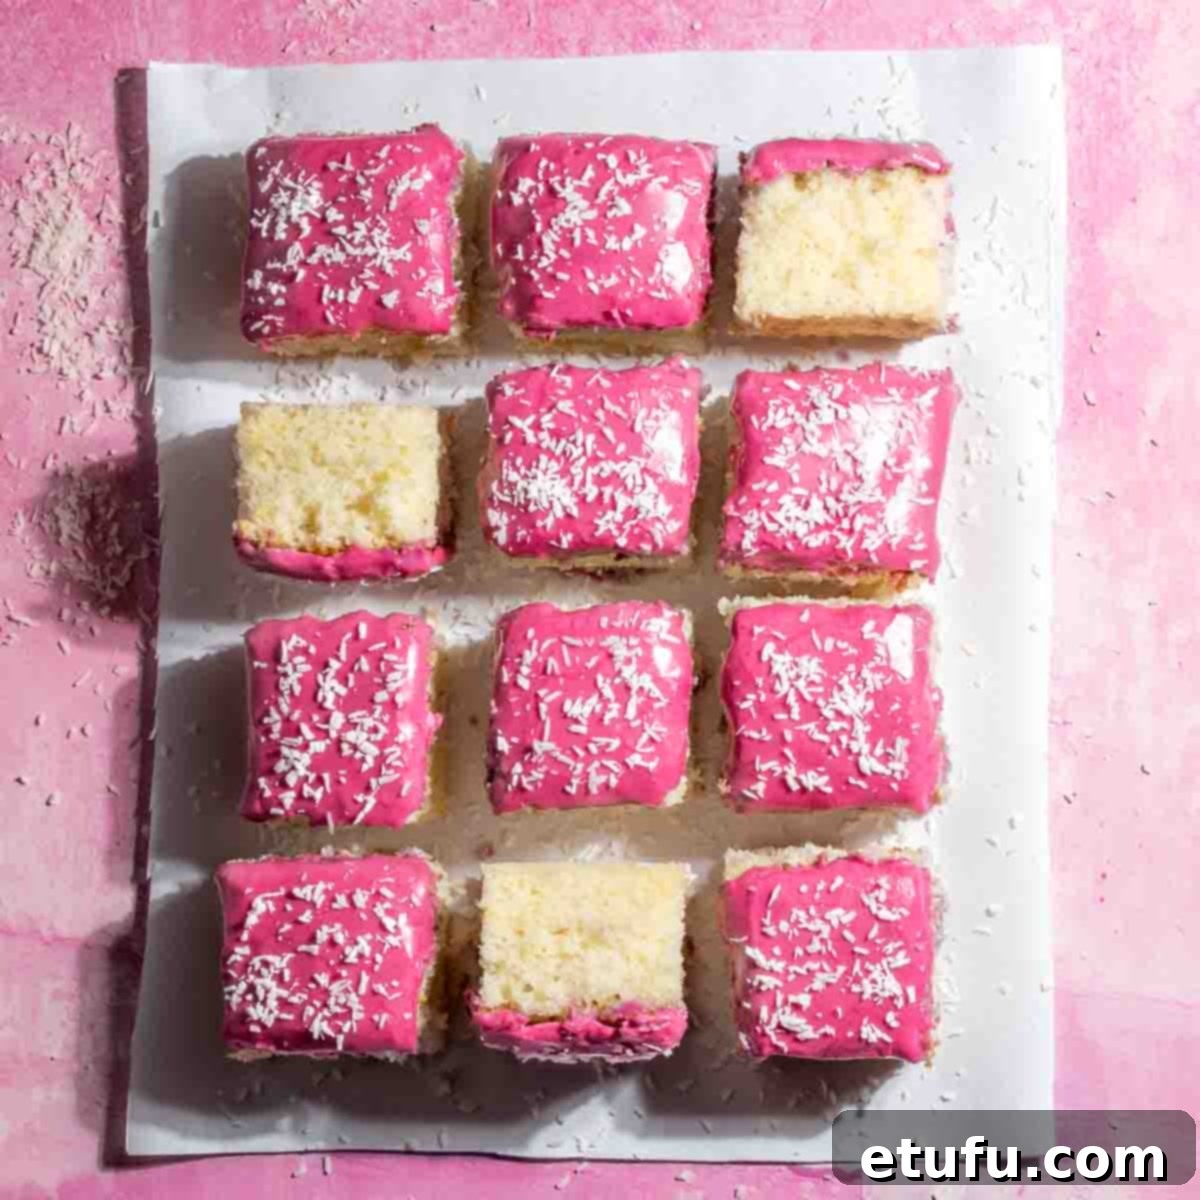
Embark on a delightful culinary journey to the heart of the United Kingdom with this iconic Tottenham Cake recipe. More than just a dessert, this lovely, single-layer traybake has graced British teatime tables for over a century, embodying simplicity, comfort, and nostalgic charm. Our easy-to-follow recipe promises a feather-light, irresistibly moist vanilla sponge, beautifully crowned with a gloriously cheerful pink icing crafted from fresh blueberries or raspberries.
Tottenham Cake isn’t just a treat; it’s a celebration in itself. Its tender white sponge, topped with vibrant pink icing, instantly brightens any gathering, making it a perfect addition to party spreads, bake sales, or simply an uplifting afternoon tea. The sheer joy of this unpretentious British classic is undeniable, offering a comforting bite that transports you back to simpler times.
Our detailed, step-by-step instructions, complete with accompanying photos, will guide you through every stage, ensuring you master the art of baking the perfect soft sponge base. From precise ingredient preparation to optimal bake times, we’ve broken down each element to make this adaptable recipe accessible to even the most novice bakers. Once you’ve perfected this versatile vanilla sponge, it will undoubtedly become a cherished staple in your baking repertoire, ready to be customized with various icings or imaginative decorations.
This foundational vanilla sponge recipe is so versatile that it also forms the delicious base for other beloved classics, such as our old-fashioned school cake recipe for Jam and Coconut Sponge and the ever-popular Fluffy Vanilla Tray Bake adorned with buttercream and sprinkles.
Fast Facts – The United Kingdom: A Culinary Hub

Understanding the context of British cuisine, often characterized by its comfort food roots and rich history, helps appreciate the simplicity and charm of dishes like Tottenham Cake. Here are some quick facts about the United Kingdom:
| Location | The United Kingdom (UK) is situated in North-western Europe, a sovereign country comprising four constituent countries: England, Scotland, Wales, and Northern Ireland. Its island geography has profoundly influenced its culinary traditions and culture. |
| Capital | London. A vibrant global city, London is not only the political and economic heart but also a melting pot of cultures, influencing everything from fashion to food. |
| Language | While English is the most widely spoken language, the UK boasts a rich tapestry of linguistic diversity, including Welsh, Scottish Gaelic, Cornish, Manx, and Scots, alongside three indigenous sign languages. This cultural richness contributes to the varied culinary landscape found across the nation. |
| Population | With a population of approximately 66.8 million people, the UK is a densely populated nation whose diverse communities contribute to a dynamic food scene, blending traditional British fare with international influences. |
| Trivia | In 1945, an extraordinary event occurred when a large flock of starlings, seeking refuge, perched upon the minute hand of St. Stephen’s Tower – famously housing Big Ben. Their combined weight caused the iconic clock to temporarily regress by a notable 5 minutes, a testament to the unforeseen impacts of nature on even the most steadfast of human creations. |
What Exactly is Tottenham Cake? Understanding This Simple British Classic
Tottenham Cake is a quintessential British tea cake that rose to international prominence after its appearance on The Great British Bake Off in 2013, captivating audiences with its unassuming yet utterly delicious nature. Despite its simple components, this cake holds a special place in British culinary history and hearts.
At its core, Tottenham Cake features a basic, incredibly light, and moist vanilla sponge base. This sponge is typically baked in a rectangular tray, then cut into squares or rectangles, making it an ideal choice for sharing at gatherings or as an easy individual serving. Its straightforward sponge appearance often draws comparisons to traditional “school cake,” a nostalgic treat from British school canteens.
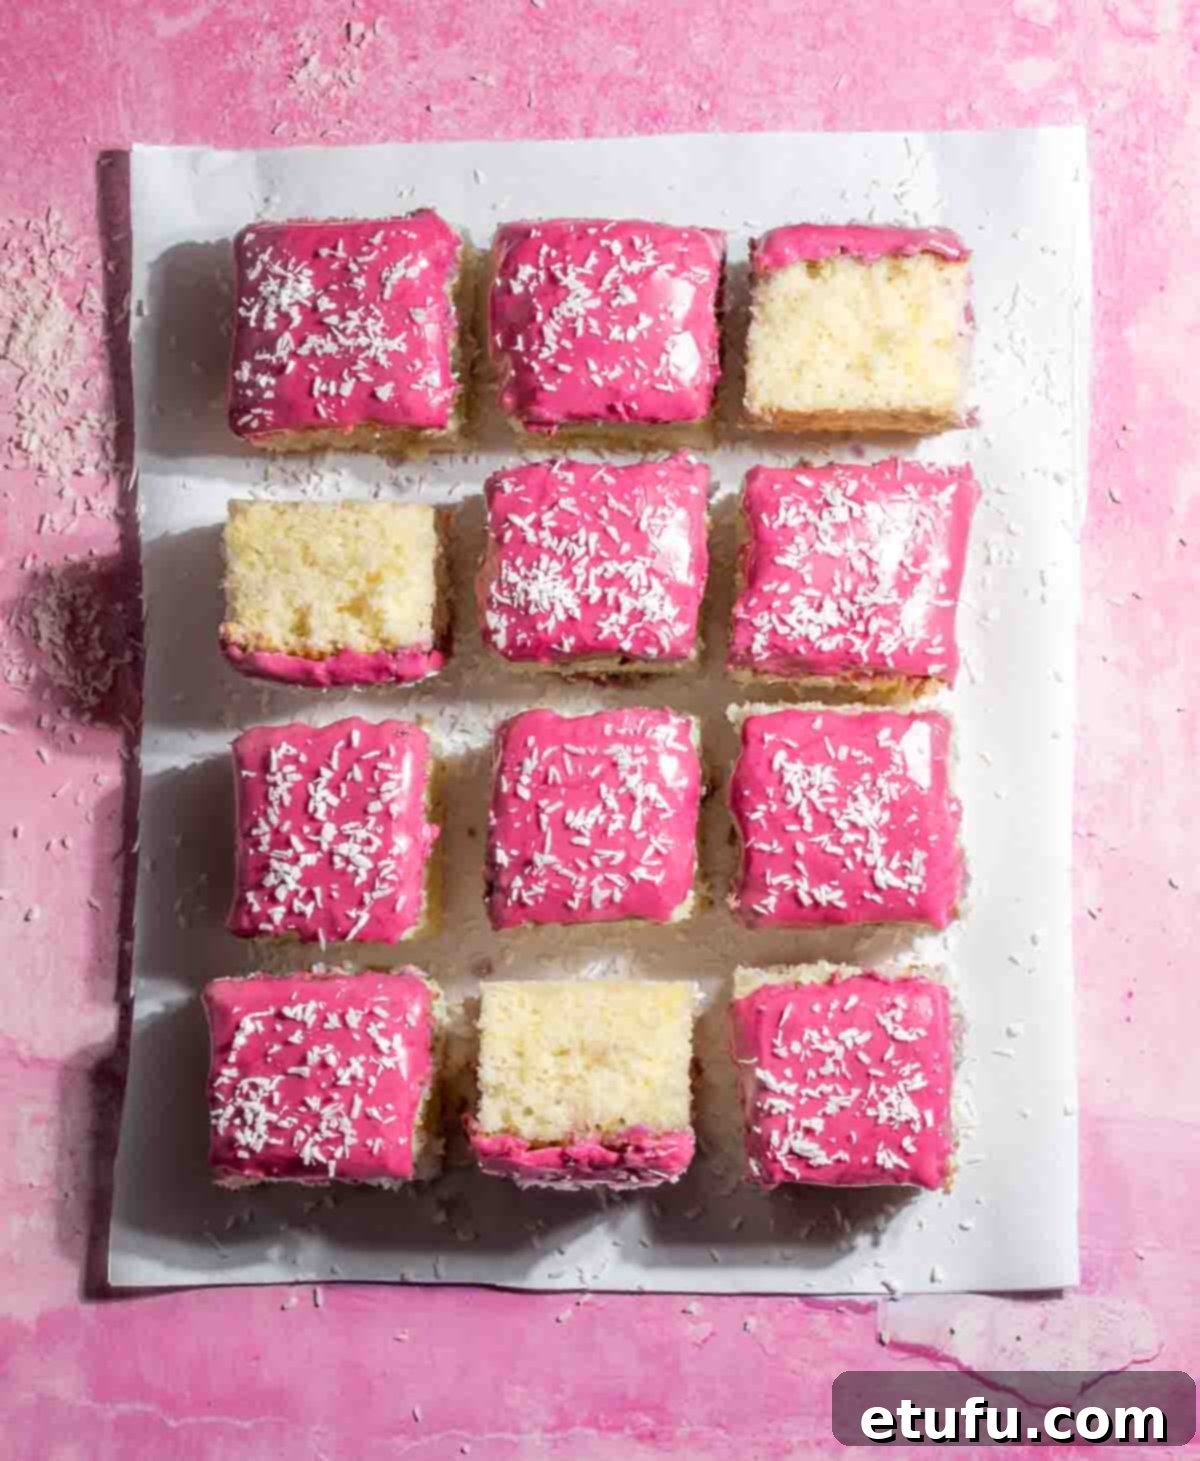
However, what truly distinguishes Tottenham Cake and gives it its signature whimsical character is its topping: a layer of bright, often vibrant, pink icing. Historically, this striking pink hue was achieved using the natural juices from berries of local mulberry bushes, which were plentiful in the Tottenham area where the cake originated. In modern adaptations, bakers commonly use other readily available fruits like raspberries or blueberries to naturally tint the icing. For those seeking an even more vivid colour, a touch of pink food dye can also be used, though the charm often lies in the natural, slightly varied shades produced by the fruit.
The beauty of Tottenham Cake lies in its unpretentious simplicity. It’s a testament to how humble ingredients can combine to create something truly delightful and enduringly popular, providing a burst of sweetness and a hint of tradition with every bite.
A Heart-warming History: The Origins of Tottenham Cake
The story of Tottenham Cake is as charming and wholesome as the cake itself, deeply rooted in the social history of its North London namesake. This beloved British treat emerged in the late 1800s, a period marked by significant social change and a growing emphasis on community welfare. Its origins are inextricably linked to the Quakers, a religious group known for their strong commitment to equality, simplicity, and community care.
In Tottenham, the Quakers were highly regarded for their philanthropic efforts, which included providing affordable and nourishing treats for local children. Tottenham Cake perfectly aligned with their ethos. It was a simple, inexpensive cake, made with readily available ingredients, and crucially, topped with natural mulberry icing. These cakes were sold for just one penny a piece, making them accessible to even the poorest families. Off-cuts, ensuring no waste, were sold for half that price, further underscoring the Quaker dedication to affordability and resourcefulness.
Around the same historical juncture, another local institution was rising to prominence: the Tottenham Hotspur football club. The cake’s history even intertwines with the club’s early successes. Henry Chalkley, a local baker and a Quaker himself, created a scone-like version of the cake to be distributed to children in celebration after Tottenham Hotspur famously won the 1901 FA Cup against Sheffield United. This memorable gesture further cemented the cake’s place in the local community’s affections and folklore (though my husband, a loyal Blades fan, remains a bit sore about that particular tale!).
Over the decades, the recipe for Tottenham Cake evolved. The initial scone-like base gradually transformed into the lighter, softer vanilla sponge we recognize today, while the signature pink icing remained a constant. Despite these changes in ingredients and preparation, Tottenham Cake has never lost touch with its humble beginnings. It remains an accessible, unpretentious treat, symbolizing joy, community spirit, and the simple pleasure of a delicious, affordable cake. Its enduring popularity is a testament to its comforting taste and the heart-warming story behind its creation.
Why You’ll Adore This Tottenham Cake Recipe
This Tottenham Cake recipe isn’t just about baking; it’s about creating memories and enjoying a truly delightful British classic. Here’s why you’ll love adding it to your repertoire:
- Effortlessly Simple, Economical Ingredients: You won’t need any fancy, hard-to-find items for this recipe. It relies on everyday pantry staples, making it incredibly approachable and budget-friendly. Plus, it’s a brilliant option if you’re looking for a delicious cake recipe that doesn’t require butter.
- Beginner-Friendly Baking: Whether you’re a seasoned baker or just starting your culinary adventures, this recipe is designed to be easy to whip up. The clear instructions ensure a smooth and enjoyable baking process, even for novices.
- Visual Guidance for Success: To ensure your cake turns out perfectly every time, we’ve included step-by-step photos along with helpful tips and tricks. These visual aids make it simpler to follow each stage, guaranteeing a successful bake.
- Feather-light and Fluffy Sponge: The simple sponge technique yields an exceptionally light, airy, and fluffy vanilla sponge that melts in your mouth. It’s the ideal texture for a traditional tea cake.
- Customizable Flavors: While vanilla is classic, this recipe provides a fantastic base for experimentation. Feel free to add your own favourite flavourings, such as a hint of zesty lemon, almond essence, or even orange extract, to personalize your cake.
- Quick to Assemble and Decorate: This recipe is designed for efficiency. Both the cake batter and the icing come together quickly, allowing you to enjoy your delicious creation without spending hours in the kitchen.
- A Taste of Nostalgia: For many, Tottenham Cake evokes a sense of whimsical charm and a comforting throwback to childhood memories. It’s a delightful reminder of traditional British baking.
- Kids Adore the Pink Icing: The vibrant pink icing is an absolute hit with children! Its cheerful colour and sweet taste make it an irresistible treat that will bring smiles all around.
- Perfect for Any Occasion: Its easy-eating, square format and delightful appearance make it ideal for birthday parties, school bake sales, picnics, or simply as an everyday treat.
- A Truly Timeless British Classic: Tottenham Cake is an integral part of British culinary heritage. By baking it, you’re not just making a cake; you’re celebrating a piece of history and tradition.
- Effortless Eating Experience: Cut into convenient squares or rectangles, this cake is incredibly easy to serve and eat, making it perfect for sharing without the need for plates and forks.
Key Ingredient Notes and Smart Substitutions for Perfect Tottenham Cake
Understanding the role of each ingredient is crucial for achieving the perfect Tottenham Cake. Here’s a deeper dive into the key components and potential substitutions.
Eggs: The Foundation of Fluffiness
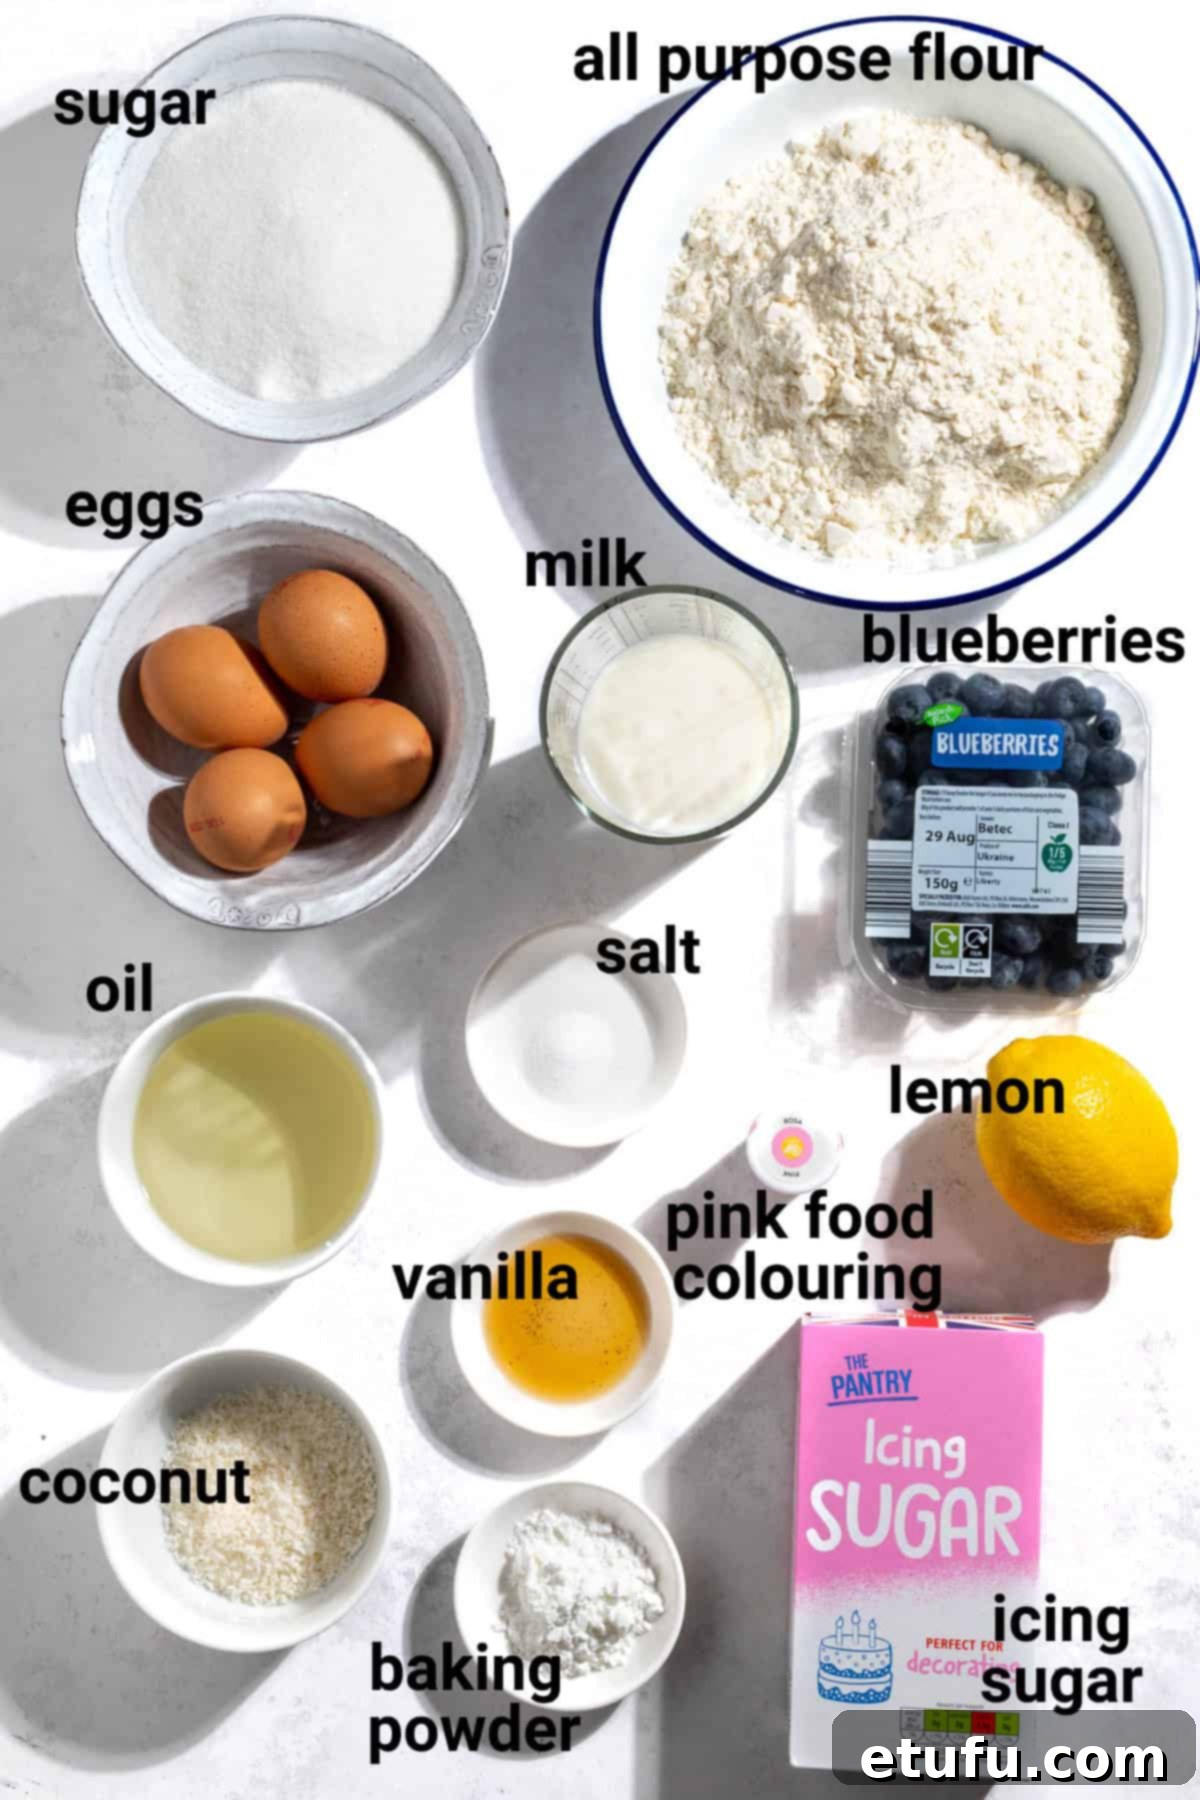
You will need four large eggs for this recipe, ideally at room temperature, each weighing approximately 62g with the shell on. Don’t worry if your eggs are a few grams over or under; the recipe is forgiving. The importance of using room-temperature eggs cannot be overstated for sponge cakes. When eggs are at room temperature, their proteins are more relaxed, allowing them to whip up to a greater volume and incorporate air more effectively. This results in a smoother, more uniform batter, which in turn helps the cake rise evenly and achieve that desired delicate, tender crumb. To quickly bring fridge-cold eggs to room temperature, simply place them in a bowl of warm (not hot!) water for about 5 minutes before use.
Sugar: Sweetness and Structure
Plain, white granulated sugar is perfectly suitable and works wonderfully in this recipe, providing both sweetness and contributing to the cake’s structure. While caster sugar (a finer granulated sugar) can also be used, it’s not essential. Granulated sugar dissolves sufficiently during the beating process to create a smooth batter. Using the correct amount of sugar is vital not only for taste but also for moisture and texture.
Oil: For Ultimate Moisture and Tenderness
For this sponge cake, we opt for a flavourless, neutral oil such as vegetable or sunflower oil. Using oil offers distinct advantages over butter in sponge cakes. Oil, being a liquid at room temperature, contributes to a cake that stays moist for longer periods without drying out. Unlike butter, which can solidify and make cakes denser when cool, oil helps maintain a softer crumb. Its neutral taste allows the primary cake flavours (like vanilla or lemon) to truly shine through without interference. Furthermore, oil is often a more economical choice compared to butter, making this recipe even more accessible.
Baking Powder: The Essential Leavening Agent
You might initially be surprised to see that this cake calls for one whole tablespoon of baking powder. Rest assured, this measurement is correct and crucial for achieving the feather-light texture of the sponge. Baking powder is a chemical leavening agent that reacts with moisture and heat to produce carbon dioxide gas, creating air bubbles that make the cake rise. Please measure it carefully: scoop a big heap into your tablespoon and then use the back of a butter knife or a straight edge to level it off precisely, ensuring consistent results.
Blueberries or Food Colouring: The Signature Pink Hue
The distinctive bright pink icing of Tottenham Cake is one of its most charming features. Traditionally, this colour was derived from the berries of mulberry trees, which grew abundantly on the grounds of the Tottenham Quaker house. If you are fortunate enough to have access to fresh mulberries, feel free to use them! You’ll need the same amount as the blueberries specified in the recipe. Raspberries are another excellent and widely available alternative, offering a lovely tartness and rich pink colour.
Alternatively, if fresh berries are not available or if you prefer a more consistent, vibrant pink, you can omit the fruit entirely and use pink food colouring. In this case, instead of berry juice, you would add milk or water to the icing sugar. Approximately 5-6.5 tablespoons of liquid are typically needed, but always add gradually until your desired thick yet spreadable icing consistency is achieved.
Fresh Lemon Juice: A Touch of Zest
In our recipe, we incorporate 30ml of freshly squeezed lemon juice along with the berries to create the fruit juice for the icing. While you can substitute water for the lemon juice, the lemon provides a wonderful, subtle tang that expertly balances the sweetness of the icing, elevating the overall flavour profile. As a reference, about half of a large lemon typically yields approximately 30ml of juice, so prepare one lemon to be safe.
Desiccated Coconut (Optional): A Modern Embellishment
While not part of the original Tottenham Cake tradition, adding desiccated coconut to the top of the icing has become a popular contemporary embellishment, lending a delightful texture and tropical hint. Vibrant, colourful sprinkles are another fantastic option for creating a visually appealing effect against the pink icing, especially for parties or children’s treats. Of course, if you prefer the classic, unadorned look, leaving the icing plain is always a perfectly delicious choice!
Essential Equipment for Your Tottenham Cake
Having the right tools on hand will make your Tottenham Cake baking experience smooth and enjoyable. Here’s a list of the key equipment you’ll need:
- Electric Hand Mixer or Stand Mixer: This is highly recommended for effectively beating the eggs and sugar, incorporating sufficient air to achieve that wonderfully light and fluffy sponge texture. While you can use a whisk and some elbow grease, an electric mixer makes the process much easier and ensures consistent results.
- A Couple of Mixing Bowls: You’ll need at least two good-sized mixing bowls – one for the wet ingredients (eggs, sugar, vanilla) and another for sifting your dry ingredients (flour, baking powder, salt). A smaller bowl will also be useful for preparing the berry juice for the icing.
- A Rectangular Baking Tin (Sheet Pan) of Approximately 33cm x 23cm (13 x 9 inches): The size of your baking tin is crucial for achieving the correct thickness of the cake. A tin of roughly 33cm x 23cm is ideal.
- If you use a larger tin, your cake will be flatter, and you may need to reduce the baking time slightly to prevent it from drying out.
- Conversely, a slightly smaller cake tin will result in a thicker cake, which might require a few minutes longer in the oven to ensure it bakes through evenly. Always use the skewer test to check for doneness.
- Parchment Paper (Baking Paper): Essential for lining your baking tin to prevent sticking and ensure easy removal of the baked cake.
- Sieve: For sifting flour and straining berry juice.
- Measuring Cups and Spoons / Digital Kitchen Scale: For accurate ingredient measurements.
- Offset Spatula or Palette Knife: For spreading the icing smoothly.
- Cooling Rack: For cooling the cake evenly after baking.
Mastering the Art of Lining a Rectangular Baking Tin
Properly lining your baking tin is a small but critical step that ensures your Tottenham Cake bakes evenly and releases effortlessly. Follow these simple steps for a perfectly lined tin:
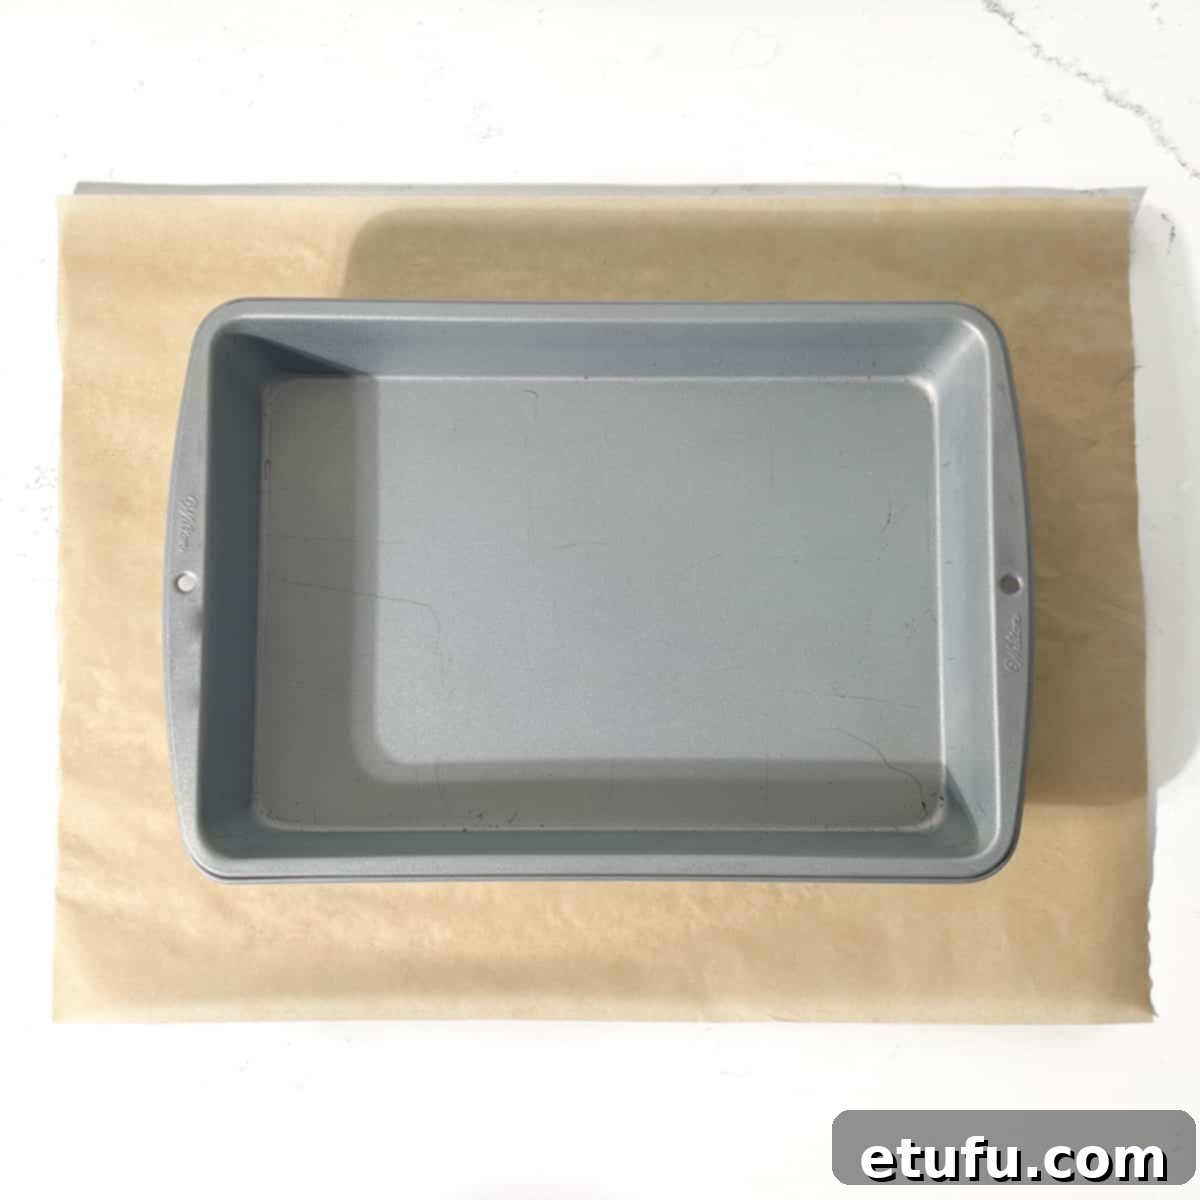
- Prepare Your Paper: Place your rectangular baking tin directly onto a piece of parchment paper (baking paper). Using scissors, cut around the tin, ensuring you leave a generous border of about 8-10cm (3-4 inches) on all sides. This extra paper will help you line the sides of the tin effectively.
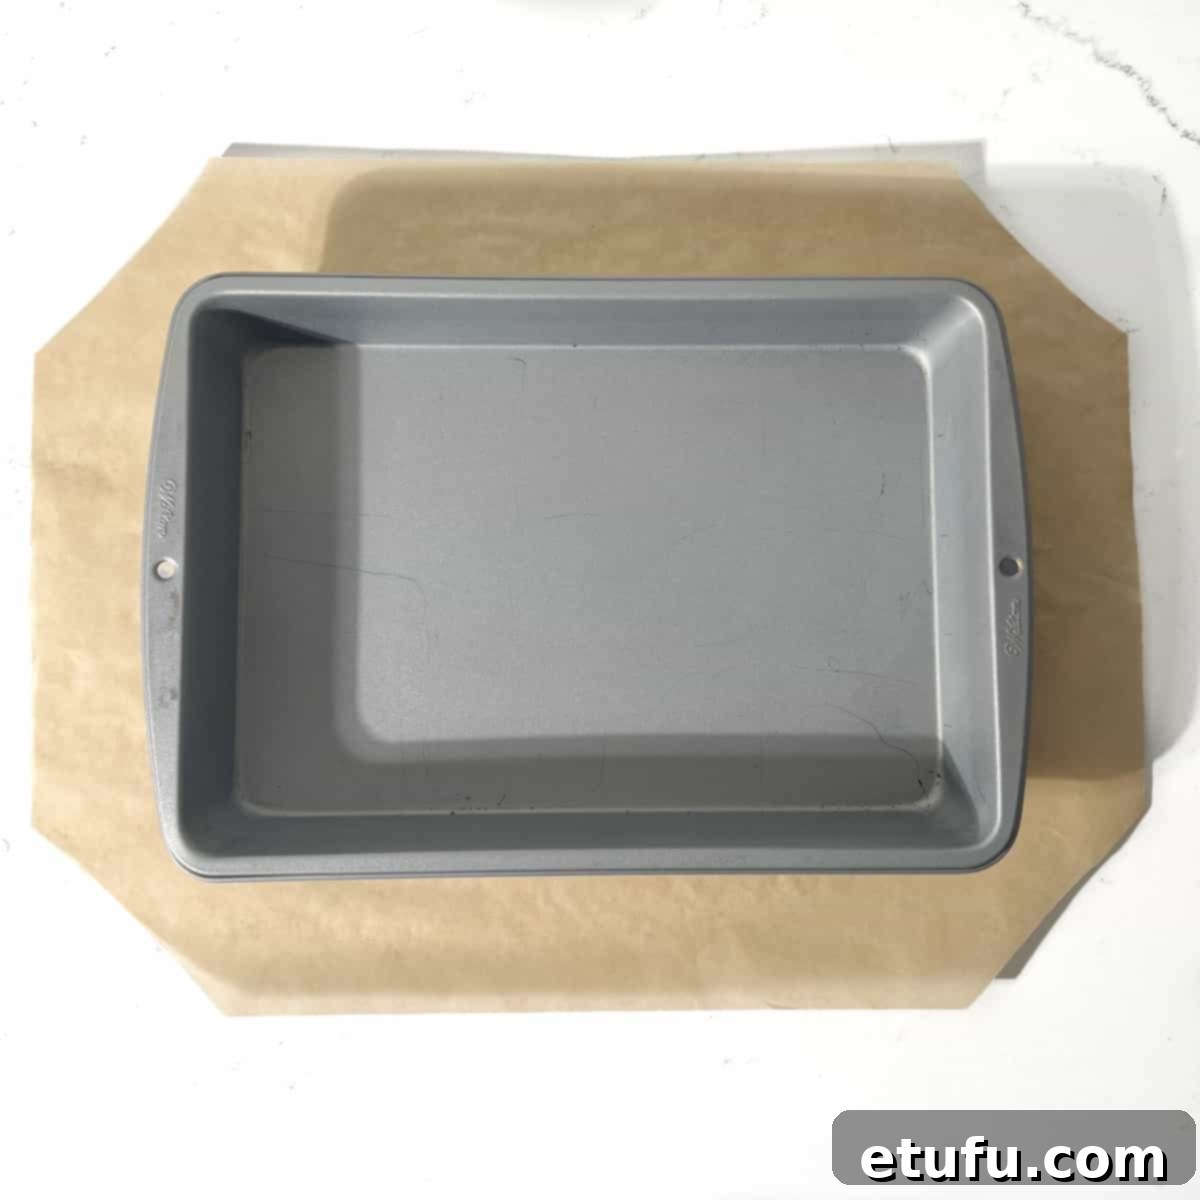
- Trim the Corners: To eliminate excess paper that would bunch up once the tin is lined, cut off each corner of the parchment. Measure about 4cm (1.5 inches) in from the edge of the paper towards the corner of the tray and make a straight cut there. This creates flaps that will overlap neatly.
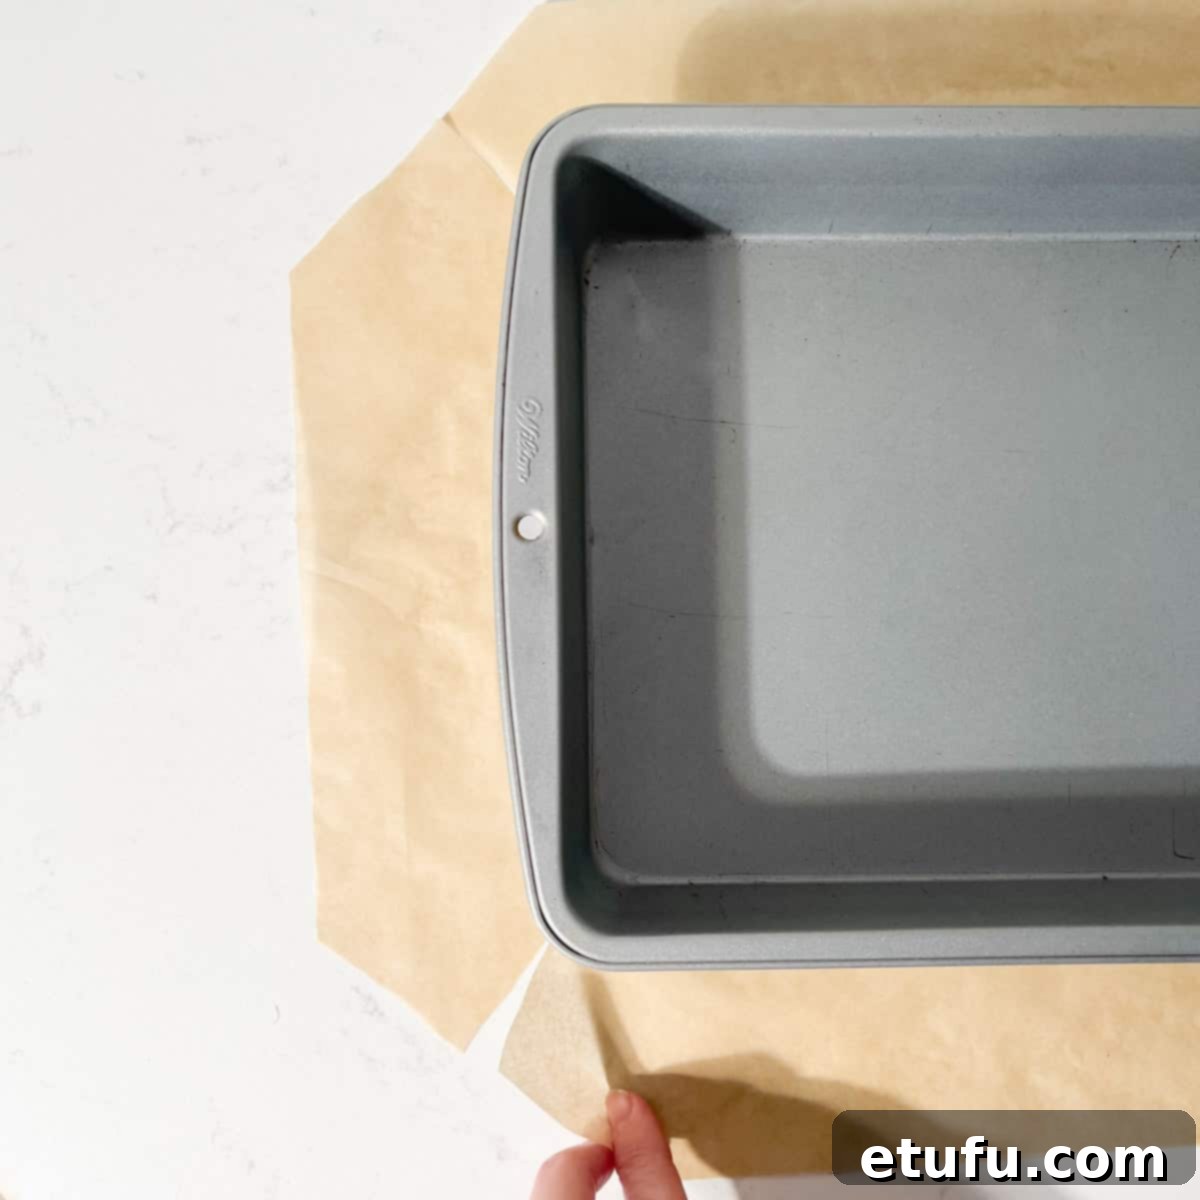
- Create Slits for Flexibility: On each corner of the paper, make a diagonal slit. Start from the outer edge of the paper and cut perpendicular to the edge, going right up to the corner of where the tray would sit (as shown in the image above). These slits allow the paper to bend and fit snugly into the tin’s corners.
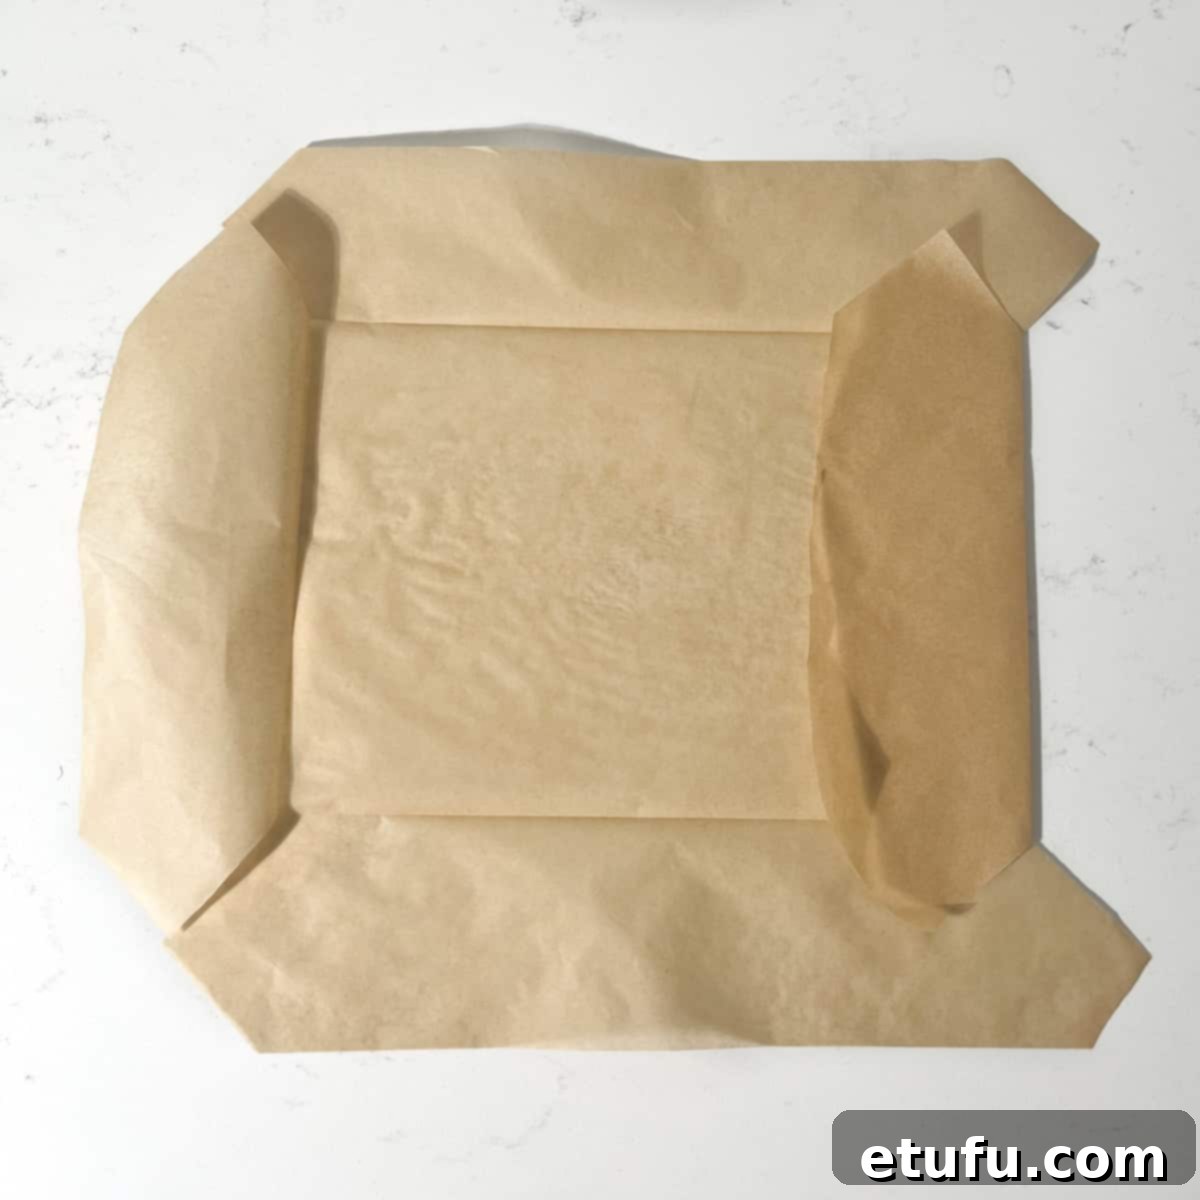
- Pre-Fold the Paper: Remove the baking tin from the paper. Now, carefully fold each side of the paper inwards towards the centre. Fold precisely to the depth of the cut you made in the previous step (as illustrated above). These pre-folds will help to perfectly shape the paper to fit the tin neatly and without creasing.
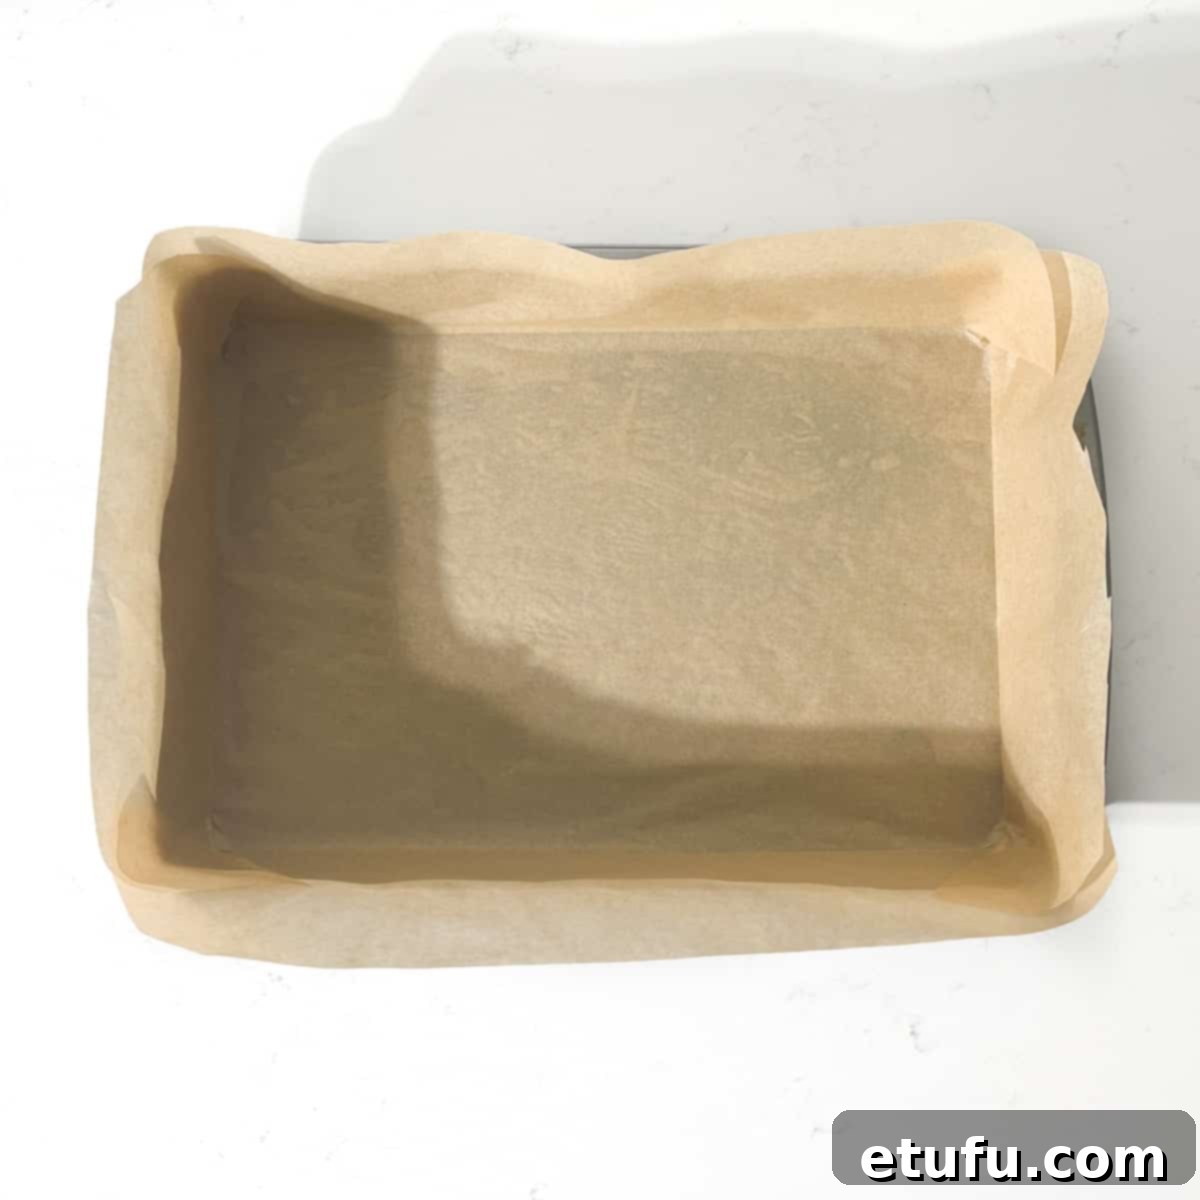
- Fit into the Tin: Gently lower the pre-folded baking paper into the empty tin. Press it firmly into all the corners and along the sides. Thanks to the folds and cuts you’ve made, it should fit perfectly, creating a seamless lining that covers the base and all four sides of the tin.

- Secure the Overlaps: The corners will naturally overlap slightly (as shown in the picture above). Press these overlaps down firmly to ensure they stay in place. A light grease of butter or cooking spray on the tin before placing the paper can also help the paper adhere better to the sides. Your tin is now perfectly prepared and ready for the cake batter!
How to Bake the Perfect Tottenham Cake – A Step-by-Step Guide
Phase 1: Essential Prepping for a Seamless Bake
- Bring Eggs to Room Temperature: If your eggs are fridge-cold, remove them from the refrigerator approximately 30 minutes before you plan to begin baking. Alternatively, for a quicker method, place the eggs in a bowl of warm (not hot) water for about 5 minutes to rapidly bring them to room temperature. This is vital for a fluffy sponge.
- Prepare the Milk: Gently heat the milk either in a microwave-safe jug or a small saucepan until it just begins to simmer around the edges. Crucially, allow it to cool down to a lukewarm temperature. You should be able to comfortably insert a clean finger into the milk without feeling any burning sensation.
- Line Your Baking Tin: Carefully line your rectangular baking tin with baking paper. Refer to our detailed guide ‘How to Line a Rectangular Baking Tin’ above for step-by-step instructions and remember the recommended tin size of approximately 33cm x 23cm.

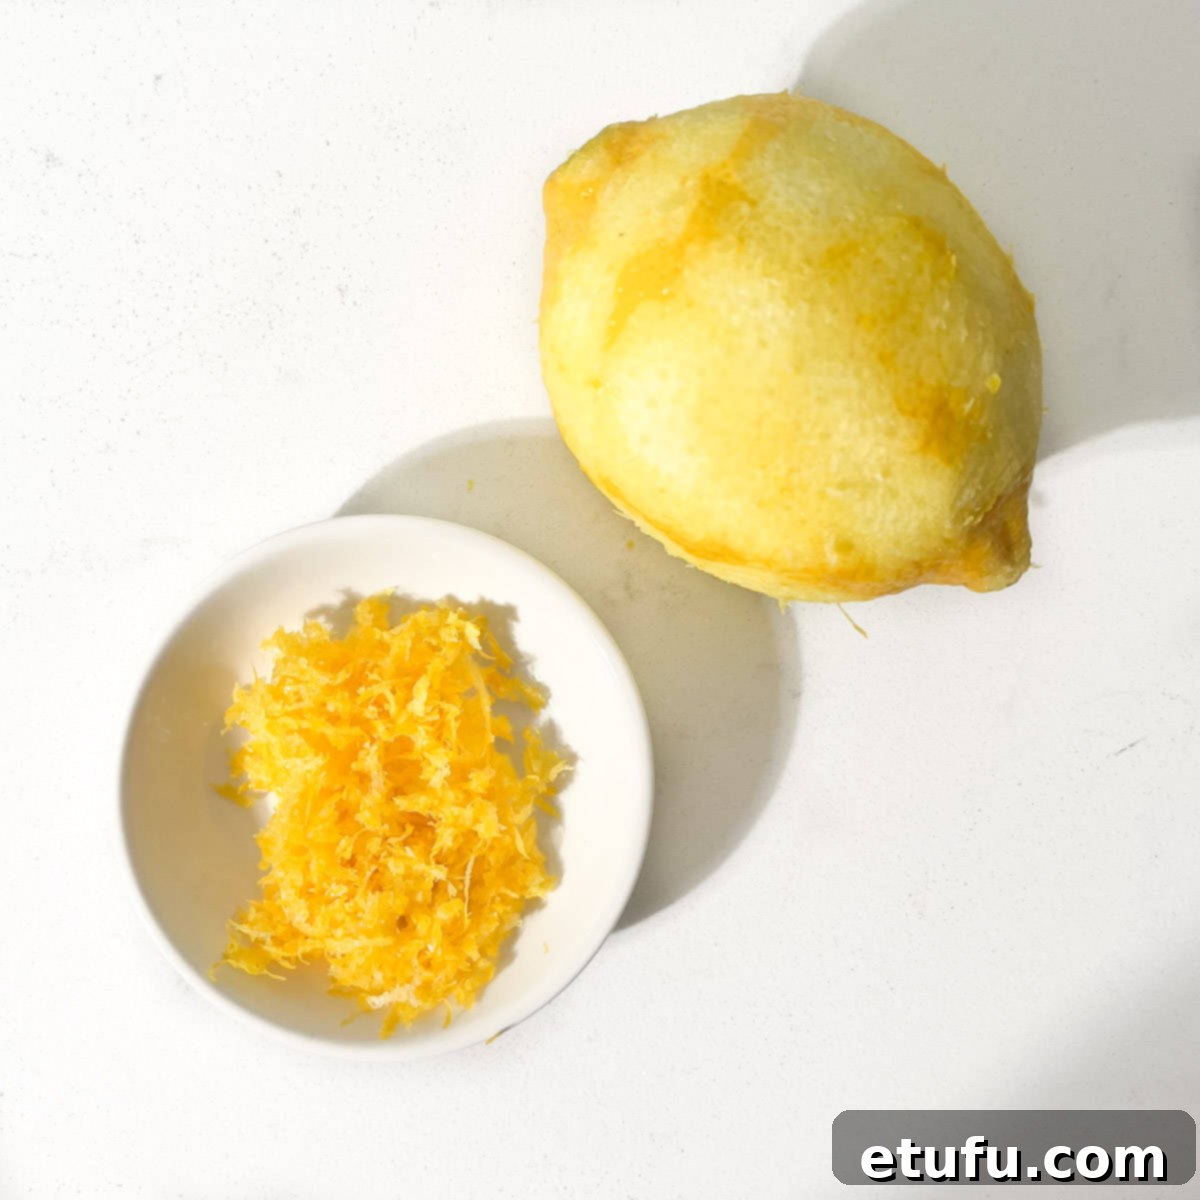
Zest the Lemon (If Using): If you plan to incorporate fresh lemon zest into your cake batter for an extra layer of flavour, now is the ideal time to zest the lemon. Set the zest aside for later.
Phase 2: Crafting the Feather-Light Vanilla Sponge
- Preheat Your Oven: Set your oven to preheat to 170℃ (338℉) or Gas Mark 3. Ensuring your oven is at the correct temperature before baking is essential for an even rise.

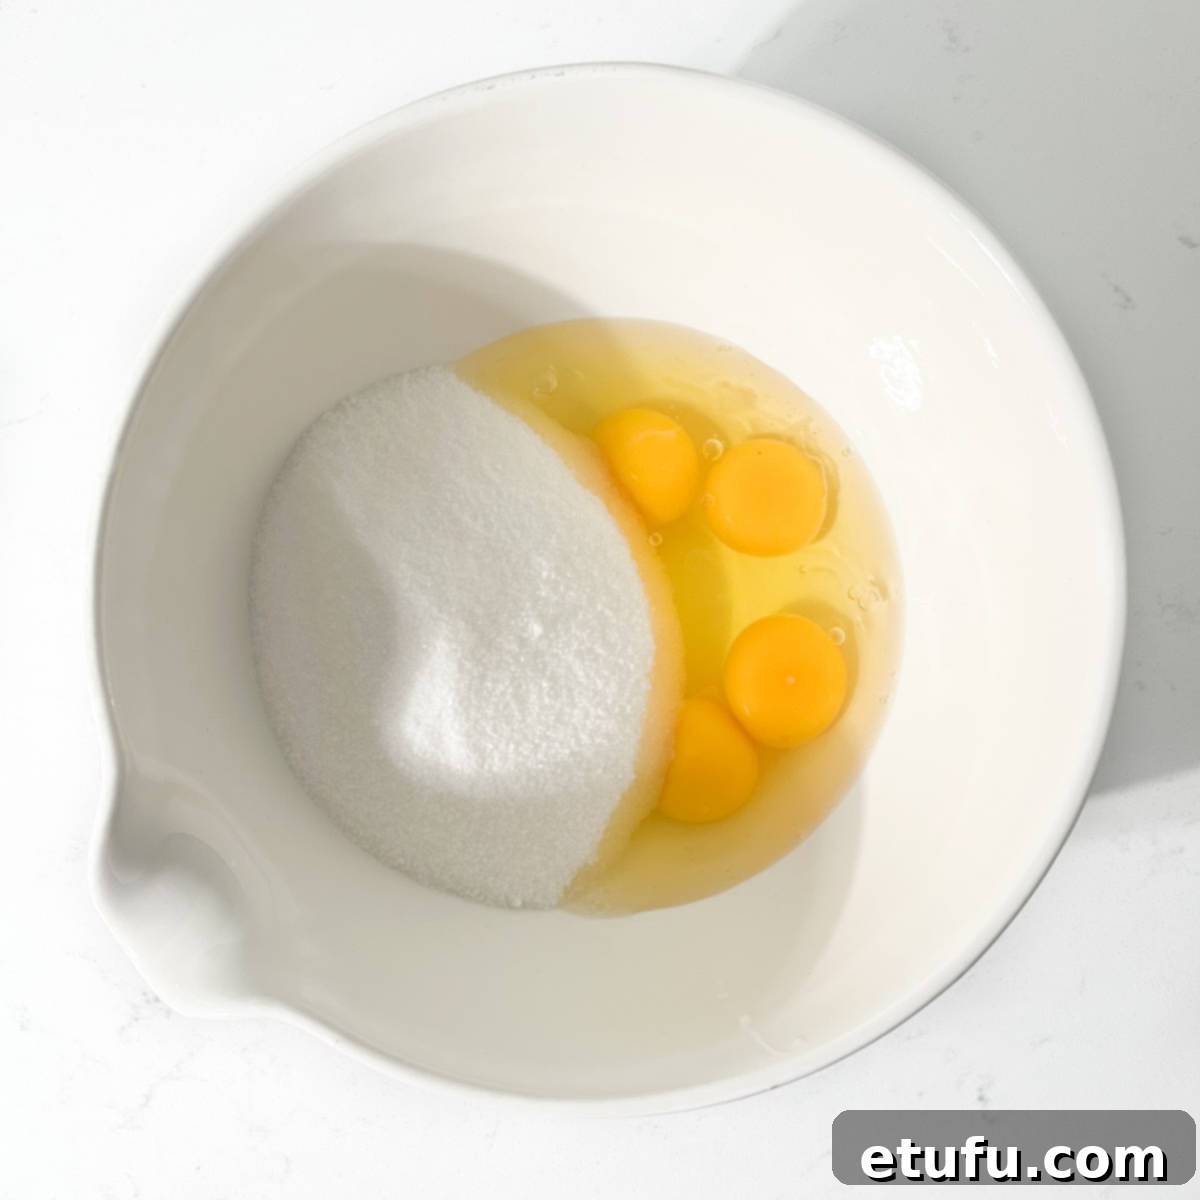
Combine Wet Ingredients: In a large mixing bowl, combine the granulated sugar, your room-temperature eggs, and the vanilla extract.

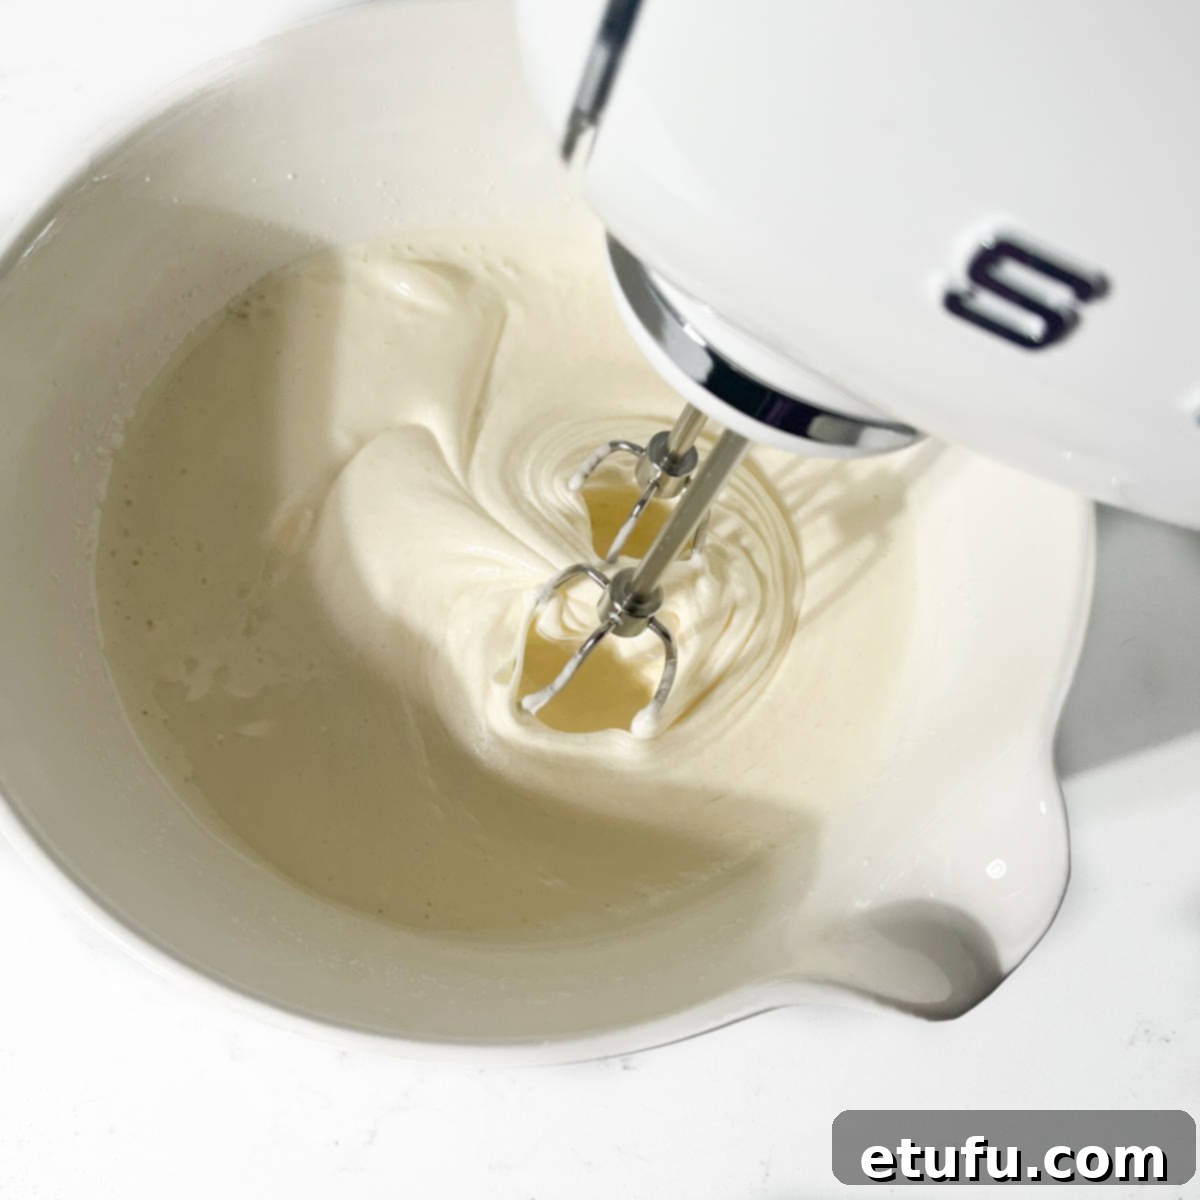
Whip to Perfection: Using an electric hand mixer or a stand mixer fitted with the whisk attachment, beat the sugar, eggs, and vanilla extract vigorously. Continue beating until the mixture becomes significantly thick, wonderfully fluffy, and very pale in colour. You should observe distinct trails left in the mixture by the beaters as they move. This crucial step typically requires a minimum of 5 minutes of continuous beating to incorporate sufficient air for a light sponge.

Prepare Liquid Mixture: In a separate small bowl or measuring jug, combine the neutral oil and the lukewarm milk. Whisk them together with a fork until they are reasonably well blended.

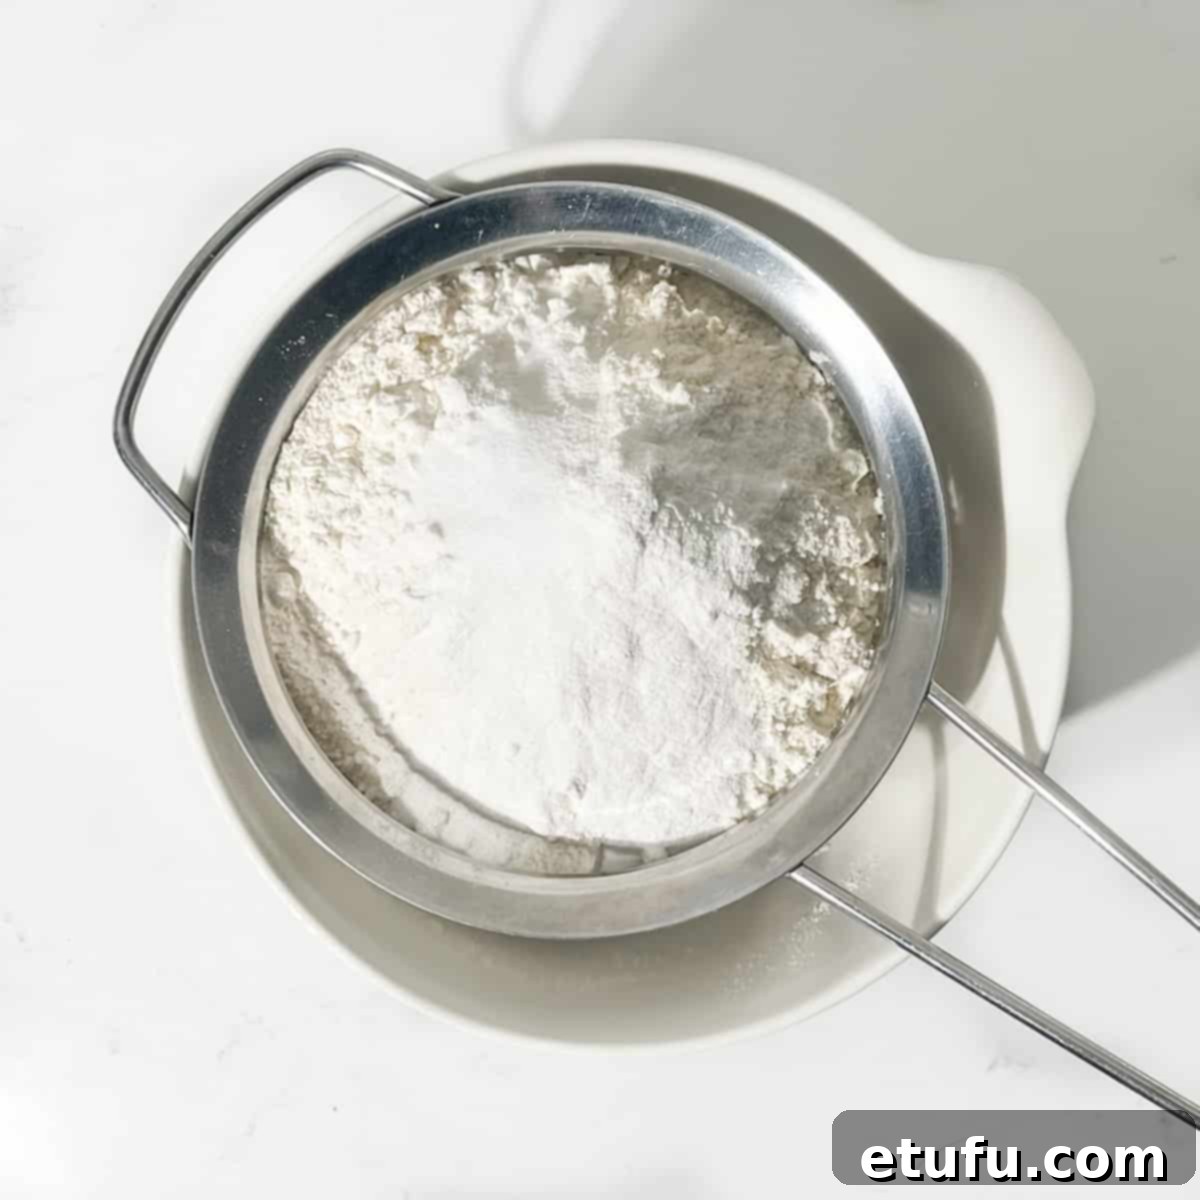
Sift Dry Ingredients: Into another bowl, sift together the all-purpose flour, baking powder, and salt. Sifting helps to aerate the flour and remove any lumps, contributing to a smooth batter.

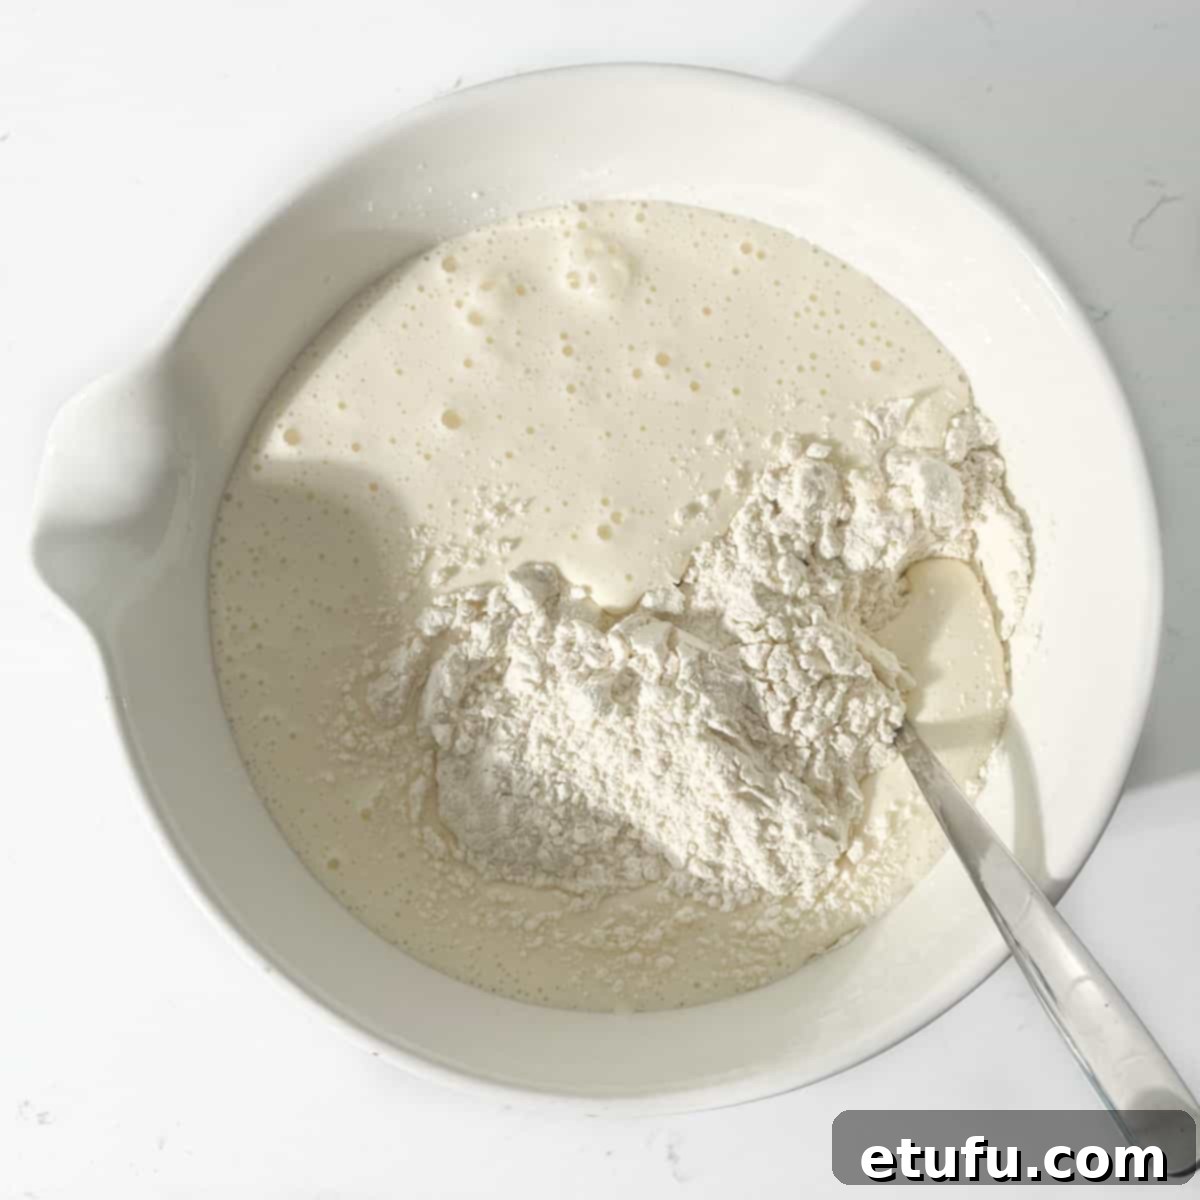
Incorporate Dry Ingredients (First Half): Add approximately half of the sifted flour mixture to the beaten eggs and sugar mixture. Using an electric hand mixer or stand mixer, beat on a very low speed. Mix just until the dry ingredients have been incorporated and no streaks of flour remain. Be careful not to overmix.

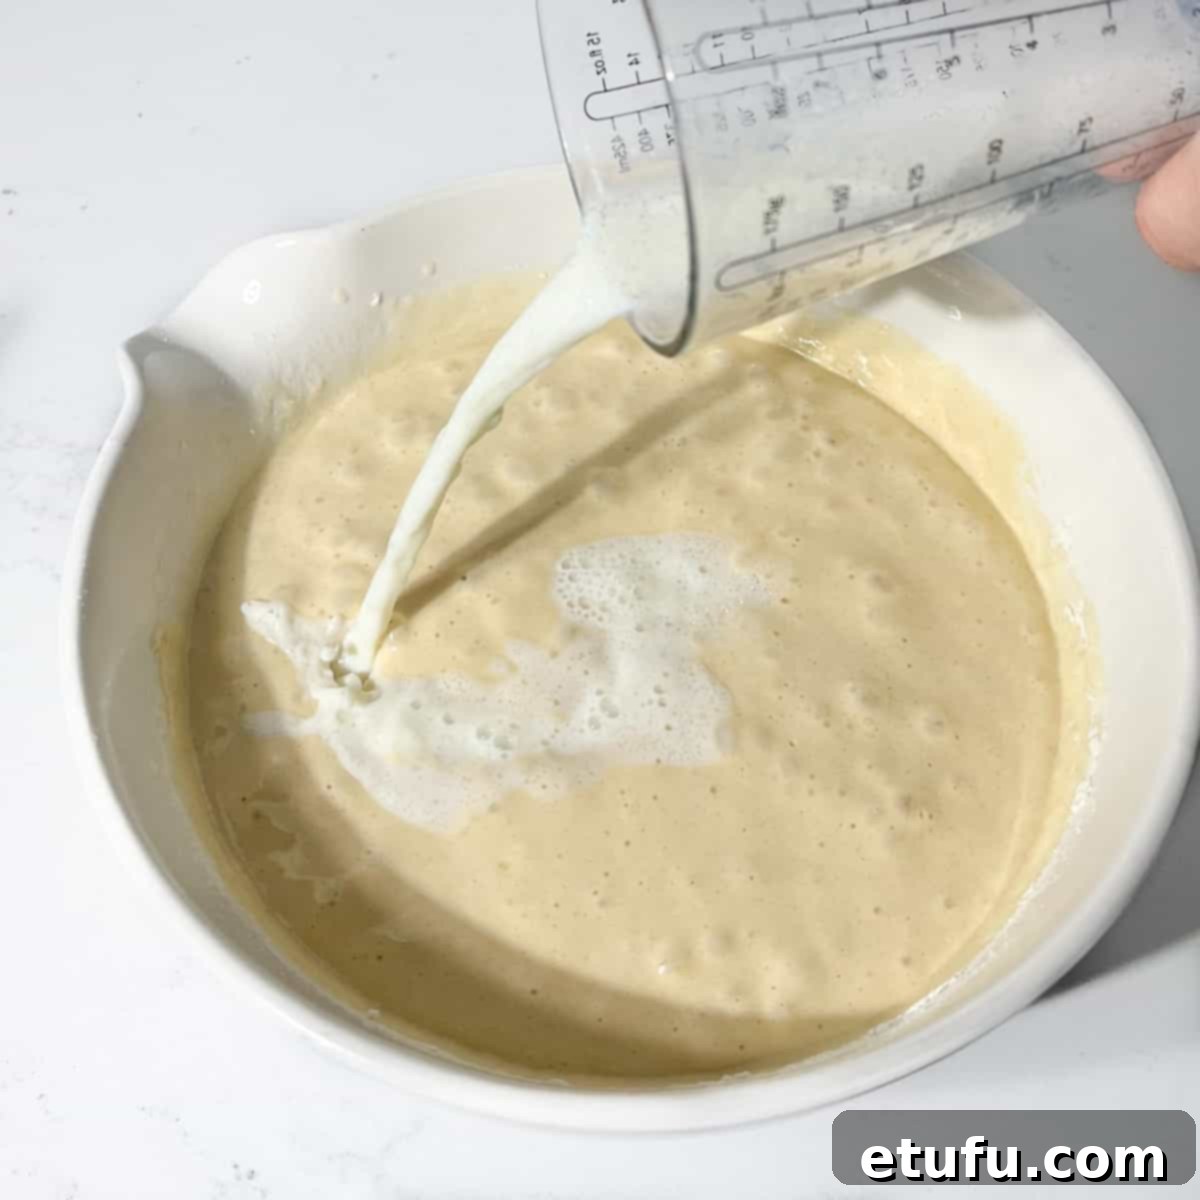
Incorporate Liquid Mixture (First Half): Next, add approximately half of the combined milk and oil mixture to the batter. Beat again at a low speed, just until the liquids have been fully incorporated into the batter.
- Repeat and Finish Batter: Repeat these steps one more time for the remaining half of the flour mixture and the remaining half of the liquid ingredients. Remember to beat on low speed after each addition and, crucially, be careful not to overbeat, as this can develop the gluten too much and result in a tough cake.
- Add Lemon Zest (If Using): If you are including lemon zest, add it to the batter at this point and beat it in very briefly, just to distribute it evenly.

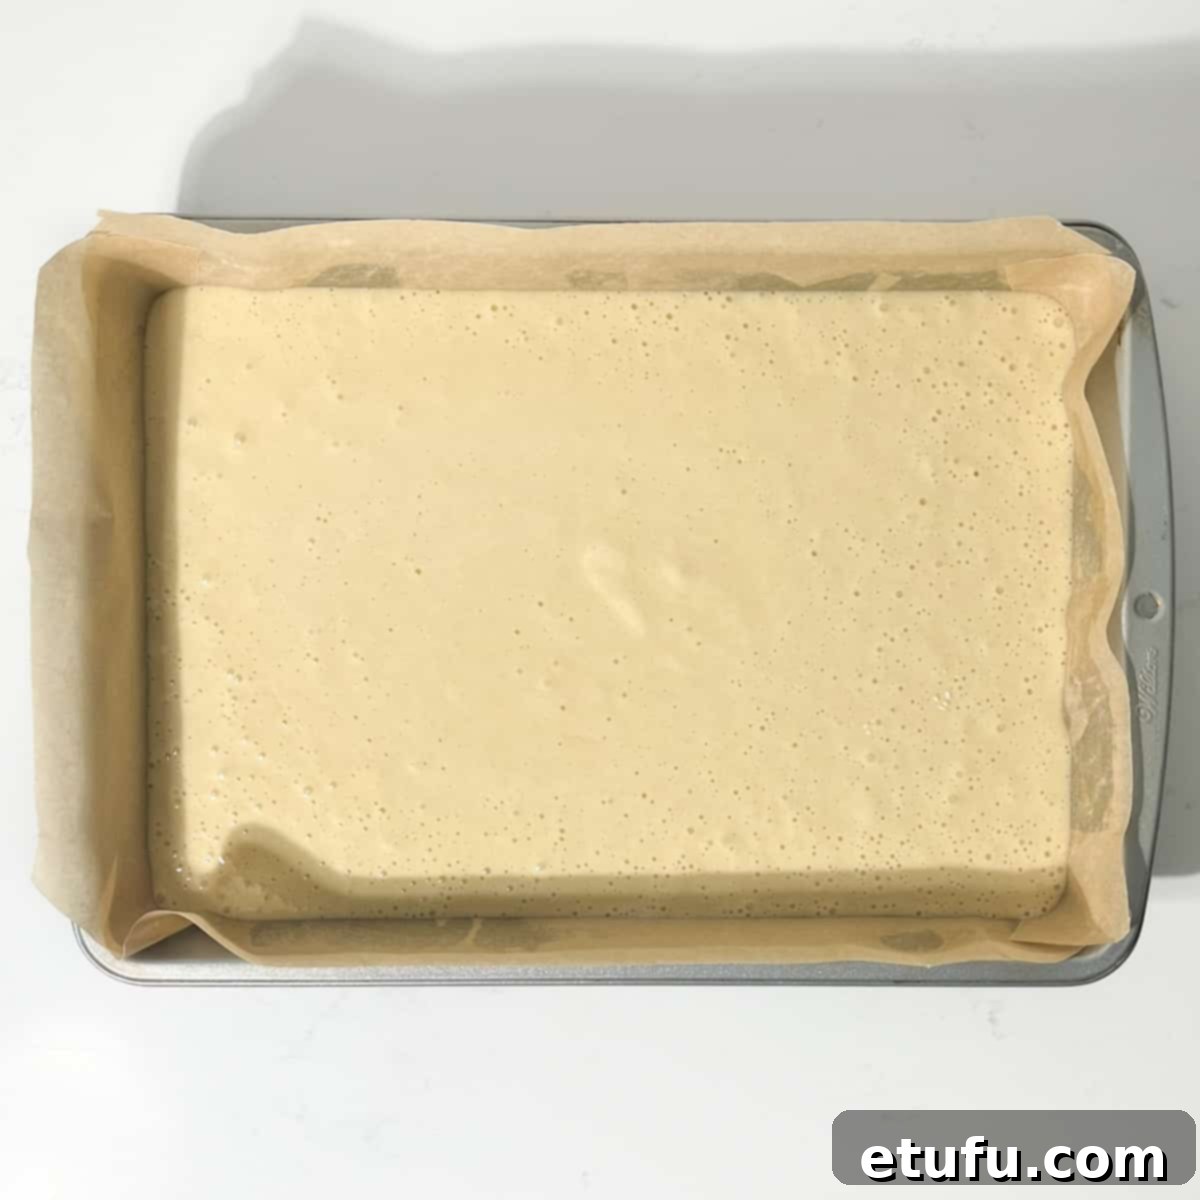
Pour and Prepare for Baking: Pour the smooth cake batter evenly into your prepared baking tin. Gently tap the tin on the counter a few times. This helps to release any large trapped air bubbles, ensuring a more even crumb structure in your finished cake.

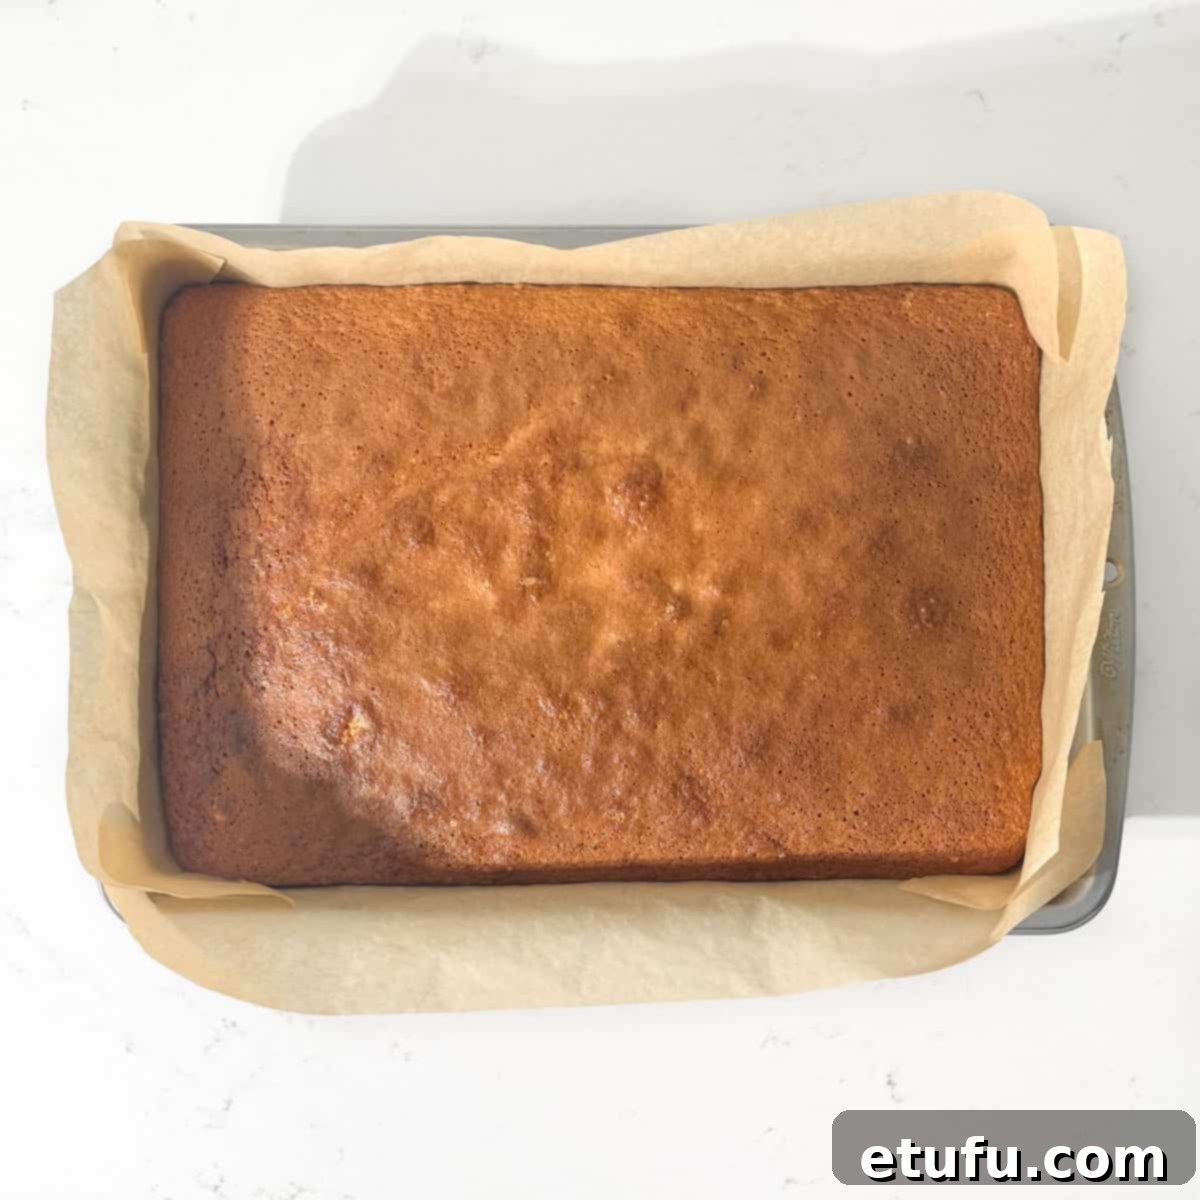
Bake the Cake: Place the tin on the middle shelf of your preheated oven. Bake for approximately 35-40 minutes. The cake is done when the top is golden brown and springs back gently when lightly touched. A skewer or cake tester inserted into the centre should come out clean. Begin checking for doneness at the 35-minute mark. If you know your oven tends to run hot, test even earlier, around 30 minutes, or consider using a slightly lower oven temperature from the start.

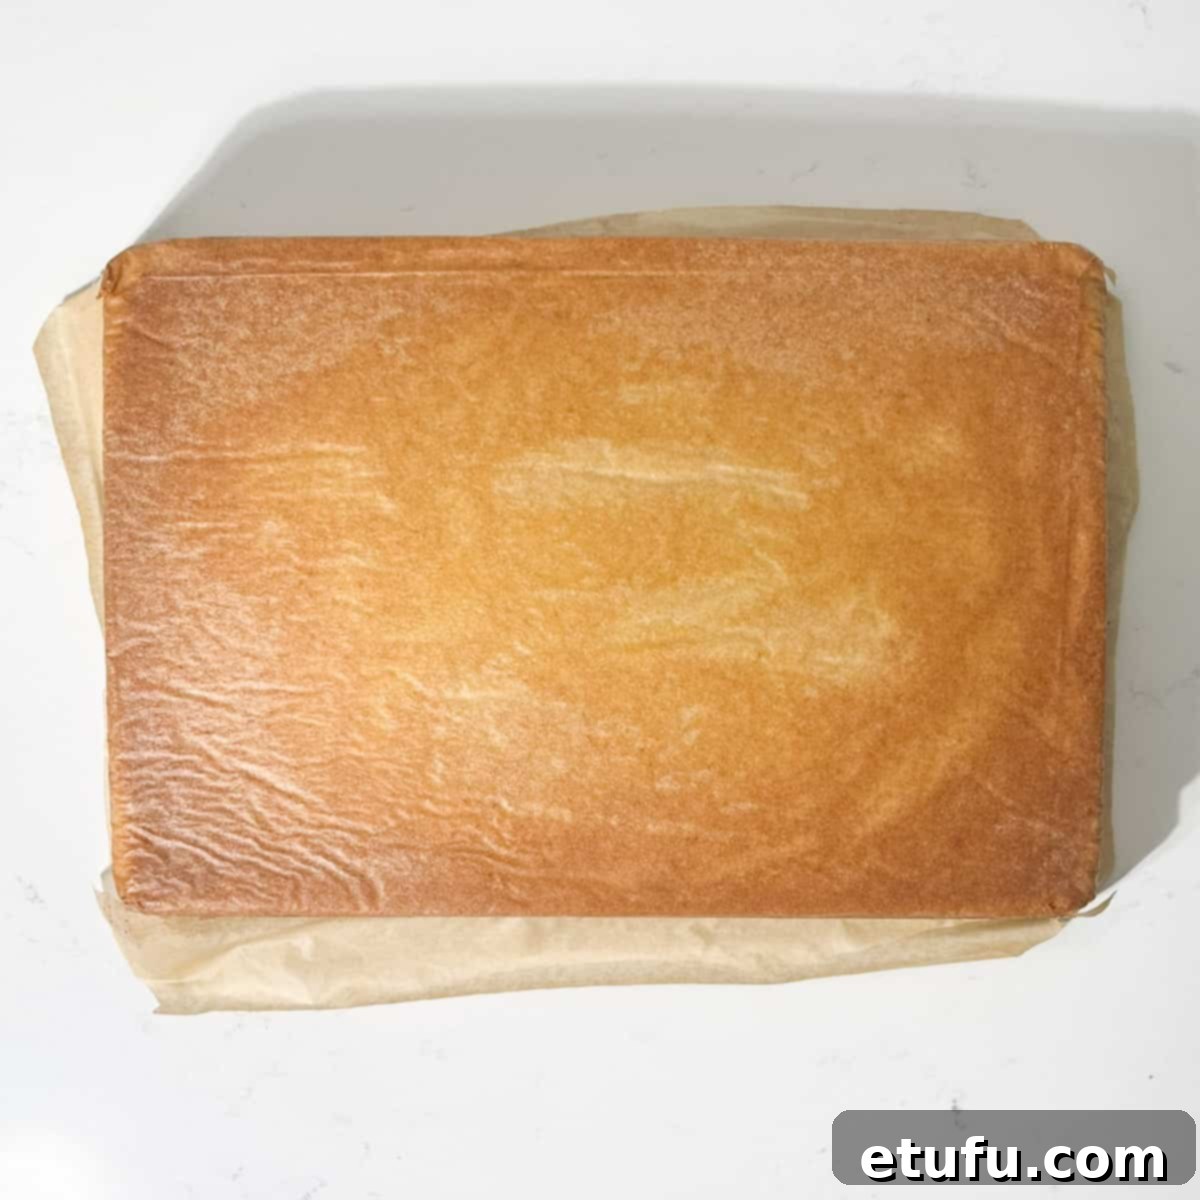
Cool in Tin: Once baked, remove the cake from the oven and let it cool in its tin for at least 20 minutes. This allows the cake to firm up slightly before you attempt to move it. After 20 minutes, carefully flip the cake upside down onto a wire cooling rack.

Remove Parchment and Cool Completely: Gently peel off the parchment paper, paying extra attention to the corners where the cake might have baked into the paper’s folds. Set the cake aside on the cooling rack to cool down fully and completely. This step is crucial before icing.
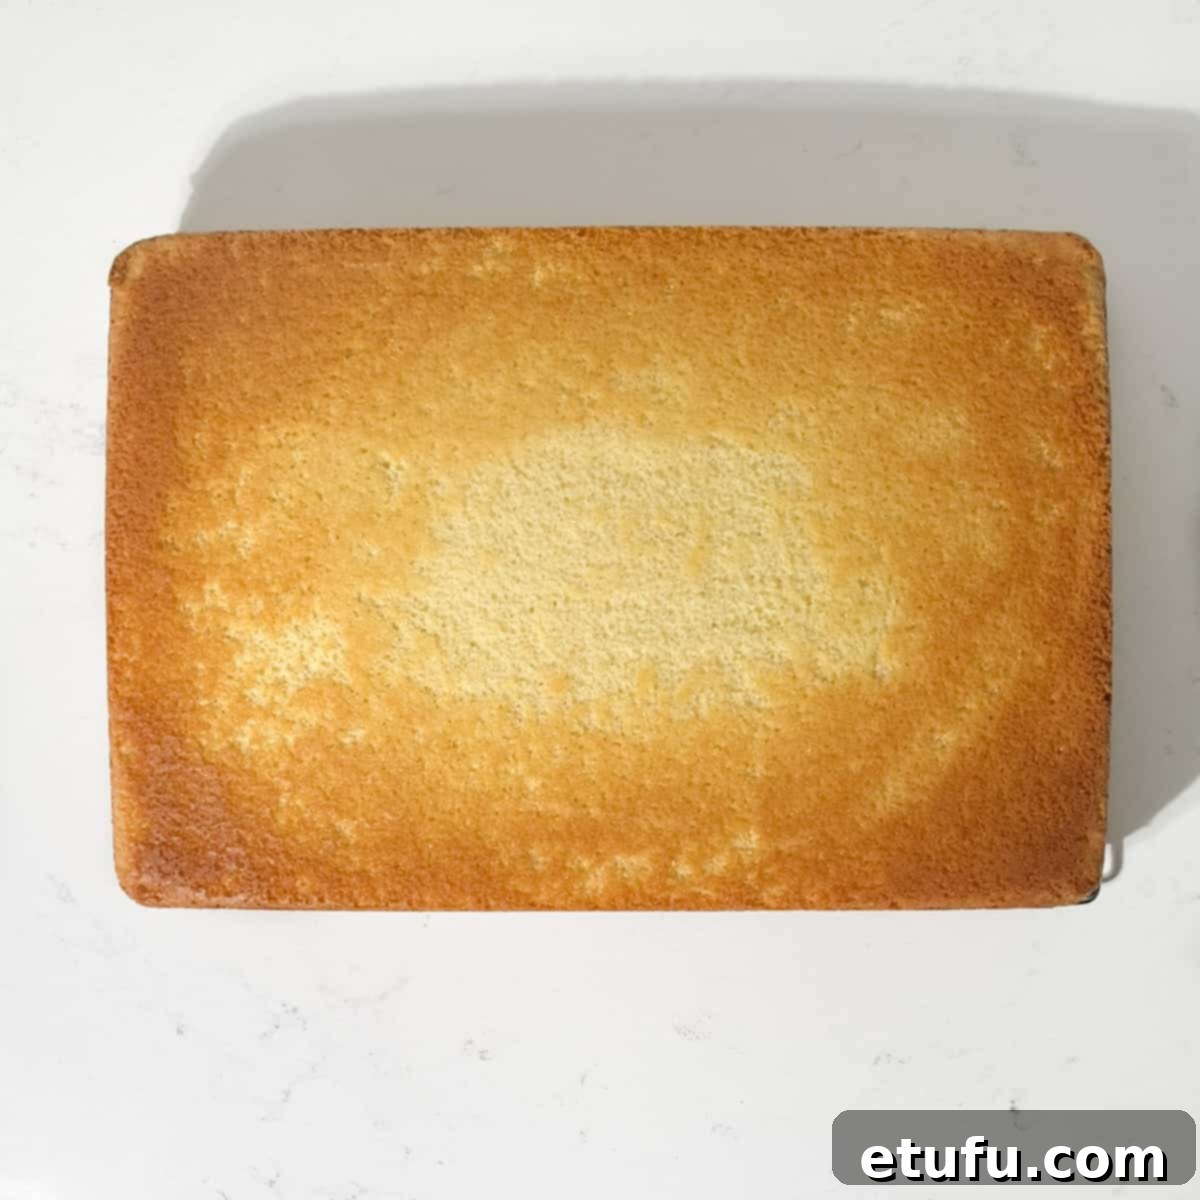
Note: We frost the cake on its bottom side after flipping. This clever trick ensures that you have a perfectly smooth and flat surface for applying the icing, resulting in a beautifully finished cake.
Phase 3: Crafting the Signature Pink Icing

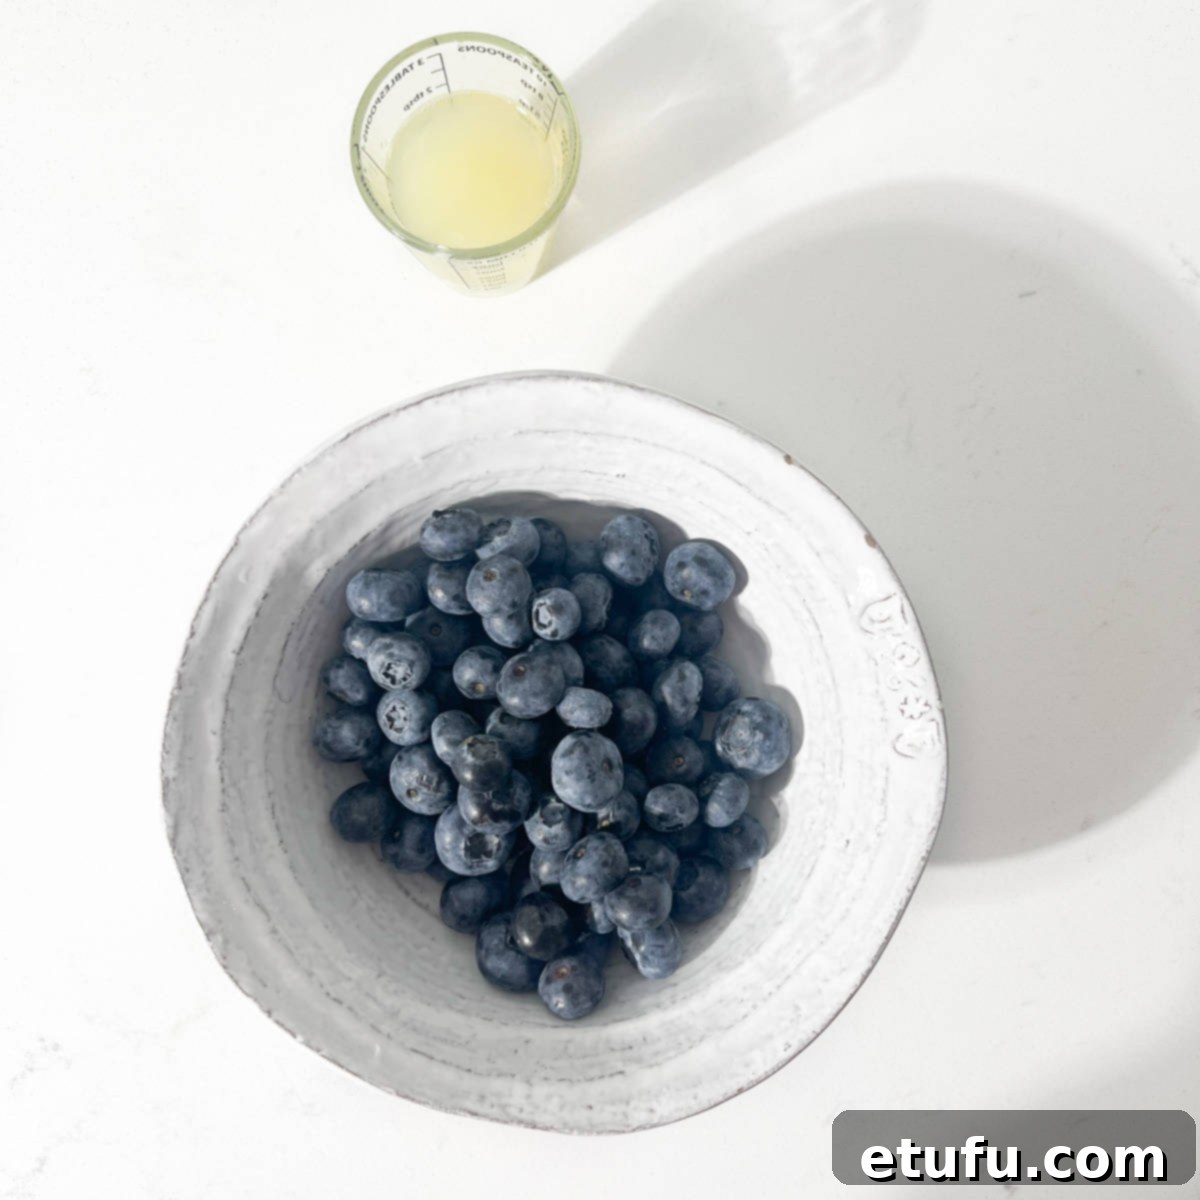
Prepare Berry Juice: Place your chosen berries (blueberries or raspberries) in a small, microwave-safe bowl. Pour the lemon juice or water over the top and give it a quick stir.
- Microwave Berries: Microwave the berries for 1 minute, stopping halfway through to stir them. If the berries still appear quite firm after this, microwave for an additional 15 seconds until they are softened and have released their juices.

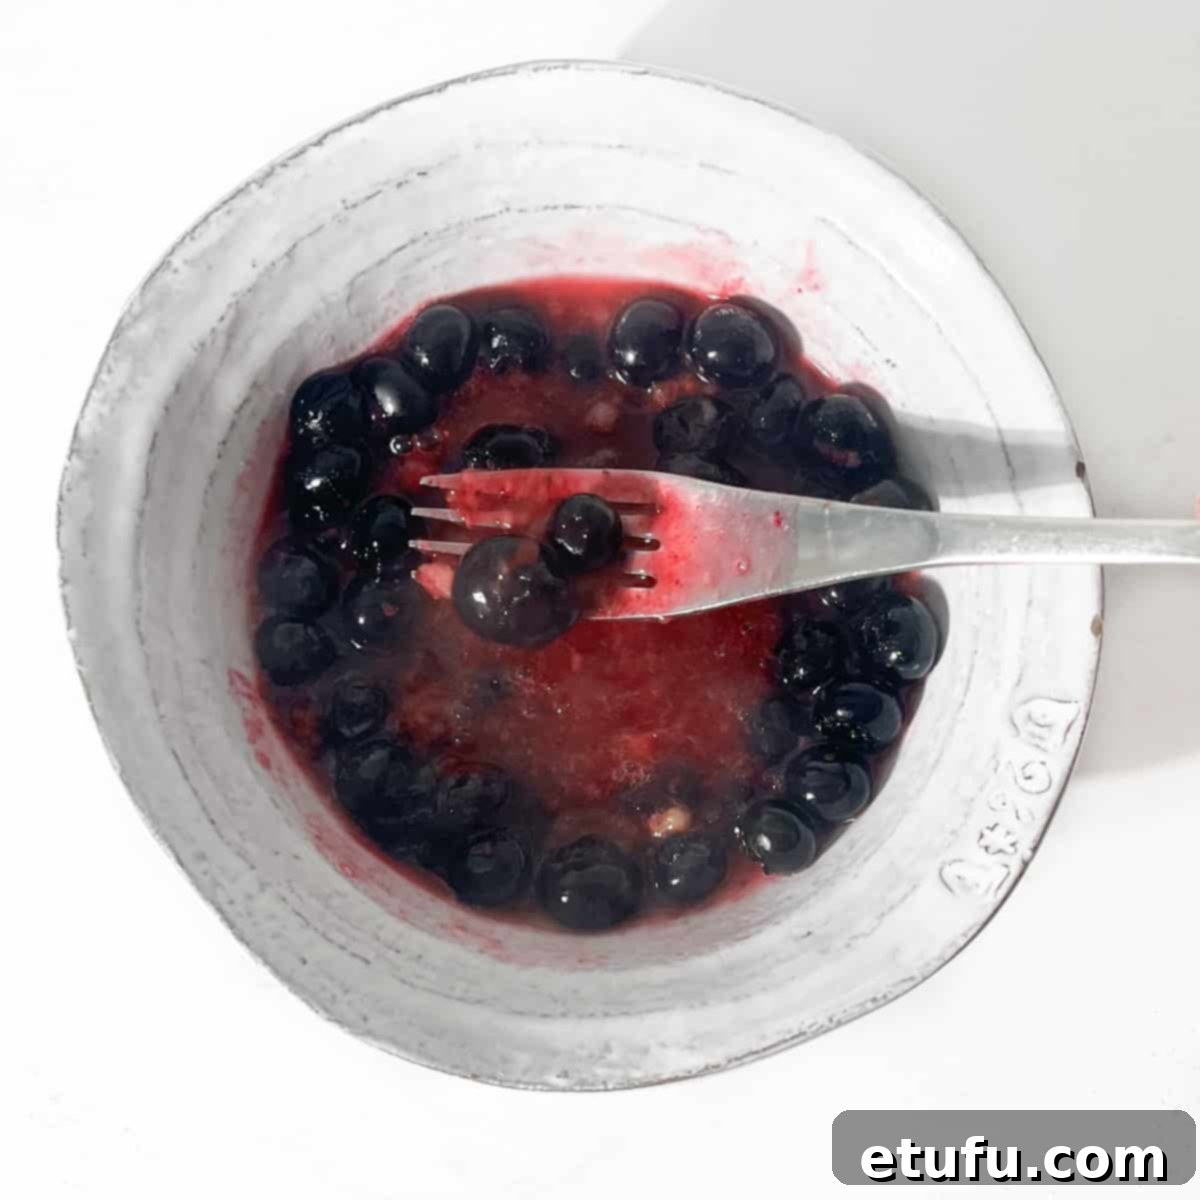
Mash the Berries: Use a fork to vigorously mash and squash the softened berries. The goal is to extract as much of their vibrant, coloured juice as possible.

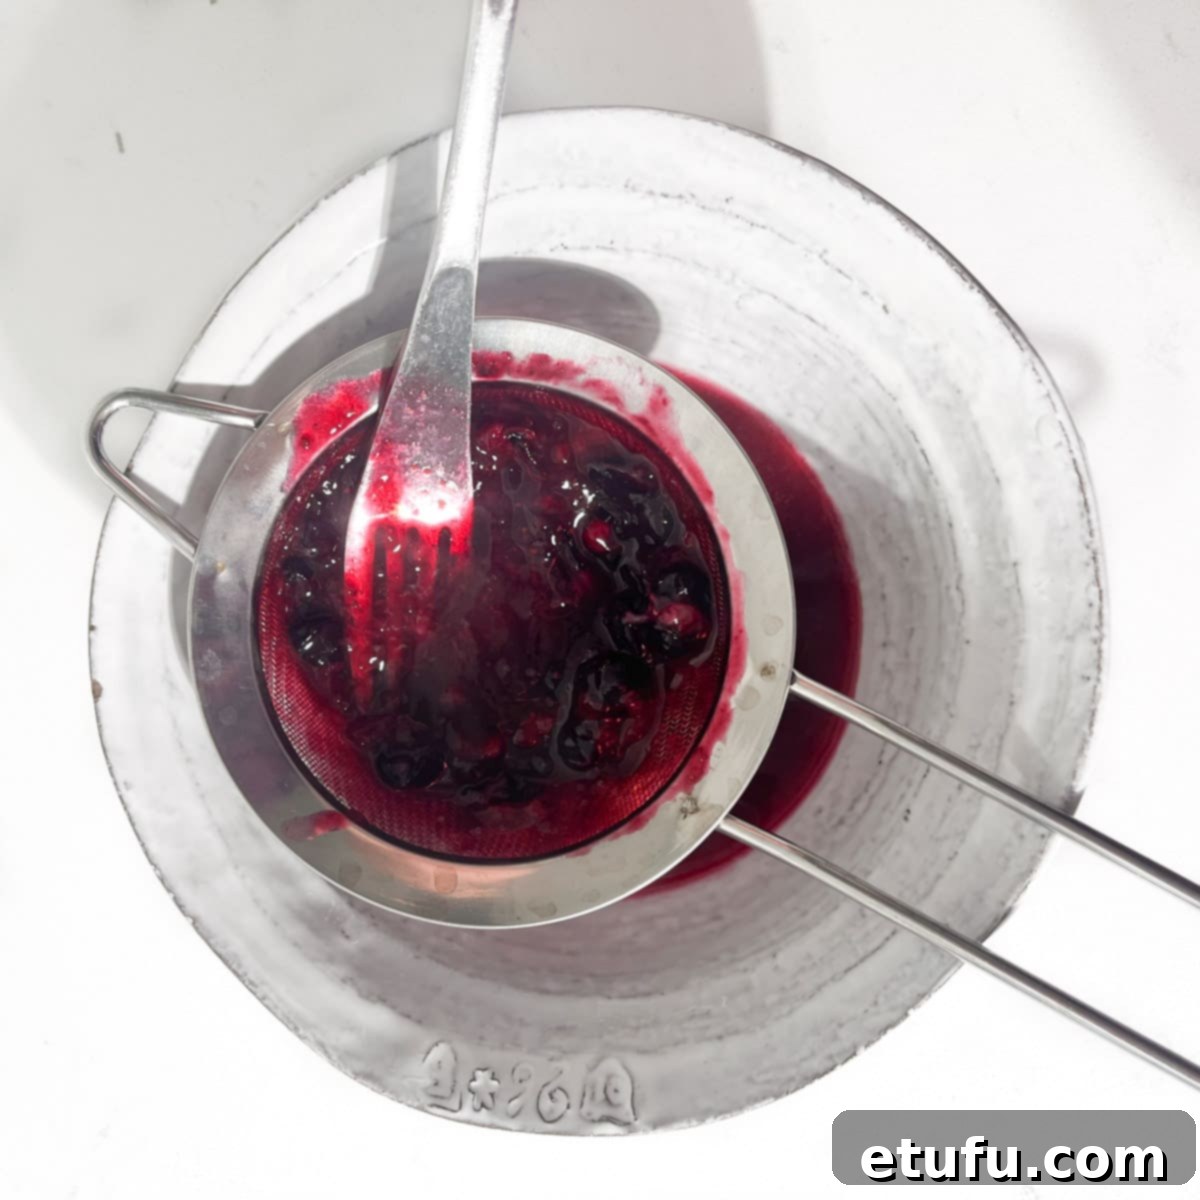
Strain the Juice: Place a fine-mesh sieve over a clean bowl. Pour the mashed berries into the sieve and press down firmly with the back of a spoon or fork to strain all the coloured juice into the bowl below. Discard the berry pulp left in the sieve.

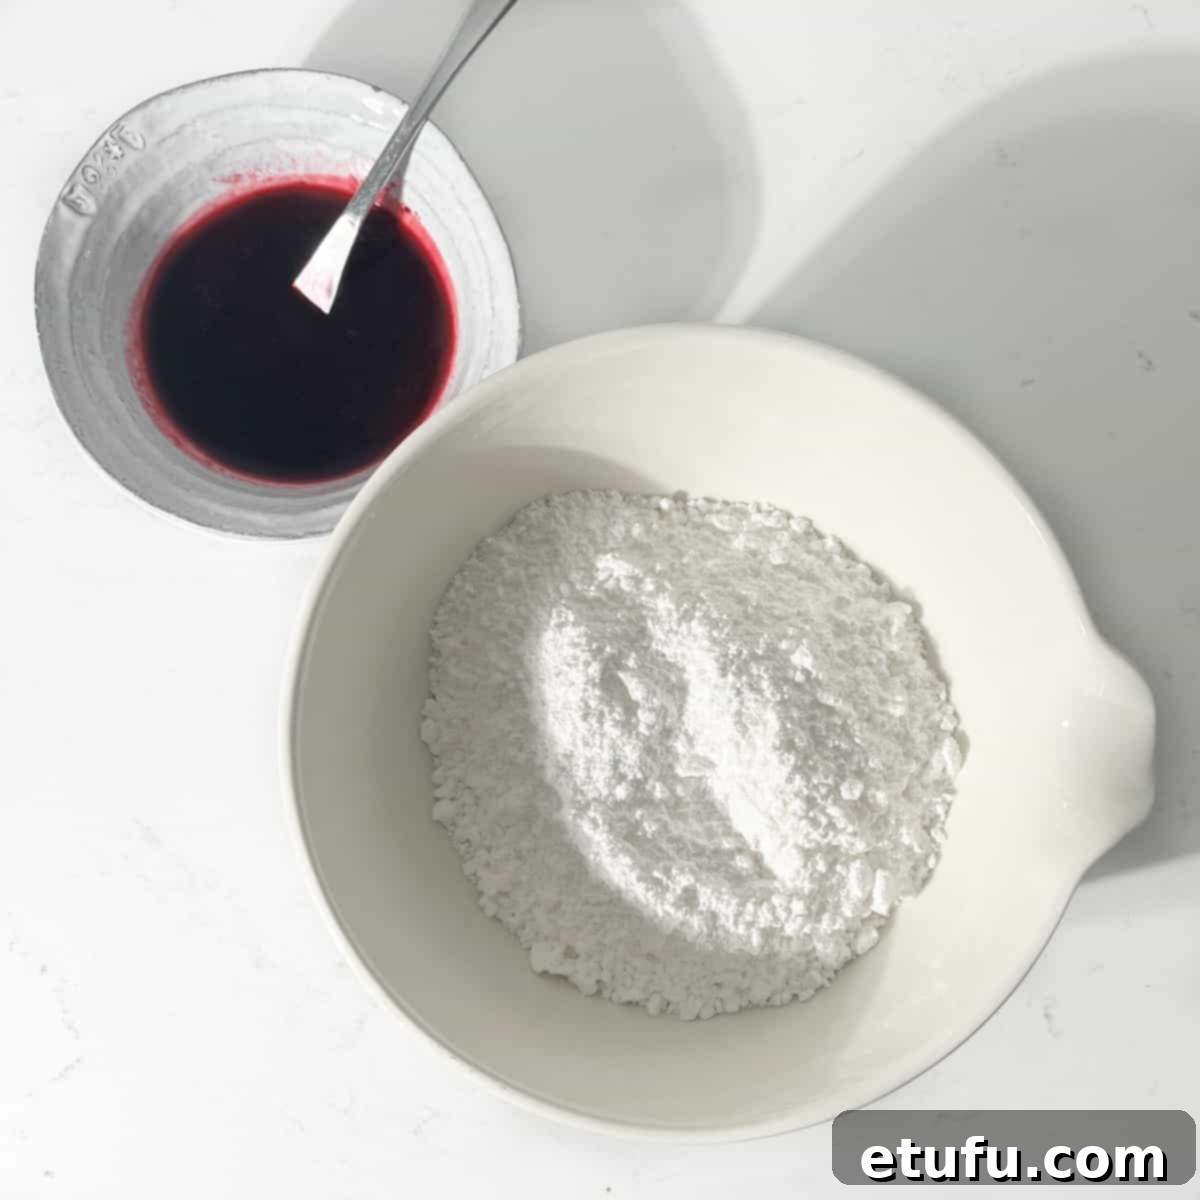
Prepare Icing Sugar: Add the icing sugar to a large mixing bowl. If your icing sugar is fresh and free-flowing, sifting isn’t strictly necessary. However, if it appears lumpy or compacted, definitely sift it to ensure a smooth, lump-free icing.

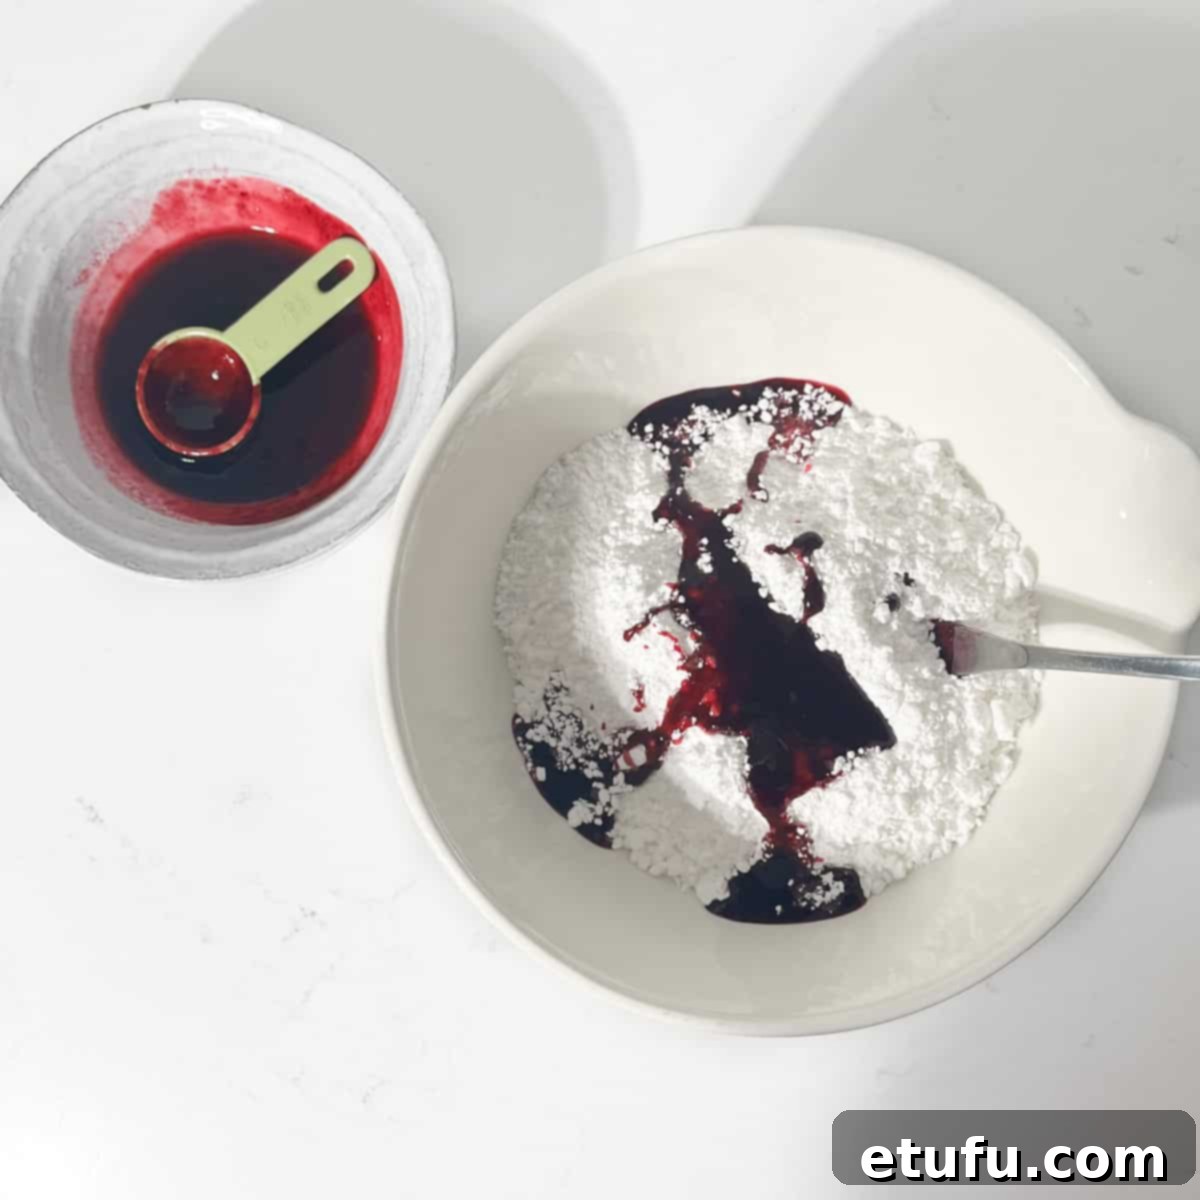
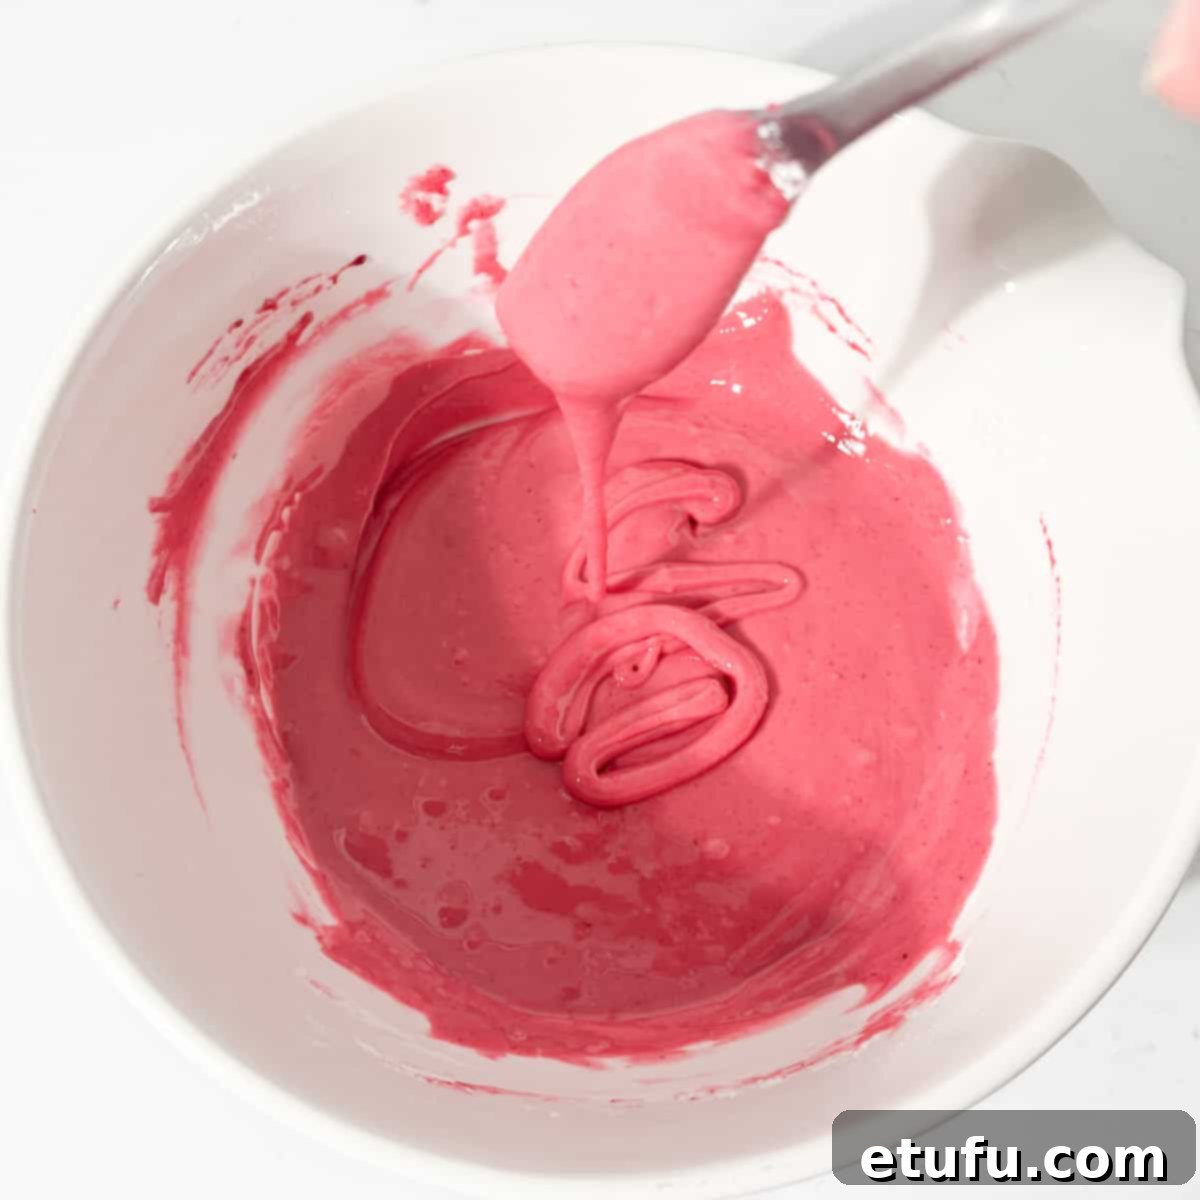
Begin Mixing Icing: Start by adding about 3 tablespoons of the reserved berry juice (or water if using food colouring) to the icing sugar. Mix it through thoroughly with a fork, breaking down any initial lumps.

Adjust Icing Consistency: Continue to add more liquid slowly, one teaspoon at a time, mixing well after each addition, until the icing reaches your preferred thickness. You are aiming for a thick yet spreadable consistency that isn’t too runny. Typically, around six tablespoons of liquid (total) will achieve the perfect balance. If you happen to run out of berry juice, simply use a splash of water to reach the desired consistency. For an even more intense pink colour, you can add a few drops of pink food colouring, but exercise caution to avoid an overly lurid shade.
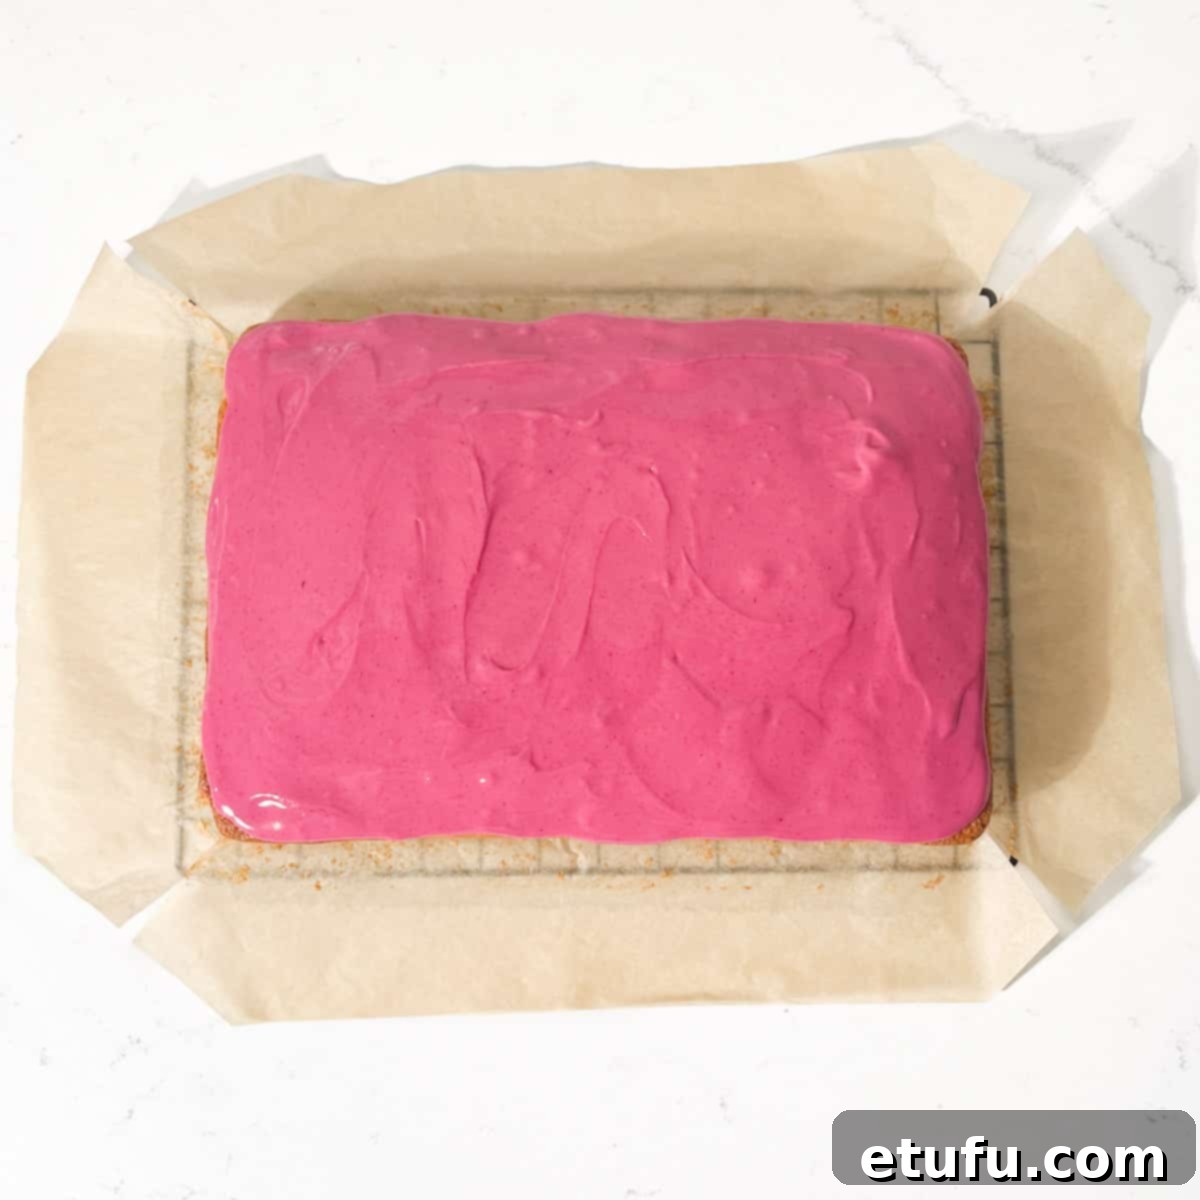
- Check Cake Temperature: Before proceeding, double-check that your cake has fully cooled down to room temperature. Applying icing to a warm cake will cause it to melt and run off. Once completely cool, scoop the prepared pink icing onto the smooth surface of the cake.

Spread the Icing: Use an offset spatula, a palette knife, or the back of a spoon to gently spread the icing evenly across the entire top surface of the cooled cake, making sure to reach all corners and edges. If your icing is on the slightly runnier side, apply it a little inward from the very edges, as it will naturally spread outwards on its own.
- Add Optional Toppings: Now is the time to add any desired toppings. You can sprinkle some desiccated coconut, colourful sprinkles, or any other chosen garnish over the top of the cake while the icing is still wet. This ensures they adhere beautifully. Alternatively, you can choose to leave the icing plain for a classic look. Allow the icing to set completely before slicing and serving.
Top Tips for Tottenham Cake Perfection
Achieving a perfectly moist and fluffy Tottenham Cake is within reach with these expert tips:
Invest in a Scale and Quality Measuring Spoons
Precision is paramount in baking. Consider investing in a reliable digital kitchen scale for dry ingredients and a set of high-quality measuring spoons. Accurate ingredient measurements, especially for flour and leavening agents, play a crucial role in ensuring the cake’s texture and rise are consistently perfect. This small investment can make a big difference in your baking success.
Always Bring Eggs to Room Temperature
This tip is often overlooked but is fundamental for a light sponge. Remember to allow fridge-cold eggs to reach room temperature before you begin mixing. Cold eggs, when added to a batter, can cause other ingredients like fats to seize up, leading to a lumpy mixture and an underdeveloped emulsification. Room-temperature eggs blend more smoothly and uniformly into the batter, which in turn helps to create a tender, evenly rising cake with a delicate crumb structure. You can achieve this by removing eggs from the fridge about 30 minutes before you start, or by placing them in warm water for 5 minutes.
Beat the Eggs and Sugar Thoroughly
Do not rush this initial step! Taking a full 5 minutes, or even slightly longer, to vigorously beat the eggs and sugar together is critical. This process incorporates a significant amount of air into the mixture, making it light, fluffy, and very pale. Using an electric mixer is highly recommended here, as it effectively aerates the mixture, providing the ultimate lift for your sponge. Well-beaten eggs and sugar are the secret to that wonderfully tender and airy crumb.
Gently Does It When Mixing in Dry Ingredients
Once you start adding the flour, the key is to mix gently and minimally. Overmixing the batter, especially after the flour has been added, can quickly develop the gluten, resulting in a tough, dense cake rather than a light and fluffy one. Handle the batter with care to preserve all those essential air bubbles you worked so hard to incorporate. Stop mixing as soon as no specks of dry flour are visible and keep your mixer on the lowest speed possible.
Know Your Oven’s Quirks
Every oven is different. Get to know your oven’s unique characteristics – whether it tends to run hotter or cooler than the temperature it displays. If you notice inconsistencies, be prepared to tweak your bake times and temperatures accordingly. Trust your instincts and perform visual tests, such as checking if the top of the cake springs back when touched, and using a clean cake tester (or skewer) as reliable indicators of doneness. When in doubt, it’s generally safer to bake at a slightly lower temperature for a longer period, within reason, to prevent overbaking or burning.
Effortlessly Fix Thin Icing
Don’t fret if your icing turns out a bit too thin or runny initially. This is an easy fix! Simply blend in additional icing sugar gradually, a tablespoon at a time, mixing well after each addition, until it reaches the desired thick, yet spreadable consistency. The key is to add liquids in small, controlled amounts to prevent your icing from becoming overly runny in the first place.
Add Toppings to Wet Icing for Best Adhesion
For the perfect finishing touch, ensure you sprinkle any coconut, sprinkles, or other decorative toppings onto the icing immediately after spreading it, while it is still moist and tacky. This critical timing ensures that your chosen embellishments stick beautifully in place, creating an appealing presentation. If you wait for the icing to set, the toppings will simply roll off.
Patience is Key: Allow Icing to Set Before Cutting
Exercise a little patience and give the icing ample time to firm up and set completely before you attempt to slice your cake. This vital step helps to maintain clean, well-defined squares or rectangles, preventing the icing from smudging or sticking to your knife. Once the icing is firm, use a long, sharp knife, wiping it clean between cuts, for precise, neat slices. On the flip side, remember that when it comes to Tottenham Cake, it’s not always about achieving absolute perfection in its appearance. It’s truly about embracing its comforting, down-to-earth, and unpretentious charm. So, while neat slices are lovely, don’t stress too much about how your cake looks; focus on enjoying the delightful simplicity and taste it brings!
Creative Variations for Your Tottenham Cake Sponge
While the classic Tottenham Cake with its pink icing is beloved, the versatile vanilla sponge base offers endless possibilities for creative variations:
- Classic Plain Vanilla: For a purer taste, simply omit the lemon zest from the cake batter to create a truly plain vanilla cake. This allows the delicate vanilla flavour to shine through even more prominently.
- Explore Other Flavorings: Don’t limit yourself to lemon! The basic sponge is an excellent canvas for other flavour enhancements. Consider adding a few drops of almond essence for a nutty aroma, orange extract for a citrusy brightness, or even a tablespoon of cocoa powder for a subtle chocolate twist (though this would stray from the traditional vanilla).
- Alternative Toppings and Frostings: While our signature pink icing is iconic, the sponge base is perfectly adaptable for other delicious toppings and buttercreams.
- Pair it with a rich and creamy Mascarpone Cream for a more decadent dessert.
- For a truly indulgent and whimsical treat, top it with fluffy Homemade Marshmallow Fluff, perhaps toasted lightly for extra flavour.
- Traditional buttercream, cream cheese frosting, or even a simple lemon glaze would also be fantastic.
Keep in mind, however, that while these variations are delicious, they would technically no longer be considered “Tottenham Cake” as it’s defined by its specific pink icing. But they certainly make for wonderful cake creations!
Can This Cake Recipe Be Baked in Round Cake Tins?
Absolutely! The versatile batter from this Tottenham Cake recipe can indeed be baked in round cake tins, making it adaptable for layer cakes or more traditional round presentations. This recipe yields enough batter to make two standard 8-inch (20cm) round cakes. When baking in round tins, adjust your oven settings slightly:
- Oven Temperature: Keep your oven preheated to 170℃ (338℉) / Gas Mark 3.
- Baking Time: The baking time will be shorter for round cakes due to their differing surface area and thickness compared to a single traybake. Bake for approximately 25-30 minutes. Always check for doneness by inserting a skewer into the centre; it should come out clean.
Remember to prepare your round tins by greasing and flouring them, or lining the bottoms with parchment paper, to ensure easy release.
Can You Transform This Recipe into Delicious Cupcakes?
Yes, this versatile vanilla sponge batter is perfectly suited for making delightful cupcakes! The recipe quantity will yield approximately 24 standard-sized cupcakes. Converting the traybake into cupcakes is a fantastic option for individual servings or parties.
- Oven Temperature: Maintain the oven temperature at 170℃ (338℉) / Gas Mark 3.
- Baking Time: Cupcakes bake much faster than a large cake. Bake for approximately 20-25 minutes. Begin checking for doneness at 20 minutes with a skewer or by gently pressing the top of a cupcake – it should spring back.
Remember to line your muffin tin with paper cupcake liners before filling them about two-thirds full with batter. Once cooled, you can top them with the signature pink icing or get creative with other frosting flavours.
Storing Your Tottenham Cake for Lasting Freshness
Proper storage ensures your Tottenham Cake remains delicious and moist for as long as possible. Here are our recommendations:
- Room Temperature Storage (Iced Cake): For up to 3 days, store the iced Tottenham Cake in an airtight container at room temperature. Choose a cool, dry place away from direct sunlight, moisture, and heat to prevent the cake from drying out or the icing from becoming sticky.
- Freezing Un-Iced Cake for Longer Storage: If you’re planning ahead or have leftover un-iced cake, it freezes beautifully for extended freshness. Once the cake has fully cooled, wrap it tightly first in plastic wrap (cling film), ensuring no air pockets, and then in a layer of aluminium foil. This double wrapping helps to protect it from freezer burn. Store in the freezer for up to 2 months.
- Thawing Frozen Cake: To thaw the frozen cake, remove it from the freezer and place it in the refrigerator overnight. This slow thawing process helps to maintain its moisture and texture. Once fully thawed, you can decorate it with the pink icing and serve as usual.
Discover More Delicious Recipes from the United Kingdom
The United Kingdom boasts a rich tapestry of traditional and modern culinary delights. If you’ve enjoyed baking the Tottenham Cake, explore these other fantastic British recipes:
Sticky Jamaican Ginger Cake Recipe
Easy Mince and Dumplings Recipe
Fool-Proof 3-Ingredient Scones with Eton Mess Topping
Creamy Chicken and Leek Pies with Puff Pastry
Easy Chicken Sausage Rolls with Puff Pastry
Homemade Mini Butter Chicken Pies
Carrot and Swede Mash
Cheese and Onion Pasties with Puff Pastry
Posh Fish Finger Sandwich with Homemade Tartar Sauce
Eggless English Pancakes (Thin Pancakes)
Mini Homemade Sausage Rolls with Puff Pastry
Tottenham Cake Recipe

Tottenham Cake
Print Recipe
SaveSaved!
Equipment
- 1 circa 33cm x 23cm sheet pan
Ingredients
For the cake
- 4 large eggs – at room temperature, circa 62g per egg in its shell.
- 250 millilitre (1 US cup + 1 tbsp) milk – whole or semi-skimmed. Boiled, then cooled down to lukewarm.
- 360 grams (12½ oz) granulated sugar
- 2 teaspoons vanilla extract
- 100 millilitre (0.4 US cup) oil – neutral oil like vegetable or sunflower oil
- 360 grams (12½ oz) all-purpose flour
- 1 tablespoon baking powder
- ½ teaspoon salt
- zest from one lemon (optional)
For the icing
- 150 grams blueberries – or raspberries
- 30 millilitre lemon juice – or water
- 500 grams icing sugar
- pink food colouring (optional) – only use this if you want a stronger colour pink to what the berries provide
- desiccated coconut for sprinkling (optional)
Instructions
Prepping
- If the eggs are fridge-cold, remove them from the fridge approximately 30 minutes before you start to bake. Alternatively, place the eggs in a bowl of warm water for 5 minutes to bring them to room temperature more quickly.4 large eggs
- Heat the milk in the microwave or a small saucepan until it starts to simmer. Allow it to cool to a lukewarm temperature that you can insert a clean finger into without burning.250 millilitre (1 US cup + 1 tbsp) milk
- Line the baking tin with baking paper (see ‘Equipment‘ above for the baking tin size).
- If you are adding lemon zest to the cake batter, zest the lemon now.zest from one lemon (optional)
Making the cake
- Preheat the oven to 170℃/338℉/gas mark 3.
- Add the granulated sugar, room-temperature eggs and vanilla extract to a large mixing bowl.360 grams (12½ oz) granulated sugar, 2 teaspoons vanilla extract
- Using an electric hand mixer or stand mixer, beat the sugar, eggs and vanilla extract together until the mixture is thick, fluffy and very pale in colour. You should notice trails in the mixture left by the beaters. This will take a minimum of 5 minutes of beating.
- In a separate bowl or jug, combine the oil and lukewarm milk. Whisk together with a fork until reasonably well blended.100 millilitre (0.4 US cup) oil
- Sift together the flour, baking powder and salt in a bowl.360 grams (12½ oz) all-purpose flour, 1 tablespoon baking powder, ½ teaspoon salt
- Add half of the sifted flour mixture to the eggs and sugar mixture and beat on a very low speed using an electric hand mixer or a stand mixer. Stop as soon as the dry ingredients have been incorporated.
- Next, add half of the milk and oil mixture and beat again at a low speed. Stop as soon as the liquids have been incorporated.
- Repeat these steps one more time for the remaining flour and liquid ingredients. Beat on low speed after each addition and be careful not to overbeat.
- If you’re including lemon zest, add it at this point and beat it in briefly.
- Pour the cake batter into the prepared tin and tap it gently on the counter a few times to remove any air bubbles.
- Bake on the middle oven shelf for 35-40 minutes until the top of the golden brown cake springs back when touched and a tester inserted in the centre comes out clean. Test doneness at 35 minutes. If your oven runs hot, test earlier at 30 minutes or use a lower oven temperature to begin with.
- Let the baked cake cool in the tin for at least 20 minutes before flipping it upside down onto a cooling rack.
- Carefully peel off the parchment paper, paying extra attention to the corners where the cake might have baked into the folds of the paper. Set the cake aside to cool fully while we make the icing.
Note: We will frost the cake on the bottom side, which is why we turned it upside down. This ensures a smoother and flatter surface for icing.
Making the pink icing
- Place the berries in a small bowl and pour the lemon juice or water over the top. Give it a quick stir.150 grams blueberries, 30 millilitre lemon juice
- Microwave the berries for 1 minute, stirring halfway through. If the berries are still quite firm, microwave for 15 seconds more.
- Use a fork to mash and squash the berries to release their juice.
- Strain the berries through a sieve, reserving the juice and discarding the pulp.
- Add the icing sugar to a large bowl. It’s not necessary to sift it if your icing sugar is fresh and fluffy, but if it’s lumpy, definitely sift it.500 grams icing sugar
- Start by adding about 3 tablespoons of the berry juice (or water) to the icing sugar and mix it through with a fork.
- Add more liquid slowly until the icing reaches the thickness you prefer. It needs to be a thick but spreadable icing. Around six tablespoons of liquid usually does the trick.
If you run out of berry juice, just add a splash of water to create more liquid.
You can add a few drops of food colouring if you wish, but be careful not to turn it into a completely lurid pink icing!
- Check if the cake has fully cooled down, then scoop the icing onto the surface of the cake.
- Use an offset spatula or the back of a spoon to spread the icing evenly across the top of the cooled cake, making sure to reach the corners and sides.
If the icing is a bit runny, apply it slightly inward, as it tends to spread on its own.
- You can now sprinkle some desiccated coconut or sprinkles over the top of the cake if you wish, or leave it plain.desiccated coconut for sprinkling (optional)
Notes
Use a scale and measuring spoons
Consider investing in a reliable digital kitchen scale and high-quality measuring spoons to ensure precise ingredient measurements. Accuracy plays a crucial role in achieving cake perfection!
Bring eggs to room temperature
Remember to allow fridge-cold eggs to reach room temperature before baking. Cold eggs can’t blend as smoothly into the batter. Room temperature eggs contribute to creating tender and evenly rising cakes.
You can achieve this by removing the eggs from the fridge about 30 minutes beforehand or placing them in warm water for 5 minutes.
Beat the eggs and sugar thoroughly
Don’t rush this step! Taking 5 minutes, or more, to beat the eggs and sugar makes them light and fluffy. Using an electric mixer helps incorporate tonnes of air for the ultimate lift. Well-beaten eggs = tender crumb.
Gently-gently does it
Overmixing can deflate the batter, so handle it with care to preserve those essential air bubbles for a soft texture. Stop as soon as no specks of flour are visible.
Know your oven
Get to know your oven’s quirks. If it runs hotter or cooler than expected, tweak your bake times and temperatures accordingly.
Trust your eyes and perform visual tests, like checking for springy tops and using a cake tester as indicators of doneness.
When uncertain, it’s always safer to bake lower and slower, within reason.
Fixing thin icing
Don’t fret if your icing turns out too thin. Simply blend in additional icing sugar gradually until it’s just right.
Remember, adding liquids in small amounts helps prevent your icing from becoming overly runny.
Add toppings to wet icing
For the perfect finishing touch, sprinkle coconut, sprinkles or other toppings onto the icing immediately after spreading it, while it’s still moist. This ensures they stick beautifully in place, otherwise they will just roll off.
Allow the icing to set before cutting the cake
Exercise patience and give the icing time to firm up before you start slicing your cake. This helps maintain clean, well-defined squares instead of having them smudge together. When you’re ready to cut, use a long, sharp knife for precise, neat slices.
On the flip side, when it comes to Tottenham cake, it’s not all about achieving perfection in its appearance. It’s about embracing its down-to-earth and unpretentious charm. So, don’t stress too much about how your cake looks, focus on enjoying the delightful simplicity it brings!
**Nutritional data disclaimer**
Please keep in mind that the nutritional information provided below is calculated by a third party and we cannot guarantee the accuracy. We try our best to give you the most accurate information, but we do not take responsibility for errors that may be present. Also, the nutritional value of the recipe may change depending on the exact brands and products used. We recommend that you consult with a qualified healthcare professional or registered dietitian for personalised advice on your dietary needs.
Nutrition
For food safety advice, including guidance on food allergies
