Tarte aux Fruits: An Exquisite French Fruit Tart Recipe
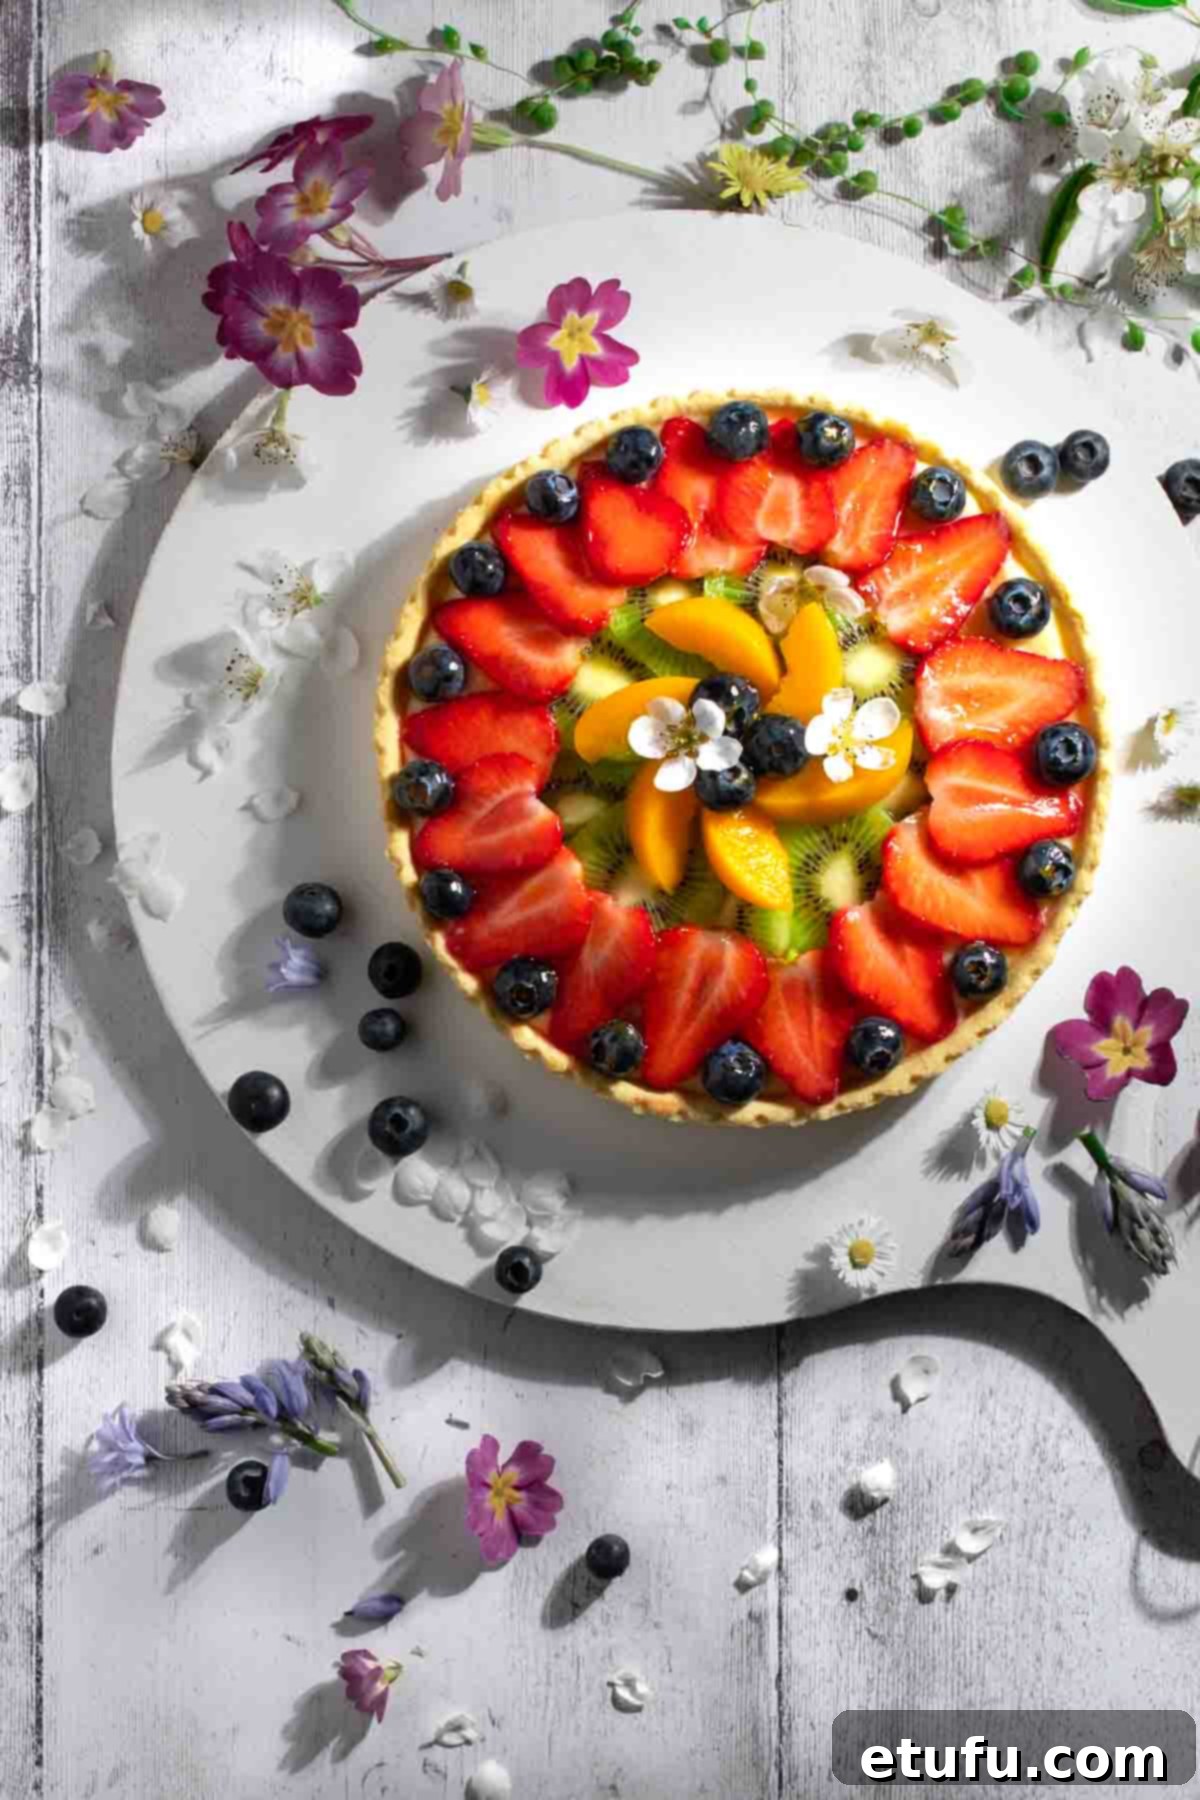
Step into the delightful world of classic French patisserie with our comprehensive guide to making a stunning Tarte aux Fruits, often simply called a French fruit tart. This dessert isn’t merely a treat for the taste buds; it’s a vibrant feast for the eyes, promising an unforgettable culinary journey for anyone who attempts it.
Imagine biting into a perfectly crisp, golden-brown Pâte Sucrée (sweet tart dough) shell – delicately buttery and just crumbly enough to melt in your mouth. Inside, it cradles a velvety, rich Crème Pâtissière (pastry cream), infused with the subtle, intoxicating fragrance of vanilla. The crowning glory? A magnificent mosaic of fresh, seasonal fruits, glistening under a delicate apricot glaze. Each bite offers a harmonious symphony of textures and flavors – the satisfying snap of the crust, the smooth indulgence of the cream, and the bright, natural burst of fresh fruit.
While the prospect of mastering a Tarte aux Fruits might appear challenging at first glance, especially for home bakers, we assure you it’s a thoroughly rewarding and achievable process. This recipe meticulously breaks down the creation into its three fundamental components: crafting the perfect pastry case, preparing the luscious pastry cream, and artfully arranging the fresh fruit topping. Each step is designed to be clear, concise, and approachable, even for novice bakers taking their first foray into French desserts.
To ensure your absolute success, we’ve included detailed, step-by-step instructions accompanied by helpful process photos. These visual aids will guide you through every stage, from mixing the delicate dough to achieving that signature glossy fruit finish. However, we understand that life can often be busy. If you find yourself pressed for time, there’s absolutely no shame in utilizing a high-quality, ready-made shortcrust pastry case. This clever shortcut allows you to jump straight into making the decadent Crème Pâtissière and assembling your beautiful fruit topping, saving you precious time without compromising significantly on flavor or elegant presentation. It’s a truly easy-peasy way to enjoy this beloved French classic without the extensive time commitment!
For those who appreciate the refreshing elegance of fresh fruit desserts, you might also find delight in our recipe for Mixed Berry Cheesecake, another delightful creation that celebrates natural sweetness and vibrant flavors.
Fast Facts – A Glimpse into France
Before we dive deeper into the culinary wonders of the Tarte aux Fruits, let’s take a brief moment to appreciate the country that gave us this magnificent dessert and so much more.

| Location | France, a prominent country in Western Europe, shares its borders with several nations, including Belgium, Luxembourg, Germany, Switzerland, Italy, Spain, and Andorra. Its diverse geography also includes extensive coastlines along the Mediterranean Sea, the Atlantic Ocean, and the English Channel. |
| Official Language | The official and primary language spoken throughout France is French, a beautiful Romance language known for its elegance. |
| Population | France is home to a substantial population, estimated at approximately 67 million people. |
| Cultural Trivia | Here’s a fascinating tidbit: it is technically illegal to capture and share photos of the Eiffel Tower at night. This is because the tower’s spectacular nighttime lighting arrangement is protected by copyright. Permission is legally required to capture and distribute such images, especially for commercial purposes. This intriguing restriction primarily impacts professional photographers intending to sell their work, rather than casual tourists capturing personal memories. |
Why You’ll Adore This Tarte aux Fruits Recipe
There are countless reasons to fall head over heels in love with making your very own French fruit tart from scratch. Here are just a few compelling points that make this particular recipe a must-try for any baking enthusiast:
- Guaranteed Success with Unmatched Guidance: Our recipe stands out for its exceptionally detailed instructions and accompanying helpful images, meticulously walking you through each stage of the process. Don’t be put off by the seemingly extensive list of steps; we’ve deliberately broken down every action to ensure that even beginners can confidently create this truly delicious and visually impressive tart. We believe everyone deserves to bake a masterpiece!
- A True Showstopper for Any Special Occasion: The classic French fruit tart is renowned not only for its incredible taste but also for its unparalleled elegant appearance. If you’re looking to impress guests at a dinner party, celebrate a special milestone, or simply treat someone dear to your heart, this tarte is guaranteed to be a magnificent and much-admired centerpiece on any dessert table. It truly demands attention!
- Unquestionably Delicious – A Taste of French Tradition: There’s a profound reason why the French fruit tart holds such a cherished and prominent spot in nearly every authentic French bakery and patisserie across the globe. Its perfect balance of a tender, buttery crust, smooth, creamy filling, and fresh, vibrant fruit creates an irresistible dessert experience that consistently delights the palate and satisfies every craving for something sweet and sophisticated.
- Infinitely Customizable to Your Personal Taste: One of the most delightful aspects of this recipe is its remarkable flexibility. You have complete creative freedom to choose your absolute favorite fruits or whatever is perfectly in season, making each tart a unique reflection of your preferences. Feel free to experiment with your arrangement and design, adding a personal touch that truly makes it your own culinary work of art!
- Easily Adaptable to a Classic Strawberry Tart: Craving a specific, beloved flavor? This versatile Tarte aux Fruits recipe can be effortlessly transformed into a Tarte aux Fraise (French Strawberry Tart) by simply using only fresh, ripe strawberries for your entire topping. It’s a simple swap for a dramatically different, yet equally classic, French dessert experience.
Smart Shortcuts & Time-Saving Tips for Your French Fruit Tart
Eager to enjoy a delicious Tarte aux Fruits but find yourself short on time, or perhaps you lack a specific piece of equipment like a tart tin? No need to worry! French patisserie can still be accessible. Here are some clever shortcuts and cheats to help you create this delightful dessert with surprising ease:
- Opt for a Ready-Made Tart Shell: This is the ultimate time-saver! Purchase a high-quality, pre-baked sweet tart shell from your local supermarket or a specialty bakery. This allows you to completely bypass the entire pastry-making and blind-baking process, letting you dive straight into the most enjoyable part: filling and decorating your tart with cream and fruit.
- Utilize Store-Bought Shortcrust Pastry: If you still desire the satisfaction of baking your own tart shell but prefer to avoid the intricacies of making pastry from scratch, ready-made shortcrust pastry sheets are an excellent solution. Simply unroll the pastry, carefully press it into your tart tin, and then proceed with the blind-baking steps as instructed in our recipe.
- Prepare Crème Pâtissière in Advance: To make the overall baking process feel significantly less overwhelming and more manageable, consider preparing the pastry cream a full day ahead of time. Once it’s made and cooled slightly, cover it tightly with plastic wrap directly on the surface (to prevent a “skin” from forming) and refrigerate. This strategy allows you to tackle the remaining tasks of baking the shell and assembling the tart without feeling rushed on the day of serving, making for a much calmer baking experience.
- Embrace Tinned or Frozen Fruits: While fresh, vibrant fruit offers unparalleled beauty and flavor, pre-sliced tinned fruits like peaches, apricots, or mandarins can be a remarkably convenient and perfectly acceptable substitute. Just be sure to drain them exceptionally well to prevent a soggy tart. Frozen berries can also work beautifully; simply thaw them thoroughly and pat them very dry with paper towels to remove any excess moisture before arranging.
However, if you’re feeling adventurous and ready to embrace the challenge and immense satisfaction of creating every element from scratch, then don your apron, grab your whisk, and let’s show this magnificent tart who’s boss! Continue reading for the full, immersive baking adventure that awaits you.
Essential Ingredients for the Perfect Tarte aux Fruits
Understanding the role of each ingredient is absolutely key to achieving bakery-quality results when making your Tarte aux Fruits. Here’s a closer look at the components that make this classic French fruit tart so special and some useful notes:
For the Pâte Sucrée (Sweet Tart Dough)
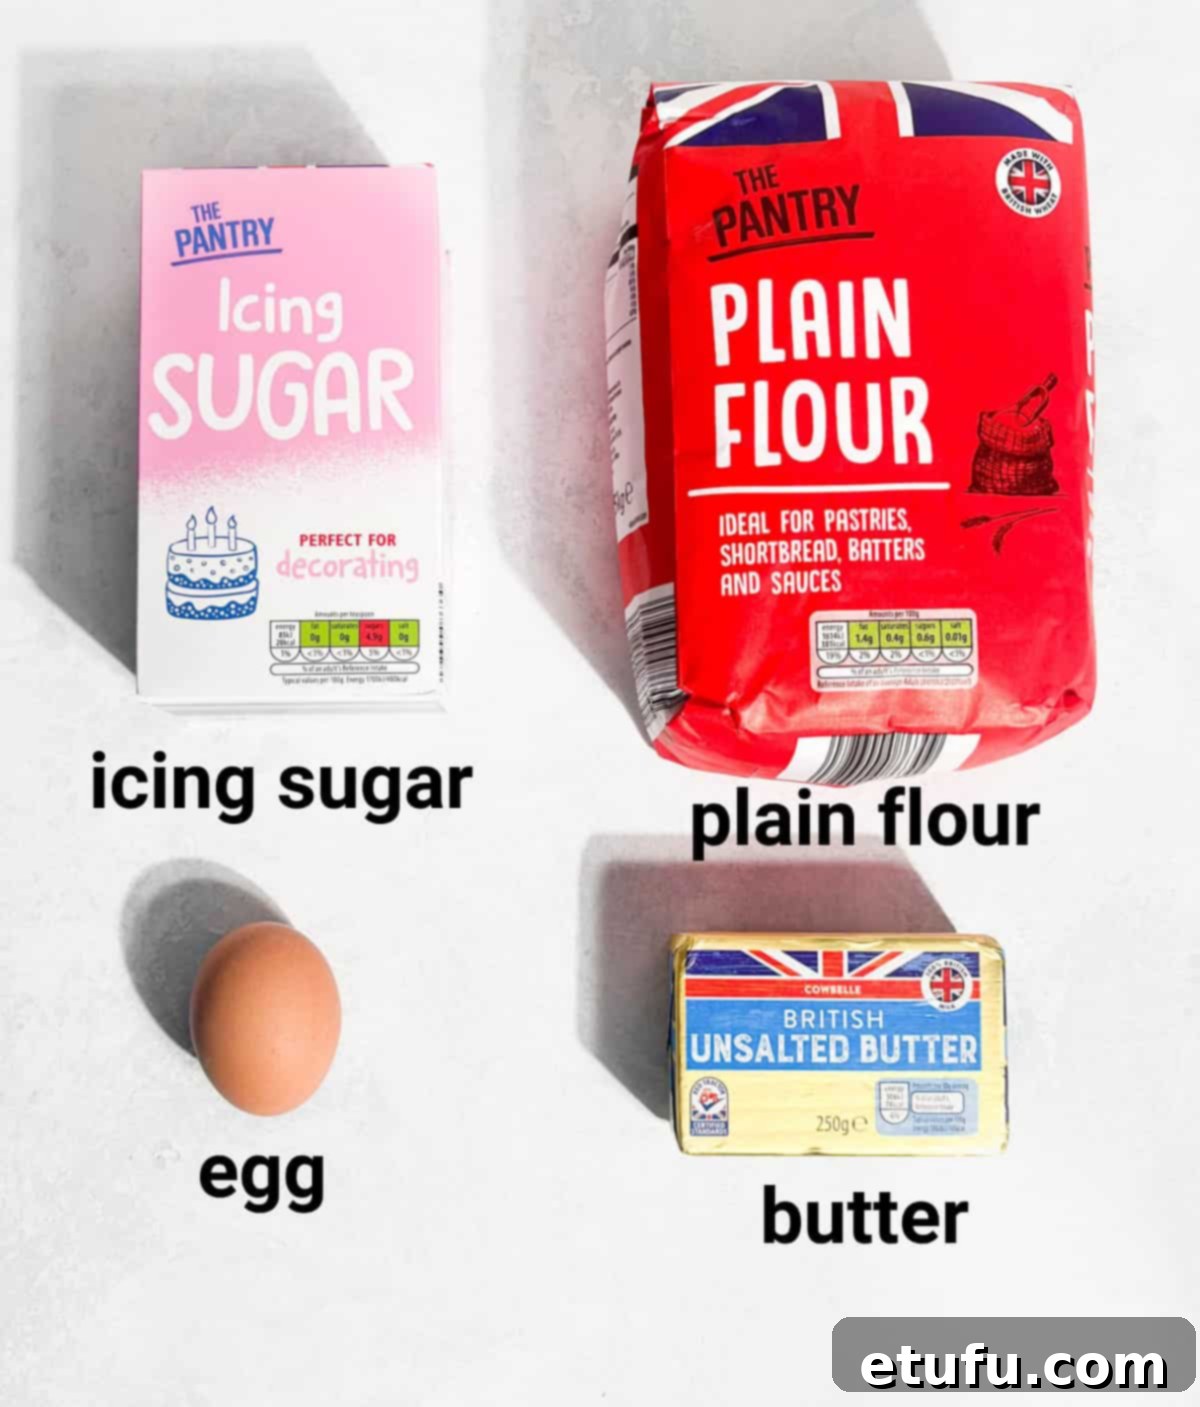
The Pâte Sucrée provides the foundational crunch and buttery richness for your tart. It’s a sweet, delicate pastry that perfectly complements the creamy filling and fresh fruit topping, offering a tender bite without being brittle.
For the Crème Pâtissière (Pastry Cream) and Fruit Topping
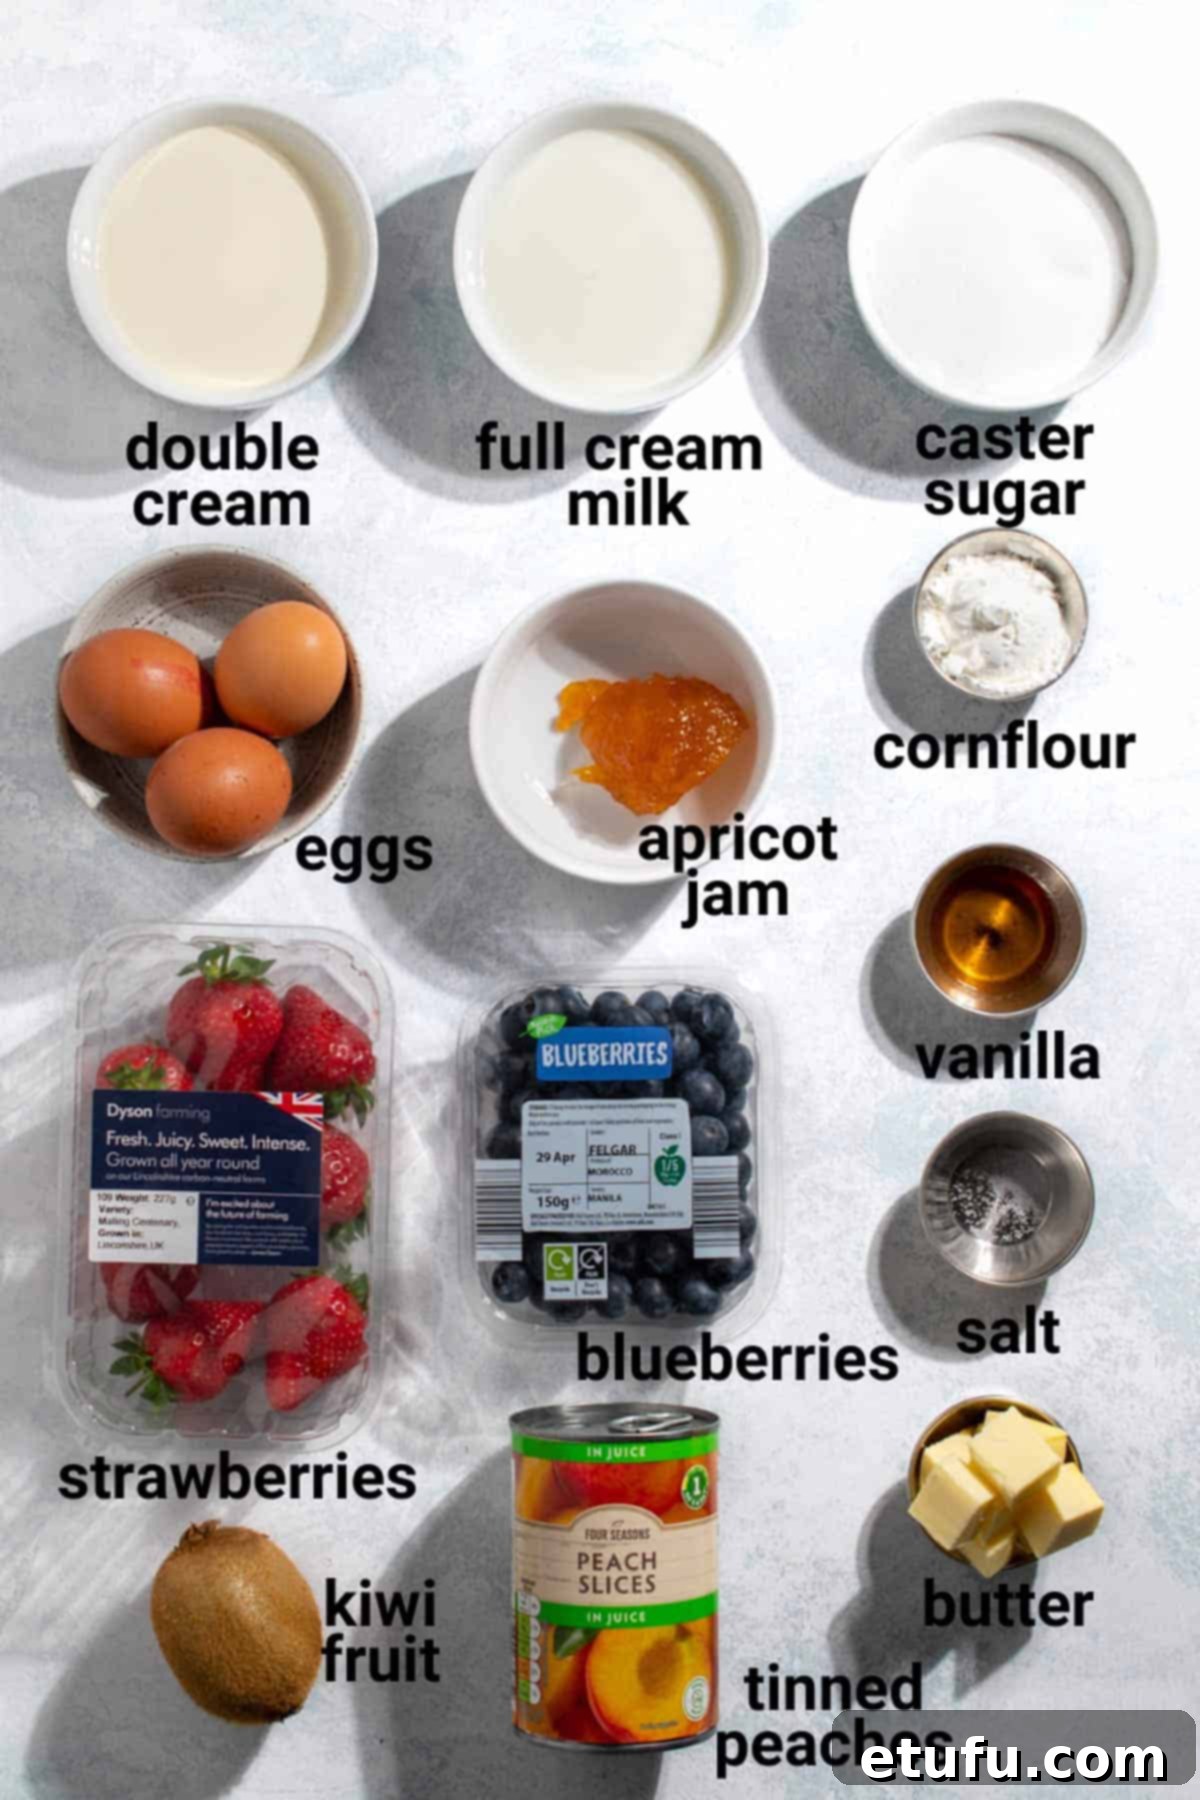
This dynamic duo forms the indulgent heart and vibrant soul of the Tarte aux Fruits. The Crème Pâtissière adds a luxurious, smooth creaminess, while the carefully chosen fruit topping brings essential freshness, stunning color, and a burst of natural sweetness and tang.
Butter: The Unsung Hero of Flavor and Texture
For both the Pâte Sucrée and the Crème Pâtissière, the quality of your butter significantly impacts the final taste and texture of your tart. Always opt for a good quality butter with a fat content of at least 80%. This higher fat content contributes to a richer, more profound flavor and helps create a flakier, more tender pastry crust. You can use either salted or unsalted butter; if using salted, simply reduce the pinch of salt specified in the pastry cream recipe slightly to balance the flavor.
Eggs: The Essential Binder and Enricher
Eggs play crucial roles throughout this recipe, from binding the delicate tart dough together to enriching and thickening the luxurious pastry cream. For optimal results in both components, it is absolutely essential to ensure your eggs are at room temperature. Room-temperature eggs are less viscous than cold eggs, meaning they blend more easily and uniformly with other ingredients. This leads to a smoother, more cohesive dough and a wonderfully lump-free, perfectly emulsified pastry cream. If your eggs are cold and you’re in a hurry, a quick and effective trick is to place them in a bowl of warm (but not hot!) water for about 5 minutes before using.
Caster Sugar: For Refined Sweetness and Smoothness
Caster sugar, with its fine crystal size, is preferred in this recipe because it dissolves quickly and evenly, ensuring a smooth texture in both the tart dough and the Crème Pâtissière. This prevents any grainy mouthfeel. For the pastry cream, you can readily replace caster sugar with standard granulated sugar if it’s all you have on hand, as it will dissolve during the cooking process. Alternatively, you can easily make your own caster sugar by blending regular granulated sugar in a food processor for a few seconds until it reaches a consistency finer than granulated but not as fine as icing or powdered sugar.
Milk and Cream: The Foundation of Decadence
To achieve an exceptionally rich, velvety, and luscious Crème Pâtissière, we highly recommend using full-fat milk and double (or heavy) cream. The higher fat content of these dairy products is paramount in contributing to the wonderfully thick, smooth, and decadent consistency that defines a truly great pastry cream. While you can substitute heavy cream with single or whipping cream if absolutely necessary, always stick to whole milk for the best possible texture and a robust flavor profile.
Vanilla Extract: The Soulful Aromatic Heart
Vanilla is a cornerstone flavor in authentic Crème Pâtissière and, by extension, the Tarte aux Fruits as a whole. Its warm, sweet, and incredibly aromatic notes elevate the entire dessert from delicious to truly sublime. Therefore, we wholeheartedly recommend investing in and using the best quality pure vanilla extract or vanilla bean paste that is affordable for you. The profound difference in flavor between a high-quality, natural vanilla and an artificial imitation is truly remarkable and will significantly impact your tart. As an even more authentic alternative, you can also replace the extract with a split vanilla pod, allowing its precious seeds to infuse directly into the heating milk and cream for an unparalleled depth of flavor.
Apricot Jam: The Professional Glaze and Flavor Enhancer
This step, painting on that exquisite glossy finish at the very end, is often highlighted as our absolute favorite part of the recipe – it’s where the magic truly happens! A smooth apricot jam (or an apricot glaze) creates a beautiful, professional-looking shine on your fruit topping, significantly enhancing its visual appeal and adding a subtle, delicate fruity sweetness. You can certainly use any other smooth, light-colored jam that you believe will complement the specific fruits you’ve chosen for your tart (e.g., raspberry, redcurrant, peach). If you find that the jam is too thick and doesn’t become sufficiently runny when gently heated, simply add a tiny drop of water, one teaspoon at a time, until it reaches the desired brushable consistency. For a perfectly clear and unblemished glaze, quickly strain the warm jam through a fine-mesh sieve if it contains any small fruit pieces or seeds.
The Fruits: Your Artistic Canvas of Creativity
While our recipe suggests a delightful array of fruits that we typically use for our tarts, the true beauty and versatility of a Tarte aux Fruits lies in your freedom of choice. You are enthusiastically encouraged to use any fruit of your choosing, letting seasonality, personal preference, and local availability guide your selections. Traditionally, various vibrant berries (strawberries, raspberries, blueberries, blackberries) feature prominently on classic French fruit tarts due to their vibrant colors and naturally complementary flavors. However, feel free to explore options like well-drained canned mandarins, elegant fresh nectarine or plum slices, thinly sliced kiwi rounds, or even artfully arranged segments of grapefruit or oranges for a citrusy twist. The most crucial consideration is to select fruits that won’t release an excessive amount of water, which could potentially make the tart’s crust soggy, or fruits that won’t quickly oxidize and turn unappealingly brown when exposed to air. For instance, apples are generally not recommended for this type of fresh fruit tart as they brown very quickly, even if brushed with lemon juice, diminishing the tart’s overall visual appeal.
Mastering the Tarte aux Fruits: A Step-by-Step Guide
Ready to embark on your delightful tart-making adventure? Follow these detailed steps to create a showstopping French fruit tart that will impress everyone. If you’re an experienced baker and confident in your skills, you can skip all the photo steps below and head straight to the concise recipe card for a quick overview.
To Make the Pâte Sucrée (Sweet Tart Dough)
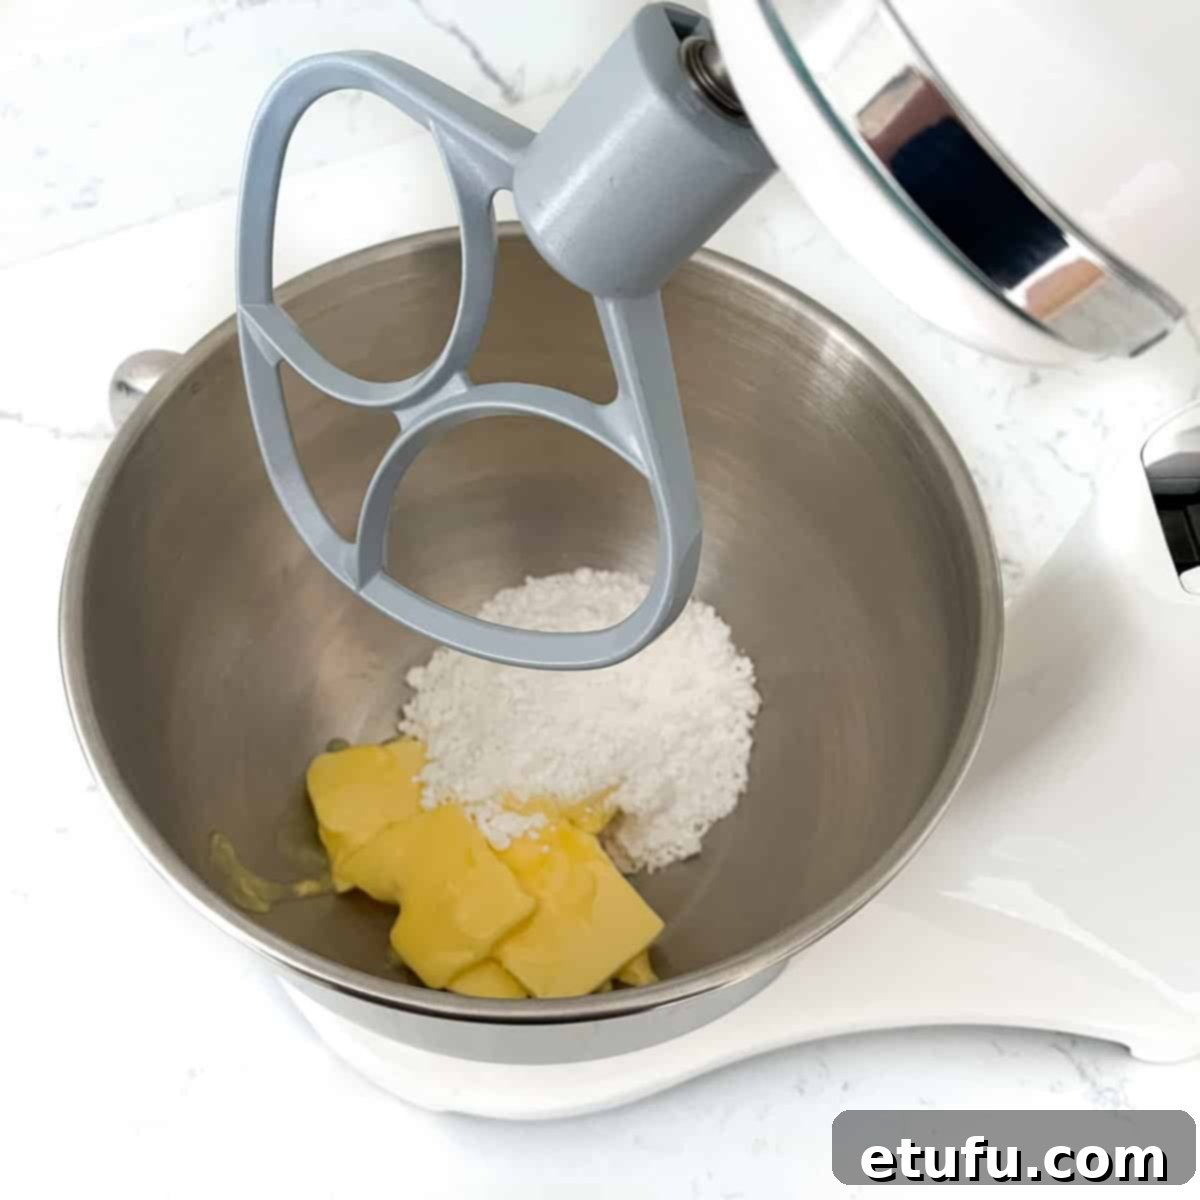
- In the bowl of a stand mixer fitted with the paddle attachment, or using an electric hand mixer, add the softened butter and icing sugar.
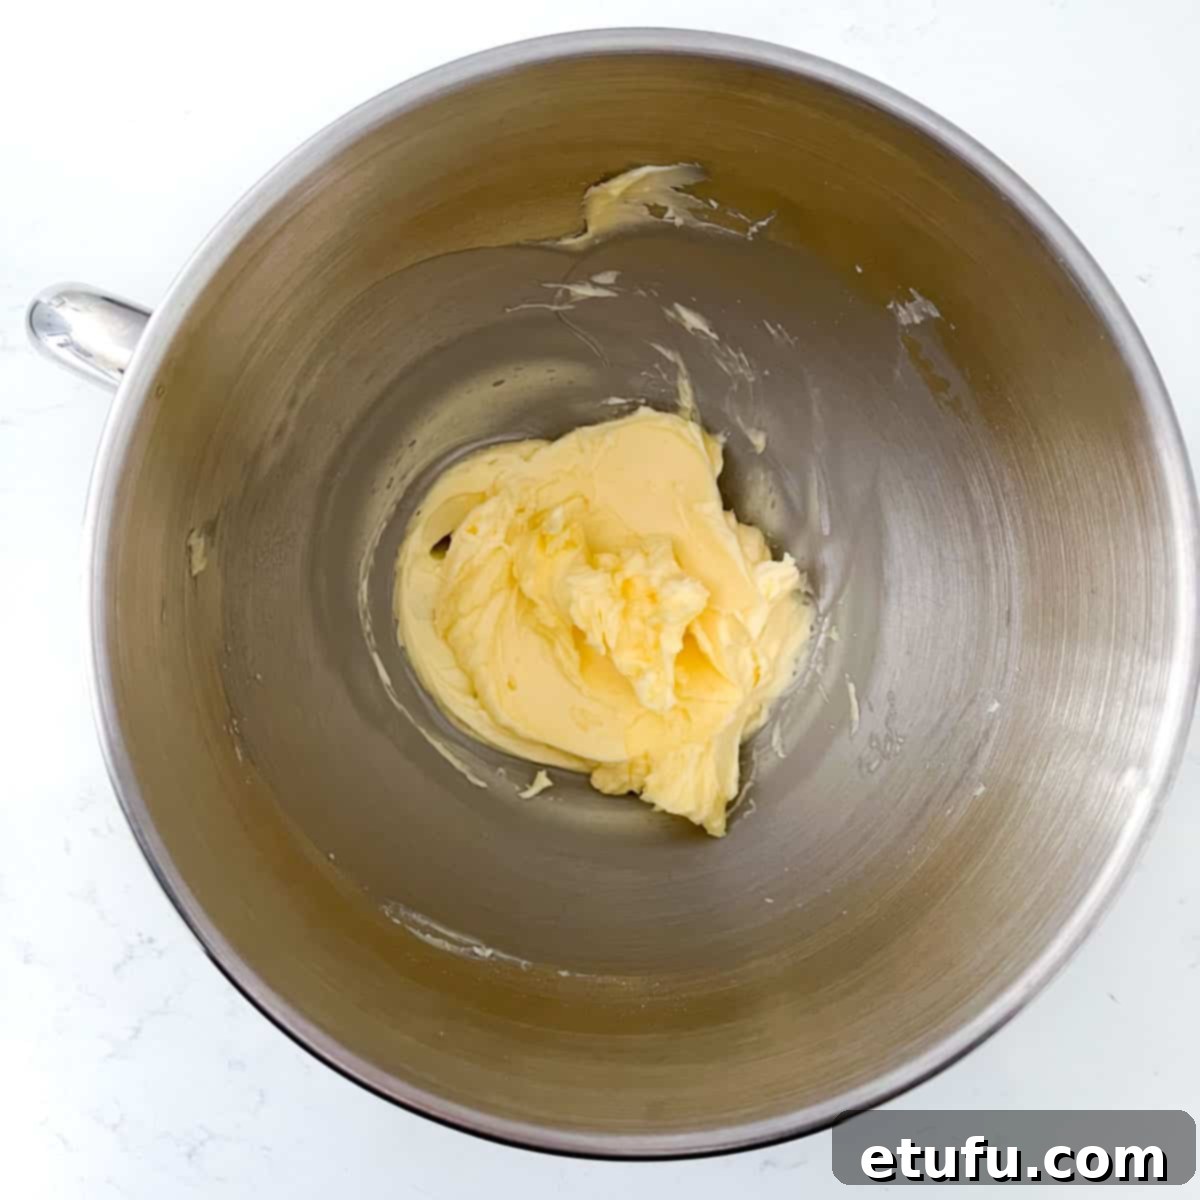
- Beat the butter and sugar together on medium speed until the mixture becomes light, pale, and wonderfully creamy. Remember to scrape down the sides of the bowl as needed to ensure even mixing.
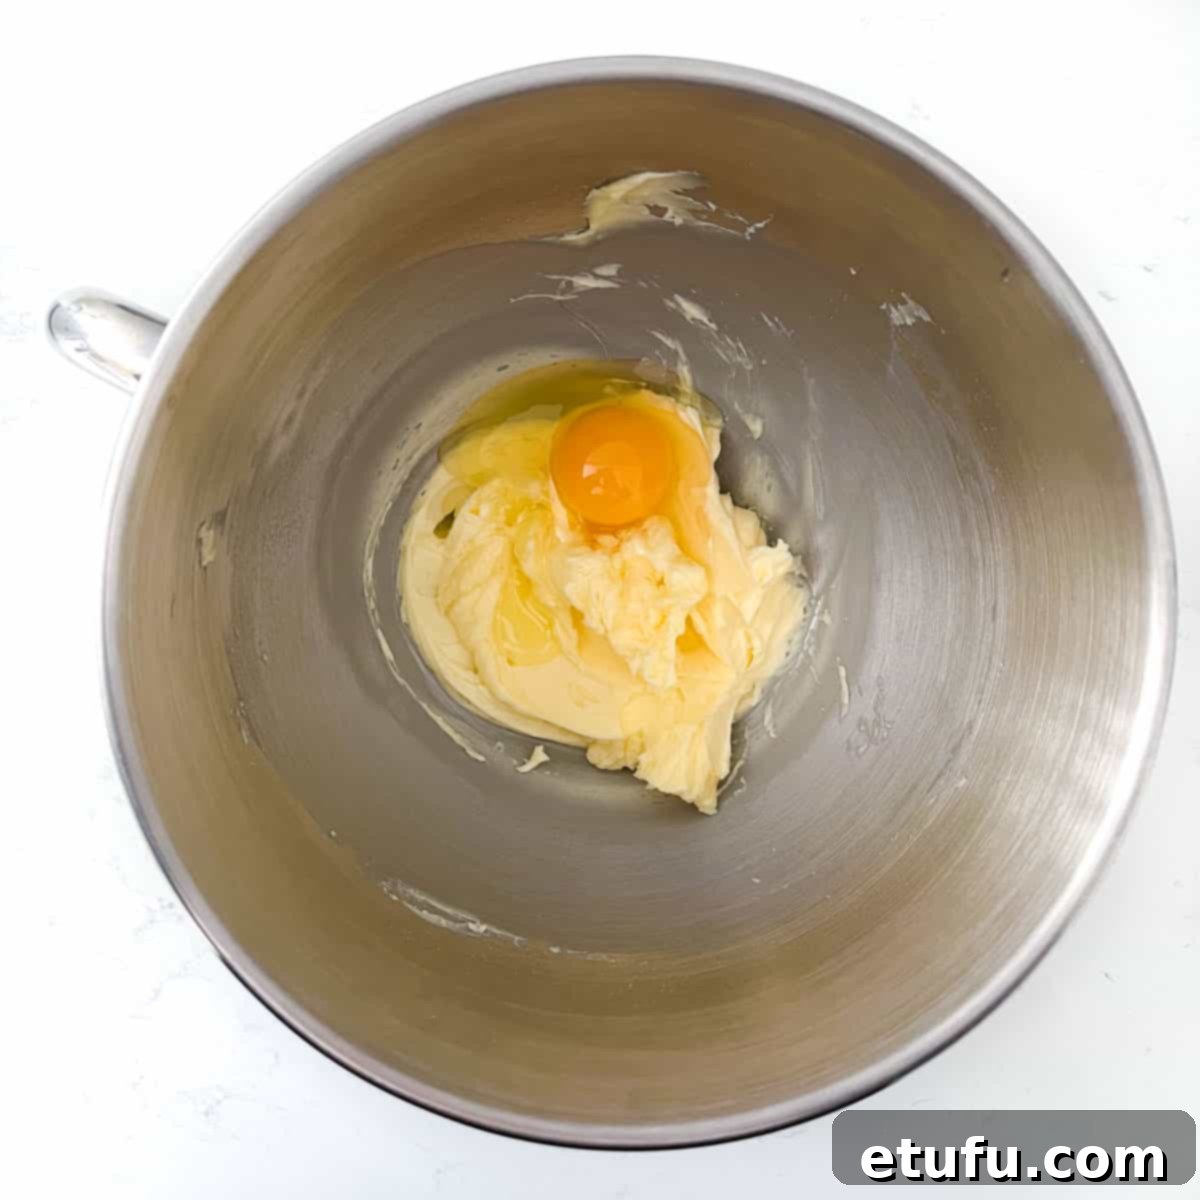
- Add the room-temperature large egg to the creamed butter and sugar mixture. Continue to beat until the egg is fully incorporated and the mixture appears uniform and smooth.
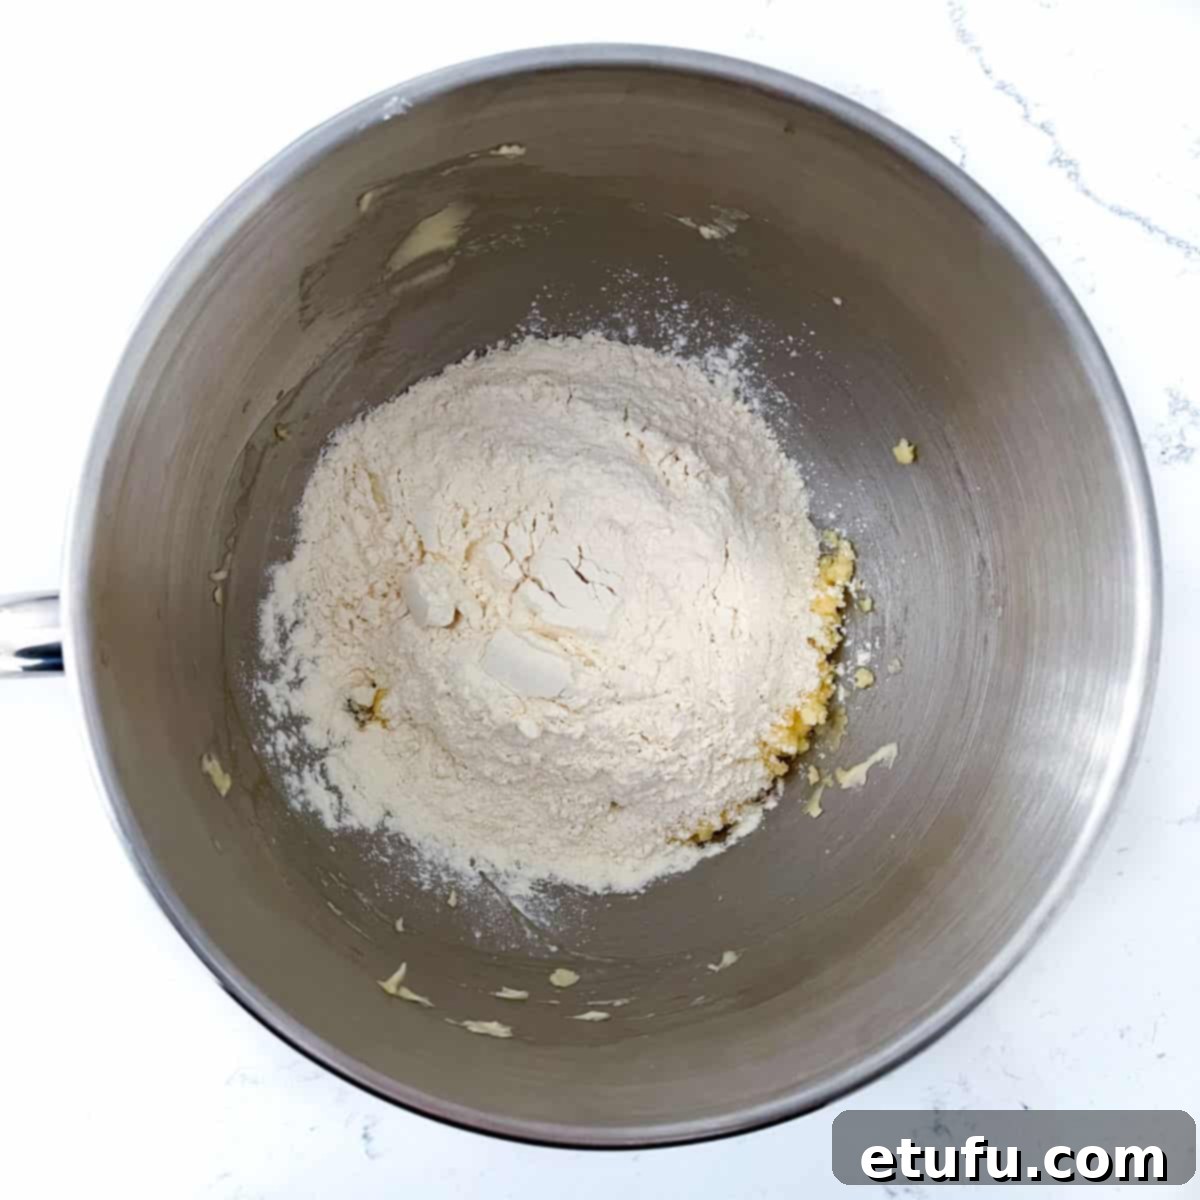
- Gently add the all-purpose flour to the egg and butter mixture.
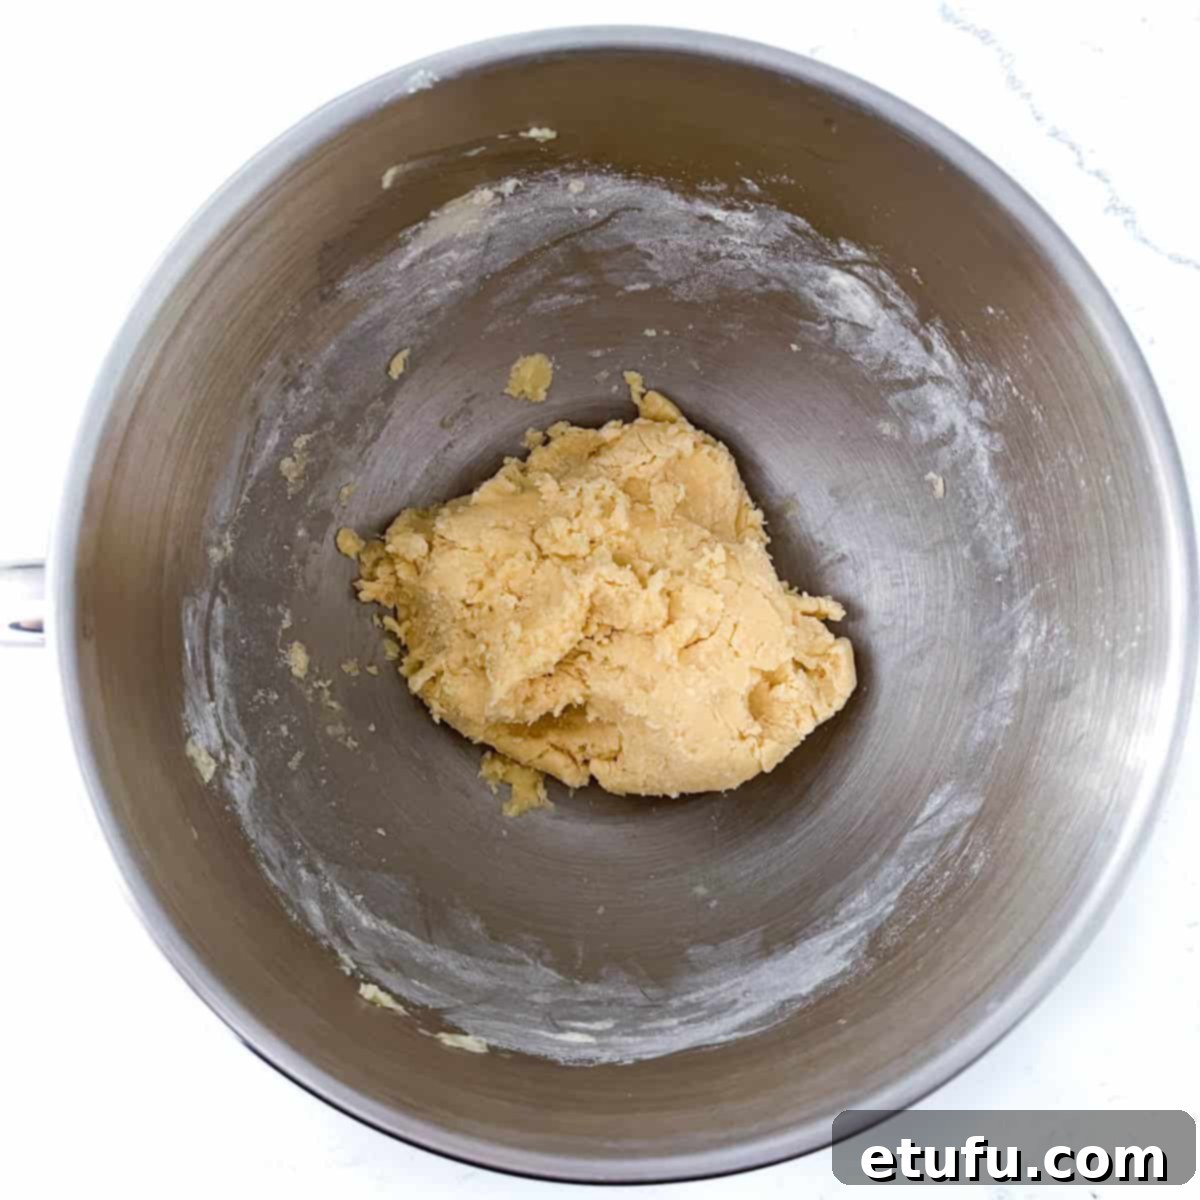
- Using a wooden spoon or a spatula, carefully fold the flour into the wet ingredients until just combined. Be careful not to overmix, as excessive mixing can develop the gluten in the flour and result in a tough, rather than tender, crust. The mixture should come together into a soft dough.
- Gently gather the pastry dough into a cohesive ball. Transfer it onto a piece of plastic wrap, ensuring it’s completely enclosed.
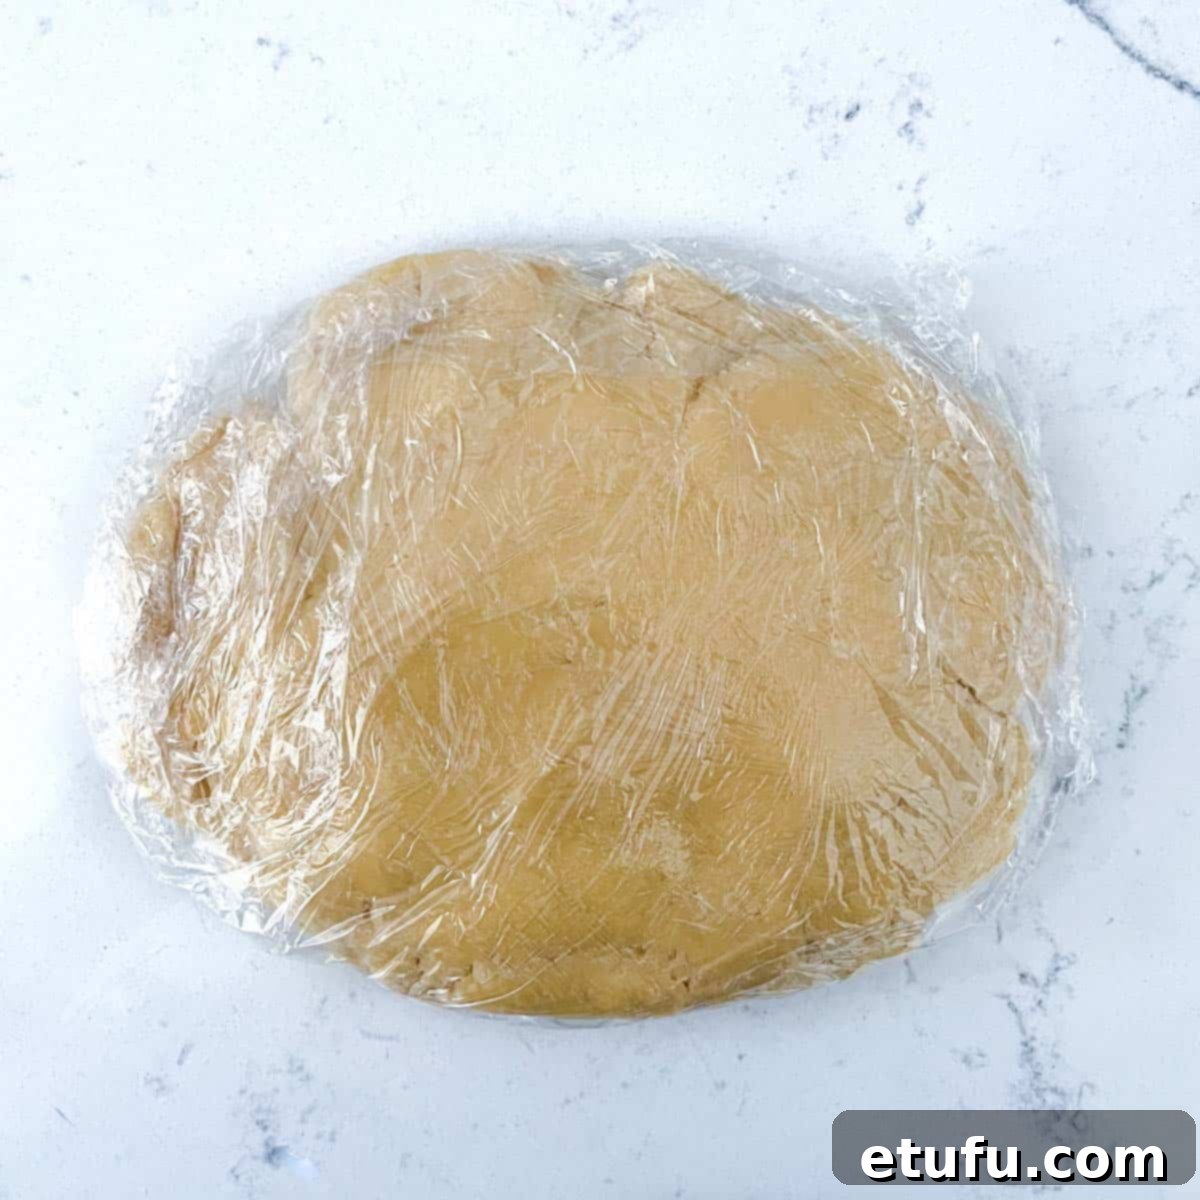
- Press the dough down slightly to form a thick, flat disk shape. This makes it significantly easier to roll out evenly later. Wrap the pastry tightly and place it in the refrigerator to chill for at least 30 minutes. Chilling is crucial as it allows the butter to firm up, making the dough easier to handle and preventing it from shrinking excessively during baking.
- After the 30-minute chilling period, preheat your oven to 180℃ (356℉) / Gas Mark 4. Prepare a 20cm (8-inch) fluted tart tin with a removable bottom, if you have one.
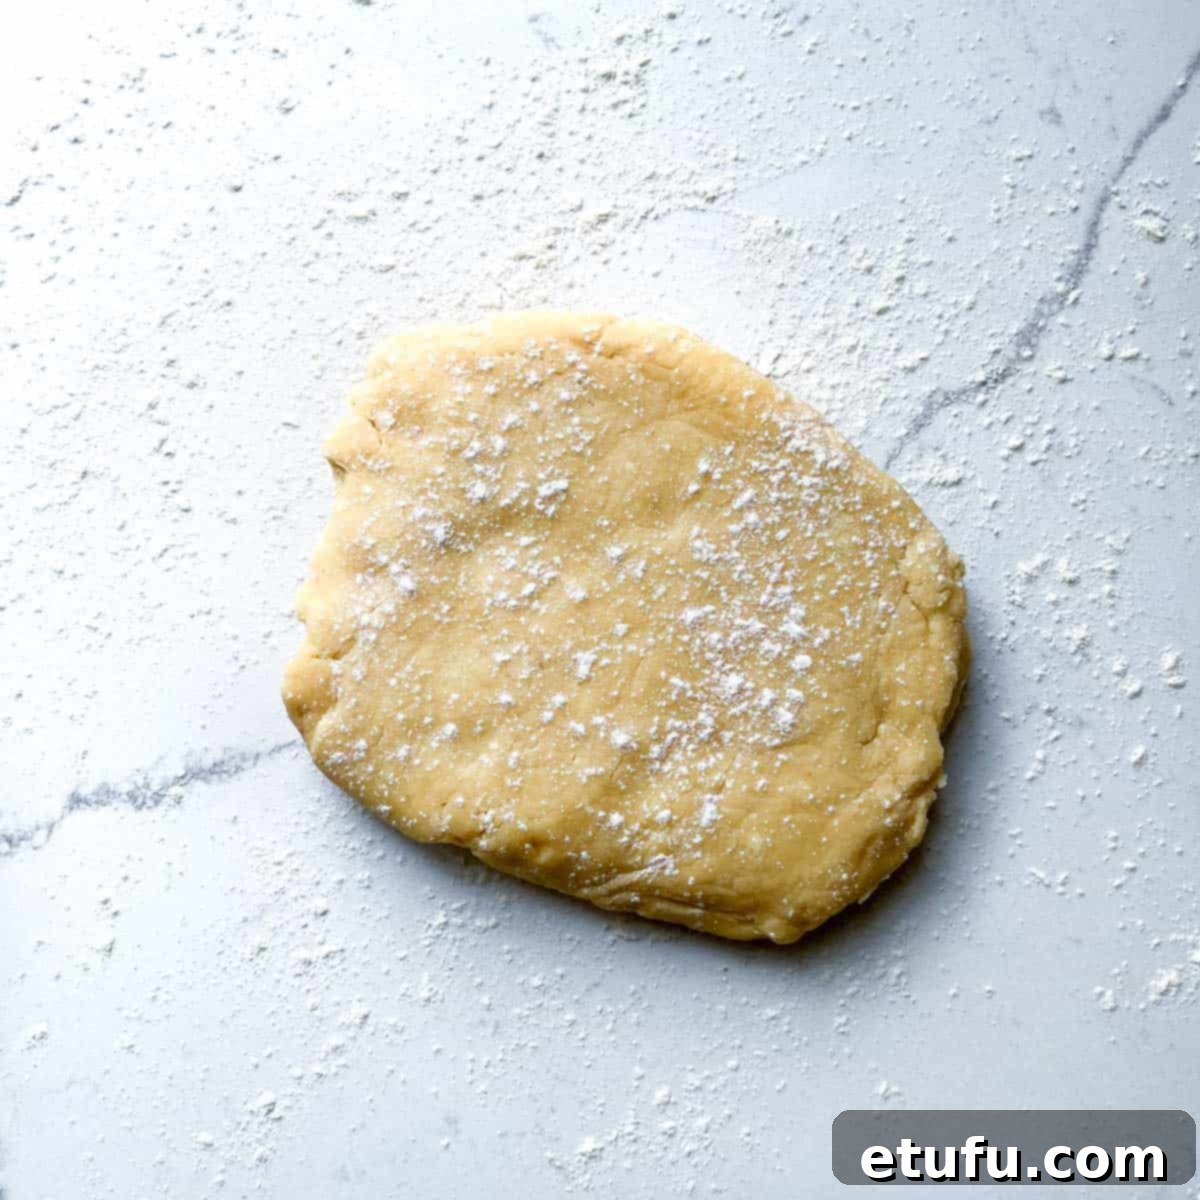
- Lightly dust your clean work surface with a fine sprinkling of all-purpose flour. Unwrap the chilled pastry dough and place it onto the floured surface.
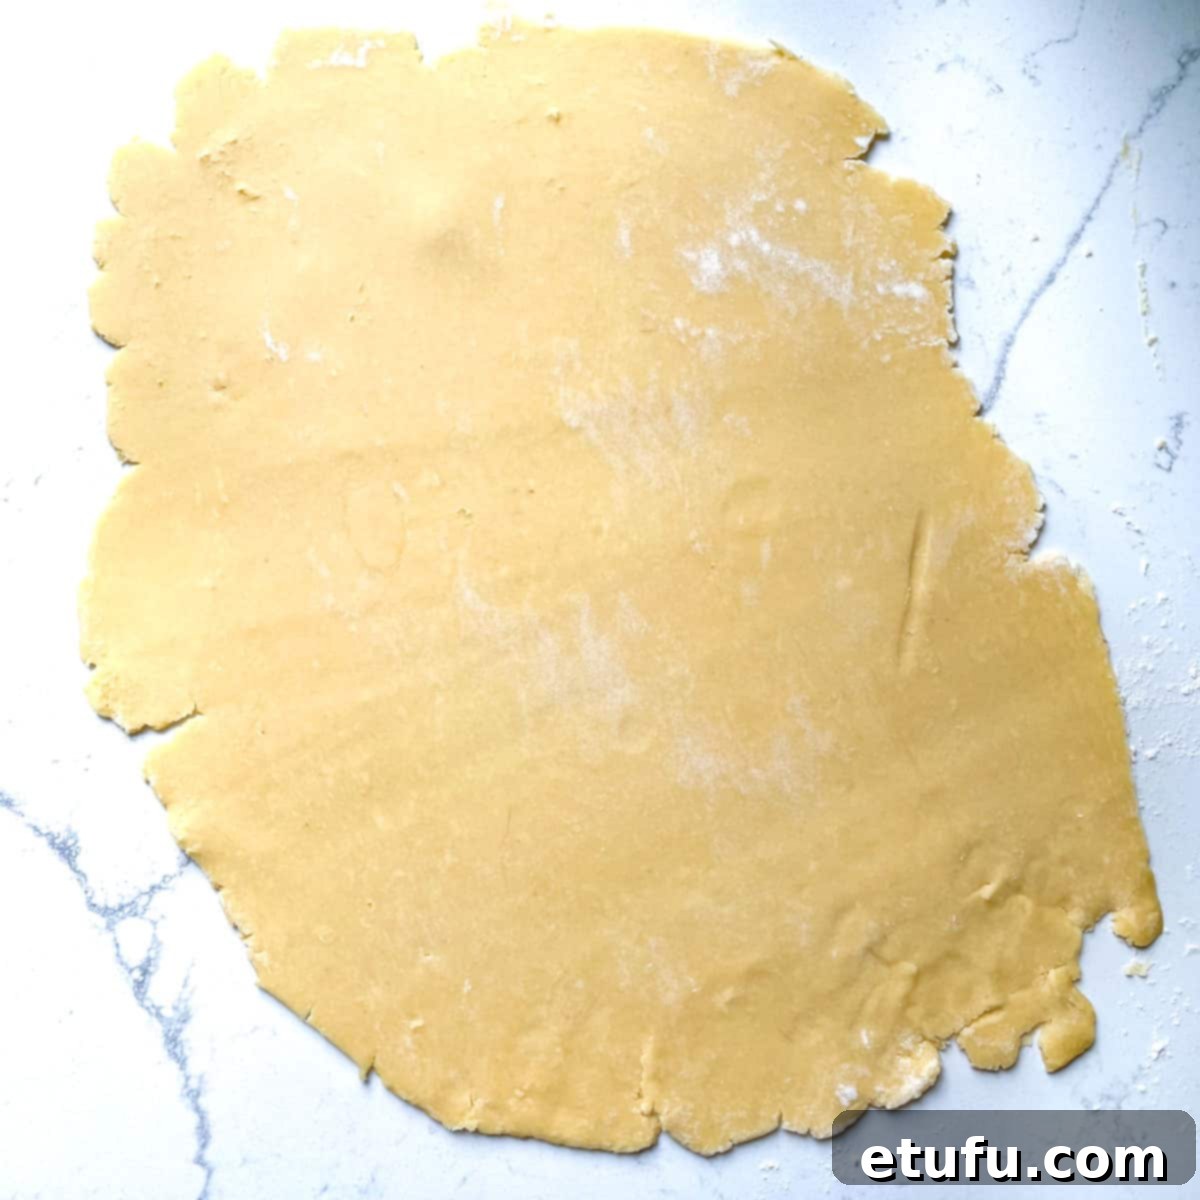
- Using a rolling pin, roll the pastry out evenly to a thickness of approximately 3mm-5mm (0.1″-0.2″). Try your best to roll it into a rough circular shape that is large enough to cover your tart tin with some generous overhang. Regularly lift and turn the pastry, adding a little more flour underneath and on top as needed, to prevent it from sticking to the work surface.
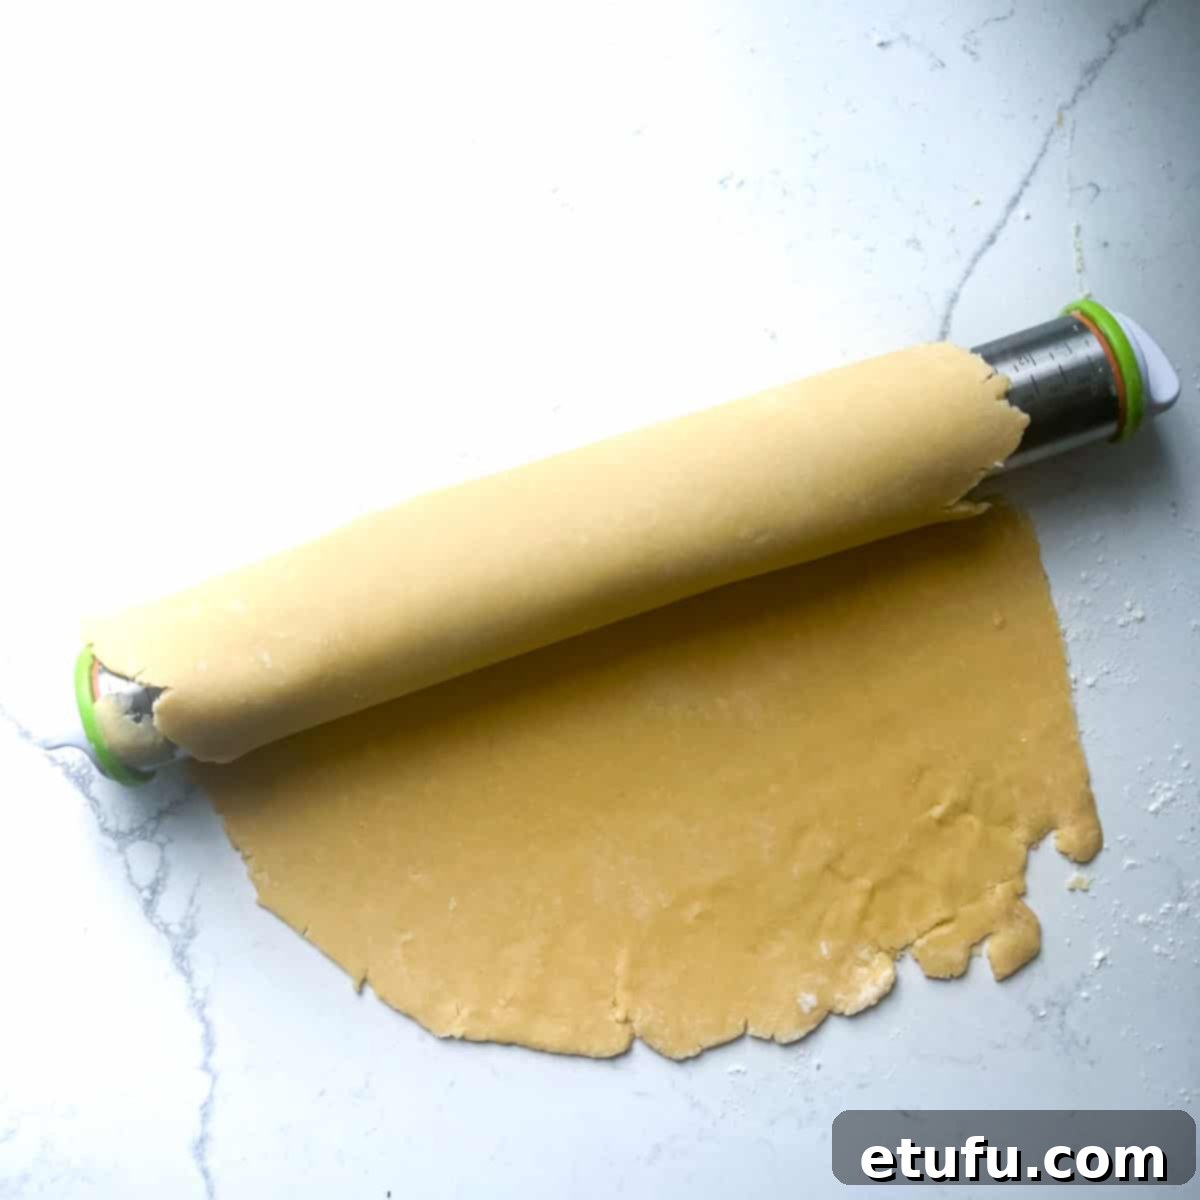
- Carefully roll the sheet of pastry loosely onto your rolling pin. This technique makes it easy to transfer the dough to the tart tin without tearing or stretching it excessively. Gently unroll it over your prepared tart tin.
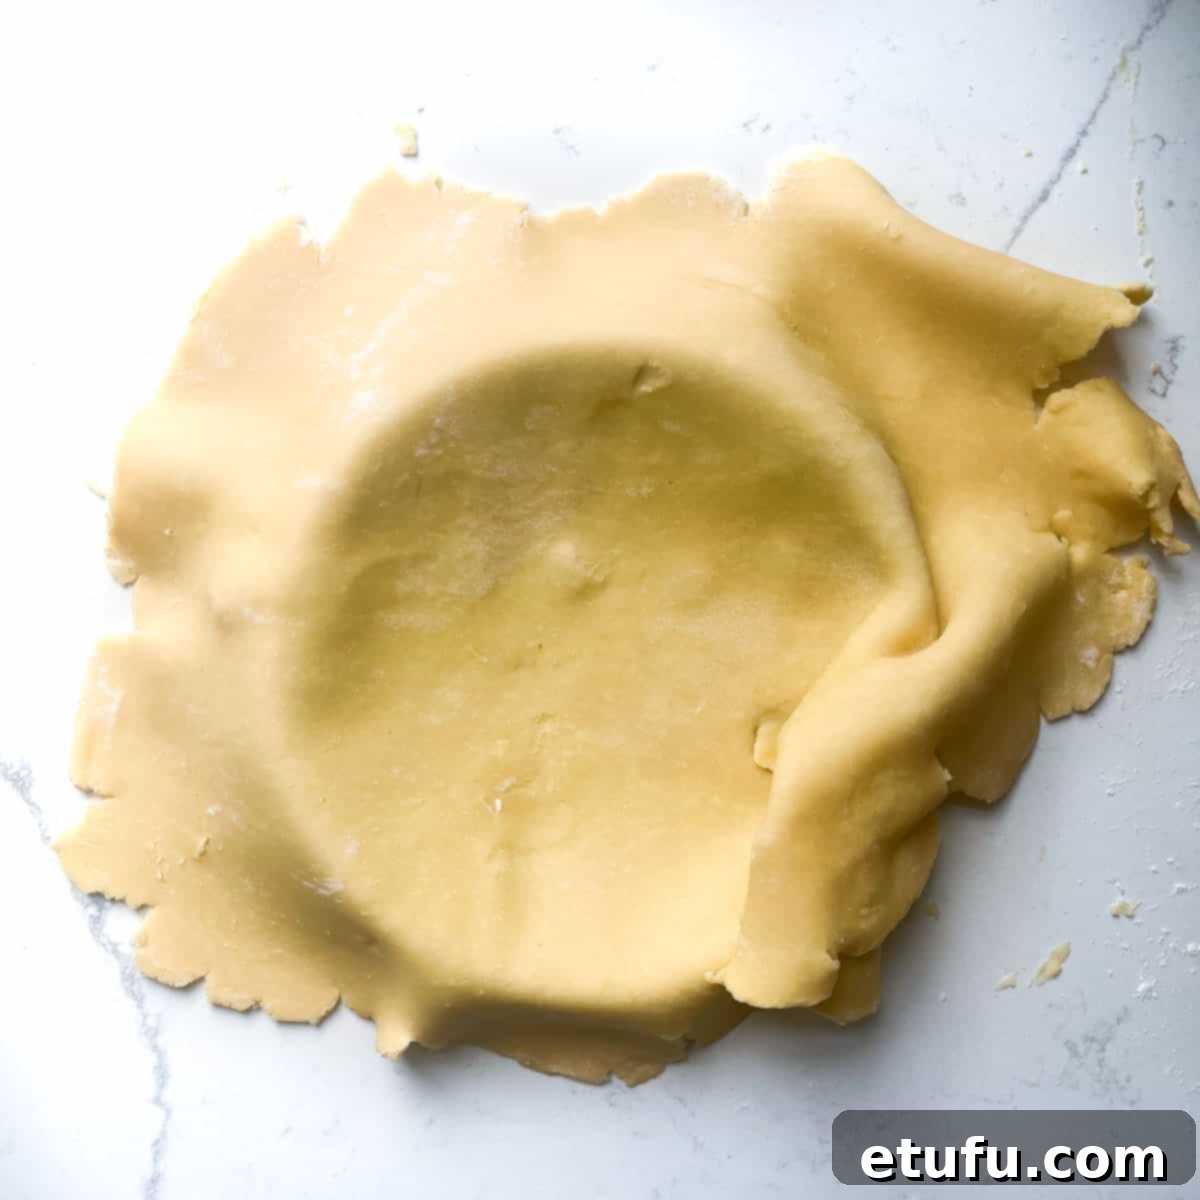
- Ensure there’s enough slack for the pastry to loosely drape inside the hollow of the tin. This allows the dough to settle naturally into the corners and flutes without stretching, which is key to preventing shrinkage during baking.
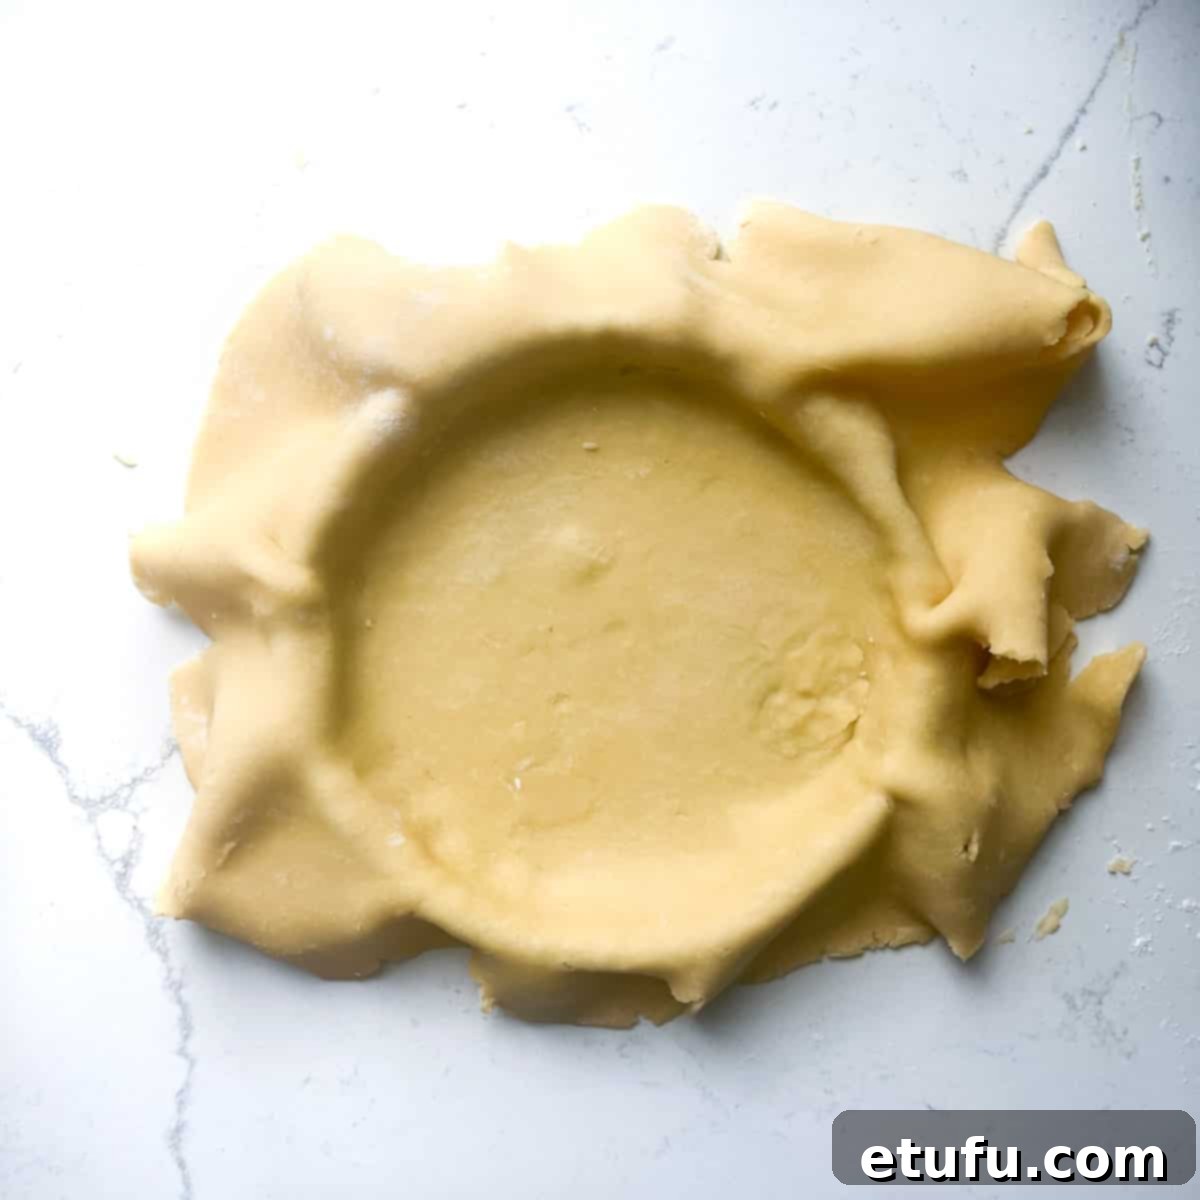
- Lightly push the dough down very gently, ensuring you have ample pastry to line both the bottom and the sides of the tin evenly. Do not firmly press or mold it into place just yet; allow for some gentle drape.
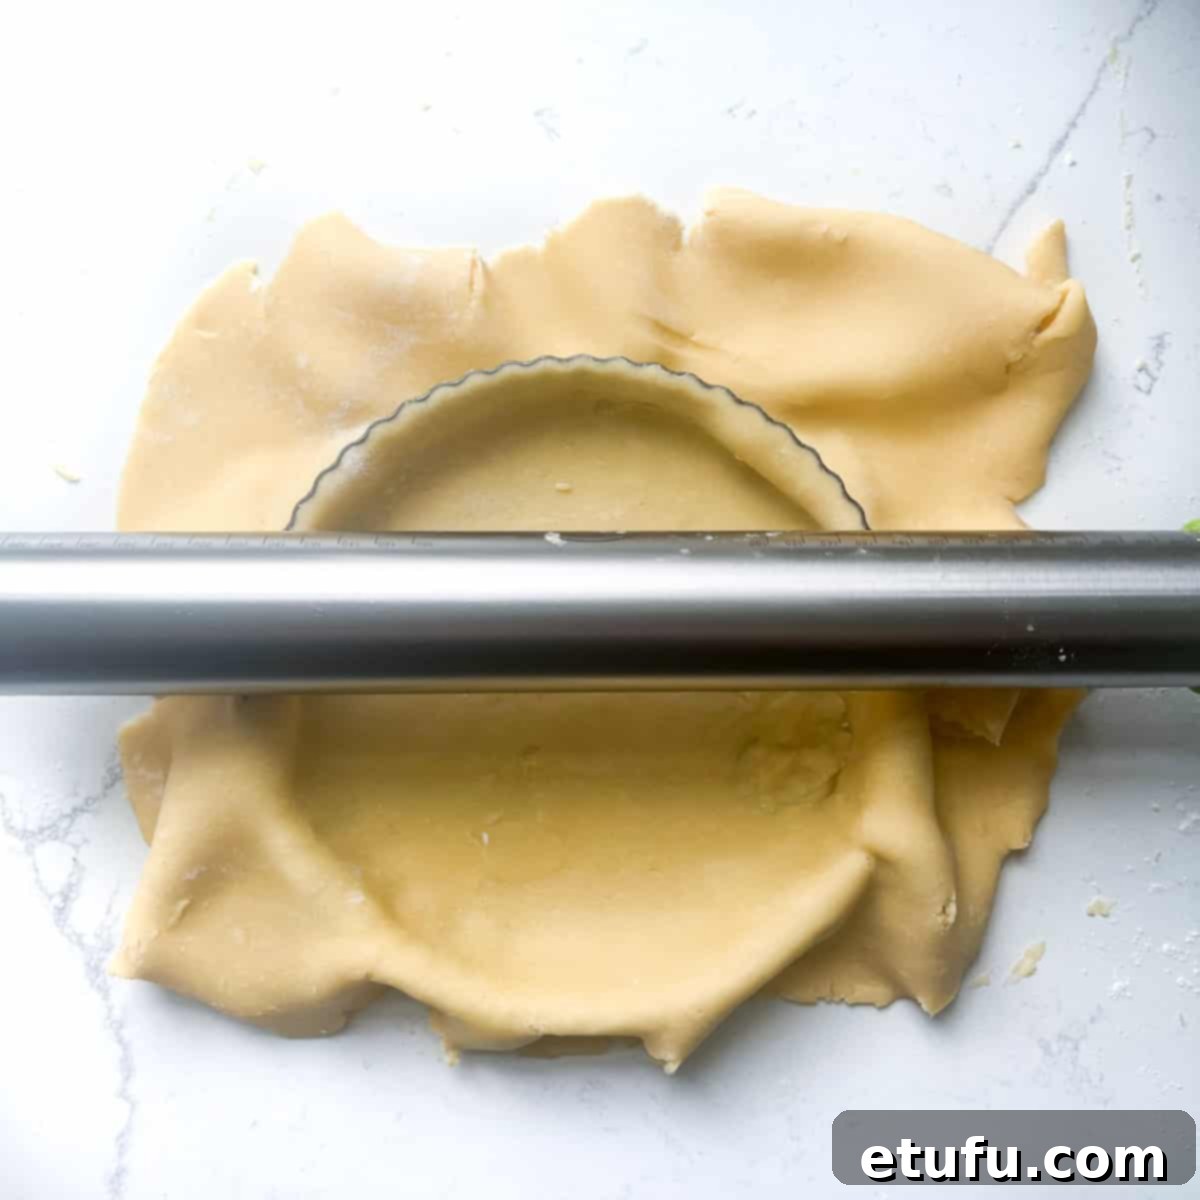
- Roll your rolling pin firmly over the top edges of the tart tin. This clever action will neatly cut off any excess pastry, leaving a clean, precise edge.
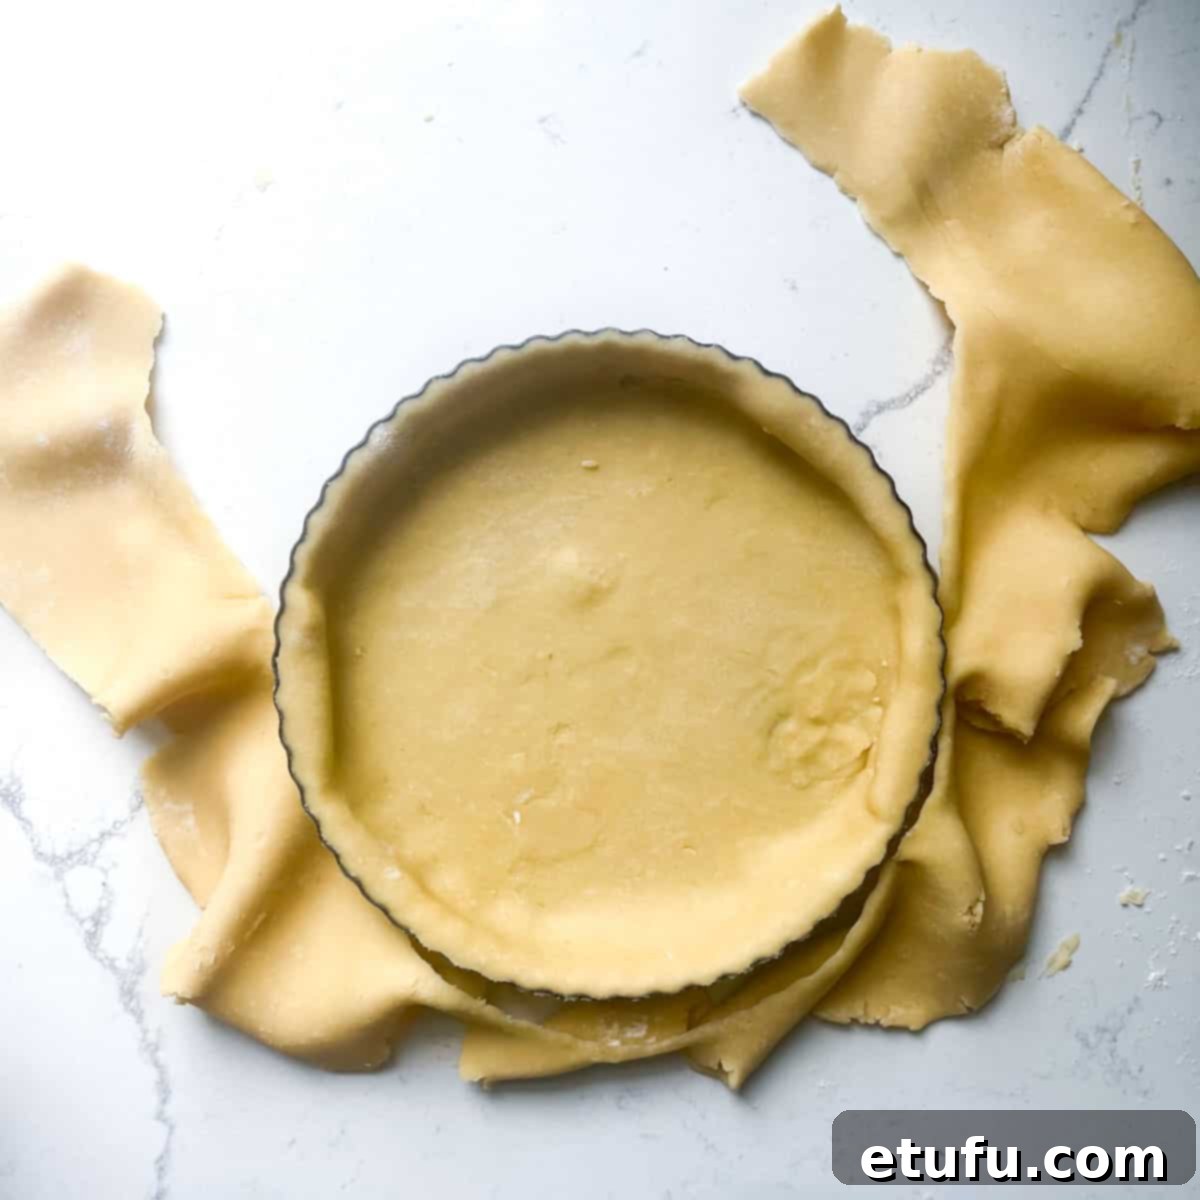
- Gather up the pastry offcuts. These can be saved for future use (refer to our ‘Clever Uses for Leftover Pastry Dough’ section) or used to patch any accidental tears in your tart shell.
- Now, working your way around the entire tin, gently but firmly press the pastry into the fluted sides of the tin using your thumb and index finger. Be delicate to avoid tearing. If you accidentally create a tear, don’t panic; simply patch it up with a small piece of the reserved extra dough and gently smooth it over.
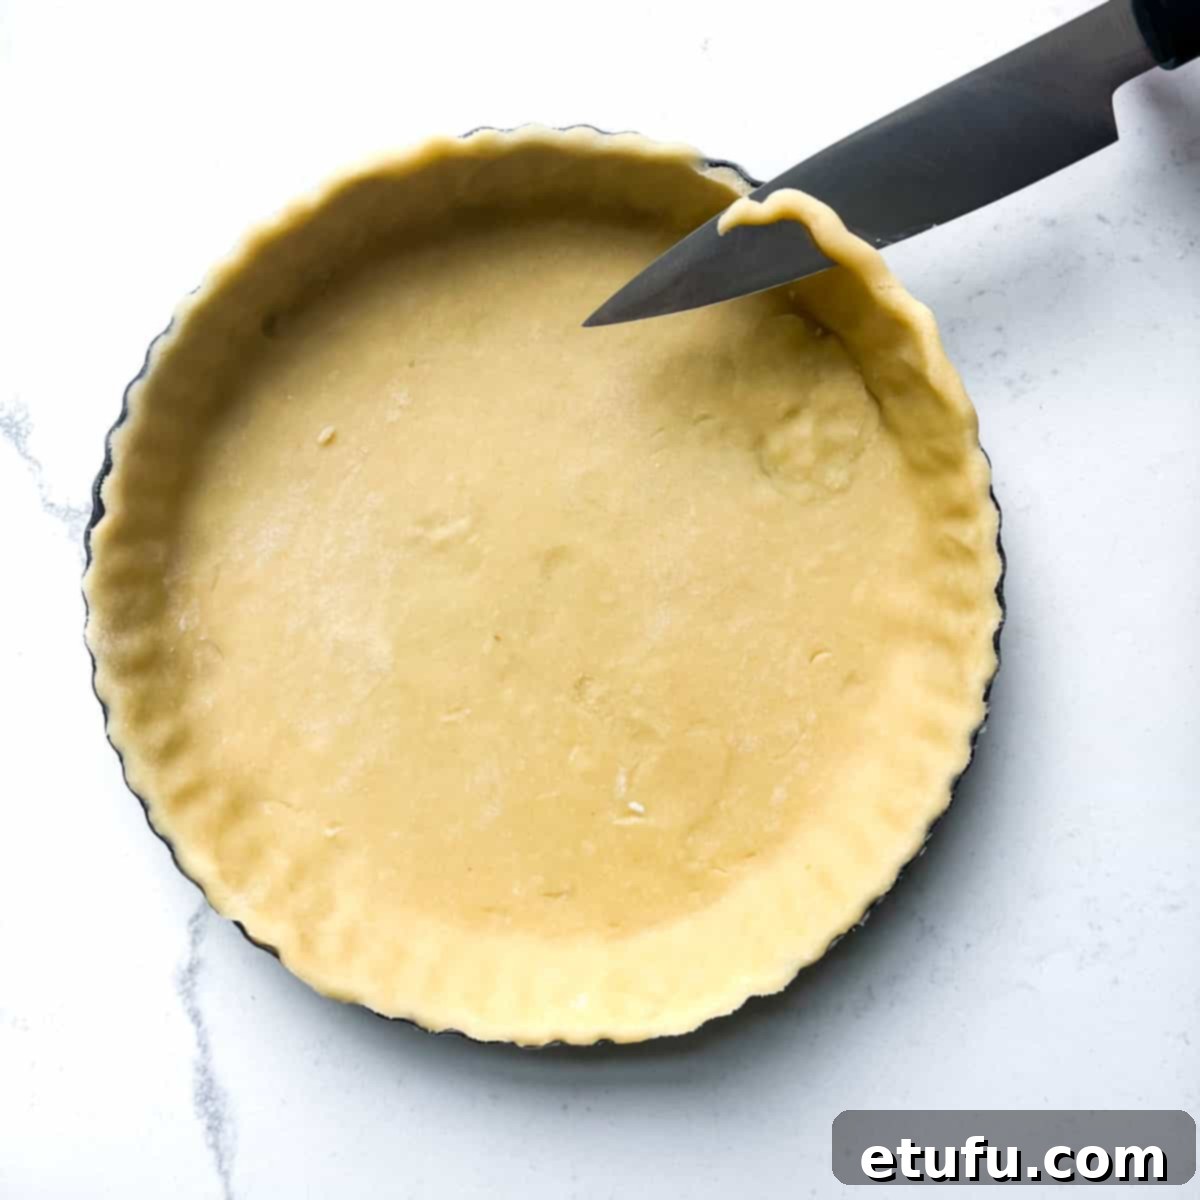
- For a perfectly neat and professional finish, use a small, sharp knife to glide horizontally over the top rim of the tin, carefully slicing off any remaining extra pastry that may have been missed by the rolling pin.
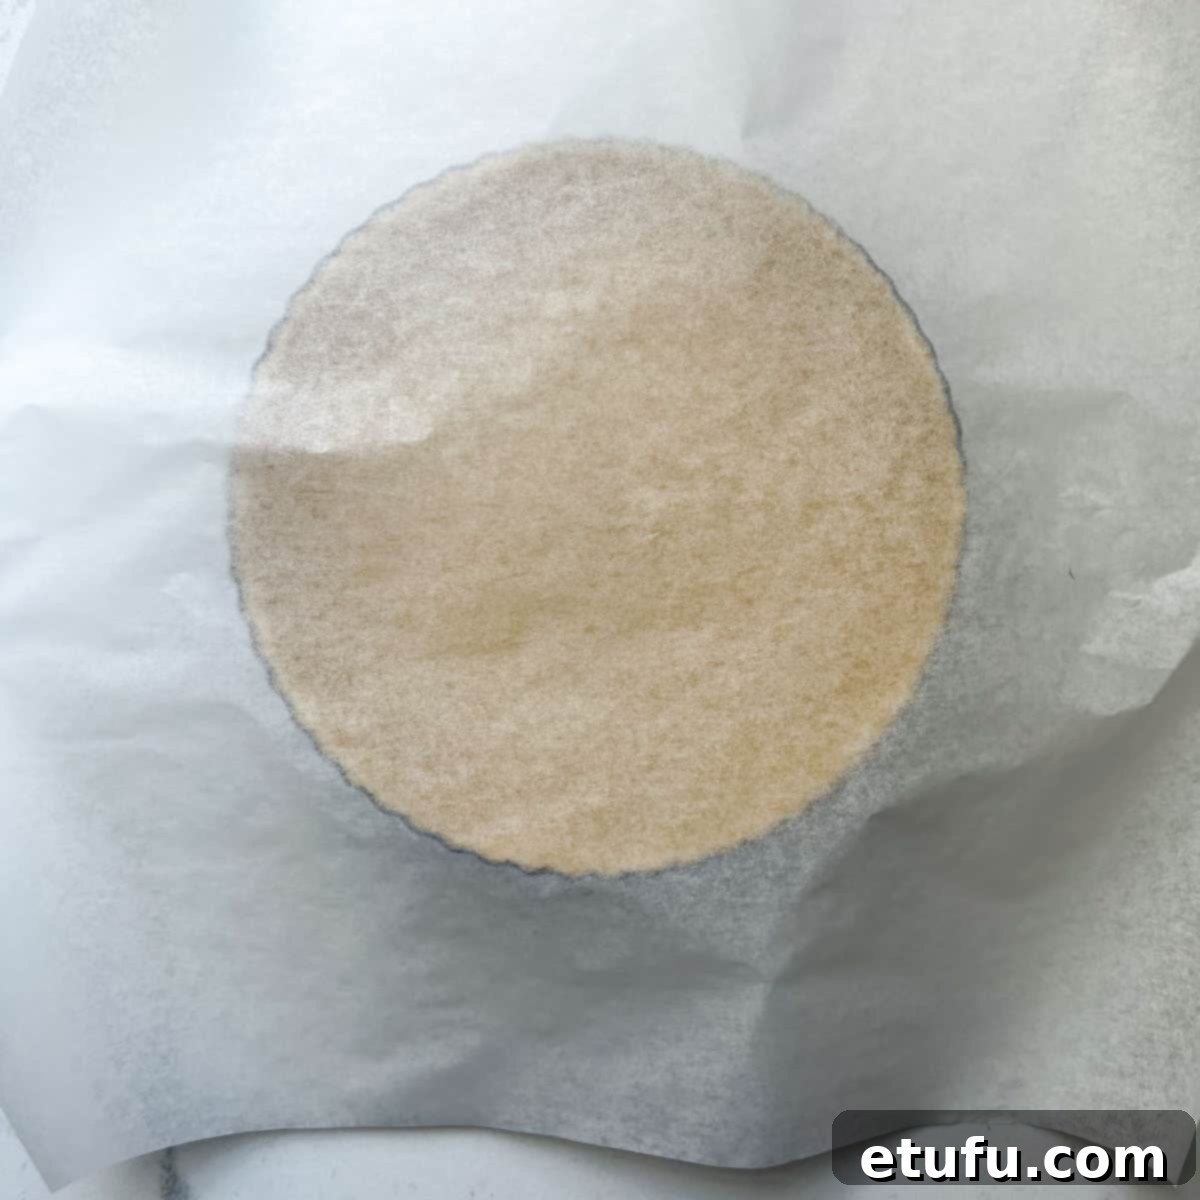
- To prepare for blind baking, drape a piece of parchment paper or aluminum foil over the tart tin, ensuring it covers the bottom and extends well up the sides.
What is Blind Baking?
Blind baking is a crucial technique used for tarts and pies, especially those destined for wet fillings or fillings that require a short baking time. It involves partially or fully baking the pastry crust before adding the filling. This essential step prevents the crust from becoming soggy (a common issue known as a “soggy bottom”) and ensures it achieves a perfectly crisp, golden texture. To blind bake, the pastry is typically lined with parchment paper or aluminum foil and weighed down with baking beans, dried rice, or specialized pie weights. This weight helps prevent the pastry from puffing up or shrinking dramatically during the baking process. The pastry is then baked in the oven until it is set and lightly golden brown. Once blind-baked to perfection, the crust is ready to receive its delicious filling.
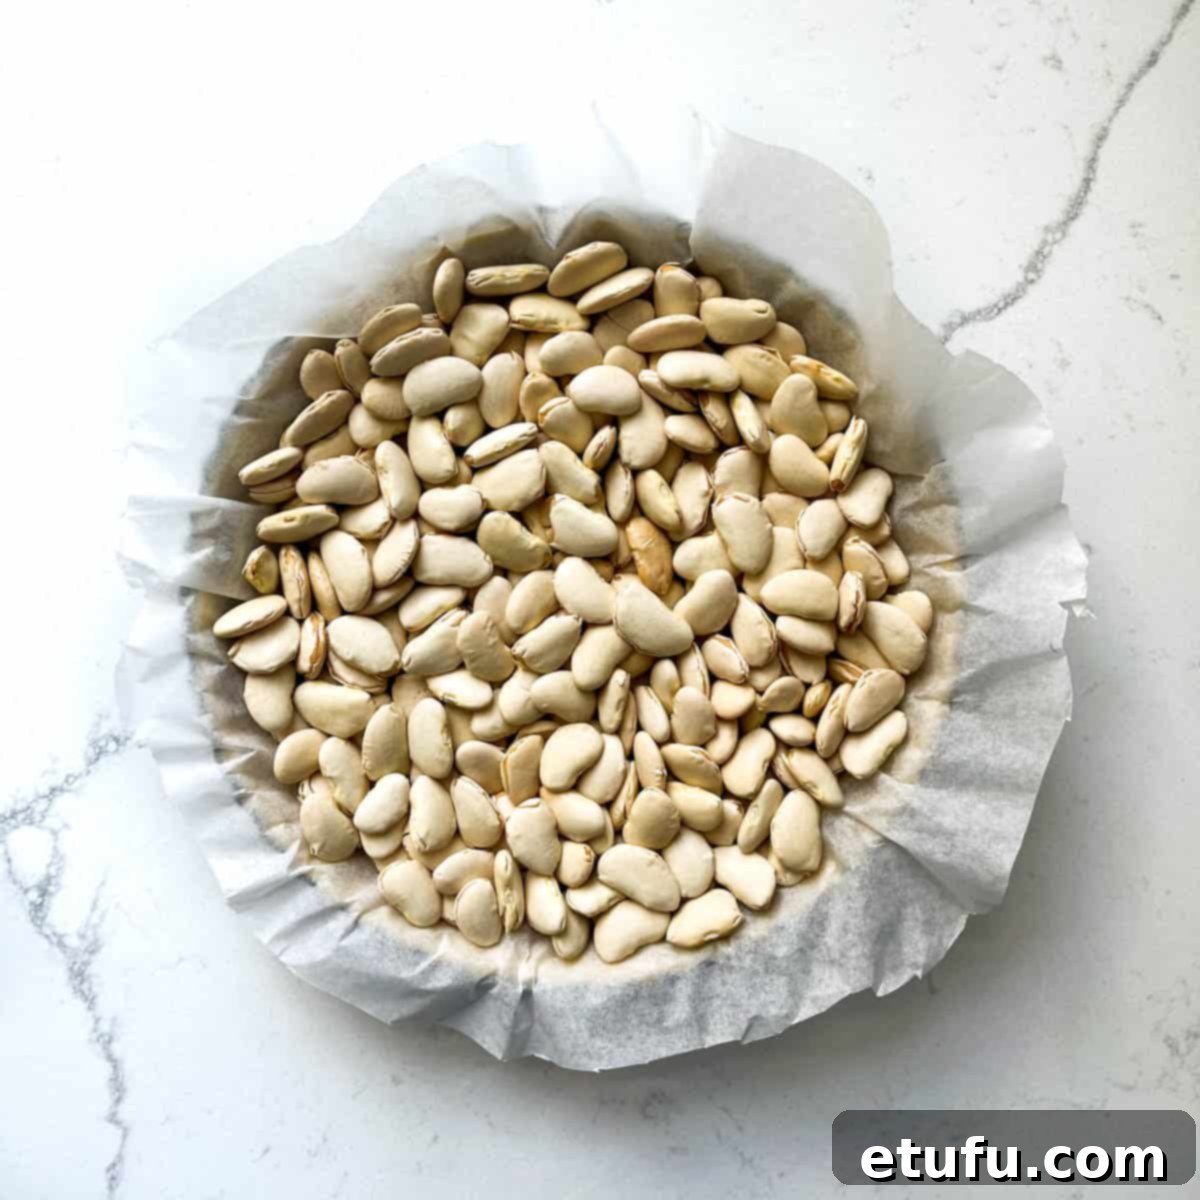
- Fill the parchment-lined hollow of the tart with your chosen baking weights or baking beans. Distribute them evenly across the bottom and up the sides.
- Bake the tart shell for exactly 10 minutes in the preheated oven.
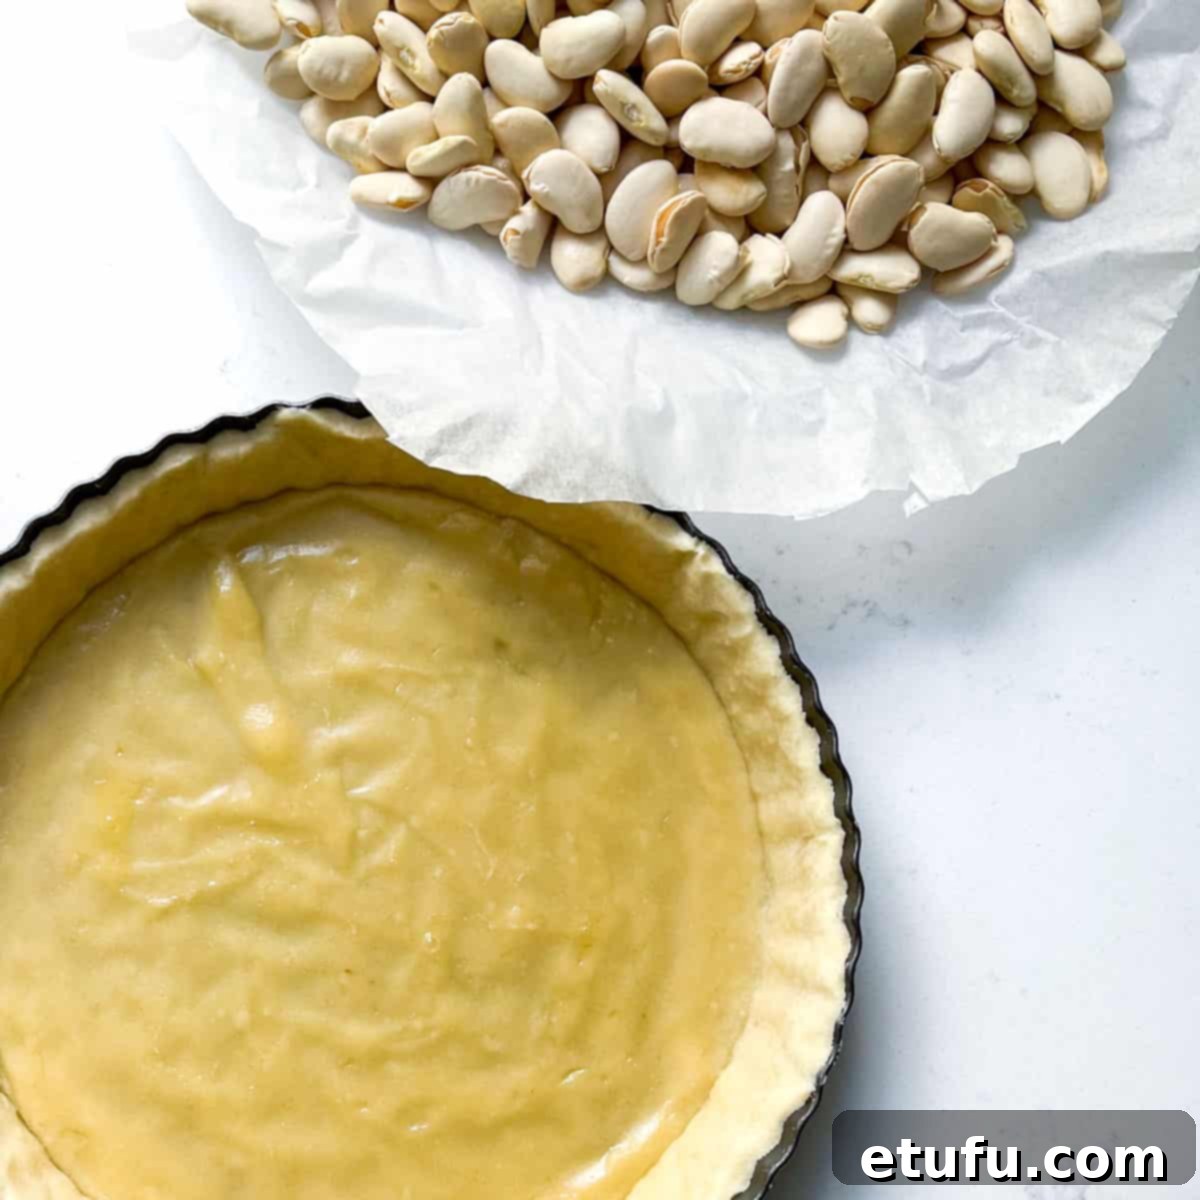
- Carefully remove the tart tin from the oven. Gently lift the parchment paper along with the baking weights and set them aside (they can be reused!). Return the tart shell to the oven and bake for a further 15 minutes, or until it achieves a beautiful light golden brown color.
Top Tip: When handling a tart tin with a loose bottom, always be very careful not to accidentally push the bottom upwards from underneath. This can easily break the delicate seam of your partially baked tart, compromising its structure. Always lift and move the tin solely by its solid sides.
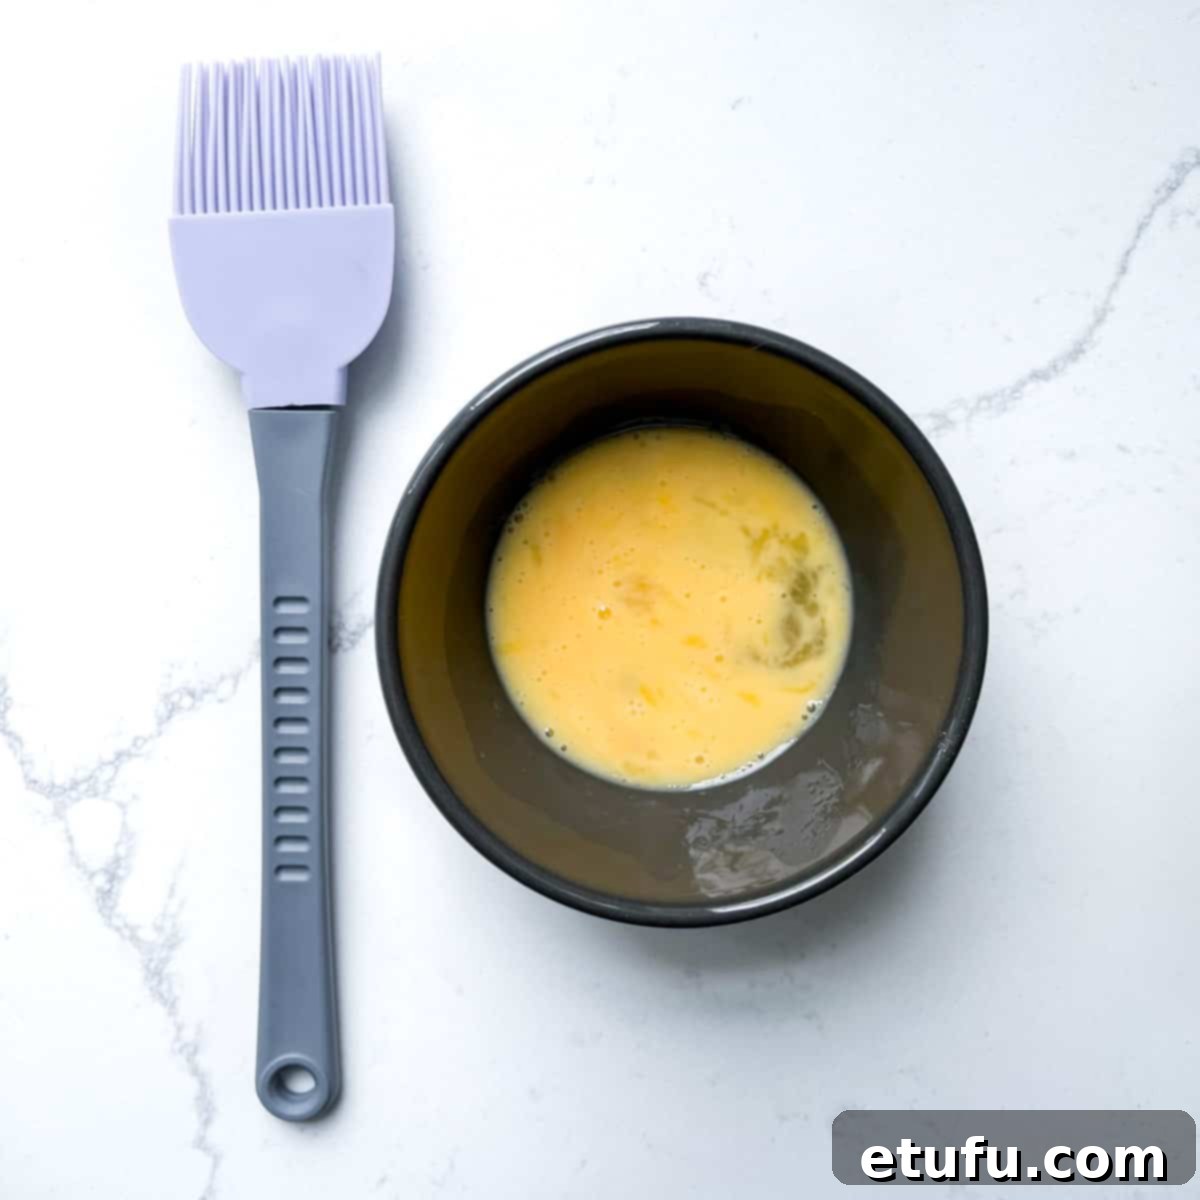
- In the meantime, prepare a simple egg wash. Whisk one large egg thoroughly in a small bowl until it is smooth and uniform.
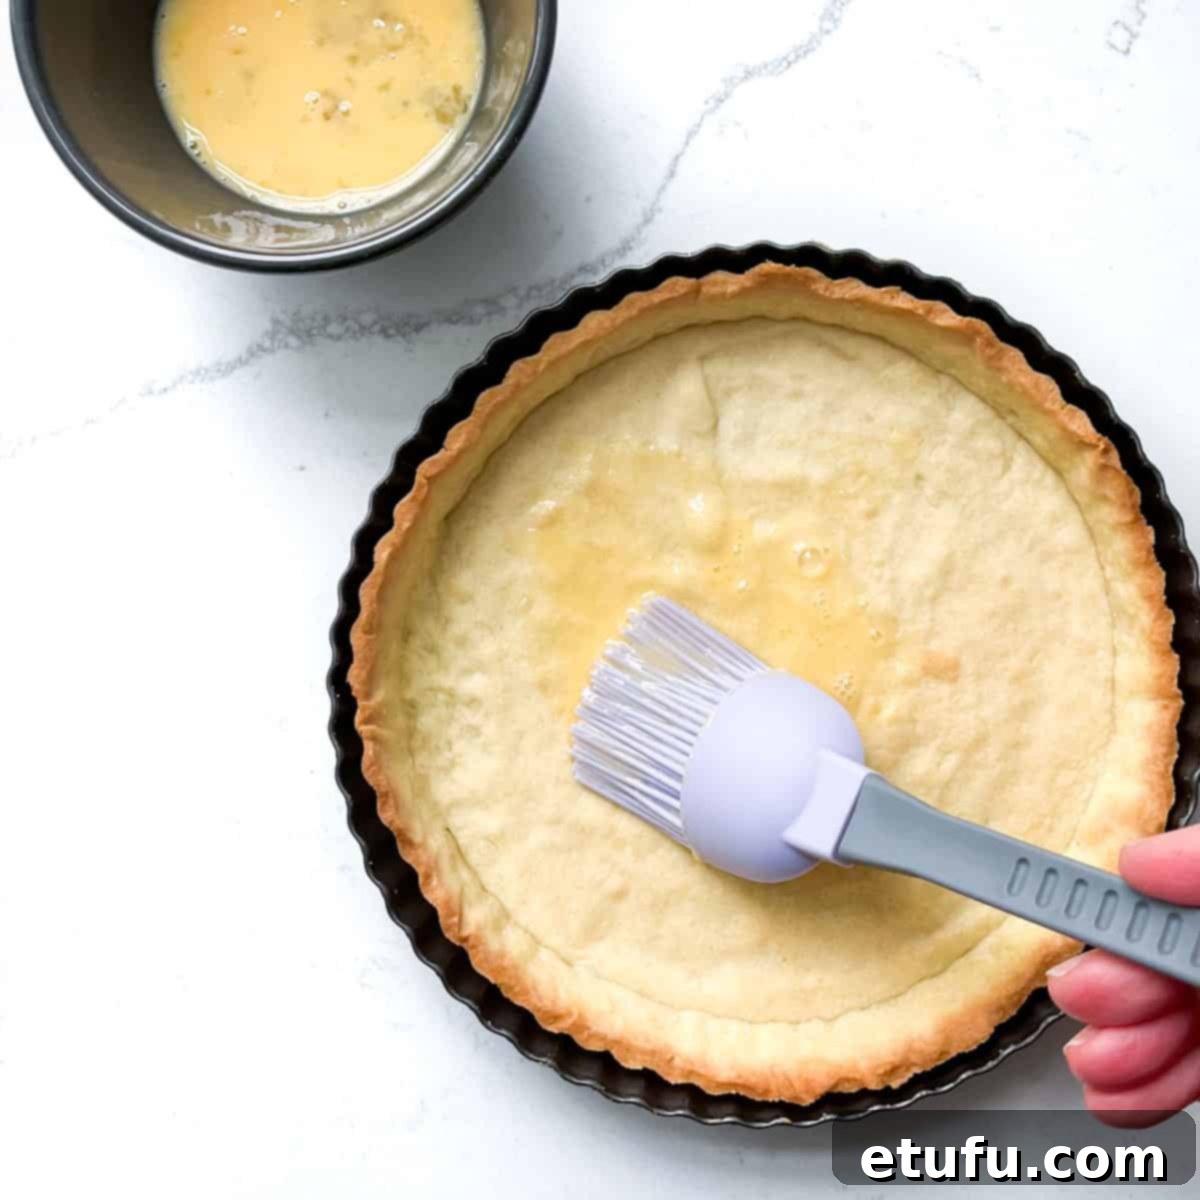
- Remove the tart case from the oven once more. Using a pastry brush, lightly and evenly coat the bottom and sides of the still-warm pastry with the egg wash. Return to the oven and bake for another 3-4 minutes, or until the egg wash is set and appears shiny.
This crucial step effectively seals the pastry case, creating a protective barrier that is vital in preventing it from becoming soggy when the creamy Crème Pâtissière filling is added.
- Allow the perfectly baked pastry case to cool completely in the tart pan for about 10 minutes before gently removing it and transferring it to a wire rack. Let it cool fully to room temperature.
Top Tip: If you notice any slightly uneven or rough areas along the ridge or edge of your tart crust after baking, you can gently smooth them down and refine the edge with a fine grater or zester for a truly perfect, polished finish.
To Make the Crème Pâtissière (Pastry Cream)
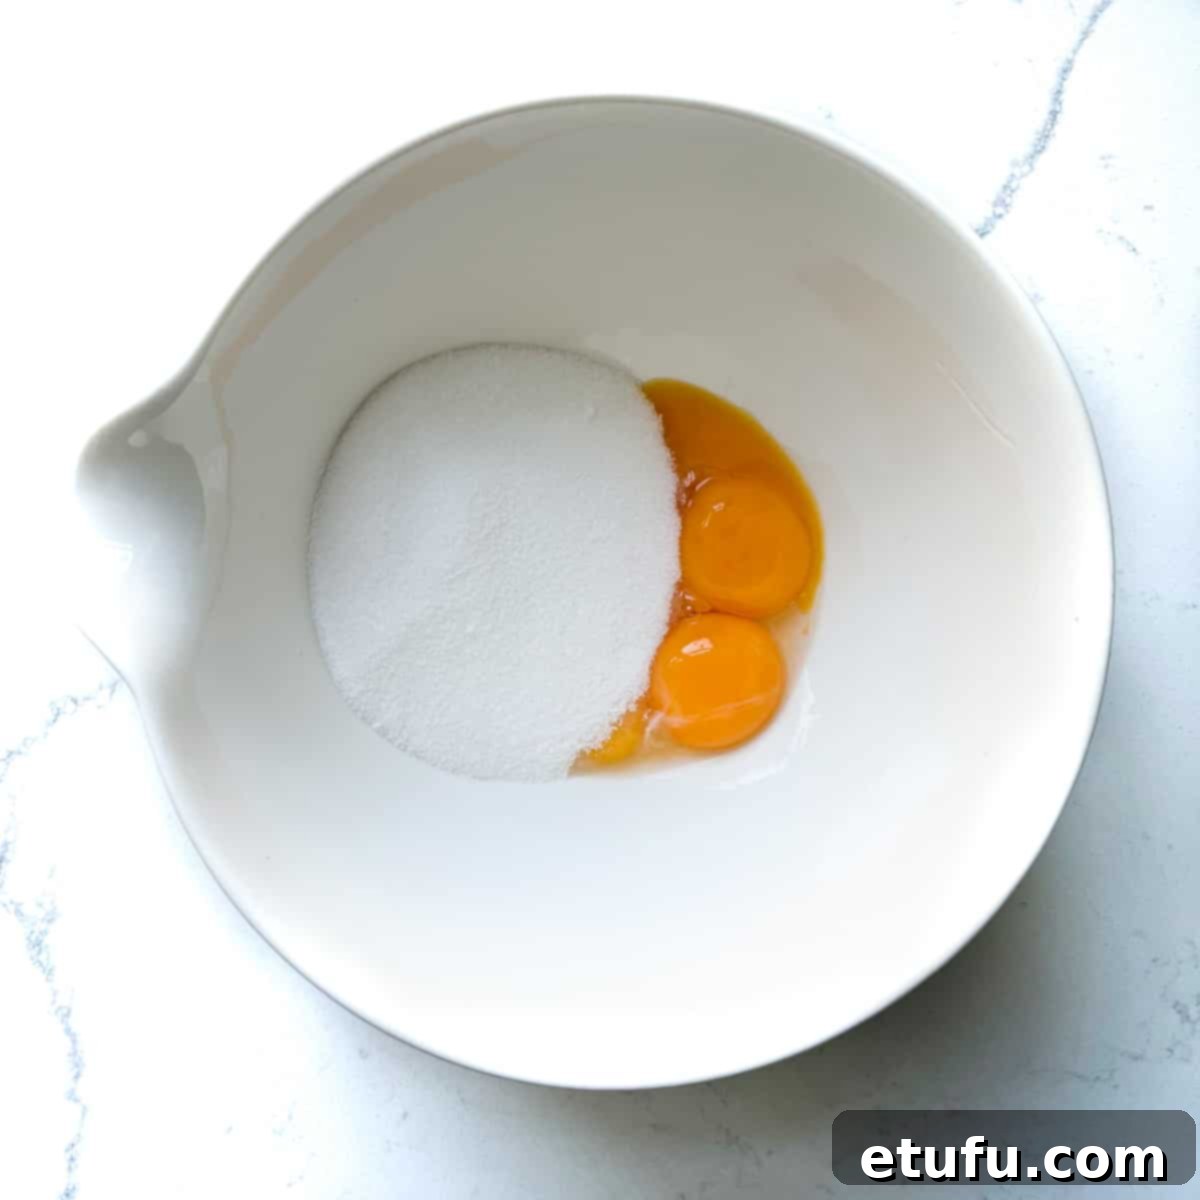
- In a medium-sized heatproof bowl, combine the three egg yolks with the caster sugar.
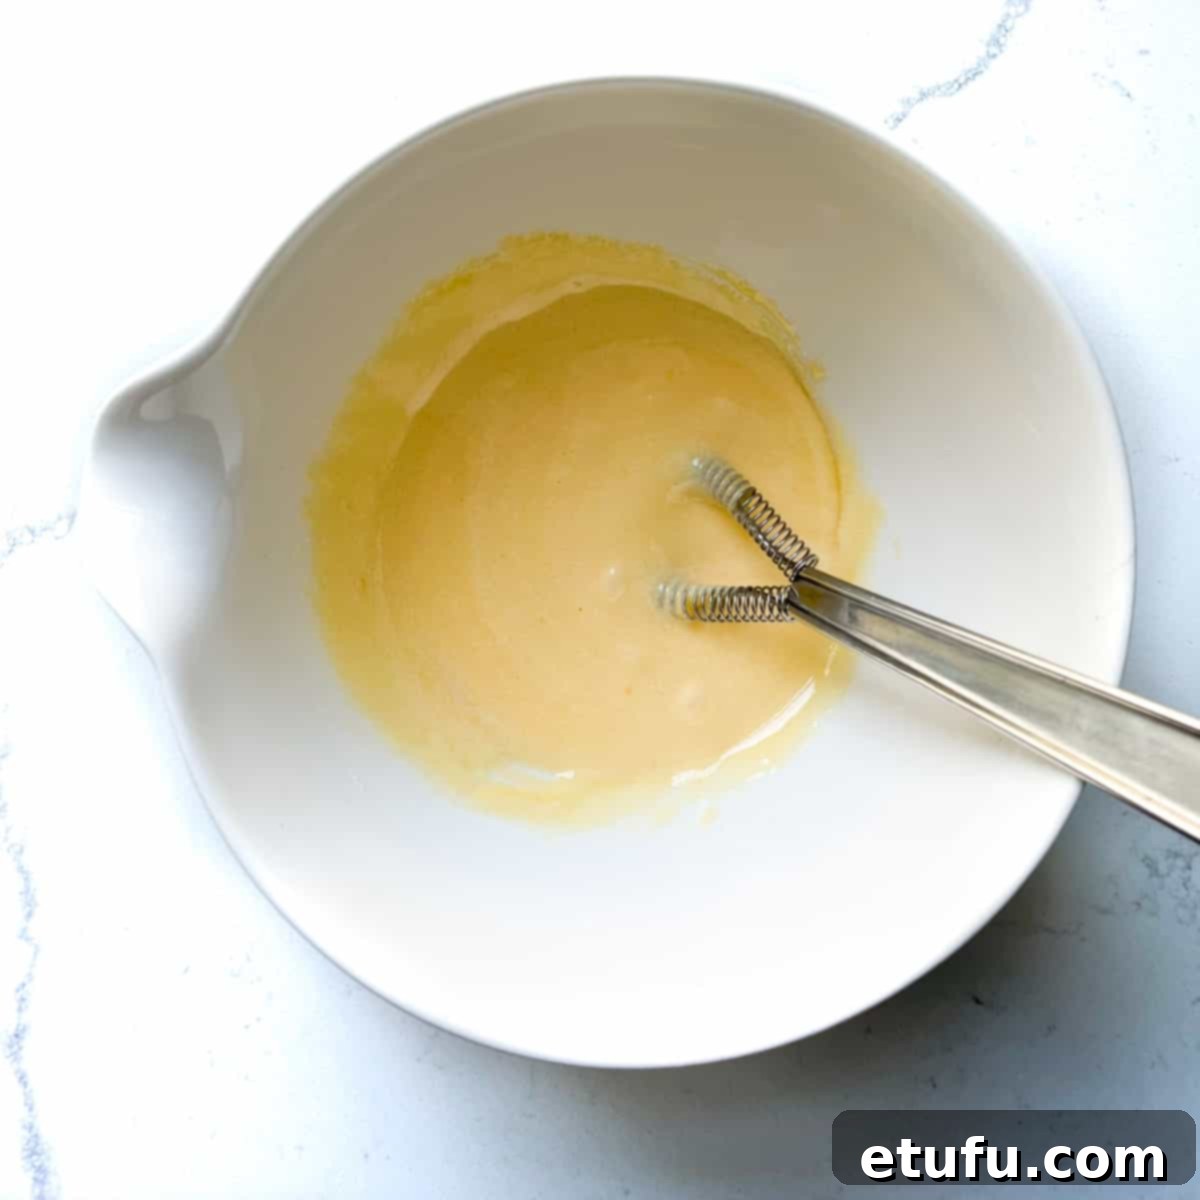
- Whisk the egg yolks and sugar vigorously together until the mixture is well combined, appears pale yellow, and is slightly thickened. This can be easily done by hand with a good whisk.
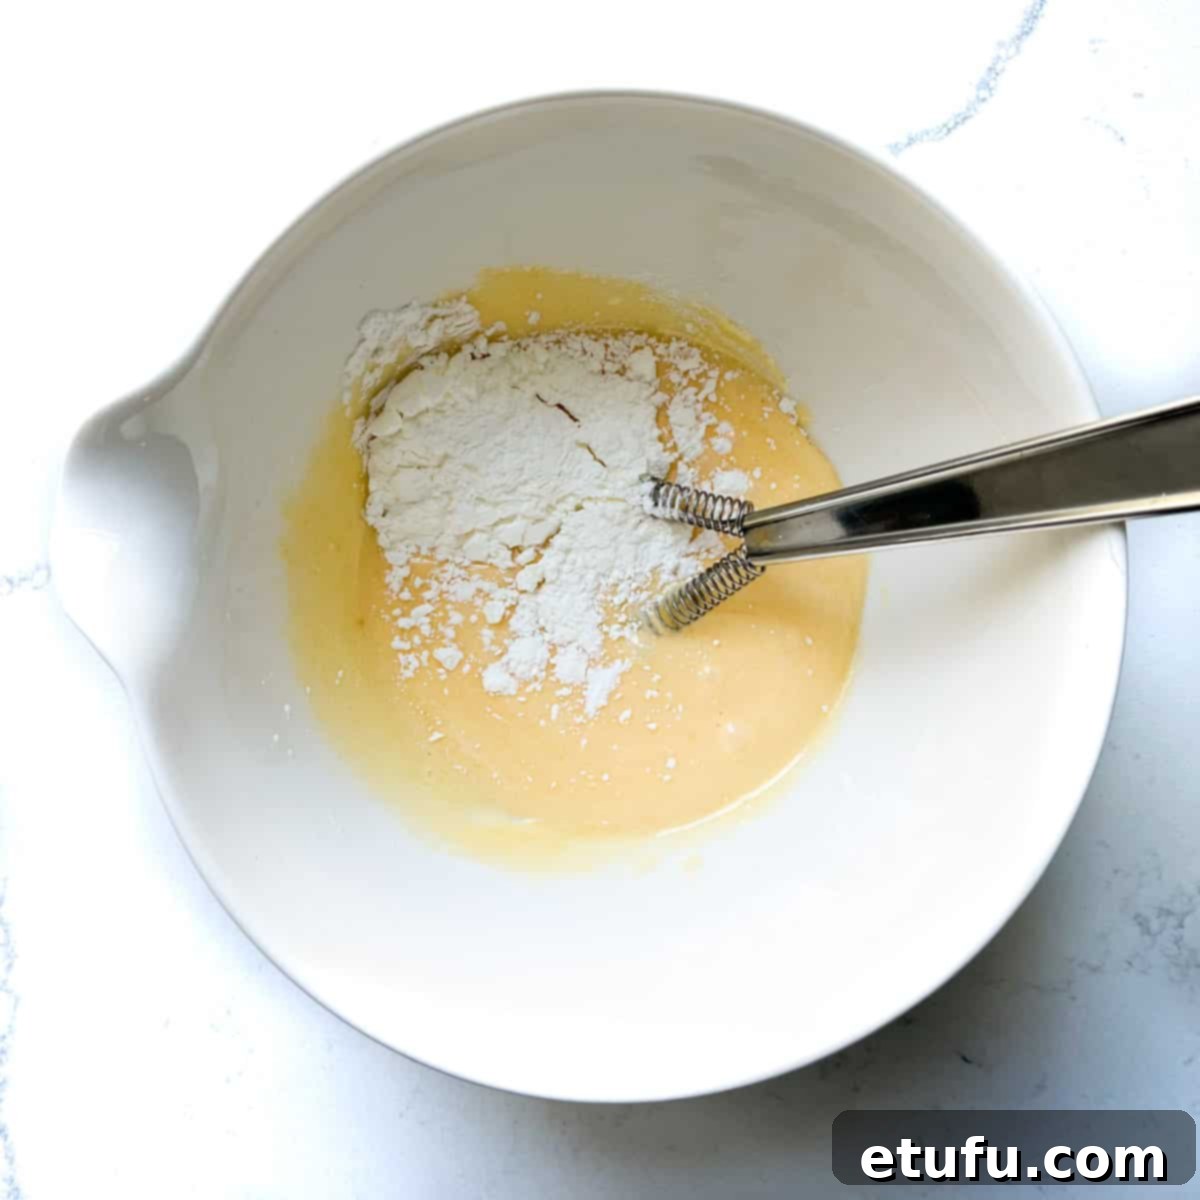
- Add the cornflour (also known as cornstarch in some regions) to the egg yolk mixture.
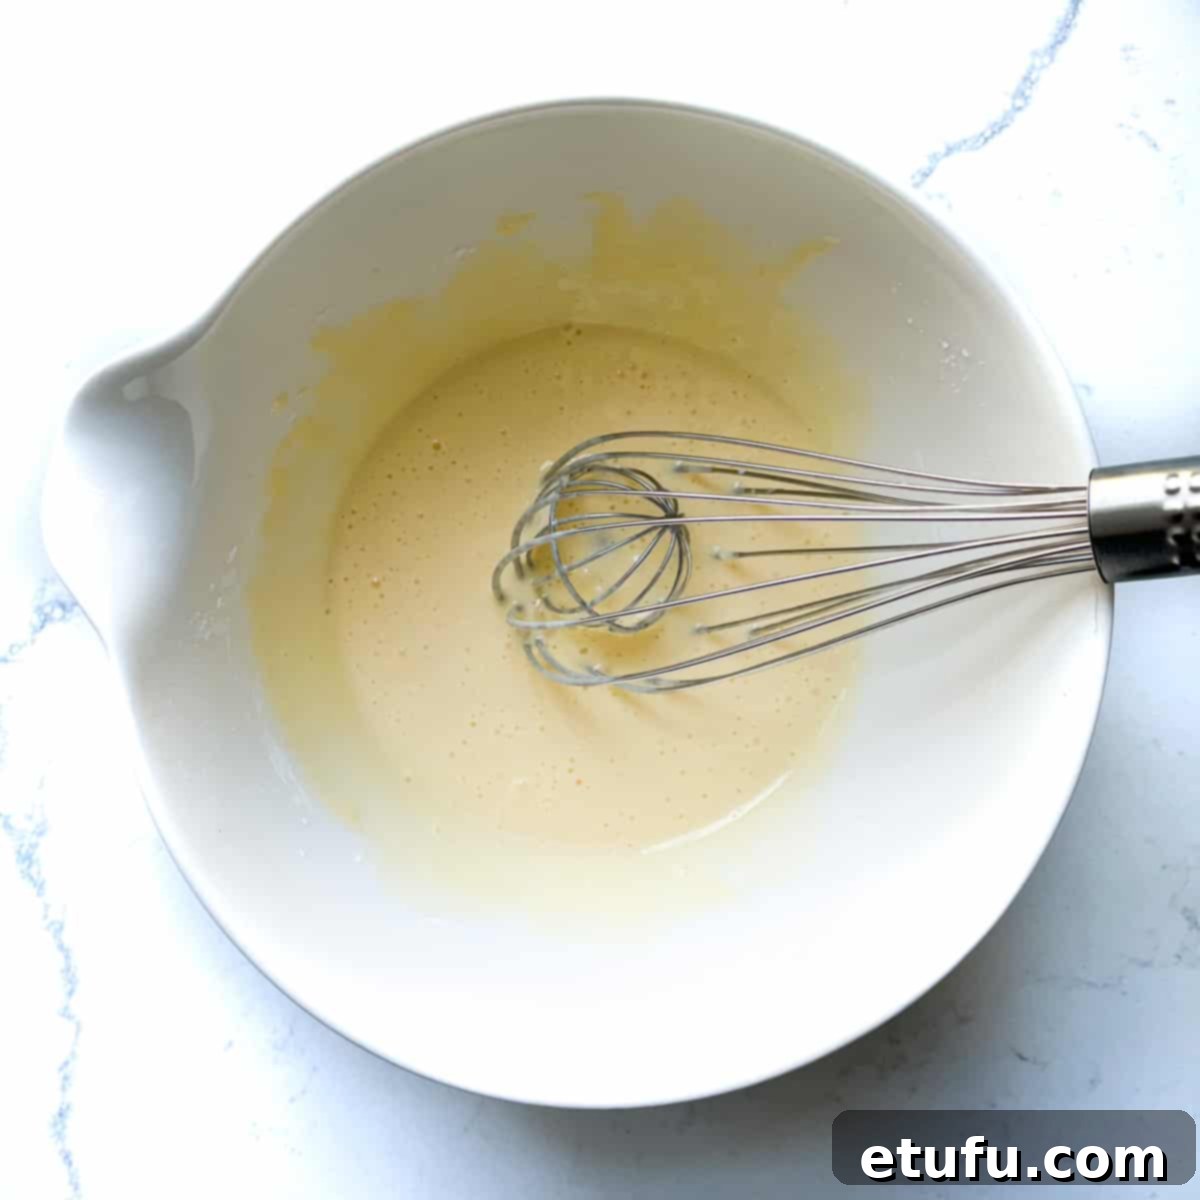
- Continue whisking until the cornflour is fully incorporated into the mixture and you achieve a perfectly lump-free, smooth paste. This critical step ensures a silky-smooth pastry cream later, without any unpleasant powdery bits.
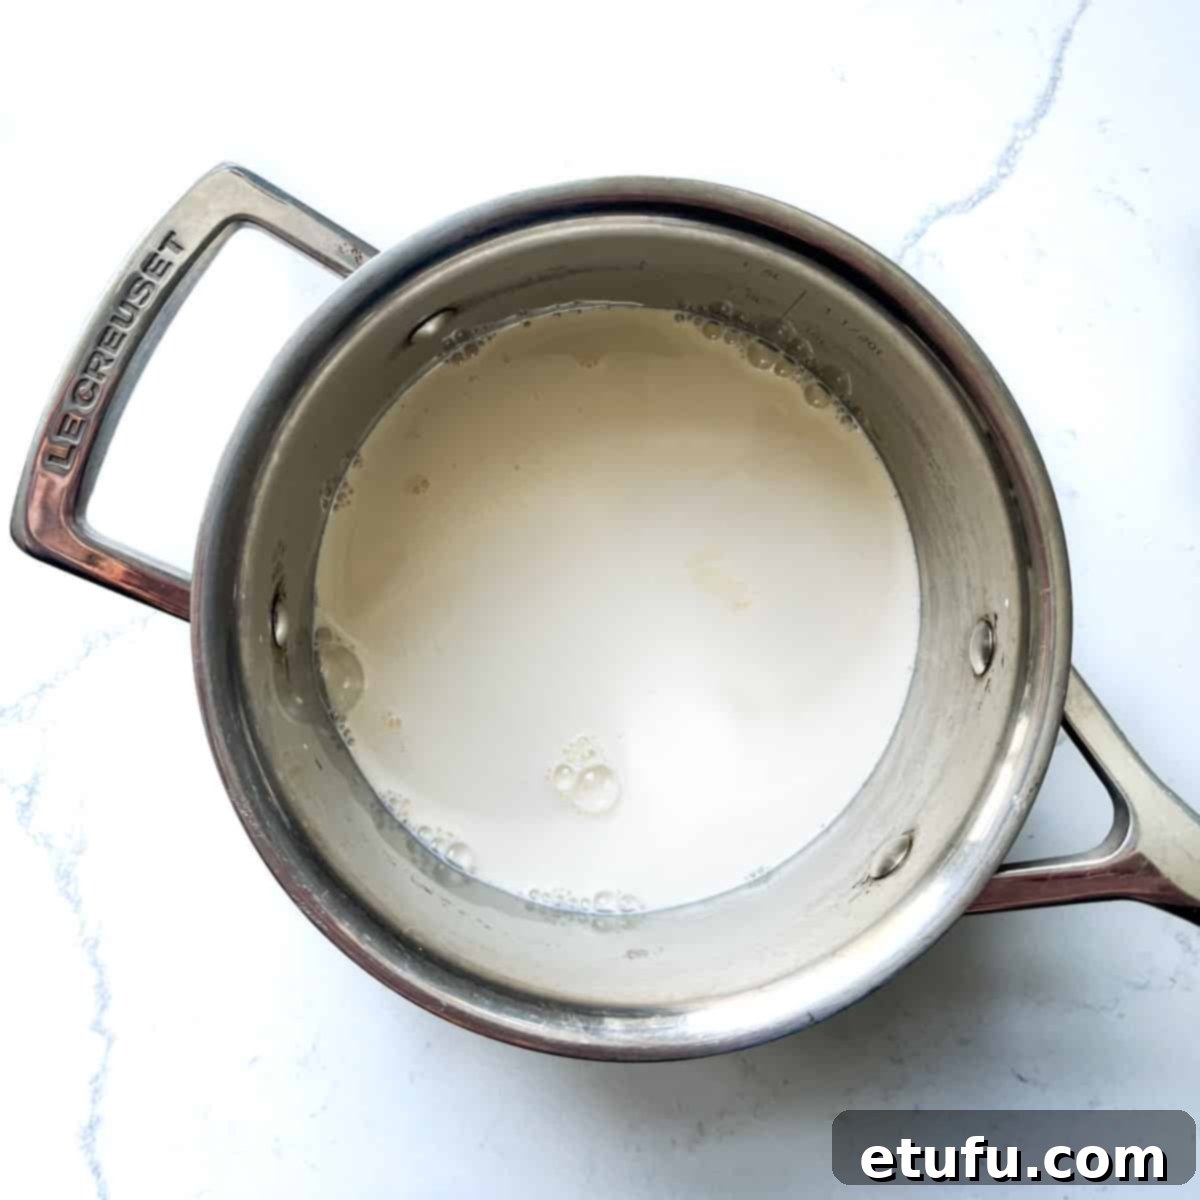
- Pour the double cream (or heavy cream), full cream milk (or whole milk), and a tiny pinch of salt into a medium saucepan.
- Place the saucepan over low heat. Gently heat the mixture, stirring occasionally to prevent scorching, until it is hot but not boiling. You’ll know it’s ready when you see tiny bubbles just beginning to appear around the edges of the saucepan. It’s important not to let it come to a rolling boil at this stage.
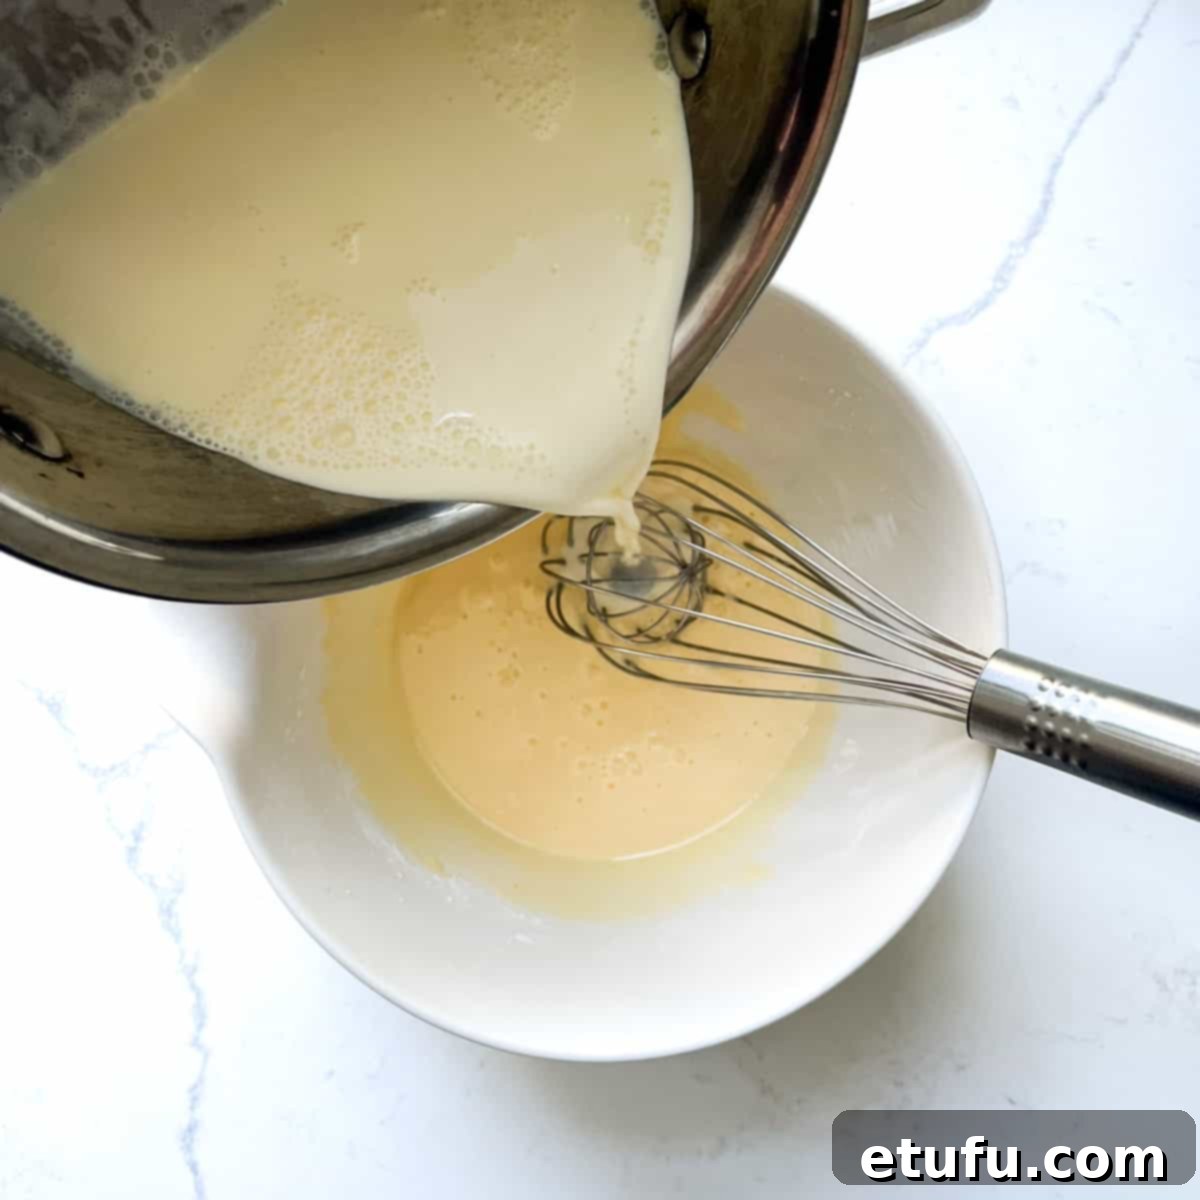
- Carefully ladle about a quarter of the warm milk mixture into the egg yolk mixture while continuously and vigorously whisking. This process, known as tempering, gradually raises the temperature of the egg yolks, which is crucial for preventing them from scrambling when they are eventually combined with the remaining hot liquid.
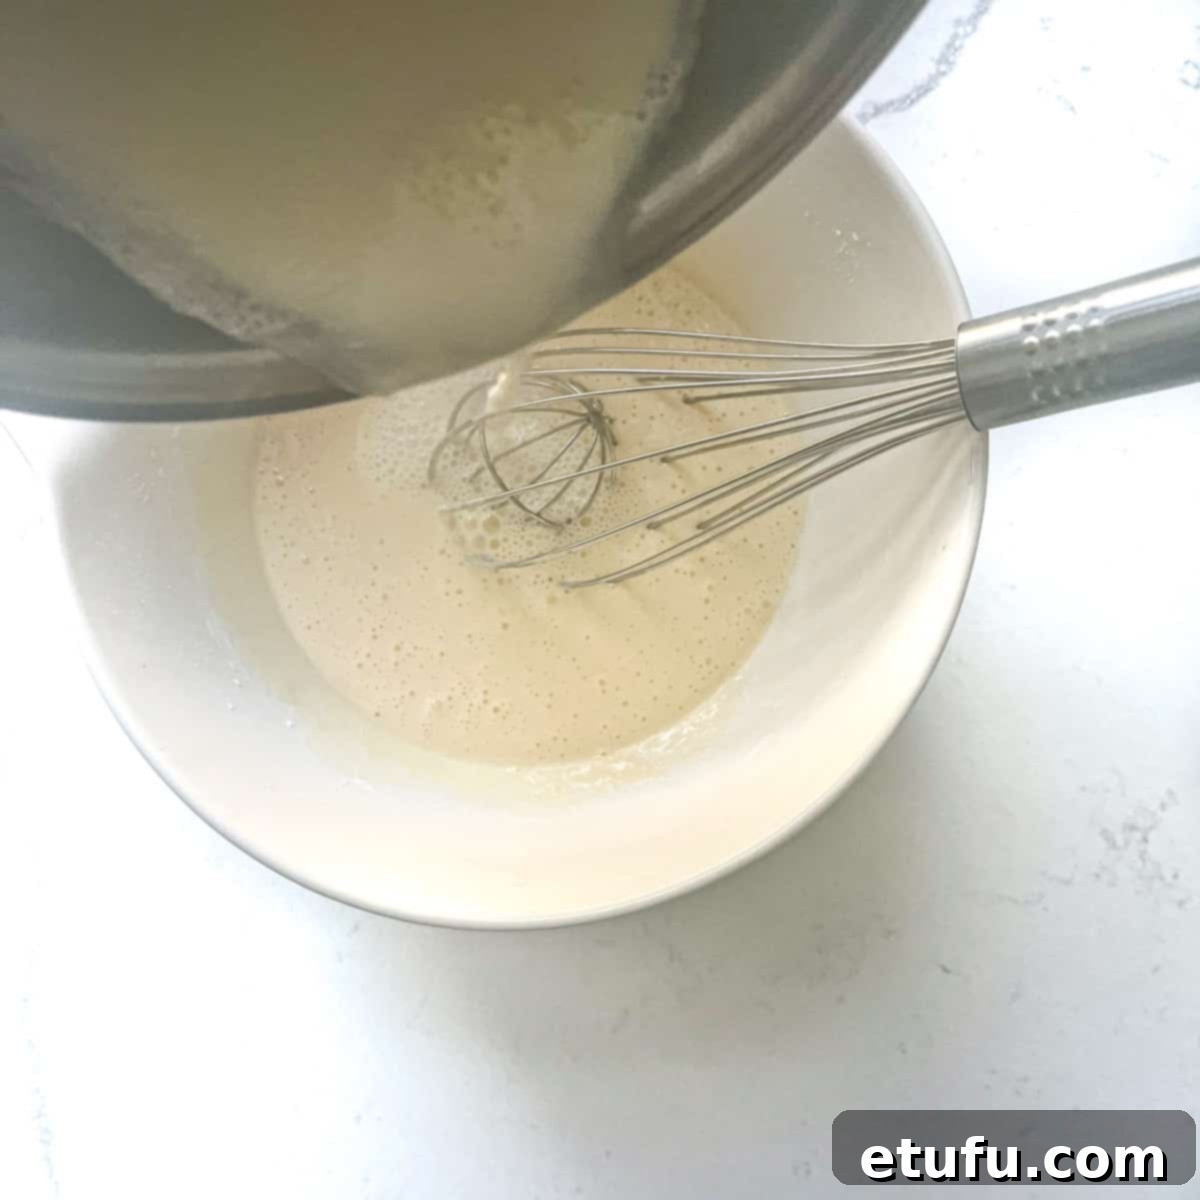
- Once tempered, slowly pour the remaining warm milk mixture into the egg mixture, continuing to whisk constantly until everything is thoroughly combined and smooth.
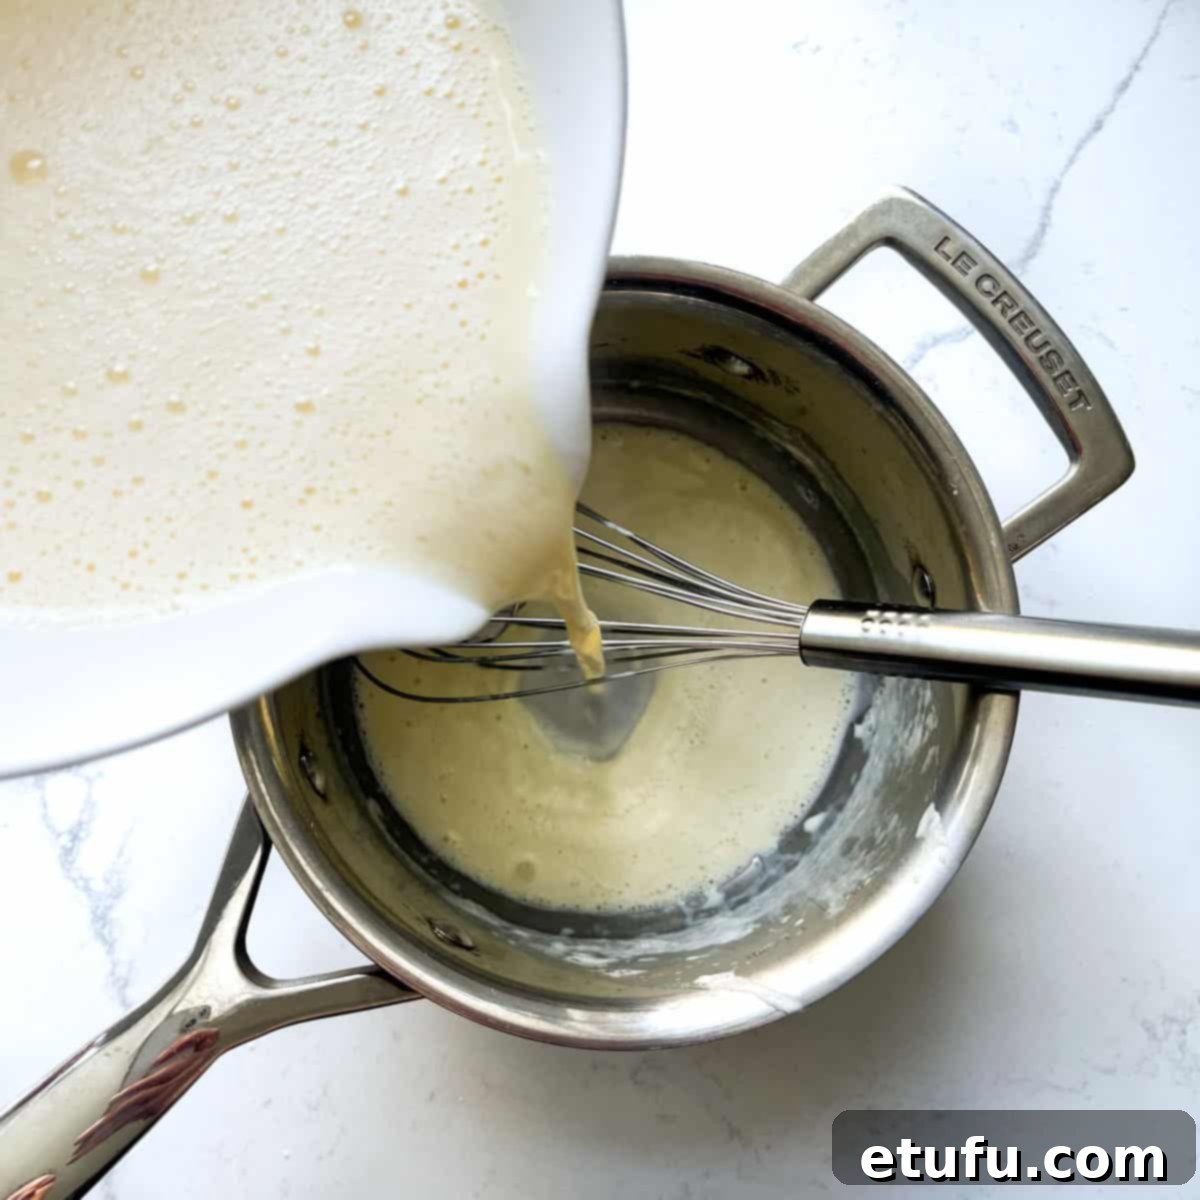
- Pour the entire custard mixture back into the saucepan and place it over low to medium-low heat.
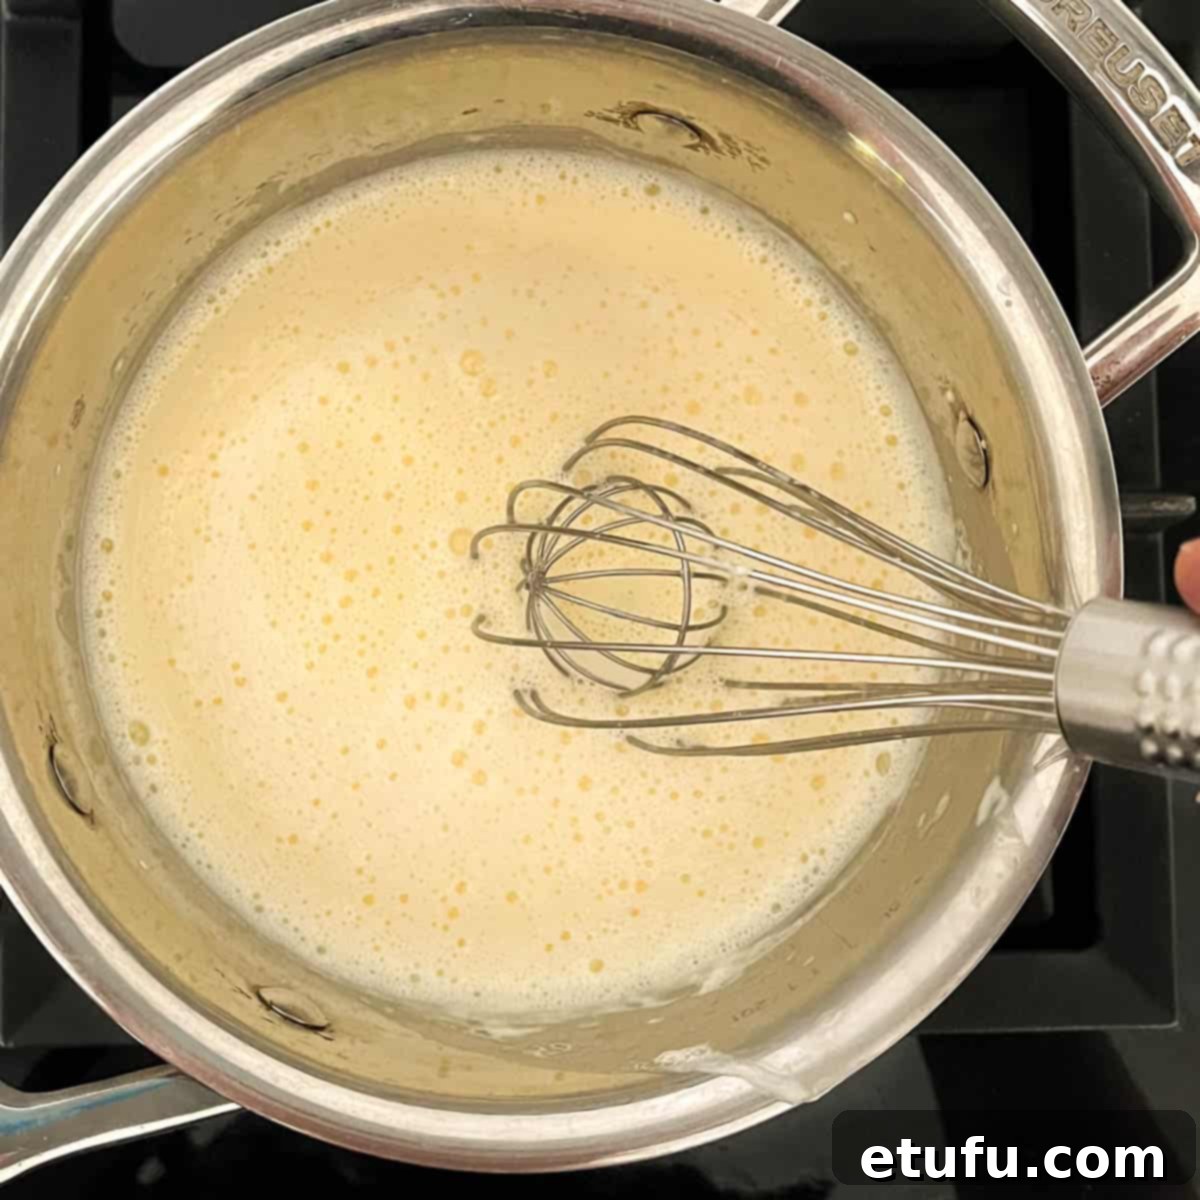
- Continue to whisk vigorously and constantly as the mixture heats and thickens. This will take several minutes. Once it comes up to a gentle boil (you’ll see a few large bubbles breaking the surface), continue to cook and whisk for 1 minute longer to ensure the cornflour is fully cooked and the cream is thoroughly thickened. Remove the saucepan from the heat immediately to prevent overcooking.
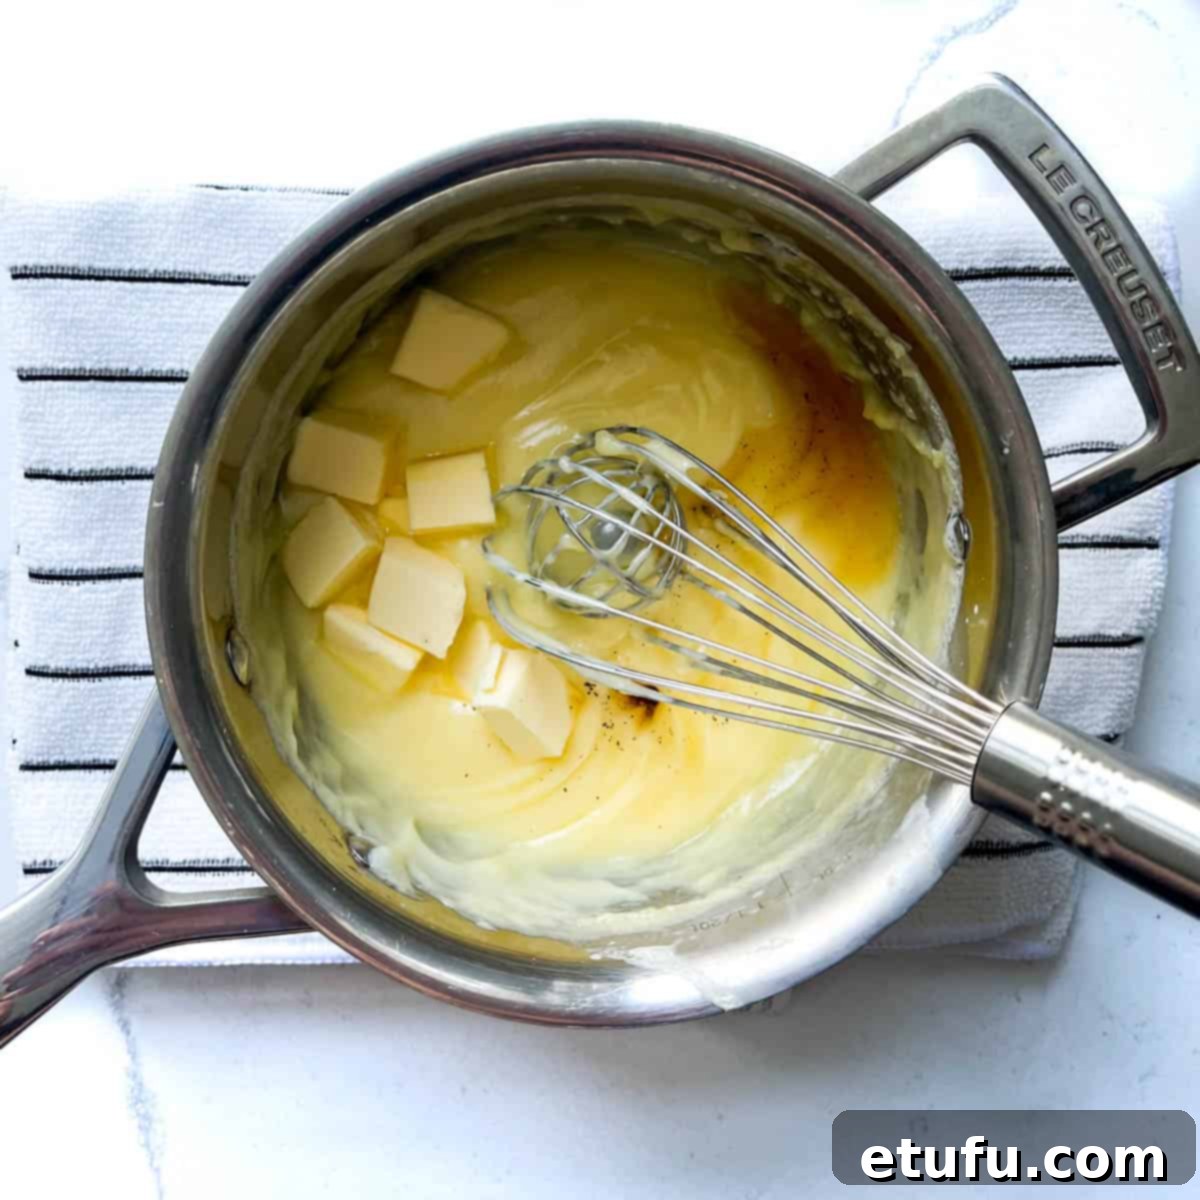
- Add the softened butter and vanilla extract to the hot pastry cream.
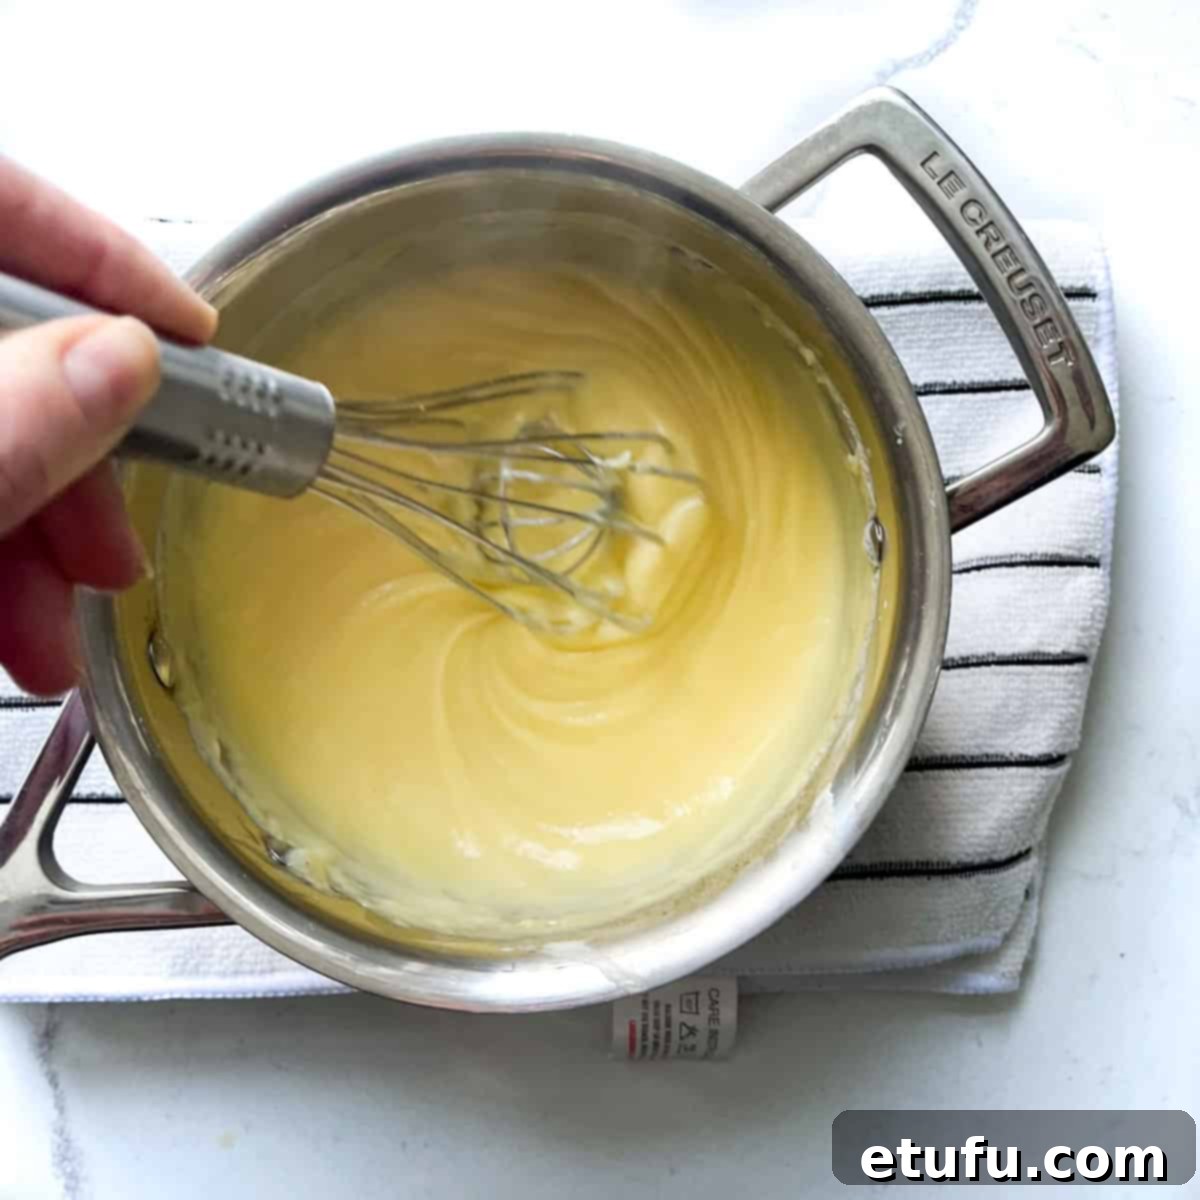
- Whisk until the butter is completely melted and fully incorporated, and the Crème Pâtissière is beautifully glossy and perfectly smooth.
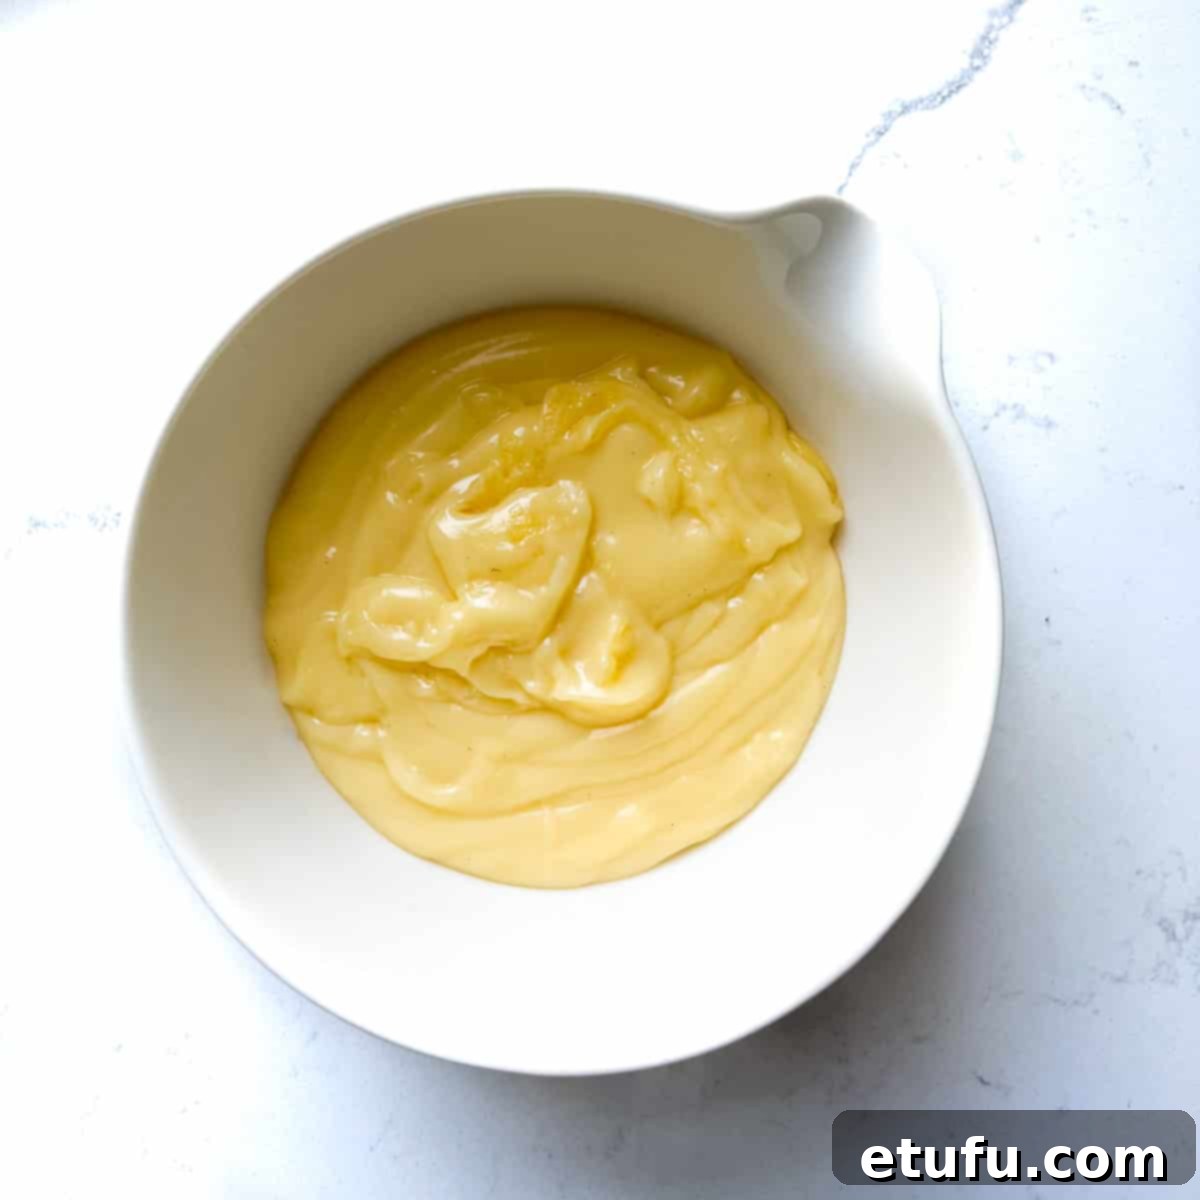
- Transfer the finished Crème Pâtissière to a clean bowl.
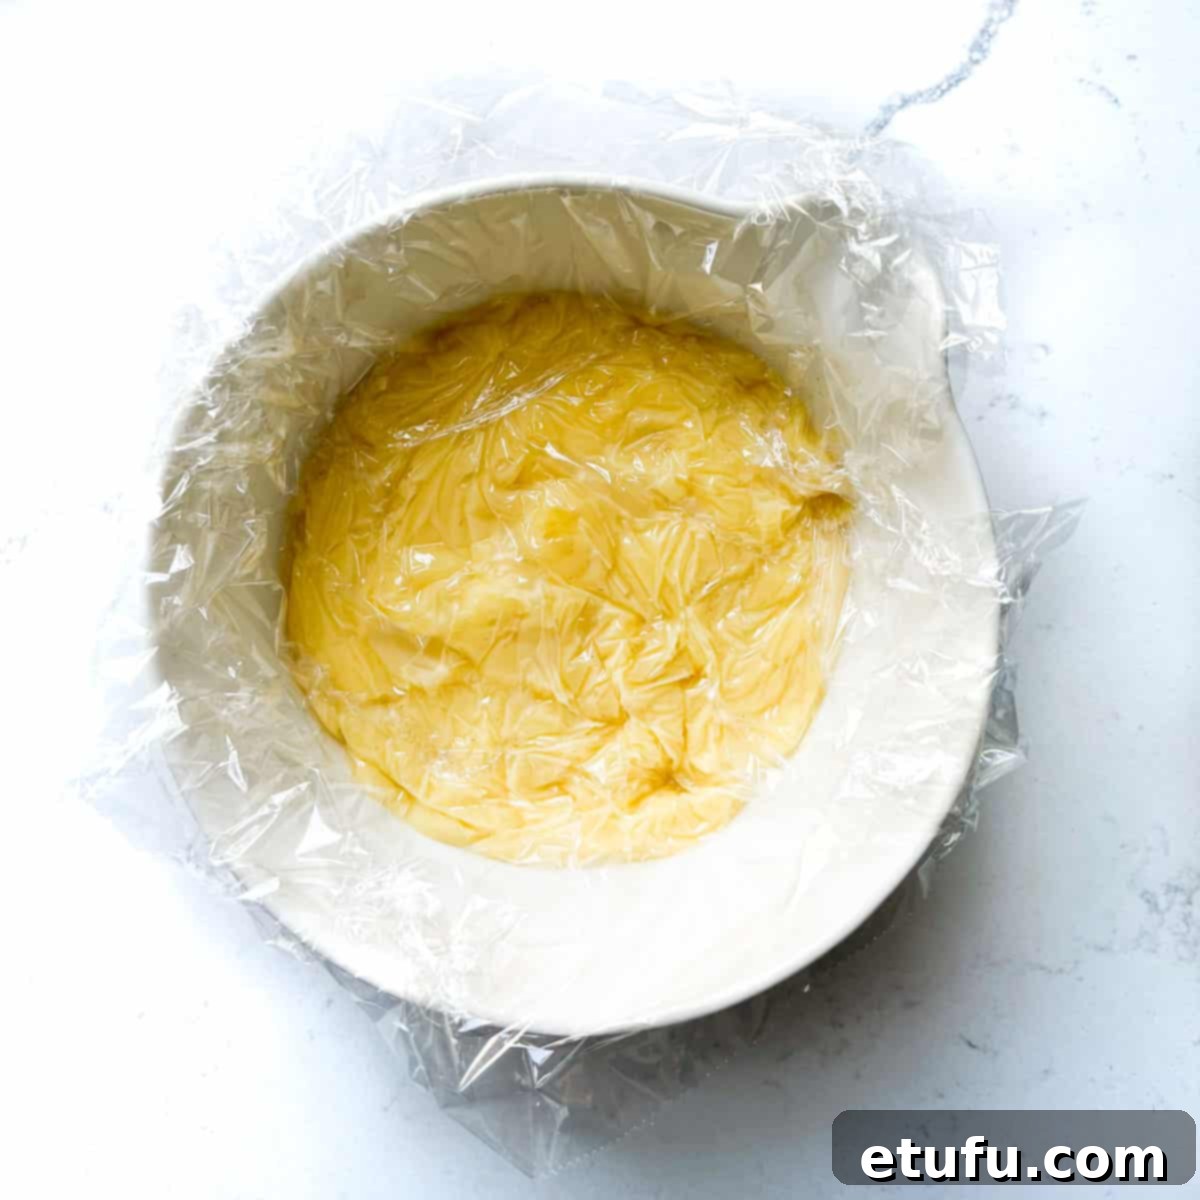
- Immediately lay a piece of plastic wrap directly onto the surface of the pastry cream, pressing it down gently to eliminate any air bubbles. This crucial step prevents a “skin” from forming on top as it cools. Place the bowl in the refrigerator for at least 2 hours, or until completely chilled and firm.
Assemble Your Exquisite Tarte aux Fruits
- While your Crème Pâtissière is chilling in the refrigerator, take this valuable time to wash, hull, and meticulously prep your chosen fresh fruits. Remember, you don’t have to strictly stick to the fruits listed in our recipe; instead, select your personal favorites or whatever looks best and is perfectly in season at your local market. Slice the fruits into shapes and sizes that are visually appealing and easy to arrange artfully on your tart.
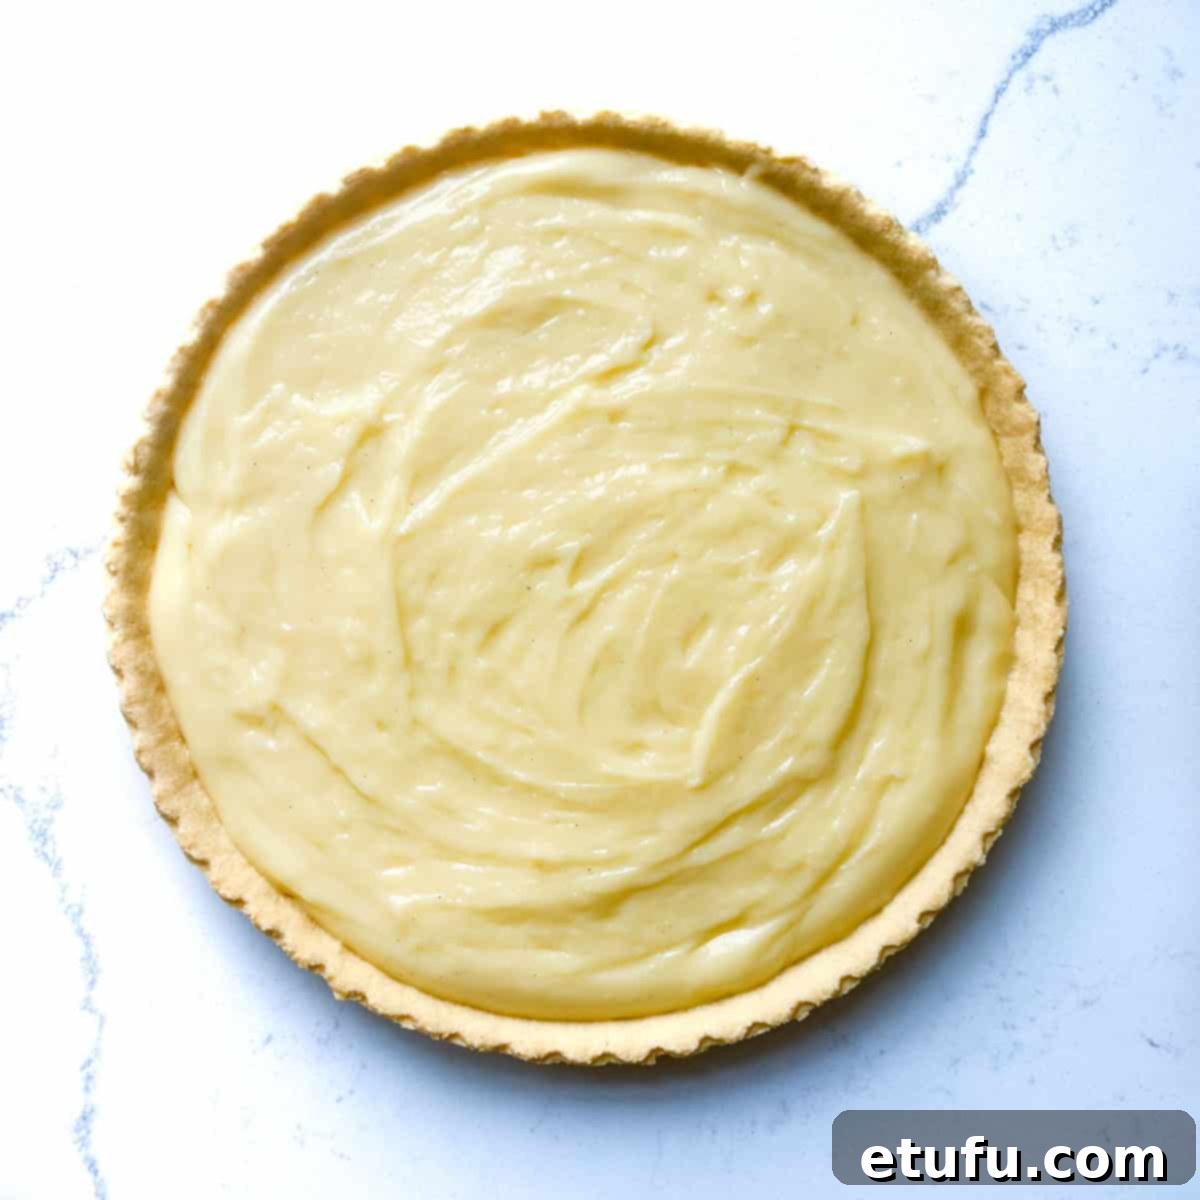
- Once the pastry cream is thoroughly chilled and firm, spoon it generously into the cooled, blind-baked tart case. Use an offset spatula or the back of a spoon to gently spread and level the top, creating a smooth, even surface that will serve as the perfect bed for your fruit.
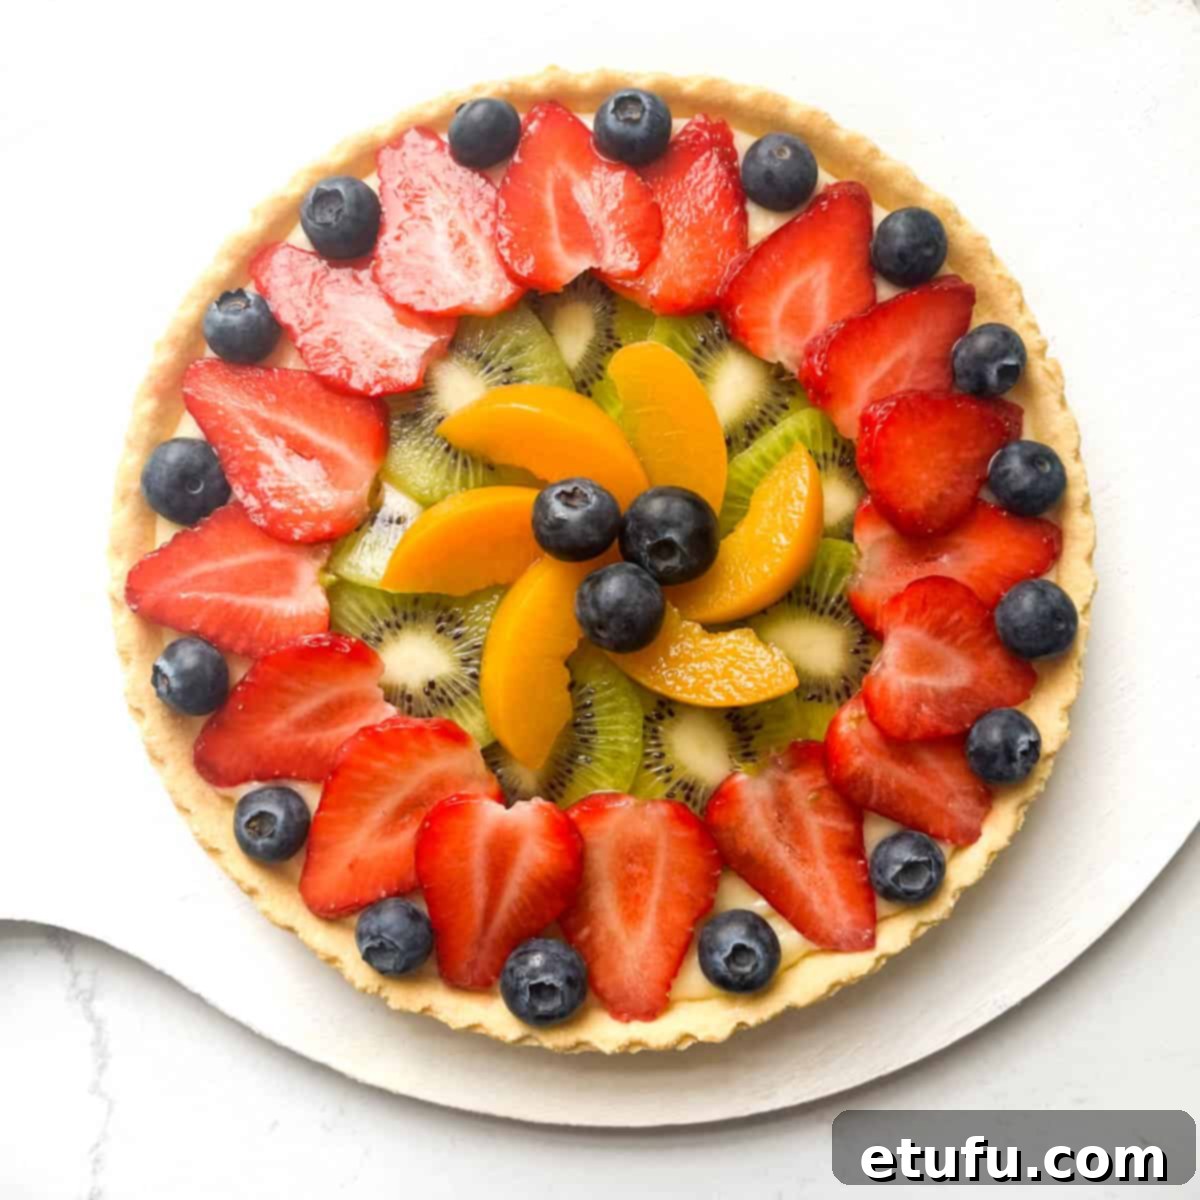
- Now comes the truly artistic and fun part: meticulously arrange your prepared fresh fruits beautifully on top of the pastry cream. Get creative with patterns, colors, and textures to make your tart a true visual masterpiece that’s as stunning to look at as it is delicious to eat!
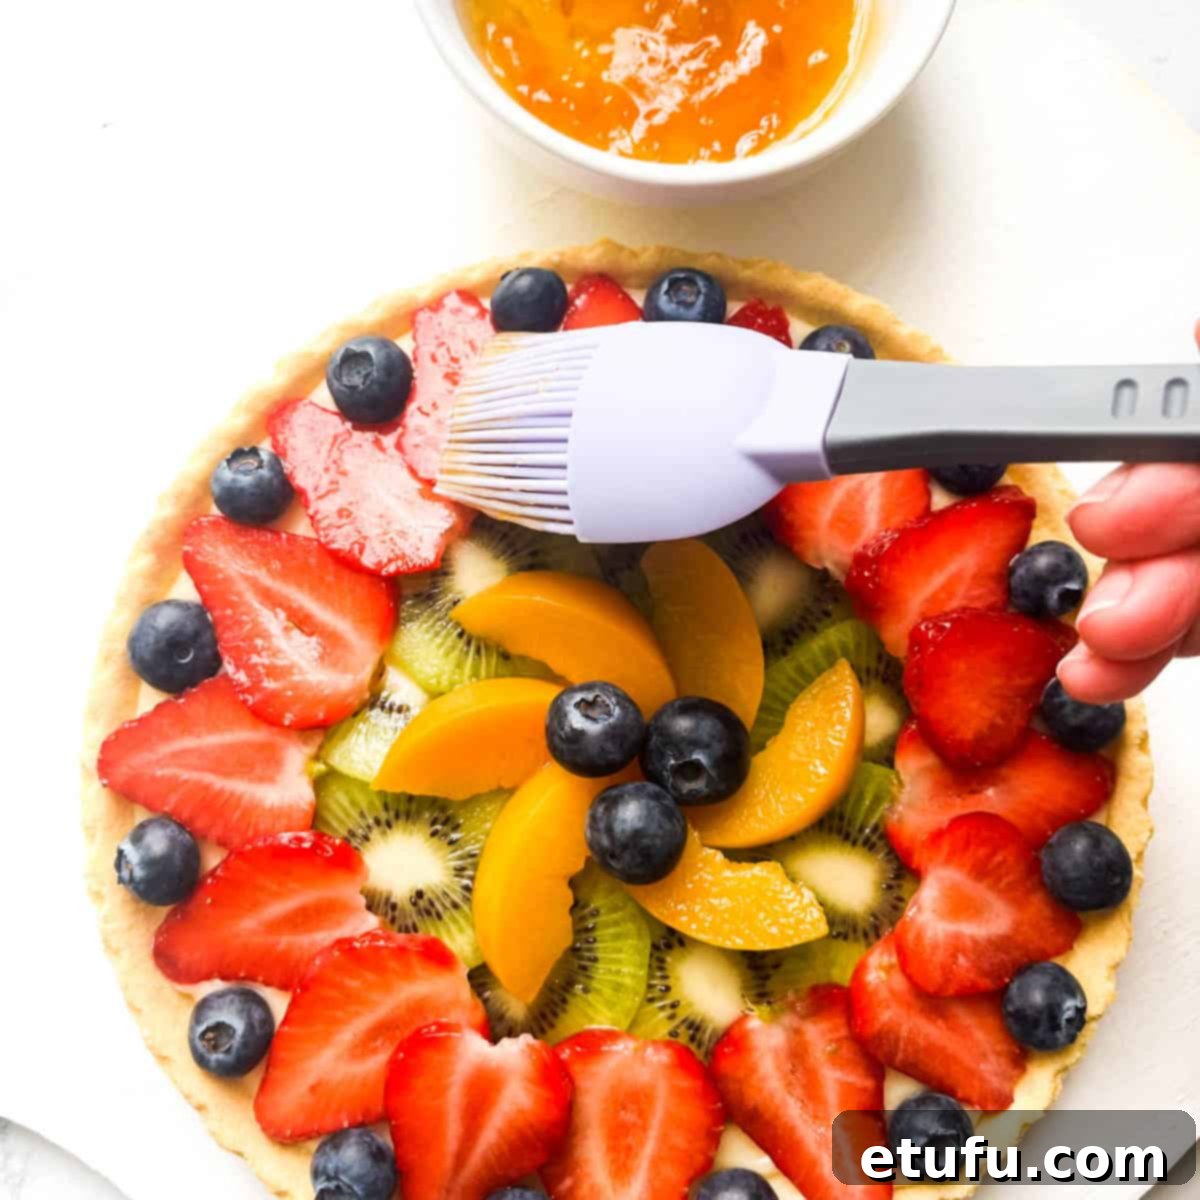
- To achieve that professional, glossy finish that makes French tarts so appealing, warm the smooth apricot jam in a small bowl in the microwave for 15-30 seconds until it’s runny but not excessively hot. Using a pastry brush, gently and evenly brush the warm apricot glaze over all the arranged fruits. This glaze not only adds a magnificent shine and enhances the vibrant colors but also provides a subtle layer of protection for the fruit. Carefully transfer the completed tart onto a beautiful serving plate.
Store the finished Tarte aux Fruits in the refrigerator until you are ready to serve. For the absolute best flavor and texture, particularly a crisp crust and fresh fruit, it is highly recommended to enjoy your masterpiece on the same day it was assembled.
Creative Fruit Decoration Ideas for Your Tart
The fruit topping on your Tarte aux Fruits isn’t just about taste; it’s a wonderful opportunity to showcase your artistic flair and creativity! Here are some inspirational ideas to help you design a truly captivating and visually stunning French fruit tart:
- The Classic Arrangement: For an eternally elegant and timeless look, arrange your fruit slices in neat, precise concentric circles, starting from the outer edge of the tart and gracefully working your way towards the center. Alternatively, create clean, orderly rows with alternating fruits for a visually appealing linear pattern that is both timeless and sophisticated. This style speaks of traditional French patisserie.
- Whimsical & Playful Designs: Let your imagination run wild and embrace a more playful approach! Use small cookie cutters to create charming shapes from larger, firmer fruits like melon or kiwi. You could also meticulously arrange small berries to form delightful hearts, elegant stars, or even personalized initials for a truly unique and customized touch. This whimsical approach is especially charming for birthday celebrations or joyous family gatherings.
- An Artistic & Gradient Masterpiece: Channel your inner artist and strive to create a stunning visual gradient or a complex, intricate pattern. Thoughtfully combine fruits of different colors, varied shapes, and interesting sizes to build an elaborate and eye-catching design. Think about the striking contrast between vibrant red strawberries and bright green kiwi, or create a flowing, natural landscape of seasonal fruits that meanders gracefully across your tart’s surface.
- Effortless Rustic Charm: If highly structured patterns aren’t quite your style, then embrace a more casual, organic approach to fruit placement. Arrange the fruit slices in a seemingly random yet thoughtful manner, allowing them to overlap naturally and imperfectly. This creates an unpretentious, rustic charm that suggests effortless elegance and beautifully highlights the natural, inherent beauty of the fresh fruit itself. It’s a look that says “deliciously homemade.”
Storage & Freshness Tips for Your Tarte aux Fruits
While a freshly made Tarte aux Fruits is truly at its absolute peak and most delicious on the day it’s assembled – especially when the fruit is at its freshest and the pastry crust is at its crispest – you can certainly store it to enjoy for a little longer. To maintain its quality and prolong its freshness, store the tart carefully in an airtight container in the refrigerator for up to 3 days. It’s important to be aware that over time, the delicate pastry crust may soften slightly due to the moisture naturally released by both the creamy Crème Pâtissière and the fresh fruit. For optimal enjoyment, experiencing the full harmony of textures and flavors, we strongly recommend savoring your magnificent Tarte aux Fruits on the very same day it was baked and assembled.
Make-Ahead Strategies for Stress-Free Baking
Although this Tarte aux Fruits recipe involves several distinct steps, it’s remarkably forgiving and perfectly suited for breaking down the workload over a couple of days. This makes it an ideal dessert to prepare when you’re entertaining, as most of the preparation can be done well in advance, leaving you with minimal last-minute tasks and allowing you to enjoy your guests.
- Pastry Case (Pâte Sucrée): You can prepare and blind bake the tart shell (Pâte Sucrée) a full day or even two days in advance. Once it is completely cooled to room temperature, store it carefully in an airtight container to protect its crispness. For even longer storage, a blind-baked pastry case can be wrapped tightly in plastic wrap and then aluminum foil, and frozen for several weeks. When ready to use, simply thaw it at room temperature before filling.
- Pastry Cream (Crème Pâtissière): The luscious Crème Pâtissière can also be made a day in advance. After cooking and once it has cooled slightly, transfer it to a clean bowl and immediately press plastic wrap directly onto its entire surface to prevent a thick “skin” from forming. Refrigerate it until it is thoroughly chilled and firm. Before assembling your tart, give the chilled pastry cream a good whisk to restore its perfectly smooth and creamy consistency.
On the day of serving, simply retrieve your pre-made and chilled components, efficiently wash and slice your fresh fruits, and then quickly assemble your beautiful Tarte aux Fruits. This thoughtful make-ahead strategy allows you to truly enjoy the baking process and effortlessly present a spectacular, fresh dessert without any last-minute stress or rush.
Clever Uses for Leftover Pastry Dough
The amount of Pâte Sucrée specified in this recipe is intentionally generous, providing ample dough for a robust crust and to account for any minor mishaps that might occur during rolling. Consequently, you might find yourself with some leftover dough – which is actually a fantastic and delicious opportunity! Don’t let those precious scraps go to waste; here are a few clever ideas to make the most of your extra pastry:
- Freeze for Future Tarts: If you have a substantial amount of leftover dough (enough for a small tart or several mini ones), wrap it tightly in plastic wrap and then place it in a freezer-safe bag. It will keep beautifully in the freezer for several weeks, ready to be thawed and used for another small tart or a batch of individual tartlets whenever the craving strikes.
- Create Adorable Mini Tartlets: Roll out the leftover pastry dough thinly and use small cookie cutters (like rounds or elegant fluted edges) to line mini tart tins. Blind bake these small shells just as you did the main tart. Once baked, you’ll have perfect individual tartlets ready to be filled with any remaining pastry cream and fruit, or even a different sweet or savory filling.
- Delightful Savory Cheese Sticks or Straws: Transform your sweet pastry into a delightful savory snack! Roll out the dough thinly, cut it into long, even strips, and then sprinkle generously with grated Parmesan or Gruyere cheese, and perhaps a pinch of paprika or dried herbs like oregano. Bake them in a preheated oven at 220℃ (428℉) / Gas Mark 7 for about 8-10 minutes, or until they are beautifully golden brown and wonderfully crispy.
- Charming Shortbread-Style Cookies: Easily transform your pastry scraps into delightful shortbread-style cookies! Simply roll out the dough, cut it into small, appealing shapes (like the hearts or stars shown in the image), and bake them alongside your main tart shell. We often bake these tiny cookies at the same time as the first blind-baking stage of the tart, removing them after the initial 10-minute mark. They make a lovely little treat or a charming garnish for your finished tart.

Transform Your Tarte aux Fruits into a Classic Tarte aux Fraise (French Strawberry Tart)
One of the most beloved and visually appealing variations of the classic French fruit tart is undoubtedly the Tarte aux Fraise, a delectable and refreshing strawberry tart. The wonderful news is that transforming this recipe into a Tarte aux Fraise is incredibly simple and requires minimal effort! Just follow all the detailed steps for our Tarte aux Fruits recipe, but when it comes to the fruit topping, simply replace ALL other fruits with an abundance of fresh, perfectly ripe strawberries. Artistically arrange them on top of the Crème Pâtissière, glaze generously with warm apricot jam for that signature shine, and voilà – you’ll have a stunningly beautiful and intensely flavorful Tarte aux Fraise that perfectly captures the essence of a French springtime dessert. It’s a guaranteed crowd-pleaser!
Explore More Delicious Tart Recipes
If you’ve thoroughly enjoyed the process of creating and savoring this exquisite French fruit tart, you’ll surely love exploring other delightful and diverse tart recipes from our extensive collection. Each offers a unique flavor profile and a rewarding baking experience:
- Apple Crumble Tart Recipe
- Peppermint Crisp Tart with a Twist
- Easy Coconut Tart Recipe (Ravani)
- Chocotorta – Argentinian Chocolate Birthday Cake
Tarte aux Fruits – Classic French Fruit Tart Recipe Card

Tarte aux Fruits – French Fruit Tart
Tarte aux Fruits, a classic French fruit tart, is an utterly delicious and visually stunning dessert. Featuring a crisp, buttery pastry shell, a rich and creamy Crème Pâtissière filling, and a colorful array of glossy fresh fruits, it’s a true masterpiece of French baking.
Dessert, Snack
French
40 minutes
30 minutes
2 hours 30 minutes
3 hours 40 minutes
8 servings
437 kcal
Maretha Corbett
Equipment
- 1 20cm (8″) fluted, loose-bottomed tart tin
Ingredients
For the Pâte Sucrée (Sweet Tart Dough)
- 250 grams all-purpose flour
- 125 grams unsalted butter – softened
- 85 grams powdered/icing sugar
- 1 large egg – room temperature
For the Crème Pâtissière (Pastry Cream)
- 3 egg yolks
- 100 grams caster sugar
- 2½ tablespoons cornflour (cornstarch)
- 150 millilitre double cream (heavy cream)
- 150 millilitre full cream milk (whole milk)
- Pinch of salt
- 2 teaspoons vanilla extract
- 30 grams unsalted butter
For the Fruit Topping
- 2 tablespoons smooth apricot jam
- 1 small punnet strawberries
- 1 kiwi fruit
- 1 tin peaches (drained and sliced)
- 1 small punnet blueberries
Instructions
To Make the Pâte Sucrée (Sweet Tart Dough)
- In the bowl of a stand mixer (or using an electric hand mixer), add the softened butter and icing sugar.
- Beat until light and creamy.
- Add the room-temperature egg and beat until the mixture is uniform.
- Add the all-purpose flour. Using a wooden spoon or spatula, fold the flour in until just combined into a soft dough.
- Gather the pastry into a ball, flatten slightly into a thick disk, wrap tightly in plastic wrap, and refrigerate for at least 30 minutes.
- After chilling, preheat oven to 180℃/356℉/gas mark 4.
- Lightly flour your work surface. Unwrap the dough and roll it out to 3mm-5mm (0.1″-0.2″) thickness, forming a rough circle larger than your tart tin.
- Loosely roll the pastry onto your rolling pin and transfer it over the 20cm (8″) fluted, loose-bottomed tart tin.
- Gently drape the pastry into the tin, ensuring enough slack. Do not stretch.
- Roll the rolling pin over the edges of the tart tin to trim excess pastry. Gather offcuts aside.
- Gently press the pastry into the sides of the tin with your thumb and index finger. Patch any tears with offcut dough.
- Use a small sharp knife to neatly trim any remaining excess pastry along the rim.
- Line the pastry with parchment paper, fill with baking weights/beans.
- Bake for 10 minutes.
- Remove baking weights and parchment. Bake for a further 15 minutes, until lightly golden.
- Whisk an egg in a small bowl for an egg wash. Remove tart case from oven, lightly brush bottom and sides with egg wash. Bake for another 3-4 minutes to seal the crust.
- Cool in the tin for 10 minutes, then transfer to a wire rack to cool completely.
To Make the Crème Pâtissière (Pastry Cream)
- In a medium bowl, whisk together the 3 egg yolks and caster sugar until pale and combined.
- Add the cornflour and whisk until smooth and lump-free.
- In a medium saucepan, heat the double cream, milk, and pinch of salt over low heat until hot but not boiling (small bubbles at edges).
- Gradually whisk about a quarter of the hot milk mixture into the egg mixture (tempering).
- Pour the remaining warm milk into the egg mixture, whisking constantly until well combined.
- Pour the entire mixture back into the saucepan. Cook over low heat, whisking constantly, until smooth and thick. Once it comes to a gentle boil, cook and whisk for 1 minute longer. Remove from heat.
- Stir in the 30 grams of butter and vanilla extract until glossy and smooth.
- Transfer the Crème Pâtissière to a clean bowl. Cover its surface directly with plastic wrap to prevent a skin. Refrigerate for at least 2 hours until completely chilled and firm.
Assemble the Tart
- While pastry cream chills, wash, prep, and slice your chosen fruits.
- Once Crème Pâtissière is chilled, spoon it into the cooled tart case and level the top evenly.
- Artistically arrange the fresh fruits on top of the pastry cream.
- Warm apricot jam until runny. Brush it over the fruits for a glossy finish.
- Store in the fridge until serving, ideally on the same day.
Nutrition Disclaimer
Please note that the nutritional information provided below is an estimate calculated by a third party. We strive for accuracy but cannot guarantee it, as values may vary based on specific brands and products used. For personalized dietary advice, please consult a qualified healthcare professional or registered dietitian.
Nutrition (per serving)
- Calories: 437 kcal
- Carbohydrates: 55g
- Protein: 7g
- Fat: 26g
- Saturated Fat: 16g
- Polyunsaturated Fat: 1g
- Monounsaturated Fat: 7g
- Trans Fat: 1g
- Cholesterol: 159mg
- Sodium: 152mg
- Potassium: 137mg
- Fiber: 1g
- Sugar: 18g
- Vitamin A: 941IU
- Vitamin C: 10mg
- Calcium: 66mg
- Iron: 2mg
For food safety advice, including guidance on food allergies, please refer to official health authorities.
