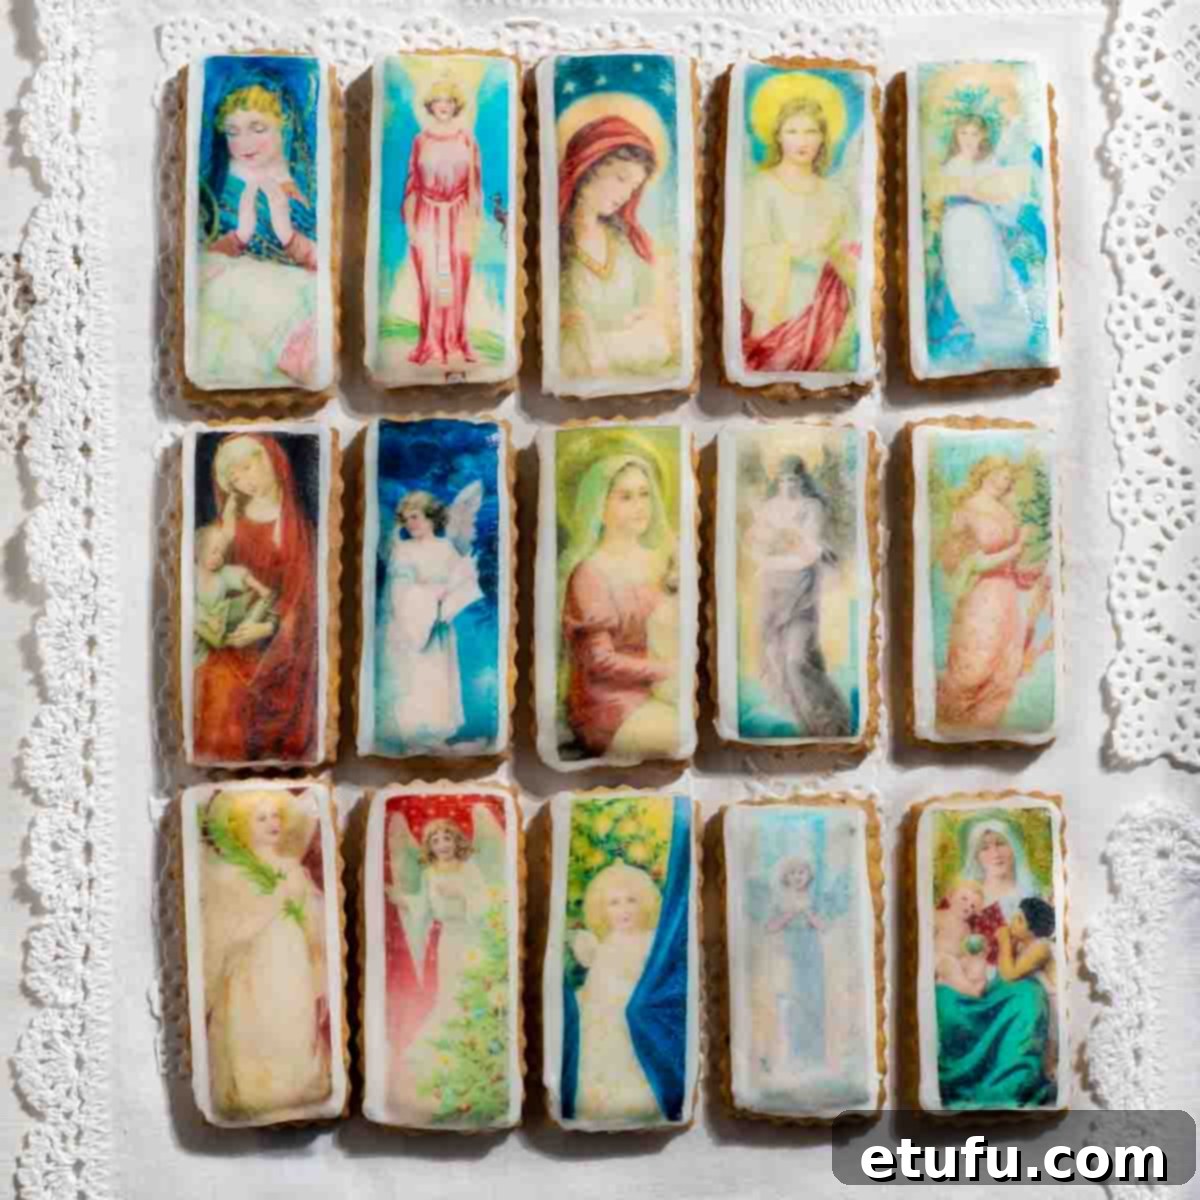
Are you tired of the same old Christmas cookies adorned with predictable reindeer and snowflakes? This festive season, it’s time to elevate your cookie game and create something truly memorable: stunning Christmas picture cookies! These edible works of art allow you to infuse personality and charm into your holiday treats, transforming them from simple desserts into cherished keepsakes.
Whether you’re a seasoned baking enthusiast with years of experience or a busy individual who appreciates the convenience of store-bought goodies, this project is perfectly suited for you. The beauty of these custom cookies lies in their adaptability, making them accessible to bakers of all skill levels.
The magic truly begins when you choose your unique designs. Imagine selecting beloved family photos, vintage holiday illustrations, or even custom artwork, then having these images beautifully printed on edible wafer paper and delivered right to your door. The decorating process itself is a delightful experience: simply apply a smooth, even layer of royal icing to your cookies, carefully attach your personalized wafer paper designs, and watch as each ordinary cookie transforms into a magnificent, edible masterpiece. The vibrant colors and intricate details of your chosen images will pop, creating a visually stunning treat that’s almost too beautiful to eat.
These exquisite Christmas cookies aren’t just incredible gifts that will undoubtedly impress friends and family; they also offer a charming way to add extra festive flair to your home. Imagine these personalized creations hanging gracefully on your Christmas tree, each one telling a story or evoking a special memory. They become conversation starters, unique decorations, and delightful surprises all in one.
Feeling a little hesitant about where to begin your journey into custom cookie decorating? Don’t worry, we’ve got you covered. This comprehensive guide will walk you through every step, providing valuable insights on where to discover inspiring images, how to source high-quality printed edible wafer paper sheets, and detailed instructions for the entire process. We’ll demystify each stage, ensuring you feel confident and prepared.
The best part? This entire creative endeavor is not only incredibly fun and rewarding, but it’s also surprisingly easy. You don’t need to possess the skills of a professional artist or a master baker to create truly spectacular results. With a little guidance and enthusiasm, anyone can craft these delightful Christmas picture cookies, making your holiday celebrations even more special and personalized.
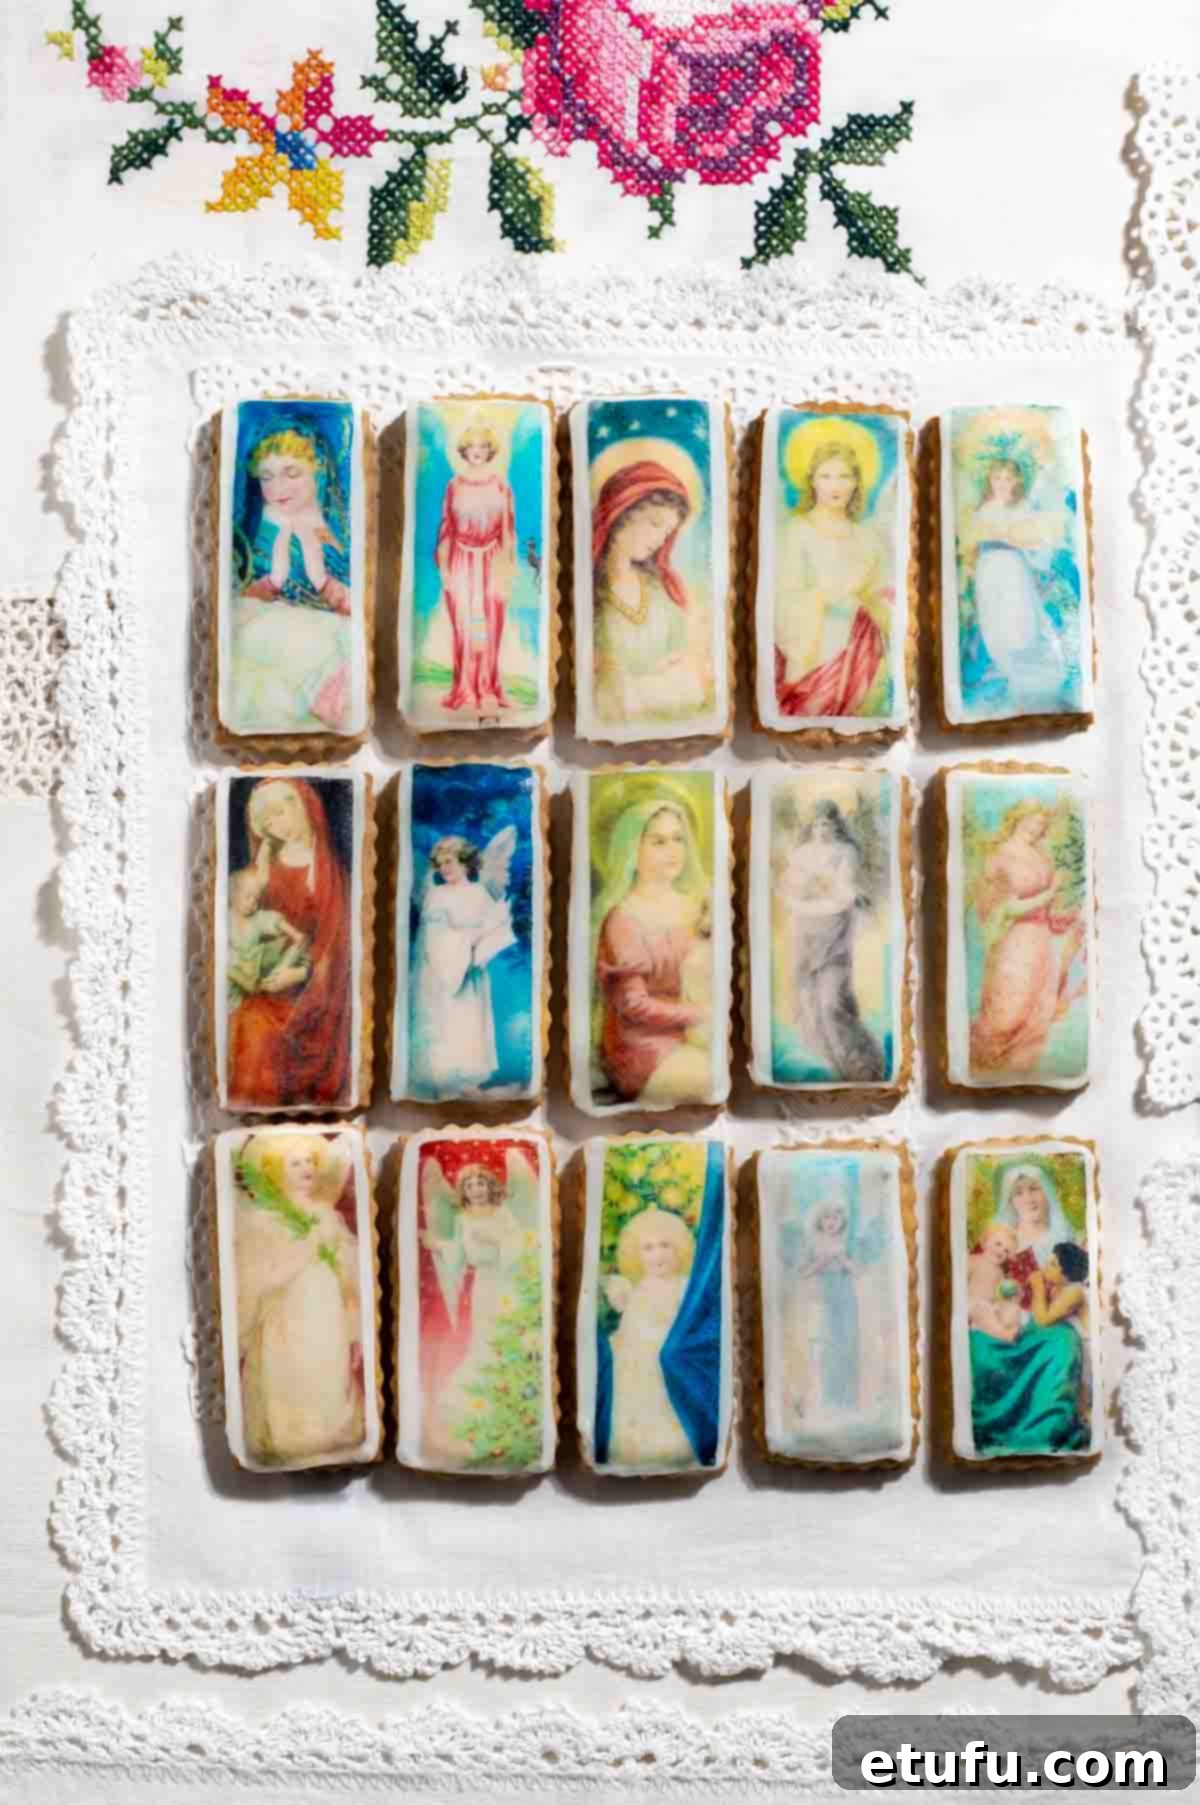
Why You’ll Adore Making These Personalized Christmas Cookies
Get ready to discover a fresh and exciting way to celebrate the holidays with these unique Christmas picture cookies. Here’s why this decorating project is an absolute must-try this season:
- Uniquely Yours: Say goodbye to generic holiday treats! These cookies allow you to design confections that are as individual and imaginative as you are. From cherished family photographs to bespoke illustrations, the possibilities for customization are truly limitless, ensuring your cookies stand out.
- Beginner-Friendly Brilliance: Whether you’re a novice baker just starting out or a seasoned pro in the kitchen, this cookie decorating technique is wonderfully accommodating. The simple steps and forgiving nature of edible wafer paper make it an enjoyable activity for everyone, guaranteeing beautiful results without the stress.
- Your Choice of Base: Enjoy the flexibility of choosing your cookie base. Opt for the comforting taste of homemade cookies, carefully baked from scratch, or save time and effort by using your favorite store-bought varieties. Both options provide a perfect canvas for your edible art.
- Effortless Decorating with Edible Wafer Paper: The true genius behind these cookies lies in the use of edible wafer paper. This innovative material makes intricate cookie decorating incredibly simple and mess-free. Forget complicated piping techniques; with wafer paper, beautiful designs are just a few steps away.
- Thoughtful and Memorable Gifts: Imagine the joy on someone’s face when they receive a box of cookies featuring their own photos, a pet, or a beloved memory. These personalized treats make exceptionally thoughtful and unique gifts for friends, family, teachers, or colleagues, creating lasting impressions and warm holiday cheer.
- Festive Tree Decorations: Beyond being delicious gifts, these cookies can also serve as charming decorations for your Christmas tree. With a small hole pre-baked into homemade cookies, they transform into delightful ornaments, adding a personal and edible touch to your holiday decor that everyone will admire.
Essential Ingredients and Creative Substitutions for Your Photo Cookies
**For a complete list of ingredients and precise measurements, please refer to the detailed recipe card conveniently located at the bottom of this post.
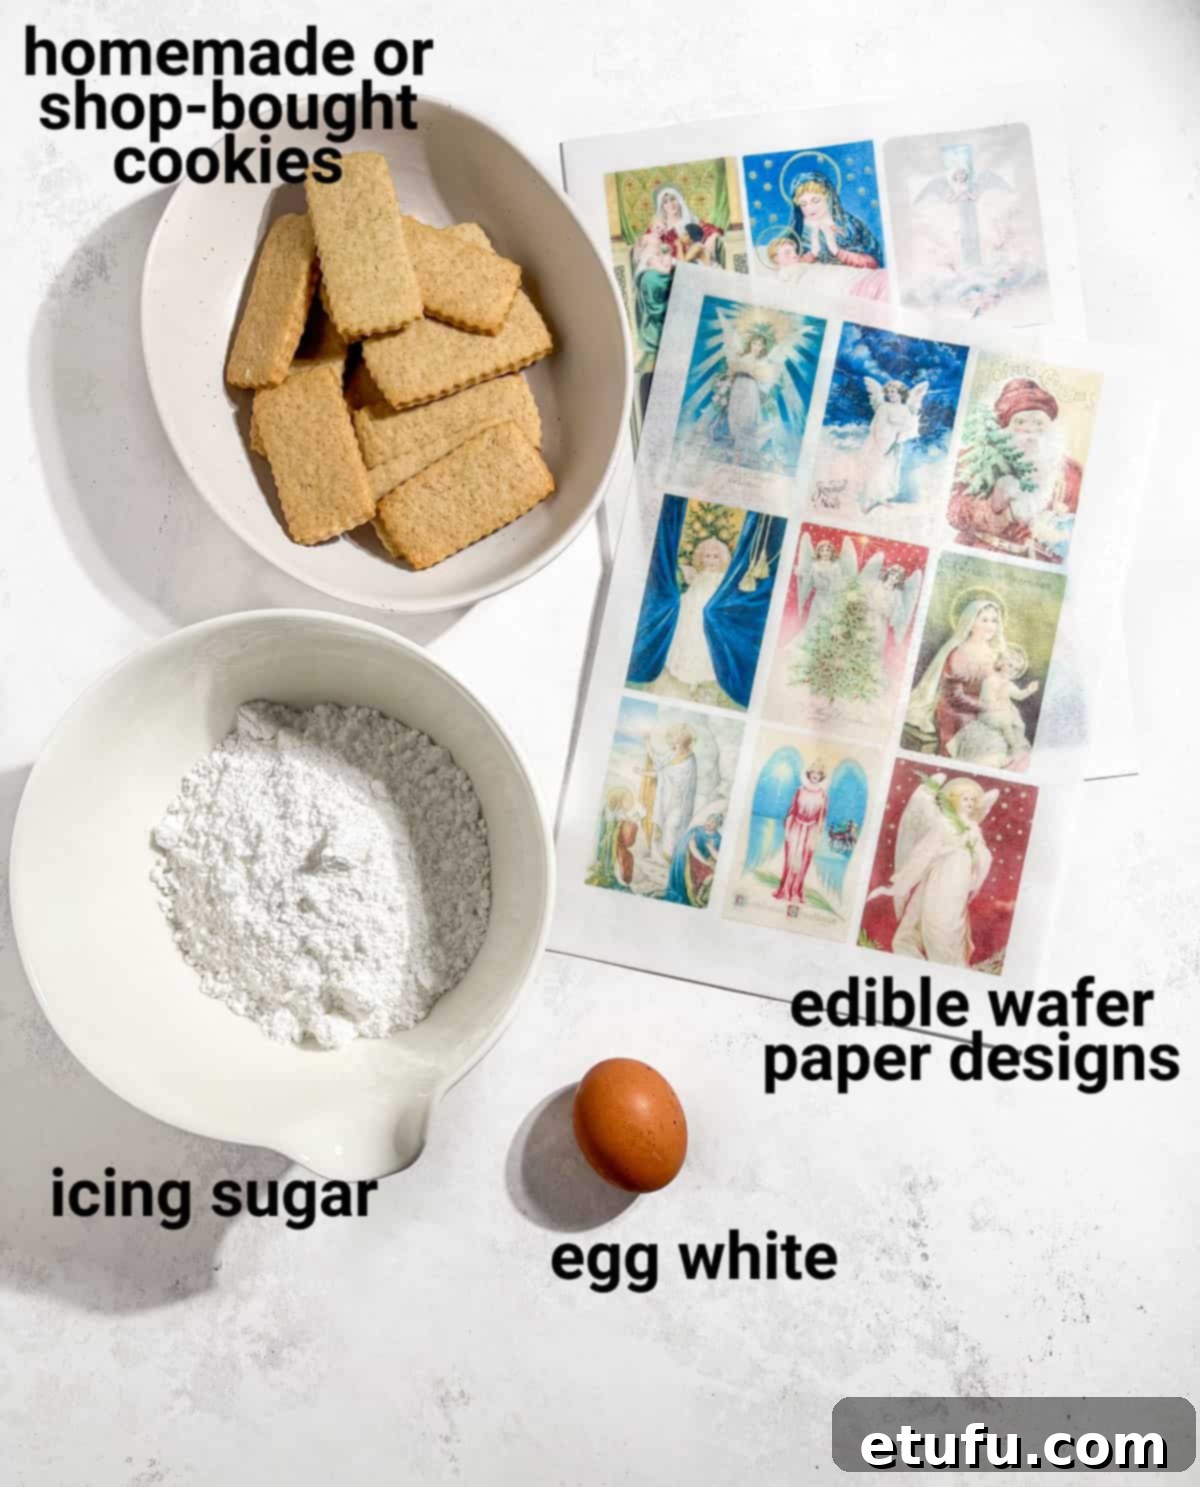
Selecting the Perfect Cookies
The foundation of any great picture cookie is, of course, the cookie itself. Here’s what to consider for both homemade and store-bought options:
Crafting Homemade Cookies:
- Smooth Surface is Key: Opt for a plain cookie recipe that doesn’t include chunky add-ins like chocolate chips, nuts, or dried fruit. A smooth, even surface is crucial for the edible wafer paper to adhere perfectly without any bumps or distortions, ensuring your images look crisp and professional.
- Preventing Spread: Choose a cookie recipe known for holding its shape well during baking and not spreading excessively. To achieve this, avoid making your cookie dough too thick, which can lead to uneven baking. More importantly, always allow your cut-out cookie dough to chill and firm up thoroughly in the refrigerator before baking. The longer the chill time, the less your cookies will spread in the oven, preserving their precise shapes for optimal decorating.
- Fixing Imperfections: Even with careful preparation, some cookies might develop a slight ‘dome’ on top. Don’t fret! Simply turn these cookies over and apply your royal icing and edible wafer paper to the flatter bottom surface. No one will ever know the difference!
- Tree Decoration Tip: If your vision includes using these delightful cookies as charming Christmas tree decorations, remember to create a small hole through the center of each cookie before baking. A thin straw or a small round piping tip works wonderfully for this purpose, creating a perfect opening for string or ribbon.
We have several tried-and-tested cookie recipes that are ideal for this technique, provided you chill the cut-out cookies before baking:
- For a classic, versatile base, try this delicious sugar cookie recipe. Its plain canvas is perfect for showcasing your chosen designs.
- If you’re a chocolate lover, these rich chocolate shortbreads offer a delightful dark background that can make lighter images pop.
- For a cookie infused with comforting festive aromas, these warmly spiced spice cookies are an excellent choice, adding an extra layer of holiday flavor.
Utilizing Store-Bought Cookies:
- Flat and Unembossed: When selecting store-bought cookies, prioritize plain varieties without any significant embossing or intricate designs on their surface. A smooth, flat cookie, such as classic Digestive biscuits (similar to Graham crackers in the US), provides the best foundation for your edible images.
- Addressing Embossed Designs: If your chosen store-bought cookies have a shallow embossed design, you can often fill these indentations with royal icing to create a level surface. However, deeply embossed lines may still show through the thin wafer paper. As an ingenious alternative, instead of relying solely on royal icing, you can cut out a piece of fondant icing to match the shape of your cookie. This creates a perfectly smooth base for the wafer paper. Simply adhere the fondant to the cookie using a tiny touch of jam, corn syrup, or even a dab of water.
- Limitations for Tree Decorations: Please be aware that store-bought cookies are generally not suitable for hanging as tree decorations. Creating the necessary hole for string or ribbon typically requires punching it into the dough before baking, a step that isn’t possible with pre-made, hardened cookies.
The Essential Icing Layer: Your Canvas for Edible Art
The layer of icing beneath your edible wafer paper is more than just a sweet addition; it’s a critical component for achieving professional-looking results. It acts as both an adhesive and a vibrant backdrop for your designs.
Option 1: Classic Royal Icing
In our preferred method, we utilize royal icing as the foundational layer to coat the cookies before the edible wafer paper design is applied. Here’s a deeper look into why royal icing is an excellent choice:
- Flawless Smooth Canvas: Royal icing dries to an incredibly hard, smooth, and even finish. This creates a pristine surface for the wafer paper to adhere to, ensuring there are no unsightly lumps, bumps, or textural irregularities from the cookie itself. Since wafer paper is exceptionally thin and translucent, any imperfections on the cookie surface would be visible without this perfectly smooth layer of icing.
- Enhanced Color Brilliance: A pure white royal icing base acts as the perfect backdrop, allowing the colors and details in your edible wafer paper design to truly pop and appear vibrant. Think of it much like placing a colorful transparency on a lightbox – the white surface illuminates the image, making the colors incredibly vivid and true to their original print.
- Professional and Polished Finish: The delicate white border created by the royal icing around the edge of your wafer paper design provides a clean, framed look. This subtle detail elevates the overall aesthetic of your cookie, giving it a refined and professional appearance that will impress everyone.
Option 2: Convenient Fondant Icing
While royal icing is fantastic, fondant icing offers another excellent and convenient alternative, especially if you prefer to skip the egg white preparation. Ready-made packs of fondant icing are readily available in most supermarkets and baking supply stores, making this a quick solution.
To use fondant, simply roll it out thinly, aiming for a thickness of about 1-2mm. Then, use a cookie cutter or knife to cut the fondant into the same shape and size as your cookies. Once cut, gently attach the fondant piece to your cookie. A tiny dab of jam, corn syrup, or even just a brush of water will help it adhere securely. Finally, to secure your edible wafer paper design, lightly brush the fondant surface with a small amount of water before carefully positioning and pressing your design into place. This method is incredibly straightforward and highly effective for creating a smooth, even base.
Understanding Edible Wafer Paper: The Heart of Your Photo Cookies
Edible wafer paper is the innovative ingredient that makes these custom cookies possible. Though it feels like ordinary paper, it’s actually a unique, food-safe material primarily composed of potato starch, vegetable oil, and water. This makes it a fantastic choice for a wide range of dietary needs, as it’s typically vegetarian and vegan-friendly, as well as being dairy and gluten-free.
One of its most appealing characteristics is its delicate texture. It practically melts on the tongue, offering a virtually tasteless experience that allows the flavor of your cookie and icing to shine through. Wafer paper also boasts an impressively long shelf life when stored correctly, making it a convenient ingredient to have on hand. It’s incredibly easy to work with; you can effortlessly cut it into any desired shape using standard scissors, making customization a breeze. Furthermore, water is all you need to activate its adhesive properties and make it stick securely to your iced cookie surface.
The true magic of wafer paper, however, lies in its ability to be printed with edible ink. This means you can transform any image, photograph, or design into a vibrant, food-safe print. There is a vast and growing market of specialized shops that offer custom printing services, allowing you to submit your chosen designs and receive them perfectly printed on edible wafer paper sheets, ready for your creative project.
Here is a curated selection of reputable online shops that provide custom edible wafer paper printing services (please note, we are not affiliated with any of these companies and encourage you to explore all options):
- CakeyBake – Based in the United Kingdom, they are highly recommended for their efficiency and friendly service, often delivering quickly.
- Ink4Cakes – A popular choice for customers in the USA, offering a wide range of printing options.
- Bee Box Design Studio – Another excellent American option known for quality prints and customer focus.
- Custom Icing – Catering to Australian customers with a variety of edible print services.
- Edible Images Canada – Your go-to source for custom edible prints in Canada.
- Crystal Candy – A reliable supplier for those in South Africa seeking personalized edible designs.
- Kiwi Cakes – Providing edible printing services for customers in New Zealand.
Beyond these suggestions, numerous other online and local websites are available. We highly recommend exploring local printing shops in your area or considering other alternatives that may offer more cost-effective choices or faster shipping tailored to your region. A quick online search for “custom edible image printing” or “wafer paper prints near me” can reveal a wealth of options.
Unleashing Your Creativity: Ideas and Resources for Stunning Graphics
The world of edible picture cookies is truly boundless! The only limit is your imagination. Here are some fantastic ideas to spark your creativity and inspire unique designs for your festive treats:
- Your Original Artwork: Showcase your personal talent by using your very own drawings, paintings, or digital art. This adds an incredibly personal and artistic touch to your cookies.
- Life Stages Montage: Create a deeply touching series of cookies featuring photos of a loved one from their birth right up to the present day. This is an incredibly thoughtful and unique way to celebrate milestone birthdays, such as an 80th, 90th, or even 100th celebration.
- Pop Culture Icons: Delight fans by featuring favorite sports team logos, iconic superheroes, beloved Disney princesses, or characters from popular movies and TV shows. These are always a hit at themed parties or as gifts for enthusiasts.
- Anniversary Memories: Commemorate a special anniversary by using cherished wedding photos or other significant images from a couple’s journey. It’s a sweet and nostalgic way to celebrate enduring love.
- Vintage Charm: Dive into the past by exploring captivating vintage images from old Christmas cards, classic stamps, historical magazine cuttings, and nostalgic advertisements. This adds a unique, timeless, and sophisticated feel to your holiday cookies.
- Musical Inspiration: Pay homage to a favorite artist, musician, or band by featuring their album covers, iconic photographs, or concert imagery. Perfect for music lovers!
- Poetic Touch: Incorporate parts of a cherished poem, a meaningful quote, or elegant calligraphy as the central design for your cookies, adding a sophisticated and intellectual flair.
- Harmonious Melodies: For the music enthusiasts, consider incorporating a piece of sheet music from a favorite song or a classical composition into your cookie designs.
- Elegant Florals: Decorate your cookies with intricate floral patterns, botanical illustrations, or beautiful flower arrangements for a touch of natural elegance and beauty.
- Geometric and Abstract Patterns: Experiment with modern geometric shapes, abstract designs, or complex mandalas for a contemporary and visually striking aesthetic.
- Humor and Wit: Inject some lighthearted fun by adding witty jokes, clever one-liners, or funny quotes. You could even feature phrases that someone is well-known for always saying, making them a truly personalized and humorous gift.
- Inspirational Quotes: Use uplifting and motivational quotes to inspire and encourage recipients, turning your cookies into miniature messages of positivity.
- Spiritual Symbols: Explore various religious motifs or spiritual symbols for a meaningful and reverent touch, particularly appropriate for certain holiday celebrations or personal beliefs.
Discovering Free Graphics:
It’s vital to remember that if you intend to use any graphics for commercial purposes, you must always review the site’s specific terms and conditions. This ensures full compliance with their usage policies and protects you from any potential copyright issues.
- The Graphics Fairy: This is our personal favorite and the source of many of the beautiful vintage images used for the cookies featured in this post. It offers a treasure trove of public domain vintage graphics.
- Heritage Library: A fantastic resource for classic and historical illustrations, perfect for adding a touch of antiquity to your designs.
- The New York Public Library Digital Collections: An extensive archive of digitized public domain materials, including historical photographs, artwork, and prints.
- The Old Design Shop: Offers charming vintage clip art, patterns, and illustrations that are wonderful for creative projects.
- Creative Fabrica: A popular platform that often features a section of free graphics, fonts, and crafts. Be sure to check their license for specific usage.
- Dribbble: While primarily a platform for designers to showcase work, Dribbble sometimes features free graphics and resources, often from independent artists.
A Deeper Dive into Crafting the Perfect Royal Icing
Achieving flawless royal icing for your photo cookies involves a two-step process, using the same initial batch of icing. This dual approach ensures you have the correct consistency for both outlining and filling, leading to beautifully finished cookies:
- Creating the Outline Consistency: The first portion of your royal icing will be thicker, resembling a firm paste. This consistency is specifically designed for piping the outlines around your cookies. These outlines are absolutely essential as they create a barrier, or “dam,” that will effectively contain the thinner, “flooding” icing that you’ll apply later. Without these firm outlines, the thinner icing would simply flow off the edges of your cookies.
- Achieving the Flooding Consistency: With the majority of your icing remaining in the bowl, you will then adjust its consistency for flooding. This is achieved by gradually adding small amounts of water, stirring thoroughly until the icing becomes noticeably thinner but still retains some body. This thinner consistency allows the icing to flow smoothly and evenly across the surface of the cookie, filling the outlined areas to create a perfectly level and glossy canvas.
For this process, you will need two clean piping bags. Using separate bags for outlining and flooding helps maintain the different consistencies and keeps your workspace tidy. A small, round piping tip (such as a Wilton 1 or 2) is ideal for both outlining intricate details and controlling the flow of the flooding icing.
Crucially, it is imperative that you allow the royal icing to dry and harden completely before proceeding to attach your edible wafer paper designs. This typically takes anywhere from 12 to 24 hours, depending on humidity. A fully dried icing layer provides a stable, non-sticky surface for the wafer paper, preventing any smudging or dissolving, and ensuring your final cookies look pristine and professional.
Crafting Your Custom Christmas Cookies: A Step-by-Step Guide
Follow these detailed instructions to create your beautiful edible picture cookies. For the best results, we recommend reading through all steps before you begin.
Step 1: Preparing the Royal Icing and Piping Outlines
This initial stage focuses on creating the perfect outline consistency for your royal icing.
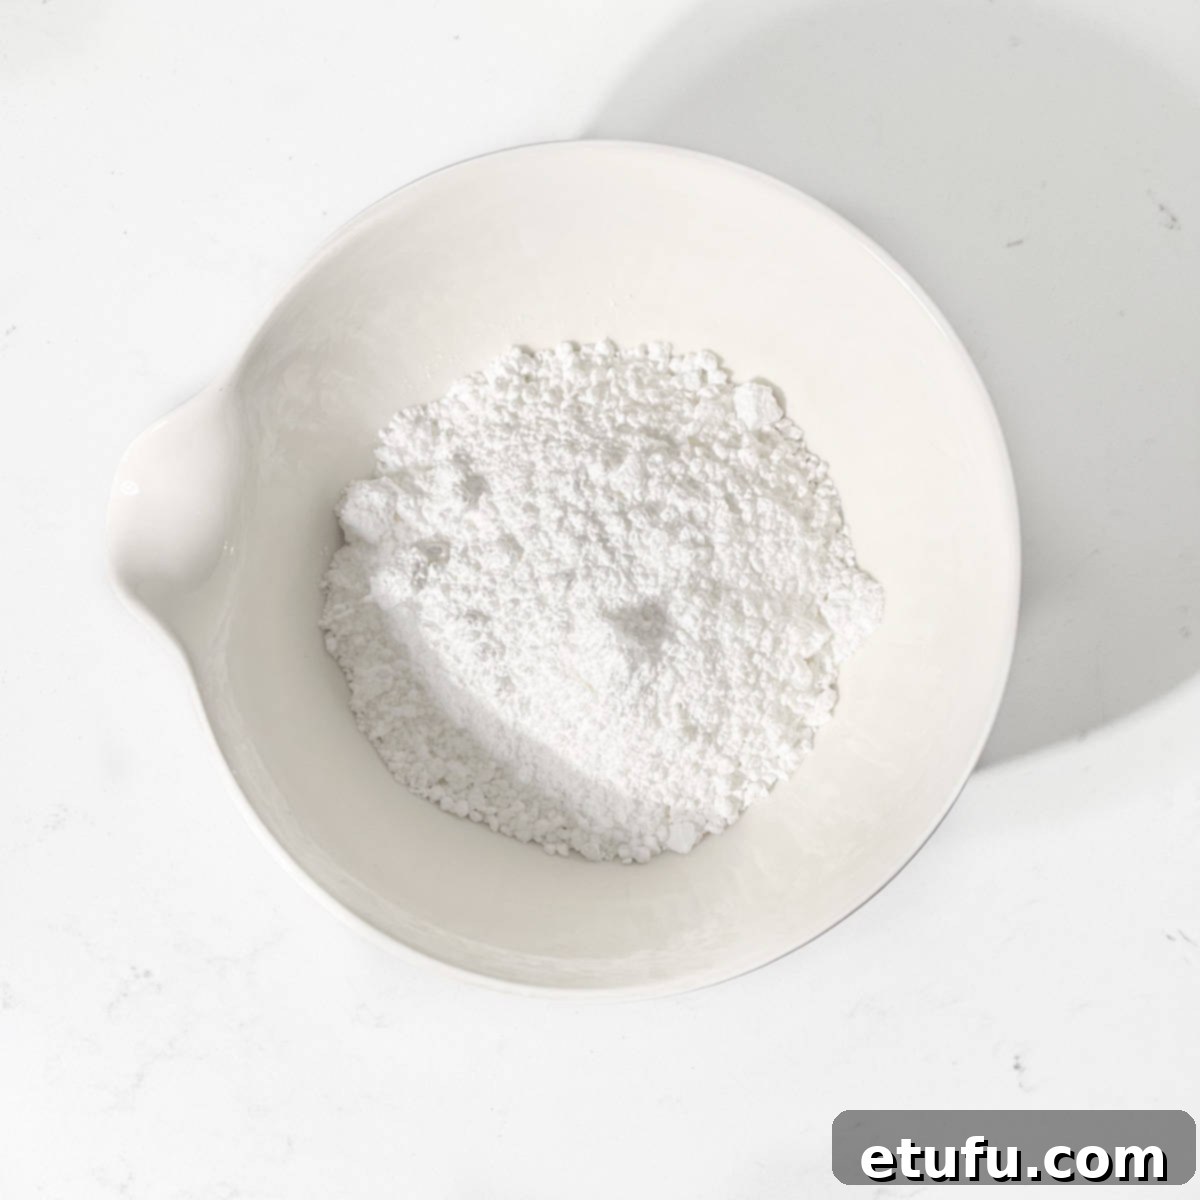
- Sift the Icing Sugar: Carefully sift the required amount of icing sugar (also known as powdered sugar) into a clean, medium-sized mixing bowl. Sifting is important to remove any lumps, ensuring a super smooth icing.
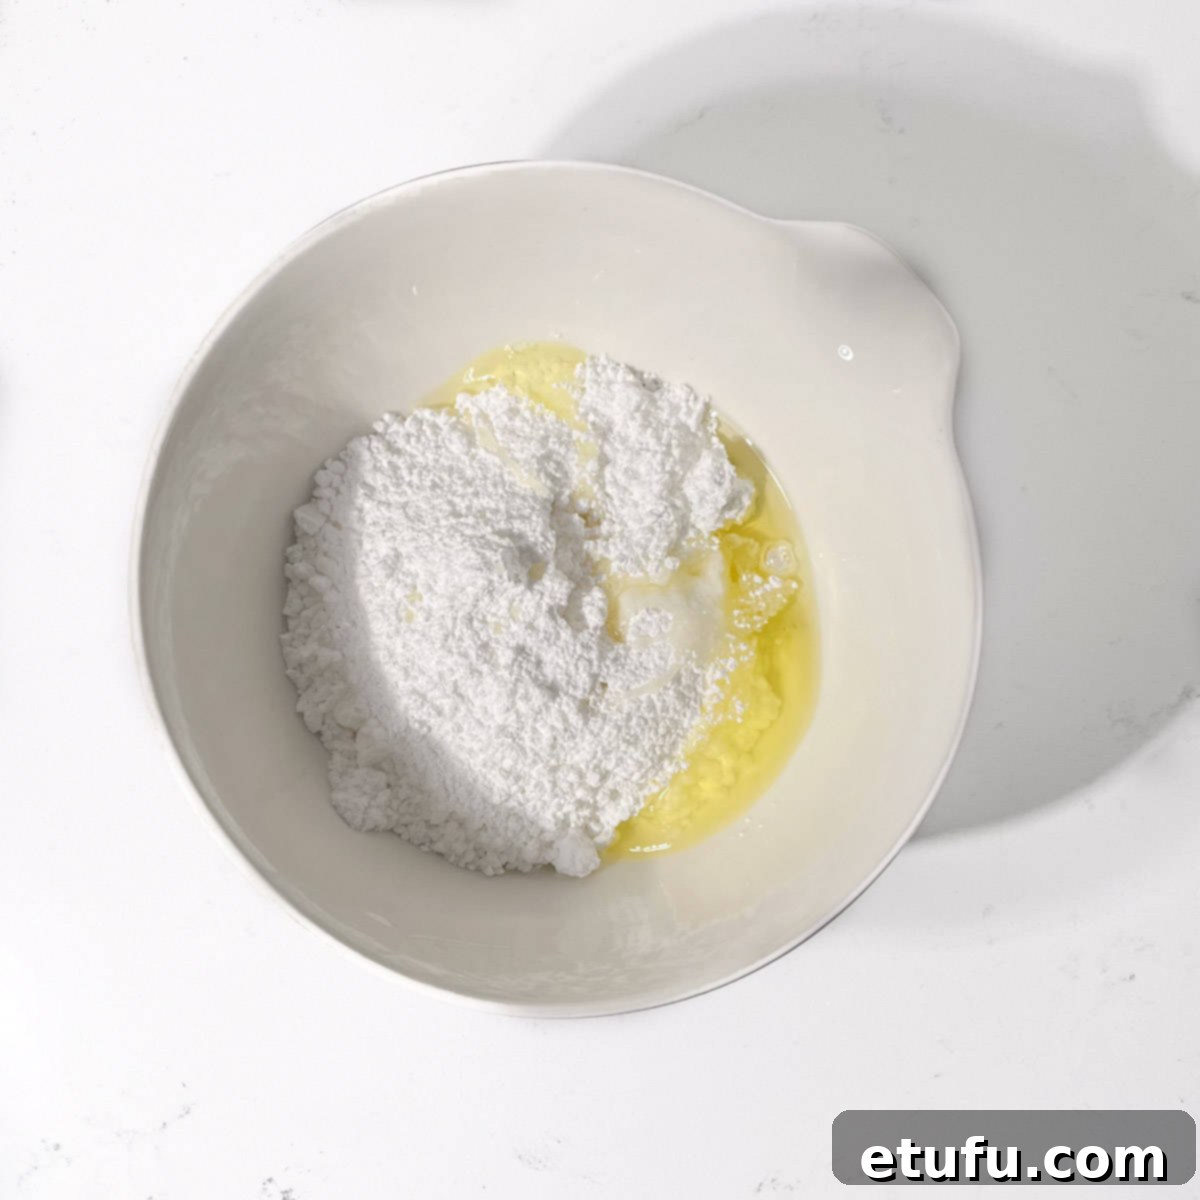
- Incorporate the Egg White: Add the fresh egg white to the sifted icing sugar. Ensure your egg white is free from any yolk, as fat can prevent royal icing from setting correctly.
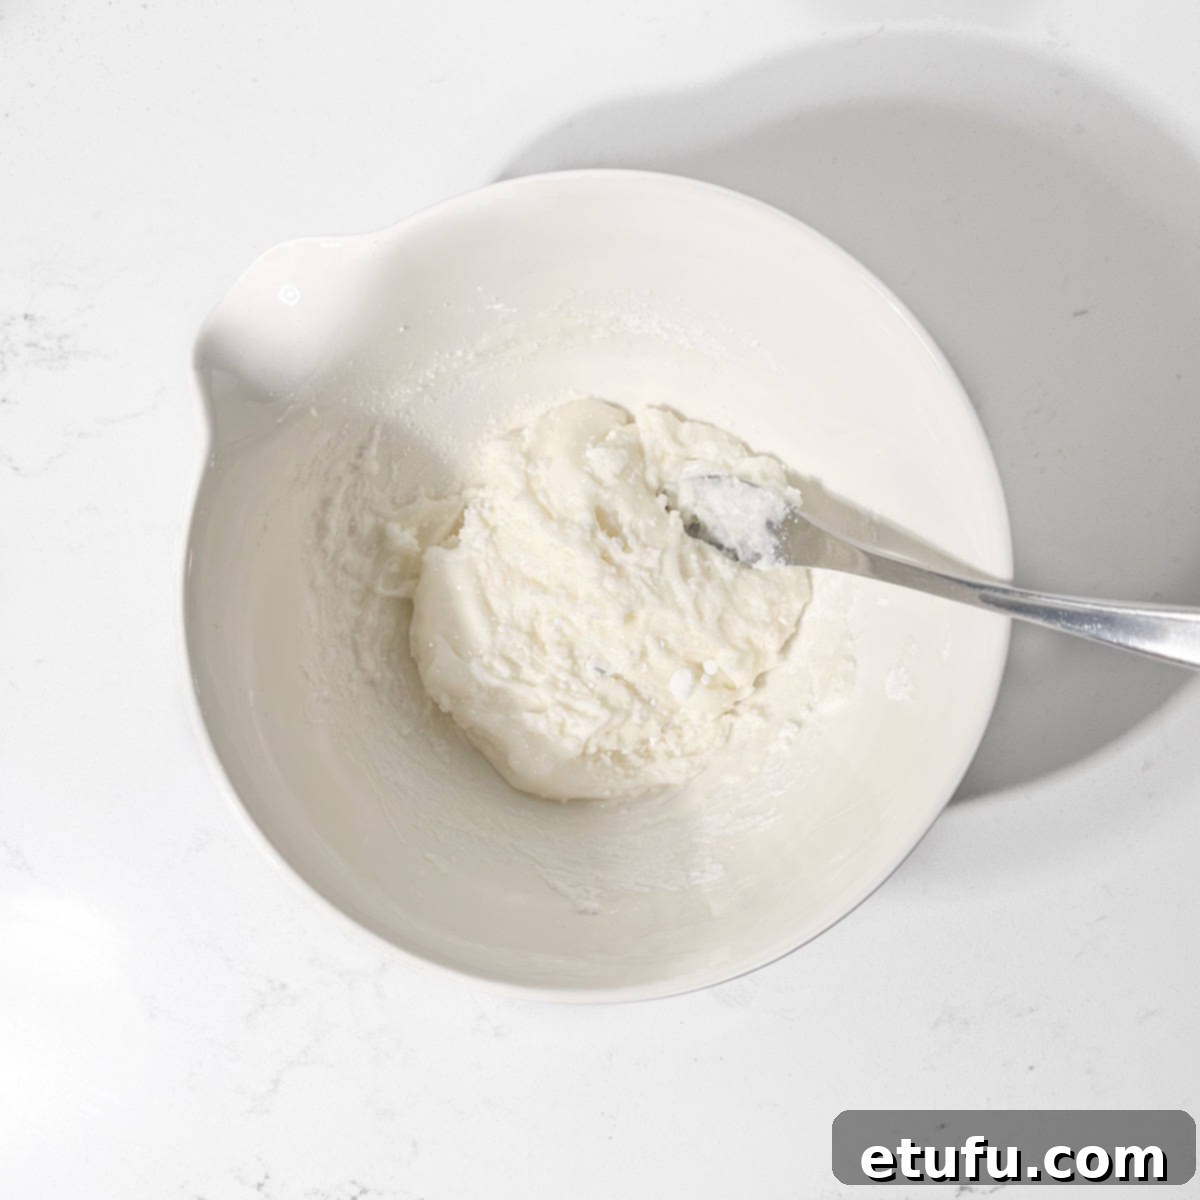
- Initial Hand Mixing: Before turning on your electric mixer, use a fork to gently mix the icing sugar and egg white together. This crucial step prevents a “sugar cloud” from forming when the mixer starts, keeping your workspace clean and minimizing waste. Mix until just combined and a thick paste forms.
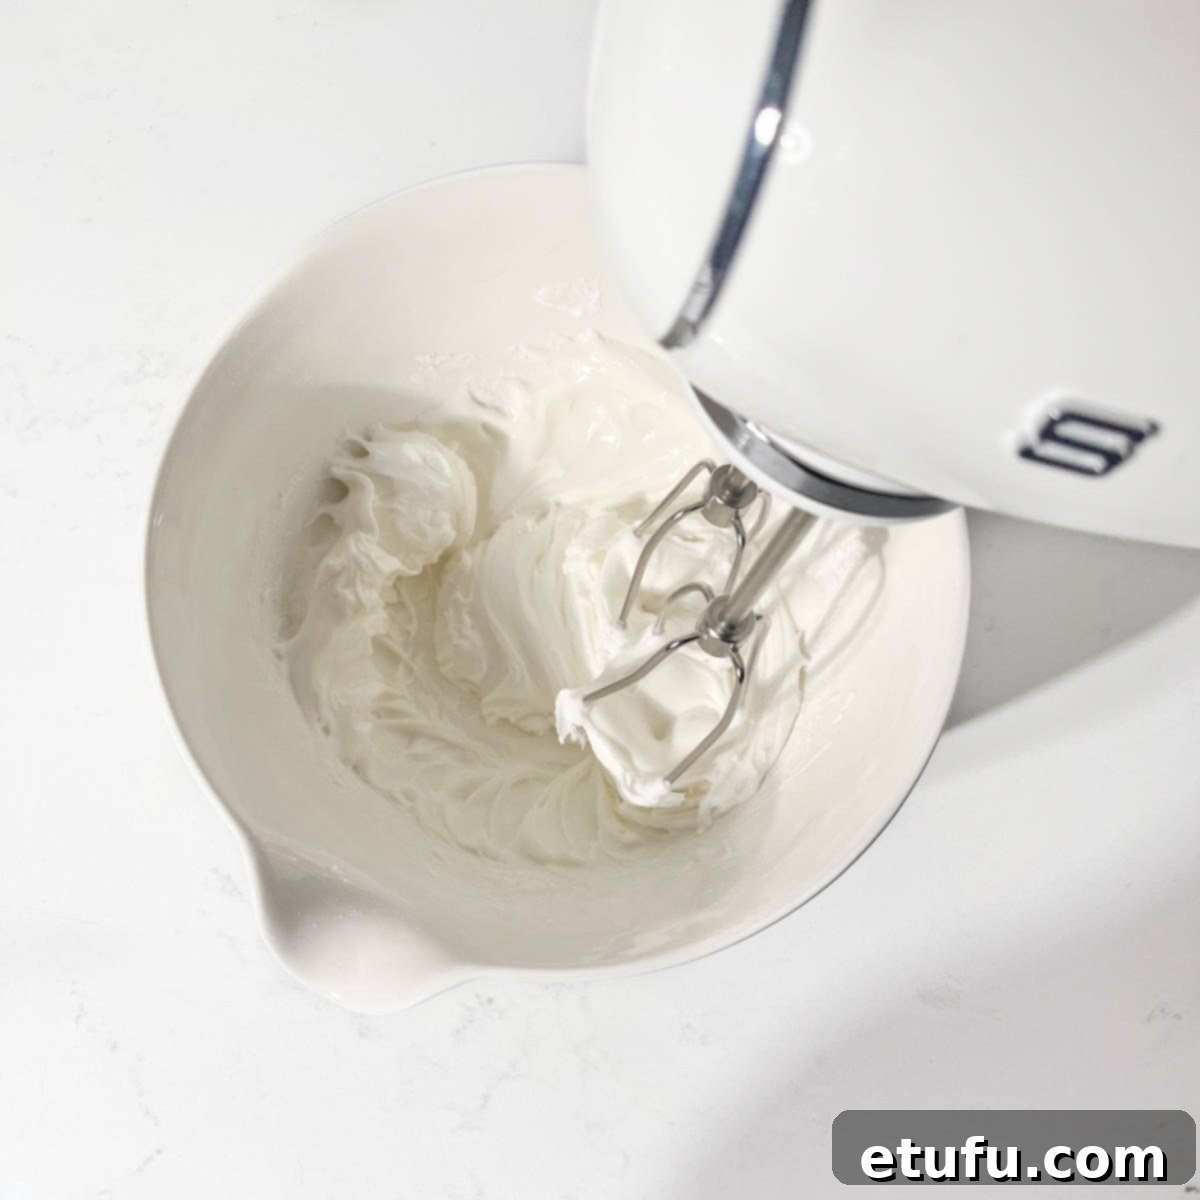
- Beat to Smoothness: Using an electric hand mixer on low to medium speed, beat the mixture thoroughly until it becomes completely smooth, lump-free, and has a bright white appearance. This can take a few minutes.
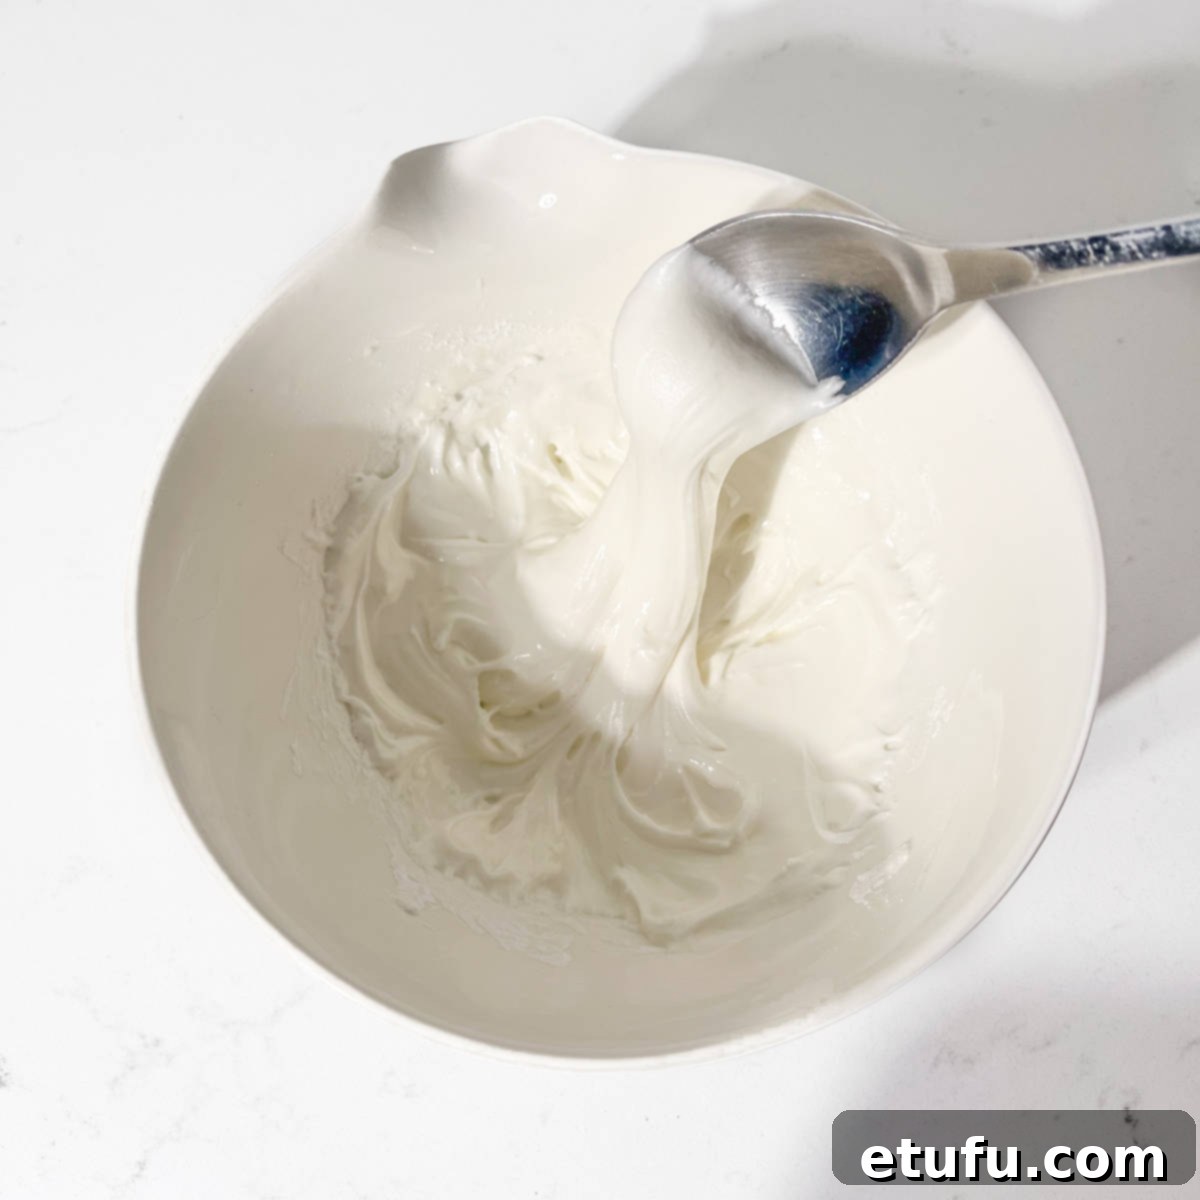
- Check Outline Consistency: At this stage, your royal icing should resemble a thick, pipeable paste that holds its shape firmly. When you lift a spoon, it should create stiff peaks or a slow-falling ribbon that stays defined for a moment. If it appears too runny, gradually add a touch more sifted icing sugar. If it’s too thick and crumbly, introduce a tiny drop of water, mixing well after each addition. Generally, minor adjustments are needed only if your egg white was exceptionally small or large. This robust consistency is vital for creating the sturdy “flood lines” that will contain your thinner flooding icing.
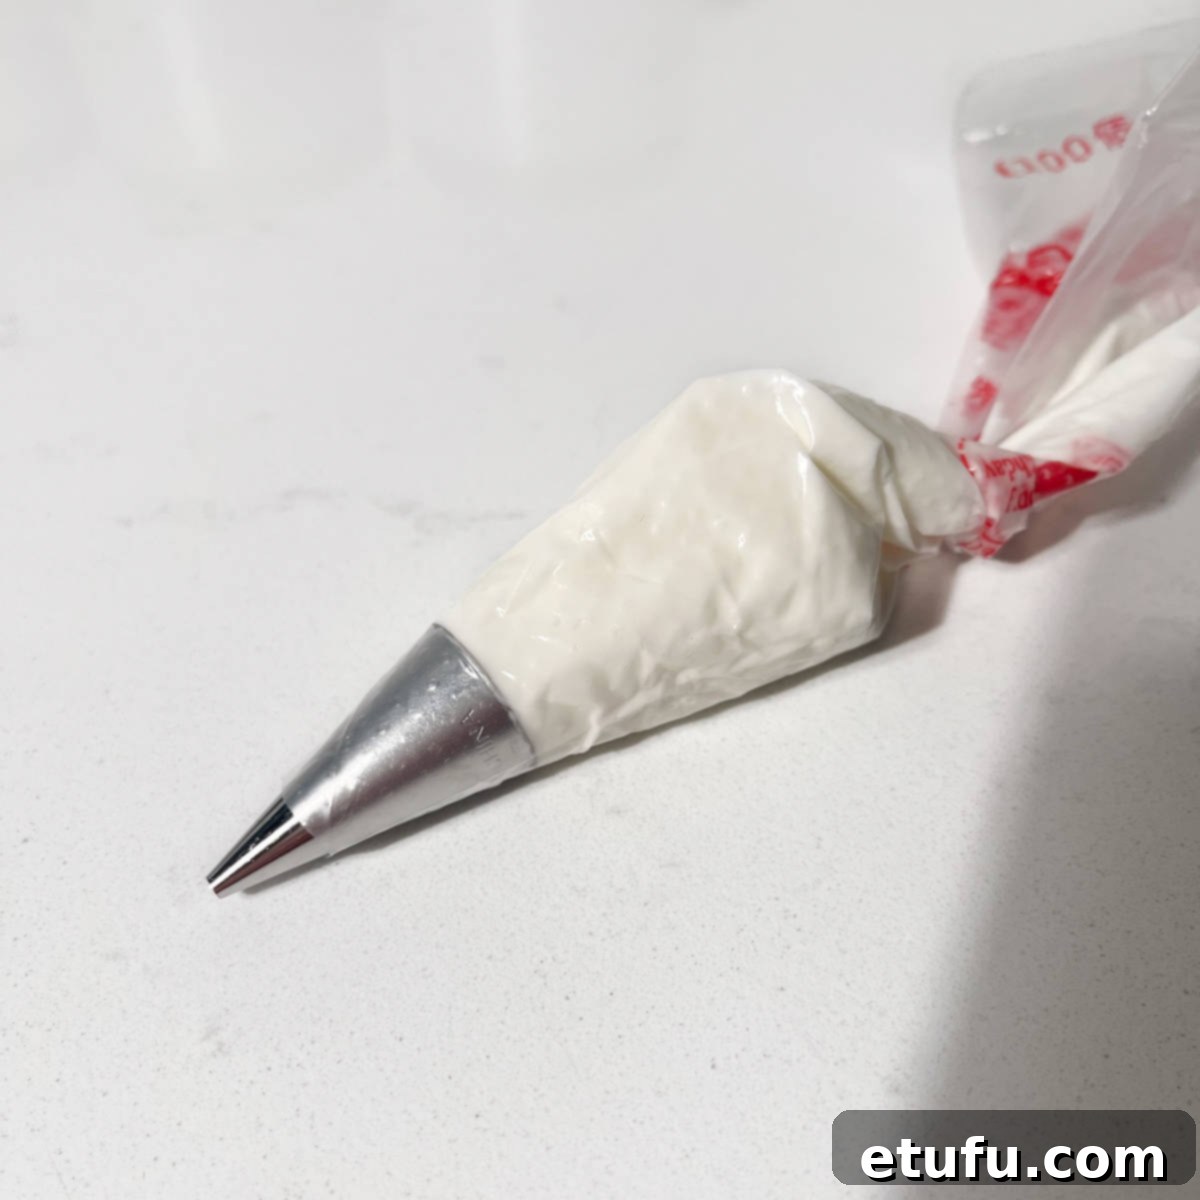
- Prepare for Piping: Transfer approximately one-fifth of this thick icing into a piping bag fitted with a small, round piping tip (e.g., Wilton #2). Secure the top of the bag to prevent drying.
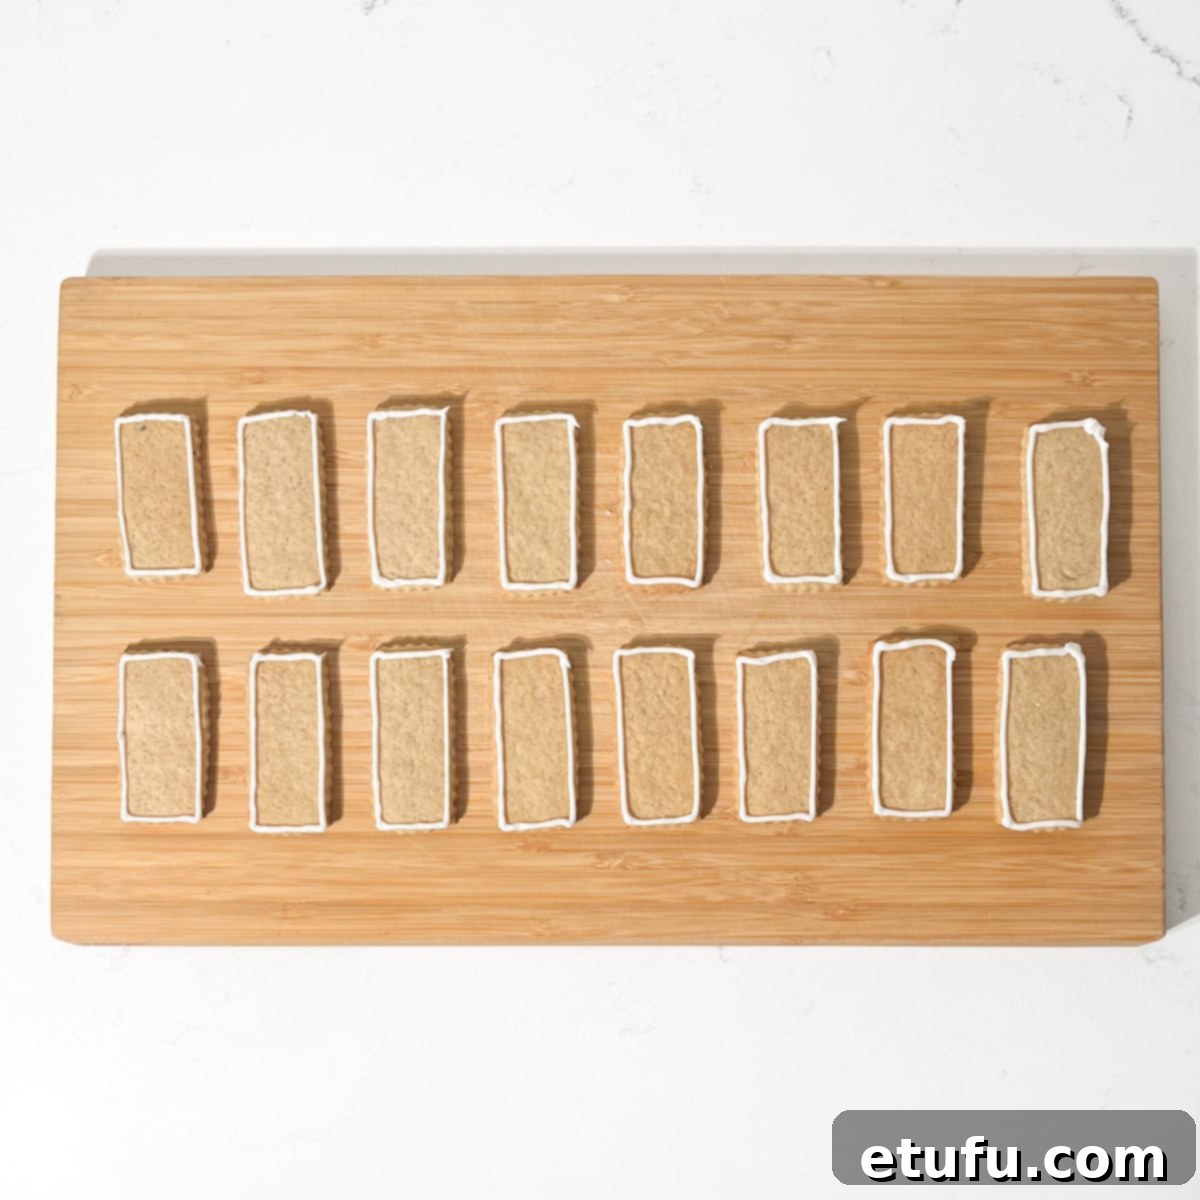
- Pipe the Outlines: Gently but steadily pipe a continuous outline around the edge of each cookie. This line will serve as your “flood line,” creating a barrier that holds the thinner icing in place. Aim for smooth, even lines, but don’t worry if they’re not perfectly symmetrical – the overall effect will still be charming.
Step 2: Flooding the Cookies with Royal Icing
Now, let’s adjust the remaining icing to the ideal flooding consistency for a smooth, even finish.
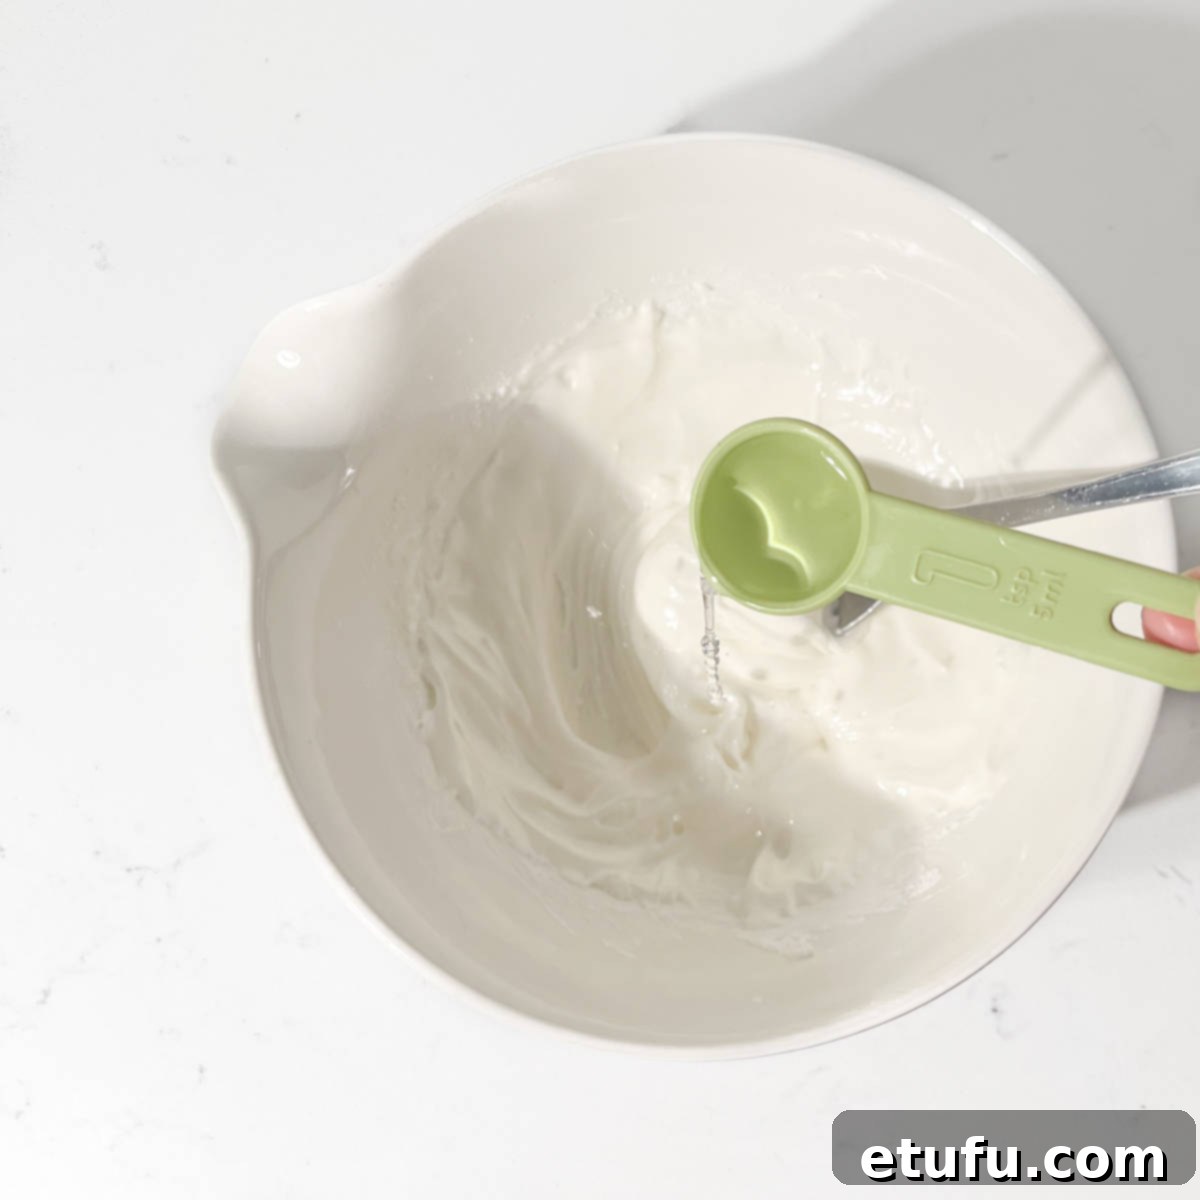
- Adjust for Flooding: Return to the larger portion of icing remaining in your bowl. Begin by adding no more than a teaspoon of water. Stir the icing thoroughly with a spoon or spatula until the water is fully incorporated.
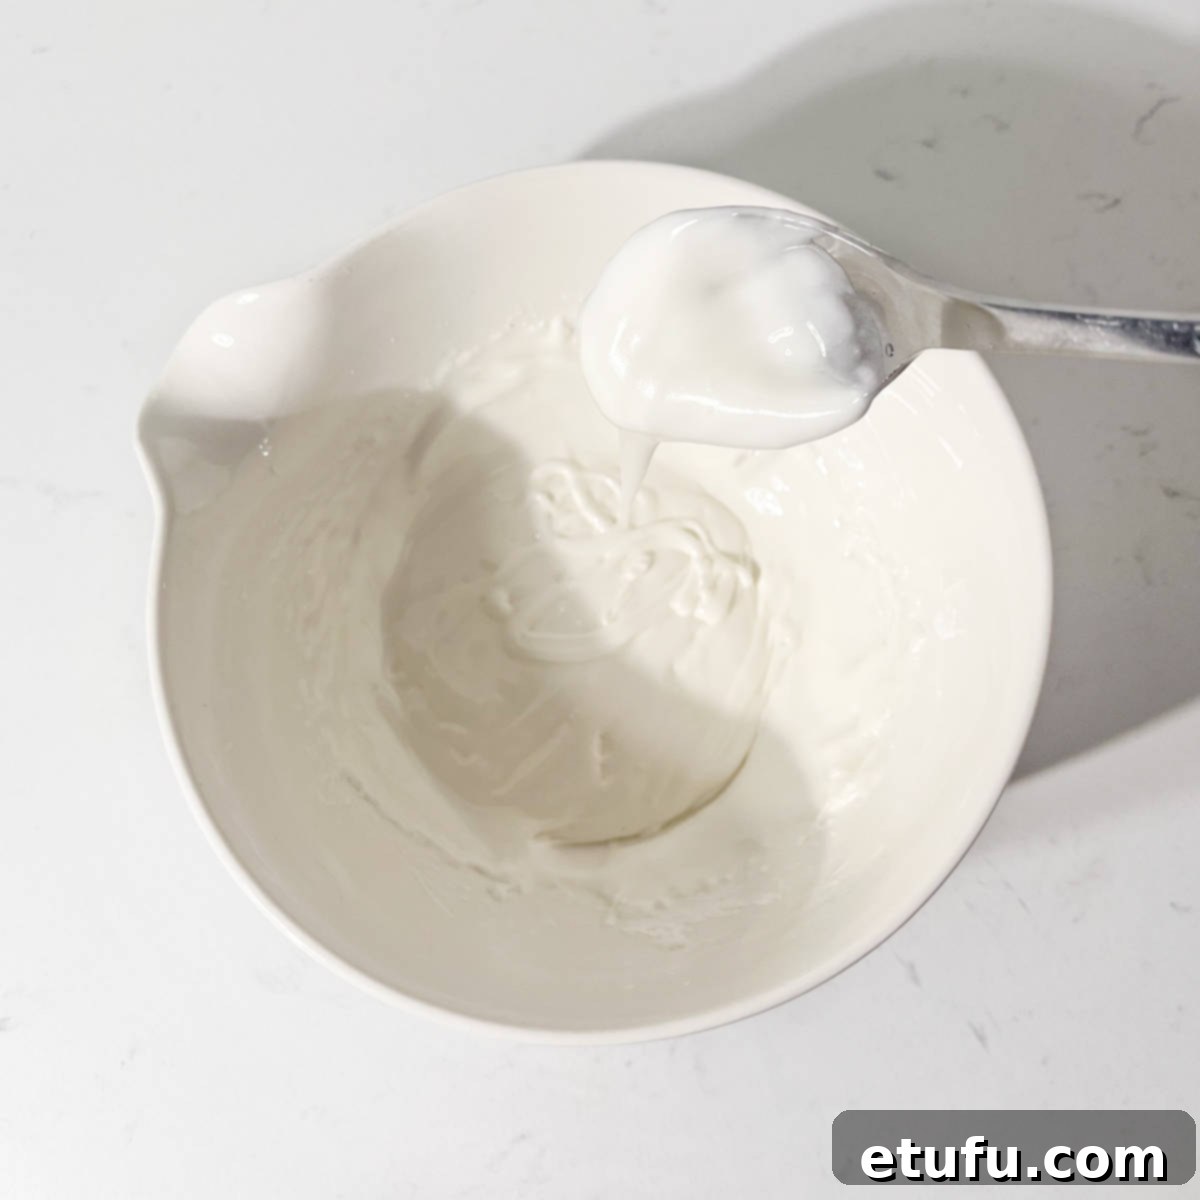
- Achieving “10-Second” Consistency: The flooding icing should be slightly runnier than your outline icing, yet not overly thin. To check for the perfect consistency, perform the “10-second rule” test:
Take a spoonful of icing and drizzle it back and forth over the surface of the icing in the bowl, creating a “ribbon” effect. Start counting immediately. If the drizzled ribbon takes approximately 10 seconds to completely disappear and blend back into the surface of the icing, you’ve achieved the ideal flooding consistency. If the ribbon takes much longer to disappear (e.g., 15-20 seconds), add another small drop of water, mix well, and test again. If it disappears in significantly less than 10 seconds (e.g., 5 seconds), it’s too thin. In this case, incorporate a small amount of additional sifted icing sugar to thicken it slightly, mix, and retest.
- Load Piping Bag for Flooding: Load a fresh piping bag with the newly thinned flooding consistency icing. You can use the same small, round piping tip as before, or switch to a slightly larger tip (e.g., Wilton #3) if you find it easier for filling larger areas.
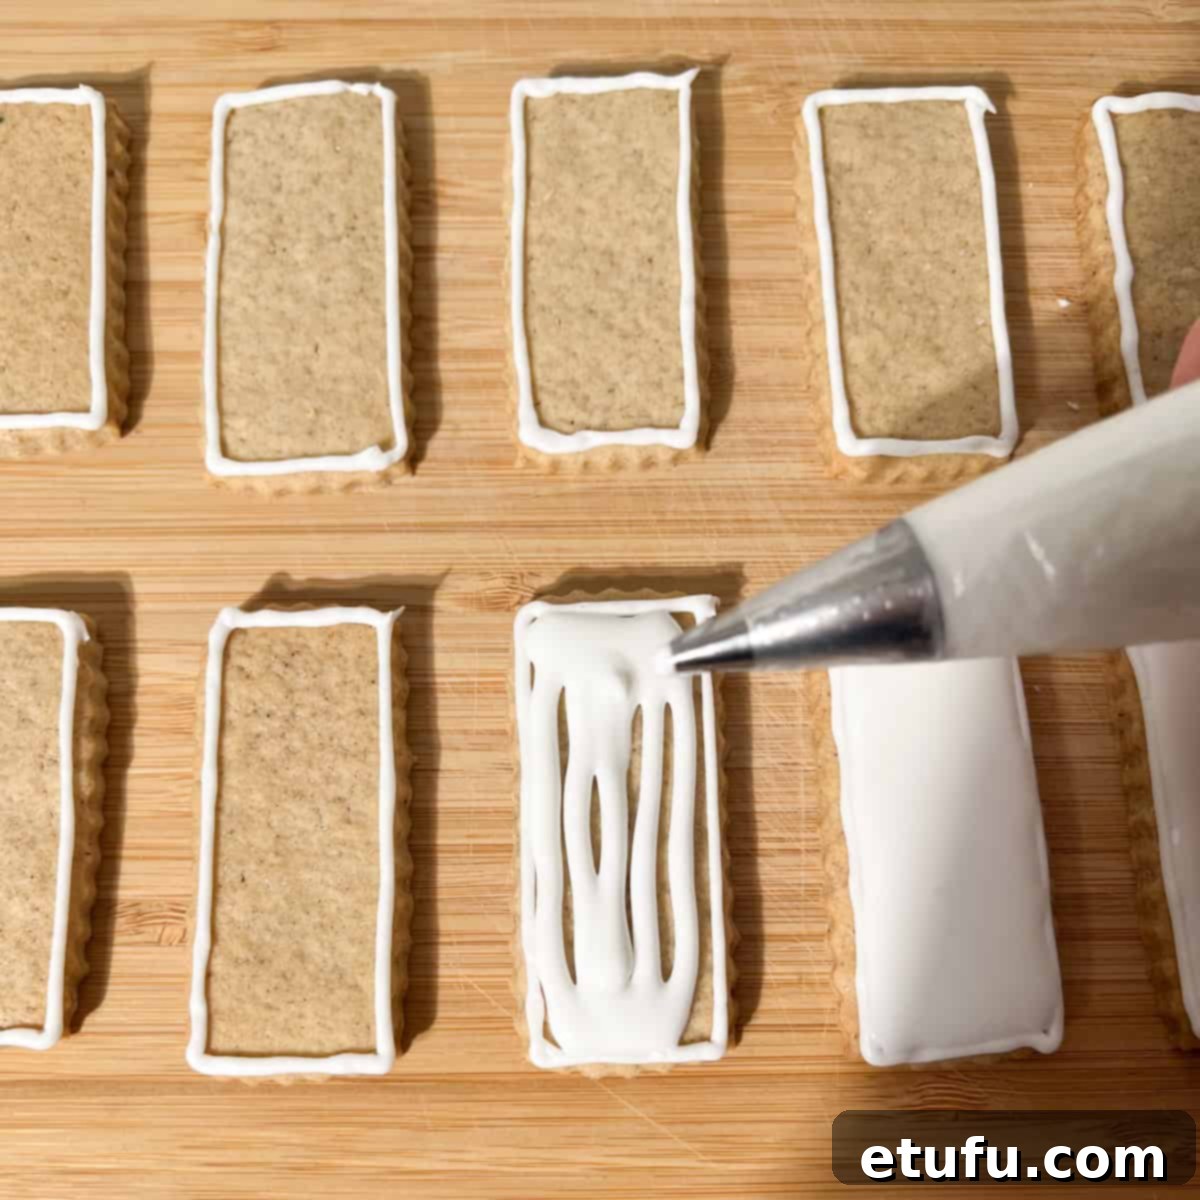
- Apply Flooding Icing: Within the previously piped outline on each cookie, pipe zig-zag lines of the flooding icing. Don’t worry about filling every single space at this point; simply lay down a good amount of icing, leaving small gaps between your lines. Avoid overfilling the cookie, as it can overflow the outlines.
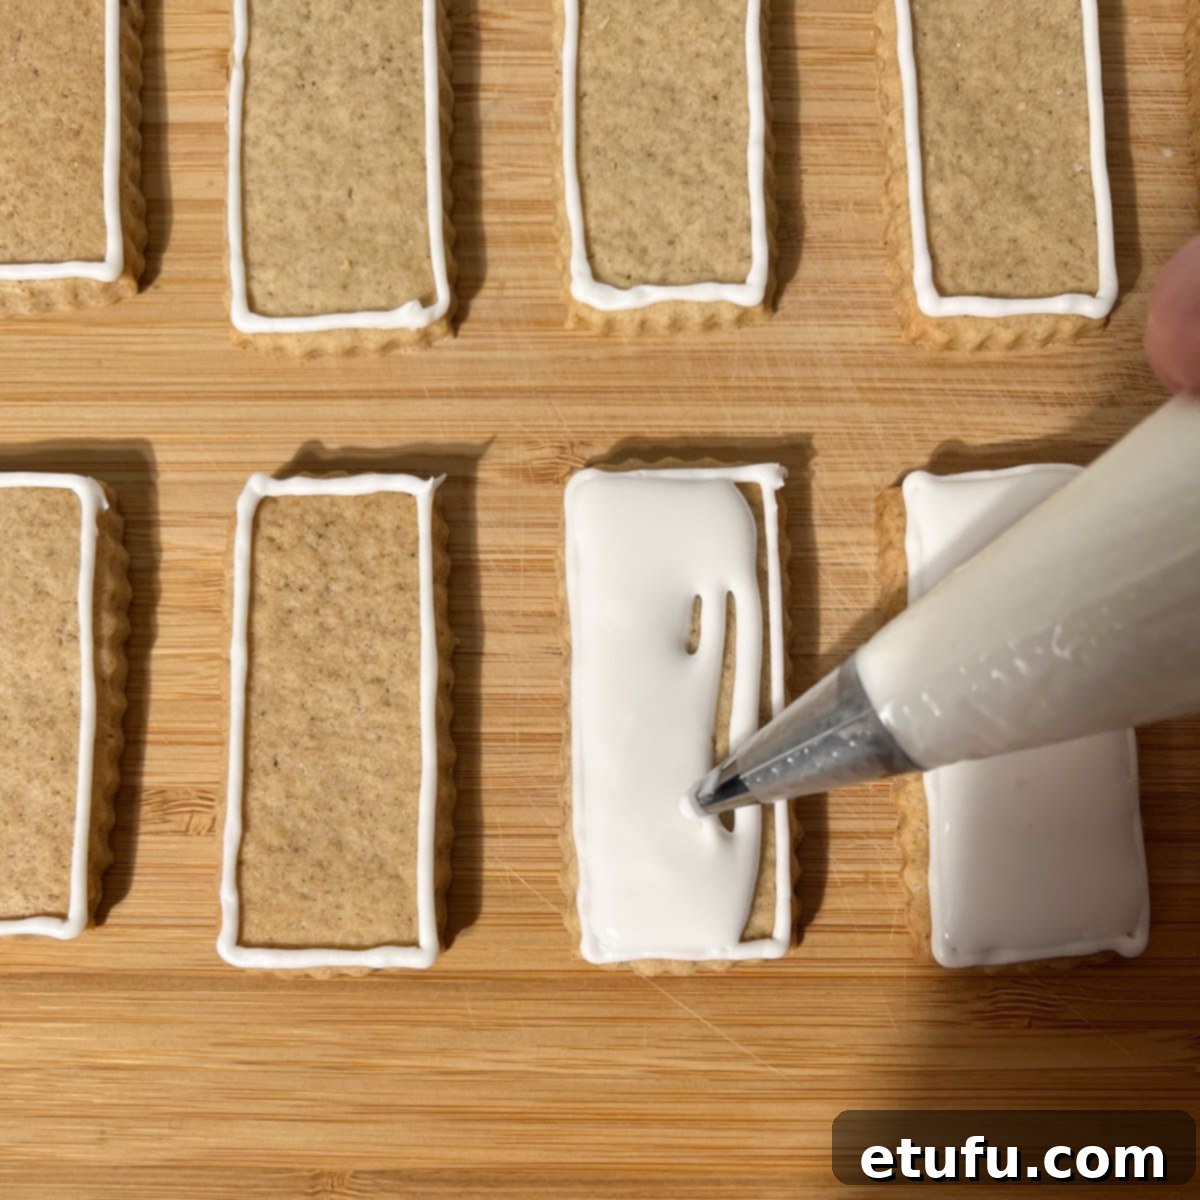
- Even Out the Surface: Using the tip of your piping tip (without squeezing the bag), or a clean toothpick, gently nudge and spread the icing into the gaps. Carefully guide the icing around until you achieve a consistent, perfectly even, and smooth layer of icing that completely fills the area within the outlines. It’s crucial to work swiftly during this phase; if you delay too long, the icing may begin to dry, making it impossible to adjust and fill any remaining gaps seamlessly.
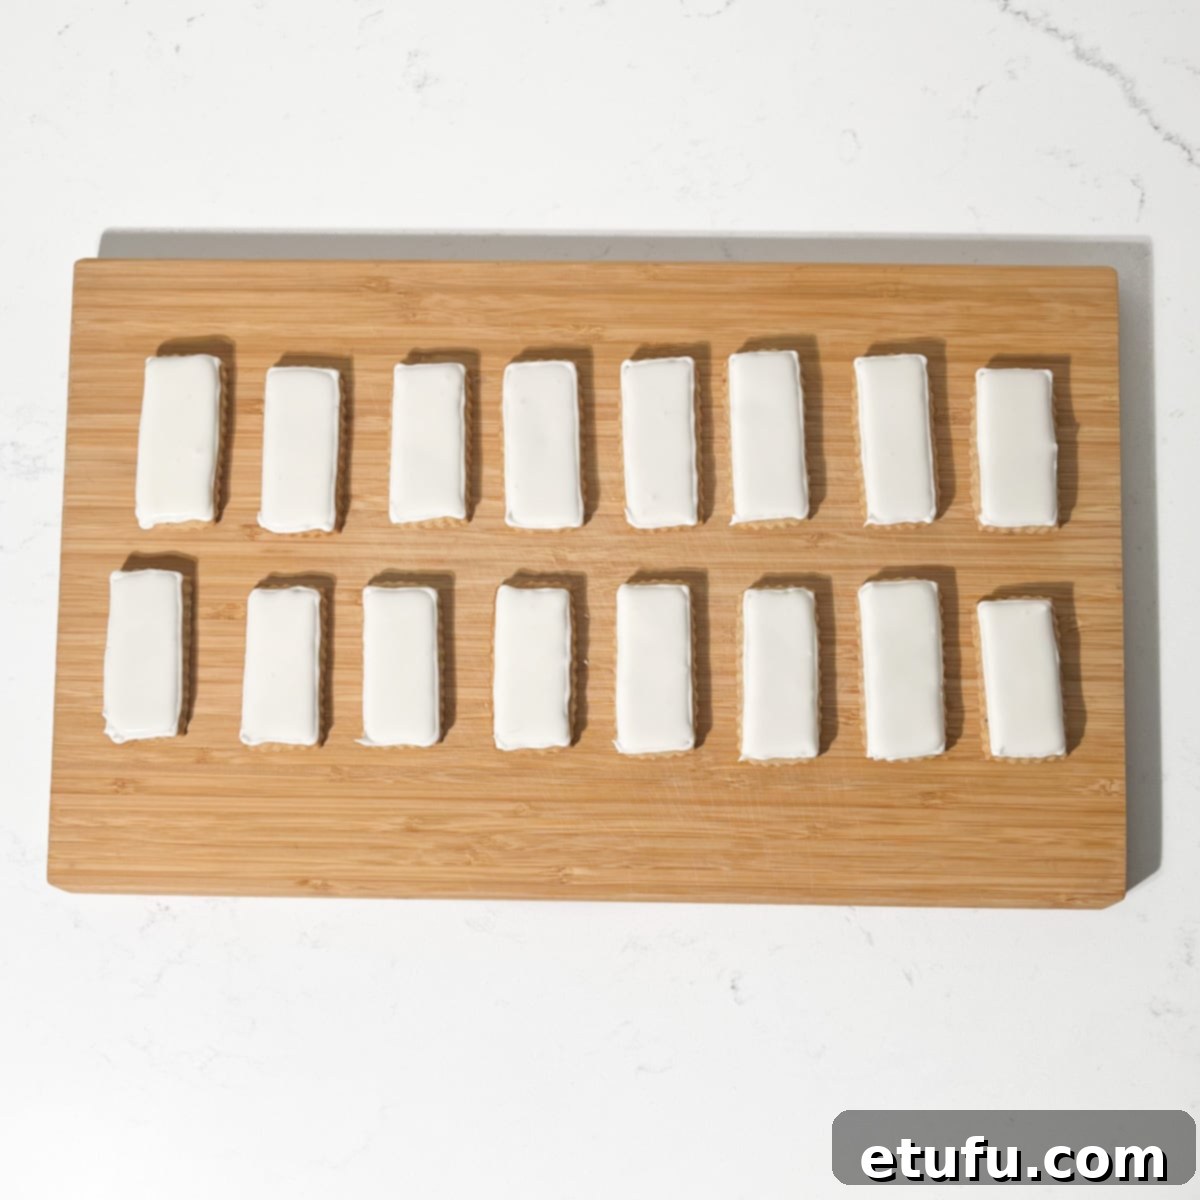
- Allow to Dry Completely: Repeat the flooding and smoothing steps for all your cookies. Once all cookies are flooded, allow them to dry undisturbed in a cool, dry place for a minimum of 12 hours, and ideally for 24 hours. This extended drying time is critical to ensure the royal icing is fully hardened, firm to the touch, and has a beautiful smooth, shiny, and non-tacky surface. Do not rush this step, as under-dried icing will cause issues when applying the wafer paper.
Step 3: Attaching Your Edible Wafer Paper Designs to the Cookies
Once your royal icing is perfectly dry and hard, you’re ready for the exciting final step: adding your personalized edible images!
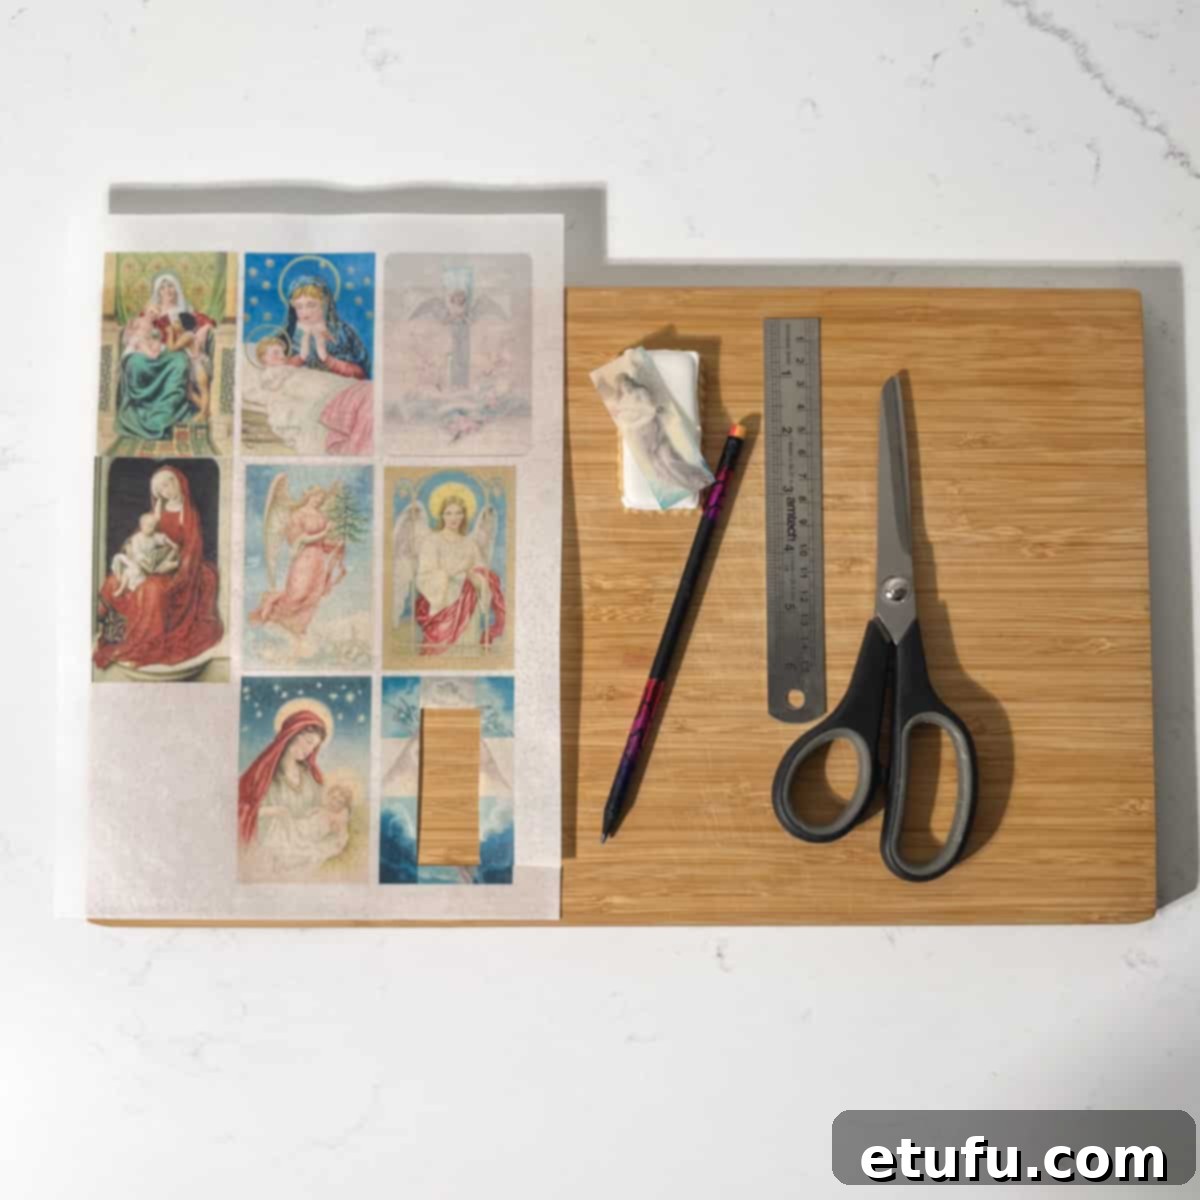
- Measure and Cut Wafer Paper: Carefully measure the specific area on each cookie where you intend to place your wafer paper design. It’s often best to cut the wafer paper slightly smaller than the cookie’s iced surface to leave a small, clean border of royal icing around the image. Using sharp scissors, precisely cut out the corresponding shapes from your printed edible wafer paper sheets.
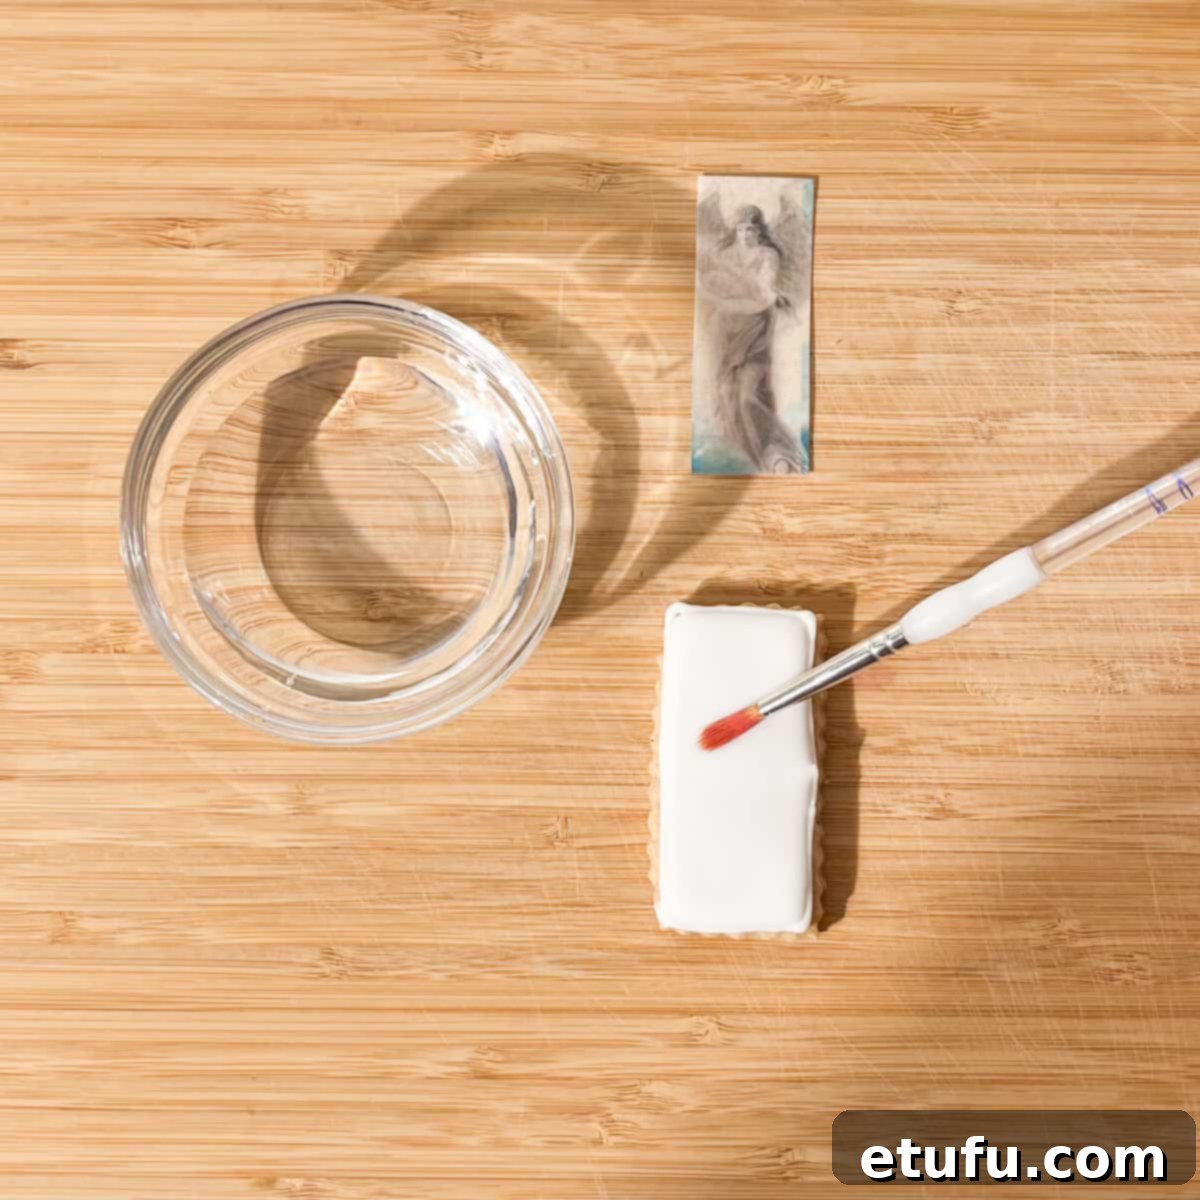
- Moisten the Cookie Surface: Using a small, clean food-safe brush (a clean paintbrush or pastry brush works well), gently apply a very thin and even layer of water onto the surface of the hardened royal icing where your design will go. The key is to use just enough water to make the surface tacky, but not so much that it creates puddles or starts to dissolve the icing. Important: Do NOT brush water directly onto the wafer paper itself. This is a common mistake that will cause the wafer paper to become soggy, wrinkle, or even dissolve before you have a chance to properly adhere it to the cookie.
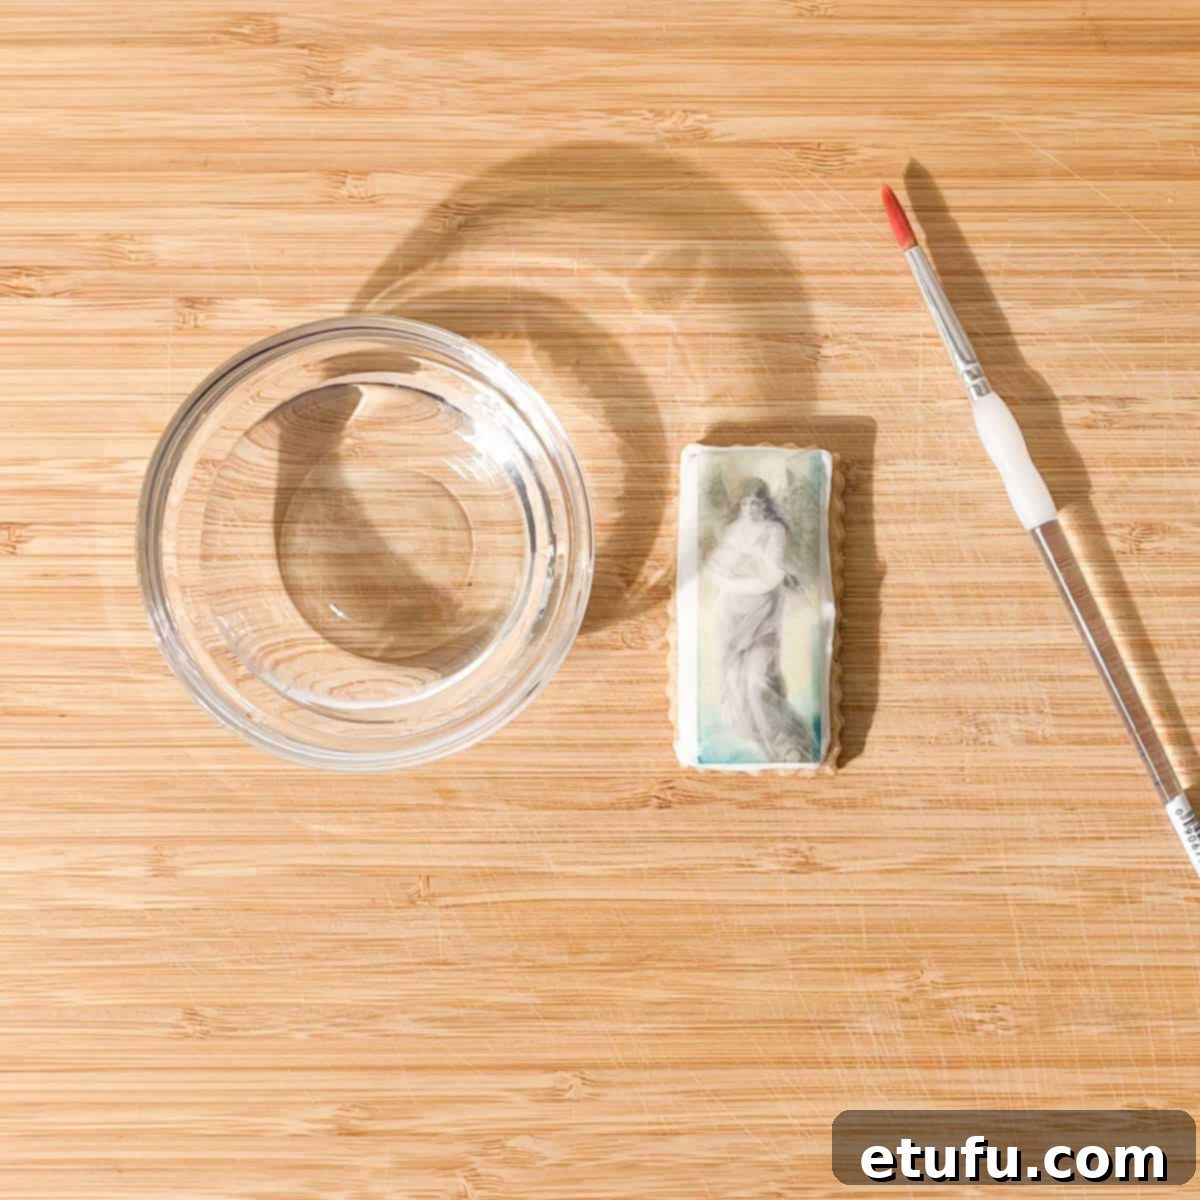
- Position and Secure the Design: Delicately pick up your cut-out wafer paper design and carefully position it onto the moistened surface of the cookie. Once it’s in place, gently press it down with your fingertips, working from the center outwards to smooth out any air bubbles and ensure full contact. If you notice any areas, such as corners or sides, lifting up or not adhering properly, simply use your small brush to apply a tiny amount of water *under* the lifting edge or *very lightly* brush water directly onto the top of the wafer paper edge and gently press it into place. Be gentle to avoid tearing.
- Final Drying: Once all your designs are attached, leave your little works of art to dry completely for at least an hour or until the wafer paper has fully set onto the icing. Avoid handling them excessively during this time to prevent smudging or dislodging the designs.
Thoughtful Gifting with Personalized Cookies
Let’s be honest, these custom Christmas picture cookies are truly magnificent gifts! The personalized touch makes them incredibly special and far more memorable than traditional treats. However, whipping up a massive batch for numerous recipients can indeed be a time-consuming challenge, especially during the busy holiday season – unless, of course, you have abundant time and resources at your disposal.
As a clever and equally charming alternative, consider this ingenious gifting strategy: group a batch of delicious plain cookies together, then strategically place just one or two beautifully crafted picture cookies on top of the stack. This creates a stunning focal point and a delightful surprise without requiring you to personalize every single cookie. To complete the presentation, secure them together with a piece of rustic twine, elegant ribbon, or a festive bow. This method allows you to spread the joy of personalized cookies more widely and efficiently.
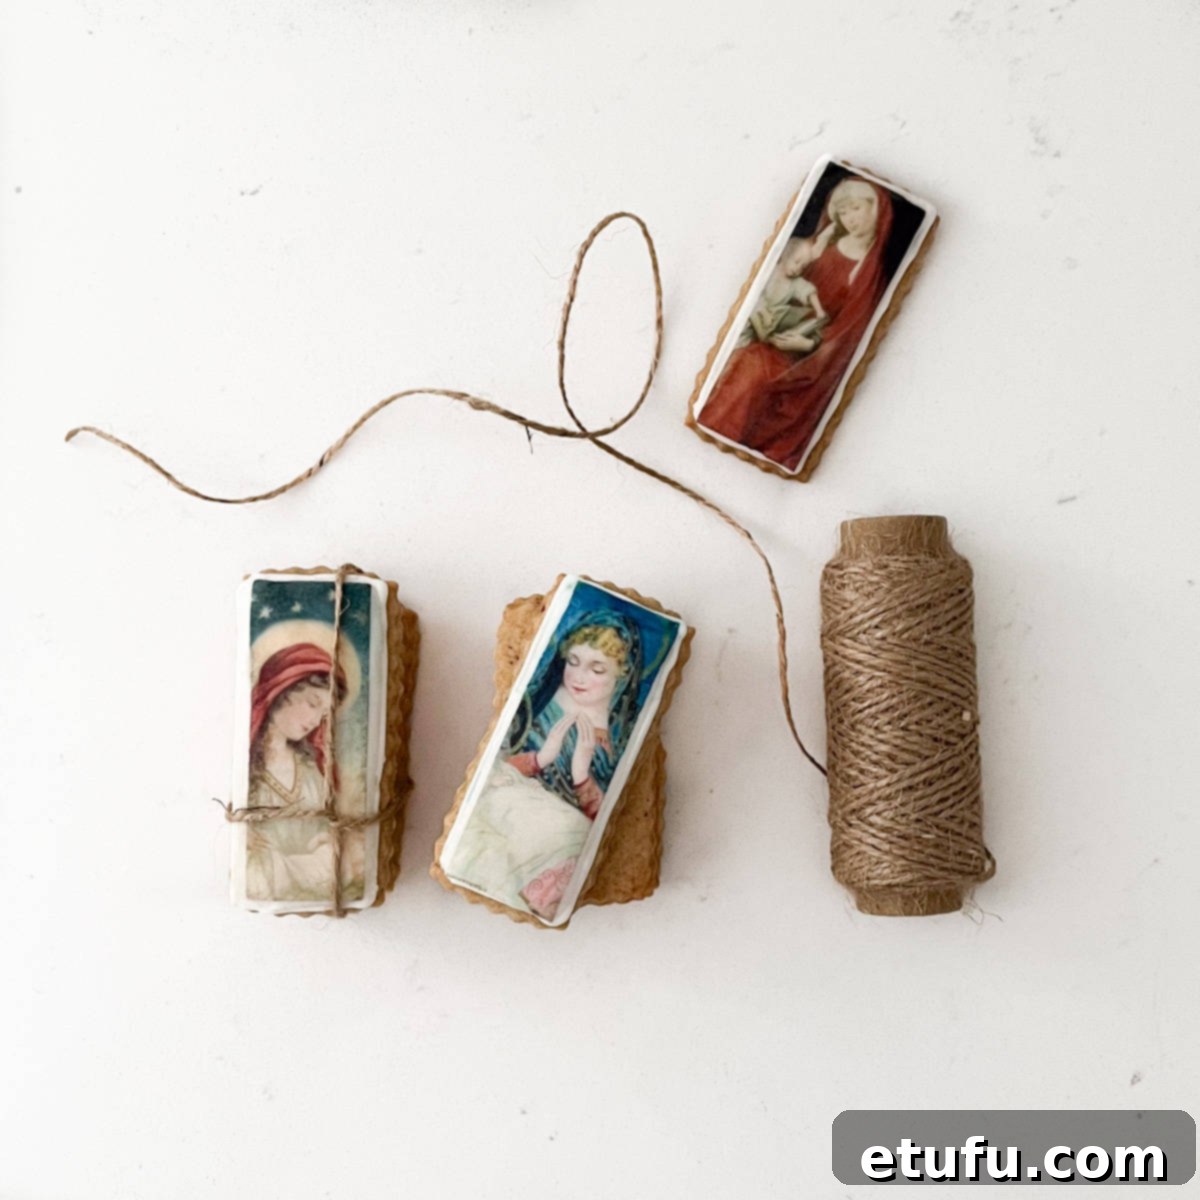
These unique cookies also lend themselves perfectly to being incorporated into homemade Advent calendars. Imagine the excitement of discovering a different, charming picture cookie each day leading up to Christmas, turning the countdown into a delicious and visually appealing daily treat. They add an extra layer of anticipation and personalized cheer to the holiday season.
Optimal Storage for Your Wafer Paper Cookies
Proper storage is essential to maintain the freshness, appearance, and integrity of your beautiful wafer paper cookies. Follow these guidelines to ensure they remain delightful for as long as possible:
- Airtight is Key: Always store the cookies in an airtight container. This is crucial for preventing air exposure, which can quickly lead to stale cookies and can also affect the wafer paper. A well-sealed container helps to preserve both the crispness of the cookie and the delicate nature of the edible image.
- Layer with Parchment: To prevent the cookies from sticking together, transferring moisture, or potentially damaging the wafer paper designs, place layers of parchment paper or wax paper between each stack of cookies. This barrier protects the images and keeps everything neat.
- Cool, Dry, and Dark: Keep the container in a cool, dry location, away from direct sunlight, heat sources, and strong odors. Excessive heat can cause the wafer paper to melt or wrinkle, while direct sunlight can fade the edible inks over time. A pantry or a cool cupboard is ideal. These cookies will generally keep well for up to 3 months when stored correctly, though they are best enjoyed within a few weeks for optimal freshness.
- Humidity Awareness: Wafer paper is highly sensitive to moisture and humidity. In humid conditions, it can become sticky, soft, or even begin to dissolve. If you reside in a particularly humid climate, consider placing a food-safe desiccant packet (like those found in vitamin bottles or food packaging) inside the airtight container to absorb any excess moisture, providing an extra layer of protection.
- Avoid Freezing: Unfortunately, wafer paper cookies are not suitable for freezing. The thawing process can introduce moisture, causing the wafer paper to warp, bleed, or dissolve, ruining your carefully crafted designs. It’s best to enjoy them fresh or within their recommended storage period.
Discover More Festive Christmas Recipes
Looking for more culinary inspiration to make your holiday season truly delicious? Explore these other delightful Christmas recipes:
- The Ultimate Crispy Roast Potatoes – Get All the Secrets!
- Elegant and Easy Frangipane Mince Pies
- Simple and Delicious Traditional Christmas Cake
- The Best Pigs in Blankets with a Whiskey and Honey Glaze
- Easy Parmentier Potatoes (Perfect Roasted Mini Potatoes)
- Roasted Tenderstem Broccoli with Parmesan and Pine Nuts
- Creamy Carrot and Swede Mash
- The Best Honey-Roasted Carrots and Parsnips
- Quick and Festive Cassata Ice Cream
- Decadent Homemade Rum Truffles
- Charming Thumbprint Icing Cookies
Recipe
Christmas Cookies with Edible Wafer Paper (Photo Cookies)
Break away from traditional Christmas cookie designs and create stunning, personalized photo cookies using edible wafer paper. This guide makes decorating easy for everyone, yielding beautiful results perfect for gifts or festive decorations. Choose homemade or store-bought cookies and get ready to impress!
Course: Dessert, Snack
Cuisine: International
Prep Time: 30 minutes
Drying time: 12 hours
Total Time: 12 hours 30 minutes
Servings: 12 cookies
Calories: 125 kcal
Author: Maretha Corbett
Equipment
- 1 small brush
- 1 small bowl with water
- Printed, edible wafer paper sheets
- 2 piping bags
- Small, round piping tip (e.g., Wilton #2 or #3)
- Electric hand mixer
- Medium mixing bowl
- Sieve
Ingredients
- 12 cookies – homemade or shop-bought (choose plain, flat varieties)
- 225 grams icing sugar – (aka powdered sugar)
- 1 egg white
- 1-2 teaspoons water (for flooding consistency)
Instructions
**We highly recommend reading the full blog post above first, as it includes visual aids and detailed explanations that will make these steps easier to understand and execute.**
Making the Royal Icing – Piping the Outlines
- Sift 225 grams of icing sugar into a medium bowl to ensure a smooth, lump-free base.
- Add 1 egg white to the sifted icing sugar.
- Use a fork to gently mix the icing sugar and egg white together until a thick paste forms. This prevents a cloud of sugar when you start mixing.
- With an electric hand mixer, beat the mixture on low to medium speed until it is smooth, free of lumps, and bright white.
- Check the consistency: The icing should be a thick paste that holds its shape well. If it’s too runny, add a tiny bit more icing sugar. If it’s too thick, add a single drop of water. This is your outline consistency.
- Place about one-fifth of this thick icing into a piping bag fitted with a small, round tip.
- Gently pipe a continuous outline around the edge of each of your 12 cookies. This outline will act as a barrier to hold the thinner flooding icing.
Making the Royal Icing – Flooding Inside the Lines
- Revisit the remaining icing in the bowl. Begin by adding no more than one teaspoon of water to it and stir thoroughly until fully incorporated.
- Check the consistency: The icing should now be slightly runnier than before, but not watery. Perform the “10-second rule” test: Drizzle a spoonful of icing back and forth over the icing in the bowl. If the “ribbon” created takes approximately 10 seconds to disappear and blend back into the surface, it’s the correct flooding consistency. If it takes longer, add another small drop of water, mix, and test again. If it disappears too quickly (less than 10 seconds), incorporate a small amount of additional icing sugar to thicken it, mix, and retest.
- Load a new piping bag with the flooding consistency icing, using the same small piping tip or a slightly larger one if preferred.
- Within the outlined area of each cookie, pipe zig-zag lines of the flooding icing. Avoid overfilling the space by leaving small gaps between the lines.
- With the very tip of your piping tip (without squeezing the bag) or a clean toothpick, gently nudge and spread the icing into any gaps. Carefully push the icing around until you achieve a consistent, even, and smooth layer of icing within the outlines. Work swiftly, as the icing can start to dry, making it harder to smooth.
- Repeat this step for all your cookies. Allow them to dry completely for a minimum of 12 hours, and ideally for 24 hours. The royal icing should be fully dried, quite firm, and have a smooth, shiny surface before proceeding.
Attaching the Wafer Paper to the Cookies
- Measure the specific area on each cookie where you want to place the wafer paper design. Then, carefully cut out the corresponding shapes from your printed edible wafer paper sheets using sharp scissors.
- Using a small, clean food-safe brush, gently apply a very thin layer of water onto the hardened royal icing surface of the cookie. Important: Do NOT brush water directly onto the wafer paper itself, as it can cause it to become soggy or dissolve.
- Delicately position your wafer paper design onto the moistened cookie surface and gently press it down, smoothing it from the center outwards to remove any air bubbles. If any edges or corners lift, apply a tiny amount of water underneath the wafer paper with your brush and press down to secure it.
- Leave your finished cookies to fully dry for at least an hour before handling them extensively or packaging.
**Nutritional Data Disclaimer**
Please keep in mind that the nutritional information provided below is calculated by a third party and we cannot guarantee its absolute accuracy. While we strive to offer the most accurate information possible, we do not take responsibility for any potential errors. The nutritional value of this recipe may vary depending on the exact brands and specific products used. For personalized advice on your dietary needs, we strongly recommend consulting with a qualified healthcare professional or a registered dietitian.
Nutrition
Calories: 125kcal | Carbohydrates: 25g | Protein: 1g | Fat: 3g | Saturated Fat: 1g | Polyunsaturated Fat: 1g | Monounsaturated Fat: 1g | Sodium: 40mg | Potassium: 13mg | Fiber: 0.1g | Sugar: 21g | Vitamin A: 9IU | Calcium: 2mg | Iron: 0.3mg
For comprehensive food safety advice, including detailed guidance on managing food allergies, please refer to official food safety resources.
